CH.Detailed - 1968 Ferrari 330 GTC

CH.Detailing

What's a detail?
The Ferrari 330 GTC, a powerful and well balanced GT for the enthusiast. Based on a 275 frame with front and rear unequal length double A-arms, a rear trans-axle, four wheel disc brakes, and a triumphant 4.0L V12 engine all contained within beautifully sculpted Pininfarina bodywork. The 330 came into existence during what many consider to be the ‘golden era’ for Ferrari, and as such the value for these vehicles has been steadily appreciating.

This car was restored from the ground up with a fresh coat of Azzuro Italver paint, re-plated trim, new rubber throughout, re-built mechanicals, and an entirely re-upholstered interior. The previous owner actually was a mechanic for Ferrari in Italy during his youth, and was really the perfect candidate to do the work. The restoration was completed three years ago, and was unfortunately already beginning to show its age.

7033776335_160ca36cff_b.jpg


6887682996_47beac63b5_b.jpg


6889819764_71b4cb6e18_b.jpg


The paint appeared dull, lackluster, and cloudy with poor reflections, which was a major concern for the new owner. The car had already been washed by the owner a couple of days previous, and had not been driven since and as such was fairly clean.

7033777451_0990d663e3_b.jpg


7033777201_5291043b99_b.jpg


7033777299_46fc45931b_b.jpg


7035829371_937f2805e7_b.jpg


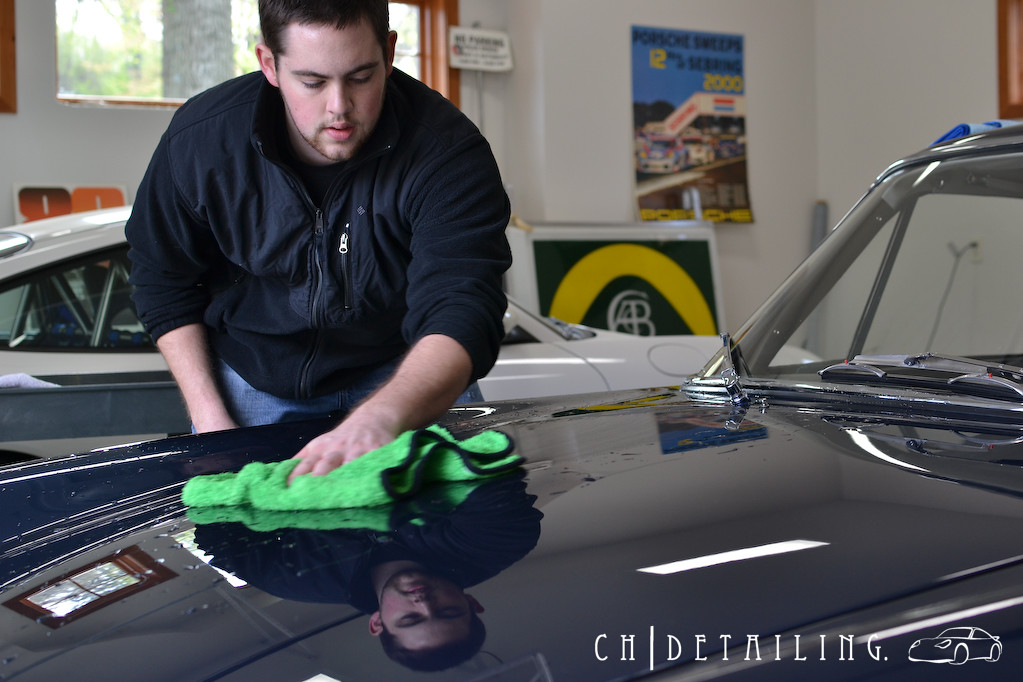
The car had accumulated some dust over the few days since it was washed, and there was some accumulated dirt behind the wheels, so I began with a rinseless wash using Blackfire.

6889822106_9852266288_b.jpg


7033781217_45abbdf686_b.jpg


The super plush Cobra Shamrock towel makes rinseless washing an absolute breeze!

6887688350_9e580e433b_b.jpg


The lower panels behind the wheels had some dirt splatter, so I opted to treat those with P21S Total Auto Wash first.

6889823574_b283b98a39_b.jpg


With how clean the vehicle was initially, I was rather surprised at how dirty the rinse water was when the wash was complete.

7033781721_41d6a6a3f4_b.jpg


After the car was washed and dried, I removed the trim that would interfere with the paint correction later on, which included the trunk badges, the license plate and frame, and the side mirror.

6887688444_3834f6d0e4_b.jpg


6887688564_2d1030ff2a_b.jpg


7033781601_b53ea4e7fe_b.jpg


I opted to remove the trim after the wash so as to minimize the amount of water that would run into the body. The dirty areas behind the trim were wiped down with a quick detailer solution of Blackfire rinseless wash. Next up I began to clay using Meguiars blue mild clay.

7033785121_137b706b34_b.jpg


The paint was very clean and the clay pulled up few embedded contaminants.

6887692154_2ccce05f49_b.jpg


Once the claying was complete I wiped down the surface with a solution of isopropyl alcohol to strip any residual waxes or oils, afterwards I began my inspection of the paint surface.

7033776799_ec22e67943_b.jpg


7033776939_3946e2e123_b.jpg


7033777045_281f311d98_b.jpg


6887685748_08c689b6ab_b.jpg


6887686556_752d3895a3_b.jpg


The lower panels and the trunk lid were by far the worst areas on the car.

7033779881_1be8f41292_b.jpg


6889733158_254048125c_b.jpg


6889733384_6f16a8ef11_b.jpg


6889734166_bcb198c965_b.jpg


6889752472_cdd9194630_b.jpg
 
7035850755_c81024cf73_b.jpg


6889754474_531f88f2ba_b.jpg


7035840159_f49cf7ebc9_b.jpg


6889750006_f0e24576c6_b.jpg


Once I had a good idea of what the paint looked like, and what sort of defects I would need to remove, I continued on with measuring the paint thickness. Given that this car has been restored, it was no surprise that the gauge showed readings all over the map. In these situations I’ll work off the lowest reading (which was 9.0 mils) and assume that all the thicker readings are due to body filler. In reality there may very well be thicker working thicknesses, but this is the safest way to go about it.

7035831679_b68484c900_b.jpg


6889737728_12ec019e37_b.jpg


6889738538_01c32ec406_b.jpg


6889739168_9cc298f84d_b.jpg


7035834505_a797f6f430_b.jpg


6889740876_2190433ef5_b.jpg


Now that the car was clean, inspected, and measured it was time to mask the remaining trim to protect it during the correction.

7035856939_52d7ff24fc_b.jpg


6889762222_4df15bd612_b.jpg


7035862535_74a5d8eb9e_b.jpg


7035863007_22c97eb371_b.jpg


Continuous, clean, and tight tape lines ensure that nothing will get snagged by the buffer and that none of the paint ‘edges’ gets covered up, ensuring a more thorough correction.

6889830158_af8c9050bb_b.jpg


7035924627_54d320d65d_b.jpg


To begin the correction I tried M205/tangerine via PC, while this cleaned up most of the lighter marring and improved reflections, it left behind plenty of RIDS. For my next attempt I used M105 with a dab of D300 on a Meguiars microfiber pad via PC, followed by PO85RD on a Lake Country crimson pad via rotary. The second method resulted in a swirl free finish with no residual marring, although some RIDS remained. For a final attempt I used M105 with a light mist of M34 on a microfiber pad via rotary, followed by M205 on a tangerine pad via rotary as well. This managed to remove all but the most stubborn RIDS and left the finish extremely glossy with amazing reflections.

7035859319_40e6dc8a25_b.jpg


7035859623_5aafeefa7f_b.jpg


7035868313_4b443827b8_b.jpg


6889774810_6d1102dd55_b.jpg


6889791334_0af2ce7c22_b.jpg


7035886901_36749ef30b_b.jpg


After correction the paint lost its dull appearance and the metallic flake really started to pop.

6889767364_abd588c6f6_b.jpg


7035899435_9969464c7a_b.jpg


6889837604_9b8f4395aa_b.jpg


Obviously not all areas can be polished by machine, so the side vents, A pillar, C pillar, and all other tight areas were polished out by hand using M105.

6889793034_df514f7ecb_b.jpg


6889796946_851f8185ed_b.jpg


7035892739_db68af6529_b.jpg
 
The wheels appeared to be fairly clean upon first glance, but a closer look showed otherwise.

6889729160_8242edd1c0_b.jpg


7035871971_1cb499160a_b.jpg


7035878203_ce0c0fe821_b.jpg


The tires were scrubbed down with Meguiars APC+, Super Degreaser, and a short bristle brush.

6889777678_354e94c40c_b.jpg


7035927537_1c0a791635_b.jpg


7035874243_3d6338dc4d_b.jpg


The tires were really dirty!

7035904953_4647c6787f_b.jpg


The tire looked much better once cleaned and dried. CarPro PERL at a 1:1 ratio was later applied.

6889809934_f0efdfb782_b.jpg


7037539719_338e916f34_b.jpg


The chrome wheel centers, and the wheels themselves, were cleaned and polished using Menzerna Acrylic Jacket.

7035928049_7f966619d5_b.jpg


6891445310_fe96bdfafd_b.jpg


All of the chrome trim, bumpers, and door handles were showing similar signs of dirt and water spots, so all of that was polished up using Menzerna Acrylic Jacket as well.

7035829301_1177a558c2_b.jpg


6891445974_3b60815702_b.jpg


6889730126_d4708d3461_b.jpg


6891445780_427a503fc0_b.jpg


6889824290_cf94ee0f7e_b.jpg


7037540215_e9c44203fc_b.jpg


The rubber weather stripping around the windows was dirty and beginning to show signs of oxidation, so it was carefully scrubbed with Meguiars #40.

7035894155_ce3f4c8f2e_b.jpg


7035895547_7da1b75f30_b.jpg


Detailing an engine bay like this is always a sensitive affair, and thankfully it wasn’t terribly filthy to begin with.

6889726670_4e052bd494_b.jpg


All of the cracks and crevices were brushed out to remove any loose dust and dirt, rubber was scrubbed using Meguiars #40, the aluminum hood braces were polished with Optimum Metal Polish, and all hard surfaces were cleaned up using Menzerna Acrylic Jacket. If you haven’t noticed yet, this product really proved its merit. Even the oil filters were polished up! :)

7035906157_6b887eb9b0_b.jpg


7037540577_ecd0dfab70_b.jpg


The interior was still showing very nicely, and in order to make sure it continued to do so all the vinyl, plastic, and leather was first brushed and then cleaned with Blackfire Interior Cleaner. 303 Aerospace Protectant was later applied to the same surfaces. Interior and exterior glass cleaned with Eimann Fabrik, and exterior glass was treated with Blackfire Polymer Spray.

6889812624_17e088e743_b.jpg


6889815338_ac01fce56d_b.jpg


7037540749_6074b8b136_b.jpg
 
The steering wheel was looking dull as well, so it was polished using Optimum Metal Polish.

6889836396_5d8dcdb4e0_b.jpg


6889814198_1376e8e23f_b.jpg


6889814470_7bc9b8f1ce_b.jpg


7035909277_85af1ab44f_b.jpg


7035911367_8bb104a595_b.jpg


7035911581_105d14e3a8_b.jpg


It’s important to mind all your edges and jambs, as these are the rarely seen transitional areas that can really make the difference between a simply ‘clean’ car and one that is truly ‘detailed’.

7035907005_0653f98ea5_b.jpg


6889812034_88753d60c5_b.jpg


6889835976_e6f00d97ed_b.jpg


This car was given the ultimate in Blackfire LSPs, as two coats of Wet Diamond were applied (12 hours apart), one coat of Midnight Sun, and was finally topped up with Polymer Spray.

6889834374_5f87e98f56_b.jpg


6889803872_ddd9dcec3c_b.jpg


7035902769_9193ee63af_b.jpg


7035931487_6f1864f96e_b.jpg


7035912715_3000d55310_b.jpg


7035913079_aa9d8b06ba_b.jpg


The resulting shine and slickness out of this world!

6889837604_9b8f4395aa_b.jpg


6889804468_8af6faf4e1_b.jpg


6889805862_c88e58a040_b.jpg


7035901319_5469b36860_b.jpg


[img http://farm8.staticflickr.com/7176/7035901557_5c1c0ab887_b.jpg[/img]

7035902283_bdf4b26141_b.jpg


The car was completed just in time for the season opener for our local Cars and Coffee, unfortunately the weather forecast of upper 70’s with sunny skies turned into lower 50’s and overcast skies. Hopefully I can meet up with the owner again sometime soon and get some better pictures for you guys.

6891446312_1e7e534486_b.jpg


6891445610_2e275da222_b.jpg


6891444388_5196a1cb9a_b.jpg


7037538977_35a2a77885_b.jpg


6891445036_d8aa389e47_b.jpg


7037540979_fe22670570_b.jpg


6891444596_3b5ae794b1_b.jpg


:)
 
Great job. Although the paint looks fantastic, its nice to see other aspects being covered in your write up. Engines & interiors don't get nearly enough discussion imo. Again, outstanding turnaround.
 
Wow Connor, that was a Triple Crown Winner IMO, what a great write up.
Awesome car (the Ferrari 330 GTC is the best looking 4 seat Ferrari ever IMO)... check
Amazing work (goes with out saying).
Top-notch notch write (including grammar and pictures): For sure.

Thanks for sharing and congrats on such and amazing job.
 
Thanks guys, I always appreciate the feedback!

Todd, the 330 GTC is a 2 seater with a large rear luggage shelf, you're probably thinking of the 365 GT 2+2 which shares the front fascia but has a more elongated and sloping cabin, a more abrupt rear end, and different placement for the fender vents. ;)
 
wow connor, you did some real justice to such a fine automobile. that balckfire finish is an abosolutely beautiful finale for all your hard work.
 
Man-o-man what a beauty and a nice change of pace from all the modern cars we normally get to see. She's a real beauty now and your attention to detail is the reason why. All those small things in addition to the refined paint go a long way. Great work!
 
Very nice documentation. Great attention to detail. Very nice work.

I love that blue. I personally like the way the 330 GTC drives compared to a 275 GTS. It was surprising that there is a difference. One of the great V12s.

Thanks for sharing! Great work as always.
 
Connor, thats just incredible.

E
P
I
C

What else can be said that hasn't been already. One of the finest jobs I've seen in a while!
 
Absolutely beautiful work Connor!

That car definitely deserved the attention it was given, thats for sure!

Really fantastic!
 
Speechless......

This is top-shelf work right here. Everything came together well, from the paint to the interior, to those wheels (:drool:) to the trim resto!

Take a bow, Connor. This write up delivers!
 
Thanks everybody.

I would have liked to have done more disassembly to really get the paint behind the bumpers corrected and grill polished a bit better, but the time invested vs. the ROI wouldn't have been very good.

Not to mention I didn't want to relive a previous nightmare.

4953134924_49a238b53b_b.jpg
 
Back
Top