RaskyR1
Rasky's Auto Detailing
The owner of this 469-hp beauty contacted me late last fall after purchasing this car used. Since he was going to be storing it for the winter we decided to wait until this spring to perform the paint correction.
Upon inspection heavy swirls and dealer installed holograms were apparent on all panels. The owner and I agreed on a 2-step correction which should have removed the holograms and most the swirls. However, lately I have come across too many vehicles which appear to only need a 2-step correction, and I ended up getting burned by those nasty SHRIDS. Because of this I wanted to make the owner aware of the possibility that they may appear once I started the correction. For those of you who may not know what SHRIDS are, it’s basically my twist on the RIDS, or Random Isolated Deep Scratches. SHRIDS are the same as RIDS except they cannot be seen when the finish is so cover in swirls. Because of this I’ve coined them Sneaky Hidden Random Isolated Deep Scratches….SHRIDS!")
On top of all the swirls and holograms The owner had a few areas of concern which required a little wet sanding. I wasn’t able to fully remove them, but I improved them to the point where they could hardly be seen.
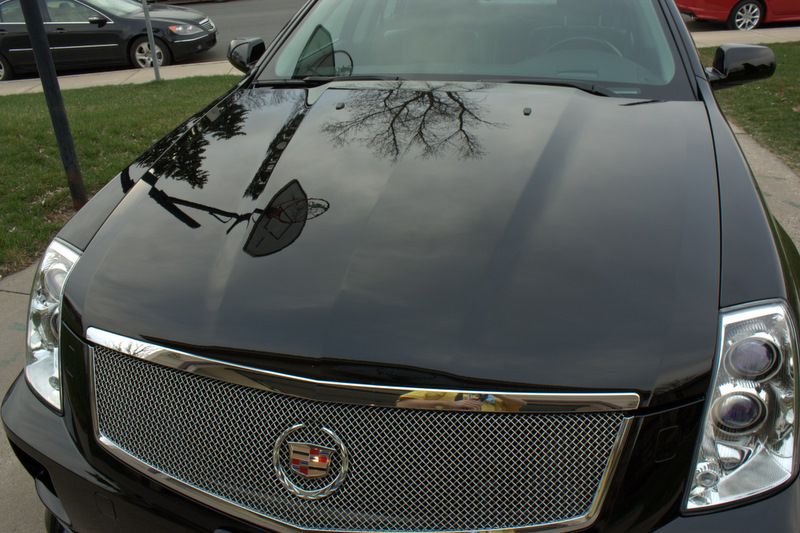
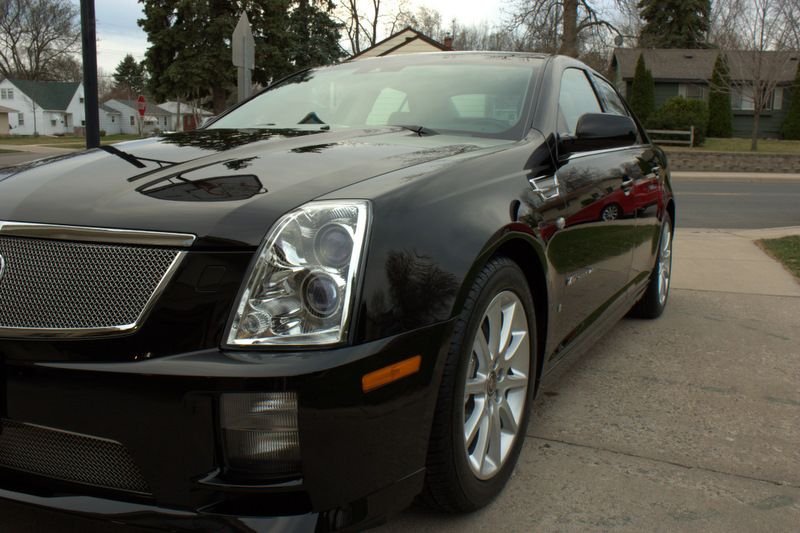
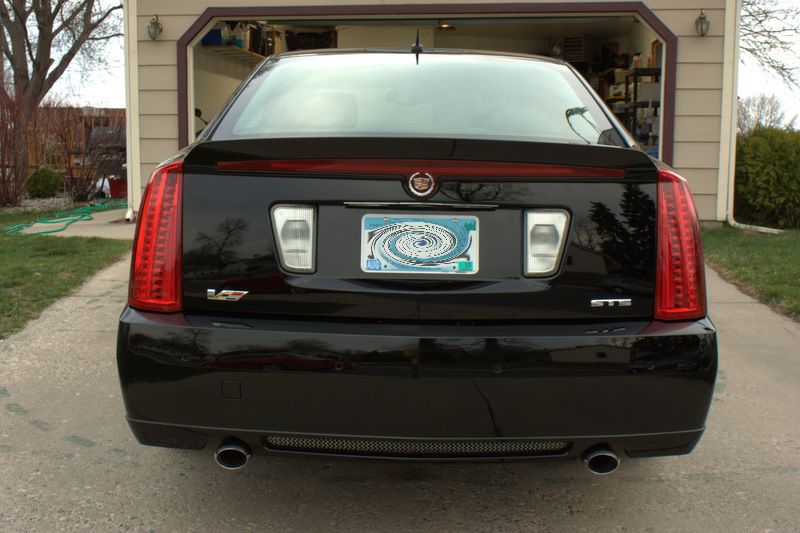
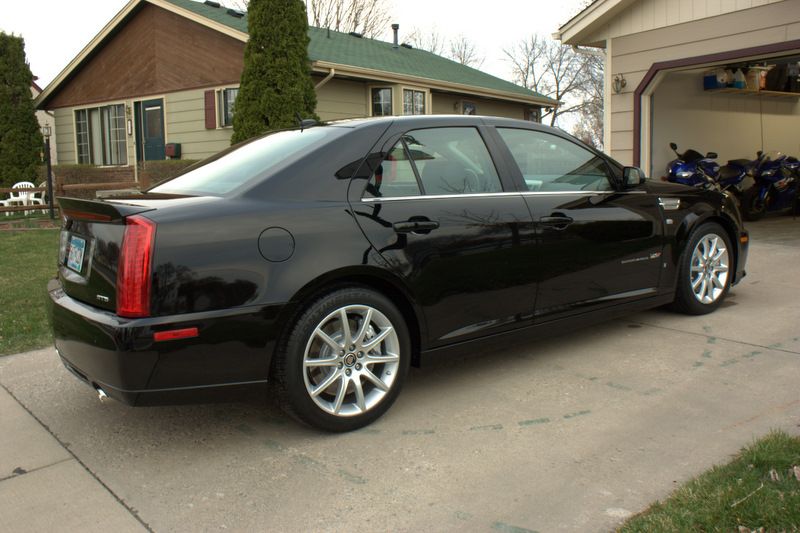
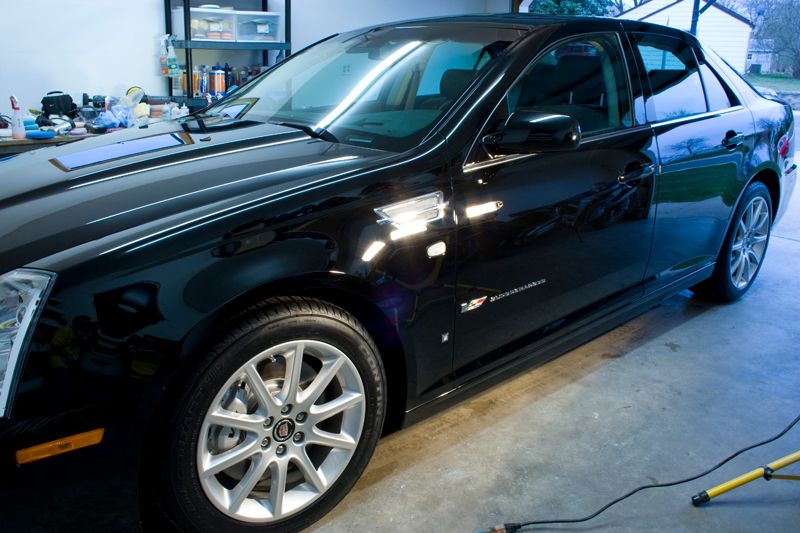
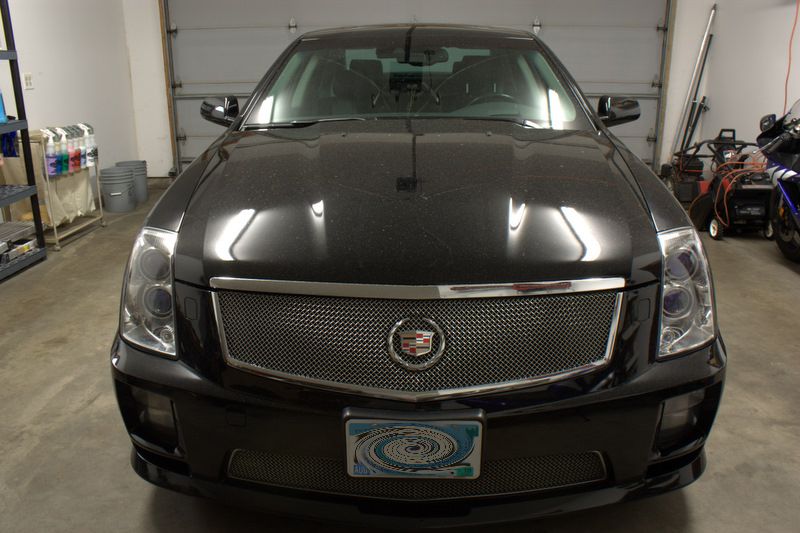
Now lets see some pics! Here is the car as it arrived.
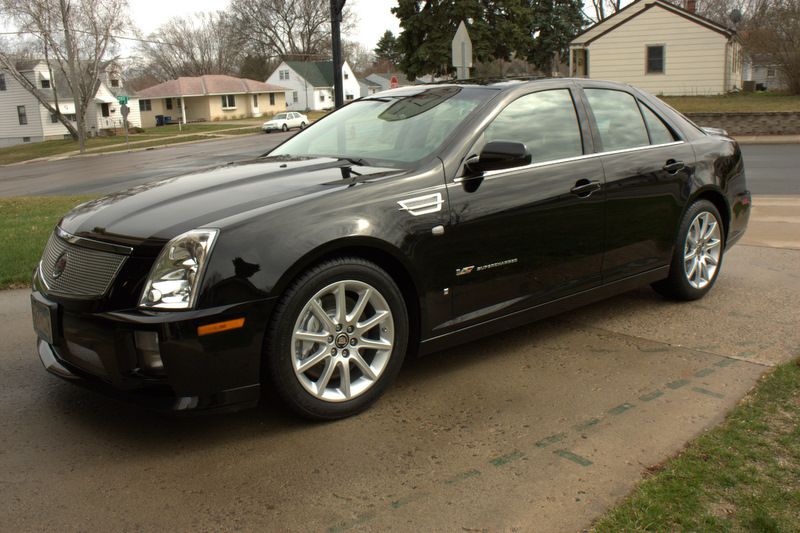
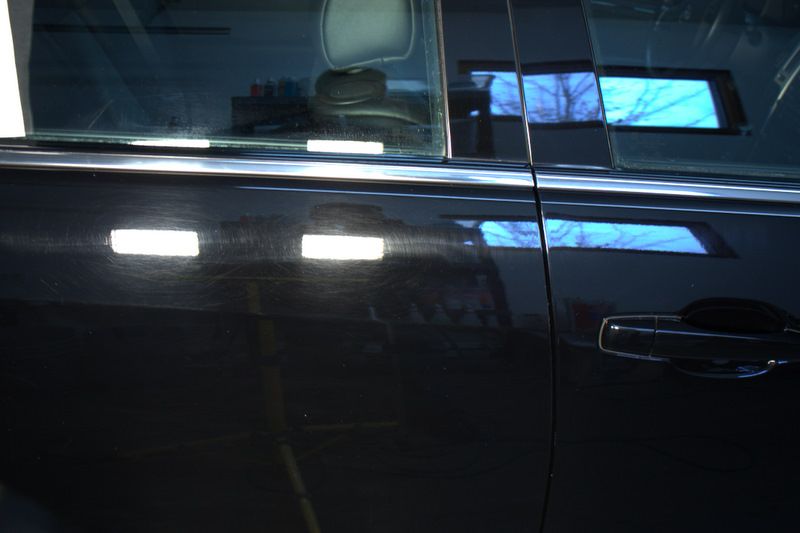
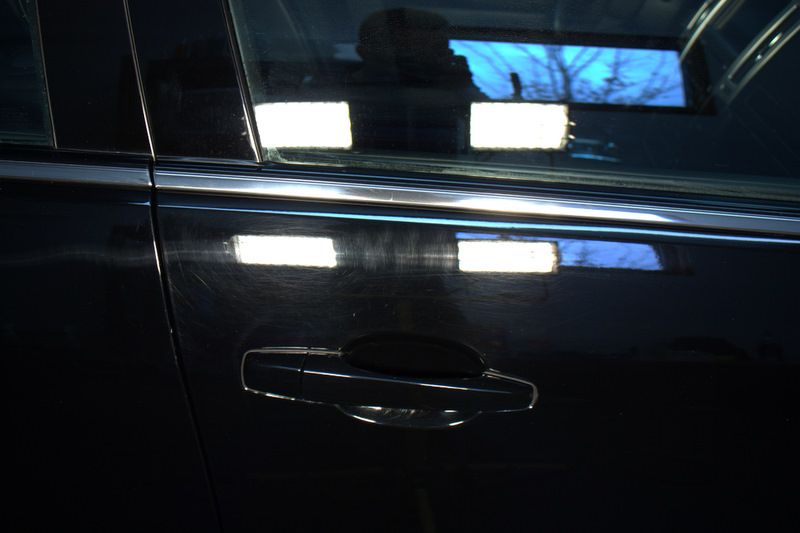
Here is one outside after a thorough wash using CG Citrus Wash and Clear with the help of some P21S TAW to remove any wax or fillers the dealer may have applied....looks great under the overcast sky doesn't it???
Still look great???
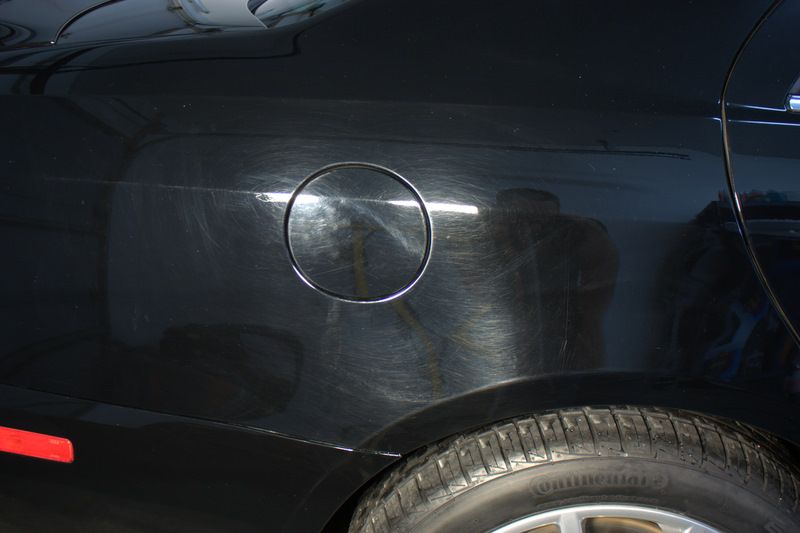
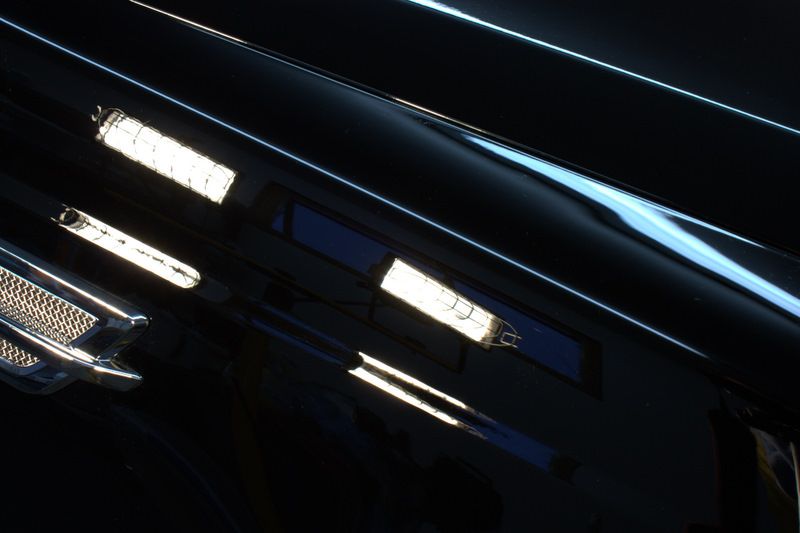
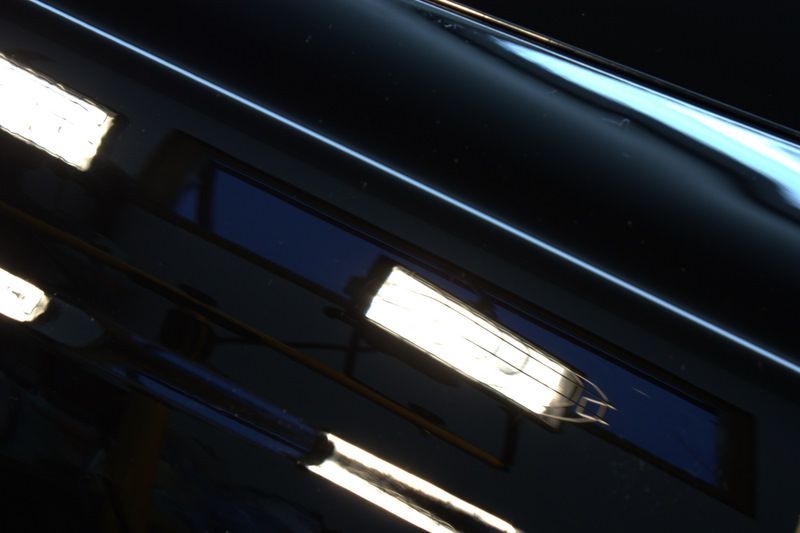
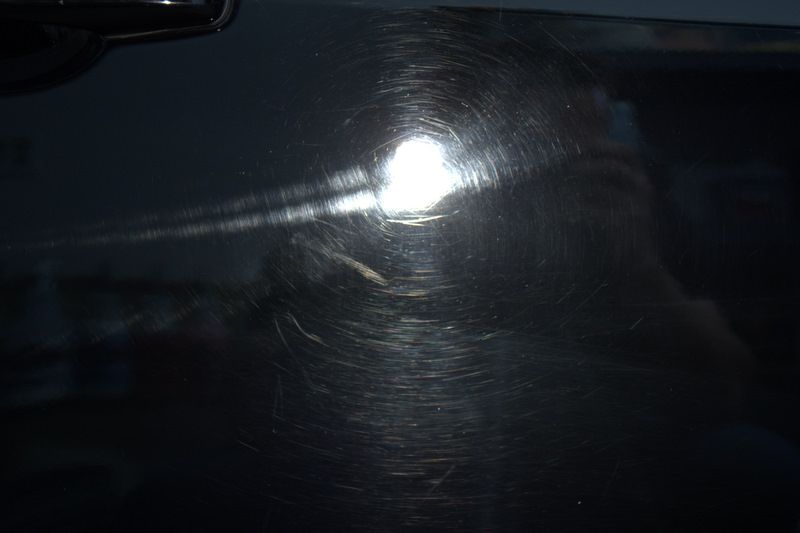
Buffer holograms car really be seen here
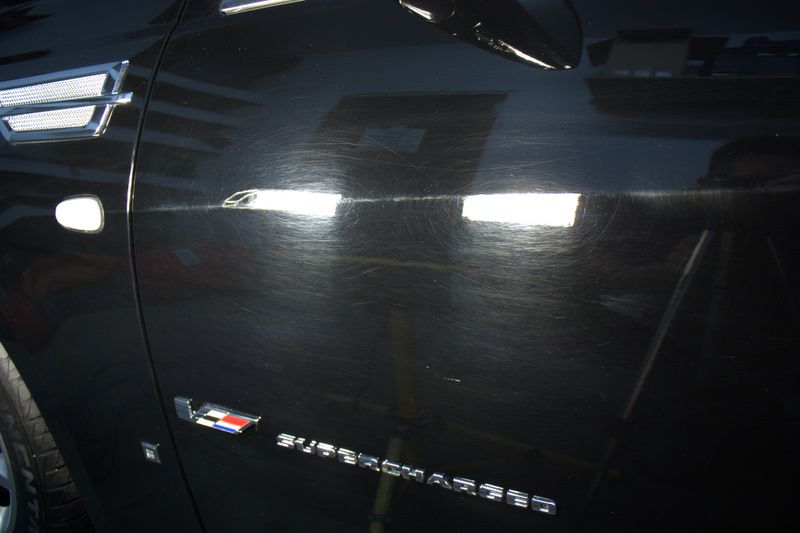
Every panels was loaded with swirls and holograms!
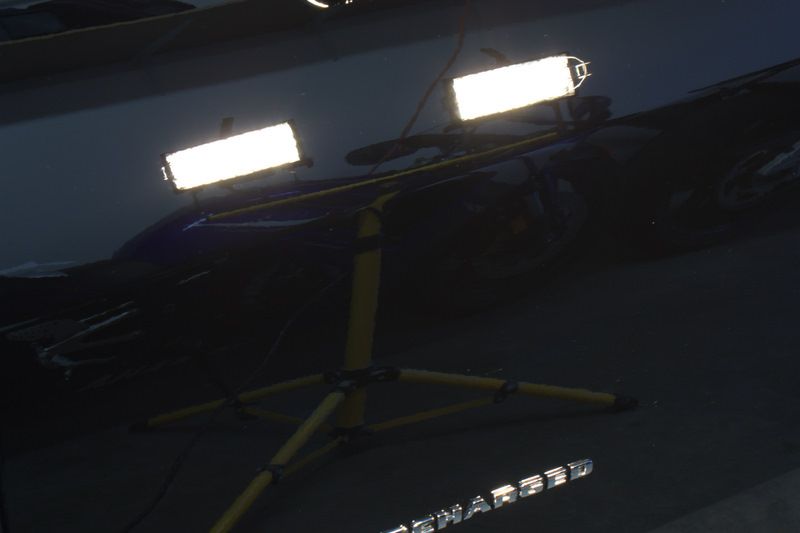
Another shot using the Brinkmann Dual Xenon light
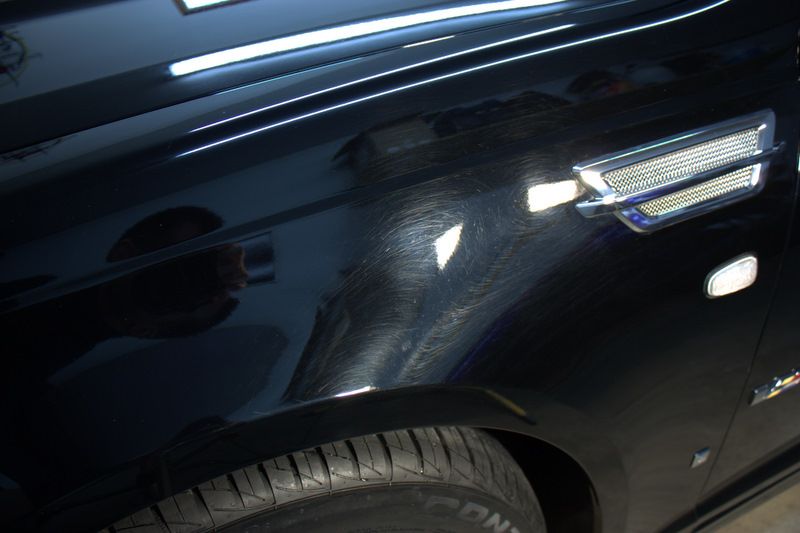
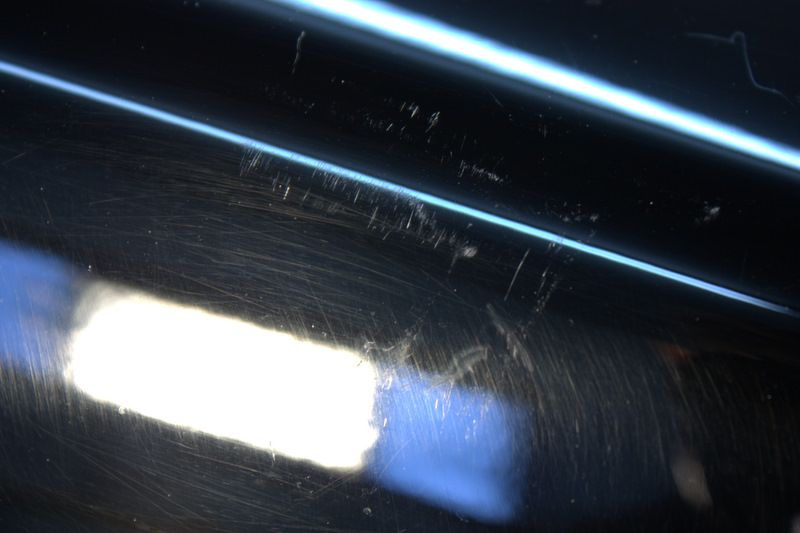
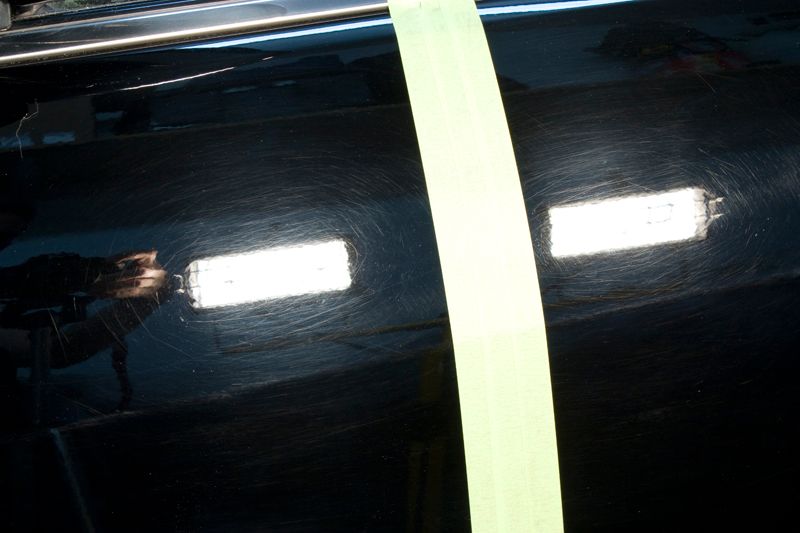
The passenger side fender was one of the areas of concern the owner had. It appeared someone had been leaning up against the car and had either a belt on or some other hard object that kept rubbing against the paint.

Zoomed in a little closer you can get a better idea of the damage. Most of the scratches were actually on the sharp bend of the fender which is never an easy area to correct since it very easy to rub through.
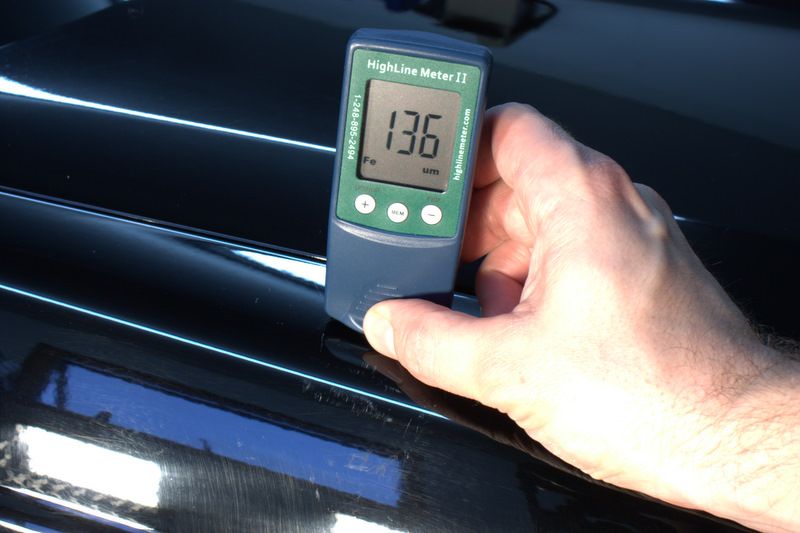
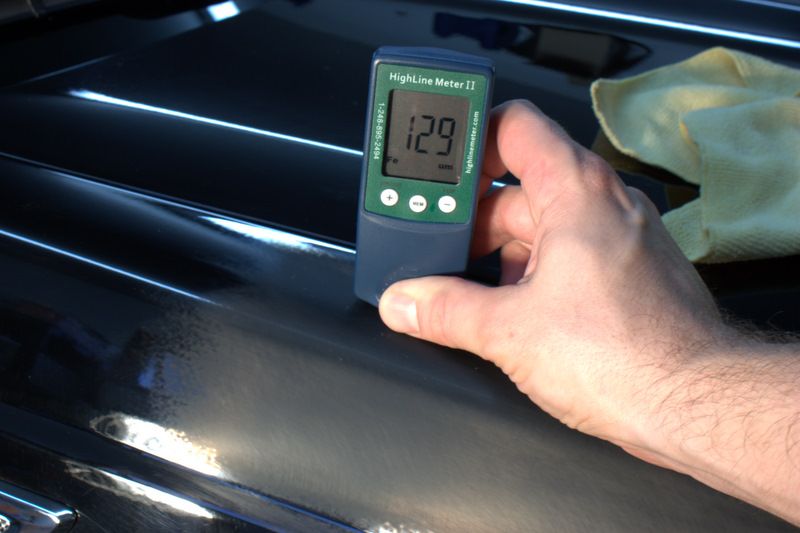
First I took several PTG reading to see how much paint I had to work with. One of the other areas on the roof had actually been worked on once already and readings around it were only in the 100 micron range so I was far less aggressive on that area. Here we can see some healthy reading in the upper 130 micron range.
I carefully sanded the area with 2000 grit Meguiars paper by hand and checked my PTG readings often. Once I got to a point were I was happy with the result I follow up with some 3000 grit Meguiars paper and took a final reading.
A total of only 7 microns were removed. Since I was sanding on an edge I figured it best not to push my luck.")
Anytime you attempt to polish a car you should always do a test spot first to make sure your process is going to have the desired effect you are after. Since I already had a plan of attack I started my test spot out by using Meguiars M105 on the PCXP using an orange LC 5.5" pad. After doing two buffing cycles it was apparent that a 2-step correction was not going to be enough....those nasty SHRIDS have struck again!
Here is my test panel taped up. You can see both side still have heavy swirls.
After two buffing cycles using M105 all the swirls were now gone, but the SHRIDS are now clear as day! Because there were so many of them I simply could not let a car go out of my shop looking this way and my 2-step correction just turned into a 4-step correction.
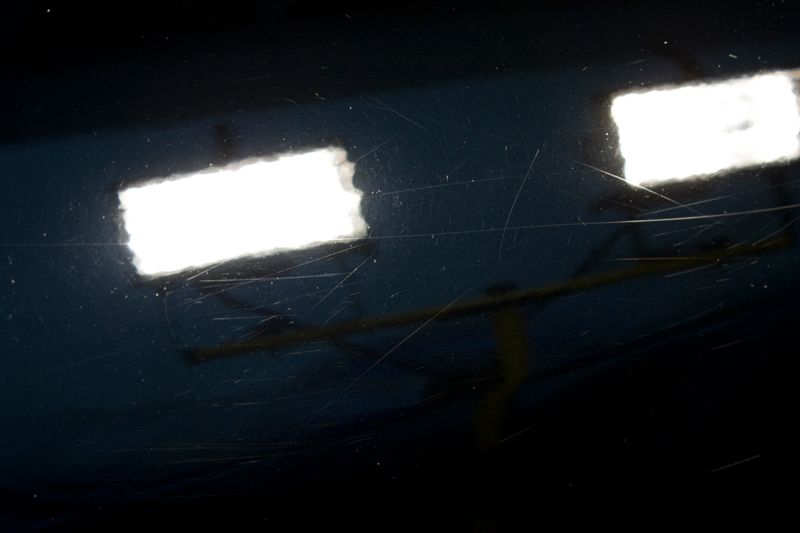
Here is a 50/50 shot after the M105. As you can see there was a huge improvement in the finish but the SHIRDS are very noticeable.

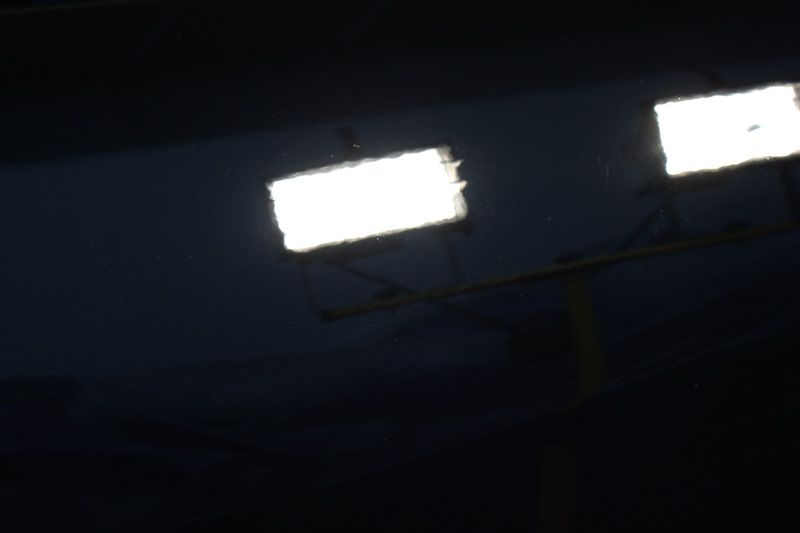
Zoomed in closer on the corrected side you can better see them
Here is that same section after using M105 on a rotary polsiher equipped with a heavy cut wool pad and then followed with M105 on the PCXP with an orange LC pad. Some faint micro marring can be seen which was removed in the proceeding buffing steps.
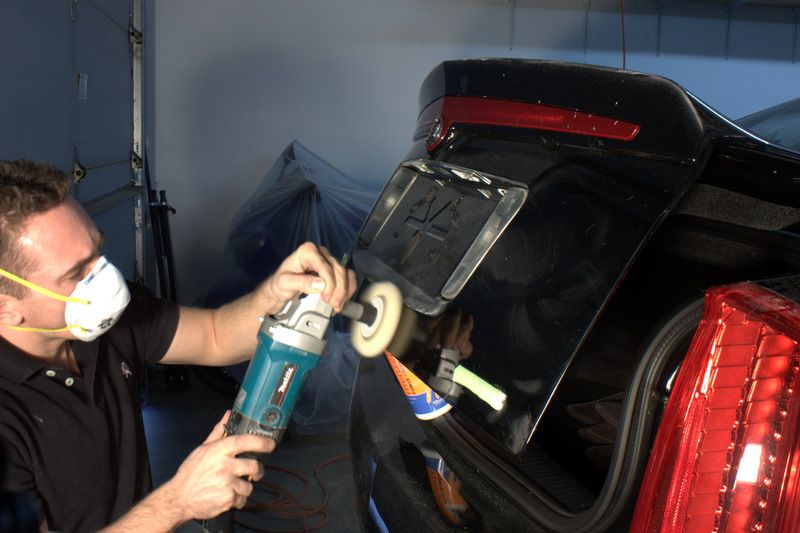
Here is a pic I took to show some cool little wool pads I picked up but I also wanted to show a good way to safely polish the lower edge of the deck lid. If I were to polish this area with the deck lid closed you could possible damage the bumper cover if you are not careful...If the side of the buffing pad or backing plate were to touch the bumper cover it could easily damage the finish! This method puts a large distance between the two perpendicular surfaces and also allows you better access for polishing.
The final correction process I decided upon after doing my test spots was as follows:
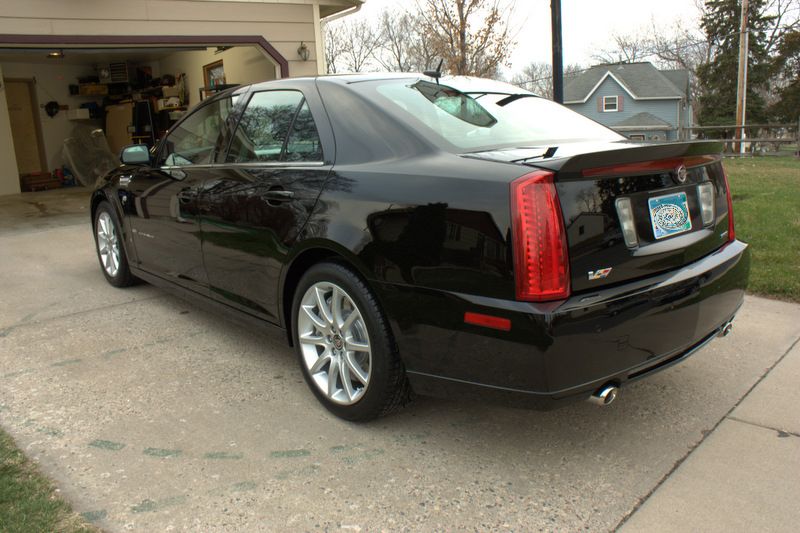
Paint protection was done using Blackfire Wet-Diamond, glass was cleaned with Meguiars D120 and polished using KAIO, tires dressed with Meguiars Hyper Dressing at 4:1, stainless exhaust tips were clean with M105 and #0000 steel wool, and the headlamps/tail lights were polished using M105/M205 on the PCXP.
Upon inspection heavy swirls and dealer installed holograms were apparent on all panels. The owner and I agreed on a 2-step correction which should have removed the holograms and most the swirls. However, lately I have come across too many vehicles which appear to only need a 2-step correction, and I ended up getting burned by those nasty SHRIDS. Because of this I wanted to make the owner aware of the possibility that they may appear once I started the correction. For those of you who may not know what SHRIDS are, it’s basically my twist on the RIDS, or Random Isolated Deep Scratches. SHRIDS are the same as RIDS except they cannot be seen when the finish is so cover in swirls. Because of this I’ve coined them Sneaky Hidden Random Isolated Deep Scratches….SHRIDS!
On top of all the swirls and holograms The owner had a few areas of concern which required a little wet sanding. I wasn’t able to fully remove them, but I improved them to the point where they could hardly be seen.
Now lets see some pics! Here is the car as it arrived.
Here is one outside after a thorough wash using CG Citrus Wash and Clear with the help of some P21S TAW to remove any wax or fillers the dealer may have applied....looks great under the overcast sky doesn't it???
Still look great???
Buffer holograms car really be seen here
Every panels was loaded with swirls and holograms!
Another shot using the Brinkmann Dual Xenon light
The passenger side fender was one of the areas of concern the owner had. It appeared someone had been leaning up against the car and had either a belt on or some other hard object that kept rubbing against the paint.
Zoomed in a little closer you can get a better idea of the damage. Most of the scratches were actually on the sharp bend of the fender which is never an easy area to correct since it very easy to rub through.
First I took several PTG reading to see how much paint I had to work with. One of the other areas on the roof had actually been worked on once already and readings around it were only in the 100 micron range so I was far less aggressive on that area. Here we can see some healthy reading in the upper 130 micron range.
I carefully sanded the area with 2000 grit Meguiars paper by hand and checked my PTG readings often. Once I got to a point were I was happy with the result I follow up with some 3000 grit Meguiars paper and took a final reading.
A total of only 7 microns were removed. Since I was sanding on an edge I figured it best not to push my luck.
Anytime you attempt to polish a car you should always do a test spot first to make sure your process is going to have the desired effect you are after. Since I already had a plan of attack I started my test spot out by using Meguiars M105 on the PCXP using an orange LC 5.5" pad. After doing two buffing cycles it was apparent that a 2-step correction was not going to be enough....those nasty SHRIDS have struck again!
Here is my test panel taped up. You can see both side still have heavy swirls.
After two buffing cycles using M105 all the swirls were now gone, but the SHRIDS are now clear as day! Because there were so many of them I simply could not let a car go out of my shop looking this way and my 2-step correction just turned into a 4-step correction.
Here is a 50/50 shot after the M105. As you can see there was a huge improvement in the finish but the SHIRDS are very noticeable.
Zoomed in closer on the corrected side you can better see them
Here is that same section after using M105 on a rotary polsiher equipped with a heavy cut wool pad and then followed with M105 on the PCXP with an orange LC pad. Some faint micro marring can be seen which was removed in the proceeding buffing steps.
Here is a pic I took to show some cool little wool pads I picked up but I also wanted to show a good way to safely polish the lower edge of the deck lid. If I were to polish this area with the deck lid closed you could possible damage the bumper cover if you are not careful...If the side of the buffing pad or backing plate were to touch the bumper cover it could easily damage the finish! This method puts a large distance between the two perpendicular surfaces and also allows you better access for polishing.
The final correction process I decided upon after doing my test spots was as follows:
- M105 on the rotary equipped with a heavy wool cutting pad. Polisher was run between 1200-1500rpms
- M105 on the PCXP equipped with 5.5" LC Hydro cyan pads on a speed of 6
- M205 on the PCXP equipped with 5.5" LC white pads on a speed of 6
- 3M Ultrafina on the rotary equipped with a 6.5" LC blue pads. Polishing was done by spreading out the polish at 900rpms, polishing for several passes at 1800rpms followed by another pass or two at 900rpms
Paint protection was done using Blackfire Wet-Diamond, glass was cleaned with Meguiars D120 and polished using KAIO, tires dressed with Meguiars Hyper Dressing at 4:1, stainless exhaust tips were clean with M105 and #0000 steel wool, and the headlamps/tail lights were polished using M105/M205 on the PCXP.