Navigation
Install the app
How to install the app on iOS
Follow along with the video below to see how to install our site as a web app on your home screen.
Note: This feature may not be available in some browsers.
More options
Style variation
You are using an out of date browser. It may not display this or other websites correctly.
You should upgrade or use an alternative browser.
You should upgrade or use an alternative browser.
Wet sanding, cutting and buffing using only a DA
- Thread starter touhy
- Start date
DETAILKING
New member
eom
imported_doug
New member
it was a pretty sill test. The guy DID prep the Zaino section with Z1 and Zymol section with Zymol paint cleaner - but he just waxed right over plain old, uncleaned paint with the Meguiar's. Gimme a break.
Ron Ketcham
Active member
1. New panels
2. One set painted with OEM materials
3. One set painted with refinish materials, at least 3 of the top brands. (both are either black or dark metallic green with clearcoat)
4. Panels must have full cure.
5. Treat each panel, divided in 6 sections with 6 products.
6. First test is to place in Flordia at the Long Term Weathering and UV Exposure Facility for specified time. (chosen by the submitter as to amount of time, usually for wax/sealant test, min of 6 months.
7. Following cleaning with a mild, non-caustic shampoo, evaluate gloss level with a Gloss Meter or Quality Finish Meter.
Second test criteria
1.Using new panels, with OEM and the refinish material, heat to 160 to 180 F.
2. Allow to cool and apply the 6 chosen products to each panel in the divided sections.
3. Following curing directions, when cured, wipe off indicators.
4. Reheat panels to 160 to 180F
5. Apply drops of acid compound consisting of sulfuric and nitric acid (pH of 3 attained) to the panels.
6. Reheat to temperature
7. Remove and apply a mist of water to the panels.
8. Allow water to evaporate.
9. Reheat to temperature
10 Remist panels and allow to dry.
11. Allow panels to set out of doors in sunlight and natural elements for one week.
12. Inspect for damages due to acids application.
These are just two of the required testing, there are several others that products must be submitted.
These are the sort of testing that the manufacturers use to test protective products.
Interestingly, since they are done by engineers, all fail.
The quest is to find the ones that hold up the best.
Ketch
Ron Ketcham
Active member
See there have been a lot of looks, but really expected some comments on this.
As I stated, there are other tests that done, but these are the main one in checking for gloss and durabilty, ability to withstand enviormental contaminates and the damage they produce.
Ketch

As I stated, there are other tests that done, but these are the main one in checking for gloss and durabilty, ability to withstand enviormental contaminates and the damage they produce.
Ketch
imported_RaskyR1
New member
Admittedly I can be a little old school at times, and wet sanding is probably one of those areas. With all the recent threads on wet sanding a fellow detailer, one I respect, David Fermani, mentioned to me how he felt the sanding scratch removal was more efficient by DA as it reduced the number of buffing steps needed (3000+ girt sanding). I've been removing sanding scratches via rotary polisher for over 20 years now and being a little old school like I am I found this hard to believe, but I am always willing to learn new things and figured I'd give it a try.
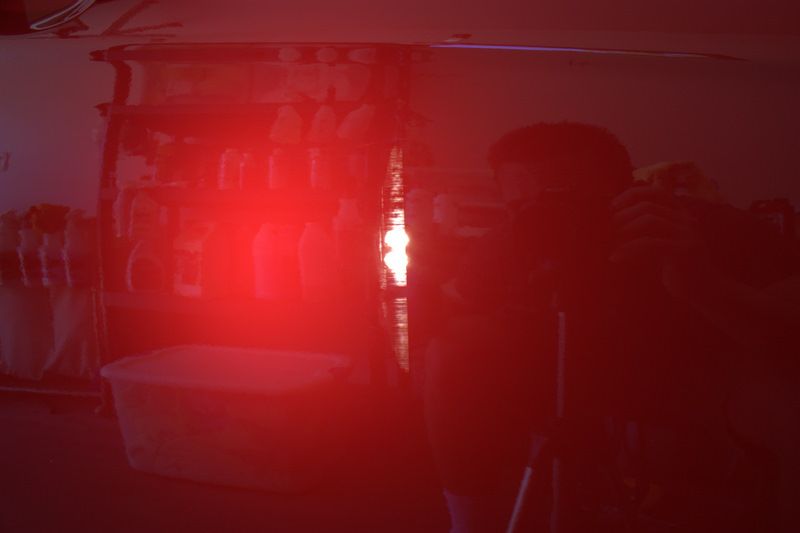
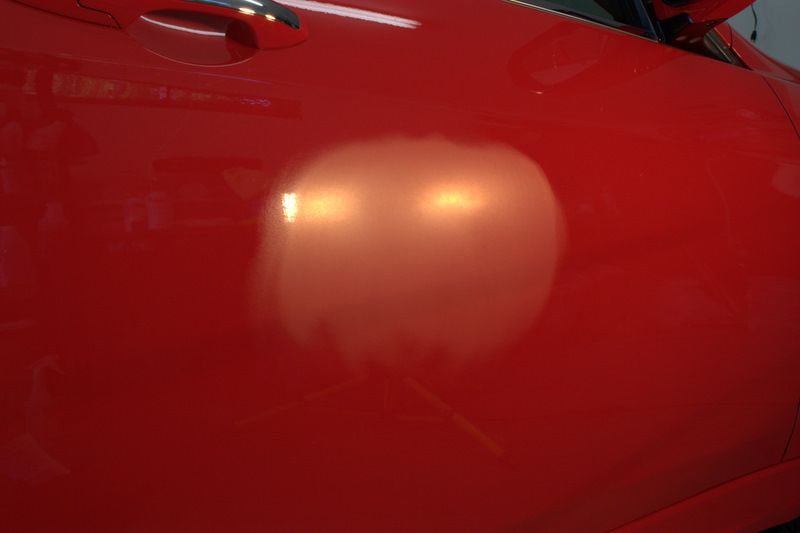
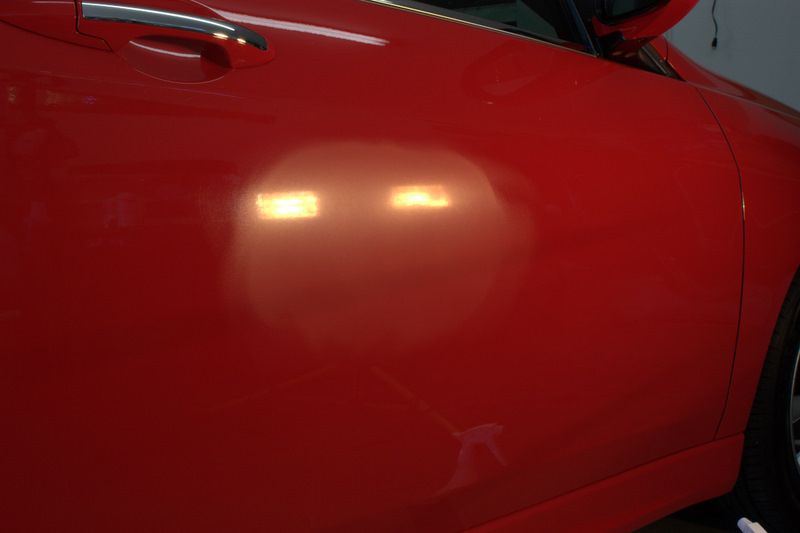
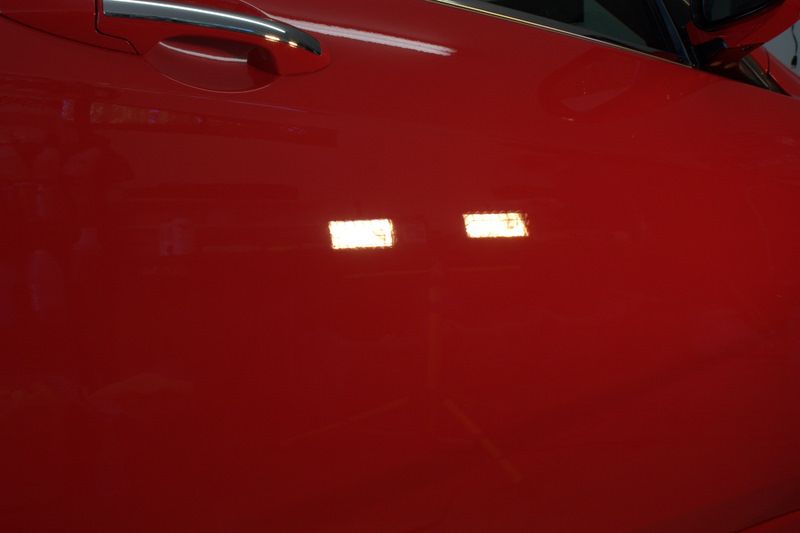
Since some jerk (aka. bad word) decided it would be fun to slam his door into the side of my car last weekend (even though I was parked out back next to a curb) I had a good test car for Davids method. Luckily it didn't dent my door but car was pretty dirty at the time and as you can see it left some nice deep scuff marks, which measured 3-4 inches vertically. I'm confident I could have removed them using only M105, but this gave me a good reason to wet sand the area and then try removing the sanding marks by DA.
Here is are some pics of the scuff

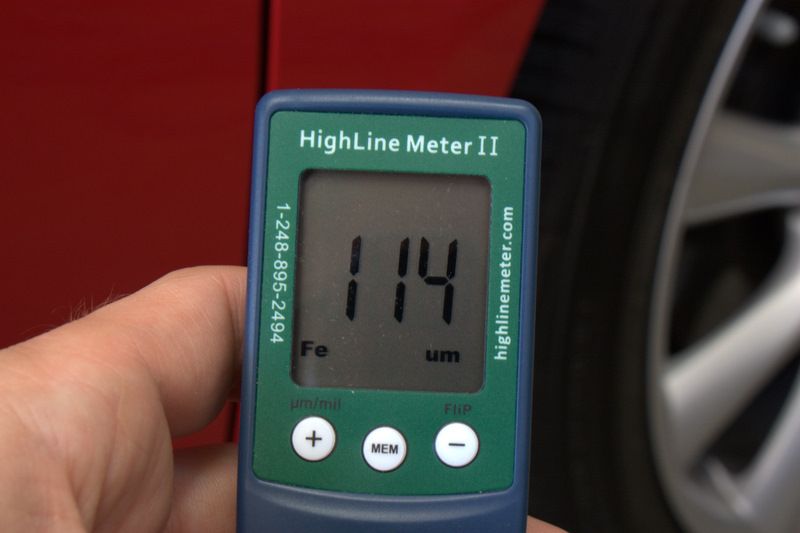
PTG readings on the door averaged around 115 microns. Since this is car still has the original factory paint, and having know my paint was pretty thin from the factory, I wanted to be sure I didn't remove too much clear.
I first sanded with Mirka Abralon 2000 grit disks on the PCXP using a speed of 3.5
I then followed that up with some Abralon 4000 grit disks....you can see a noticeable difference in the two in how much more dull the 2000 grit looked.
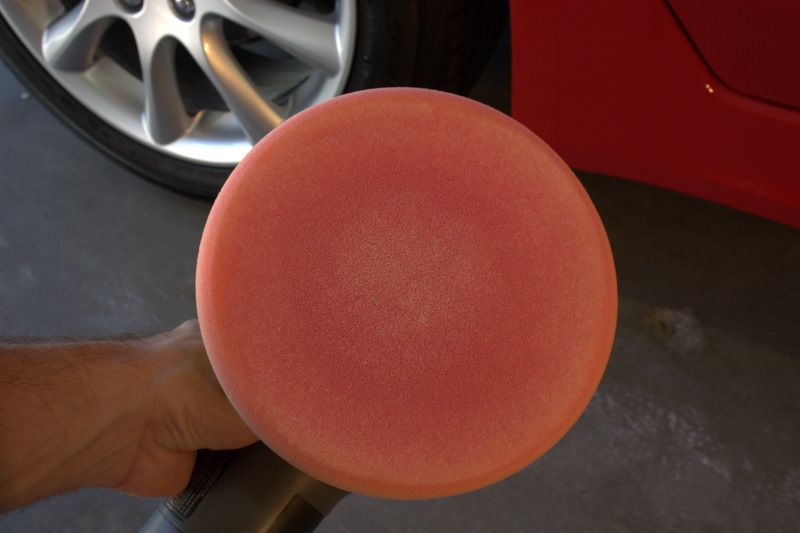
I then primed an orange LC pad with M105 and made 1 section pass (3 vertical, 3 horizontal over lapping passes) using the KBM on the PCXP, speed 6.
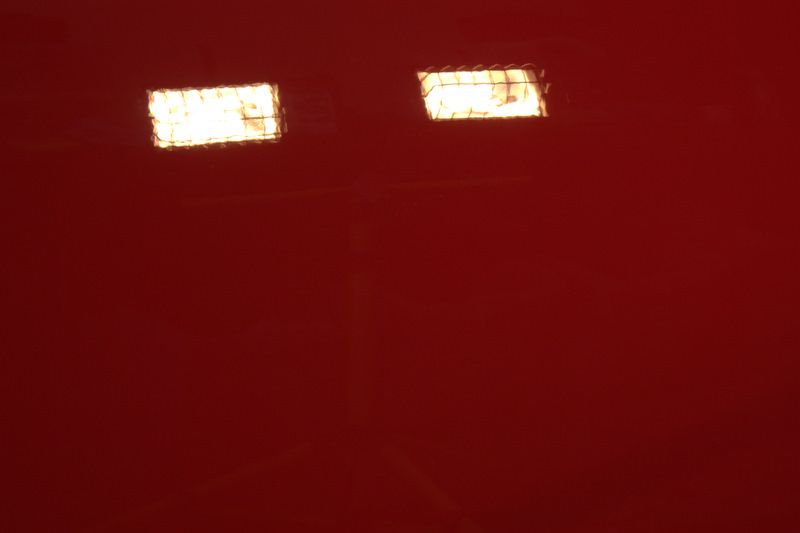
Here is how the paint looked after that pass!

Pigment transfer from my tinted clear...
After a quick section pass with M205 on a black LC pad here were the results.

I must say I was very impressed at how quickly this method was able to remove the sanding scratches. Keep in mind that the paint on my car is very soft and the results may very on different paints. I'd definitely like to try this method out on a few more paint types, but as of now it seems very promising.
Total material removal was 8-10 microns
Thanks David!
Next up will be this bad boy which has some crazy hard paint! May be a while before I get to it though.
Rasky
Since some jerk (aka. bad word) decided it would be fun to slam his door into the side of my car last weekend (even though I was parked out back next to a curb) I had a good test car for Davids method. Luckily it didn't dent my door but car was pretty dirty at the time and as you can see it left some nice deep scuff marks, which measured 3-4 inches vertically. I'm confident I could have removed them using only M105, but this gave me a good reason to wet sand the area and then try removing the sanding marks by DA.
Here is are some pics of the scuff
PTG readings on the door averaged around 115 microns. Since this is car still has the original factory paint, and having know my paint was pretty thin from the factory, I wanted to be sure I didn't remove too much clear.
I first sanded with Mirka Abralon 2000 grit disks on the PCXP using a speed of 3.5
I then followed that up with some Abralon 4000 grit disks....you can see a noticeable difference in the two in how much more dull the 2000 grit looked.
I then primed an orange LC pad with M105 and made 1 section pass (3 vertical, 3 horizontal over lapping passes) using the KBM on the PCXP, speed 6.
Here is how the paint looked after that pass!
Pigment transfer from my tinted clear...
After a quick section pass with M205 on a black LC pad here were the results.
I must say I was very impressed at how quickly this method was able to remove the sanding scratches. Keep in mind that the paint on my car is very soft and the results may very on different paints. I'd definitely like to try this method out on a few more paint types, but as of now it seems very promising.
Total material removal was 8-10 microns
Thanks David!
Next up will be this bad boy which has some crazy hard paint! May be a while before I get to it though.
Rasky
imported_Indy YZF
New member
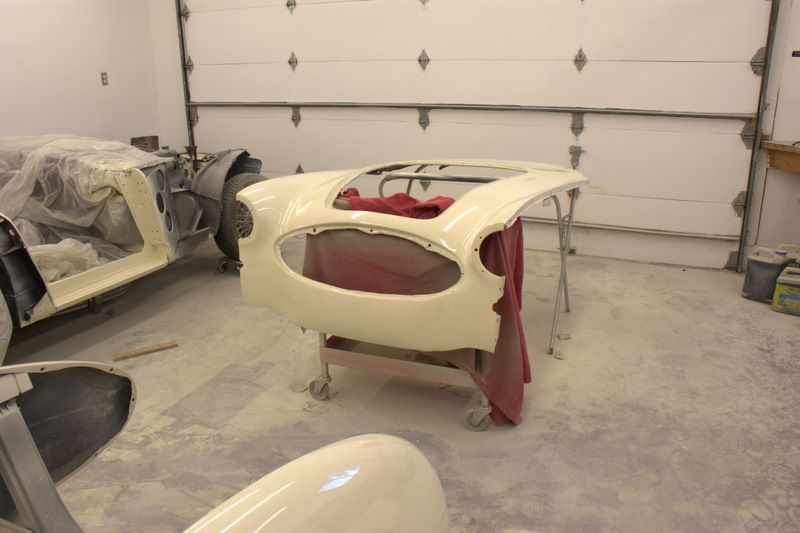
Neat method. Hey is that an Austin Healy front end I see?? (well pieces of the whole car I guess:biggrin")
imported_RaskyR1
New member
Neat method. Hey is that an Austin Healy front end I see?? (well pieces of the whole car I guess:biggrin
Yep. '63 AH 3000MKII BJ7
Todd@RUPES
Just a regular guy
Great writeup Chad! I am suprised by the amount of material removed! 1/10 the total thickness just like that :O
David has (much like Bryan B) given up on the rotary and sticks to a DA for just about everything. I also respect his opinion greatly.
David has (much like Bryan B) given up on the rotary and sticks to a DA for just about everything. I also respect his opinion greatly.
imported_RaskyR1
New member
Great writeup Chad! I am suprised by the amount of material removed! 1/10 the total thickness just like that :O
David has (much like Bryan B) given up on the rotary and sticks to a DA for just about everything. I also respect his opinion greatly.
Yeah, it definitely seemed like it cut fast. I wasn't using a laser pointer or anything to get solid readings, but in that general area most readings were around 104-108 microns...it could be more or less but it gave a good estimate anyway.
I really hate how soft and thin my paint is!

Not sure I can part with my rotary but this definitely has me thinking.
")
Rasky
imported_Flash Gordon
New member
Cool Beans Chad. I was hoping you would make a thread on this one day. Unfortunately I have to get back outside and get to work, but will check this out throughly later :spy:
imported_Luster
New member
Excellent work Rasky! And great documentation as usual.... :biggrin: ancing Dot::biggrin:ancing Dot::biggrin:
ancing Dot::biggrin:ancing Dot::biggrin:bmw5541
New member
Great post Chad.
You are becomming the King of Wet Sanding.
Thanks for sharing it with us.ancing Dot::rockon:
You are becomming the King of Wet Sanding.
Thanks for sharing it with us.
ancing Dot::rockon:imported_Flash Gordon
New member
Rasky
Hey, that one looks like a smileyman.....Awesome :cornut:
imported_Indy YZF
New member
Make sure to post pics of the finished Healy, I love those things. Used to own a 75 TR6, I love the old british sports cars.
imported_RaskyR1
New member
LOL@Flash!
Will Do! It's going to be a while though. I'm getting married in 3 weeks, off to my honeymoon, and then we should be back at it in July. Lots of parts to order yet too!
Make sure to post pics of the finished Healy, I love those things. Used to own a 75 TR6, I love the old british sports cars.
Will Do! It's going to be a while though. I'm getting married in 3 weeks, off to my honeymoon, and then we should be back at it in July. Lots of parts to order yet too!
imported_Brian_Brice
New member
Great writeup Chad! I am suprised by the amount of material removed! 1/10 the total thickness just like that :O
David has (much like Bryan B) given up on the rotary and sticks to a DA for just about everything. I also respect his opinion greatly.
I still use my Makita sometimes. A pass or two here and there, until it starts shocking me again. With the KBM topped with the fact my chord is constanly on the fritz I have come across no need to use my rotary when comparing time spent. I've always liked severe defect removal with a pc, this just takes it to a whole new level.
imported_Stokdgs
New member
Chad,
Excellent write up and pics - awesome work on the scuff to remove it and finish down.
Interesting to hear you are considering the Random Orbital over the Rotary.
It goes without saying that the R/O is so much easier to control and handle than the big Makita, DeWalts, etc., of the world; I just cant get my mind around the longer time it may or may not take to finish down paint like the Rotary does for me, anyway.
I will have to experiment as you did sometime soon on one of my vehicles and then see how this works for me on a full scale paint correction detail.
Congratulations on your upcoming marriage !!!
Good for you and your Sweetheart !!!
Dan F