paco said:
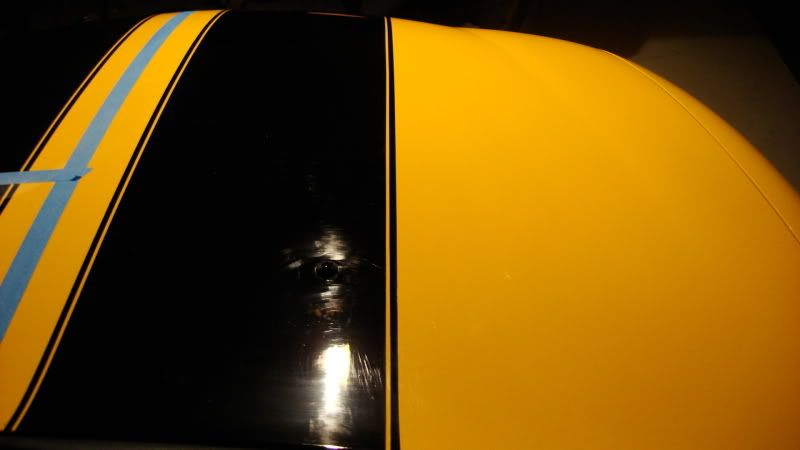
Bumble..did you sand in 2 directions lengthwise and across the hood? When wet sanding, it's best to only sand in one direction. Makes removal much easier and helps control the depth of the removal.
Was working on a related article so I finished it so I could add it here,
Two Schools of Thought when Hand Sanding - Straight-lines or Crosshatch Pattern
Copyright ©PBMA - Autogeekonline.net® All Rights Reserved
There's two schools of thought on the correct method or best method on which direction to move your hand and backing pad when hand-sanding.
Straight-line School of Thought
This method means to to sand in only one direction with all sanding steps. The perceived benefit is it will keep all your sanding marks in the same direction. Then, if you want to take this thought deeper this would mean if you don't get all your sanding marks out of the paint then at least they're all running in the same direction and my guess is most people will think this won't look as bad as sanding marks left in the paint that are in a crosshatch pattern and to some level straight-line scratches might be less noticeable and less unsightly than crosshatch scratches.
Crosshatch School of Thought
This method means that with each change in grit size of sanding or finishing papers, you sand in a different direction 90 degrees away from the previous direction. The goal is as you move to a higher grit paper you completely sand-out all the previous sanding marks that were running in the 90 degree angle opposite from the direction you're sanding with in subsequent steps.
Now assuming you sand all the previous sanding marks out you would then only be left with sanding marks running in one direction. If you don't remove all the sanding marks from previous sanding steps you'll have a crosshatch pattern of sanding scratches in the paint of varying depths. At this point you can either re-sand and try to remove the 90 degree sanding marks or move on to the compounding step and try to remove all the sanding marks with a rotary buffer. If you don't remove all the sanding marks using a rotary buffer then you'll be left with a crosshatch pattern of sanding marks in the paint and these will tend to be easier to see than sanding marks all running in one direction.
Big Picture
Of course the
big picture goal is no matter how you sand the paint, in the end you remove
ALL sanding marks and then there isn't any issue with which method you used. This is easier said than done and paint hardness is a crucial factor as to how easy or difficult it will be to buff out the sanding marks and film-build or paint thickness will be the limiting factor as to how much paint you can remove with both the sanding and the buffing process. (So be careful).
Personal Preference
Because in my life I've met seasoned Professionals that are proponents of both methods, choosing the best method becomes a personal preference. As long a there's enough paint or film-build on the car to work with then theoretically, both methods will work.
Ultimate Goal - Leave the most paint on the car
The most important part of any hand sanding project is to use the highest quality finishing papers you can obtain as this will reduce the potential for uneven sanding marks while leaving the most amount of paint on the car and making the removal process faster and easier.
Machine Sanding
And in this writer/detailer's opinion, generally speaking, machine sanding is a better option than hand sanding as it will leave more uniform sanding marks that will be a lot easier to remove and the machine compounding process will always be faster and easier versus trying to remove hand sanding marks.
Related Topics
Wet-sanding - Fresh Paint vs Factory Paint
Basic Hand Sanding Techniques
How long will a half sheet of wet/dry sandpaper last before it stops cutting and you need to replace it?
RIDS and Feathersanding - A Highly Specialized Technique by Mike Phillips
Removing Orange Peel & Sanding Marks with the Griot's ROP and the Wolfgang Twins
paco said:
Also, if you did introduce any RIDS, it would help minimize the appearance of it.
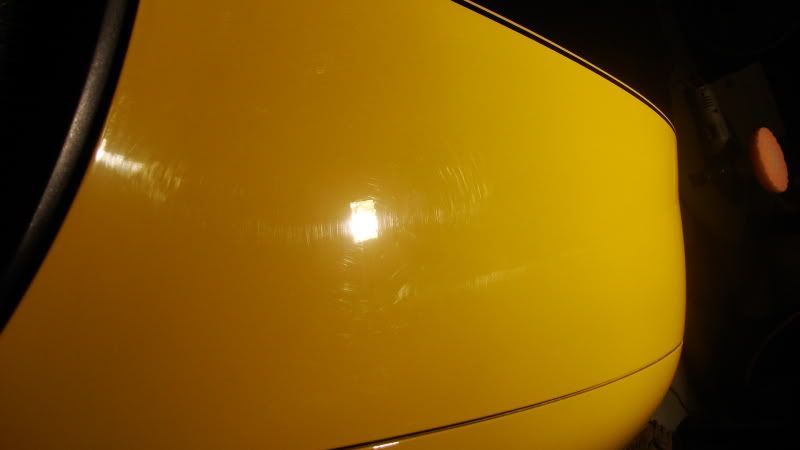
Just to note, when sanding by hand you leave behind
Tracers, not
RIDS, they both mean deeper scratches but Tracers are left by sanding and RIDS are scratches that are instilled by normal, day-in, day-out wear and tear.
Tracers - RIDS - Pigtails - Cobweb Swirls
Copyright ©PBMA - Autogeekonline.net® All Rights Reserved
Here's a list of the most common types of "Below Surface Defects" in the detailing world followed with suggestions on how to remove them.
Tracers
Deeper scratches left by the hand sanding process, usually in straight-lines because most people move their hand in a back and forth motion when wet-sanding. Tracers show up after you machine compound the paint and remove all the shallow scratches. After the shallow scratches or sanding marks are removed what remains in the paint is the deeper sanding marks and these are called tracers. Tracers are usually difficult to remove because they are deeper and removing them means either re-sanding to level the surface or re-compounding to machine buff them out. The problem with re-sanding is that you could remove one group of tracers only to leave behind a new set of tracers, so the problem can be a Catch-22 situation. This is why it's so important to use the highest quality finishing papers you can obtain, at least for your last sanding steps. It is possible to remove tracers using the
Feathersanding Technique if there are not too many of them.
RIDS
Random Isolated Deeper Scratches. These type of scratches come from normal wear & tear and there is no pattern to them. RIDS are like Tracers in that they are deeper scratches that show up
after the shallow scratches have first been removed through a machine or hand buffing process, usually with a compound or paint cleaner. After the shallow swirls and scratches have been removed, any deeper scratches that remain will now show up like a
sore thumb to your eyes because there are no longer thousands of lighter, more shallow scratches camouflaging them.
Pigtails
These types of scratches look like a
curly pig tail and are left in the paint by a DA Sander. Typically what happens is an abrasive particle gets trapped between the paint and the face of your sanding paper and because the backing plate that holds the sandpaper is moving in an oscillating fashion, it grinds the abrasive particle into the paint in a curly pattern that looks somewhat like the tail on a pig, thus the name.
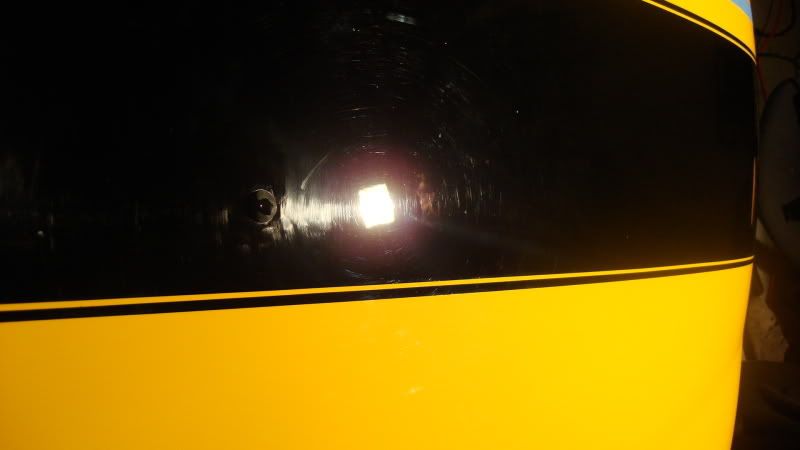
Cobweb or Spiderweb Swirls
The term cobweb swirls or spiderweb swirls comes from the appearance of the swirls in the paint which can kind of look like a cobweb or spider web in that they have a circular or radial pattern to them when the paint is highlighted with a strong beam or focus point of bright light like the reflection of the sun or another source of bright light like a
Brinkman Swirl Finder Light. The scratches are not actually in circular patterns but randomly inflicted throughout the entire finish but when you place a strong, point of light on the surface the long running edges of the scratches reflect back towards the point of light creating the appearance of a circular pattern of scratches.
Removing any of the above types of scratches means removing paint from the surface until you lower the upper most level of the surface with the lowest depth of the defects, (scratches), you're trying to remove.
What it means to remove swirls, scratches and water spots out of automotive clear coats
Superior__Shine said:
The shine looks very nice but you need to know when to use the proper tool for any specific job.
A DA with a wool pad on it to polish out a hood that has been color sanded is a very ineffective way of doing that.
Depending on the orange peel, runs, and /or debris in the finish, that job would have taken me an hour 1/2 to two hours tops. Price would have been about $120-$160.
Joe's correct in that the right tool for the job is a rotary buffer, not a dual action polisher that uses a free rotating spindle assembly instead of a direct drive gear assembly. The difference is if you put too much pressure on the dual action polisher or hold it on hedge or buff on a raised body line it can and will stop the pad from rotating.
Paint is removed best when a pad is rotating over the surface, not just vibrating against it. With a direct drive rotary buffer the pad spins no matter what when you pull the trigger and rotary buffers are the tool of choice when it comes to removing a lot of paint quickly.
The thing is though that Joe is a seasoned professional detailer and using a rotary buffer is second nature to him, if you've never used one before then what I've been telling people all my rotary buffer life is,
"Don't learn how to use a rotary buffer on something that's important to you"
Instead, learn on a junker car. So don't feel bad that you didn't use a rotary buffer to remove your sanding marks but if you're going to do more of the car or more wet-sanding in the future than consider learning to use a rotary buffer. I cut my teeth on a very heavy old school rotary buffer, it was either a Sioux or a Milwaukee and modern full size rotary buffers are a lot lighter and easier to use.
On that note, I can't say enough good things about the
Flex 3403 Lightweight Rotary Buffer, it's lightweight, (5 pounds), and small size make it VERY easy to control and that's the key to using a rotary buffer, learning to control it and the pad spinning on the end of the buffing head.
For what it's worth, you can remove sanding marks with a DA style polisher as you've proved and recently I wrote an article on this same topic. In my article I finish sanded with #3000 grit Nikken Finishing Papers to make it easier to remove the sanding marks and then I used the new Griot's Garage ROP for my DA polisher which has the most usable power of all the easily assessable DA Polishers on the market right now.
I actually used some very NON-aggressive products to remove the sanding marks as a part of my article but the job could be done much faster using a true aggressive compound.
Here's a link to the article for anyone that wants to read it,
Removing Orange Peel & Sanding Marks with the Griot's ROP and the Wolfgang Twins
Here's another related article...
Basic Hand Sanding Techniques
Besides that nice work and hats off to you for even tackling the job!
:2thumbs: