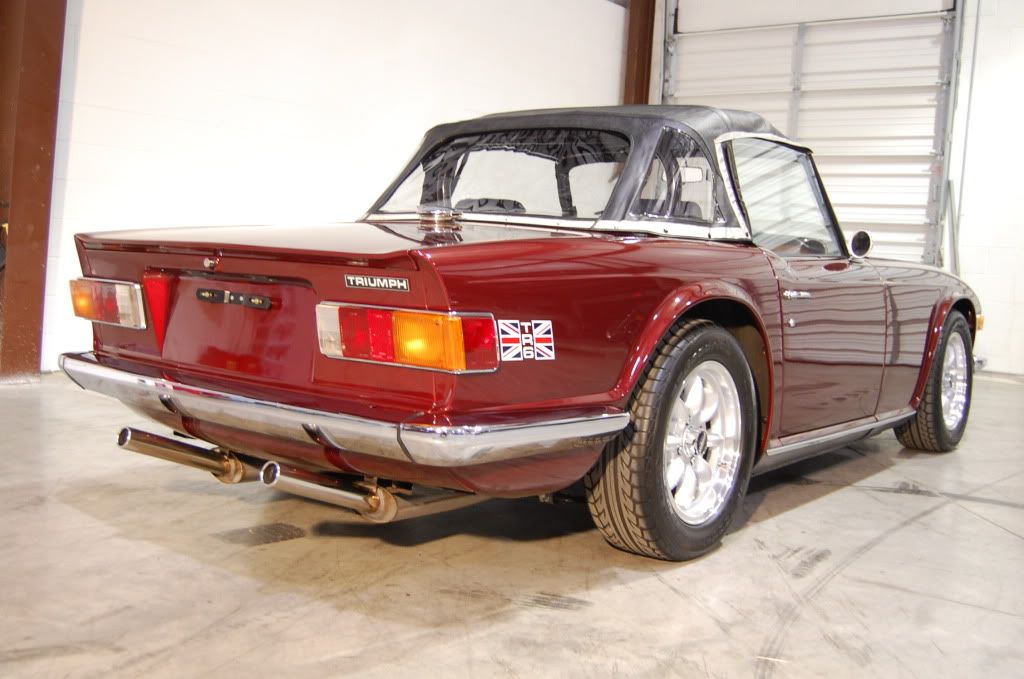
Triumph TR6 by Knox Details

Sirslap2

New member
I am sure I am no different than the rest of you in that my neighbors think I am nuts.

Well I am in Canada and it hasn't warmed up enough to detail the exterior yet so I was cleaning the inside of my wife F150.

I was cleaning the glass with Stoners when my neighbor pulled up in his Mustang. He said he couldn't understand why his glass is hazed on the inside and was surprised when I told him it was due to the plastics.

I gave him my Stoners and told him to just pop it back in the garage when he was done if I wasn't around.

Yesterday I was just getting home when he pulled up and rolled down his window and proceeded to tell me how amazed he was with the Stoners!:up

He couldn't shut up about the stuff!

Now he wantes me to order some for him as you can't buy it retail in Canada.

Now I don't feel like such a weirdo! Whew!
 
I made sure there wasn't much in the can:D

I helped him take a boot scuff off of his Harley last year and he loved that too!
 
I often look at my job as an opportunity to preserve a piece of history. That was exactly the case when the time came to work with this restored classic. I recently spent about 15 hours on this Triumph TR6. I did not plan on doing this write up so my picture selection is somewhat limited, however, here we go!

I washed the car with ONR as it was already quite clean. I just needed to get the dust of the car. I clayed the car and prepped the surface for polishing.
DSC_1148.jpg

As you can see, the paintwork needed correcting badly. Correction was carried out using M105/205, LC pads, and my trusty 7424. Here is after I had gone over the front quarter with only the 105.
DSC_1181.jpg

I was happy with the results. As the work continued I pulled out the tri-pod and got some more pics.
DSC_1184.jpg

DSC_1186.jpg

This is after the first of a few passes with the 105.
DSC_1191.jpg

DSC_1192.jpg

Even though the clear was very think on this car and I was only using a 7424 I taped off where I felt necessary. The body panals were not perfectly flush and its always better to be safe than sorry.
I moved on to the engine bay. Polished and waxed the wheel arches where possible. Polished some of the metal hand and got everything up to par.
DSC_1205.jpg

DSC_1204.jpg

Polished the exhaust and tail lights.
DSC_1209.jpg

DSC_1210.jpg

DSC_1211.jpg

DSC_1212.jpg

Detailed the interior
DSC_1215.jpg

Here are some after shots
DSC_1200.jpg

DSC_1213.jpg

Last but not least, this is one of my favorite shots...
DSC_1197.jpg

It was a pleasure to enhance and preserve this peice of history. Hope everyone enjoys! Thanks for checking this out!
 
Nice job, I love those cars, my dad had one when I was in high school. Spent a lot of time fixing it, but it was fun. That one is done up (aluminum rad, weber triple carbs, etc). Looks mint after you were done.
 
Thanks guys! In my mind there is (almost) always room for improvement, that applies to this car but I did what I could in the time frame I had. Thankyou for the nice comments!
 
Thank you for the write up Knox, I had one in the 70's in British Racing Green and it was fun to drive! Great save on this classic!:Car smiley:
 
SoonerFan, it's not my building but this is where I do my detail work. I am lucky to have the opportunity to work here.

zoomzoom mazda5, Thanks man! This would look great in British racing green!

kakeuter, thankyou!
 
Back
Top