"The Whole Enchilada" 1997 Toyota Land Cruiser gets it all

DETAILKING

New member
05108.jpg


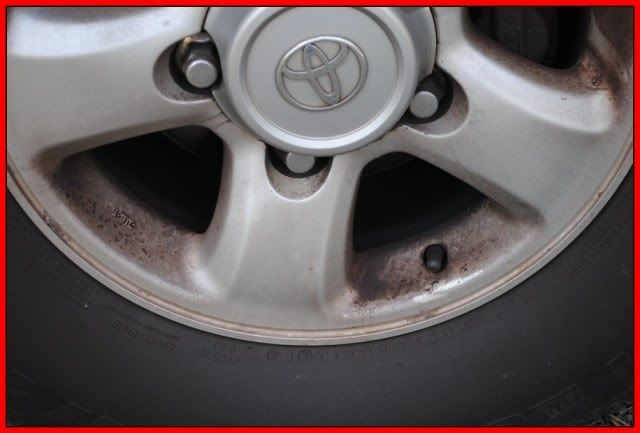
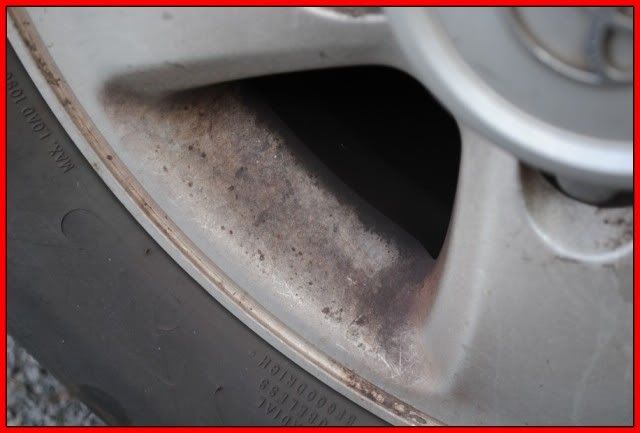
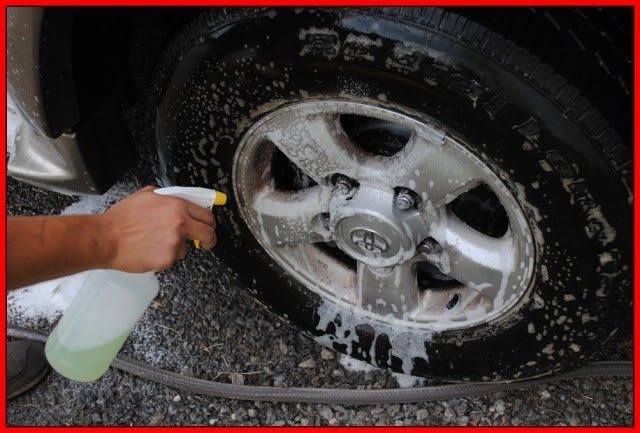
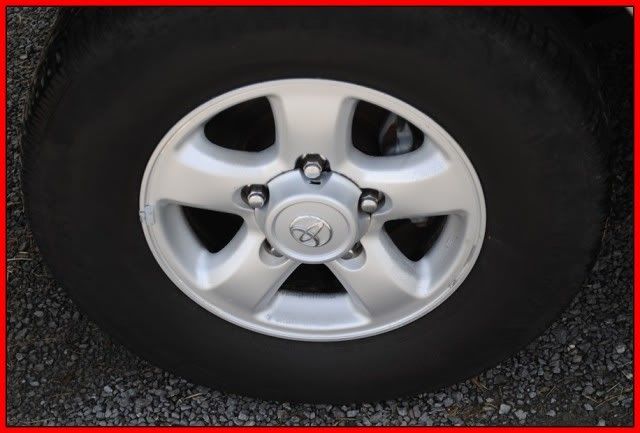
As many of you know, I am not a fan of strong chemical wheel cleaners. I use them as needed, but once my wheels are clean, I protect them with a sealant, and just wash them with car wash and a sponge every week. Over time, some brake dust particles become embedded in the clearcoat of the wheel, and sometimes it takes something a bit stronger than clay to remove them.

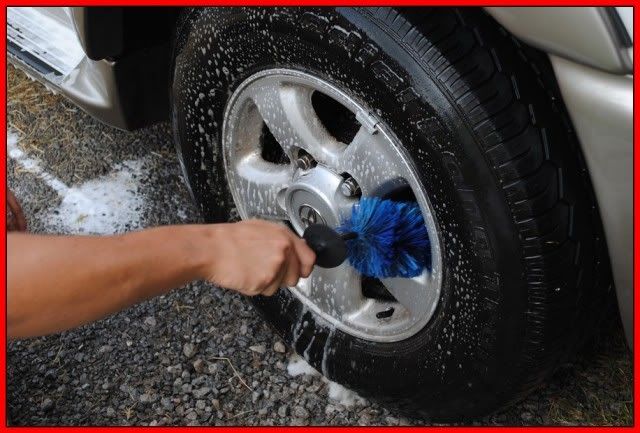
I tried MOTHER'S Clear Coat Wheel Polish on my wheels this weekend. It appears to be a very mild abrasive (which I was looking for), and took more elbow grease than a chemical cleaner, but the results were very pleasing. I used a foam pad cut in half for application, and the product was very easy to work into wheel surface. After a few seconds of rubbing, it buffed off very easy and clean with a cotton towel. It removed the embedded particles of brake dust, as well as some surface scratches on the wheels from road debris and rocks. It left the wheels very glossy and smooth, with a perfect "like new" finish.

I followed up with a spray of car wash in a squirt bottle and a hose rinse, and then applied a sealant to the wheels. I plan to do this polish/sealant process every few months as needed on the wheels. I give Mother's clear coat wheel polish a thumbs up, and feel I had better results with it than using a harsh chemical wheel cleaner. If your wheels are a bit neglected though, I would use something a little more aggressive.
 
Good review DK.


I have this product too and I haven't gotten a chance to use it yet. Looks like I'll be using it as soon as the weather gets warmer.
 
I looked in two local autoparts stores and Kmart no luck just the chrome polish.


I am on a search again to add to the stash.


Like I needed another excuse!:D
 
Thank you for this product report. I have a bad case of swirls on my clearcoated, high polished aluminum rims. I have not tried any abrasive compound on them for fear I'd make matters worse. Do you think the mild abrasive in Mothers would help? Thanks.
 
got some and just tried it. Pretty good stuff.


I did what DK said but used a small cotton wash cloth for application. It did remove black gook I could not see since the rag turned a black in certain areas. The shine when done was not bad either.


I did not coat wheels yet with anything since it is dark now and I will probably try it like it is for a while to see how the next wash goes.


I will post how it hangs when I wash truck next aqnd being Mardie Gras is next week I am not sure when that will be.


This detail was done a few months ago, but I'm just now getting to the write up. This vehicle took me 32 hours in 3 days to complete. It was one of the biggest jobs I have taken on.


This is a 1997 Toyota Land Cruiser that has NEVER been detailed (or probably waxed) lol. This was scheduled for full exterior, Full interior, leatherique leather treatment, and engine degrease. The whole enchilada!

Let's begin by showing you what I had to work with. Sit back and enjoy
(I hope you have a strong stomach)


58f4654c.jpg


814b056c.jpg


49745d89.jpg


1292b2b8.jpg


8e2be652.jpg


a9d53c98.jpg


7f14c597.jpg


0acef227.jpg


f8dbd693.jpg


02c1d9aa.jpg


Dont even Ask?

5eb32deb.jpg


51f63065.jpg


5c5be53b.jpg


9a395c0a.jpg


Now for the inside!

6222dfd8.jpg


0527f367.jpg


See how nasty and shiny and oily the seats are? also all of the cracks and creases.

70ee6dc3.jpg


c37355a5.jpg


5ea2ba81.jpg


The carpet

d71b40c9.jpg


e0b17851.jpg


31593f58.jpg


e9f4a6a7.jpg


I think that's my tip?

ea492fbc.jpg


5bd311ad.jpg


cf92bb94.jpg


c7f32108.jpg


2f7c8d91.jpg


5bf1e76a.jpg


201fae37.jpg


fdd5e78f.jpg


1ab2ebd5.jpg


d94683fd.jpg


The back of the seats

30660ee4.jpg


093a3042.jpg


a1507187.jpg


537b9a21.jpg


eb1e2edd.jpg


6231a275.jpg


fc436924.jpg


bd33092a.jpg


1fb01aca.jpg


0bd7bfa5.jpg


8c510903.jpg


So lets get to work!

I began by degreasing the engine bay with APC and degreaser using my Karcher foam gun.

667998fc.jpg


46b5145b.jpg


Then I agitated it with various brushes

017c25dd.jpg


93eb9ba9.jpg


7fcdba20.jpg


then rinse

81a3f07a.jpg


I hand dried all of the standing water

8290a45b.jpg


then applied the 303 protectant.

25e61c79.jpg


Next it was time for a bath, a foam bath that is, using Dawn detergent to strip off any and all waxes and oils and such.

a43f8a1d.jpg


applying some P21s wheel gel to the wheel

ed2f7093.jpg


Then agitating them

3a397bfb.jpg


I rinsed off the first foam bath and finished the wheels

5f52bd17.jpg


Next I got out the real Foam cannon and applied some real foam.

173cadcf.jpg


916289fe.jpg


Then I washed it using two bucket method and 2 grit guards and a 100% sheep skin wash mitt.

800b393c.jpg


Then another thorough rinse

f21f605b.jpg


After I dried it off, I took some shots of the engine bay after the 303 soaked in real good.

Way better!

80ac603a.jpg


6bb46fa9.jpg


4fc51810.jpg


Now it's time to see the paint condition.

5275fe08.jpg


def1eced.jpg


9e938396.jpg


10b87799.jpg


Very Dull and Faded!

edc0b204.jpg


473b0837.jpg


edc746d8.jpg


6796dc2c.jpg


5ab1870b.jpg
'

78ed8749.jpg


af7f09fb.jpg


041d348d.jpg


Day one I started the interior. I knew that the leatherique needed to dwell for 24-48 hours so I had to clean it up first.

here is a 50/50 of some APC and lots of scrubbing

ff6085d0.jpg


Sorry for the lighting.......

e99cfac3.jpg


It was a long day of interior detailing. lots of APC and rags and brushes.

f5b27405.jpg


I used my Cyclo polisher with carpet brush backing plates to scrub the big areas.

0292a6f7.jpg


0da278c9.jpg


So this is the seats after a full on scrubbing (not to bad, but not good enough)

ff8d1f0d.jpg


35d9a13a.jpg


2b0345d6.jpg


7fb52fd3.jpg


cdc2c484.jpg


After this step I smeared the Leatherique Rejuvenator oil into every crack and crevice of the seats. and left it to dwell for 48 hours.

Sorry I didn't get any pics of these steps. but here is the seat after the 48 hours of dwell time.


The Rejuvenator oil soaks into the leather raising all of the oils and grim to the surface and softens the leather tremendously. causing a lot of the creases and cracks to go away.


In this picture you can see all of the Nasty Oils and grim that has risen to the surface of the leather.

dbe41016.jpg


fd7fe616.jpg


To Remove the Rejuvenator Oil, you take a bucket of water and a Damp towel and scrub the seats, rinsing the rag out as needed.

here are the the seats after

fe7d768e.jpg


Here is a pic of the back seat before and after

ac602682.jpg


71230c39.jpg


30293077.jpg


and now after cleaning off the Rejuvenator Oil, It's So plump and Soft

236607ad.jpg


7f99bc80.jpg


1547a955.jpg


Here is the bucket of water after just a couple of seats (And Remember, these seats were already cleaned once before, that just goes to show how much nasty grim gets down into the leather)

47687fbe.jpg


f4d70153.jpg


Ewww, just aftera couple of seats!

400d2a1a.jpg


And here is the final Interior shots

02a9e586.jpg


da3272ed.jpg


b10e8bfb.jpg


62f3750f.jpg


Remember those Dirty Creases? BAM! this is what leatherique does!

851369a1.jpg


1ab93a00.jpg


5ac06db7.jpg


b25d7ee0.jpg


5c99c8b7.jpg


d2e717bf.jpg


57784912.jpg


e3355ce2.jpg


6bdff90e.jpg


fce5dd9c.jpg


af04a476.jpg


423cbffd.jpg


fa310482.jpg


6ea59917.jpg


Now lets go back in time to Day 2 "the Paint correction"


The paint was very dull and swirled. The correction was done using a FLEX 3401 and Harbor freight Rotary buffer with various backing plates and Lake country Purple Foamed wool pad and Hydrotech pads. all with Meguiars M105 & M205.

7ef0eb33.jpg


9cf4243e.jpg


Here is a 50/50 shot.

6d3abfc4.jpg


4a701366.jpg


2a362359.jpg


d91f8bf9.jpg


c6ea89af.jpg


Wow!

d0947a00.jpg


a0668d15.jpg


here I am Polishing the tailights using 4" Cyan hydrotech pad and M05 via Rotary

c5b2d50d.jpg


All of this clear coat on the back was faded and staind so I had to buff it to get it all out

b29bf7e6.jpg


b8eaabe9.jpg


2bffbf09.jpg


27add6a6.jpg


3164873f.jpg


89cfb9fc.jpg


Here are the front fog lights.

509217ac.jpg


and here is a 50/50 of it

50d8ef24.jpg


b5cd8110.jpg


0a8783b5.jpg


0c69d09b.jpg


By the time day 3 rolls around I was almost finished. I applied some Black Fire Wet Diamond

6ce21ce2.jpg


90431be6.jpg


And finally, the Finished product.

fe5b0997.jpg


f5cb39c4.jpg


8e479dbd.jpg


be9d08b3.jpg


afc8aebd.jpg


776923fe.jpg


c9e0feab.jpg


b6fd7ce9.jpg


e994a2e9.jpg


Thanks for viewing, Have a blessed day!


Great job! You must of charged him a $1000.00 for all that work or was he a friend. How long do you think that the Toyota will stay that way?

Close, but $1000 would scare away most people around here. but this was my biggest ticket yet, thats for sure.

Great job.... That's a ton of work \m/

Thanks, it makes me tired just re-reading this wirte up

Holy cow, that Cruiser was thrashed, excellent turnaround.

thanks Eddie!
 
Kind of mind-boggling how some cars can be neglected for so long isn't it?

Fantastic work Eric, I always enjoy reading your write-ups because I always pick up a tip or two to try out on my next detail. I need to invest in some Leatherique.

Thanks a great post.

-Kody-
 
Eric, you are THE MAN!!!
Holly S*@!t, that thing was a disaster, and you knocked it out of the park. The interior was down right scarry. What a fabulous save!!!
Great writeup as well.
Thanks for sharing it with us here at TID.:clap::clap::clap:
 
Back
Top