The AutoLavish depository: A Living, Continuous Thread

2008 Audi R8


This has to be one of the best build sports cars ever. It feels so very solid, precise, crisp. Things fit beautifully, everything feels solid and finished. The owner of this 2008 R8 contacted us to prep this for a sale to make way for a new-er R8 ;) Time was limited to a budget, so we would have to keep any paint correction to a one step. On a black car, this means low correction or buffer trails, so we would have to choose wisely. This also means we would not be able to take many pictures :(


Before:


DSC07711.jpg


DSC07712.jpg


DSC07715.jpg


DSC07718.jpg


DSC07720.jpg


DSC07717.jpg


DSC07722.jpg


DSC07723.jpg


DSC07726.jpg


DSC07727.jpg


DSC07730.jpg


DSC07731.jpg


DSC07732.jpg


DSC07733.jpg


DSC07735.jpg


DSC07736.jpg


DSC07737.jpg


DSC07739.jpg


We start with the P21S Total Auto Wash on the engine bay:


DSC07740.jpg


DSC07742.jpg


DSC07744.jpg


DSC07748.jpg


... and rinsed off after lots of agitation:


DSC07749.jpg


DSC07752.jpg


Wheels treated with P21S Wheel Gel:


DSC07755.jpg


DSC07756.jpg


DSC07759.jpg


DSC07761.jpg


DSC07763.jpg


DSC07764.jpg
 
(Audi R8 continued)


Interior after thorough vacuuming and Einsett:


DSC07767.jpg


DSC07769.jpg


DSC07770.jpg


Washing via foam gun:


DSC07771.jpg


DSC07772.jpg


DSC07773.jpg


DSC07774.jpg


DSC07777.jpg


You can tell the is no protection on this paint by how much the water adheres to the finish instead of beading:


DSC07778.jpg


Next we polished the vehicle to help minimize swirl marks and bring back it's lost luster, and here is the sole picture of the polishing phase:


DSC07788.jpg


Engine after:


DSC07789.jpg


DSC07790.jpg


DSC07792.jpg


DSC07793.jpg


DSC07794.jpg


More afters:


DSC07795.jpg


DSC07797.jpg


DSC07800.jpg


DSC07801.jpg


DSC07802.jpg


DSC07804.jpg


DSC07806.jpg


DSC07808.jpg


DSC07810.jpg


DSC07813.jpg


Thanks for looking!


DSC07815.jpg
 
Ahh, the E46 M3. Smiles, this is one of my favorite cars, the design is so balanced yet aggressive, it has all the performance needed, a great interior, and there is even a convertible and a pretty slick no-shift option. They are great on the road, and great on the track. They take to changes in wheels very well. You can fit large wheels and almost any design looks good on the car. There is plenty of high quality aftermarket support for the car. And their resale value holds well.


This is one of the cleanest customer's car we have ever seen.


I met this vehicle last year when I was giving a client a ride home. He had dropped off another of his vehicle at our place for some services, and we were driving him home. We were in my E36 M3, and he mentioned he had an E46 M3 in the garage. As soon as I saw it I knew this client was hard core. Purchased since new, this car had never been polished. The owner, using grit guards and good detailing products, had maintained the finish in almost perfect condition. The interior is mint, and the engine and everything else on the vehicle looked like it had never been on the road. Under 12k miles on the clock, nice mods properly done (by the same shop that works on my M3!). He mentioned this one could be next for us to detail. I thought all it would need were a few hours.


After the seasons changed, the owner contacted us to do it.


Upon arrival, the vehicle was in its typical ultra clean condition.


DSC08266.jpg


DSC08267.jpg


It had been driven in light rain, only the second time it had ever seen rain in its life.


DSC08269.jpg


DSC08270.jpg


DSC08271.jpg


DSC08274.jpg


DSC08275.jpg


Exhaust tips wouldn't need much.


DSC08281.jpg


DSC08280.jpg


We pulled it outside to start working. The sky was cloudy, which was perfect for this as we could work in the open (the car we had been working on previously that week was in a very tight space for us to work at, so this felt particularly good).


DSC08283.jpg


Here, the owner is explaining how the Alcon calipers took the number of pistons from 1 to 6 on the front.


DSC08285.jpg


Fikse anodized wheels will be cleaned with P21S gel only.


DSC08286.jpg


DSC08287.jpg


While Marc works on the faces and holes of the wheels with the 1" brush, I work on the barrels with the wheel brush.


DSC08289.jpg


DSC08290.jpg


DSC08291.jpg


DSC08294.jpg


Then tires and a rinse...


DSC08296.jpg


DSC08298.jpg


DSC08300.jpg


DSC08304.jpg


The 2 piston rear calipers poke through the rear wheel:


DSC08305.jpg


Starting to work on the engine. Here I am aiming at the backside of the radiator/fan module which can only be seen from behind the hood. But I know the dirt likes to hide there!


DSC08306.jpg


DSC08309.jpg


The easiest way to polish the hood of the E46 M3 is to take the top vent grill off. Just place a towel underneath to keep polish dust from getting on the engine per se.


DSC08314.jpg


Foaming all:


DSC08314.jpg


And rinsed. That was fast ;)


DSC08318.jpg
 
(Silver E46 M3 continued)


After a light clay, we pulled it back in the garage. This is the only picture we have with anything on the clay.


DSC08320.jpg


DSC08321.jpg


We taped it up for polishing:


DSC08323.jpg


DSC08324.jpg


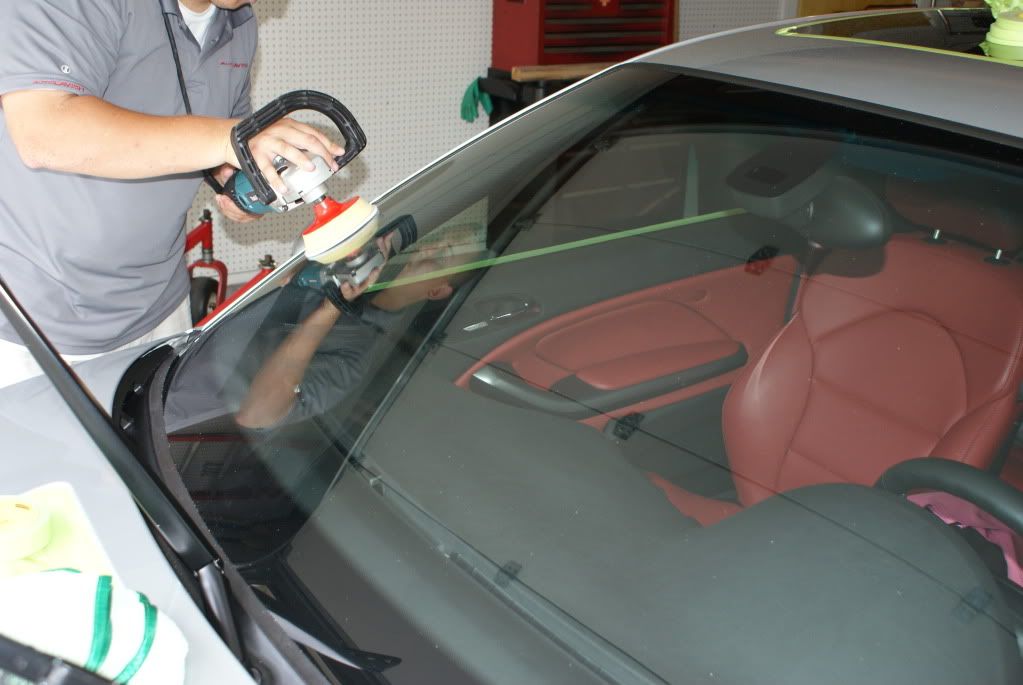
We started on the glass. Makita over the hard 3M backing plate over a special glass polishing pad and glass polishing compound:


DSC08325.jpg


DSC08326.jpg


DSC08329.jpg


Polishing was rather straight forward.


DSC08330.jpg


After polishing, a final wash to clear out crevices and remove oils:


DSC08331.jpg


DSC08332.jpg


Sealing the paint was done with Menzerna Power Loc on a gold pad


DSC08335.jpg


DSC08336.jpg


Wheels got the OptiSeal treatment:


DSC08337.jpg


As did the surfaces under the hood:


DSC08345.jpg


Plastics and rubber under hood was treated with 303:


DSC08348.jpg


DSC08349.jpg


DSC08350.jpg


DSC08352.jpg


Afters:


DSC08354.jpg


DSC08357.jpg


Sorry for the dirty lens! They really messed up the photos :(


DSC08358.jpg


DSC08359.jpg


DSC08360.jpg


DSC08365.jpg


DSC08368.jpg


DSC08383.jpg


DSC08387.jpg


DSC08396.jpg


DSC08397.jpg


Thanks for looking!


DSC08405.jpg
 
1998 Nissan R-34 Skyline GT-R


DSC04027.jpg


DSC04235.jpg


The real deal. The cleanest car we have ever worked on. The owner has poured in time, sweat, and money taking this R-34 from Great to Legendary. AutoLavish was called upon to prep the vehicle for a show. No paint correction needed or wanted, just a nice cleaning and wax.


Now imagine how you would be feeling if this were your car, which has never been touched by anyone other than yourself, is in pretty much perfect condition, and is this particular car. That exactly how the owner felt. He was much relieved we treated the vehicle with the same level of care and delicacy as he did, and then some.


We arrive at location and proceed to start cleaning the hard things…


DSC04000.jpg


DSC04001.jpg


The vehicle was very clean to begin with:


DSC04004.jpg


DSC04006.jpg


DSC04009.jpg


DSC04013.jpg


DSC04018.jpg


DSC04023.jpg


DSC04031.jpg


Interior:


DSC04032.jpg


DSC04033.jpg


DSC04034.jpg


DSC04035.jpg


DSC04036.jpg


DSC04038.jpg


DSC04040.jpg


DSC04060.jpg


DSC04075.jpg


Starting by vacuuming as much of the dust as possible:


DSC04082.jpg


DSC04084.jpg


DSC04086.jpg


DSC04094.jpg


DSC04096.jpg


DSC04090.jpg


DSC04104.jpg


Looking mighty nice!


DSC04115.jpg


DSC04124.jpg


DSC04126.jpg
 
(R-34 Continued)


DSC04135.jpg


DSC04143.jpg


DSC04152.jpg


DSC04155.jpg


The engine before:


DSC04147.jpg


DSC04164.jpg


DSC04161.jpg


DSC04168.jpg


DSC04169.jpg


DSC04170.jpg


DSC04175.jpg


DSC04177.jpg


DSC04184.jpg


All done with the engine:


DSC04187.jpg


DSC04194.jpg


DSC04200.jpg


DSC04202.jpg


DSC04203.jpg


Crevices:


DSC04172.jpg


DSC04173.jpg


Now it is ready for a wash:


DSC04207.jpg


Wheels cleaned with just wash shampoo from the foam gun, done one wheel at a time:


DSC04208.jpg


DSC04210.jpg


Foamed with a light shampoo with extra sudsing foam:


DSC04212.jpg


Rinsed:


DSC04213.jpg


Then foamed and washed once more:


DSC04216.jpg


DSC04217.jpg


Rinsed again:


DSC04218.jpg


And dried with the leaf blower:


DSC04220.jpg


We sealed with this:


DSC04223.jpg
 
(R-34 Continued)


Nice and matte as the sealant hazes:


DSC04224.jpg


While that sets, we dress the tires:


DSC04225.jpg


Front dressed, rear not yet:


DSC04226.jpg


So by now you can tell it was very dark, so no good after shots. But expect a full paint correction on this baby sometime next year.


DSC04231.jpg


DSC04235.jpg


Wheels were sealed as well.


DSC04238.jpg


DSC04240.jpg


DSC04241.jpg


DSC04242.jpg


Thanks for reading! We hope you enjoy ☺


DSC04245.jpg
 
Oh man! That is some work, Amazing attention to detail in the engine bay, Absolutely stunning work gentlemen and excellent cars. Thanks for sharing :)
 
Thanks guys! There are plenty more to come. We might get a chance to empty the queue of write-ups ready to be posted if this weather keeps up ;)
 
Back
Top