I took advantage of a nice Saturday afternoon and opted to restore my dull headlights on a 2002 Toyota Sequoia. This car sits outside in the Arizona sun (for the past five years) and in the past I had used Meguiar’s Scratch X to attempt to renew the lens but it always dulled back out.
At this year’s SEMA and APEX shows, it seems that everybody had a headlight restoration kit. And if they didn’t have a kit, their older product could be used for that purpose too!!
Sylvania’s kit comes with a liquid final UV Block Clear Coat that is intended to keep the restoration from fading quickly. This sets them off from some of their competitors.
The kit came with enough ample supplies to do the two headlights, sans towels and water.
The give you a roll of rubber electrical tape to mask off nearby painted surfaces. I popped up the hood and only had three sides to worry about!
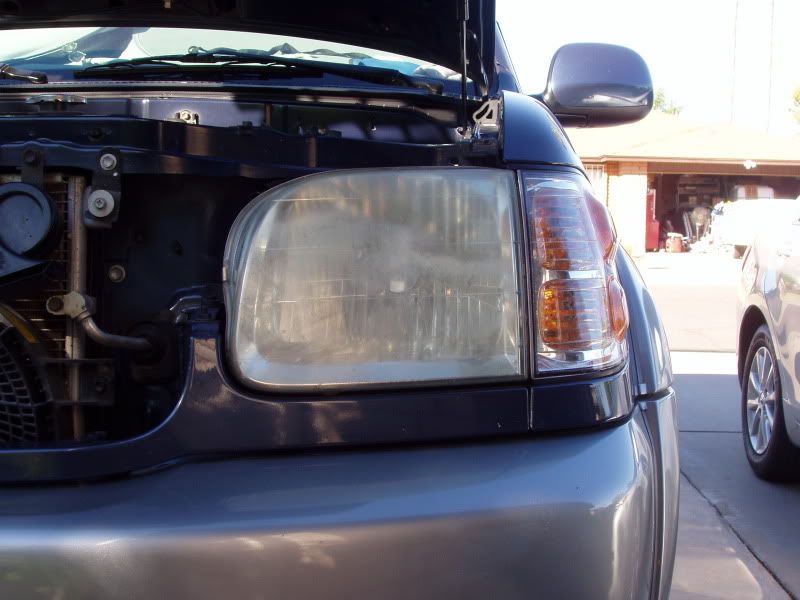
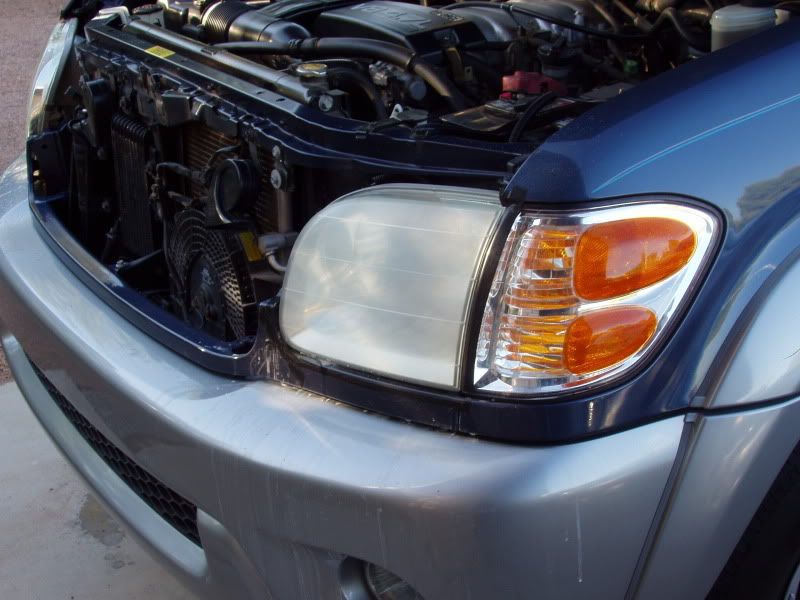
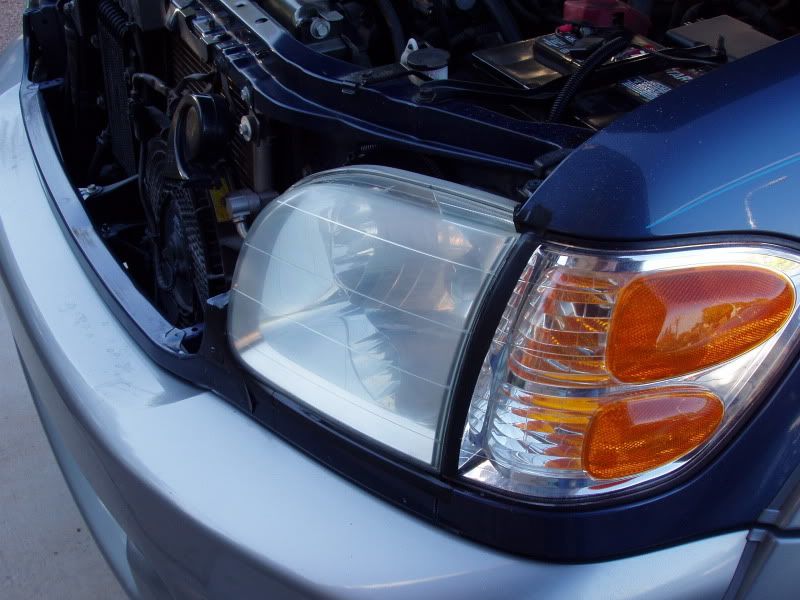
Before
The first step is to spray their Surface Applicator over the headlight surface. This is supposed to help remove discoloration and soften the UV coating. I noticed a streak of yellow coming off my lenses right away.
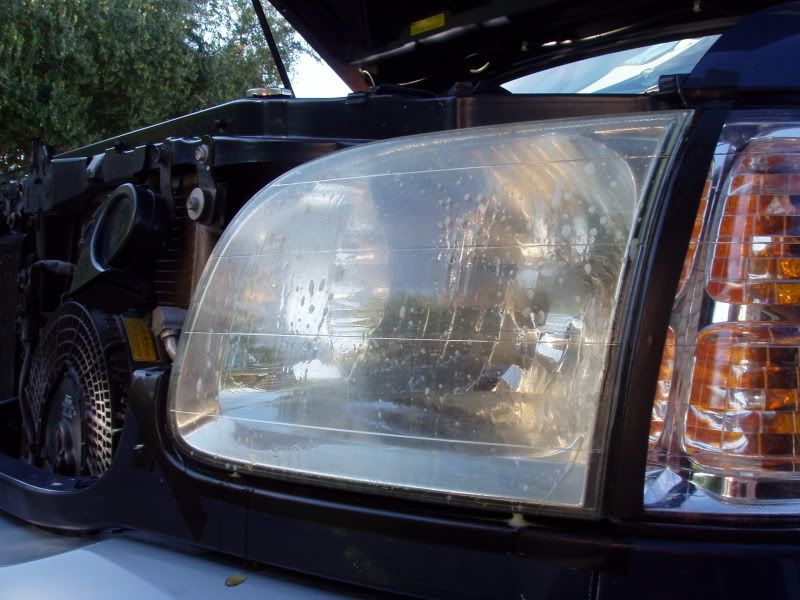
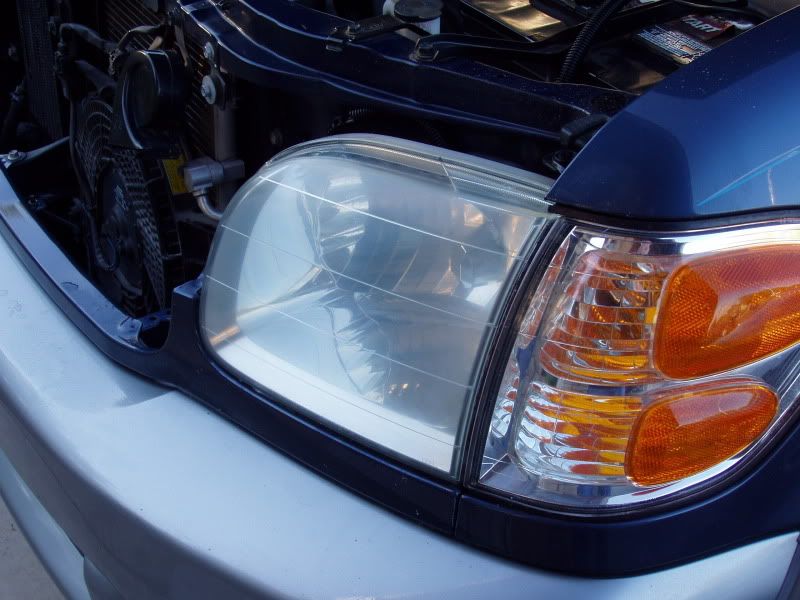
After spraying down the Surface Activator
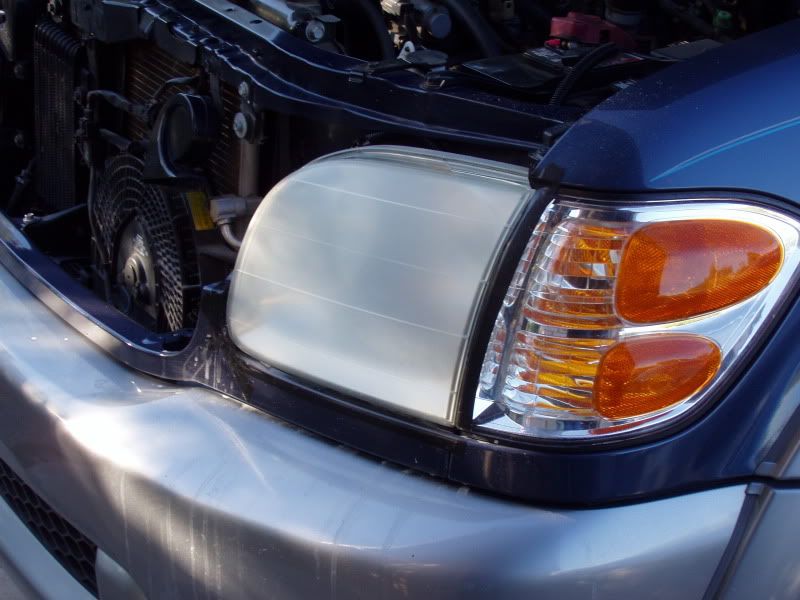
The kit comes with three grades of sandpaper, 400-1000-2000 grit. Wet sand each headlight, starting with 400 and working up to the 2000 grit paper. They recommend sanding 2-5 minutes per headlight with each grit, using plenty of water and a circular motion. With water, the lens looked better, but as it dried the lens became opaque again.
After 400 grit
After 1000 grit
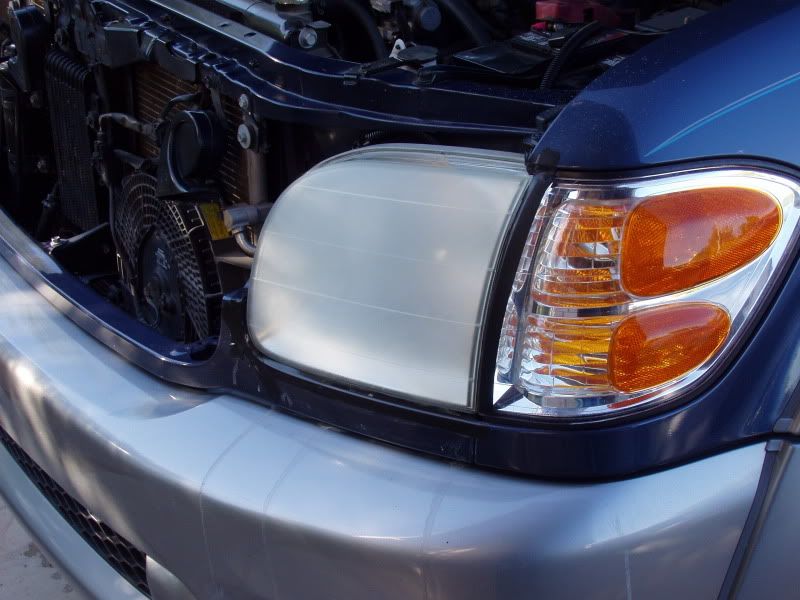
After 2000 grit
Then use a tan Clarifying Compound to polish the lens. This left the lens clean but with a haze after drying.
After using the compound
Re-apply their surface activator to clean the lens one last time.
After final cleaning
Make sure the both lenses are dry before the final step.
Use the UV Block Clear Coat to soak an edge of a folded paper towel and in one stroke wipe the top edge of the headlight. Keep the edge moist and with a slight overlap swipe the next portion of the headlight and repeat until all he lens has been coated.
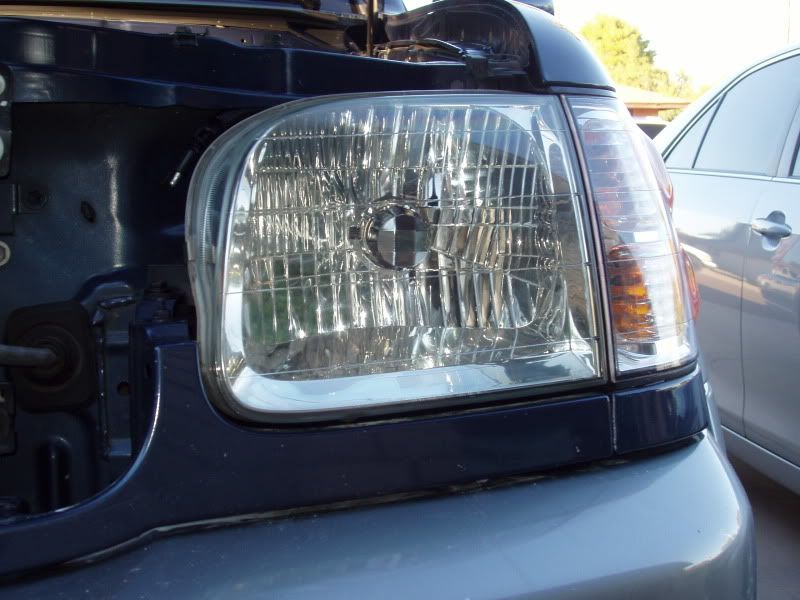
Final phase after the UV Block Clear Coat is applied and dry
Let dry for 4-6 hours to fully cure.
It took me about 45 minutes for both lenses and being careful to cover all the surface area with the wet sandpaper. A close examination can show some scratches that didn’t come out but from even a few feet they look like new. My wife was impressed with the outcome. There was enough liquid to do both headlights and some surplus remained – but probably not enough surface activator to do even one more headlight.
The next day I washed off the paint just to be sure that the residue from the sandpaper and polish didn’t remain.
I’ll keep an eye and see how this looks in a month or two.
See their website for more info - OSRAM SYLVANIA - Headlight Restoration Kit
At this year’s SEMA and APEX shows, it seems that everybody had a headlight restoration kit. And if they didn’t have a kit, their older product could be used for that purpose too!!
Sylvania’s kit comes with a liquid final UV Block Clear Coat that is intended to keep the restoration from fading quickly. This sets them off from some of their competitors.
The kit came with enough ample supplies to do the two headlights, sans towels and water.
The give you a roll of rubber electrical tape to mask off nearby painted surfaces. I popped up the hood and only had three sides to worry about!
Before
The first step is to spray their Surface Applicator over the headlight surface. This is supposed to help remove discoloration and soften the UV coating. I noticed a streak of yellow coming off my lenses right away.
After spraying down the Surface Activator
The kit comes with three grades of sandpaper, 400-1000-2000 grit. Wet sand each headlight, starting with 400 and working up to the 2000 grit paper. They recommend sanding 2-5 minutes per headlight with each grit, using plenty of water and a circular motion. With water, the lens looked better, but as it dried the lens became opaque again.
After 400 grit
After 1000 grit
After 2000 grit
Then use a tan Clarifying Compound to polish the lens. This left the lens clean but with a haze after drying.
After using the compound
Re-apply their surface activator to clean the lens one last time.
After final cleaning
Make sure the both lenses are dry before the final step.
Use the UV Block Clear Coat to soak an edge of a folded paper towel and in one stroke wipe the top edge of the headlight. Keep the edge moist and with a slight overlap swipe the next portion of the headlight and repeat until all he lens has been coated.
Final phase after the UV Block Clear Coat is applied and dry
Let dry for 4-6 hours to fully cure.
It took me about 45 minutes for both lenses and being careful to cover all the surface area with the wet sandpaper. A close examination can show some scratches that didn’t come out but from even a few feet they look like new. My wife was impressed with the outcome. There was enough liquid to do both headlights and some surplus remained – but probably not enough surface activator to do even one more headlight.
The next day I washed off the paint just to be sure that the residue from the sandpaper and polish didn’t remain.
I’ll keep an eye and see how this looks in a month or two.
See their website for more info - OSRAM SYLVANIA - Headlight Restoration Kit