Reviving this old thread since a few people have asked me for info.
http://liquid-finish.com/equipment-reinforce-vx5000-vapor-steamer-hose/
REINFORCE YOUR VX5000 VAPOR STEAMER HOSE
<p style="color:rgb(0,0,0);font-family:'Helvetica Neue', Helvetica, Arial;font-size:13px;">In January of 2010 we were crazy enough to purchase a VX5000 Steam Cleaner from
Steam-Cleaners-Direct. It’s been a reliable work horse and fearless around interiors. Do a search on any Detailing forum and you’ll see it’s one of the best entry line professional vapor steam cleaners you can buy on the market without entering the $1000-$2000 range. We’ve modded ours with a custom horsehair brush attachment we may reveal in the future. What was particular awesome was seeing
Greg Nichols of Reflections Detailing Utah reinforce his steamer hose:
<p style="color:rgb(0,0,0);font-family:'Helvetica Neue', Helvetica, Arial;font-size:13px;">
Autopia – Steamer Hose Made Heavy Duty
<p style="color:rgb(0,0,0);font-family:'Helvetica Neue', Helvetica, Arial;font-size:13px;">
DetailingBliss – Steamer Hose Made Heavy Duty
<p style="color:rgb(0,0,0);font-family:'Helvetica Neue', Helvetica, Arial;font-size:13px;">
<p style="color:rgb(0,0,0);font-family:'Helvetica Neue', Helvetica, Arial;font-size:13px;">So with his blessing and a couple emails this is our write up on how to reinforce your VX5000 steamer hose without breaking the bank. Reinforcing the hose allows:
<p style="color:rgb(0,0,0);font-family:'Helvetica Neue', Helvetica, Arial;font-size:13px;">- cheap straightforward option to preserving your hose
<p style="color:rgb(0,0,0);font-family:'Helvetica Neue', Helvetica, Arial;font-size:13px;">- protection for your hose around doors, walking on the hose, hard abrasion, and heat reduction
<p style="color:rgb(0,0,0);font-family:'Helvetica Neue', Helvetica, Arial;font-size:13px;">- won’t scratch paint as easy when moving the hose up and down
<p style="color:rgb(0,0,0);font-family:'Helvetica Neue', Helvetica, Arial;font-size:13px;">- looks funky cool with custom heat shrink tubing colors
<p style="color:rgb(0,0,0);font-family:'Helvetica Neue', Helvetica, Arial;font-size:13px;">- spend $25-40 to save a $1000 steamer hose
<p style="color:rgb(0,0,0);font-family:'Helvetica Neue', Helvetica, Arial;font-size:13px;">- at the moment there is only one company that sells the existing VX5000 unit with a reinforced hose.
<p style="color:rgb(0,0,0);font-family:'Helvetica Neue', Helvetica, Arial;font-size:13px;">
MATERIALS FOR VX5000 HOSE REINFORCEMENT
<p style="color:rgb(0,0,0);font-family:'Helvetica Neue', Helvetica, Arial;font-size:13px;">The hardest part of this process is obtaining the right materials. Your biggest obstacle is finding the right materials to go over the thick handle. Greg was awesome in providing the info:
<p style="color:rgb(0,0,0);font-family:'Helvetica Neue', Helvetica, Arial;font-size:13px;">
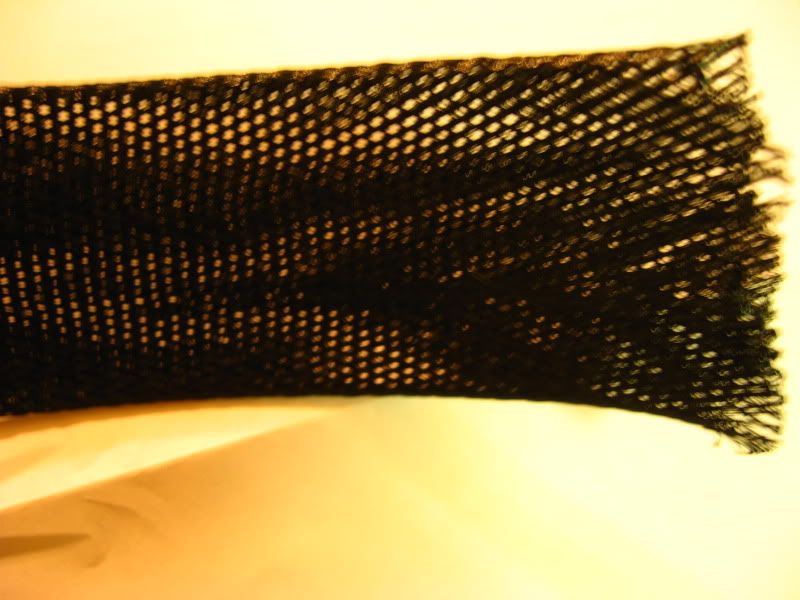
1) 1 3/4 dia expanding braided sleeving (will expand to 2 1/2 which should fit over the handle) at 11 Feet.
<p style="color:rgb(0,0,0);font-family:'Helvetica Neue', Helvetica, Arial;font-size:13px;">
Measure your hose as a precaution. I measured my hose to be cheap and came up with 11 feet. Having finished the install 11 feet is plenty, you will trim some off the hose during the install.
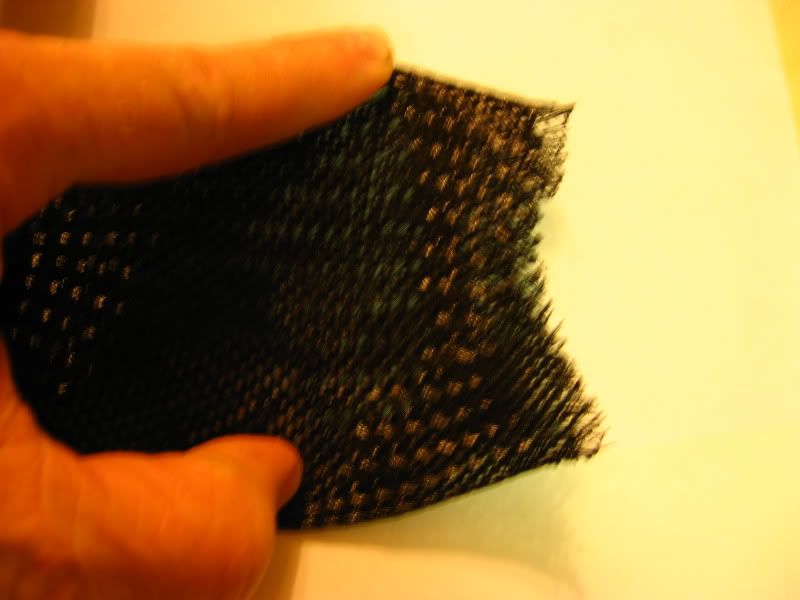
<p style="color:rgb(0,0,0);font-family:'Helvetica Neue', Helvetica, Arial;font-size:13px;">** For future installers, try and see if you can chose “Rounded Sleeving�. Mine came flat and I despise the look, it adds way too much material to the hose. They also make these sleeves with fire retardant specs.
<p style="color:rgb(0,0,0);font-family:'Helvetica Neue', Helvetica, Arial;font-size:13px;">
2) 3:1 heat shrink tubing <span style="margin:0px;">2 Inch size
<p style="color:rgb(0,0,0);font-family:'Helvetica Neue', Helvetica, Arial;font-size:13px;">1 Foot is plenty, but you may use 2 feet. 2inch tubing allows the heat shrink to pass through the handles. I went with
2:1 heat shrink tubing since finding 2 inch tubing was so hard. You may also use 4:1 tubing.
<p style="color:rgb(0,0,0);font-family:'Helvetica Neue', Helvetica, Arial;font-size:13px;">
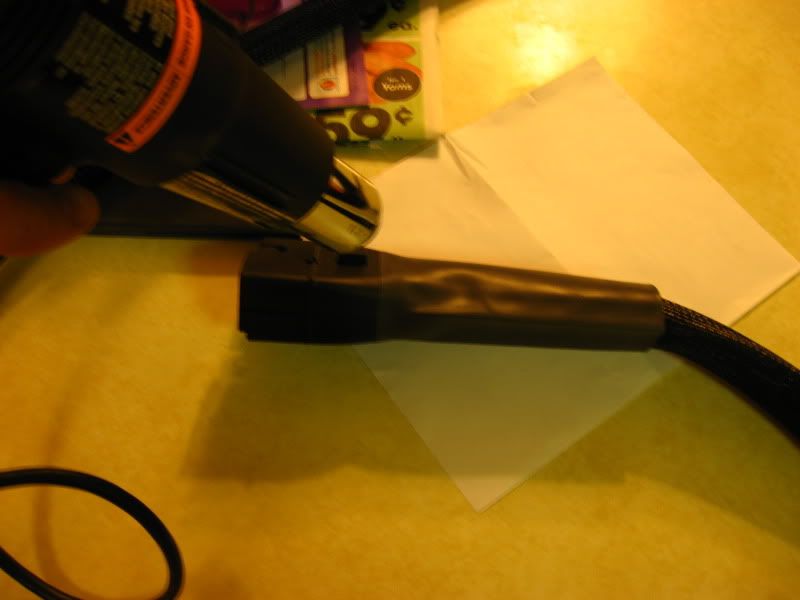
3) Heat Gun
<p style="color:rgb(0,0,0);font-family:'Helvetica Neue', Helvetica, Arial;font-size:13px;">
4) Scissors
<p style="color:rgb(0,0,0);font-family:'Helvetica Neue', Helvetica, Arial;font-size:13px;">
<p style="color:rgb(0,0,0);font-family:'Helvetica Neue', Helvetica, Arial;font-size:13px;">
HOW MUCH DOES IT COST?
<p style="color:rgb(0,0,0);font-family:'Helvetica Neue', Helvetica, Arial;font-size:13px;">
Pretty cheap. I sourced everything from CableOrganizer. The biggest issue is finding a place with the 2inch heat shrink tubing specifications:Shipping Method: <span style="margin:0px;font-size:12px;color:rgb(85,85,85);font-weight:bold;">First Class Mail (USPS) Payment Type: <span style="margin:0px;font-size:12px;color:rgb(85,85,85);font-weight:bold;">CREDITCARD <span style="margin:0px;font-size:12px;color:rgb(85,85,85);">Last 4: 5213 <span style="margin:0px;font-size:12px;color:rgb(85,85,85);"><span style="margin:0px;font-weight:bold;">ORDERED <span style="margin:0px;font-size:12px;color:rgb(85,85,85);font-weight:bold;">SKU <span style="margin:0px;font-size:12px;color:rgb(85,85,85);font-weight:bold;">DESCRIPTION <span style="margin:0px;font-size:12px;color:rgb(85,85,85);font-weight:bold;">PRICE <span style="margin:0px;font-size:12px;color:rgb(85,85,85);">11
BS175BK <span style="margin:0px;font-size:12px;color:rgb(85,85,85);">1 3/4 in PET Sleeving- Per Foot- Black
<div style="margin:0px;font-weight:bold;color:rgb(204,0,0);">
$16.50 1 <span style="margin:0px;font-size:12px;color:rgb(85,85,85);">
HS2-200FT-GN <span style="margin:0px;font-size:12px;color:rgb(85,85,85);">2:1 HEAT SHRINK TUBING 2 inch Per Foot
$5.62 Returns will only be accepted with an approved RMA. <span style="margin:0px;font-size:12px;color:rgb(85,85,85);font-weight:bold;">Product Total: $22.12 <span style="margin:0px;font-size:12px;color:rgb(85,85,85);"><span style="margin:0px;font-weight:bold;">Sales Tax: <span style="margin:0px;font-size:12px;color:rgb(85,85,85);">$0.00 <span style="margin:0px;font-size:12px;color:rgb(85,85,85);font-weight:bold;">Shipping: <span style="margin:0px;font-size:12px;color:rgb(85,85,85);">$3.77 <span style="margin:0px;font-size:12px;color:rgb(255,0,0);"><span style="margin:0px;color:rgb(85,85,85);font-weight:bold;">Grand Total: <span style="margin:0px;font-size:12px;color:rgb(255,0,0);">$25.89
<p style="color:rgb(0,0,0);font-family:'Helvetica Neue', Helvetica, Arial;font-size:13px;">
http://www.cableorganizer.com/expandable-sleeving/
<p style="color:rgb(0,0,0);font-family:'Helvetica Neue', Helvetica, Arial;font-size:13px;">
http://www.cableorganizer.com/heat-shrink/heat-shrink2.htm?gcssku=HS2-200FT
WHERE CAN I PURCHASE EVERYTHING?
<p style="color:rgb(0,0,0);font-family:'Helvetica Neue', Helvetica, Arial;font-size:13px;">
A few other options that you can play with:
<p style="color:rgb(0,0,0);font-family:'Helvetica Neue', Helvetica, Arial;font-size:13px;">
http://www.wirecare.com/products.asp?prodline=h3
<p style="color:rgb(0,0,0);font-family:'Helvetica Neue', Helvetica, Arial;font-size:13px;">
http://www.wirecare.com/products.asp?prodline=ptn
<p style="color:rgb(0,0,0);font-family:'Helvetica Neue', Helvetica, Arial;font-size:13px;">
http://www.parts-express.com/techflex-1-3-4-expandable-sleeving-25-ft-black–082-396
<p style="color:rgb(0,0,0);font-family:'Helvetica Neue', Helvetica, Arial;font-size:13px;">
http://www.parts-express.com/2-black-2-1-heat-shrink-1-ft–080-702
<p style="color:rgb(0,0,0);font-family:'Helvetica Neue', Helvetica, Arial;font-size:13px;">
INSTRUCTIONS & METHOD: REINFORCING YOUR VX5000 HOSE
<p style="color:rgb(0,0,0);font-family:'Helvetica Neue', Helvetica, Arial;font-size:13px;">If you haven’t read Greg’s original guide:
Autopia – Steamer Hose Made Heavy Duty, do it.
<p style="color:rgb(0,0,0);font-family:'Helvetica Neue', Helvetica, Arial;font-size:13px;">
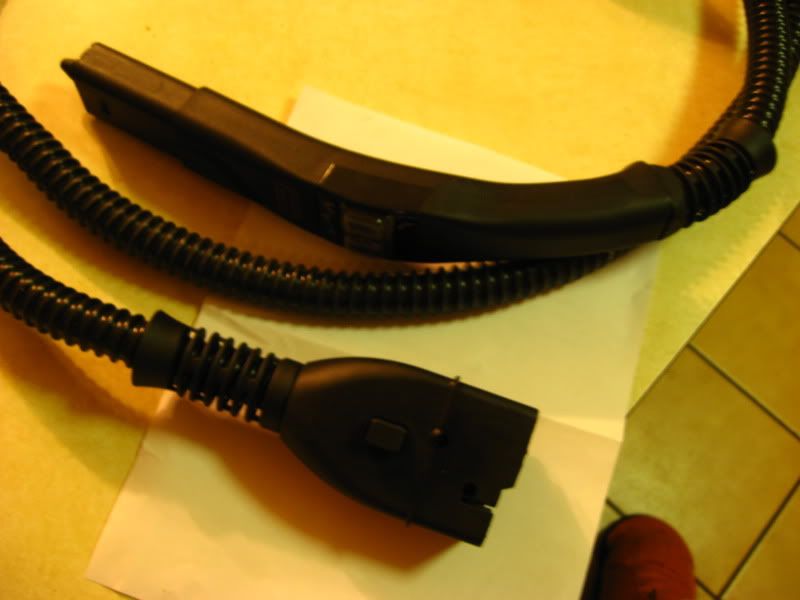
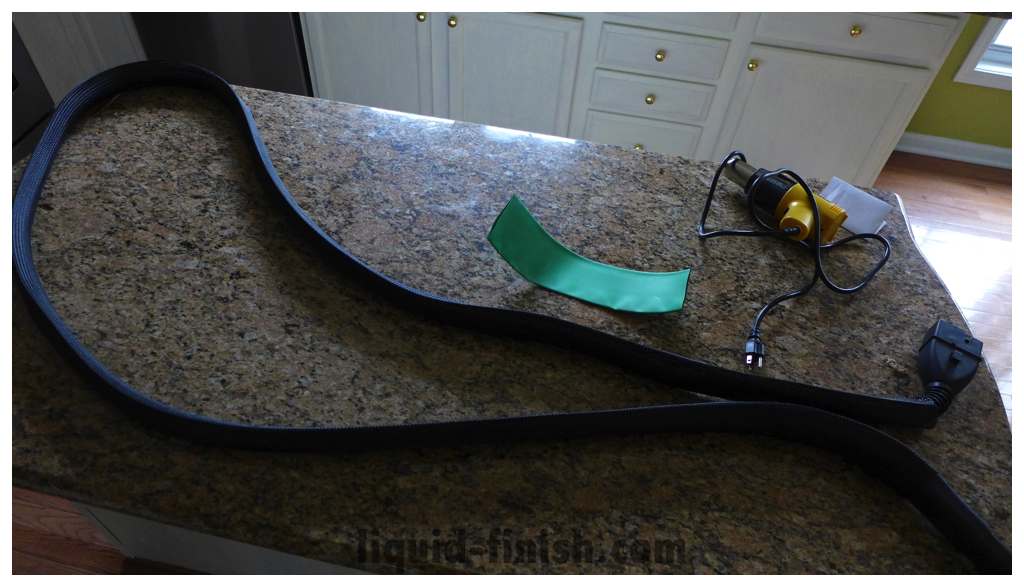
<p style="color:rgb(0,0,0);font-family:'Helvetica Neue', Helvetica, Arial;font-size:13px;">Step 1: Assemble your items. Remove hose off steamer and find a large flat working area.
<p style="color:rgb(0,0,0);font-family:'Helvetica Neue', Helvetica, Arial;font-size:13px;">Step 2:
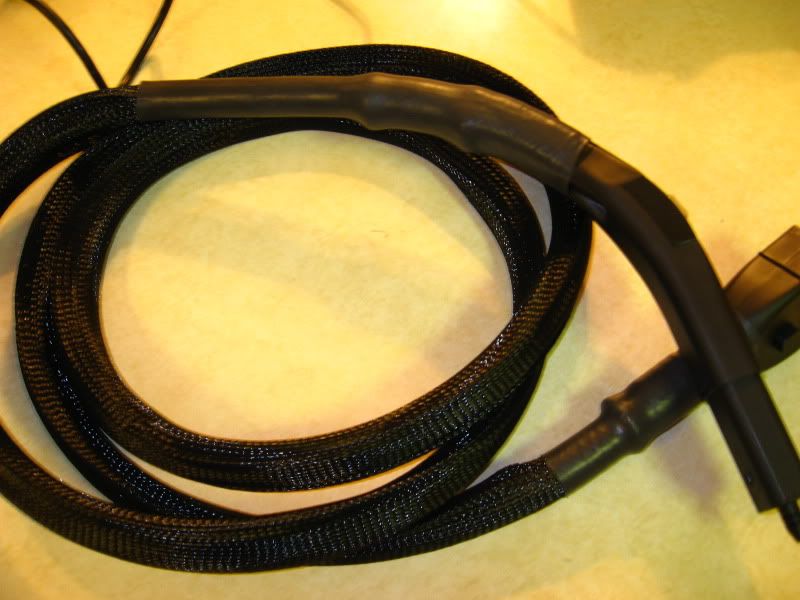
Thread sleeve on top of hose, you’ll find lots of extra material. My biggest tip is to hold one end of the sleeving, then slowly pull in the opposite direction so you smooth out the sleeving. This enables you to
cut any excess at the end.
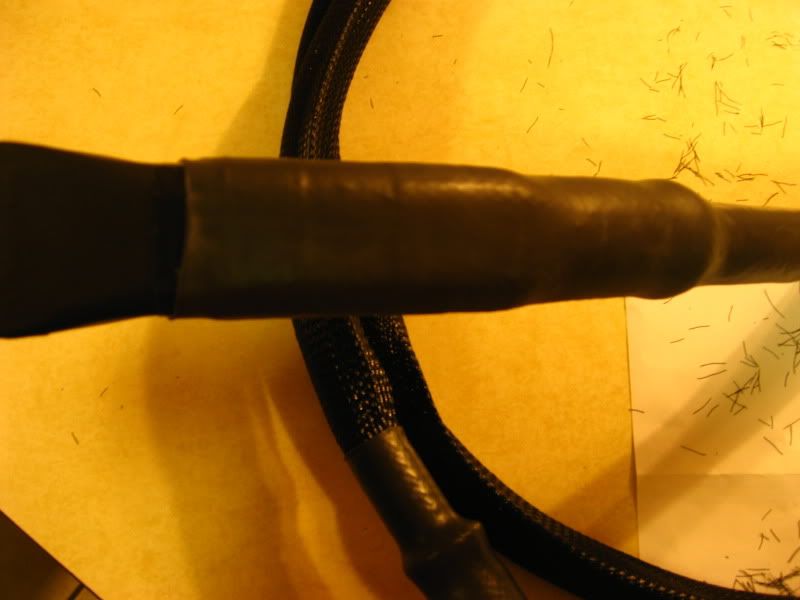
<p style="color:rgb(0,0,0);font-family:'Helvetica Neue', Helvetica, Arial;font-size:13px;">Step 3. The sleeving will make it, hence why you should push the material the entire length of the hose. Trim the sleeve, I would advise you to
have at least 1 inch of sleeving up the plastic handles.
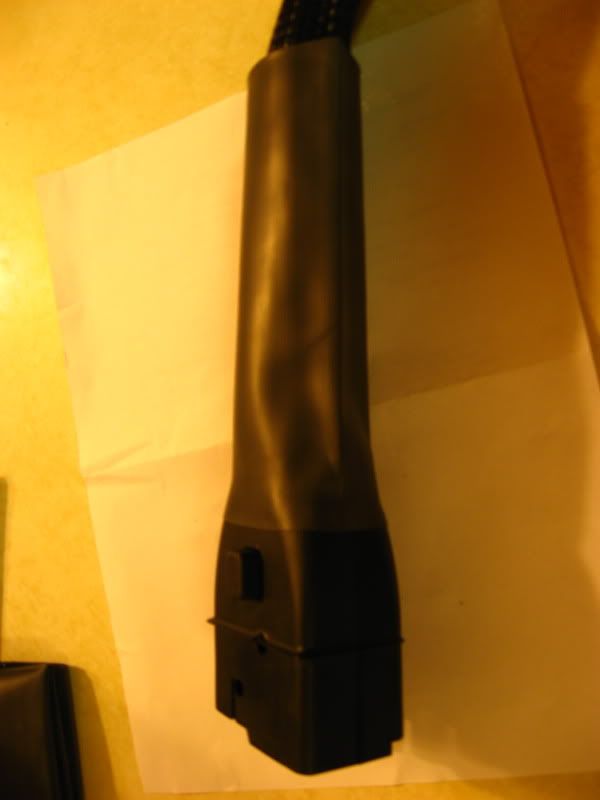
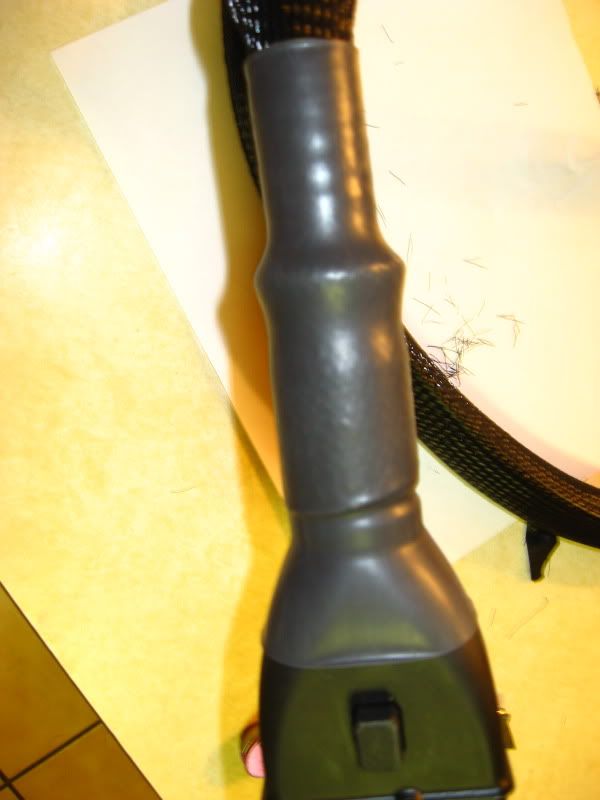
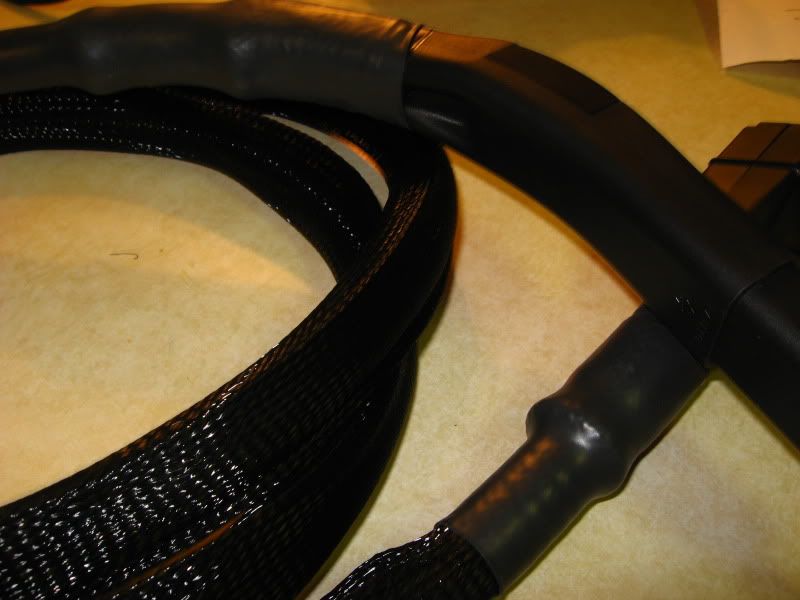
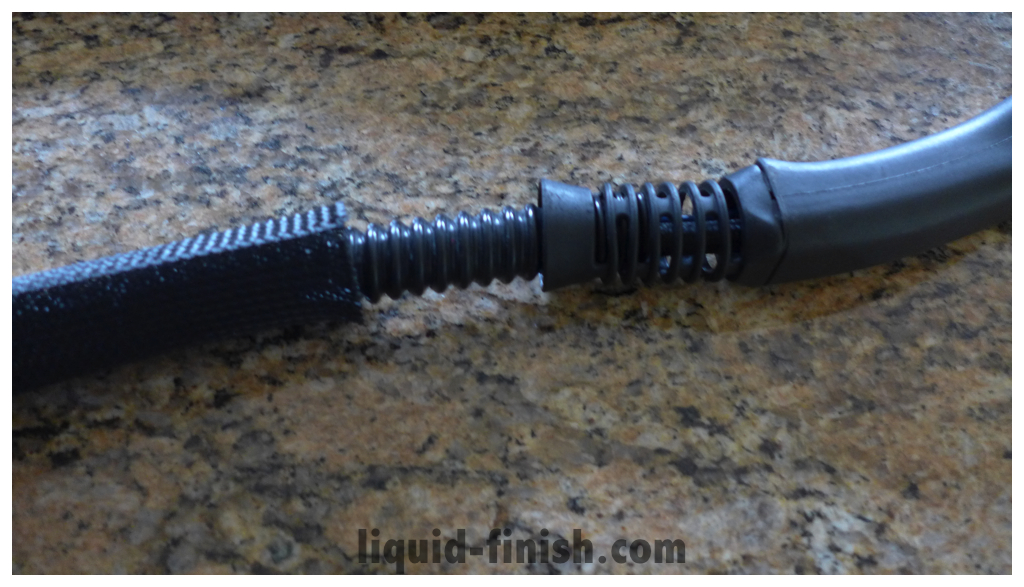
<p style="color:rgb(0,0,0);font-family:'Helvetica Neue', Helvetica, Arial;font-size:13px;">Step 4. Start with one end for the heat shrink tubing, the connector handle is easiest. It’s crucial you align the flat shrink with the flat section of the steamer hose. Shrink slowly and constantly around the hose so it goes on evenly. It’s better to have more sleeving underneath the shrink tubing. (Don’t ask me how I know). Again, pull the sleeving all the way to the end so you don’t have excess throughout the 11 feet of hose.
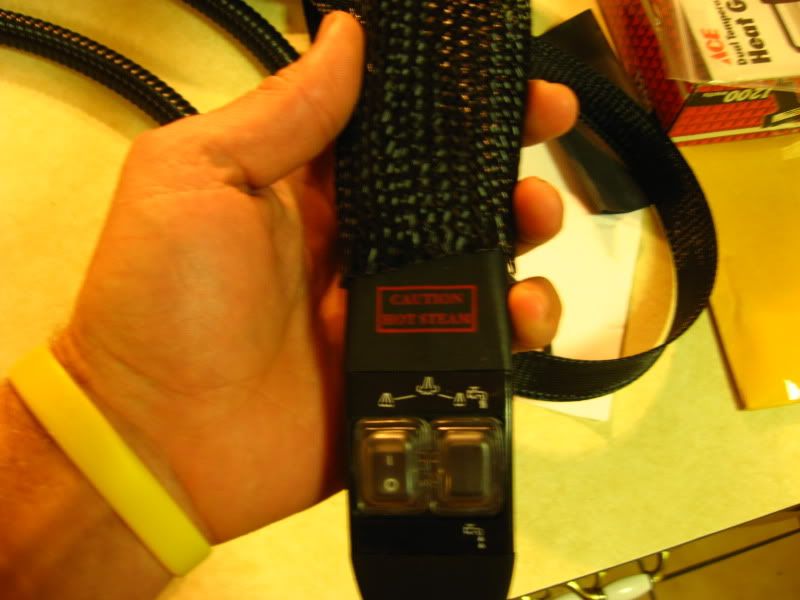
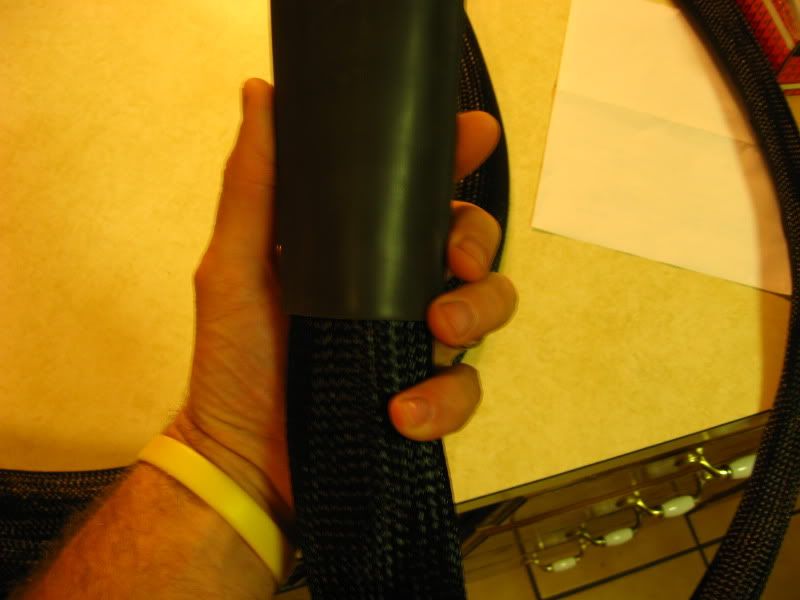
<p style="color:rgb(0,0,0);font-family:'Helvetica Neue', Helvetica, Arial;font-size:13px;">Step 5: The main handle is the hardest due to the size, but if you give enough material it should be a cinch at the end. I went with green to make it funky.
CONCLUSION & FINAL THOUGHTS
<p style="color:rgb(0,0,0);font-family:'Helvetica Neue', Helvetica, Arial;font-size:13px;">Reinforcing your VX5000 is fun and pretty easy. The hardest part of this guide is really finding all the parts. If I had to redo everything I would recommend:
<p style="color:rgb(0,0,0);font-family:'Helvetica Neue', Helvetica, Arial;font-size:13px;">- purchase funky heat shrink tubing colors
<p style="color:rgb(0,0,0);font-family:'Helvetica Neue', Helvetica, Arial;font-size:13px;">- try to purchase rounded sleeving (I dislike the flat sleeving I used)
<p style="color:rgb(0,0,0);font-family:'Helvetica Neue', Helvetica, Arial;font-size:13px;">- make sure your sleeving is secured enough underneath the heat shrink tubing.
<p style="color:rgb(0,0,0);font-family:'Helvetica Neue', Helvetica, Arial;font-size:13px;">This hack is a quick 20 minute improvement that makes your steamer way more professional, custom, and preserves the longevity of the hose. Just position your materials correctly and shrink away. Thanks to Greg Nichols for his information. It only took us 2 years to finally sit down and accomplish guide.