REMINDER!!! For those who have seen this thread first, the interior was just as icky:
http://autopia.org/forum/click-brag...art-1-interior-3.html?highlight=part+interior
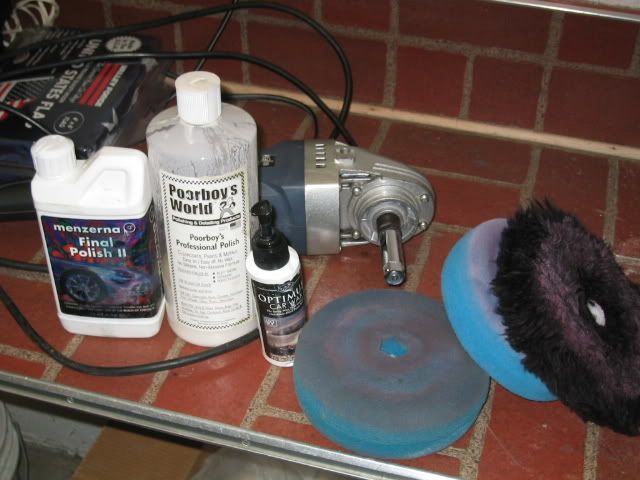
So, here we go with the start of the exterior of this vehicle. The owner told me that the paint was very thin, and non-existant in some parts, such as the ends of some body panels. Please keep in mind that I am getting almost nothing for this job. I took this for learning experience, and because the owner said do whatever you want with it. I have worked with oxidized paint, but it was not in as bad of a condition as this was. There seems to be a large compromise to be made here. The painted portions facing the sky were simply horrible...thickly oxidized and deeply, heavily scratched. Running my hand across the surface, I get a sensation of extreme dryness and a sense that these scratches are into the paint, not the clearcoat. The process was wash, clay bar, then an edge orange pad via rotary and old OHC. I tried PS and a softer blue foam pad w/o success at removing or improving the swirls and/or oxidation. After the cutting step, I tried a variety of different methods to try to maximize the condition of the paint without sacrificing the remaining clearcoat. It is my opinion that the paint in some areas such as those pointing to the sky simply cannot be brought back to good condition because the scratches are so deep. Nevertheless, for the better areas, I would follow-up with a variety of different methods, such as blue edge foam via rotary @900 and Sonus SFX-3, old formula, then PS and edge white via rotary @900. Or, I would try a green Sonus DAS pad and SSR 2.5 via UDM, followed by Sonus DAS blue pad via UDM at a speed of 3. No wax or sealant has been applied other than PS. Either way, I am having trouble removing the micromarring that you will be seeing in these pictures. It is very frustrating for me to see the micromarring, and I would wonder what could be causing it to not be removed. Could it be that my finishing products are not good enough to remove micromarring? Maybe my technique is wrong? Or maybe the paint is simply too much of a disaster to get any better? I ask for help as I want to improve in this area. Here are tons of pics:
Befores:
This is where the car was sitting at for 6 months at least before I came to it's rescue


Finally in my garage...before washing and clay


I am probably not going to touch the rear bumper...would you?

The paint was odd in that the surfaces pointing upwards had scratches and swirls that simply did not want to be polished out, while the sides seemed much softer and easy to correct. Take for example these two surfaces, inches from each other:
Before

After

This picture was inches away from the above pictures, polished at the same time, yet the surface scratches remained:

Here's another before/after pic of an area to the right of the above shots, but on the same panel:


If you look closely at where the hood meets the fender panel, you can see these scratches better. I don't think they can be improved any more...anyone think otherwise?

Here's the door before/after:


Now, the hood, roof, rear bumper, and hatch are severly oxidized...When working on the roof (pics of the roof will come tomorrow) I was not cutting a thing with a blue pad and PS! But, the oxidation was not coming out, even after orange pad and old OHC via rotary. So, I reached for my black edge wool pad and rotary and it certainly improved the finish when combined with old OHC, but those deep swirls remain and lighter oxidation remained, despite paint transfer occuring. I have no pictures of the roof as of yet. But I do have pics of the hood. The driver's side was tried to be saved, but I certainly could not save it with the OHC, rotary, and orange edge pad combo. I think I will leave it as-be though, because I don't think it can be improved without making the actual paint way too thin.
Before:


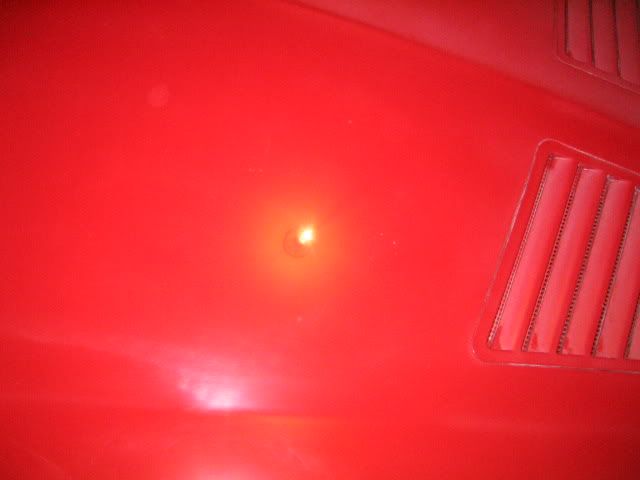
Lastly, this is the micromarring (that's the correct term, correct) that existed after ohc via rotary, then Sonus das green and ssr 2.5 via UDM, then Sonus das blue and PS at speed 3.5. I believe in this pic before using the PC I tried the rotary and edge foam blue with sfx-3 followed by edge white and ps via rotary.

I hate it when I can't get some of the finishing results that others are getting and I'd like to know how to improve this. It could be my products, it could be me, I don't know but I'd like some help. Or, maybe I am expecting too much from such poor paint??? Thanks for reading and I look foward to your responses!
http://autopia.org/forum/click-brag...art-1-interior-3.html?highlight=part+interior
So, here we go with the start of the exterior of this vehicle. The owner told me that the paint was very thin, and non-existant in some parts, such as the ends of some body panels. Please keep in mind that I am getting almost nothing for this job. I took this for learning experience, and because the owner said do whatever you want with it. I have worked with oxidized paint, but it was not in as bad of a condition as this was. There seems to be a large compromise to be made here. The painted portions facing the sky were simply horrible...thickly oxidized and deeply, heavily scratched. Running my hand across the surface, I get a sensation of extreme dryness and a sense that these scratches are into the paint, not the clearcoat. The process was wash, clay bar, then an edge orange pad via rotary and old OHC. I tried PS and a softer blue foam pad w/o success at removing or improving the swirls and/or oxidation. After the cutting step, I tried a variety of different methods to try to maximize the condition of the paint without sacrificing the remaining clearcoat. It is my opinion that the paint in some areas such as those pointing to the sky simply cannot be brought back to good condition because the scratches are so deep. Nevertheless, for the better areas, I would follow-up with a variety of different methods, such as blue edge foam via rotary @900 and Sonus SFX-3, old formula, then PS and edge white via rotary @900. Or, I would try a green Sonus DAS pad and SSR 2.5 via UDM, followed by Sonus DAS blue pad via UDM at a speed of 3. No wax or sealant has been applied other than PS. Either way, I am having trouble removing the micromarring that you will be seeing in these pictures. It is very frustrating for me to see the micromarring, and I would wonder what could be causing it to not be removed. Could it be that my finishing products are not good enough to remove micromarring? Maybe my technique is wrong? Or maybe the paint is simply too much of a disaster to get any better? I ask for help as I want to improve in this area. Here are tons of pics:
Befores:
This is where the car was sitting at for 6 months at least before I came to it's rescue
Finally in my garage...before washing and clay
I am probably not going to touch the rear bumper...would you?
The paint was odd in that the surfaces pointing upwards had scratches and swirls that simply did not want to be polished out, while the sides seemed much softer and easy to correct. Take for example these two surfaces, inches from each other:
Before
After
This picture was inches away from the above pictures, polished at the same time, yet the surface scratches remained:
Here's another before/after pic of an area to the right of the above shots, but on the same panel:
If you look closely at where the hood meets the fender panel, you can see these scratches better. I don't think they can be improved any more...anyone think otherwise?
Here's the door before/after:
Now, the hood, roof, rear bumper, and hatch are severly oxidized...When working on the roof (pics of the roof will come tomorrow) I was not cutting a thing with a blue pad and PS! But, the oxidation was not coming out, even after orange pad and old OHC via rotary. So, I reached for my black edge wool pad and rotary and it certainly improved the finish when combined with old OHC, but those deep swirls remain and lighter oxidation remained, despite paint transfer occuring. I have no pictures of the roof as of yet. But I do have pics of the hood. The driver's side was tried to be saved, but I certainly could not save it with the OHC, rotary, and orange edge pad combo. I think I will leave it as-be though, because I don't think it can be improved without making the actual paint way too thin.
Before:
Lastly, this is the micromarring (that's the correct term, correct) that existed after ohc via rotary, then Sonus das green and ssr 2.5 via UDM, then Sonus das blue and PS at speed 3.5. I believe in this pic before using the PC I tried the rotary and edge foam blue with sfx-3 followed by edge white and ps via rotary.
I hate it when I can't get some of the finishing results that others are getting and I'd like to know how to improve this. It could be my products, it could be me, I don't know but I'd like some help. Or, maybe I am expecting too much from such poor paint??? Thanks for reading and I look foward to your responses!