My First Wetsand!

So my mom drives around a Chevy Equinox, and yesterday I noticed she had two pretty decent scratches on her rear passenger door. I felt them to see how deep they were and indeed my fingernail caught them. I thought I might be able to compound them out, but decided since my nail caught, to go straight to wetsanding. Since this was the first time I've ever done this, I got some help from forum members Asphalt Rocket and Loudog. I used 2000 grit 3M wetsand paper. Now on to the pictures:


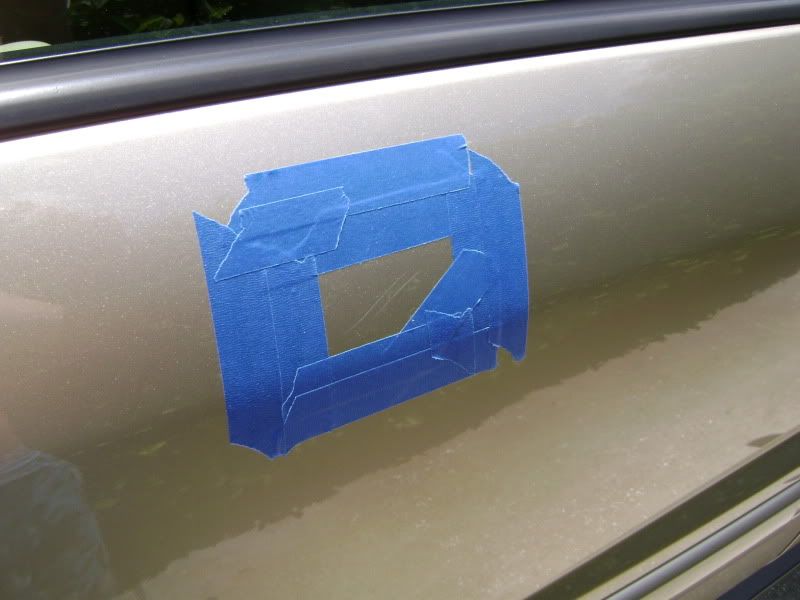
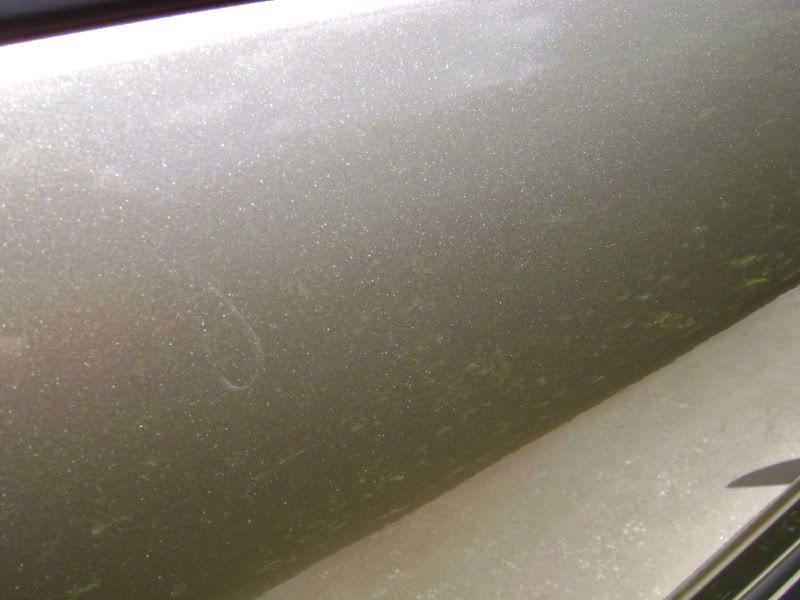
Here I taped off the section I wanted to sand down so that I wouldn't scratch the surrounding paint making more work for myself later on. You can really see how deep the scratch was:

001.jpg


002.jpg


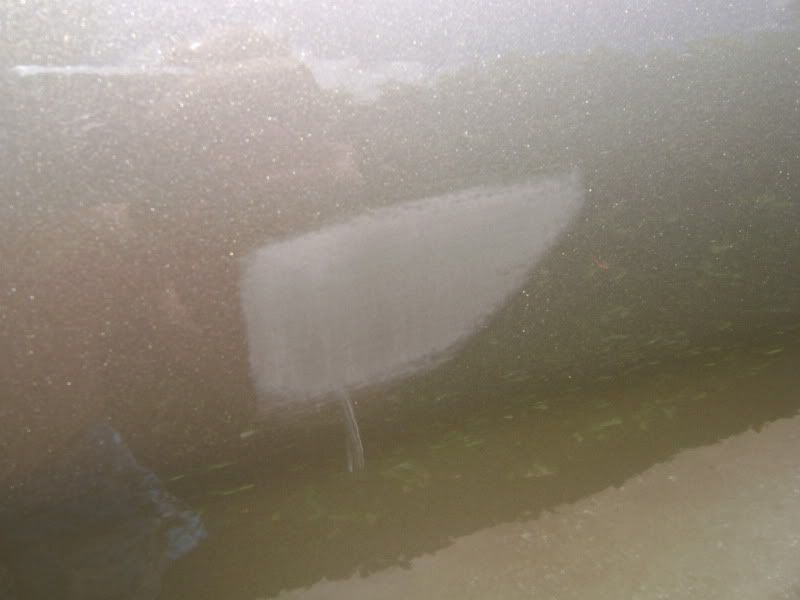
This is what I was left with after:

003.jpg


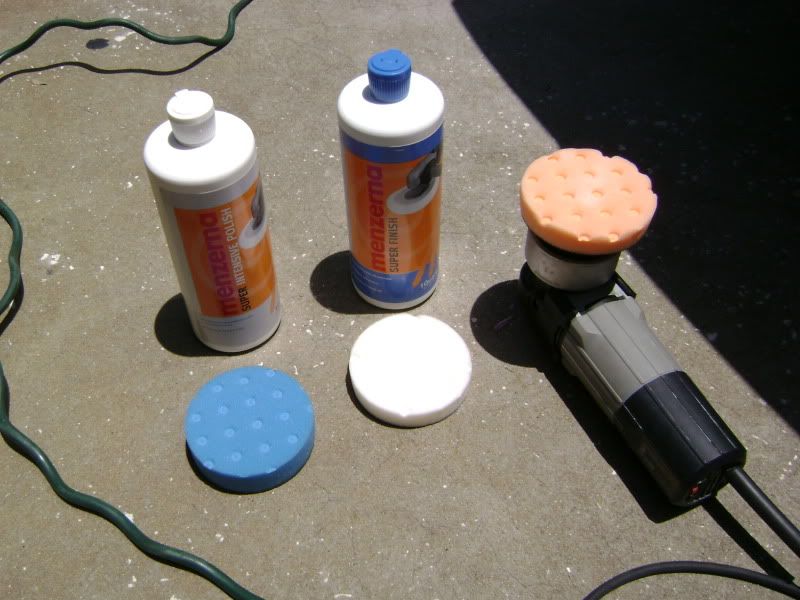
In order to bring the paint back to it's original gloss, I brought out Menz SIP/Nano along with my PC and an orange, white, and blue 4" LC CCS pads:

005.jpg


After the polishing, these were the results I achieved:

006.jpg


007.jpg


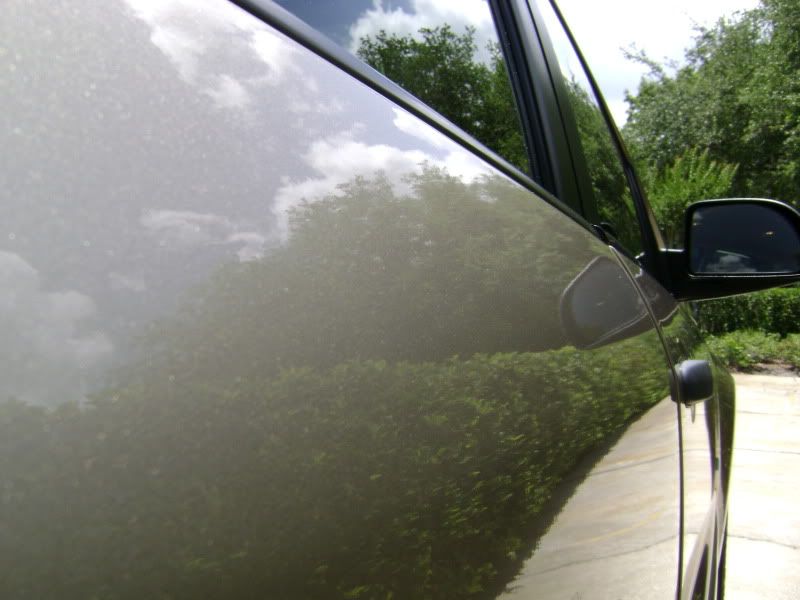
What looks like scratches at the bottom of the section is actually my camera cord hanging down. PC was used at speed 6. All in all, I am very pleased with the results I achieved. Like I said, this was my first time ever attempting this, and I was able to achieve 100% correction. I looked from every possible angle and there was nothing left. I'm open to comments or suggestions as I'd really like to get good at wetsanding because I feel it's an important tool in any detailer's arsenal. Thanks!!! :2thumbs:
 
I will say that I was a bit timid. I barely applied any pressure, and just went back and forth very lightly. I would wipe away after a little bit of time and then back to sanding. I used this method until the scratch was gone. Go give it a shot. After you finish, you will feel like you can take on anything haha.
 
josh,

wetsanding is a very crucial step in paint correction. From a guy who does wetsanding a lot, i'm impressed with those results for a first timer! great job.
 
bufferbarry said:
josh,

wetsanding is a very crucial step in paint correction. From a guy who does wetsanding a lot, i'm impressed with those results for a first timer! great job.


Thanks Barry. That means a lot coming from someone with experience. I tried to capture the results as best I could to show my work. Now my mom wants me to touch up a few other spots. She went from very nervous to giving me other jobs haha. No complaints there though.
 
awesome job! im willing to give it a shot on my DD beater but would like to know more details..could you PM me or post here more steps taken for others to see?

Im thinking you spray water, wet paper, rub scratch, keep spraying water etc etc...did you use a block? or just your hand to apply even pressure?

Thanks in advance!
 
I actually filled a cup up with water and added a couple drops of liquid soap. Then I just dipped a little bit of the paper in the cup and used my hand to sand. I used very light pressure and did it as evenly as I could. I went in a left-to-right pattern for a little bit, and then stopped to wipe away to see the progress I was making. If the scratch was still there, I would go back to going left-to-right. I did that until the scratch was gone. On the last step of sanding, I went up and down a couple times and then I was left with the sanded picture you see. After that, I pulled out my PC polishes and pads and cleaned it up to get my finished results. I also put a light coat of WG sealant on for good measure. Not sure if I was supposed to do the up and down step after going left-to-right, but I got great results. Hopefully that helps. Let me know if you or anyone else has questions. I'm definitely no pro at this, but would love to help as much as I can.
 
You definitely got good results...I'm not sure why you taped it off. You apply a little pressure to sand out the scratch and lightly sand around it to "blend" the orange peel. Otherwise you just get a spot in the middle that is flat, while the rest still has factory orange peel.

In a situation like that I would normally use a DA and sand 1500 to get out the scratch and go over it again with 3000 to fade it out.


You definitely have the hang of it. Good luck with the rest!
 
Thanks for that post...might have to give it a shot once the weather clears up! I like the idea of using a finer grit paper aroud it to 'blend' it in.


BTW-How is the Chevy CC compred to imports like Hondas and Toyotas (00-05s)? Just so I know how much CC I got to play with


Thanks!
 
Chevy CCs are on the harder side. I'm not sure about Toyota, but I know Hondas have very soft CCs. That's why I did a little bit at a time. I didn't want to remove anymore CC than I had to. The only reason I didn't finish up with 3000 grit was because I didn't have any and I also didn't know better lol. SIP cleaned up these sanding marks just fine though.
 
Thanks Josh....also, how many sheets did you go through? Trying to figure out how many packs I need to pick up
 
Thanks Dustin. I got my paper from Wal-Mart. It was like $3 for each pack, and like I said in my last post, I only used a corner of one sheet, so the pack should last a while depending on how often and how big a area you're doing.
 
Back
Top