Megs #7 Rub Down

FIDOAG14

New member
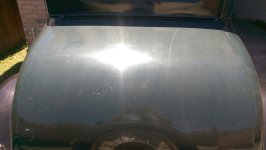
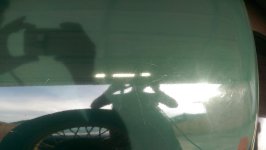
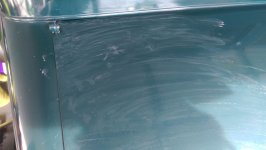
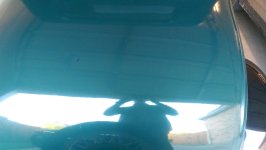
LEDetailing shared this post: The #7 Rub Down Technique by Mike Phillips with me over on another thread. After reading the full post by Mike Phillips I am convinced and curious enough to give it a try. I am going to give it a try on the trunk of my 1931 Chevy. I`ll post the results over on this thread once I`m done: http://www.autopia.org/forums/car-detailing/184416-1931-chevy-detailing-2.html

But I am curious to see if anyone else has used Megs #7 this way?

I know he said the TS Oils will absorb in the paint but wouldn`t compounding/polishing remove any of the #7 that was left?

If I wanted #7 as part of the "final appearance" would I not reapply after polishing?

Anyway, hope to get some discussion going!

Thanks,
 
#7 will bring a lot life back in to the paint and you will not have to go as aggressive on the compound polish stages, You will be able to leave more paint on the car. you could reapply #7 depending on what LSP you are using, under a show car type wax but not under a sealant or coating.
 
It is my understanding that the idea behind it is for the #7 to sit for a few hrs/Overnight and allow the oils to rejuvenate/re hydrate the paint ,so that you`re not working on dried weak paint that may need more aggression. Think of it as prepping before a shave by using a warm towel or doing it during a warm shower to open up the pores and soften your skin, it`ll make the shave more effective and gentler compared to a dryer shave.
 
FIDOAG14 -

Certainly, Meguiars Nbr-7 can be applied after polishing as well as Mike describes above, before polishing to feed the drying/dried single stage paintwork..
We used it 40 years ago in the paint shop after painting with acrylic lacquers and acrylic enamels even...

Everyone who had a vehicle entered in the Sacramento Auto Show brought a bottle of this product and went over the entire vehicle the night before the show after it was parked in its spot, and used it to refresh the look after a zillion fingerprints got on the vehicle throughout the week.

It always brought a rich look to whatever paint it was applied on..

It would not last very long but then it is a Glaze and they back then, were not chock full of chemicals that today`s products have, to hopefully ensure some longevity..

It used to be a greenish-yellowish color and smelled delicious ! :) Not sure what color it has today but it looked white in that Mike Phillips video I just saw..

So, if restoring old paint using his method is what you are looking for, this will probably work really great..
And if you want to apply it after polishing, it will make it look really great too !
Good luck !
Dan F
 
I`ve used it as per Mike Phillips methods. SOOOO much time, and I got a massive arm work out. I`ve been meaning to post a thread on that project, but...well, I haven`t.

Not sure I`d leave it on overnight, if I were to do it again. Maybe. Depends on time, maybe. Sorry! But it`s not fun removing the dried out excess after an overnight deal.

In my particular case, the single stage paint on the `67 VW was pretty thin. It was cracked, dried, peeling, rusty, etc. It was in bad shape. The owner wanted to make it "shiny" again, and didn`t ask for show quality results. I managed to accomplish the goal. The finish still had some scratches, swirls, etc, but the oxidation was removed, and the paint shined once again. Best of all, the owner was extremely happy with the results. She was even happier a week later, when she went to get some VW parts at a shop, and the owner asked if she had the car polished. A couple of pics of the before and after. Full thread coming...some day!


...

It used to be a greenish-yellowish color and smelled delicious ! :) Not sure what color it has today but it looked white in that Mike Phillips video I just saw..
...
Dan F

Yes, Dan, it`s white now. I don`t recall what the smell is like now, since I haven`t smelled it since I received it. Per Mike Phillips, it works just the same. I was going to try it on a Honda CRX with red single stage paint, but the owner decided to go a different route.

I like to top Megs #7 with Megs M16. old school, on top of old school. I just wish I could get a bottle of M80!
 
Thanks for the input guys!

I definitely intend to finish the car out with this approach, especially for the sake of backing off on all the compounding.

Trashmanssd,
I`m about half way through the car and have been using PB Natty`s Blue for my LSP (I just like the stuff so darn much...)

Migue,
That makes sense! From what I`ve done so far, which was compound, polish, glaze, wax I could tell a HUGE difference in the feel of the paint from the #7 and it did seem to slurp up product like I`ve never seen.
I`ve only ever worked on my cars and they are newer CC paints, especially since I`ve kept them clean and waxed a very little amount of product goes such a long way. The `31 paint on the other hand couldn`t get enough of the #7. To use your analogy, it`s because the paint is dry old skin.

Dan,
I think I probably will use Mike`s #7 rub down technique and then reapply #7 after polishing. Like we`ve discussed before, the paint is not perfect and that`s ok, but it can still look pretty dang good! I`ll post pictures when I get around to doing the trunk (this weekend probably) I had been putting it off because I like to do more than one panel at a time but I`m beginning to realize my wife isn`t going to give me full days in the garage to do the entire car at once. Piece by piece it is!

JustJesus,
Busted! Now you owe us a write up and more pictures! The Bug looks good though! Glad to hear someone has tried this technique. I`d not heard of it till yesterday, and had been using #7 in a "more traditional sense" if that`s correct to say.

Thanks guys!
 
Thanks, FIDOAG14. I`ll see if I can get the pics together Thursday and Friday during my lunch breaks. Then I`ll work on the write up.
 
When I moved into my house a year ago, among the extra kitchen tiles and potting soil and a few mick naks that the owners left behind, was a nearly full BIG bottle of #7.
 
Here is a tip that might help to remove it if you leave it on all night and it dried up ---

Apply MORE and it will soften up the old and hopefully will make the removal easier... :)

JustJesus !
That is Beautiful !!!!
What a difference it makes to feed old dried paint again !!!
You Killed it !!!
Great Job !!
Dan F

Thank you, sir! For the kind words AND the tip. I`ll keep that in mind next time I use that stuff. ;)
 
I`ve used it as per Mike Phillips methods. SOOOO much time, and I got a massive arm work out. I`ve been meaning to post a thread on that project, but...well, I haven`t.

Not sure I`d leave it on overnight, if I were to do it again. Maybe. Depends on time, maybe. Sorry! But it`s not fun removing the dried out excess after an overnight deal.

In my particular case, the single stage paint on the `67 VW was pretty thin. It was cracked, dried, peeling, rusty, etc. It was in bad shape. The owner wanted to make it "shiny" again, and didn`t ask for show quality results. I managed to accomplish the goal. The finish still had some scratches, swirls, etc, but the oxidation was removed, and the paint shined once again. Best of all, the owner was extremely happy with the results. She was even happier a week later, when she went to get some VW parts at a shop, and the owner asked if she had the car polished. A couple of pics of the before and after. Full thread coming...some day!


Wow, looks like a different car. I would love to get appraisals before and after. Your hard work sure paid off.
 
Yes, Dan, it`s white now. I don`t recall what the smell is like now, since I haven`t smelled it since I received it. Per Mike Phillips, it works just the same. I was going to try it on a Honda CRX with red single stage paint, but the owner decided to go a different route.

I like to top Megs #7 with Megs M16. old school, on top of old school. I just wish I could get a bottle of M80!


How long is the shelf life of a bottle of M80, in Texas heat or SoCal close to the border type heat?
 
Wow, looks like a different car. I would love to get appraisals before and after. Your hard work sure paid off.

well, if we`re talking "paid" off, then not so much. It wasn`t free, but the amount of labor vs price, it was dirt cheap. But it was valuable experience, so it`s fine by me. There`s about 400 photos to go through, so it may take a little longer to get it together. thanks for the kind words.

How long is the shelf life of a bottle of M80, in Texas heat or SoCal close to the border type heat?

Me, I wouldn`t know. I never owned the stuff. I found out about it long after it had been discontinued. Not sure this helps, or is relevant, but I just played with some old Mothers headlight polish. I had bought that maybe 5 years ago. It was more liquid than thick polish, and visibly you could see it had long broken down. But for giggles, I tried it out anyway, and it still did a decent job of removing light haze off a headlight.
 
well, if we`re talking "paid" off, then not so much. It wasn`t free, but the amount of labor vs price, it was dirt cheap. But it was valuable experience, so it`s fine by me. There`s about 400 photos to go through, so it may take a little longer to get it together. thanks for the kind words.


Me, I wouldn`t know. I never owned the stuff. I found out about it long after it had been discontinued. Not sure this helps, or is relevant, but I just played with some old Mothers headlight polish. I had bought that maybe 5 years ago. It was more liquid than thick polish, and visibly you could see it had long broken down. But for giggles, I tried it out anyway, and it still did a decent job of removing light haze off a headlight.

Okay, a few months ago work moved to a new location, whilst cleaning out the old building, I stumbled upon 3/4 gal of M80. It had been sitting up there for an undetermined amount of time, but it being a Meg`s product, I kept it. I have yet to play with it as I do not exactly have a set use for it, but it sits on my shelf, 3/4 full.
 
House of Wax,

That Lincoln is almost unbelievable!

Ok so here is the before, clay, and after of the trunk on my `31. Like I`ve said many times, the paint is far from perfect but I think it looks pretty good!

The paint feels much healthier, I`ll follow up the #7 rub down with some BlackFire SRC Compound and then BlackFire SRC Finishing Polish, probably another #7 glaze then top with PB Natty Blue.

Forgive the lighting differences and all around poor photo taking, its a phone camera...

Pre-wash
attachment.php

Post-wash, Pre-clay
attachment.php

Mid-Clay, some kind of red overspray on the trunk
attachment.php

Post #7 Rub Down left overnight. I forgot to take a post-clay pre-glaze
attachment.php


LEDetailing, can`t say thanks enough for sharing that link, I really think this technique is going to improve the overall look of the car and health of the paint.
 

Attachments

  • IMAG1030.jpg
    IMAG1030.jpg
    290.4 KB · Views: 47
  • IMAG1079.jpg
    IMAG1079.jpg
    292.2 KB · Views: 45
  • IMAG1081.jpg
    IMAG1081.jpg
    299.7 KB · Views: 45
  • IMAG1099.jpg
    IMAG1099.jpg
    295.4 KB · Views: 45
Funny, over a year later and I`m reading up on the #7 technique and I see my name come up.

Those results are amazing. Good work! Glad I could lead you to Mike Phillip`s #7 technique.

I`m going to be working on my uncle`s 1960 Austin Healey Bugeye Sprite and it needs some #7. I personally haven`t used the technique, but have a bottle of #7 on hand just for the occasion. Looking forward to the results
 
Back
Top