Navigation
Install the app
How to install the app on iOS
Follow along with the video below to see how to install our site as a web app on your home screen.
Note: This feature may not be available in some browsers.
More options
Style variation
You are using an out of date browser. It may not display this or other websites correctly.
You should upgrade or use an alternative browser.
You should upgrade or use an alternative browser.
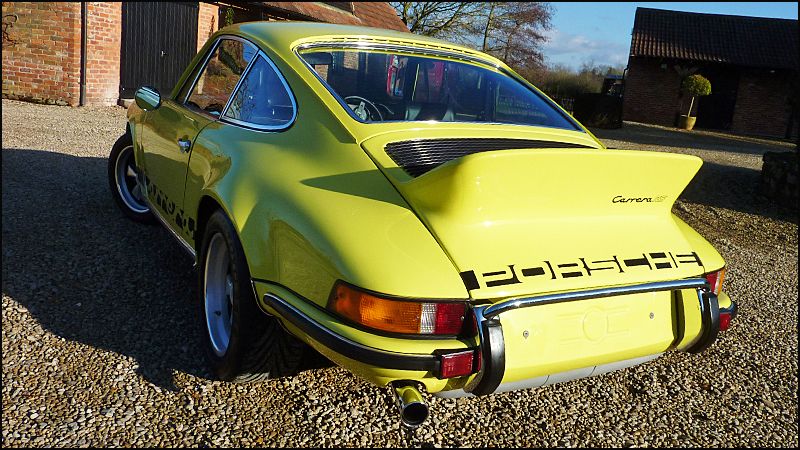
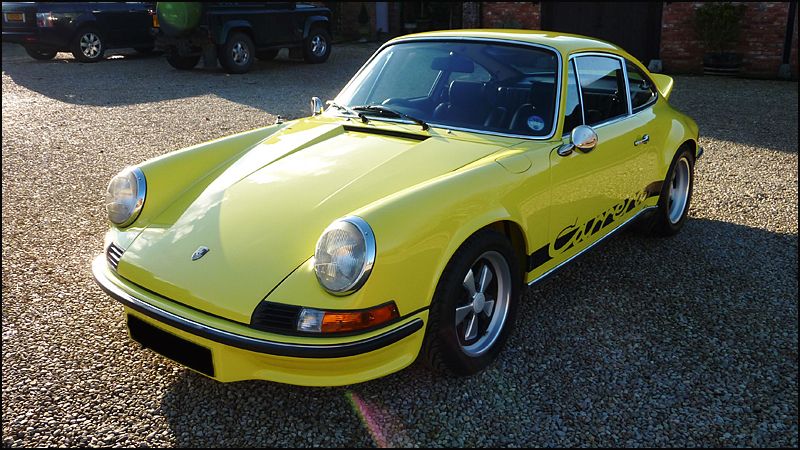
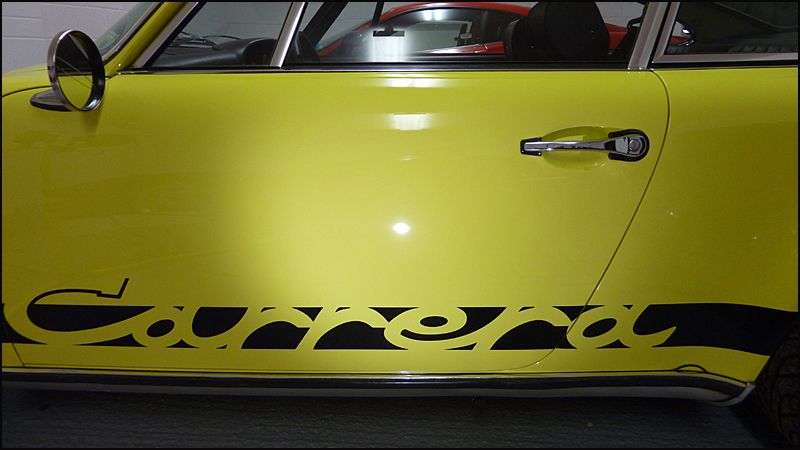
Gleaming Kleen - 1973 Porsche 911 Carrera 2.7 RS
- Thread starter Bluedog
- Start date
imported_BretFraz
New member
If it were me I'd use Prepsol or similar. Should come right off.
imported_Intel486
New member
Hmm super glue.
It'll probably have to be something pretty harsh to get that off.
I wonder when the clay pulls the glue off if it will also pull some paint off
It'll probably have to be something pretty harsh to get that off.
I wonder when the clay pulls the glue off if it will also pull some paint off
imported_BretFraz
New member
It's a prep solvent used by body shops to remove wax, silicone, and all kinds of surface crud prior to painting. You can get this stuff at auto paint suppliers or at places like Pep Boys and NAPA.
You can also try naptha or mineral spirits from hardware stores. It's similar stuff.
You can also try naptha or mineral spirits from hardware stores. It's similar stuff.
JasonC8301
New member
Prepsol is a chemical that removes almost everything from the paint (except the paint), sealants, waxes, fillers, glazes, tar, bug, etc. etc. I think an autobody shop should carry this.
If that does not work, I removed some super glue from a car with 600 grit sand paper (hey quick fix, only had 600 grit at home depot, nothing higher in grit.) So do you have any of those 2000-3000 grit sanding blocks/paper around? This would be a last resort, takes time and patience. Try using a hole puncher to punch out a few dots of this super fine sand paper and glue it to the eraser of a new pencil, let dry, wash car, leave soap on glue, place on top of glue, turn in small circles until the glue is removed and paint is level. Follow up with polish and sealant.
Jason
imported_Intel486
New member
<blockquote class='ipsBlockquote' >
<em class='bbc'>Originally posted by JasonC8301 [/i]
<strong class='bbc'>If that does not work, I removed some super glue from a car with 600 grit sand paper (hey quick fix, only had 600 grit at home depot, nothing higher in grit.) So do you have any of those 2000-3000 grit sanding blocks/paper around? This would be a last resort, takes time and patience. Try using a hole puncher to punch out a few dots of this super fine sand paper and glue it to the eraser of a new pencil, let dry, wash car, leave soap on glue, place on top of glue, turn in small circles until the glue is removed and paint is level. Follow up with polish and sealant.
[/b]</blockquote>
The high grit sandpaper you can get a pepboys or autozone. Home depot seems to be lacking with the automotive supplies. Guess that is what to expect from a hardware store though
Andre'
New member
3M's General purpose adhesive cleaner, it's safe for all paint.
Andre'
New member
Is it safe for paint?:nixweiss
I haven't used it on paint. I guess it would be about as safe as the superglue itself. I would recommend testing a small inconspicuous spot first, but I would bet its ok. Just let it sit long enough to work, then make sure you clean it completly off.
BTW, how the heck do you get superglue on a car?
BTW, how the heck do you get superglue on a car?
Andre'
New member
Looks like a good product.:up
imported_doug
New member
first - I gotta ask. How the heck did he get this stuff (formally known as "CA, short for Cyanoacrylate) on his CAR ?
I use CA glues a lot - (totally different hobby.) I seriously doubt 3M adhesive remover or prepsol (both of which I am familiar with) will help at all. CA is very inert stuff once it is cured, so it takes really strong chemicals to deal with it. It is a plastic, and so these chemicals will attack most other plastics too. Is car paint a plastic? I have no idea.
IF the surface it fell on was well waxed or oily, it MIGHT pop off with lateral pressure, and if this is the case a clay bar MIGHT work. Worth a try, because it is safe. Ca glues do not always bond. If it IS bonded, it may well pull the paint with it if you try to force it off.
I think the CA debonder is the best bet - but I would try it on a safe place first. There absolutely is a chance <strong class='bbc'>it could hurt your paint.[/b] Still, it works somewhat slowly, so you may be able to control it.
The only other ways to remove CA glue are heat (you'd probably melt the paint at about the same time, plus when you do this it makes seriously nasty fumes), or soaking with acetone (which may also damage your paint.)
The stuff is also quite hard - so if you try sanding you stand a real good chance of sanding down the paint around it while the bump just sits there smiling back at you. It CAN be sanded - but you MUST use a super-stiff sanding block. You don't want any "give" that would let the paper ride up over the bump without really sanding it hard at that time.
Proceed carefully and let us know what worked or was dangerous - so we can help the next poor $%*%##*( out.
?I use CA glues a lot - (totally different hobby.) I seriously doubt 3M adhesive remover or prepsol (both of which I am familiar with) will help at all. CA is very inert stuff once it is cured, so it takes really strong chemicals to deal with it. It is a plastic, and so these chemicals will attack most other plastics too. Is car paint a plastic? I have no idea.
IF the surface it fell on was well waxed or oily, it MIGHT pop off with lateral pressure, and if this is the case a clay bar MIGHT work. Worth a try, because it is safe. Ca glues do not always bond. If it IS bonded, it may well pull the paint with it if you try to force it off.
I think the CA debonder is the best bet - but I would try it on a safe place first. There absolutely is a chance <strong class='bbc'>it could hurt your paint.[/b] Still, it works somewhat slowly, so you may be able to control it.
The only other ways to remove CA glue are heat (you'd probably melt the paint at about the same time, plus when you do this it makes seriously nasty fumes), or soaking with acetone (which may also damage your paint.)
The stuff is also quite hard - so if you try sanding you stand a real good chance of sanding down the paint around it while the bump just sits there smiling back at you. It CAN be sanded - but you MUST use a super-stiff sanding block. You don't want any "give" that would let the paper ride up over the bump without really sanding it hard at that time.
Proceed carefully and let us know what worked or was dangerous - so we can help the next poor $%*%##*( out.

Steve @ Guru
New member
My experience with Debonder has always been mixed. I used it a lot with R/C cars...seem's like I was always CA'ing something during a race outing...
Anyway, with most plastics, the Debonder turns the plastic brittle and white, and was also somewhat dangerous near Lexan and R/C paint (Pactra brand).
Be extremely careful, as CarGuy said, if you decide to try the Debonder. Good luck, though!
Anyway, with most plastics, the Debonder turns the plastic brittle and white, and was also somewhat dangerous near Lexan and R/C paint (Pactra brand).
Be extremely careful, as CarGuy said, if you decide to try the Debonder. Good luck, though!
imported_doug
New member
Yes - nail polish remover removes super glue. Nail polish remover is acetone plus perfume. If acetone will damage your paint, so will nail polish remover.
")
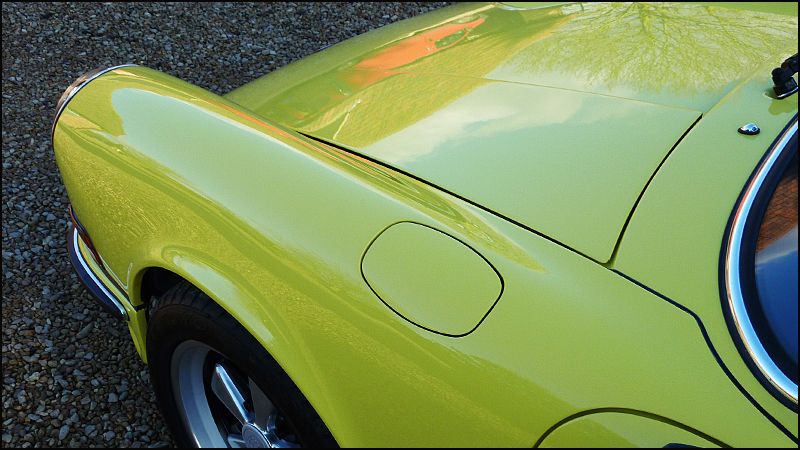
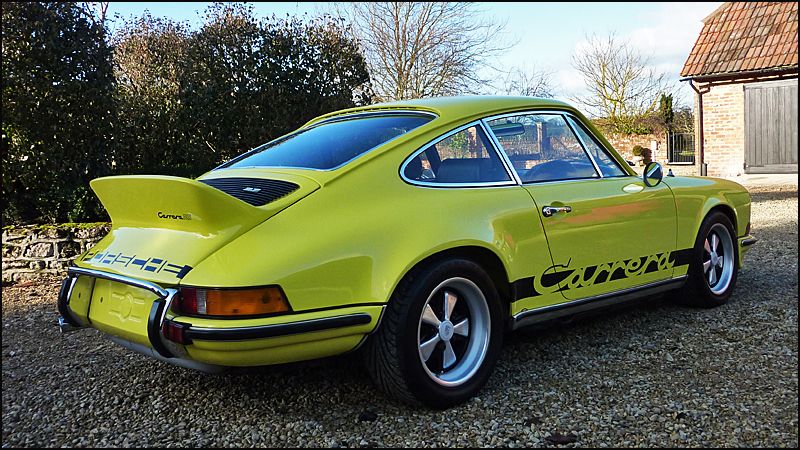
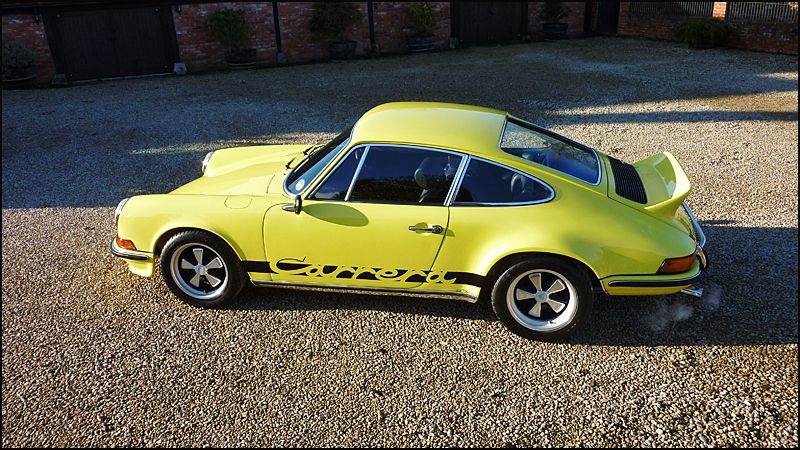
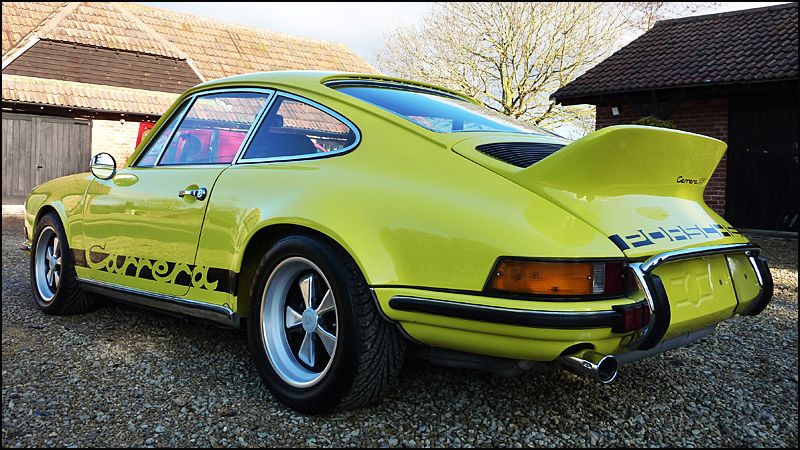
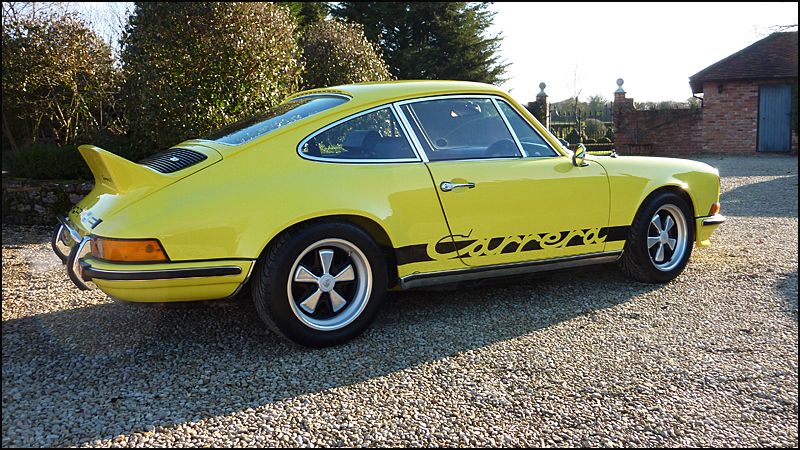
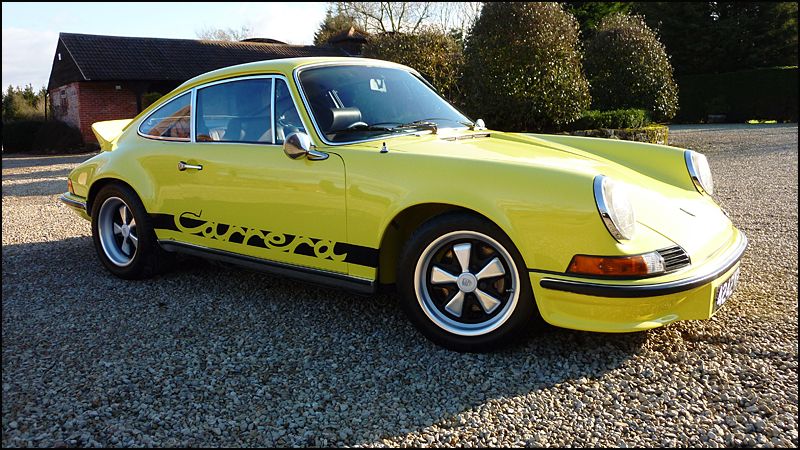
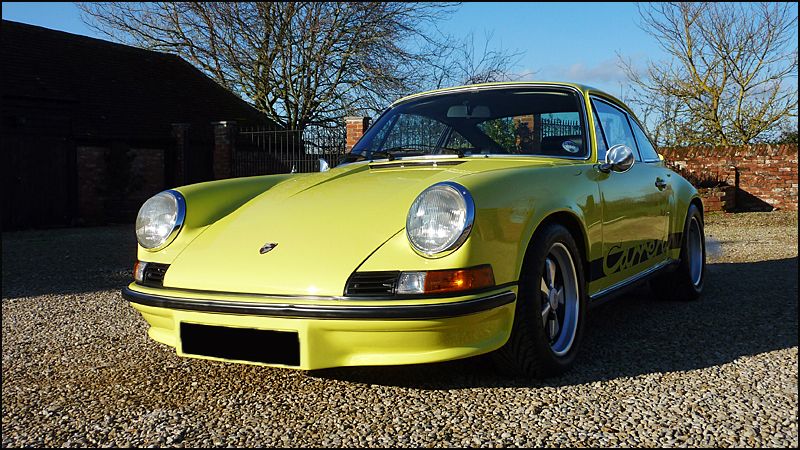
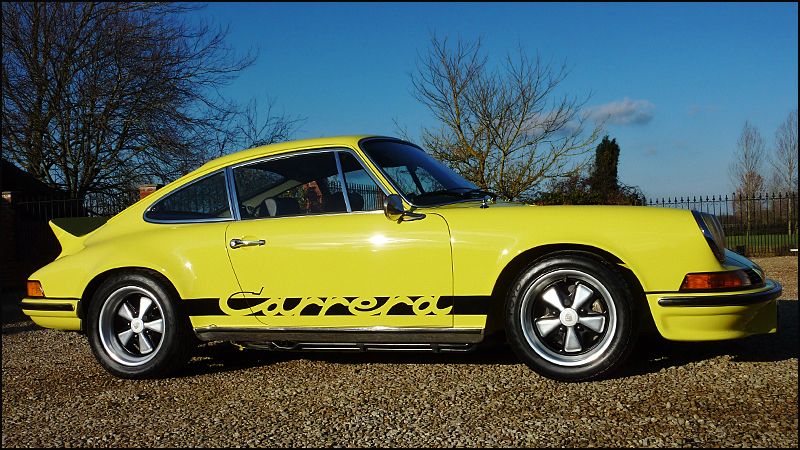
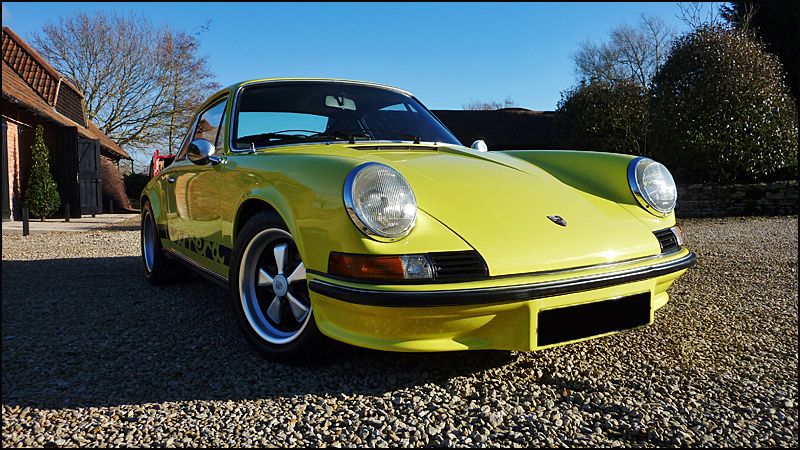
Thought I would share this iconic car with you:thumbsup:
For those that do not know about the history of the RS
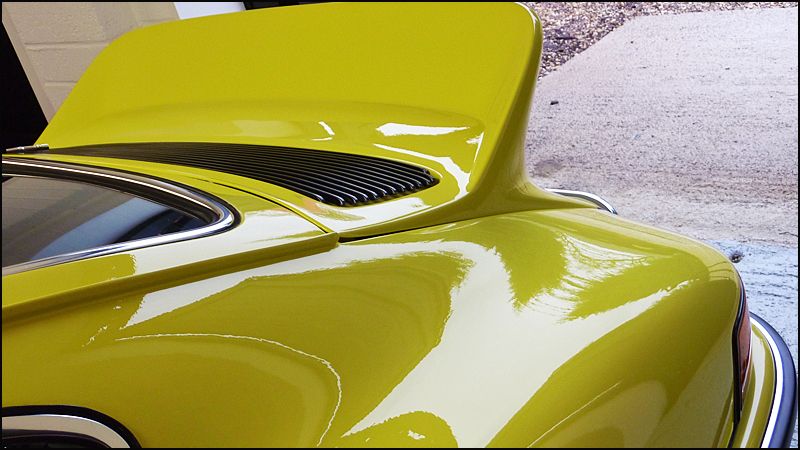
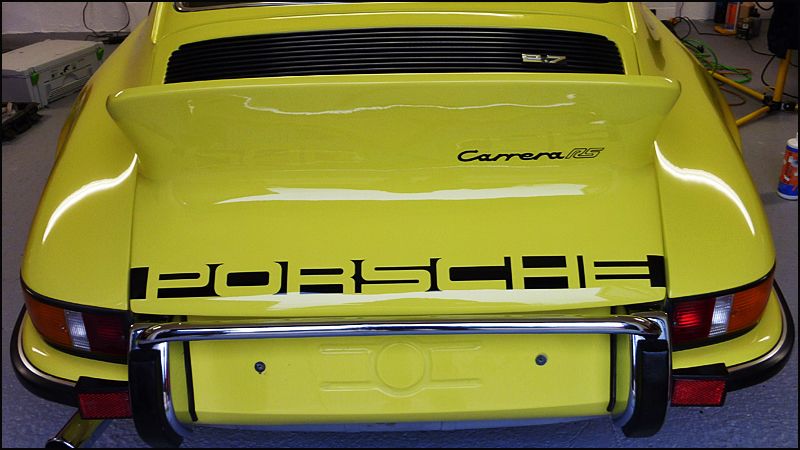
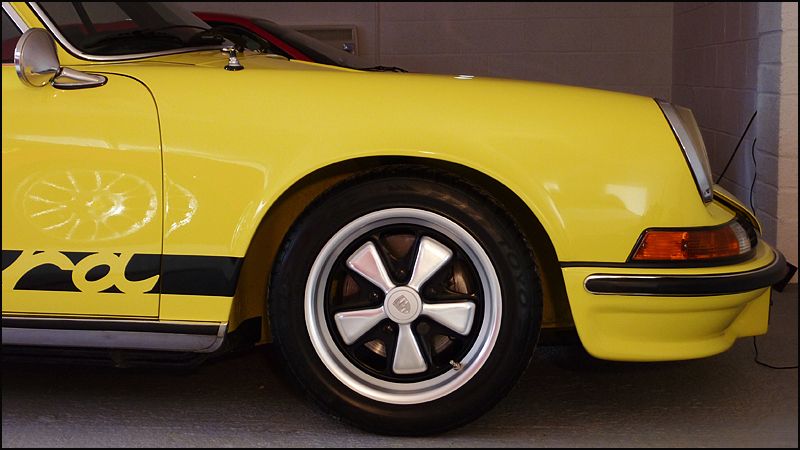
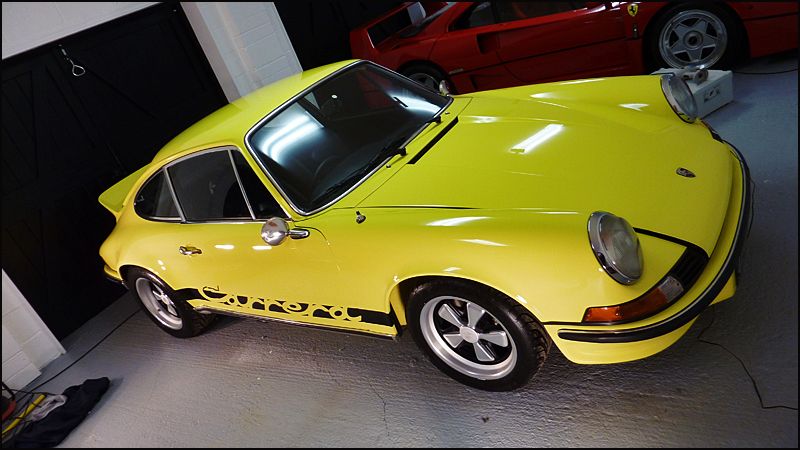
The legendary Carrera RS is widely regarded to be one of the greatest, if not the greatest roadgoing Porsche ever. The 1973 Carrera RS is sought after by collectors worldwide and is considered by many to be the best 911ever produced. It?s precision handling, light weight, powerful engine and classic lines are what makes this the ?holy grail? of 911s. Its primary purpose was to homologate the car for competition use, which required the construction of a minimum of five hundred examples within twelve months. Eventually, the cars proved to be so popular that the production run was expanded several times, with an eventual total of 1580 (1308 were touring version) cars being built. The cars themselves featured larger more powerful engines, flared rear wheel arches to accommodate wider wheels, numerous deletions and alterations to reduce weight, improved suspension, and a few cosmetic alterations, which would become the car?s trademark. With its distinctive contrasting striping and wheels and the simple and functional ?burzel? or ducktail, the styling of the RS is iconic.
The incredibly successful history of the Carrera RS is far too long to chronicle here. Suffice it to say that it won the Daytona 24 hours even before it was homologated. A few weeks later it was victorious in the Sebring 12 hours and later in 1973 won the Targa Florio. Porsche finished the year as joint European GT Champions with a host of other race and rally victories to its name
0-60 MPH in just 5.5 seconds with a top speed of 150 MPH.
2.7 Liters
210 HP
188 Ft. Lb of Torque
Weight: 1075 kg (the sport lightweight even lighter)
This car was first owned by british racing driver John Fitzpatrick
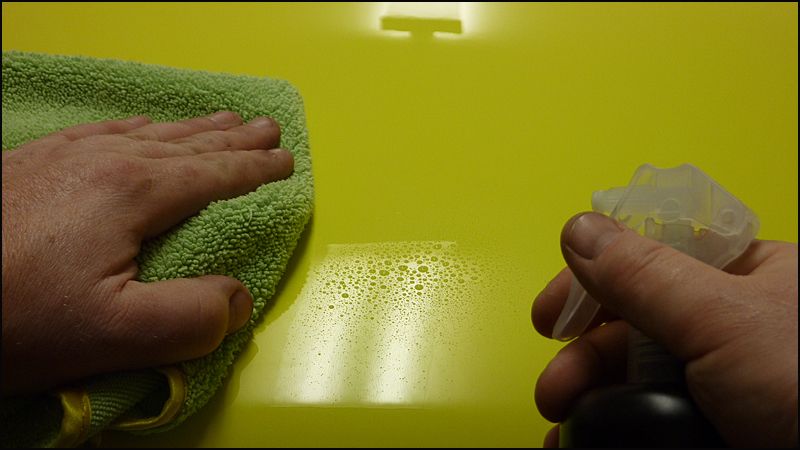
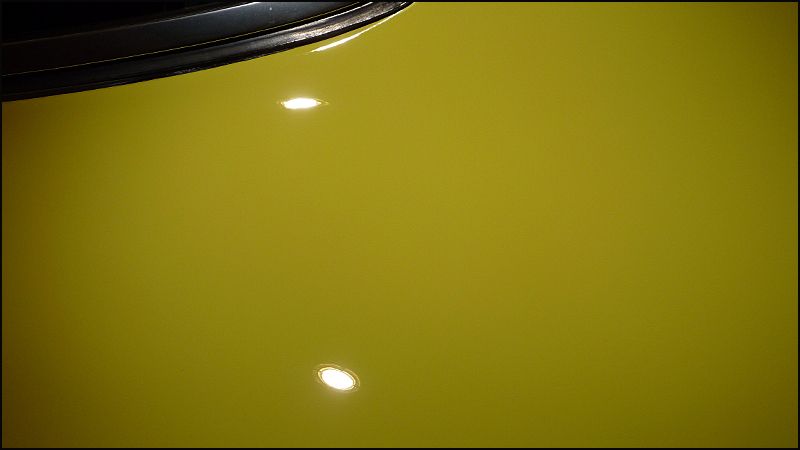
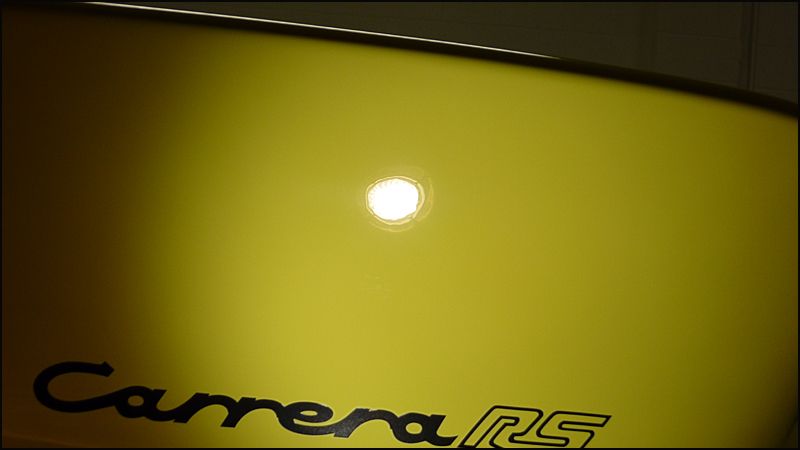
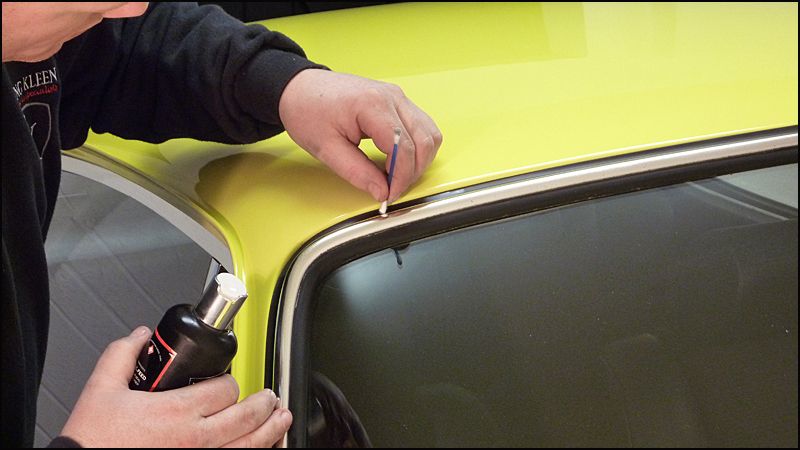
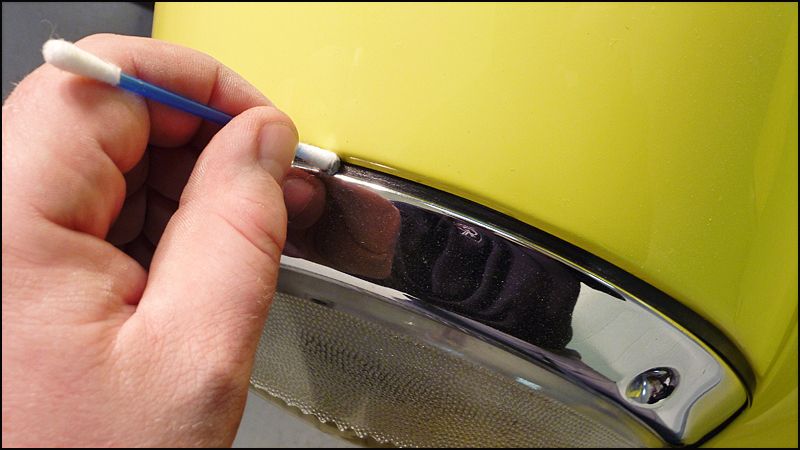
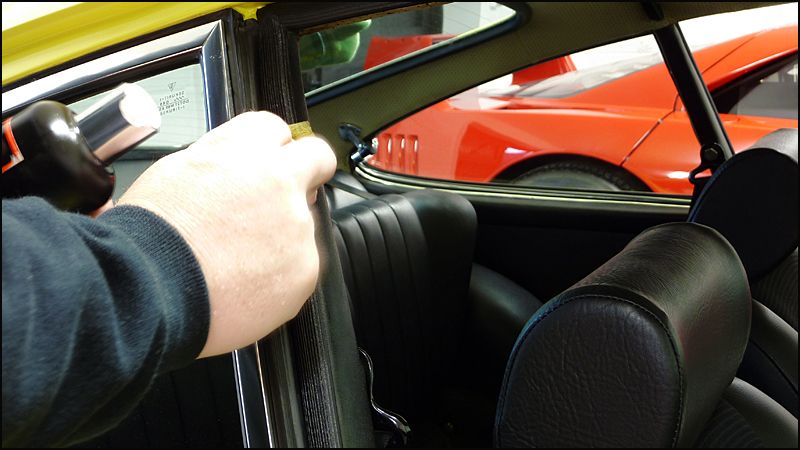
Car received the usual pre-wash, wash and decontamination stages
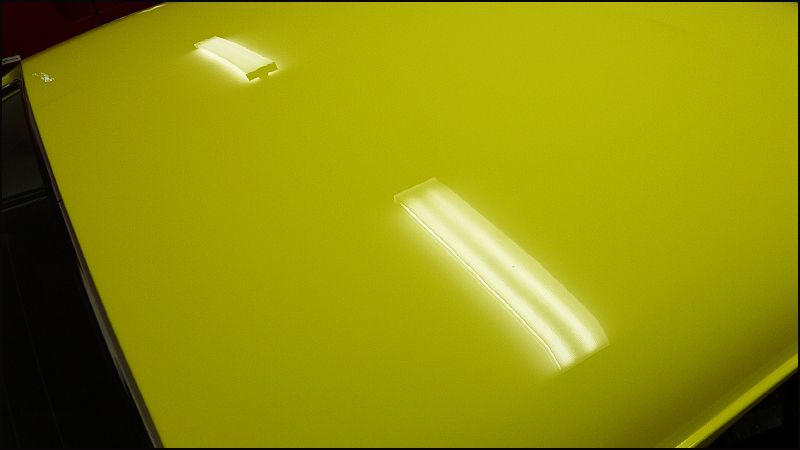
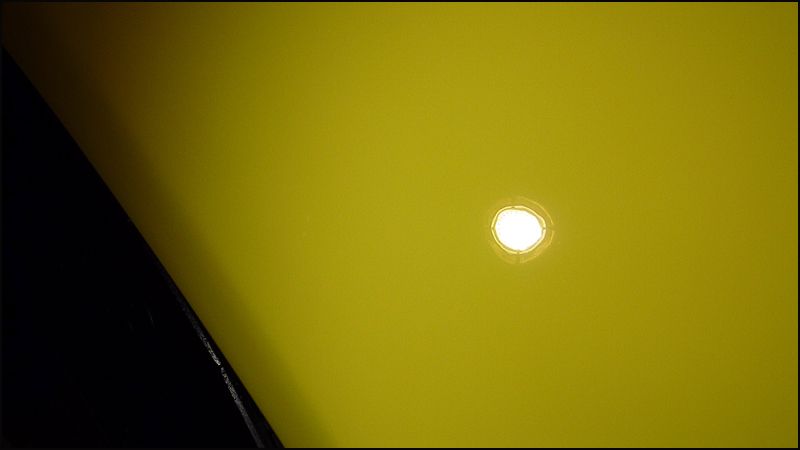
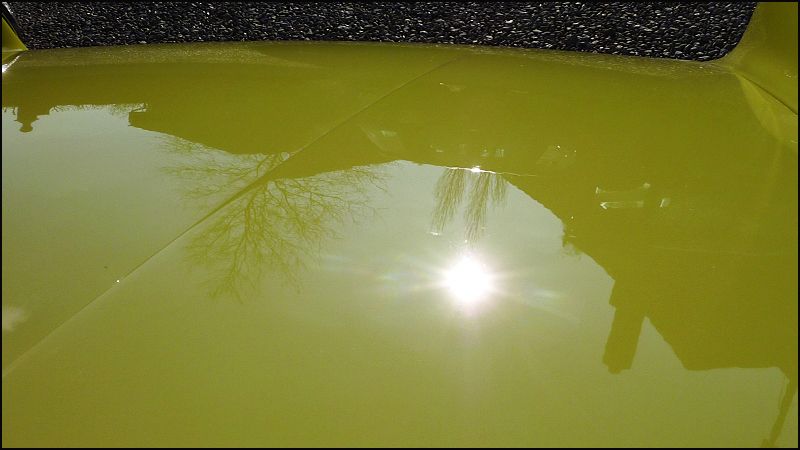
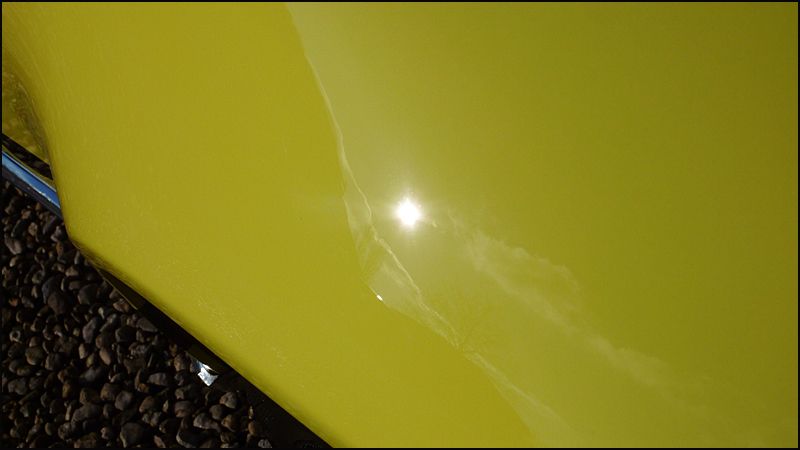
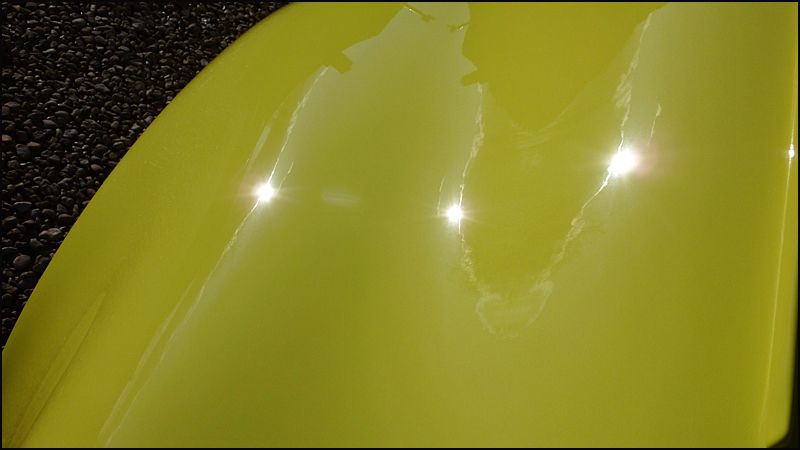
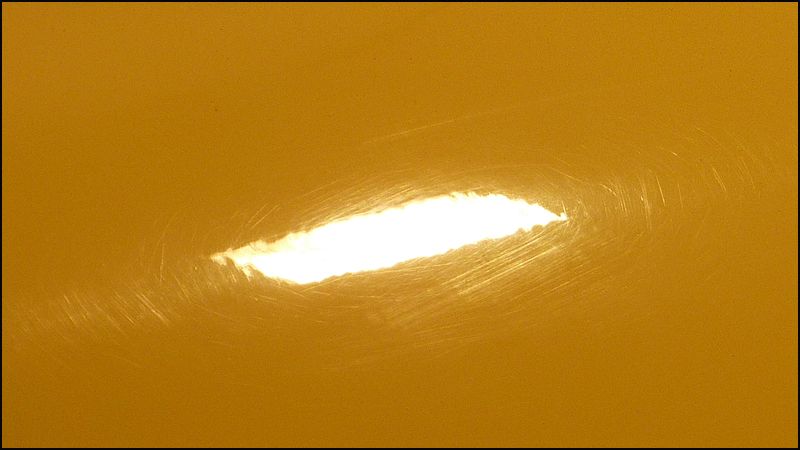
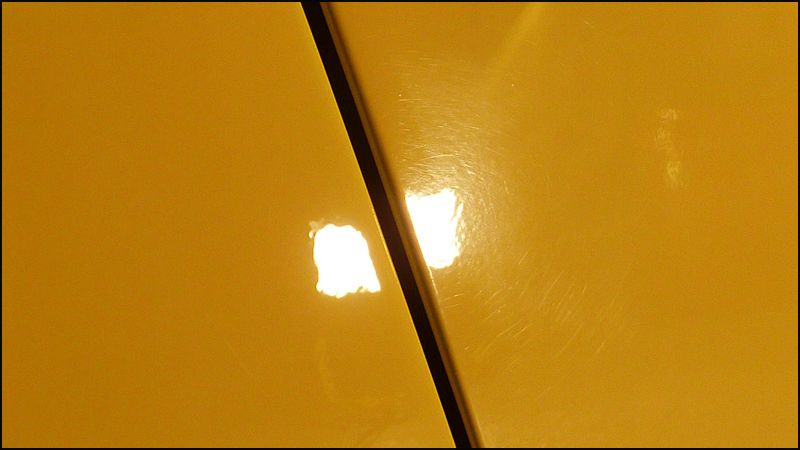
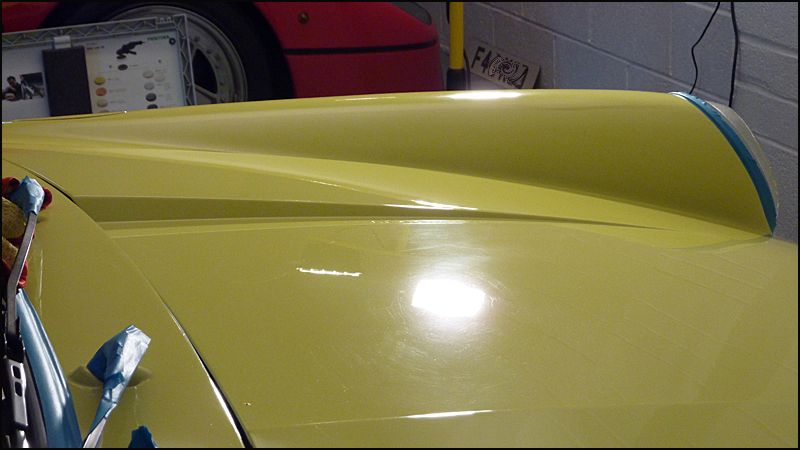
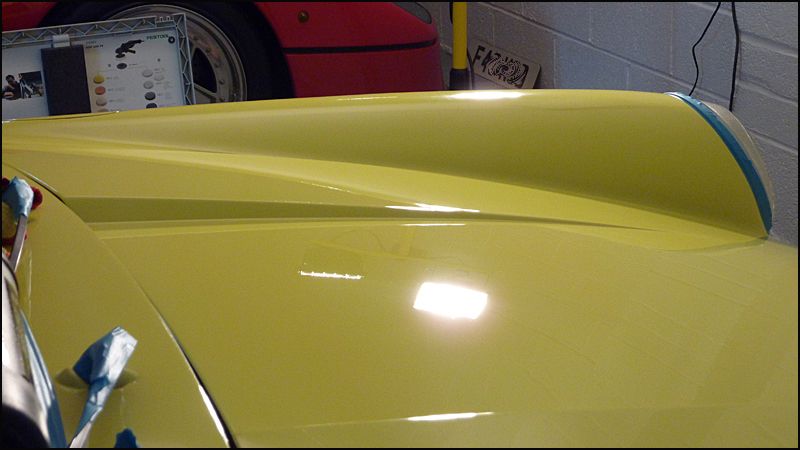
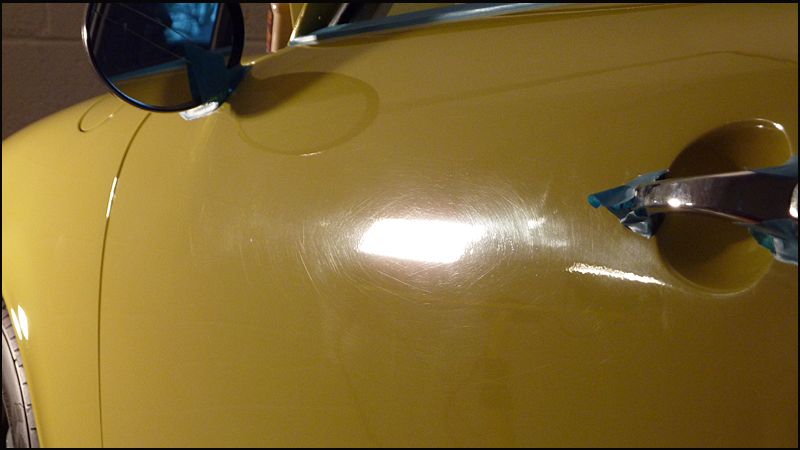
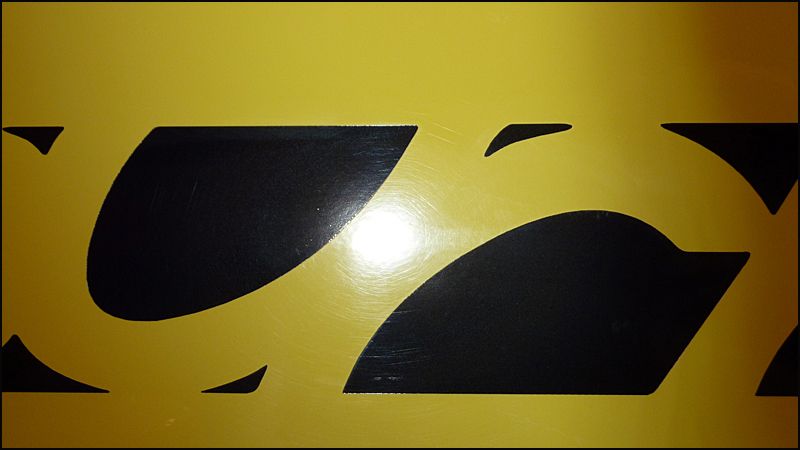
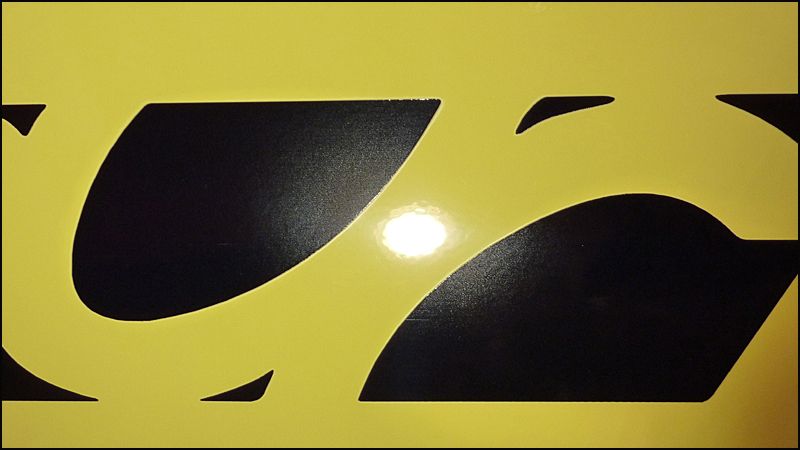
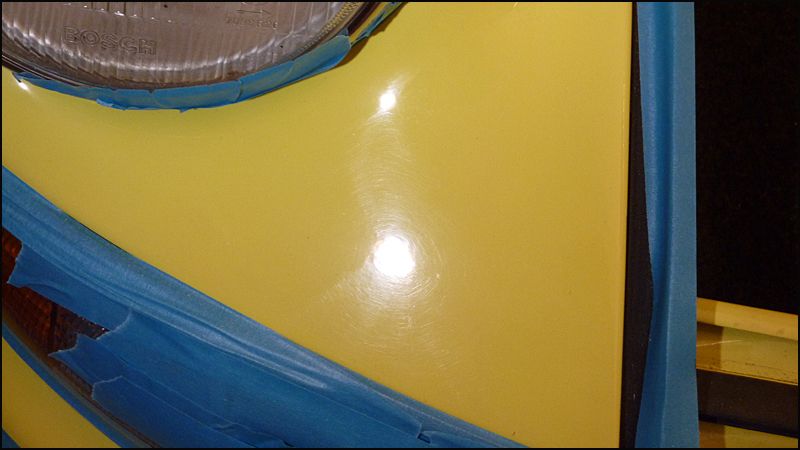
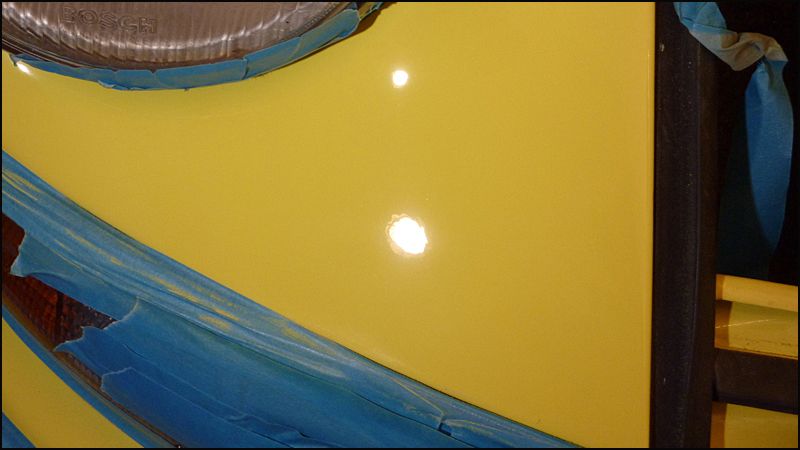
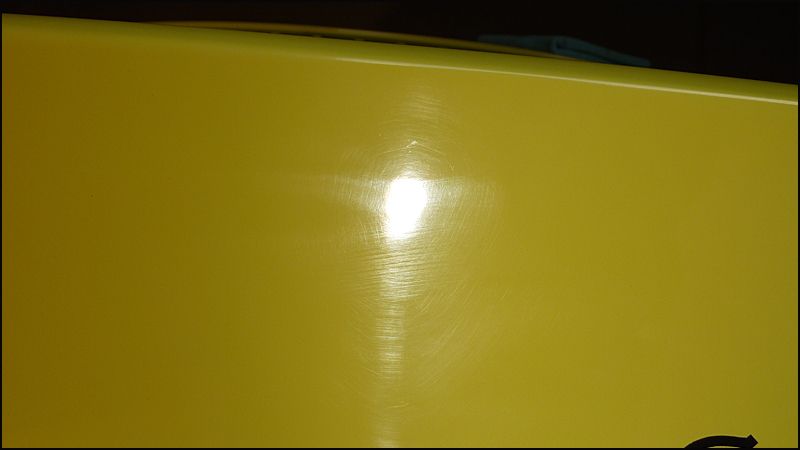
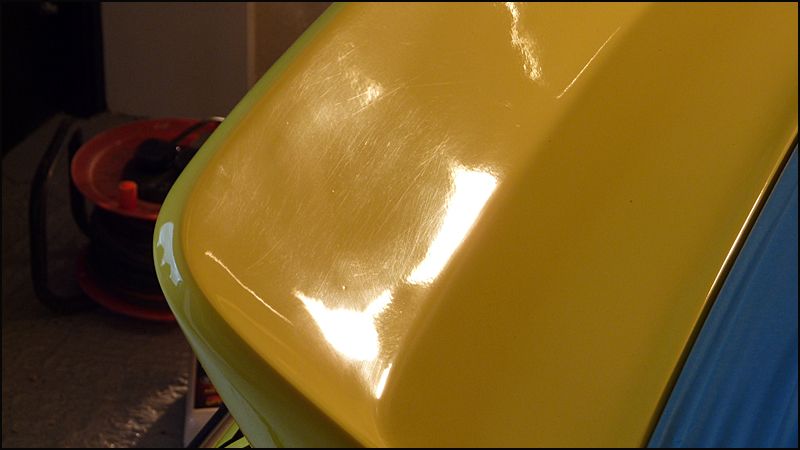
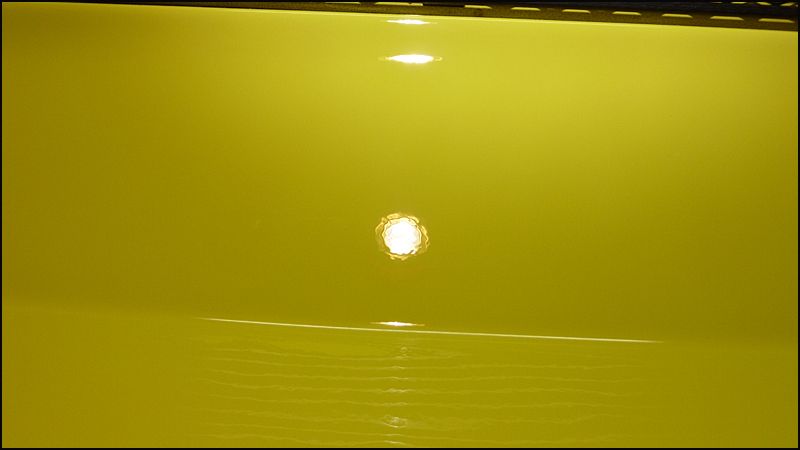
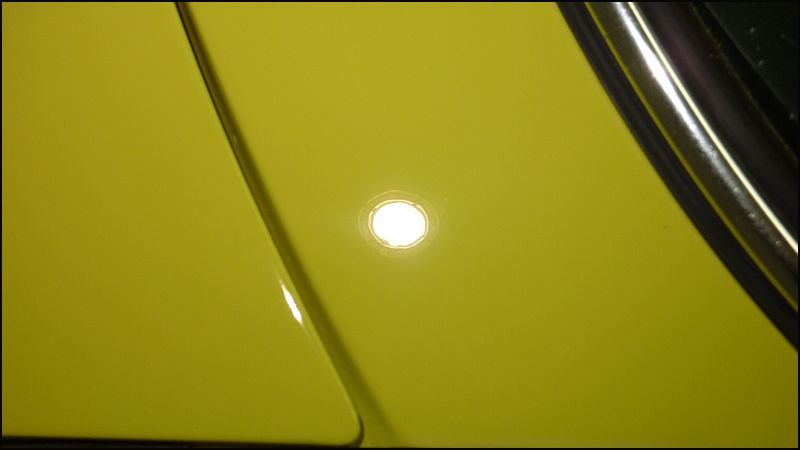
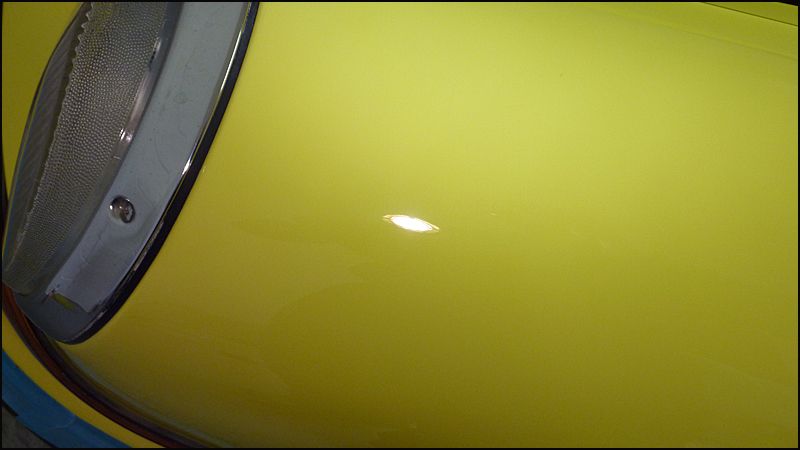
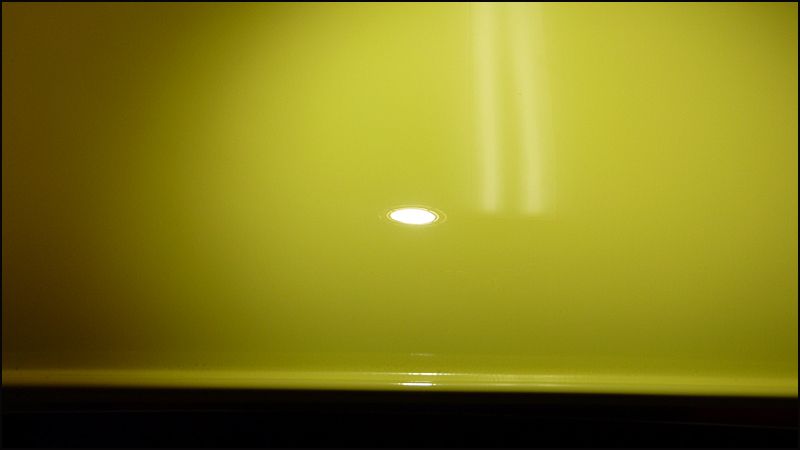
This shot was cropped to show the actual condition of the paintwork
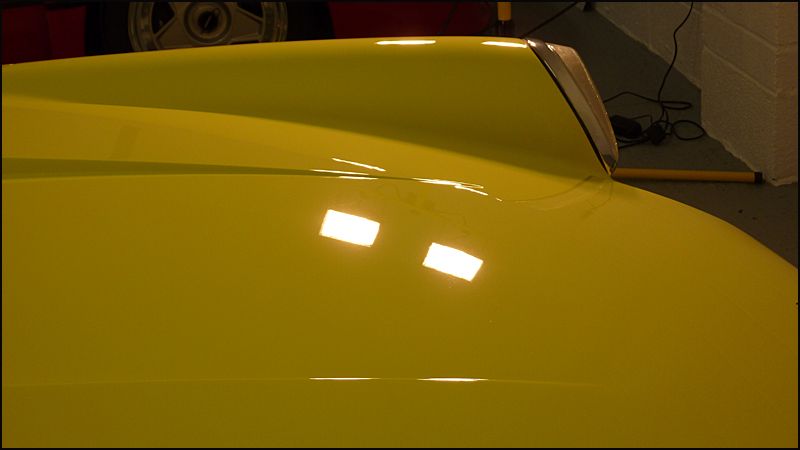
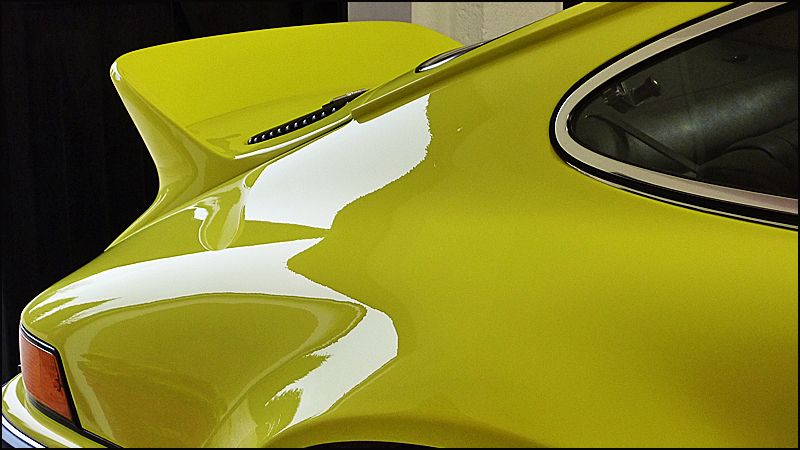
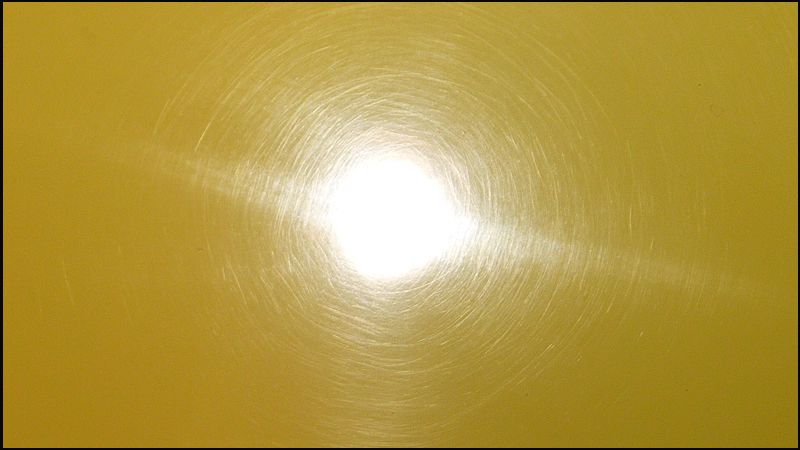
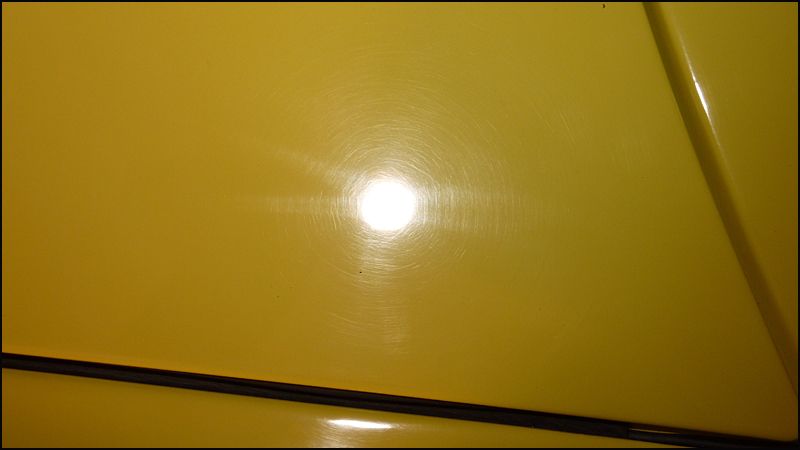
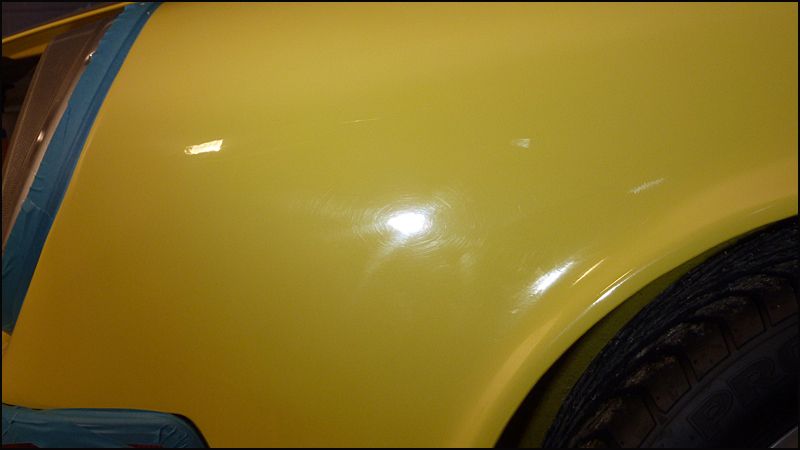
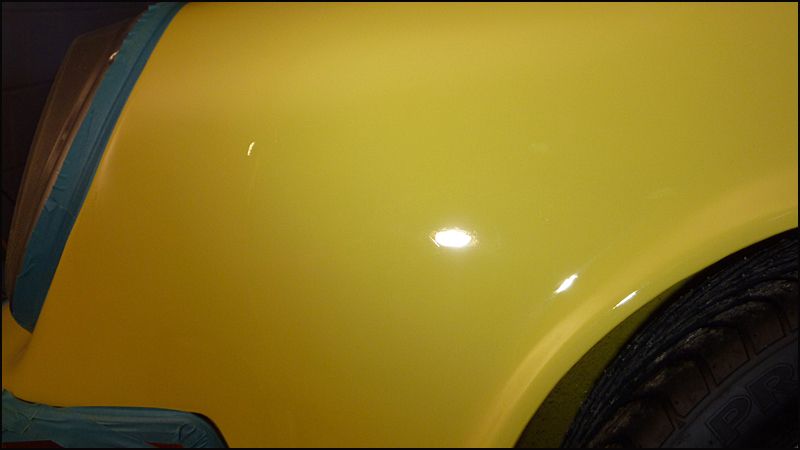
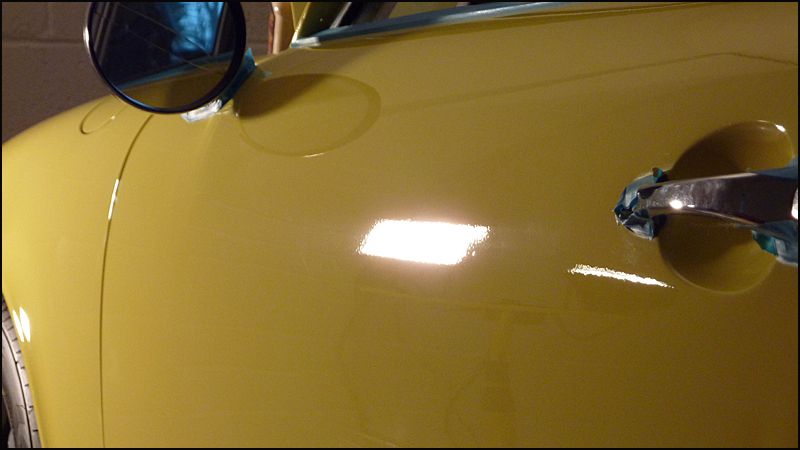
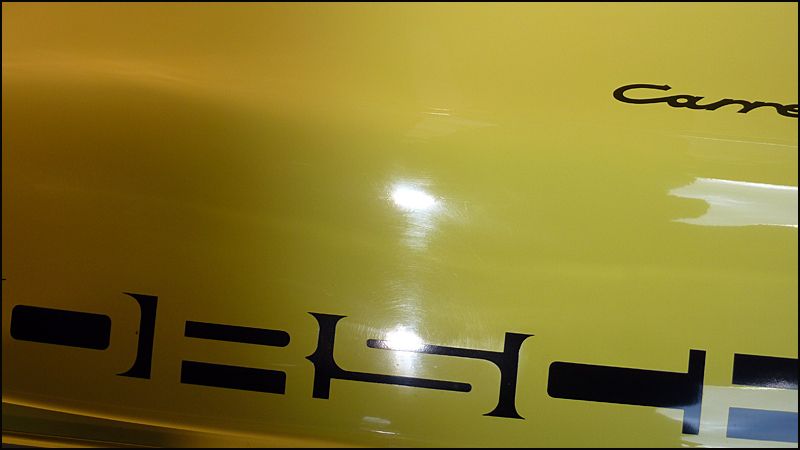
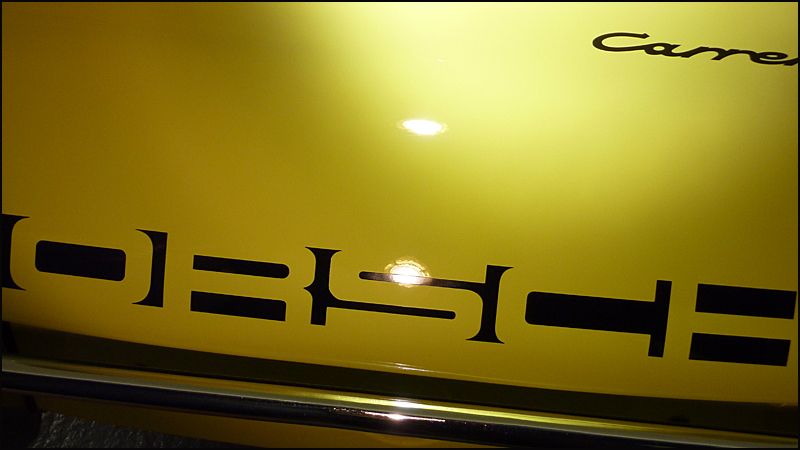
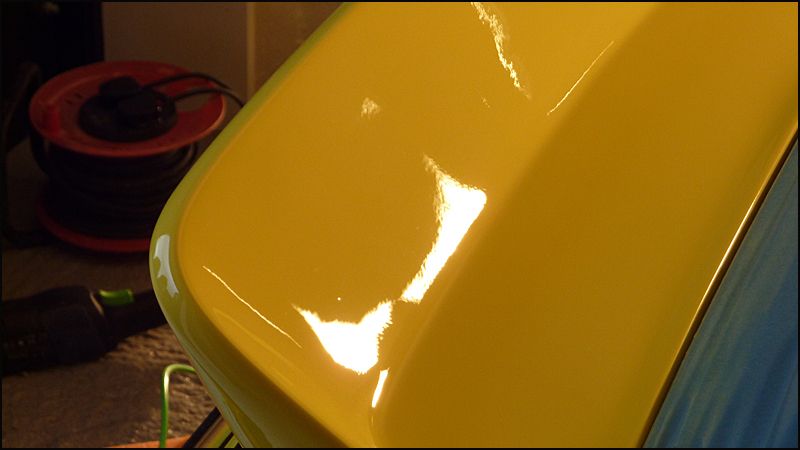
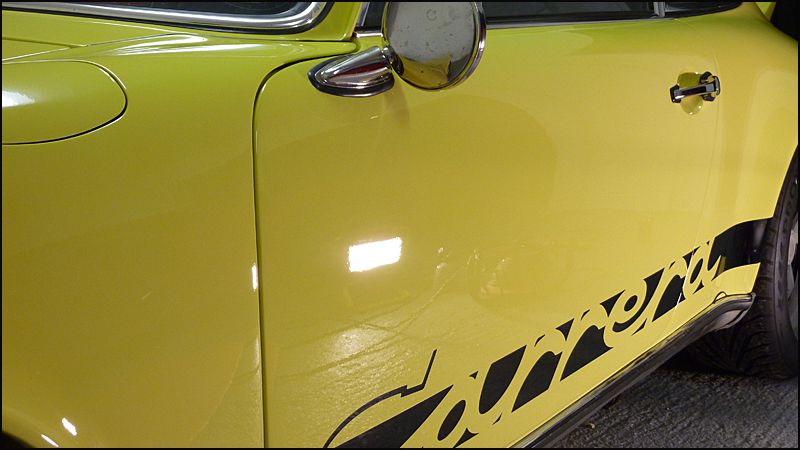
50/50- left side corrected
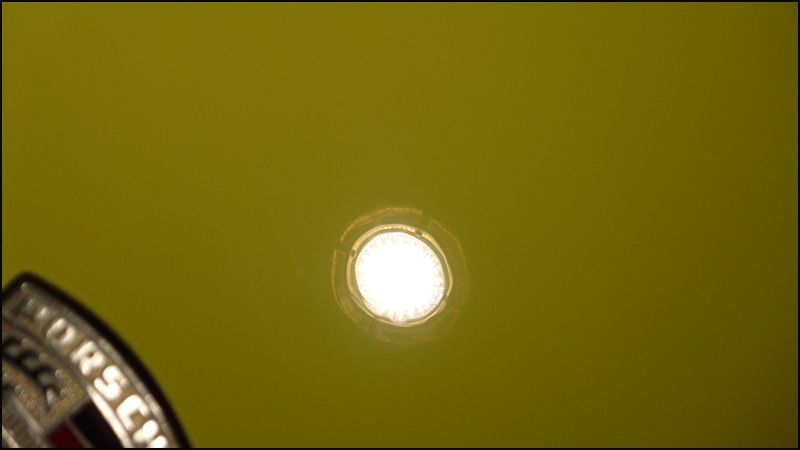
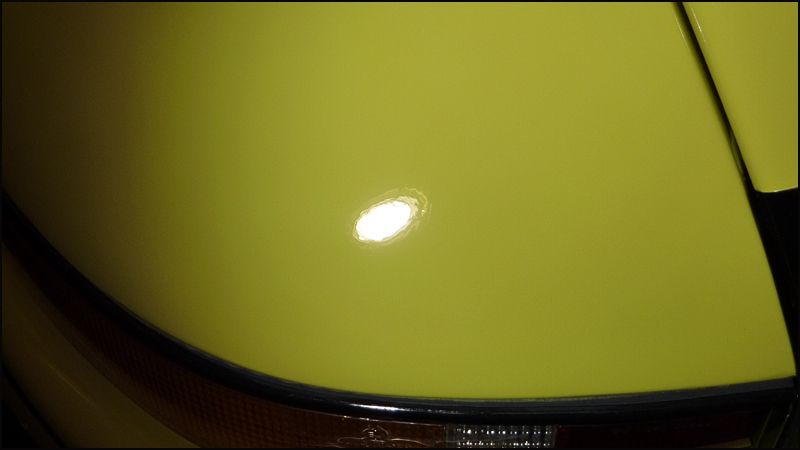
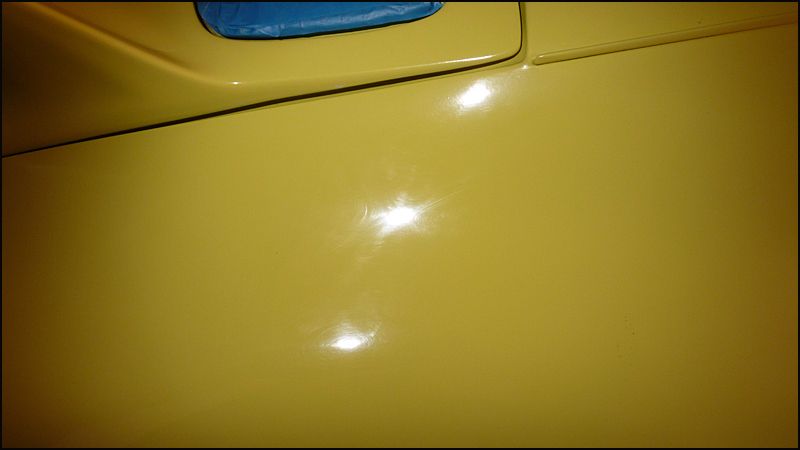
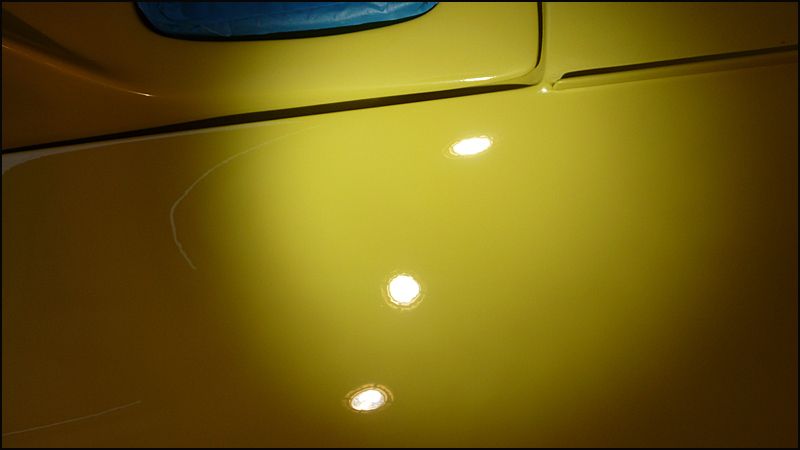
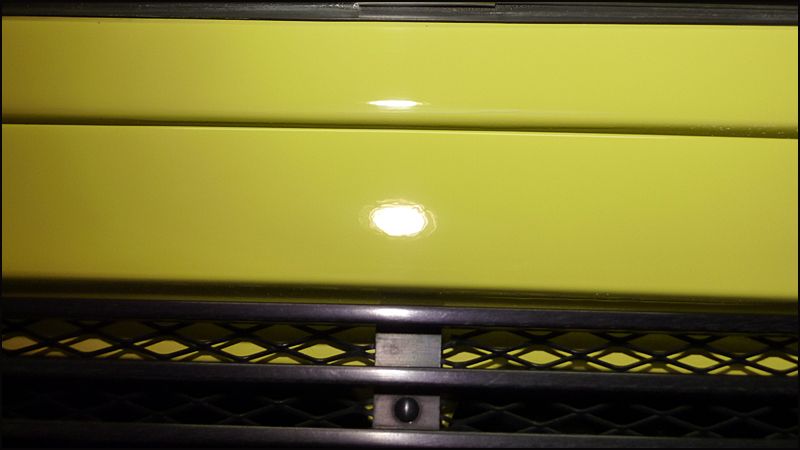
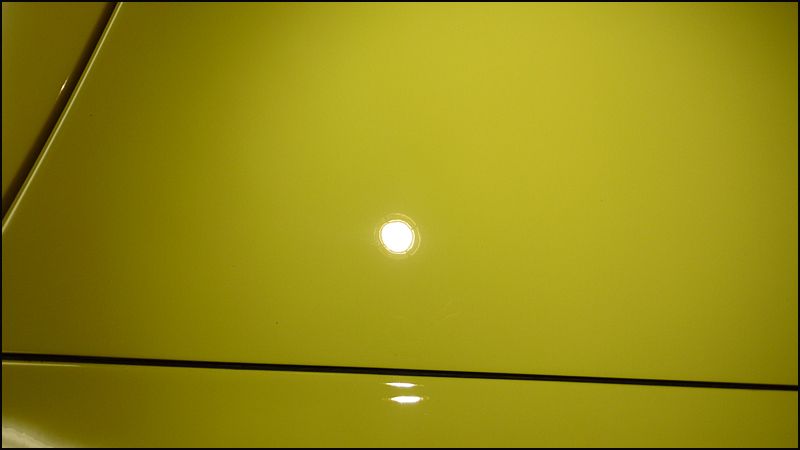
Few "before and after" shots

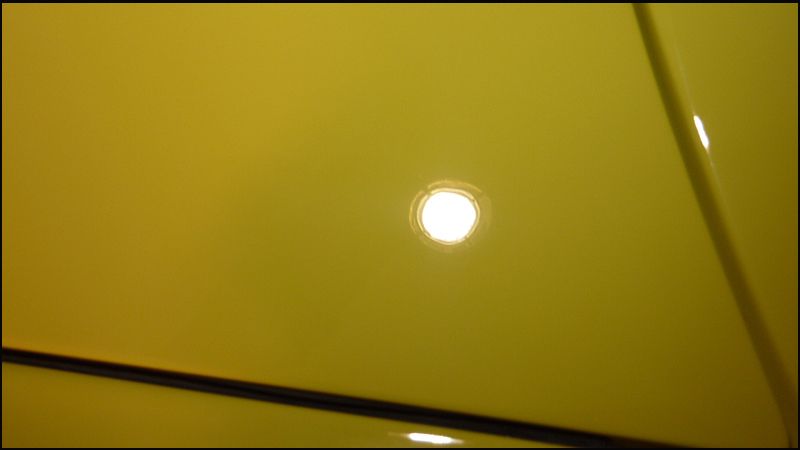
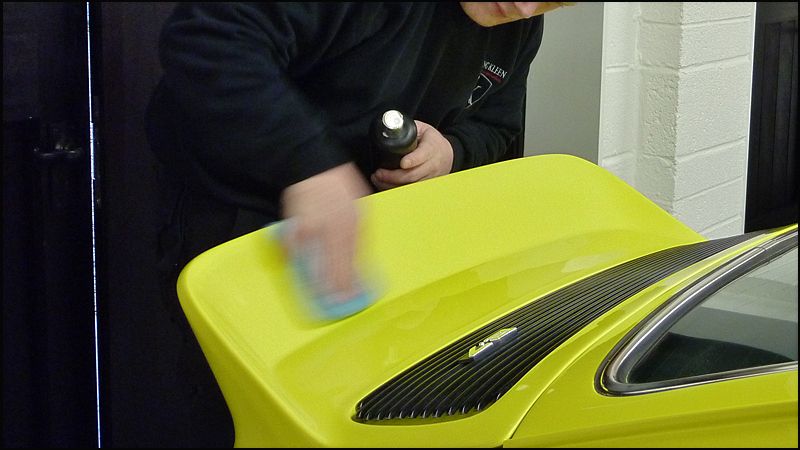
Once all correction was complete paint was refined with Megs 205

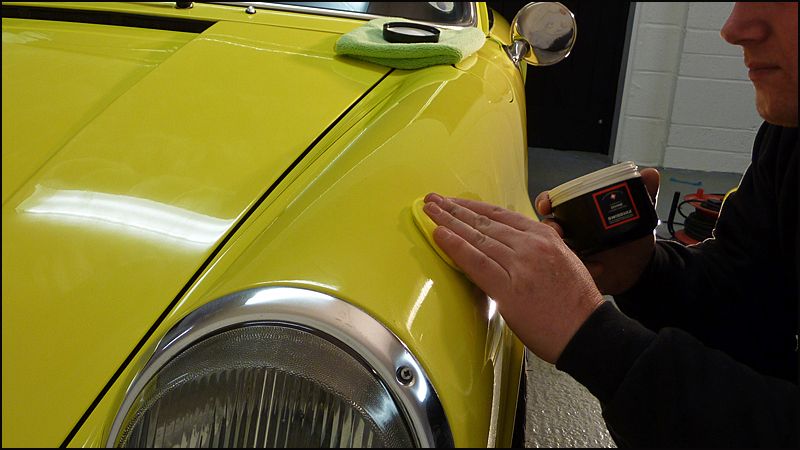
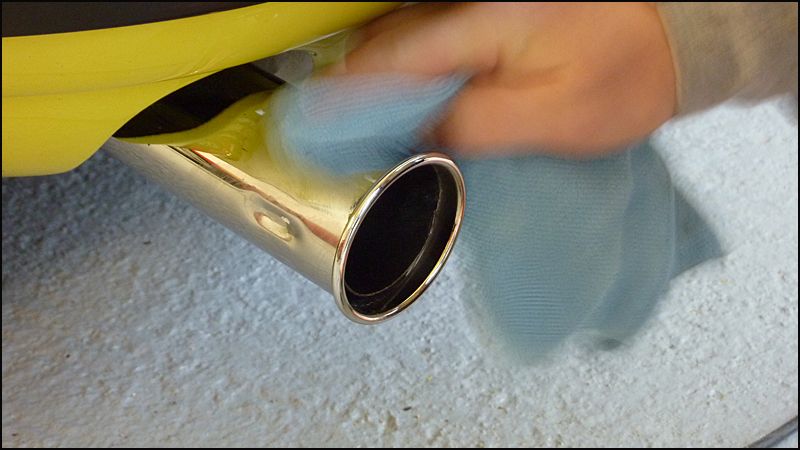
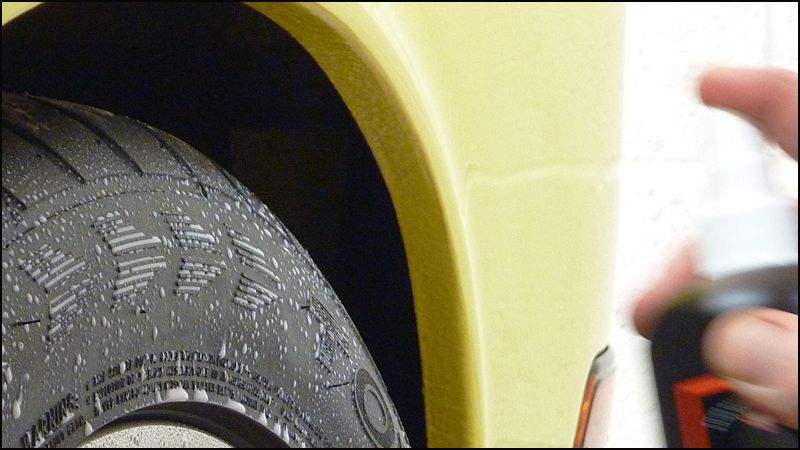
One all machine polishing stages were complete Swissvax Cleaner Fluid was applied to all paint work including door jambs and then the first coat of Swissvax Divine was applied (first coat). This was left to cure whilst I carried on with some of the smaller jobs like polishing the exhausts and conditioning all the seals with Swissvax seal Feed, applying Swissva Autobahn to the wheels and dressing tyres with Swissvax Pneu.

After a hour or so wax was buffed off and then the following morning a second coat of Swissvax Divine was applied which was then later buffed off after working on the interior. Few hours later paint was wiped down with Swissvax Quick Finish.
For those that do not know about the history of the RS
The legendary Carrera RS is widely regarded to be one of the greatest, if not the greatest roadgoing Porsche ever. The 1973 Carrera RS is sought after by collectors worldwide and is considered by many to be the best 911ever produced. It?s precision handling, light weight, powerful engine and classic lines are what makes this the ?holy grail? of 911s. Its primary purpose was to homologate the car for competition use, which required the construction of a minimum of five hundred examples within twelve months. Eventually, the cars proved to be so popular that the production run was expanded several times, with an eventual total of 1580 (1308 were touring version) cars being built. The cars themselves featured larger more powerful engines, flared rear wheel arches to accommodate wider wheels, numerous deletions and alterations to reduce weight, improved suspension, and a few cosmetic alterations, which would become the car?s trademark. With its distinctive contrasting striping and wheels and the simple and functional ?burzel? or ducktail, the styling of the RS is iconic.
The incredibly successful history of the Carrera RS is far too long to chronicle here. Suffice it to say that it won the Daytona 24 hours even before it was homologated. A few weeks later it was victorious in the Sebring 12 hours and later in 1973 won the Targa Florio. Porsche finished the year as joint European GT Champions with a host of other race and rally victories to its name
0-60 MPH in just 5.5 seconds with a top speed of 150 MPH.
2.7 Liters
210 HP
188 Ft. Lb of Torque
Weight: 1075 kg (the sport lightweight even lighter)
This car was first owned by british racing driver John Fitzpatrick
Car received the usual pre-wash, wash and decontamination stages
This shot was cropped to show the actual condition of the paintwork
50/50- left side corrected
Few "before and after" shots
Once all correction was complete paint was refined with Megs 205
One all machine polishing stages were complete Swissvax Cleaner Fluid was applied to all paint work including door jambs and then the first coat of Swissvax Divine was applied (first coat). This was left to cure whilst I carried on with some of the smaller jobs like polishing the exhausts and conditioning all the seals with Swissvax seal Feed, applying Swissva Autobahn to the wheels and dressing tyres with Swissvax Pneu.
After a hour or so wax was buffed off and then the following morning a second coat of Swissvax Divine was applied which was then later buffed off after working on the interior. Few hours later paint was wiped down with Swissvax Quick Finish.