TTBear
Allan F
Hi everyone,
After years of lurking around, and gleaning massive amounts of information from you all, I put up a post in the intro section, and was welcomed by many - thanks! Much appreciated.
I have been an enthusiast detailer for quite some years. I recall very vividly, in early university, thinking how smart I was by running a regular, run-of-the-mill window squeegee over the entire car, thinking I was being super efficient, and also, drying off a freshly washed car with paper towels at the car wash, as I had forgotten my chamois (which was one of those brutal, leather things.... that was never washed.... :blink")
Fast forward to present, and after gaining a considerable amount of knowledge through others' eyes, I think I know enough such that most cars wouldn't cause me much in the way of anxiety!
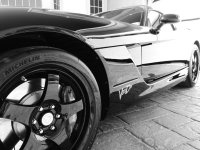
Over the past few weeks, i have been busy! I mostly do our own cars and friends' cars - we have a group of guys and girls that drive exotics, and I have started to do some of their cars. In the last couple months, I have had the pleasure of detailing a Gallardo LP-560 (my car), Dodge Challenger SRT, Lotus Esprit, Mercedes AMG SLK55.
I don't do this as a profession. I admire those that can - the attention to detail is phenomenal, and something to which I aspire.
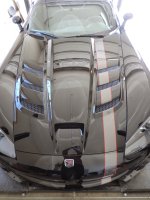
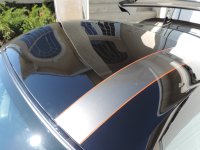
That said, my latest, and definitely most challenging car to date, was a friend's 2010 Viper ACR Voo Doo edition - number 10 of 31. The main problem with the car, was that the owner's German Shepherd decided that it would be a good idea to jump up ONTO the hood, then scramble up OVER the roof, and finally sit on the rear deck lid, resting his paws on the rear spoiler, thus gaining a fantastic vantage point of the back yard through the garage window!
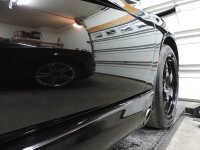
I took my time with this one. It proved to be quite complex - hard, hard paint, but it easily marred, even with buffing off the residual polish. The general condition of the paint was just okay, with several fine scratches all over, and most worrying, LOTS of scratches over the creases and edges, which I was very leery of attacking! I probably could have picked a better car on which to learn wet sanding, but as they say, "no guts, no glory"!!
I also just received my Flex PE8, and found it AMAZINGLY useful. Even on a setting of 1 or 2, however, I found that I was getting a fine haze and holograms (even on the lowest setting - from what I have read, this isn't entirely surprising?)
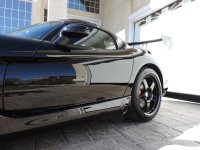
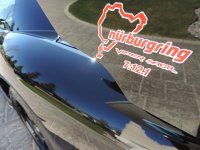
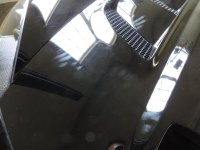
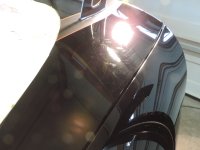
This was fairly representative of of scratches over the entire vehicle:

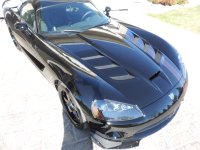
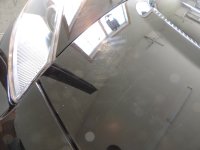
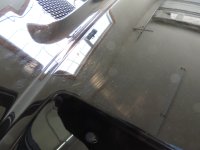
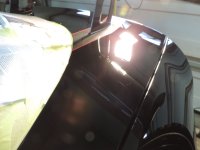
This is how some of the pooch's claw marks looked, after the owner tried to remove them, a bit:


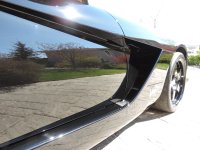
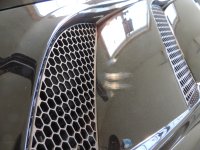
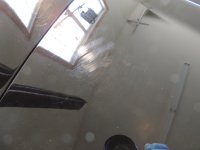
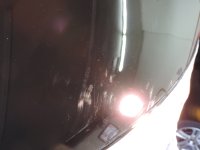
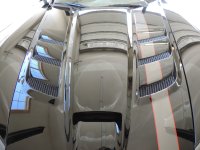
A couple more defect pics:


Ummmmm, I am a little bit lax at taking "after" shots....... clearly.
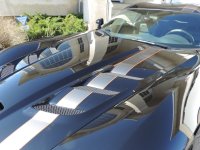
Here's a set of before and after shots that I did remember to take:


(The "after" one is the one on the bottom...... :rofl)
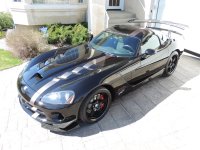
And here's what I ended up with - like I said, I don't do this for a living (obviously, haha), but I enjoy every moment that I can devote to it, immensely - it appeals to my OCD side, and it gives me GREAT satisfaction to do something for my friends, who have done so much for me.
The hood was a BEAR. There were six areas of claw marks, that needed to be wet sanded. That, and the fact that the hood is shaped in such a complex manner, made it very involved. To do it well, I used the PE8 with a 2" orange pad/Menzerna SIP, followed by hand application with Menzerna Micro Polish in the tight areas. Also, on a Viper forum, I found a debate over whether one needed to tape off the stripes on the hood/roof rear deck/rear spoiler. I can confirm that the stripes are painted on, and one can simply go at the area as a whole, without any need for taping. There was no build-up of product along the edges, at all.
After years of lurking around, and gleaning massive amounts of information from you all, I put up a post in the intro section, and was welcomed by many - thanks! Much appreciated.
I have been an enthusiast detailer for quite some years. I recall very vividly, in early university, thinking how smart I was by running a regular, run-of-the-mill window squeegee over the entire car, thinking I was being super efficient, and also, drying off a freshly washed car with paper towels at the car wash, as I had forgotten my chamois (which was one of those brutal, leather things.... that was never washed.... :blink
Fast forward to present, and after gaining a considerable amount of knowledge through others' eyes, I think I know enough such that most cars wouldn't cause me much in the way of anxiety!
Over the past few weeks, i have been busy! I mostly do our own cars and friends' cars - we have a group of guys and girls that drive exotics, and I have started to do some of their cars. In the last couple months, I have had the pleasure of detailing a Gallardo LP-560 (my car), Dodge Challenger SRT, Lotus Esprit, Mercedes AMG SLK55.
I don't do this as a profession. I admire those that can - the attention to detail is phenomenal, and something to which I aspire.
That said, my latest, and definitely most challenging car to date, was a friend's 2010 Viper ACR Voo Doo edition - number 10 of 31. The main problem with the car, was that the owner's German Shepherd decided that it would be a good idea to jump up ONTO the hood, then scramble up OVER the roof, and finally sit on the rear deck lid, resting his paws on the rear spoiler, thus gaining a fantastic vantage point of the back yard through the garage window!
I took my time with this one. It proved to be quite complex - hard, hard paint, but it easily marred, even with buffing off the residual polish. The general condition of the paint was just okay, with several fine scratches all over, and most worrying, LOTS of scratches over the creases and edges, which I was very leery of attacking! I probably could have picked a better car on which to learn wet sanding, but as they say, "no guts, no glory"!!
I also just received my Flex PE8, and found it AMAZINGLY useful. Even on a setting of 1 or 2, however, I found that I was getting a fine haze and holograms (even on the lowest setting - from what I have read, this isn't entirely surprising?)
This was fairly representative of of scratches over the entire vehicle:
This is how some of the pooch's claw marks looked, after the owner tried to remove them, a bit:
A couple more defect pics:
Ummmmm, I am a little bit lax at taking "after" shots....... clearly.
Here's a set of before and after shots that I did remember to take:
(The "after" one is the one on the bottom...... :rofl)
And here's what I ended up with - like I said, I don't do this for a living (obviously, haha), but I enjoy every moment that I can devote to it, immensely - it appeals to my OCD side, and it gives me GREAT satisfaction to do something for my friends, who have done so much for me.
The hood was a BEAR. There were six areas of claw marks, that needed to be wet sanded. That, and the fact that the hood is shaped in such a complex manner, made it very involved. To do it well, I used the PE8 with a 2" orange pad/Menzerna SIP, followed by hand application with Menzerna Micro Polish in the tight areas. Also, on a Viper forum, I found a debate over whether one needed to tape off the stripes on the hood/roof rear deck/rear spoiler. I can confirm that the stripes are painted on, and one can simply go at the area as a whole, without any need for taping. There was no build-up of product along the edges, at all.
Attachments
-
 DSCN3513.JPG399.6 KB · Views: 247
 -
 DSCN3514.JPG474.4 KB · Views: 240
 -
 DSCN3517.JPG430.2 KB · Views: 238
 -
 DSCN3515.JPG419.6 KB · Views: 239
 -
 DSCN3516.JPG377 KB · Views: 240
 -
 DSCN3518.JPG412.9 KB · Views: 237
 -
 DSCN3519.JPG355 KB · Views: 237
 -
 DSCN3520.JPG407 KB · Views: 239
 -
 DSCN3521.JPG397.3 KB · Views: 238
 -
 DSCN3539.JPG446.4 KB · Views: 20
Last edited: