Navigation
Install the app
How to install the app on iOS
Follow along with the video below to see how to install our site as a web app on your home screen.
Note: This feature may not be available in some browsers.
More options
Style variation
You are using an out of date browser. It may not display this or other websites correctly.
You should upgrade or use an alternative browser.
You should upgrade or use an alternative browser.
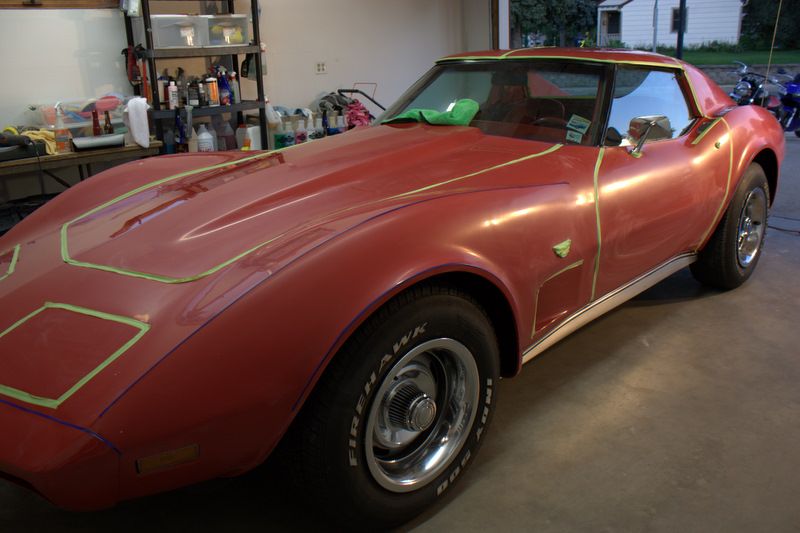
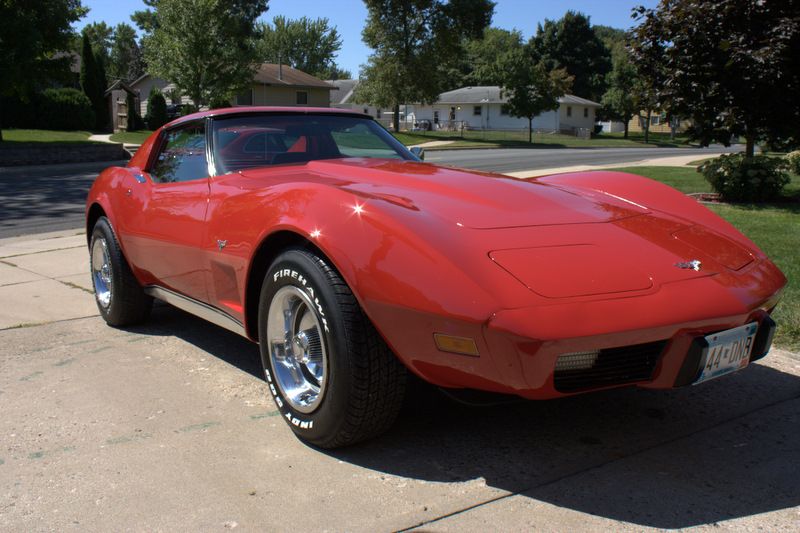
Dirk Diggler rides again! ?77 Corvette, full wet sand and buff by Rasky?s Auto Detail
- Thread starter bbquer
- Start date
imported_RaskyR1
New member
For those of you who may be wondering who Dirk Diggler is, I strongly recommend renting the movie ?Boogie Nights? ")
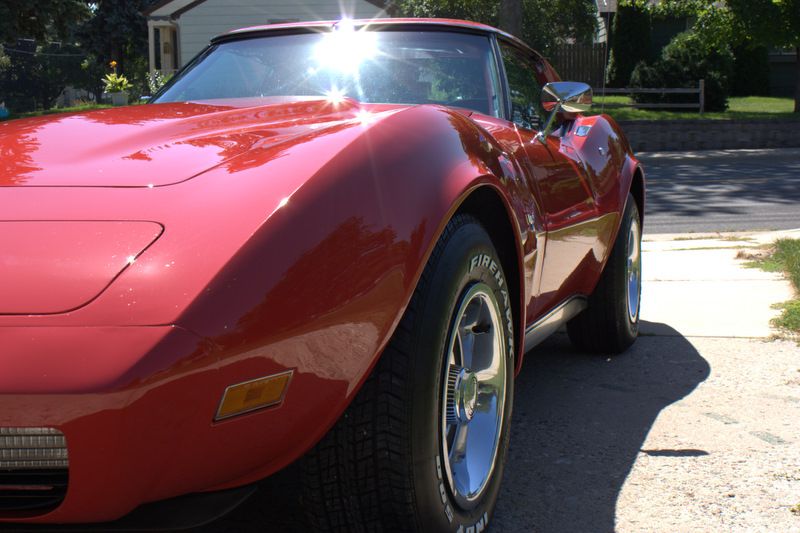
This 1977 Corvette belongs to the mother of my roommate. The car has been in the family for over 20 years now, but unfortunately it has not been driven in years. Since his mother can no longer drive the car they decided to get it running so they could try and sell it. As most of you already know, cars are meant to be driven, and when they are left to sit for long periods of time things start to go bad. Since my roommate is very mechanically inclined he offered to fix the parts that needed to be replaced prior to sale and also asked me if I?d help him restore the finish. Obviously I couldn?t say no to working on Dirk?s car!
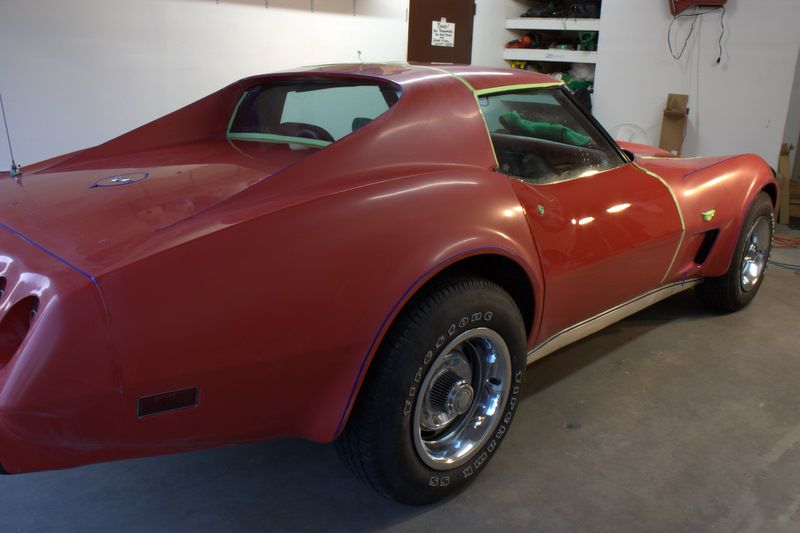
It had been over 10 years since the car was repainted and there was noticeable shrink in the paint as well as many washed induced swirls from over the years. Having talked with the painter we learned that there was at least 3 coats of clear used when it was painted and the car had only been lightly sanded after the initial repaint?which meant we should have a safe amount of paint to work with.")
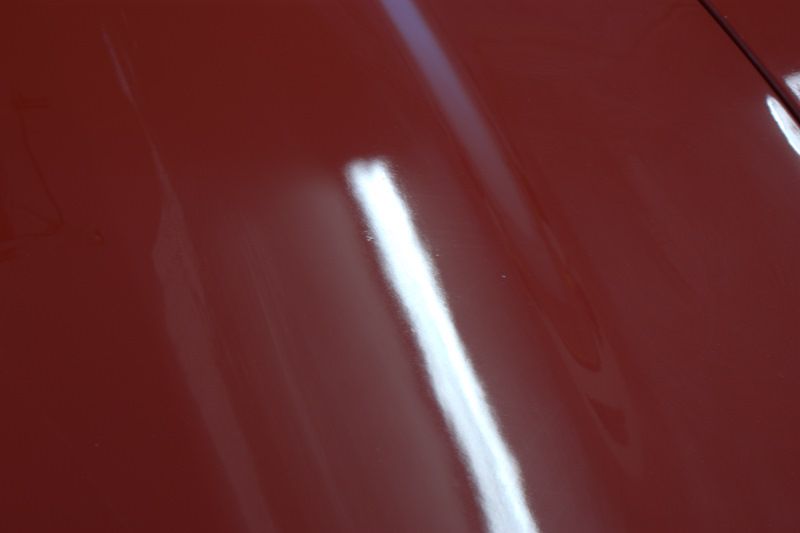
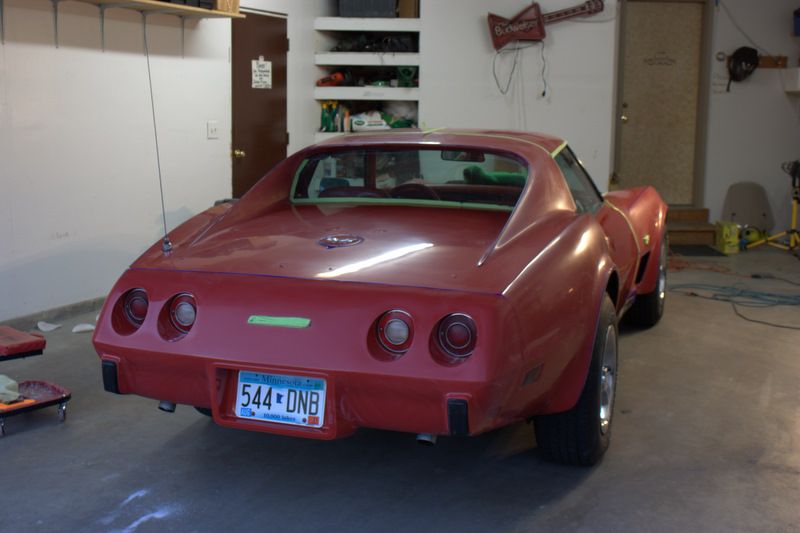
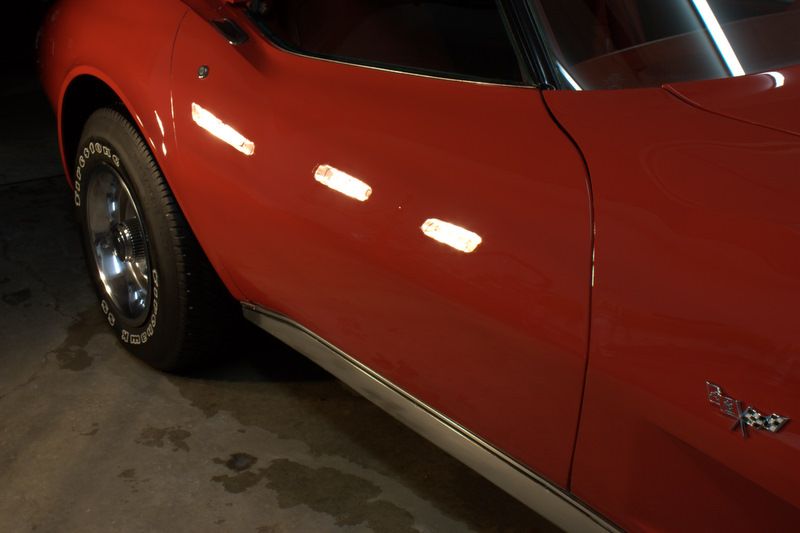
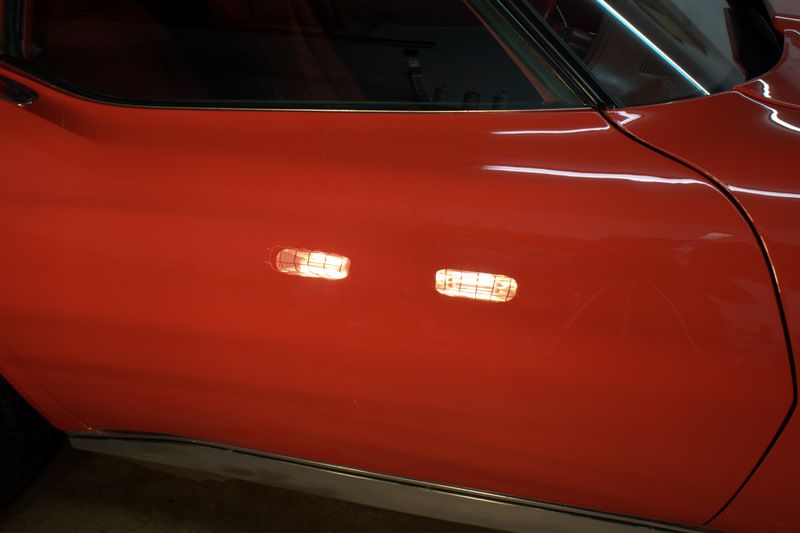
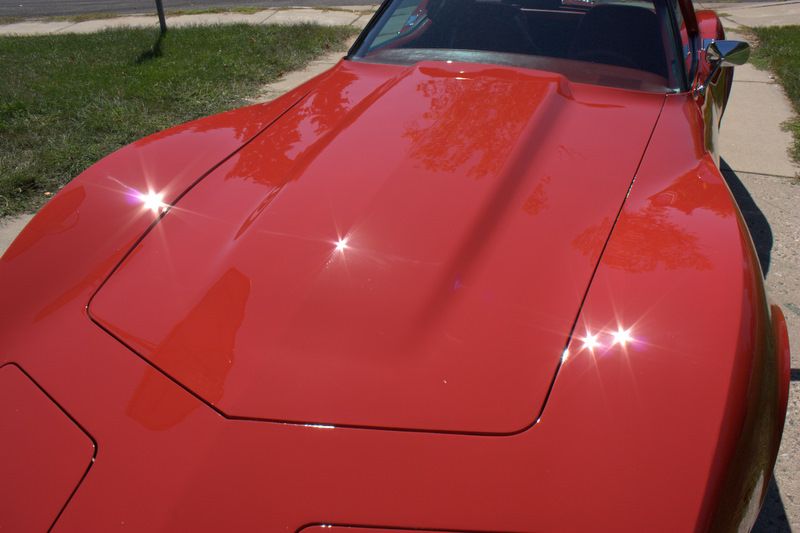
Here is the car prior to correction. As you can see there is heavy marring and light oxidation in the paint.
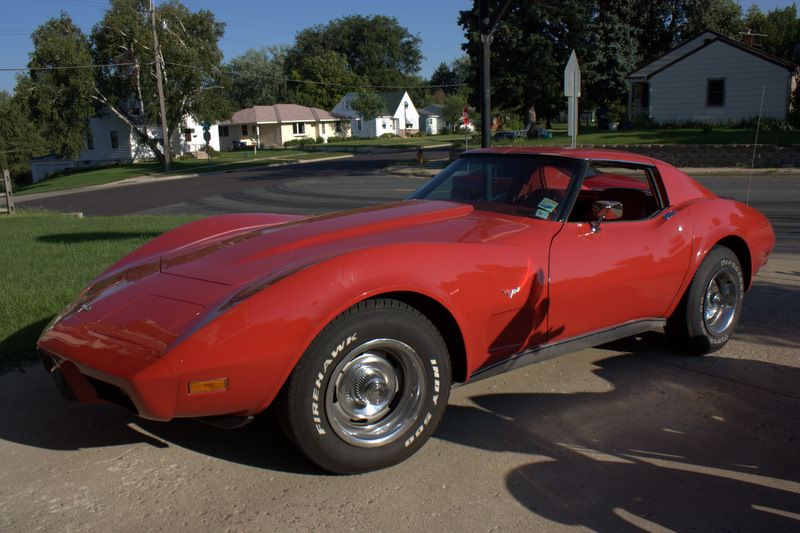
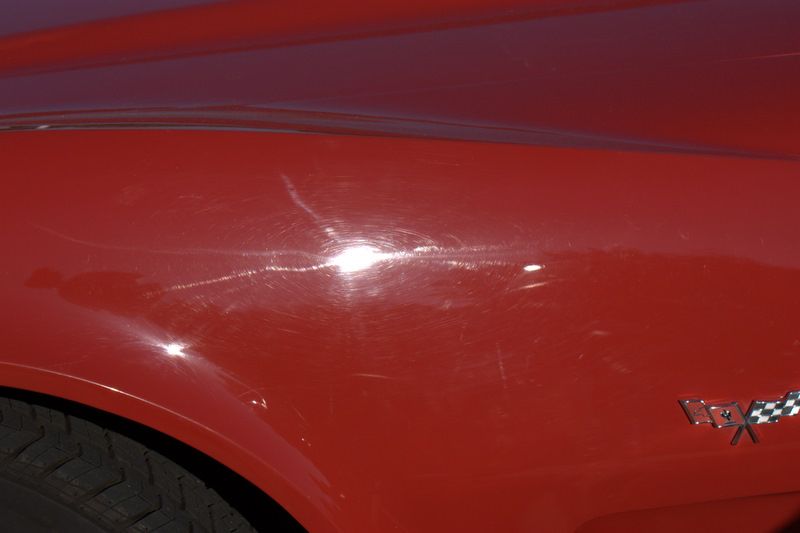
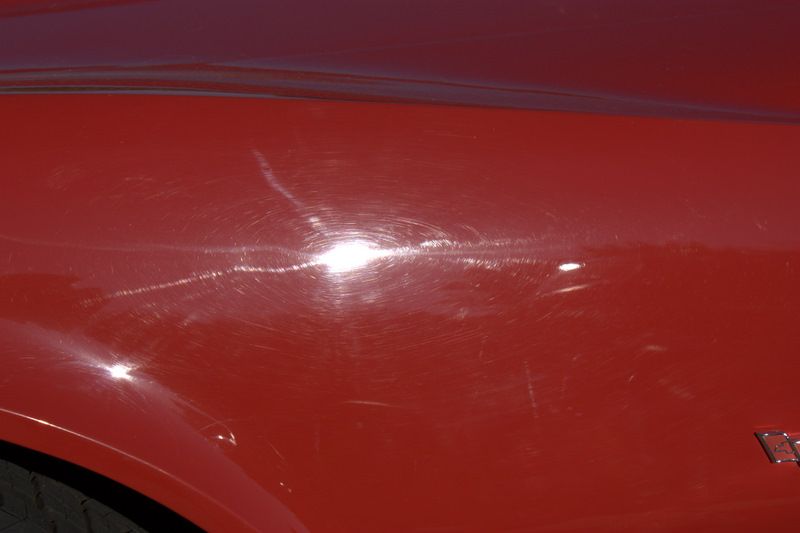
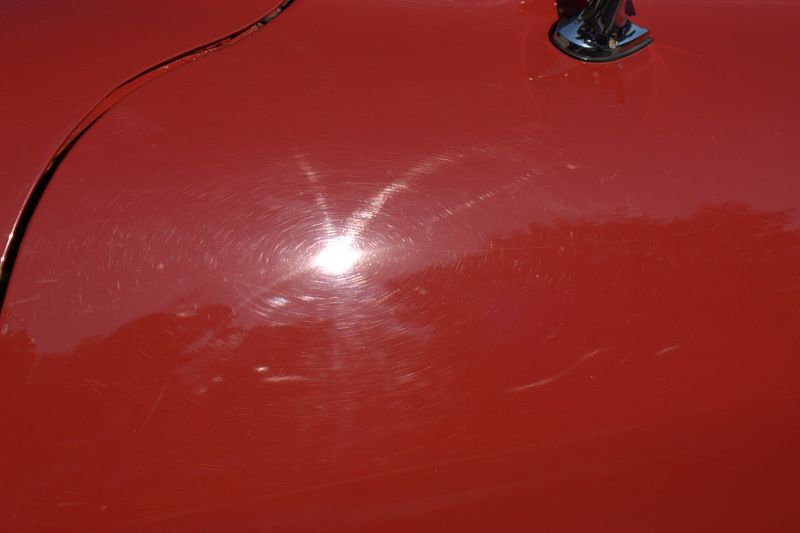
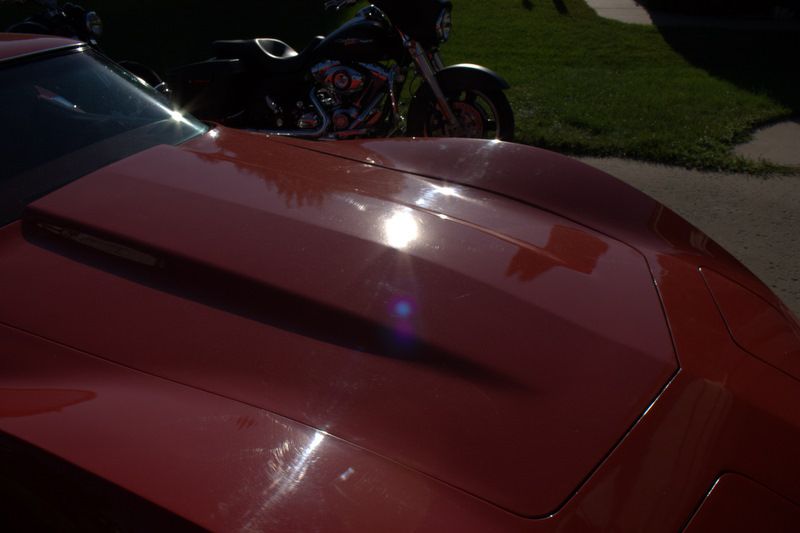
Here you can see the rough distorted texture of the paint as a result of the shrinking over the last 10 years.
We first did a few test panels using various grit paper to determine which route we wanted to go with.
The deciding sanding process was to use the following:
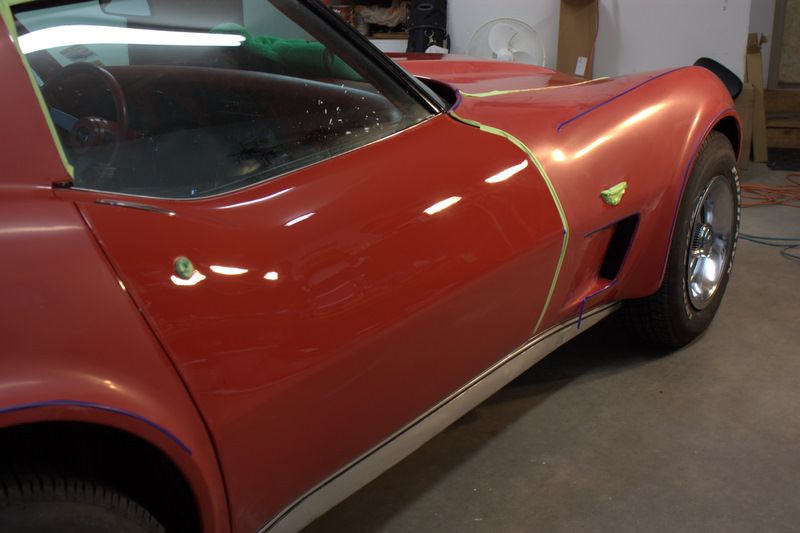
Initially I had planned to remove the sanding scratches with the PCXP and Surbuf pads as it worked effortlessly in my test panel. I also felt it was a tool my roommate could handle. However, once I started looking at all the sharp edges it was clear that the rotary would be the better option as it allows me to buff off/away from the edges, which is necessary when trying to remove sanding scratches close to the edge.
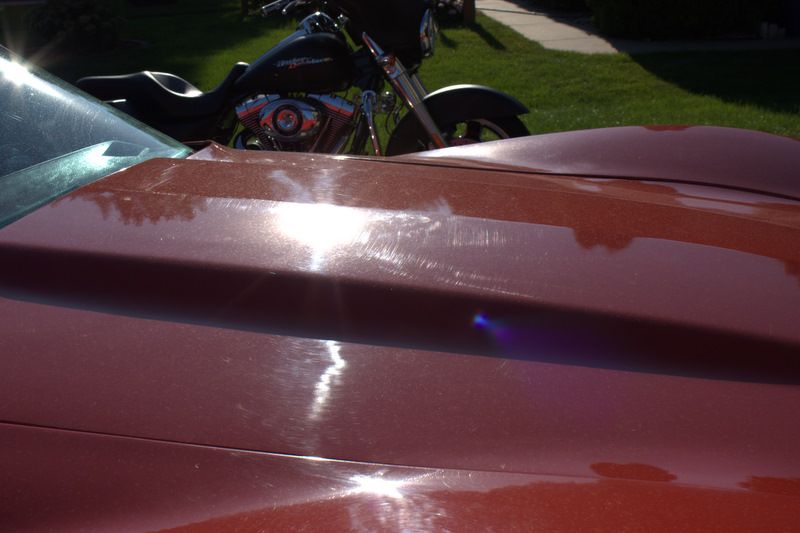
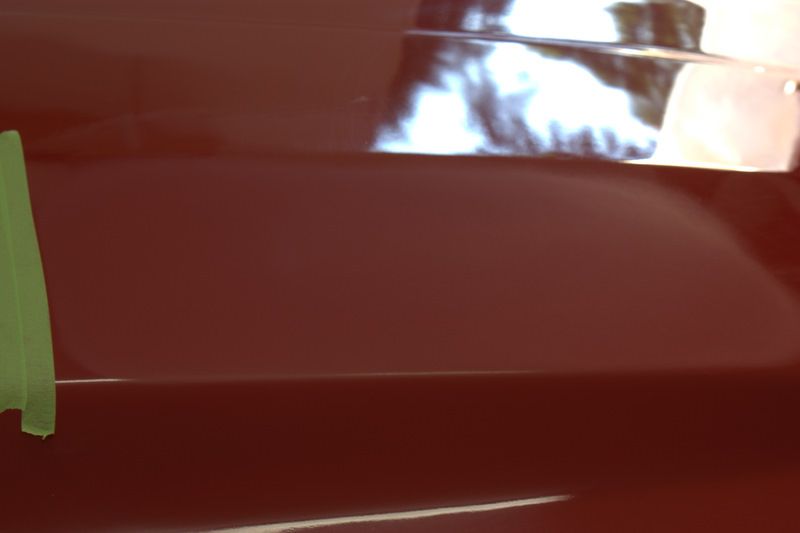
Sanded pics
Testing out the Surbuf pads on the door
The deciding polishing process for the sanding scratch removal was as follows:
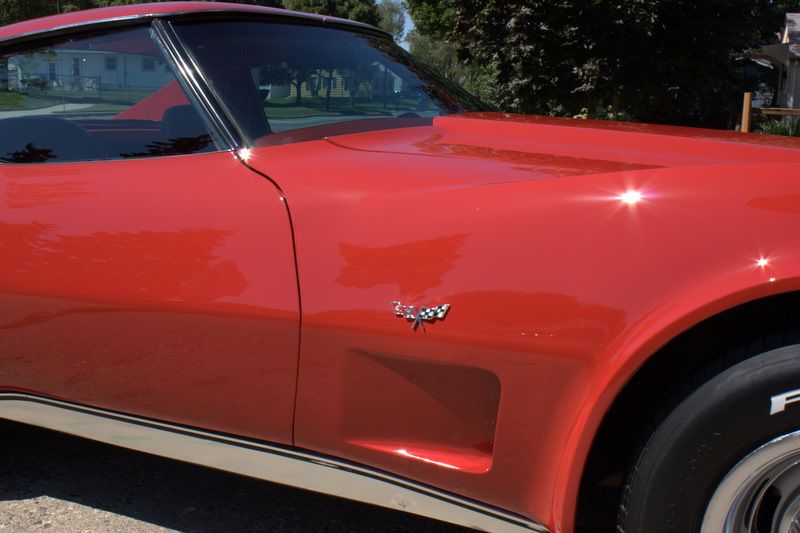
Our choice for LSP was Blackfire Wet-Diamond, tires were clean with Optimum Power Clean and dressed with Meguiars Hyper Dressing. All chrome trim was polished with Optimum Metal Polish.
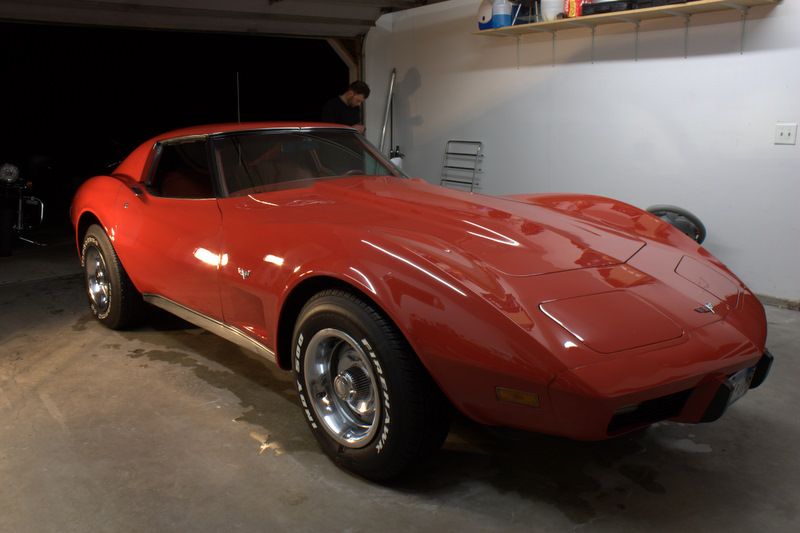
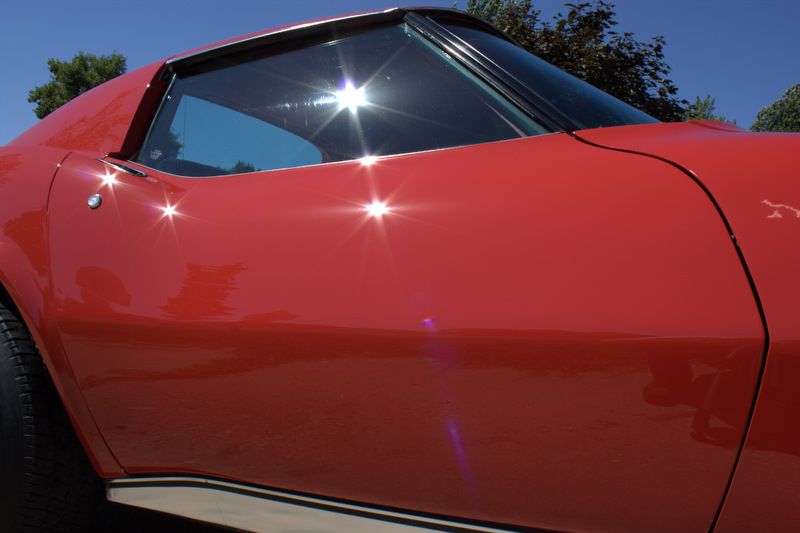
Keep in mind this job was really under the gun, which limited the amount of pics I was able to take. The work on this car took place over 3 evenings after we both finished with our regular jobs. The idea was to get the car done by Friday so that he could drive it home for a family wedding to show his mom and family. A total of 15hrs were spent on this job, which is far less than I would normally spend as I like to take my time and hate being rushed. I did have the help of my roommate though, and he handled all the fine detailing and even helped with the 2nd polishing step. We finally finished late Thursday night and I came back on my lunch break Friday afternoon to take some sun pics before he left town. I decided to do a quick wipe down with some Z8 to remove any light dust which ended up streaking the paint a little and I really didn?t have time to deal with it before taking the pics?I?m sure you can see it in a few of them?
This 1977 Corvette belongs to the mother of my roommate. The car has been in the family for over 20 years now, but unfortunately it has not been driven in years. Since his mother can no longer drive the car they decided to get it running so they could try and sell it. As most of you already know, cars are meant to be driven, and when they are left to sit for long periods of time things start to go bad. Since my roommate is very mechanically inclined he offered to fix the parts that needed to be replaced prior to sale and also asked me if I?d help him restore the finish. Obviously I couldn?t say no to working on Dirk?s car!
It had been over 10 years since the car was repainted and there was noticeable shrink in the paint as well as many washed induced swirls from over the years. Having talked with the painter we learned that there was at least 3 coats of clear used when it was painted and the car had only been lightly sanded after the initial repaint?which meant we should have a safe amount of paint to work with.
Here is the car prior to correction. As you can see there is heavy marring and light oxidation in the paint.
Here you can see the rough distorted texture of the paint as a result of the shrinking over the last 10 years.
We first did a few test panels using various grit paper to determine which route we wanted to go with.
The deciding sanding process was to use the following:
- 3M 1500 grit on the PCXP
- Mirka Abralon 2000 grit on the PCXP
- Mirka Abralon 4000 grit on the PCXP
Initially I had planned to remove the sanding scratches with the PCXP and Surbuf pads as it worked effortlessly in my test panel. I also felt it was a tool my roommate could handle. However, once I started looking at all the sharp edges it was clear that the rotary would be the better option as it allows me to buff off/away from the edges, which is necessary when trying to remove sanding scratches close to the edge.
Sanded pics
Testing out the Surbuf pads on the door
The deciding polishing process for the sanding scratch removal was as follows:
- M105 via rotary with Meguiars Solo wool pad (finished out very nice too)
- Menzerna Power Finish via PCXP and Cyan LC pad (roommate helped with this step)
- Menzerna 106fa via rotary and Crimson LC pad
Our choice for LSP was Blackfire Wet-Diamond, tires were clean with Optimum Power Clean and dressed with Meguiars Hyper Dressing. All chrome trim was polished with Optimum Metal Polish.
Keep in mind this job was really under the gun, which limited the amount of pics I was able to take. The work on this car took place over 3 evenings after we both finished with our regular jobs. The idea was to get the car done by Friday so that he could drive it home for a family wedding to show his mom and family. A total of 15hrs were spent on this job, which is far less than I would normally spend as I like to take my time and hate being rushed. I did have the help of my roommate though, and he handled all the fine detailing and even helped with the 2nd polishing step. We finally finished late Thursday night and I came back on my lunch break Friday afternoon to take some sun pics before he left town. I decided to do a quick wipe down with some Z8 to remove any light dust which ended up streaking the paint a little and I really didn?t have time to deal with it before taking the pics?I?m sure you can see it in a few of them?
imported_RaskyR1
New member
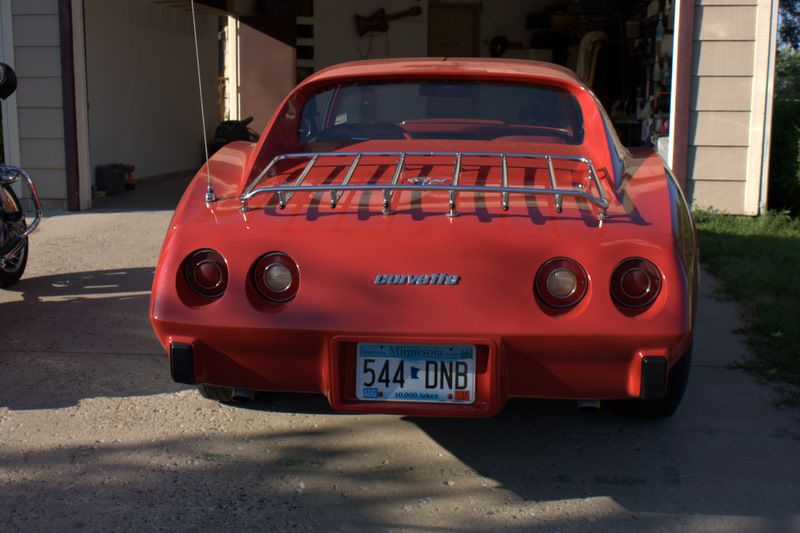
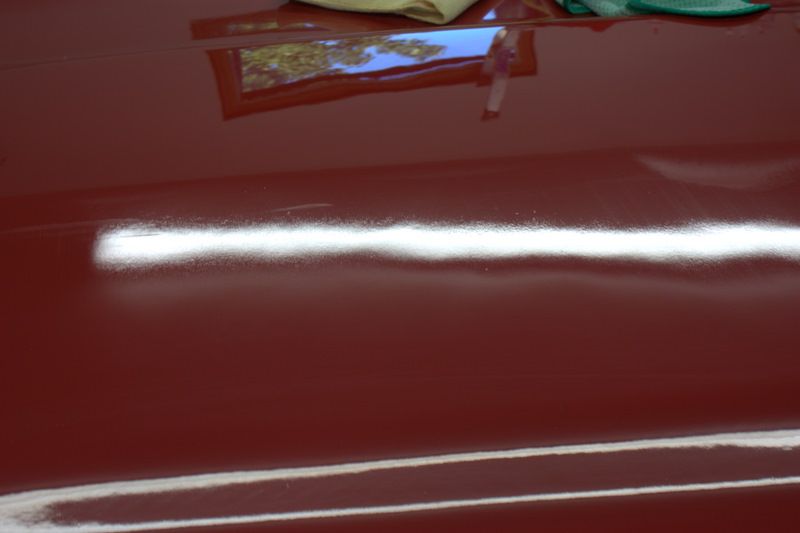
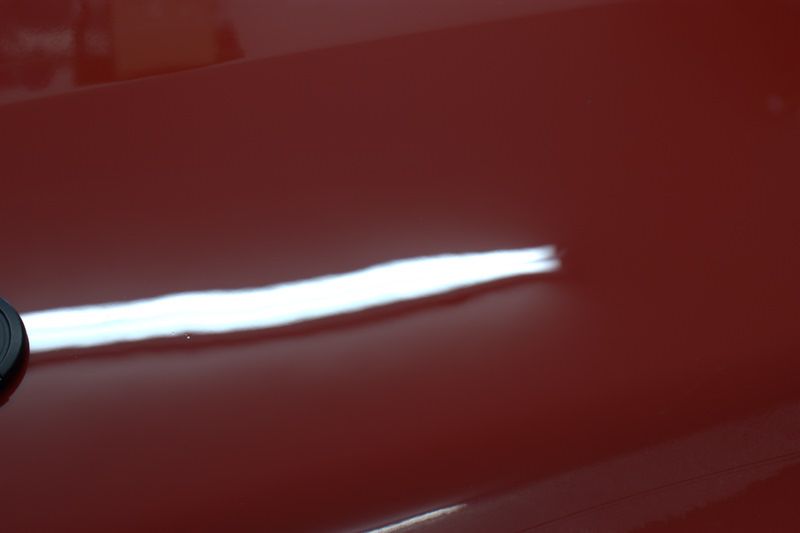
After pics
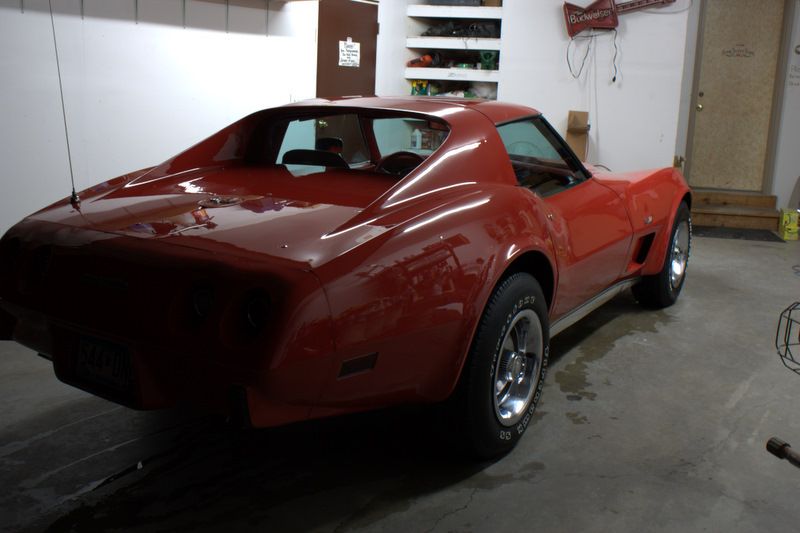
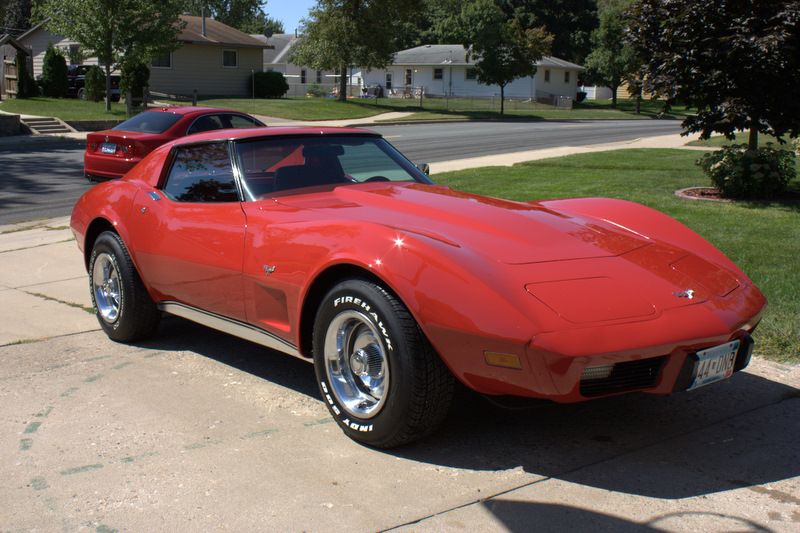
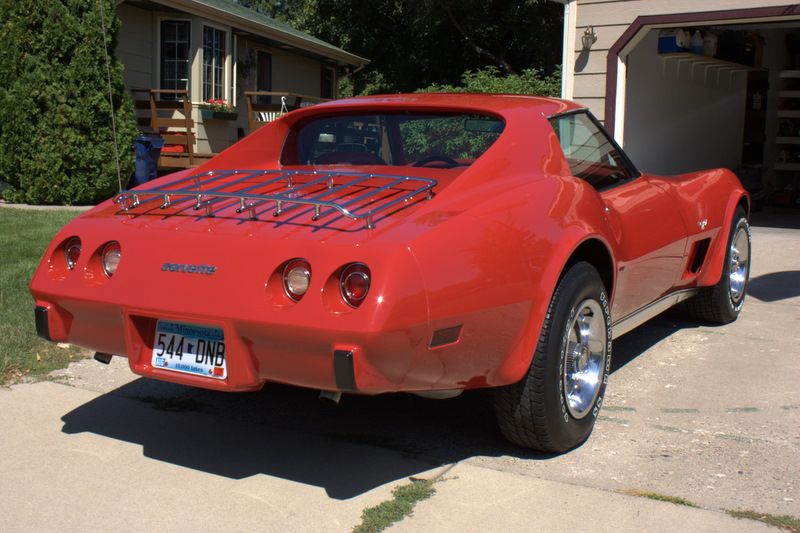
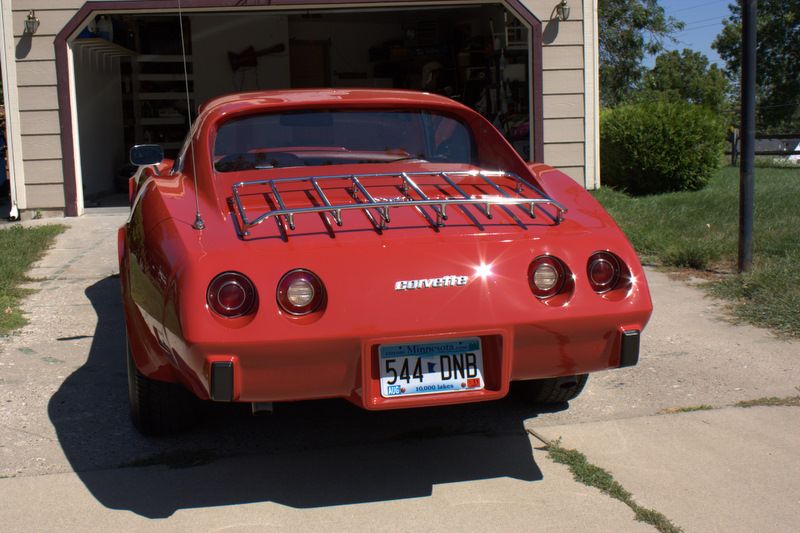
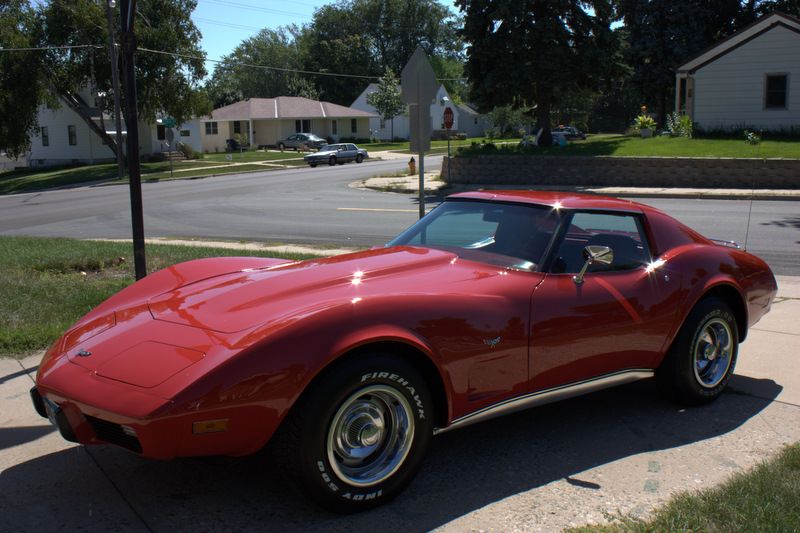
As always, thank you for taking the time to view my work.
Rasky
As always, thank you for taking the time to view my work.
Rasky
imported_Flash Gordon
New member
Very nice work Chad. She looks like she just rolled out of the paintbooth yesterday. Very nice work indeed @-)
On a side note. I burned through the LF fender on a vette that was very similar to this one over 20 years ago. I will never forgive myself for that one
On a side note. I burned through the LF fender on a vette that was very similar to this one over 20 years ago. I will never forgive myself for that one
bmw5541
New member
Hey Chad,
You have a roomate? Didn't you just get married? Does your wife know about said roomate?:devil:
It is hard to see from the pictures that there are any flaws on the car, but there is one thing that I was able to see. The car looked a million times better then it did before.:clap:
Very nice work as always Chad!!:thumbup:
imported_Luster
New member
Hey Rasky... there's living proof that you CAN bring an ole beater Corvette back to life! Nice work... the Vette looks great!ancing Dot:
ancing Dot:imported_RaskyR1
New member
Very nice work Chad. She looks like she just rolled out of the paintbooth yesterday. Very nice work indeed @-)
On a side note. I burned through the LF fender on a vette that was very similar to this one over 20 years ago. I will never forgive myself for that one
Thanks Flash!
It definitely doesn't take much to burn through one of those edges that's for sure. That 1/8 and 1/4 3M tape is perfect for those areas....expensive stuff though!
Hey Chad,
You have a roomate? Didn't you just get married? Does your wife know about said roomate?:devil:
It is hard to see from the pictures that there are any flaws on the car, but there is one thing that I was able to see. The car looked a million times better then it did before.:clap:
Very nice work as always Chad!!:thumbup:
LOL! Thanks Barry!
I guess I should call them renters now instead of roommates, though they have lived with me for 7 years now. I still have my home but have moved in with the wife. She sends me back over there when I'm bad!
Hey Rasky... there's living proof that you CAN bring an ole beater Corvette back to life! Nice work... the Vette looks great!
Thanks Bill! I figured you'd like this one being similar to your baby and all.
I should add one other funny bit to this story....
My roommate purchased his cell phone many years ago and at the time his best friend work at the Sprint store. I **** you not, his mail came to my house addressed as "Dirk Diggler" and even caller ID came up that way! I know his mail changed now to his real name but I think caller ID still comes up as Dirk! Made for some hilarious phone calls back in the day when we ordered Pizza!
Rasky
Street Dreams
New member
Outstanding work on a great car!
And boogie nights is an awesome movie!
And boogie nights is an awesome movie!
....A total of 15hrs were spent on this job
15 Hours! I couldn't have done that in 15 days.
That was quite an after hours undertaking - nice work. :clap:
Jack
imported_RaskyR1
New member
Outstanding work on a great car!
And boogie nights is an awesome movie!
Thanks Dave!
Awesome movie indeed! :thumbup:
15 Hours! I couldn't have done that in 15 days.
That was quite an after hours undertaking - nice work. :clap:
Jack
Thanks Jack! I did have help too don't forget.
imported_glfahlc
New member
i have this affinity for red vettes and you made that one look like new paint... great job... has she sold it yet and for how much
imported_RaskyR1
New member
i have this affinity for red vettes and you made that one look like new paint... great job... has she sold it yet and for how much
Thank you!
Not sold yet...honestly I don't think he even has it listed yet. He said he'd like to get $12k for it but with the economy in the crapper I don't see that happening anytime soon.
It's got 82,xxx original miles (L48/auto). The interior is in great shape and the only area I saw that needed work was the drivers side carpet which has a hole worn from the heal of her shoes. I know he just performed around $3k in mechanical work, which is almost all parts as he did all the work minus the alignment (rear end, brakes, master cylinder, shocks, drive shaft, belts, hoses, plugs, wires, air/fuel filter, and I believe a few bushings...exhaust was also replaced prior to going in storage so it's like new too).
GoFast908Z
New member
Thats how a red corvette is supposed to look. Perfect.
imported_Auto Concierge
New member
BRILLNESS:notworthy: