Continuing Struggle: 2006 Evo 9 Tarmac Black

sc_S13

New member
Hey guys, so I'm posting this a little before it's done but I figured it would be an ongoing update for the next couple weeks.

Here is my arsenal (for now)
PC 7424XP
Washing: Optimum No-Rinse, Sheepskin wash mitt (falling apart, buying Chenille Wash mitt right now!), two bucket system, but only 1 grit guard. Dried with Cobra Supreme Guzzler towel
Claying: Sonus Clay, Megs QD
Polish/Compound: Megs #83, M205, Megs Softbuff 2.0 Black/Yellow/Burgundy
Finishing: DG 105, FK 1000P
Misc: Megs #40

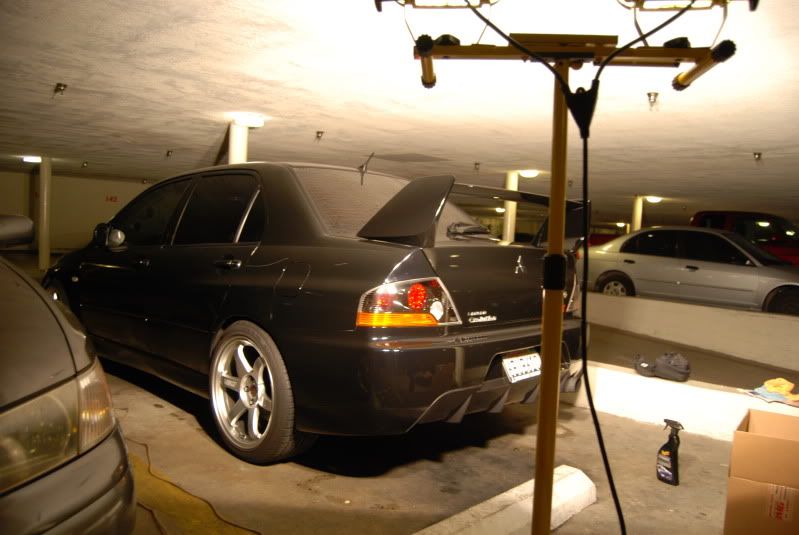
Here's how she sat prior. Note my awesome setup :D

DSC_0190.jpg

DSC_0197.jpg


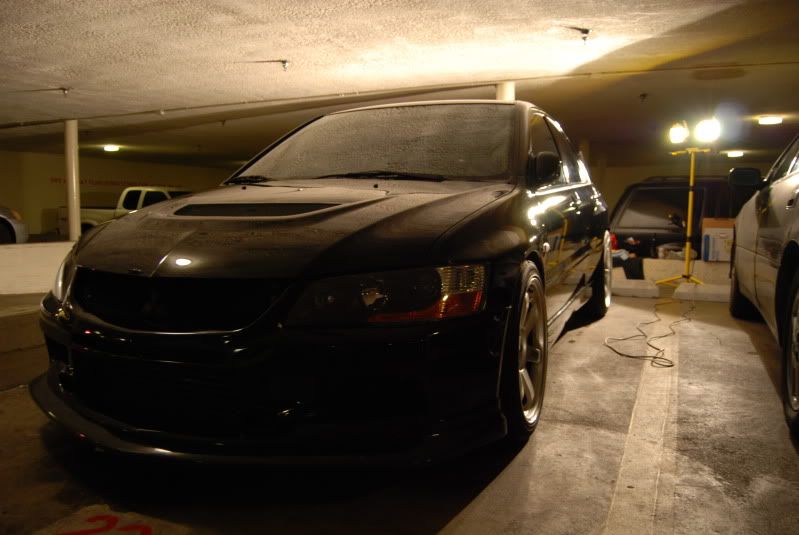
This is after the ONR and Clay. I'm not sure but I might've clayed wrong? I've watched a couple videos and am pretty sure I executed it right. Maybe I did sections too large?
Here's how the clay looked like after a about 3-4 passes on a one spot, probably the dirtiest on the entire car.
IMG_0931.jpg

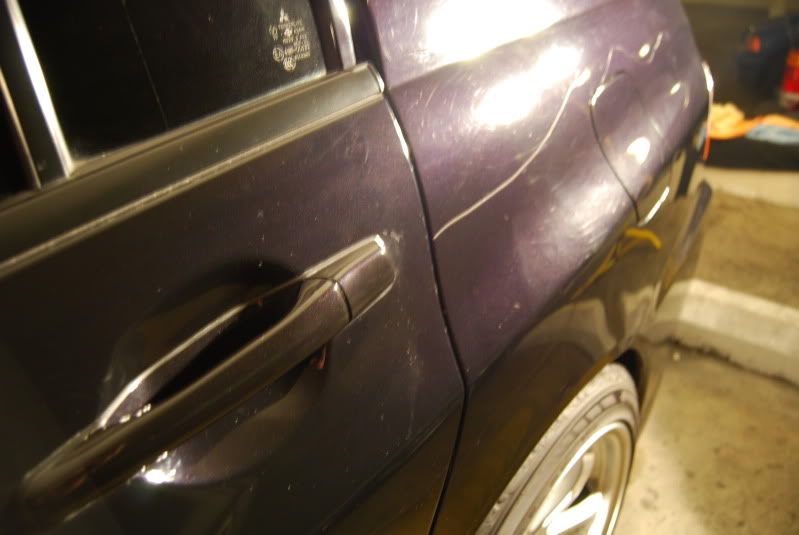
I kneaded and reformed (flattened out with my fingers and pulled apart, would eventually fold into half and keep kneading and stretching) often and used plenty of QD on the surface and on the clay. Yet I feel like it left swirls and scratched in my clear :wall

DSC_0195.jpg

DSC_0194.jpg


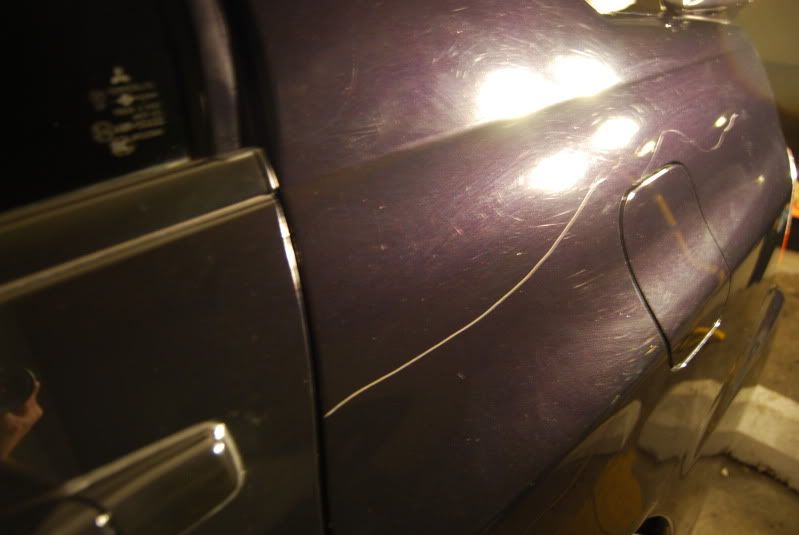
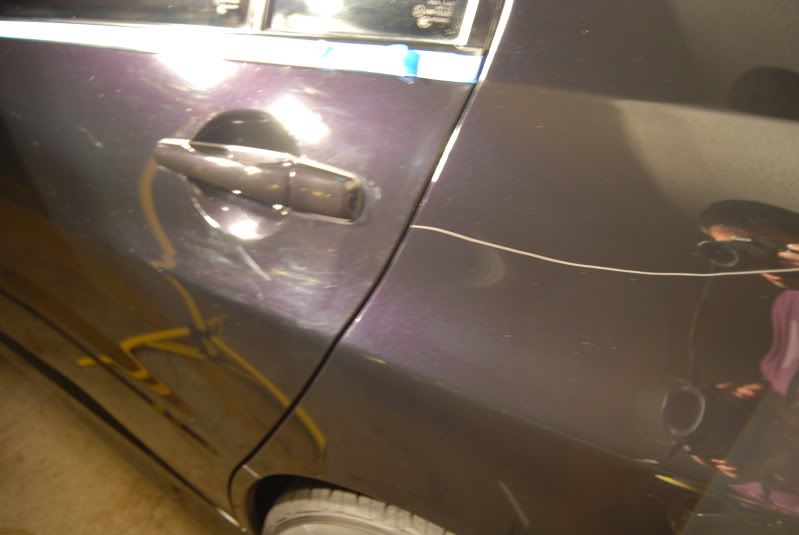
Here's the best spot I could capture on my d40x. (the long white scratch is from haters keying my car. I have one on my trunk and a deep one on my rear bumper as well :()

Now, this is the first time I've ever used a DA polisher so I was a little shaky on technique and mainly pressure at first. Started out with M205 and a 7" Megs Polishing pad :wall but I switched to the 4" pads. Gave me a chance to probably make some technique mistakes without doing anything irreparable.
Primed the pad by putting some product on and rubbing it vigorously into the pad (Not sure if I needed to do so since I spread the product around slowly, see below).
Did a couple passes on 2 to spread the 205 out, then did a 2-3 firm passes on 4 before going to a couple lighter and faster passes on 6.

At first it wasn't doing anything, probably because I wasn't working the product enough and using too large of a pad. But after switching to the 4" pad I started seeing some results
BEFORE:
DSC_0202.jpg

AFTER:
DSC_0203.jpg


50/50:
DSC_0204.jpg

DSC_0205.jpg


Can't tell but there are still some scratches I assume are RDS, I'm thinking of switching to 83 and the yellow or burgundy pads. Thoughts? I desire that perfect surface!!!

I haven't finished the car yet...I was working until 2am last night and I have class for most this week. I'm going to use the DA to apply DG 105 and the 1000P eventually. But I wanted to get some of your opinions on my technique and what not and if I could improve or prevent scratches in the future, specifically in the claying.

Here's a list of my future order that I'll be putting in later:
LC Tangerine/Crimson/Red 5.5" pads
D300 and MF pads
Pad cleaning brush (been using MF towels to clean)

I'll be updating as I eventually finish the car and seal it and add the wax!
 
Depending on what you used before hand the claymay have just cleaned out the scratches that were all ready there. I'm not familiar with the Mcguires to believe 205 is the milder of the polishes and you might just not be getting enough swirl removal from that stepping up to megs 105 might be better before you continue on with the wax. Owning a black car is a lesson in patience that is sure. When I had my black Firebird it was always a three-step detail as if you even thought about skipping and stuff you would end up Swirl marks and holograms
 
for only using 205 you got some good results. 205 is the finishing polish. step up to the 105 you will get the deeper swirls out. you will then have to go back over it with 205 to remove the marring left behind. or another thing you can try is go 1 step more aggressive with the pad you are using and try the 205 again. the pad will give you a little extra cut
 
M105 will get you better cut to help with more of those RIDS. Just be careful and don't try to go after EVERY blemish. You don't want to thin the paint too much and not have any room to work with in the future. On that note, if you plan on spot repairing those key marks you should do those first. That way any sanding or polishing to blend it doesn't further thin the clear. It also allows for better adhesion of the paint since polish can remain in the scratch and smooth the edges a bit, giving the paint less surface to adhere to.

Also, smart stepping down in pad size. The 7" on a PC would likely have taken you a lot longer to get the cut you are looking for. A 5.5" pad may be better, though. Slightly less cut than the 4", but better/more even coverage in roughly same amount of time.
 
I think you are seeing a dramatic improvement, particularly for just M205. Stepping up to D300 and the microfiber pads is going to make a huge improvement in the amount of cut (defect removal) and significantly reduce the time required to get the results you are after.

Focus on good technique, move the machine slowly, use firm pressure, and work in smooth overlapping passes. I would not recommend increasing speed and reducing pressure at the end of your passes, with a DA this can be counter productive as it forces the pad to move in a 'sharper' motion that can be detrimental to the finish. Instead keep your pressure firm and reduce speed. You may find this thread helpful: http://www.autopiaforums.com/forums...acheive-flawless-finish-m205-da-polisher.html

Also, have realistic expectations about the finish you will achieve. Perfection is usually only obtainable (or at least reasonable) on cars that will rarely be driven, will never get to dirty, and washed infrequently. If you settle for really really really good you will keep a lot of the valuable clear coat on your paint, it will look amazing, and you will not negatively impact the life of the paint.
 
Thanks for the advice guys. I was a tad disappointed with the initial results, but definitely stoked that I was removing a bulk of the swirls. I'm probably just going to use M205 on the the entire car and use the D300 on the worst spots (just ordered it, shipped out today!!) It's daily driven so I do intend to preserve the most clear possible.

I'm really looking forward to sealing it with DG105 and DG605 (also ordered and shipped out today!) and putting on the 1000P after. Will update this thread soon and take some better pics out in the sun when complete!
 
The 2003 Evo that I polished had the softest paint I have encountered. It was very, very thin as well. My process was D300/5" mf cutting disc, M205/5.5" tangerine hydro tech pad, Menzerna PO85RD/5.5" black pad all on the Griot's DA. Heavy pressure did not go over well with that paint. I would clean the panels with ONR in between steps with the softest towel you have. I used a 25% IPA mix with Cobra Indigo towels and it marred the paint, switched to PakShak Ultra Edgeless with the same results. Be patient, you will get there. You may get frustrated from time to time but don't give up, because when you finish and it shines better than new you won't stop smiling.
 
Looks like you are making good progress with the products you are using. I would consider touching up the scratches with paint to make them less noticeable.

Like Todd said you need to be realistic with the results you expect. Perfection is hard to attain and isn't realistic for a car thats driven regularly. The fact that it is black will make it even harder.
 
The 2003 Evo that I polished had the softest paint I have encountered. It was very, very thin as well. My process was D300/5" mf cutting disc, M205/5.5" tangerine hydro tech pad, Menzerna PO85RD/5.5" black pad all on the Griot's DA. Heavy pressure did not go over well with that paint. I would clean the panels with ONR in between steps with the softest towel you have. I used a 25% IPA mix with Cobra Indigo towels and it marred the paint, switched to PakShak Ultra Edgeless with the same results. Be patient, you will get there. You may get frustrated from time to time but don't give up, because when you finish and it shines better than new you won't stop smiling.

I saw that thread, with the white Evo right? I just ordered the D300 system but it won't get here until next week along with the super plush Griot's buffing towels :( Going to try to see how the light cutting pad with the M205 works and will use #83 if necessary. My roommate has a 03 white Evo, so I'll try out the D300 on his car and try to mimic your skills and post it up soon too!

BTW I ordered the normal LC orange pad as well, does it have too much cut compared to the tangerine pad? Wasn't sure if the 205 was water-based or not so does it make that much of a difference?
 
The rear bumper? That was dried QD dripping down from the trunk, I was slow to wipe it up :cool:

Gotcha, just curious what it was.

I saw that thread, with the white Evo right? I just ordered the D300 system but it won't get here until next week along with the super plush Griot's buffing towels :( Going to try to see how the light cutting pad with the M205 works and will use #83 if necessary. My roommate has a 03 white Evo, so I'll try out the D300 on his car and try to mimic your skills and post it up soon too!

BTW I ordered the normal LC orange pad as well, does it have too much cut compared to the tangerine pad? Wasn't sure if the 205 was water-based or not so does it make that much of a difference?

Orange may have a little more cut, where the HT shines is that it will finish much better, probably better for your soft paint. Ive never worked on an EVO. You have made some great progress, just look at your before and after.
 
Gotcha, just curious what it was.


Orange may have a little more cut, where the HT shines is that it will finish much better, probably better for your soft paint. Ive never worked on an EVO. You have made some great progress, just look at your before and after.

^Great response. I actually did a black Evo too. I was just viewing the thread about the white one though, the detailer used the Werkstat products and man did it turn out awesome! Try to make the best of what you have first, if that is not working try something else. You never know when a paint/product combo will make your jaw drop, it could be something totally unexpected. And just to note, one of my favorite towels to remove D300 is the Griot's Garage Wax Removal mf towel.
 
Holly Molly!....... This is as big as my head it looks like! Why in the world is your clay bar the size of a foot ball?

IMG_0931.jpg
 
The Sonus bar is pretty big! I'm holding it up on two fingers so it probably distorts perspective a tad, but I kept kneading and stretching it out a bit as I folded the bar. Should I tear the bar in half when starting? I've seen some tutorials and I didn't know if a smaller bar size mattered or if thicker bars meant better dirt absorption? I don't know lol
 
My own clay approach is to take a 50g piece (big 200g clay block split 4 ways), flatten it out into a disc, spray lube on it and on the paint and start claying.

When the clay is dirty, I fold the clay's dirty side in on itself, flatten it out into a disc and continue. That way the contaminants are hidden in the core of the clay disc rather than spread around through random kneading and folding
 
Normally you do break the clay into smaller, more manageable pieces. That way, should you drop it, you don't lose all of your clay. (You drop it, you pitch it.)
 
Normally you do break the clay into smaller, more manageable pieces. That way, should you drop it, you don't lose all of your clay. (You drop it, you pitch it.)


Yes, thats the main reason I split it up. A 200 g. bar I usually break up into 3-4 pieces. Last longer that way.
 
Back
Top