Bumper Scuff

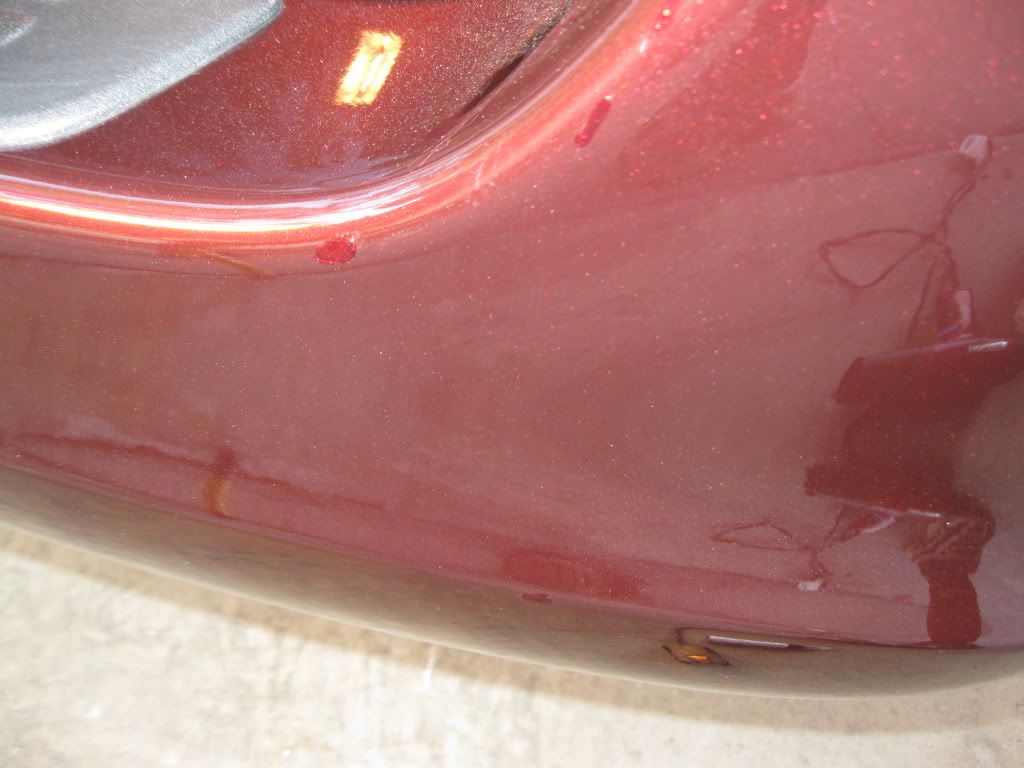
Great job at fixing this !

Hard to really see the chip clearly, but it would always look better if the paint in the chip was at the level of the surrounding paint.

Sometimes, it can be carefully either sanded wet, down just a tad, to knock off the edge line around the chip, and buffed out, or just buffed out carefully after its dry and polished.

What does the Client say? Is he ok with the work as it is? If so, leave it..

Good luck !
Dan F
******************

He thought it looked ok but wondered if I could blend it or smooth it. I am thinking of taping around chip and running the buffer to try and level chip.
 
SoonerFan -

I guess you can try to smooth it out, just remember that it has to be really completely dry there, and that this plastic piece is not going to release the heat from running a buffer on it very well.

I imagine if you try to do it like you said, and it pulls the touch up paint out, you can start over.

If you know what kind of paint this is, you can always get the appropriate reducer, etc., that was used to mix the paint originally, and carefully lay in several thinned down coats on the top to help soften and level the area too.

A camels-hair Sword Touch Up brush would be the best tool to use for this,

The absolute best touch up paint to use for chips in my experience, has always been Dr.colorchip.com. He sends the exact match, and another bottle of thinned down paint that will help mix the paint together with the original and leave a nice clearcoat gloss on top, so that there is hardly ever a need for buffing after its done.. I know you dont have time to get this product, good luck.

Dan F
***************
Thanks Dan. I will try my best to work it with some compound. Though I will present the choice of using Dr. Colorochip as another option at an added cost of course.
 
The picture is hard to make out but it looks like you may want to build it up more with coats so its more level.

The trouble with wet sanding is that the paints often sand at different rates and you dont get the desired results.

What I do is tape around the area and only sand the touch up area .(just like you had mentioned.)

Also I use a flat pencil eraser as a sanding block because its very small and hard yet flexible. Hopefully they will allow this link so you see what Im talking about.
http://content.etilize.com/Large/1011091029.jpg

Touch up never really comes out all that great IMO unless its single stage.

I have a 2 bottle touch up kit that a customer gave me called "touch up magic" that works pretty good . Im not sure its still available ,Ive had it forever.

**************

Sorry about the picture, the lighting was poor when I took it. Thanks for the tip. I am going to build it up today some more. It says that you can re-coat after 30 minutes. I was a little worry about sanding when the area is not level.
 
You may have to sand down the touchup paint carefully so the new paint will adhere properly. I dont know how long ago you did the first touchup but its something you might have to do.
 
You may have to sand down the touchup paint carefully so the new paint will adhere properly. I dont know how long ago you did the first touchup but its something you might have to do.
************
I am adding the second coat today just to build it up and will wet sand once I have it almost level and hopefully it will look even less noticeable. Should land me some more work if all goes well.
 
I brought along my halogens to get a better picture this time. I added a second and third thin coat. Used a blow dryer to help spread the paint. I think I should be ready for wet sanding in a couple of days.

IMG_2321.jpg
 
Wow thats really close to the edge and may be difficult to use a machine on . I would go with hand polishing to be safe and use a higher grit sand paper and go easy!
 
Wow thats really close to the edge and may be difficult to use a machine on . I would go with hand polishing to be safe and use a higher grit sand paper and go easy!
*************

I was thinking 1500 grit?? I am going to try either M105, UC or P091 for polishing.
 
Given the amount of paint that you had to put in there I would wait more than a couple of days. You want to make sure that all of the solvents have out gassed and the paint has shrunk as much as possible. Give it time, wait a couple of weeks (if you can) then look at it again. It may look like the paint has pulled back (more coverage is necessary) as it has continued to out gas. I have seen too much paint (and pulled too much paint) out of touch ups by not giving it the time necessary to cure. At least that is my experience, my story, and I am sticking to it! ;)
 
Given the amount of paint that you had to put in there I would wait more than a couple of days. You want to make sure that all of the solvents have out gassed and the paint has shrunk as much as possible. Give it time, wait a couple of weeks (if you can) then look at it again. It may look like the paint has pulled back (more coverage is necessary) as it has continued to out gas. I have seen too much paint (and pulled too much paint) out of touch ups by not giving it the time necessary to cure. At least that is my experience, my story, and I am sticking to it! ;)
*************
I will give it till the end of the week and observe for shrinkage. If it does, I will add another thin layer. The entire bumper is perfect other than the two blemished areas. The body shop had quoted him $400.00 to repaint.
 
Back
Top