Awesome Car, Awesome Shop, Awesome Detail! 08 Jaguar XKR Portfolio

First off I have used the search function but can't find an answer to my question, most of the stuff is "What is the best claybar?".


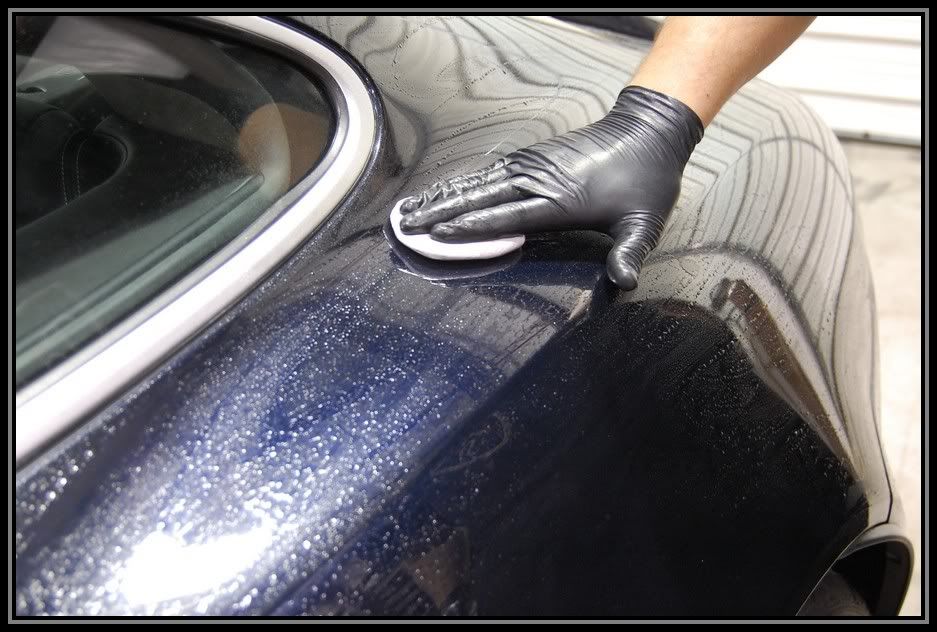
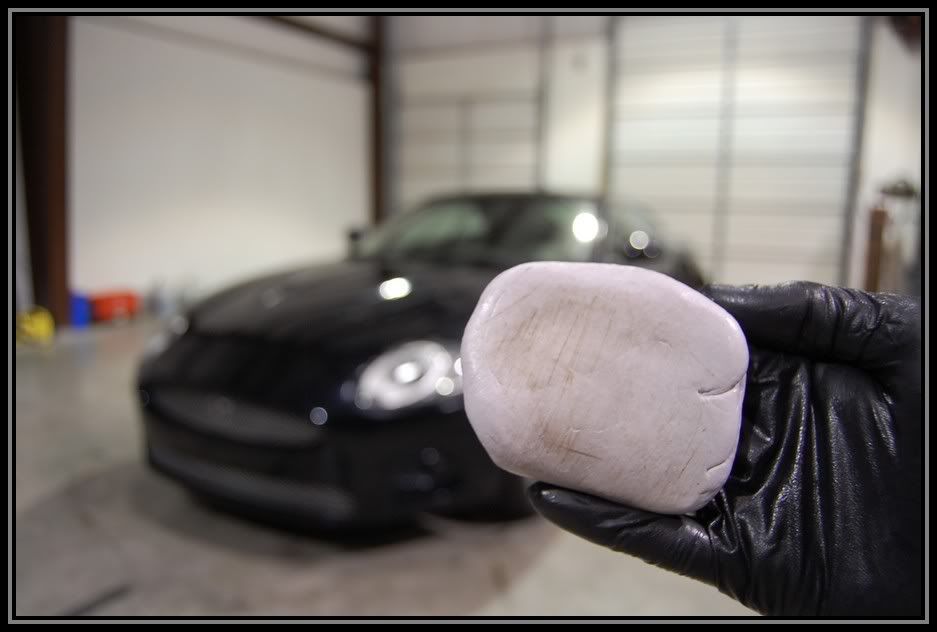
Ok now to my question, I have a zaino claybar coming with my order of zaino. How exactly do I use it? I plan on using a mixture of Z-7 zar wash and water as my lubricant. How much Z-7 and how much water do I need to mix together to use as my lubricant?


Also, after completing a section of my car with the clay do I immidiatly wipe it off with a towel and/or rinse it with water then wipe it off or do I just then move on to the next section and live the completed section as it is and come back and rinse off the whole car at one time after I have completed claying the whole car? Please give me your techniques and or suggestiong on what to do.


BTW, this is the first time I will be applying Zaino or any other type of polish or wax to my car if that matters.


Thanks

-01WS6
 
Well, I am far from an expert, but I clayed my car for the first time last week and it was real easy. I bought the Mother's brand from Wal-mart for $13.87 and it came with a bottle of QD and a small bottle of carnuaba wax. I did exactly as instructions told me: spray on QD, and rub clay in back and forth motion, I applied only enough pressure as so bar would not slip out of my hand. (Box says if you drop bar on the ground, just throw it away!) Needless to say, I was careful not to drop it. After claying one section, I wiped dry with soft cotton cloth, then wiped again with MF towel.

I did sections at a time, fender, one door, next door, quarter hood, etc...it really was easy, just time consuming. Being that your car is a 2001 ike mine is, you probably won't hear or feel the difference while claying, but if you do the finger in plastic trick before and after, you will tell the difference. Oh, forgot, after each section, I kneaded the clay like bread dough in my hand and merrily went on to next section. Directions say to do that. One bar is supposed to last 3 cars worth. Geat stuff at a great price!

Hope this helps. I used up maybe half the bottle of QD on the wole car, i was probably too generous, but it said NOT to use water. Good luck.
 
<blockquote class='ipsBlockquote' >

(Box says if you drop bar on the ground, just throw it away!)</blockquote>
I was wondering if you put an old bath towel or something clean on the ground while you're claying that if the clay does slip it would'nt be a waste of $.
 
you can just cut up the clay bar and use [pieces of it. Brad B. and many others cut up their bars into little pieces and clay the surface, then when the piece gets dirty or dropped on the ground just chuck it.


The idea about the towel on the ground sounds nice, but for me I woudl need a very large bath sheet :eek:


Jason
 
Thanks guys for the suggestions. Now its just a matter of waiting for my big order of zaino to get here. Anyone know about how long it takes to get it if ordered directly from Sal? I put my order in yesterday. Oh and buldog your towel idea sounds like a great idea, I plan on trying it out.


Thanks

-01WS6


Ladies and Gentlemen.......I would like to introduce to you this very sexy and very rare 2008 Jaguar XKR Portfolio. This 4.2L 420hp supercharged V8 Jag has seen better days. The customer contacted me after seeing some of my work and asked if there was anything I could do to help with all the swirls and scratches in his paint. After pulling a few strings and calling in some favors, I had a buddy of mine let me use this shop that he works in for the detail. I called in my good friend Tim Buxton from Knox Details to Tag team this car with me. Overall time spent on this car was about 26 man hours over the course of 2 days. The car didn't appear to be that bad outside, but the halogen lights say it all. Let's see what I had to work with.


XKR0220.jpg


XKR0221.jpg


XKR0222.jpg


XKR0223.jpg


XKR0226.jpg


XKR0230.jpg


XKR0228.jpg


XKR0232.jpg


XKR0233.jpg


XKR0234.jpg


XKR0235.jpg


XKR0236.jpg


XKR0217.jpg


Now that I know what I am working with, time to gear up!

XKR0215.jpg


XKR0213.jpg


We started off with the wheels.

First we pre-rinsed the wheels getting most of the heavy break dust off.

XKR0209.jpg


then I applied some P21s wheel gel to wheels. This is awesome pH balanced wheel cleaner, it's a little pricey but it gets the job done and its safe on all types of wheels and brakes.

XKR0208.jpg


Then it was Agitated with an EZ-detail and other various brushes.

XKR0206.jpg


XKR0205.jpg


XKR0198.jpg


Then rinsed

XKR0202.jpg


Next we pre-rinsed the car getting any heavy contaminants off the surface.

XKR0196.jpg


We pre-rinsed the motor and applied some meguiars APC+ and then agitated it with brushes.

XKR0191.jpg


XKR0190.jpg


XKR0189.jpg


Next was the wash step.

I first foamed the car down with a mixture of Dawn ULTRA concentrate and Meguiars APC+ to strip off any protection,waxes or oils.

XKR0186.jpg


XKR0185.jpg


Isn't that a beautiful shot?

XKR0182.jpg


Then we rinsed off this foam and applied another coat to wash with.

XKR0179.jpg


XKR0175.jpg


XKR0173.jpg


Using a 100% sheep skin wash mitt, I wash the car using straight lines reducing the chances of circular marring.

XKR0171.jpg


XKR0170.jpg


While I was washing the paint, Tim took care of all the jams.

XKR0167.jpg


XKR0166.jpg


Once everything was rinsed, we pulled the car inside and began the prep stage.

XKR0164.jpg


XKR0162.jpg


The prep stage consist of clay baring, and taping up any plastic moldings, and fragile areas.

XKR0159.jpg


XKR0157.jpg


XKR0156.jpg


XKR0155.jpg


After wiping down the car we began the taping using Meguiars Professional Masking tape. this stuff is incredible tape. VERY high quality stuff, tears off evenly and sticks and releases nicely and doesn't leave behind any residue.

XKR0154.jpg


XKR0152.jpg


While I was taping off the trim, Tim was taping around the Clear bra that was on the front bumper, keeping any residue from getting in it.

XKR0151.jpg


Next we took paint thickness measurements to make sure the paint was thick enough to safely correct the paint. 4.0-4.5 mils are typical thickness for original paint thickness (some make and models slightly differ).

XKR0097.jpg


XKR0096.jpg


Now it is time for some paint correction!

Check out what this car really looks like under the halogen lights!

XKR0138.jpg


XKR0136.jpg


XKR0134.jpg


XKR0133.jpg


XKR0127.jpg


After test a few areas with different methods. the final choice for the cutting stage was non other then the Surbuff pad and M105 combo. This paint had some serious defects and needed leveled out badly!

I taped off an area for a 50/50 shot

XKR0132.jpg


And this is what we got!

XKR0116.jpg


BAM!..... A whole nother shade of blue!

XKR0115.jpg


XKR0119.jpg


XKR0117.jpg


XKR0114.jpg


sorry got distracted......

XKR0113.jpg


So while I was tackling the driver side, Tim was handling the passenger side.

XKR0112.jpg


XKR0109.jpg


Look at that sexy bootay!

XKR0107.jpg


Double time!

XKR0105.jpg


While I took on the hood, Tim took on the rear bumper and hatch.

XKR0104.jpg


XKR0100.jpg


The roof had 4 deep scratches that needed wetsanded out, I used 3M 2000 grit sheets of sandpaper for this step. To remove the wetsand marks I buffed them out with Surbuff pads and M105, two passes of M105 cleared up the wetsand marks.

XKR0091.jpg


XKR0090.jpg


The paint was polished out using M205 and LC white pads and LC black finishing pads.

XKR0087.jpg


Next I sealed the wheels using some REJEX

XKR0083.jpg


and Tim polished out the tail lights.

XKR0081.jpg


XKR0077.jpg


Next I sprayed down the engine bay with some 303 aerospace protectant and let it dwell for about 30 min before wiping away excess.

XKR0073.jpg


XKR0072.jpg


While that was Dwelling, I applied some Black Fire Wet Diamond paint sealant to the paint.

XKR0069.jpg


I used 303 aerospace protectant on the dash and seats and all the interior to condition and protect all the surfaces.

XKR0058.jpg


XKR0057.jpg


now it was time to wipe away any excess 303 in the engine bay

XKR0056.jpg


XKR0053.jpg


So we cleaned the windows and shined the tires and the Black Fire Wet Diamond has had time to cure, time to wipe it off!

XKR0047.jpg


XKR0046.jpg


This is what we were left with.

XKR0041.jpg


XKR0036.jpg


XKR0032.jpg


XKR0030.jpg


XKR0028.jpg


XKR0025.jpg


XKR0024.jpg


XKR0023.jpg


XKR0021.jpg


XKR0034.jpg


XKR0039.jpg


XKR0043.jpg


Outside shots

XKR0015.jpg


XKR0014.jpg


XKR0012.jpg


XKR0011.jpg


XKR0010.jpg


XKR0008.jpg


XKR0003.jpg


XKR0002.jpg


Thanks for viewing, Have a blessed day!

 
:hurray::hurray::hurray::hurray::hurray::hurray::hurray::hurray::hurray::hurray:
I know that you can't see me, but I stood up from my desk and am giving you a standing ovation!!!

What a brilliant job you did on the extraordinary car. I wanted to cry when I saw the condition that this beauty was in, but then I remembered that my man Eric was on the job, and there was no doubt in my mind that you would restore this sexy mama to her true glory.

How nice was it having someone to work with to make things move along?
I was also truly amazed at that shop you were working in. What a stable of cars in there.:Dancing Dot:
 
Really looks nice. Its great to see a beautiful car brought back to its glory.

Pretty hard to tell from an Aston Martin.
 
Wow that Jag is STUNNING, particularly after you gave it some love. Seriously top work, great pics! Thank you for sharing!
 
I just went through this again and have to agree the 50/50's look awesome especially with that color. Even though I love black and you can see stark contrast after correcting black I still LOVE darker colors for the character. Now you can see the blue the manufacturer intended for that paint!
 
Back
Top