MirrorDetailing
New member
One of the shops I do work for, had this car sitting around their shop for a year waiting on the owner to put in some money to get the work completed. Since it sat outside a lot from being at the shop and from the owner neglecting the paint, the classic single stage paint went south in a hurry. Car was not street-able and I had some open time to get out to their shop to get it done rather than waiting on it. Originally I was going to do the usual 2-Step correction that I normally do on all the cars they bring to me, but as soon as I saw the car, I knew that 2-steps was not going to cut it. Tested the trunk, since it was an easy area of factory paint to test and the hood, since it had been repainted some years ago, to see what the outcome would be and what it would take. After starting into it, with a combo I knew would cut enough and still have the ability to finish down on the second step, did not work out. Figured out at minimum it would take 3-steps, 4 in a lot of areas.
Thanks again to Joey, Smoknfastlegend for coming out the second day to give me a hand.
Process:
ONR Wash
Clayed w/ Megs Aggressive Clay w/ ONR Lube
Buffing:
*Some Areas* PFW w/ M105 via Dewalt 849
Microfiber Cutting Pads w/ M105 via GG DA
Uber Yellow w/ M105 via Flex
Uber Green w/ PO85RD via Flex
Wiped down with Carpro Eraser
Trim w/ M105 via #0000 Steel Wool
Windows w/ Megs Window Concentrate
Rims/Front/Rear Bumpers w/ Optimum Metal Polish
Seats wiped down w/ Leather Masters Leather Protection Cream
Tires w/ Optimum Tire Gel
LSP w/ Sonax Premium Class Carnauba
Now onto the progress...
When I first showed up the condition of the car was quite a surprise...
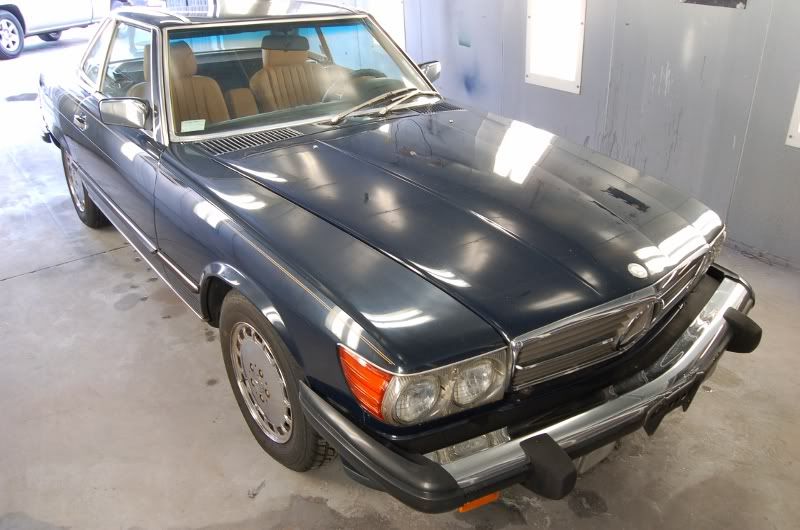


A few shots showing the condition of the paint with twin 500w lights on them...


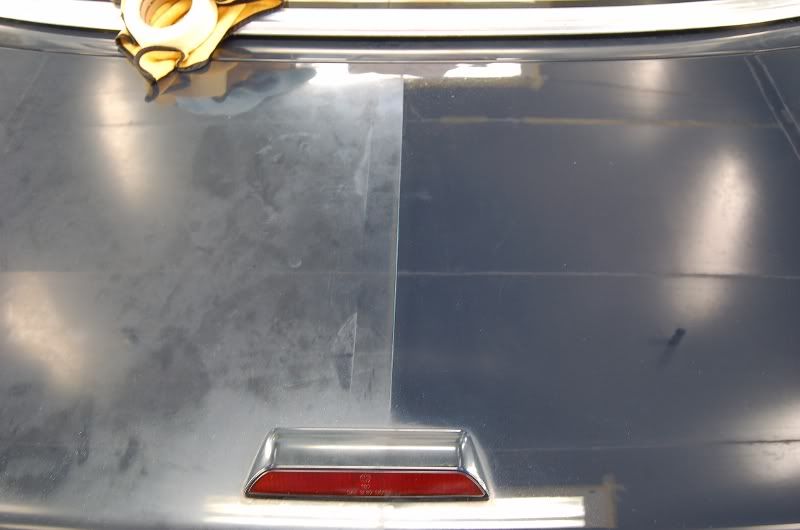
I started by testing the trunk, since it was factory single stage...
Looks to be a decent starting platform...


After 3-4 rounds with the Griots and the Flex, think there was a slight change?

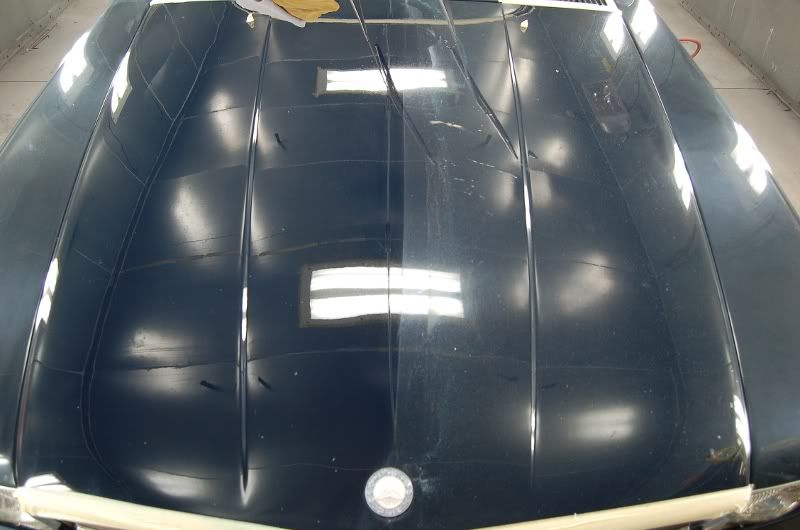
Now, it was obvious that the hood had base coat/clear coat on it, as it did not oxidize like the rest of the vehicle and more faded. Wanted to see how the paint would clean up and what it would take.
Hood before...

Now after a go at it with the Flex and Griots, another noticeable improvement...

Once I knocked out the roof, hood, trunk and top of the fenders, I did not have everything I needed to complete this job, so got as much as I could done for the day. Before I left, I talked with the owner of the shop and had them remove the windshield wipers so I could work around the cover panel and the rear emblem, so I could clean around it up.
After testing both areas, I finished claying the entire car. Even after an ONR wash, the paint felt like 800 grit sandpaper. Which, after sitting outside for a year and it being a single stage paint, I knew that was going to happen. Went straight to the Megs Aggressive Clay to help get out a lot of the grime and mold and cut some of the oxidation down. Only shot I took of the claying, as it took me just over 2 hours to do the whole thing and did not get more pictures as one explains it all.
Clay before and after, after doing a 1x1 area of the roof.


When I got back for day two, took off the pinstripe and we realized that the hood was not the only place that had been repainted, the driver door and driver quarter had been repainted at another time, separate from the hood. Which, was not a great repaint at all. So while Joey worked on the passenger side single stage, I whipped out the Dewalt and got to work on those two panels.
Once all the buffing as done, we started on the coated trim to try and clean it up as best as possible. The shop techs agreed it should be replaced, but most people do not as its costly to replace the trim. So after spending 45 minutes testing tons of combos, the only thing that would make even the slightest dent in the cloudiness of the trim was 105 & #0000 Steel Wool. So Joey and I spent about an hour and a half going over the trim and cleaning it up as best we could. I can say, it did not come out brand new, but was a world of difference better than it was before.


Final test area that showed great results...

Finally after 9.5 hours straight with no break, we finished. Many paint spots later on the wall....

We were done. It was dark and the car does not move easily, so inside pictures would have to do...
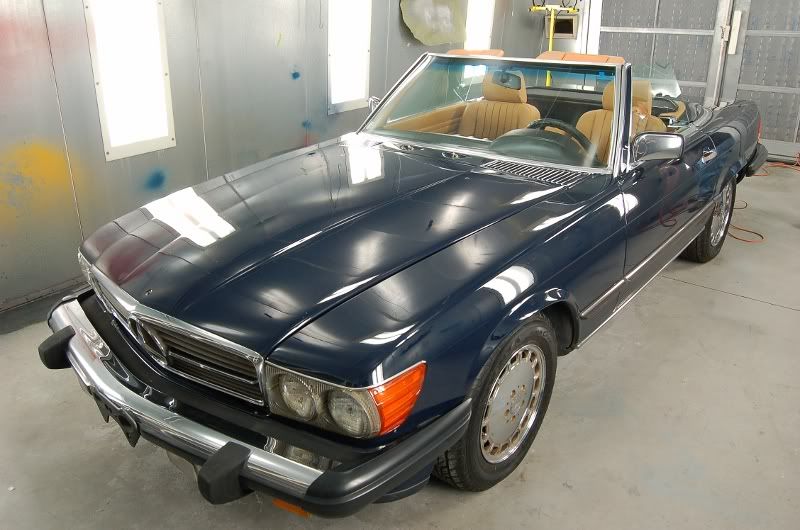


The top is missing in the afters, once we finished the top and the trim, we had it removed to work under the top that covers the paint and to get better access to the interior. It was set aside and I forgot to get any after pictures of it.
Then the causalities of war from day two...

Thanks again to Joey, Smoknfastlegend for coming out the second day to give me a hand.
Process:
ONR Wash
Clayed w/ Megs Aggressive Clay w/ ONR Lube
Buffing:
*Some Areas* PFW w/ M105 via Dewalt 849
Microfiber Cutting Pads w/ M105 via GG DA
Uber Yellow w/ M105 via Flex
Uber Green w/ PO85RD via Flex
Wiped down with Carpro Eraser
Trim w/ M105 via #0000 Steel Wool
Windows w/ Megs Window Concentrate
Rims/Front/Rear Bumpers w/ Optimum Metal Polish
Seats wiped down w/ Leather Masters Leather Protection Cream
Tires w/ Optimum Tire Gel
LSP w/ Sonax Premium Class Carnauba
Now onto the progress...
When I first showed up the condition of the car was quite a surprise...
A few shots showing the condition of the paint with twin 500w lights on them...
I started by testing the trunk, since it was factory single stage...
Looks to be a decent starting platform...
After 3-4 rounds with the Griots and the Flex, think there was a slight change?
Now, it was obvious that the hood had base coat/clear coat on it, as it did not oxidize like the rest of the vehicle and more faded. Wanted to see how the paint would clean up and what it would take.
Hood before...
Now after a go at it with the Flex and Griots, another noticeable improvement...
Once I knocked out the roof, hood, trunk and top of the fenders, I did not have everything I needed to complete this job, so got as much as I could done for the day. Before I left, I talked with the owner of the shop and had them remove the windshield wipers so I could work around the cover panel and the rear emblem, so I could clean around it up.
After testing both areas, I finished claying the entire car. Even after an ONR wash, the paint felt like 800 grit sandpaper. Which, after sitting outside for a year and it being a single stage paint, I knew that was going to happen. Went straight to the Megs Aggressive Clay to help get out a lot of the grime and mold and cut some of the oxidation down. Only shot I took of the claying, as it took me just over 2 hours to do the whole thing and did not get more pictures as one explains it all.
Clay before and after, after doing a 1x1 area of the roof.
When I got back for day two, took off the pinstripe and we realized that the hood was not the only place that had been repainted, the driver door and driver quarter had been repainted at another time, separate from the hood. Which, was not a great repaint at all. So while Joey worked on the passenger side single stage, I whipped out the Dewalt and got to work on those two panels.
Once all the buffing as done, we started on the coated trim to try and clean it up as best as possible. The shop techs agreed it should be replaced, but most people do not as its costly to replace the trim. So after spending 45 minutes testing tons of combos, the only thing that would make even the slightest dent in the cloudiness of the trim was 105 & #0000 Steel Wool. So Joey and I spent about an hour and a half going over the trim and cleaning it up as best we could. I can say, it did not come out brand new, but was a world of difference better than it was before.
Final test area that showed great results...
Finally after 9.5 hours straight with no break, we finished. Many paint spots later on the wall....
We were done. It was dark and the car does not move easily, so inside pictures would have to do...
The top is missing in the afters, once we finished the top and the trim, we had it removed to work under the top that covers the paint and to get better access to the interior. It was set aside and I forgot to get any after pictures of it.
Then the causalities of war from day two...