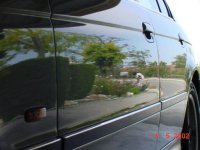
'68 Charger - Full sand and polish

C240 - your 100% correct, thats what I fear every time I use the spray bay and drive back. I have dust on my car and exhaust carbon on m rear bumper, it's impossible to get your car dry and clean at the same time. I just spend alot of time towel drying it with special special care, it works but man is it time consuming.


You'll learn all the crack in the moldings soon with enough hand washes. I used to HATE detailing my care and every time I got to the edge of the panel and the rest of was covered in Klasse Glaze I would touch the crack and out would come 8 drops of water to mess up my applicator and the friggin panel. It's a pain but you'll be able to fix it soon enough.
 
The way were going we are going to have a loooooooooong summer to detail. Maybe even TOO hot, I really need to find a shop with ac where I can detail.
 
Hey folks,

So, a while back I was asked to take a look at a '68 Dodge Charger. The car had been repainted over twenty years ago and had not aged well. This is a one owner Charger and needed a bit of work, to say the least. Spring break was just around the corner and the restoration filled the week nicely.

Here's what the car looked like to start:
adsc0157.jpg


adsc0142.jpg


adsc0139.jpg


Talk about a little texture...
asdfir.jpg


With all the deep scratches and texture, I really had no choice but to sand the entire car.

So, I sanded the whole car using 1500 Unigrit Sanding discs (both 3" and 6") with my PC 7336 and 3" Mirka sander in the tighter areas. For the finish sanding, I chose to use 3000 Unigrit Finishing discs. After much testing, the Unigrit discs provided a more uniform surface free of pigtails that was easier to polish. Mirka Abranet Soft disks level much better, but they left pigtails on this paint.

dsc0195bz.jpg


Oh yeah, so much for spring break. We got up to 50 degrees with drizzle most of the week...
dsc0207l.jpg


Test spot using 3" MF cutting pads and D300 Compound:
adsc0186.jpg


To level the sanding marks, I chose to go back to the rotary and a wool pad with M105 (old school mix, of course). The paint was extremely hard and needed something very aggressive. For the edges and tight areas, I used my trusty 7336 and 3" MF cutting pads. After the initial cutting, I used 5" MF cutting pads with D300 on the DA to remove any holograms. To further refine the finish, I used a 6" MF finishing pad and M205.

dsc0216jq.jpg


Five days later, I fired up the car and inspected the work out in the sun.
dsc0255dk.jpg


dsc0228jk.jpg


dsc0234h.jpg


dsc0251yl.jpg


dsc0258svz.jpg


dsc0265rr.jpg


Overall, the car turned out very nicely. The owner was thrilled to see the difference a sand and polish can make, even on an old paint job. Although the paint wasn't 100% perfect, it is still better than 99% of the cars sitting at the local dealership.

Oh yeah, I skipped a trip to Hawaii to polish out this classic. I guess you can say that the detailing obsession is pretty deep...

-Chris
 
Amazing job on the Charger Chris. Night and day, is all that pops into my head.

Thanks for sharing it with us here.:hurray::hurray:
 
Absolutely amazing transformation Chris! It looks like a completely different car now! :drool5:


How well did the panels with the solvent pop come out?


Is that your Porsche in the reflection? I'd love to see more pics of it...PM? :)
 
Wow, that paint had definitely sunk. Did you take any readings? I bet it was THICK.

Great job, what a TON of labor involved to do the job right.

Thanks for sharing!
 
Incredible work there, sanding down a car is on a completely different level than regular detailing, I hope to be there some day. Thanks for the post!

-Kody-
 
Thanks for the kind words, guys!

Thanks for sharing some polishing with us on the chat.

Hopefully more members will join in the chatroom...

How well did the panels with the solvent pop come out?

The solvent pop problem is there for good. I sanded in a tiny area just to see what would happen (with the owners permission). As it turns out, the bubbles are in the base coat. I could actually see the peaks getting thin and decided to quit before going any further.

Is that your Porsche in the reflection? I'd love to see more pics of it... :)

Yes, it is. Sometime, I'll dig up some.

Did you take any readings? I bet it was THICK.

Sure was! Most of the car measured ~14.5 mils. The car had no tracers, so I'm pretty sure the painter never cut and buffed the car before delivery. What a shame...
 
In the term "spring break' is the word break. What part of the meaning of the word break don't you understand. LOL. Thanks for bringing this project to the chat room and also sharing it on the forum.Looks like it turned out great. I can see why the owner was so pleased with the results. :biggrin:
Give me a shout soon and maybe we can getogether this spring or summer.

Paul S
 
Back
Top