Concours.John
Auto Detail & Restoration
Some of you know I've been experimenting and contacting people on an LED replacement or supplement to halogens. After trying out different set ups this really IMO fits the bill. I've tried billboard wash and others but the one thing I've noticed is it's not a Brinkman. The one thing with a Brinkman is how you use the focused light to view defects. A wash just gives you general light. Yes it does show defects but there is not a way to move your eye from a focused point to see the defects around. The one thing I hate is working to have to pull something out in the sun to be sure. This is always a definite way to check your work but requires time. I might add there is no subsitute. The other is constantly picking up an inspection light to check work.
After the last halogen failed I was stuck with replacement but also came up with an additional light.
The Parts
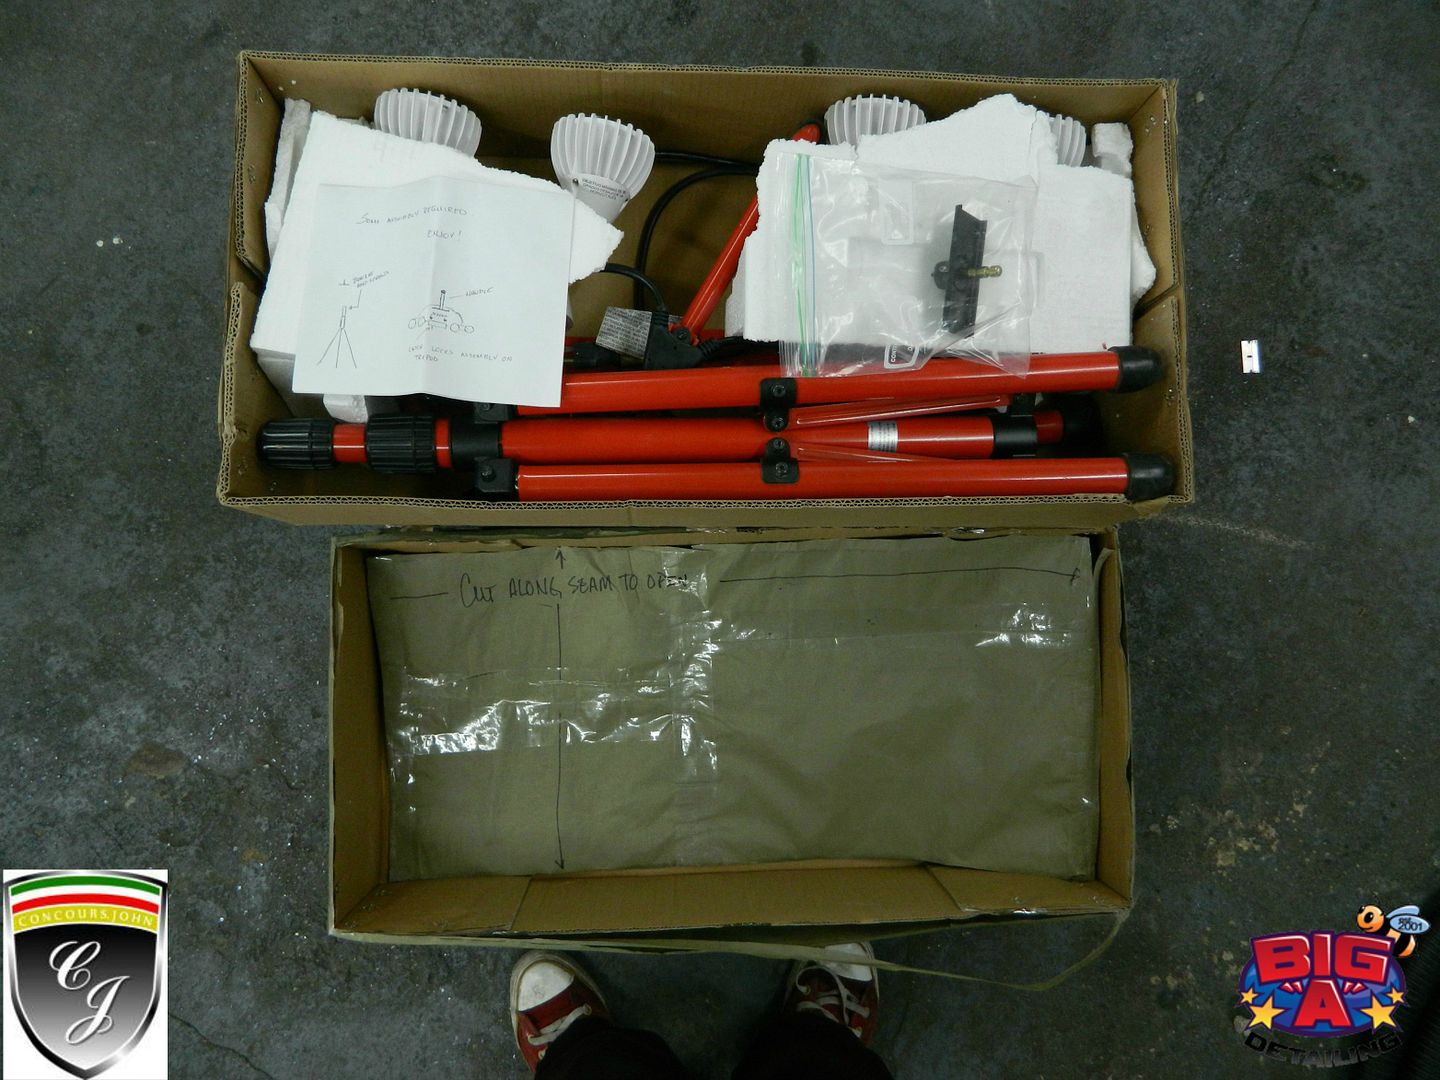
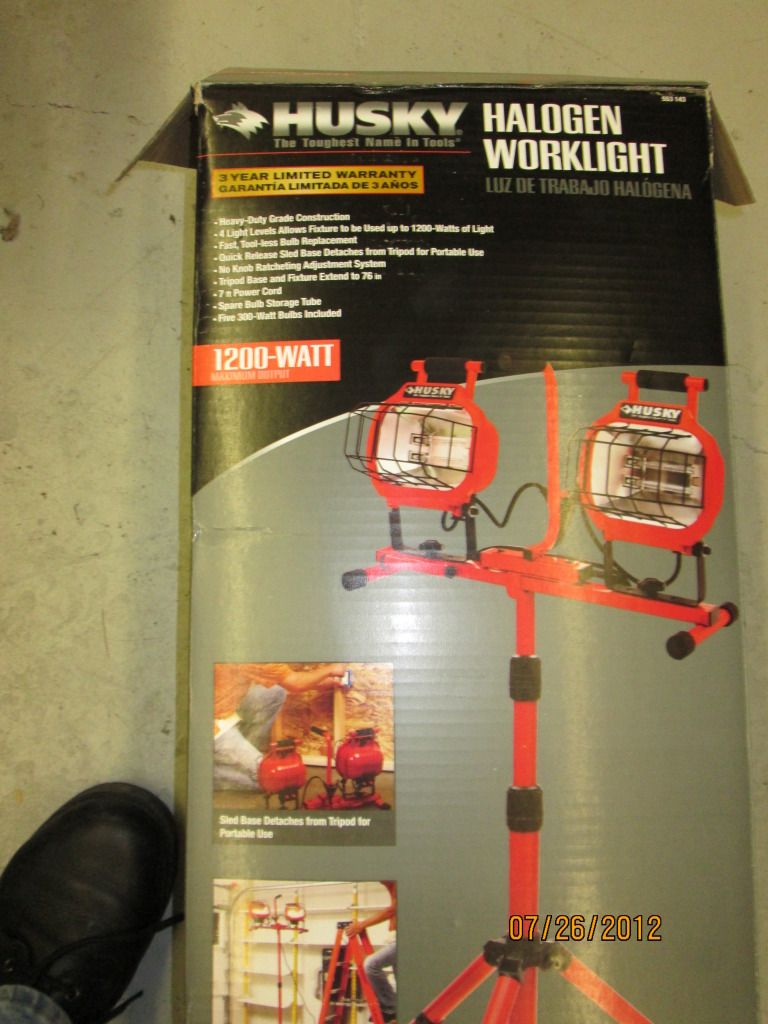
Home Depot 1200 Halogen Light stand $60.00 You can buy the dual 500w for $35 which will work
[TABLE="class: ncode_imageresizer_warning"]
[TR]
[TD="class: td1, width: 20"]
 [/TD]
[/TD]
[TD="class: td2"]This image has been resized. Click this bar to view the full image. The original image is sized %1%2 and weights %3.[/TD]
[/TR]
[/TABLE]
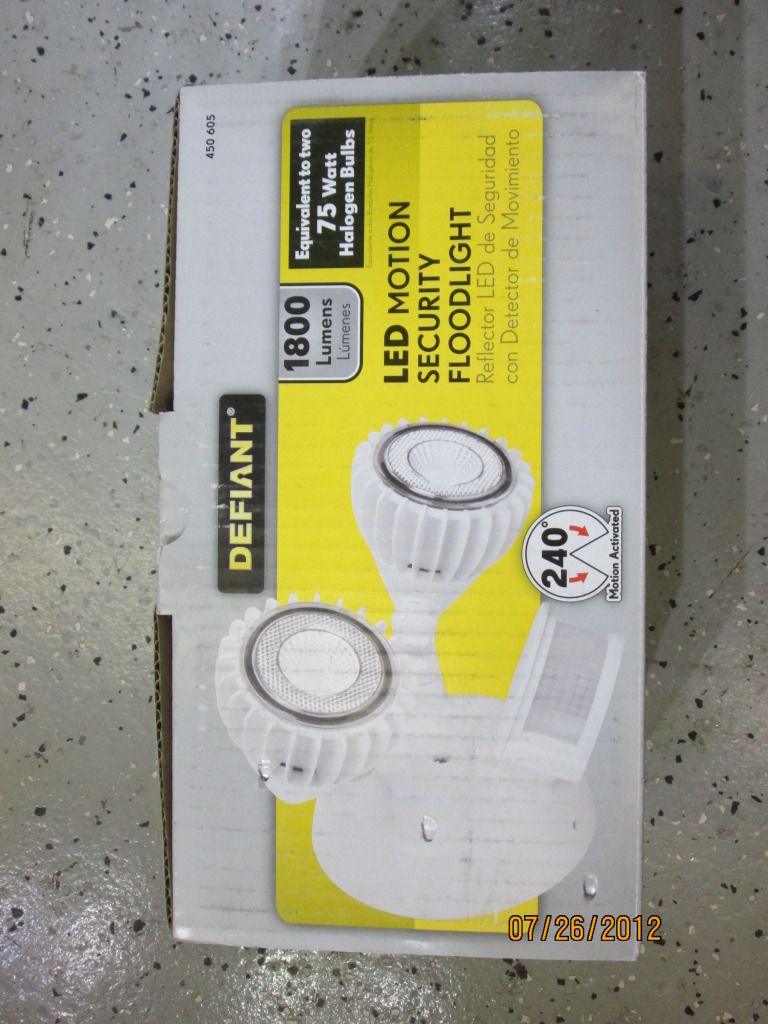
2 Home Depot CMM03120 $80.00 ea
[TABLE="class: ncode_imageresizer_warning"]
[TR]
[TD="class: td1, width: 20"]
[/TD]
[TD="class: td2"]This image has been resized. Click this bar to view the full image. The original image is sized %1%2 and weights %3.[/TD]
[/TR]
[/TABLE]
2 Aluminum case white exposed rectangle enclosures $3.49 ea
1 Bag of enclosure screw in blanks (4) $3.20
I'll be using the Husky stand for the build and the harness and boxes from my dead 2 500w Lutron halogens. The husky lights will go on the Lutron stand. The reason for this is the Husky has flat stock bars to futher support the boxes Ill be using. The Lutron has round stock.
All of this is preformed with no modification to the stands or lights making warranty not an issue. The only thing modified is the $3 boxes. It is all waterproof and look as original (other than white fixture/boxes)
The objective is a seviceable/upgradable yet professional looking assembly. This is also aside from the plug a waterproof build. Great for outside.
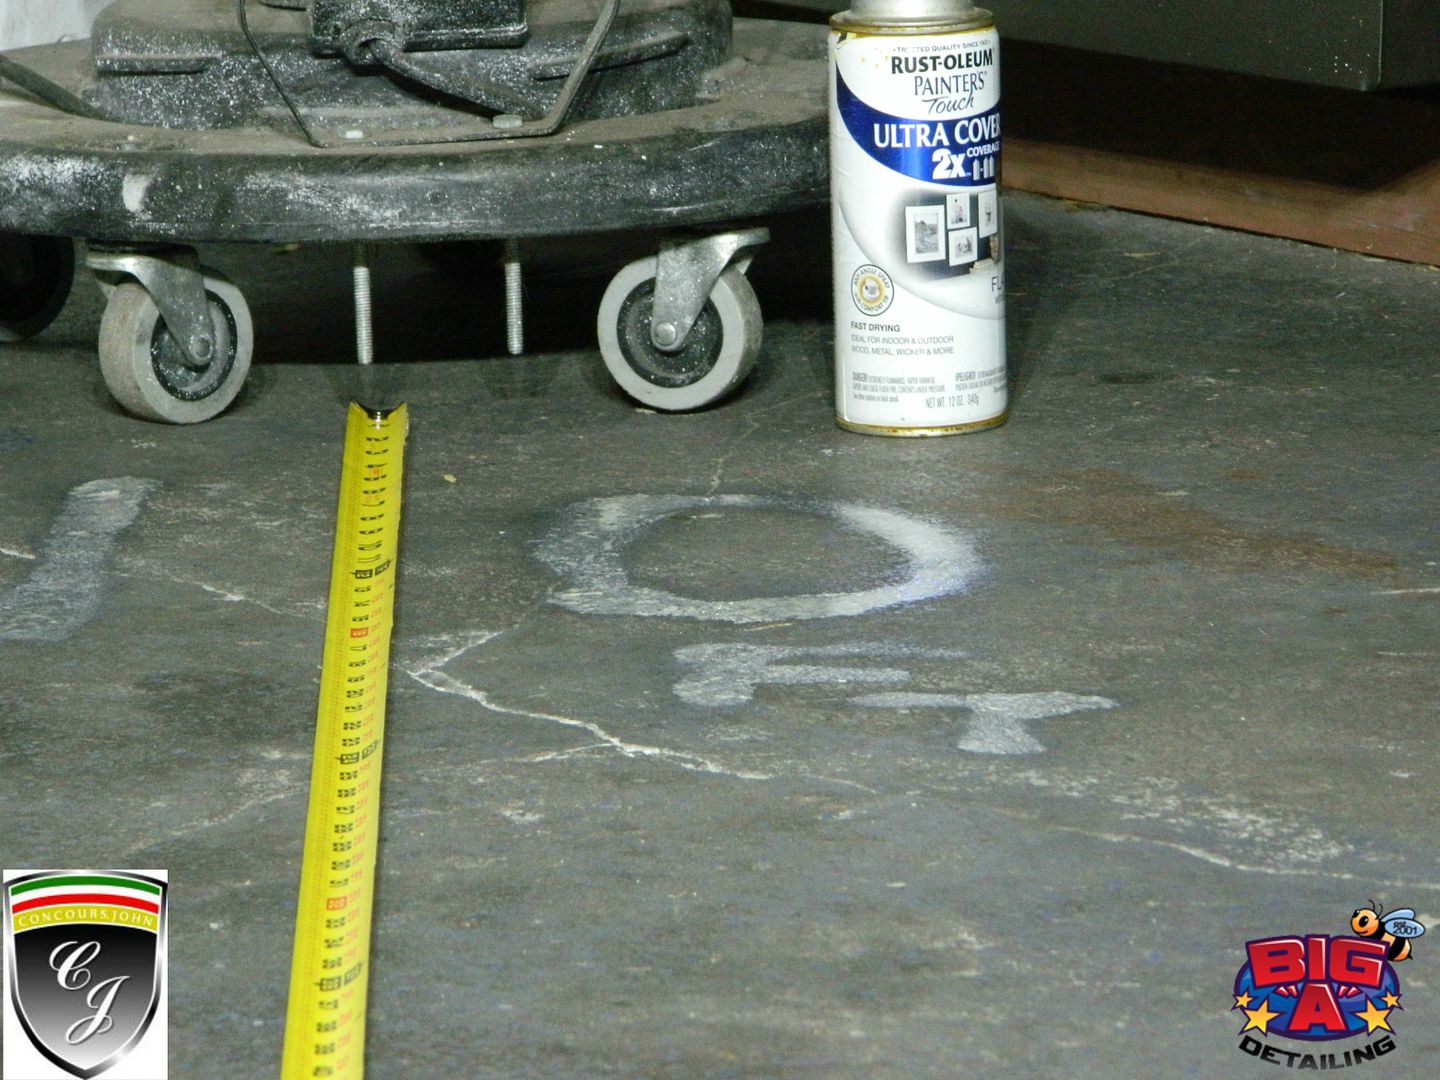
First the boxes are drilled to accept the original mounting hardware. I squared mine to match the bolt but a bigger hole with a star washer will work.
[TABLE="class: ncode_imageresizer_warning"]
[TR]
[TD="class: td1, width: 20"]
[/TD]
[TD="class: td2"]This image has been resized. Click this bar to view the full image. The original image is sized %1%2 and weights %3.[/TD]
[/TR]
[/TABLE]
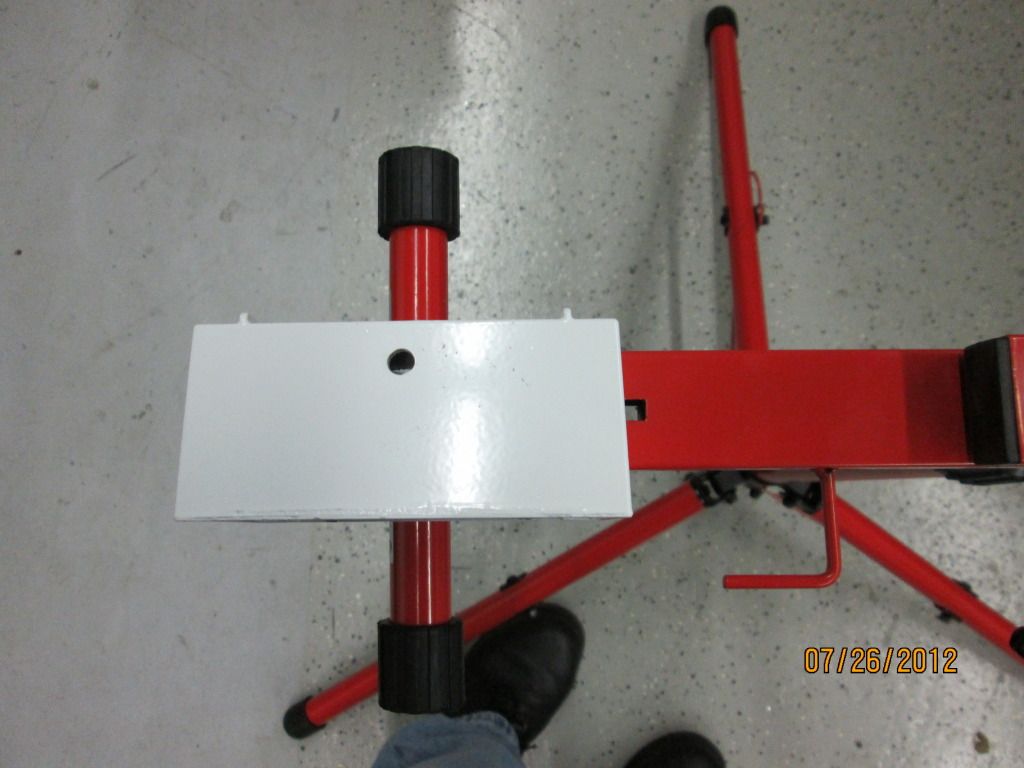
The screw was then pulled flush into the square hole I made.
[TABLE="class: ncode_imageresizer_warning"]
[TR]
[TD="class: td1, width: 20"]
[/TD]
[TD="class: td2"]This image has been resized. Click this bar to view the full image. The original image is sized %1%2 and weights %3.[/TD]
[/TR]
[/TABLE]
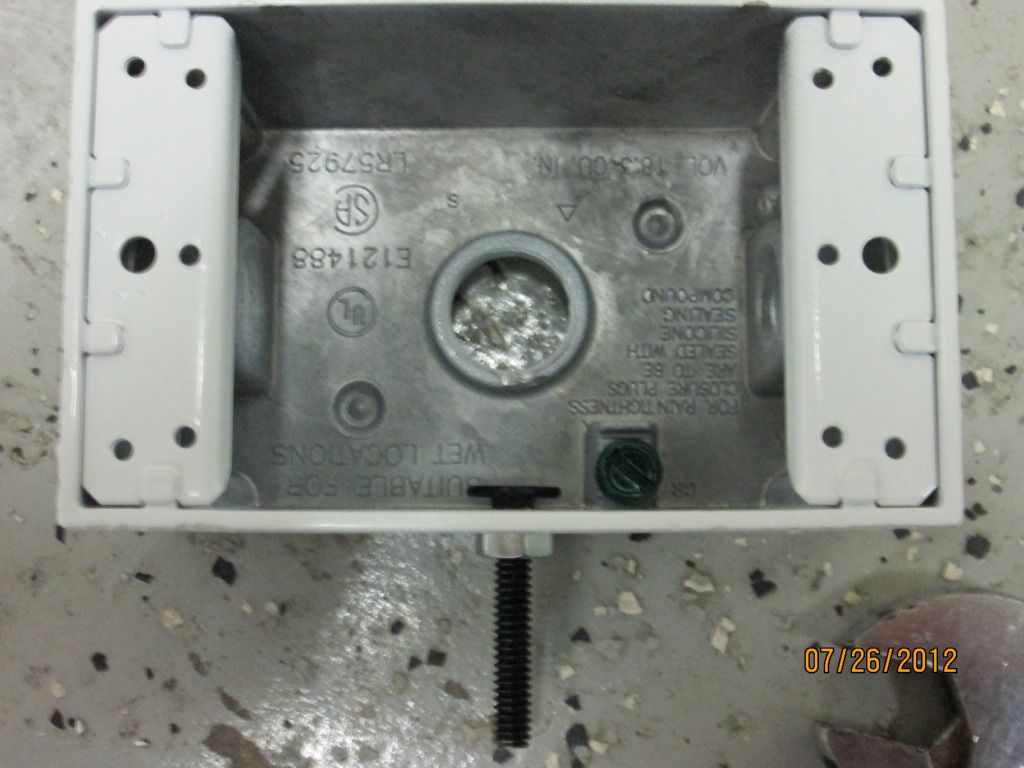
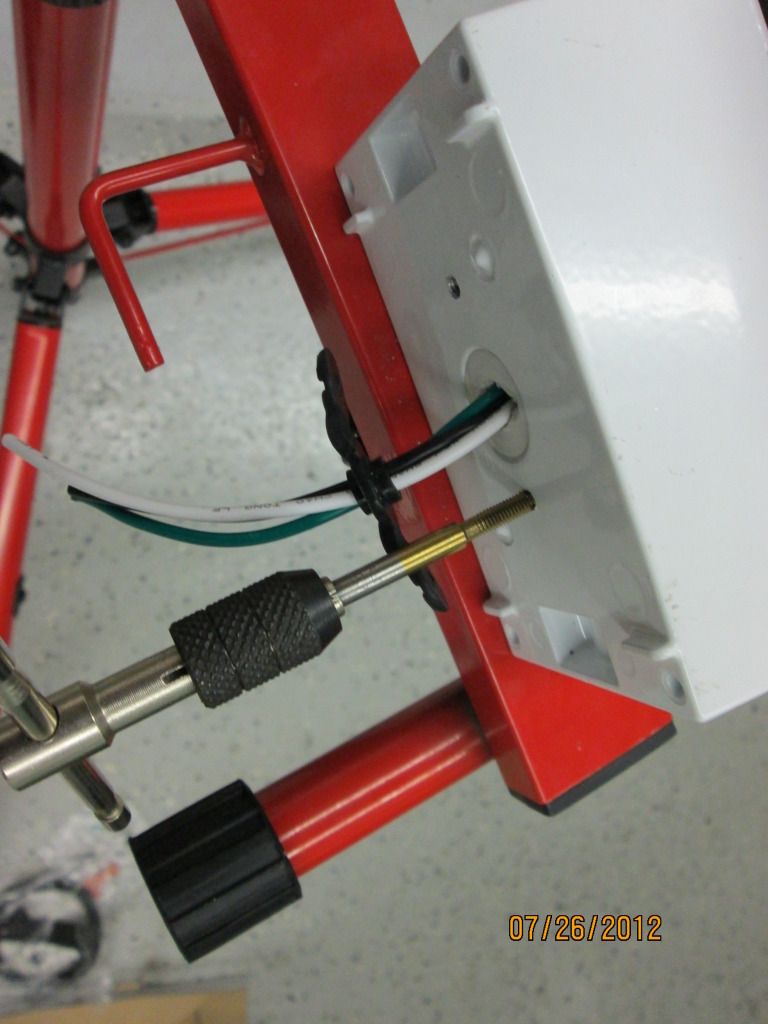
The housing is then attached with the original thumb screw through the factory hole.
[TABLE="class: ncode_imageresizer_warning"]
[TR]
[TD="class: td1, width: 20"]
[/TD]
[TD="class: td2"]This image has been resized. Click this bar to view the full image. The original image is sized %1%2 and weights %3.[/TD]
[/TR]
[/TABLE]
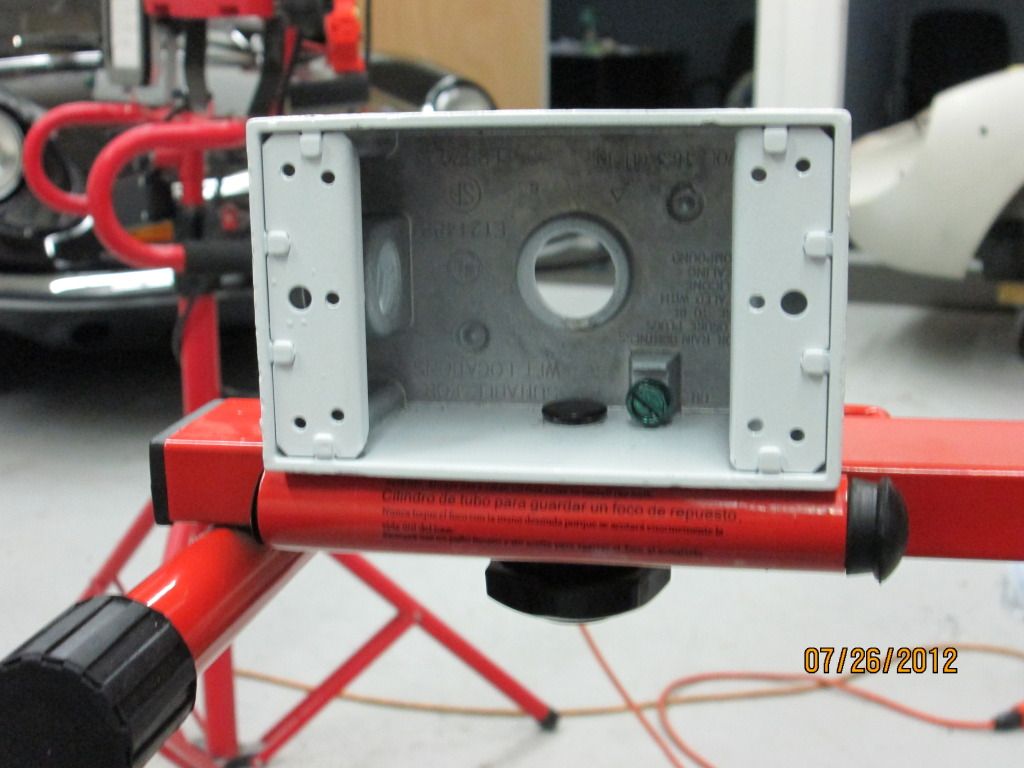
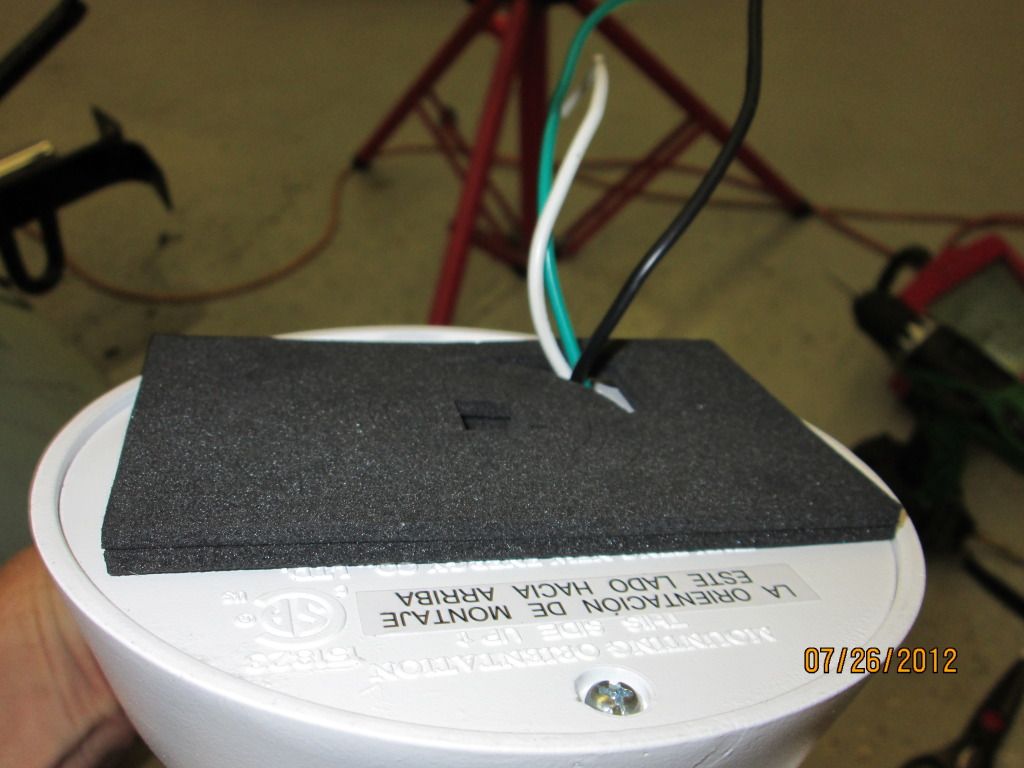
The assembly is then mounted to the box per directions with the included
hardware/bracket. (this is no different then changing a fixture at your house)
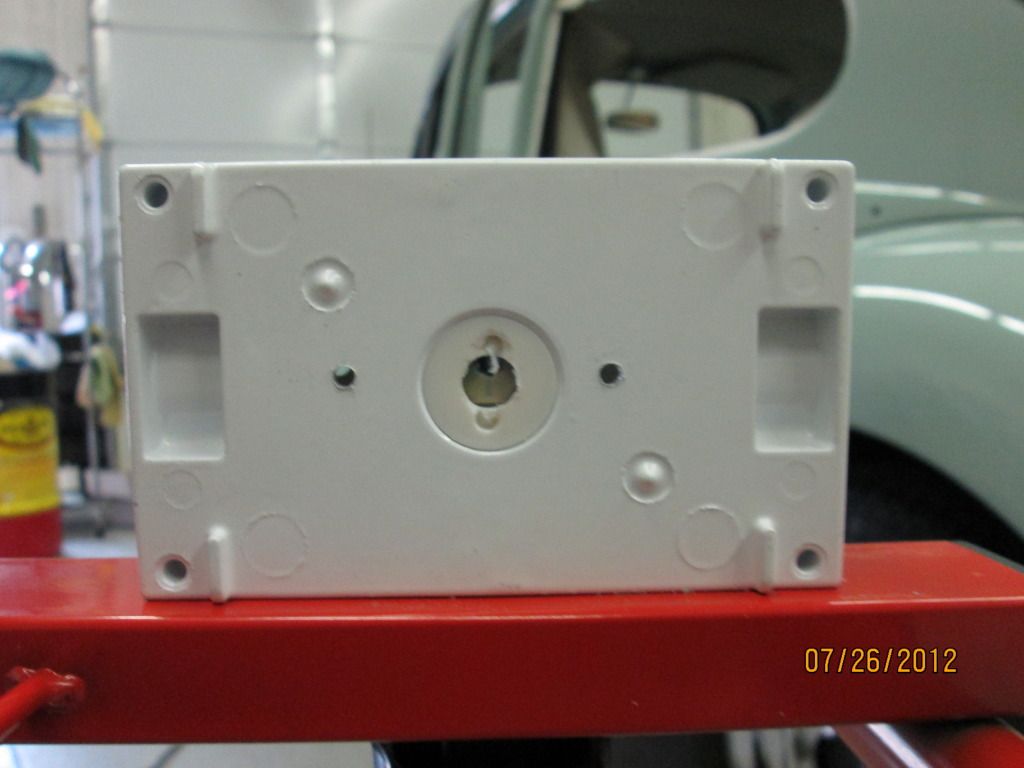
An exterior outlet seal was used to seal the fixture to the box even though the wiring will be concealed in the factory harness box.
The screw in plug was used and drilled to feed wires though and use the seal that comes off the donor harness boxes.
[TABLE="class: ncode_imageresizer_warning"]
[TR]
[TD="class: td1, width: 20"]
[/TD]
[TD="class: td2"]This image has been resized. Click this bar to view the full image. The original image is sized %1%2 and weights %3.[/TD]
[/TR]
[/TABLE]
[TABLE="class: ncode_imageresizer_warning"]
[TR]
[TD="class: td1, width: 20"]
[/TD]
[TD="class: td2"]This image has been resized. Click this bar to view the full image. The original image is sized %1%2 and weights %3.[/TD]
[/TR]
[/TABLE]
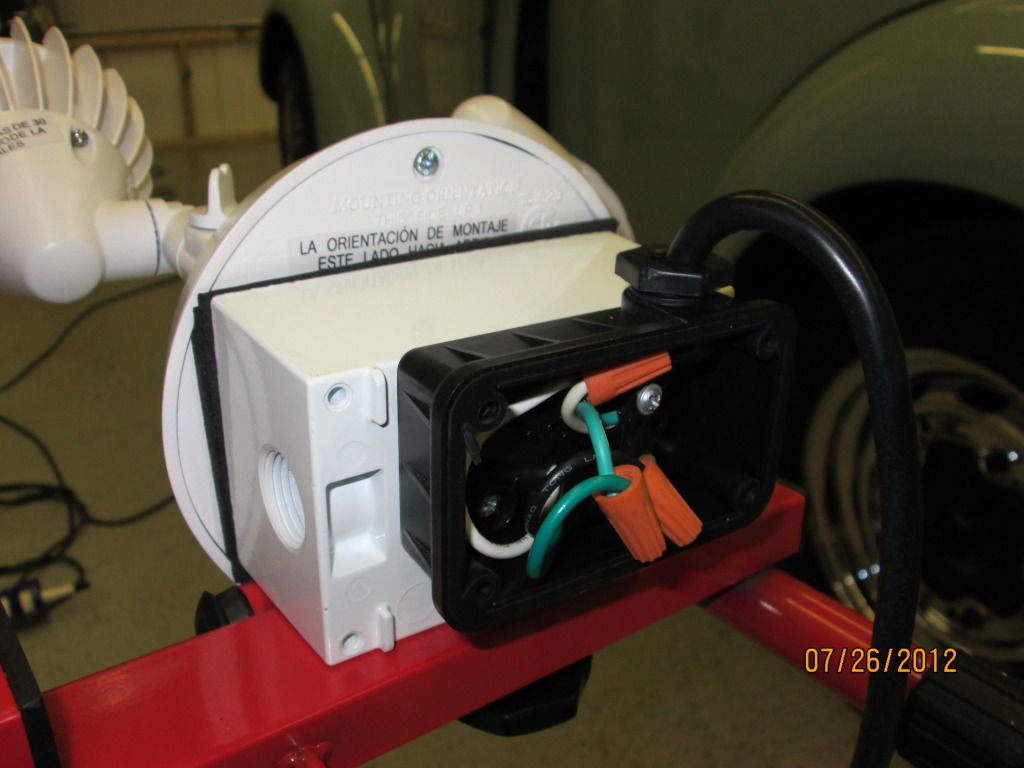
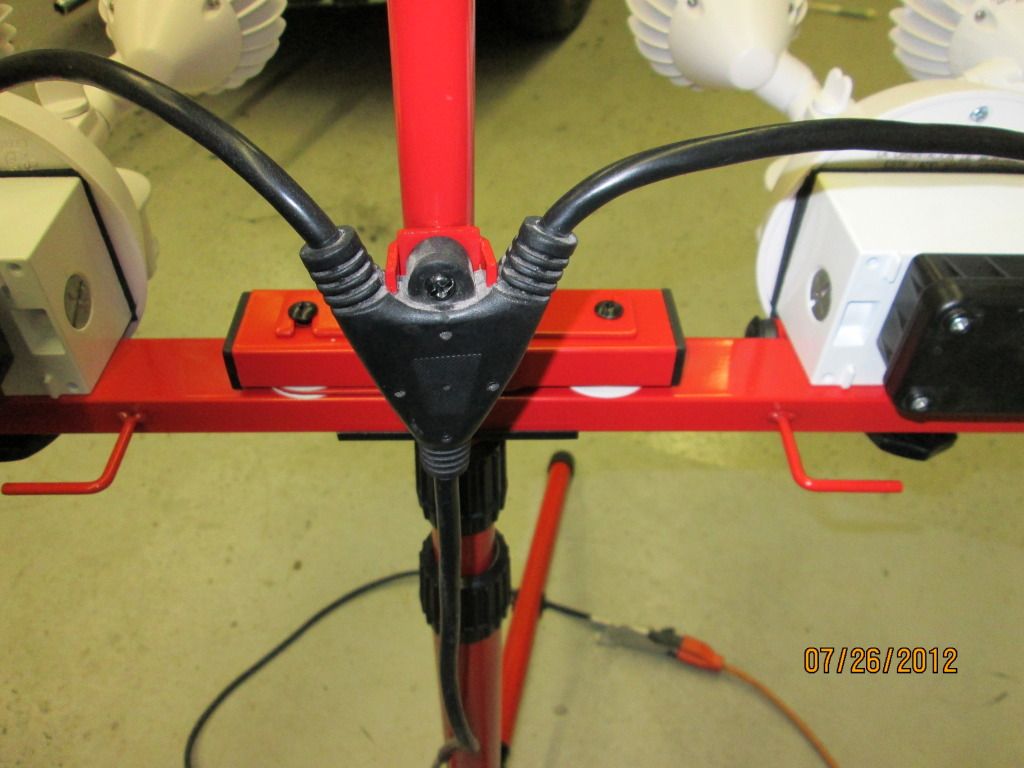
The wires are fed through the gromet (hard to see 1st pic) then holes drilled and tapped using box as template. Box is then mounted.
[TABLE="class: ncode_imageresizer_warning"]
[TR]
[TD="class: td1, width: 20"]
[/TD]
[TD="class: td2"]This image has been resized. Click this bar to view the full image. The original image is sized %1%2 and weights %3.[/TD]
[/TR]
[/TABLE]
[TABLE="class: ncode_imageresizer_warning"]
[TR]
[TD="class: td1, width: 20"]
[/TD]
[TD="class: td2"]This image has been resized. Click this bar to view the full image. The original image is sized %1%2 and weights %3.[/TD]
[/TR]
[/TABLE]
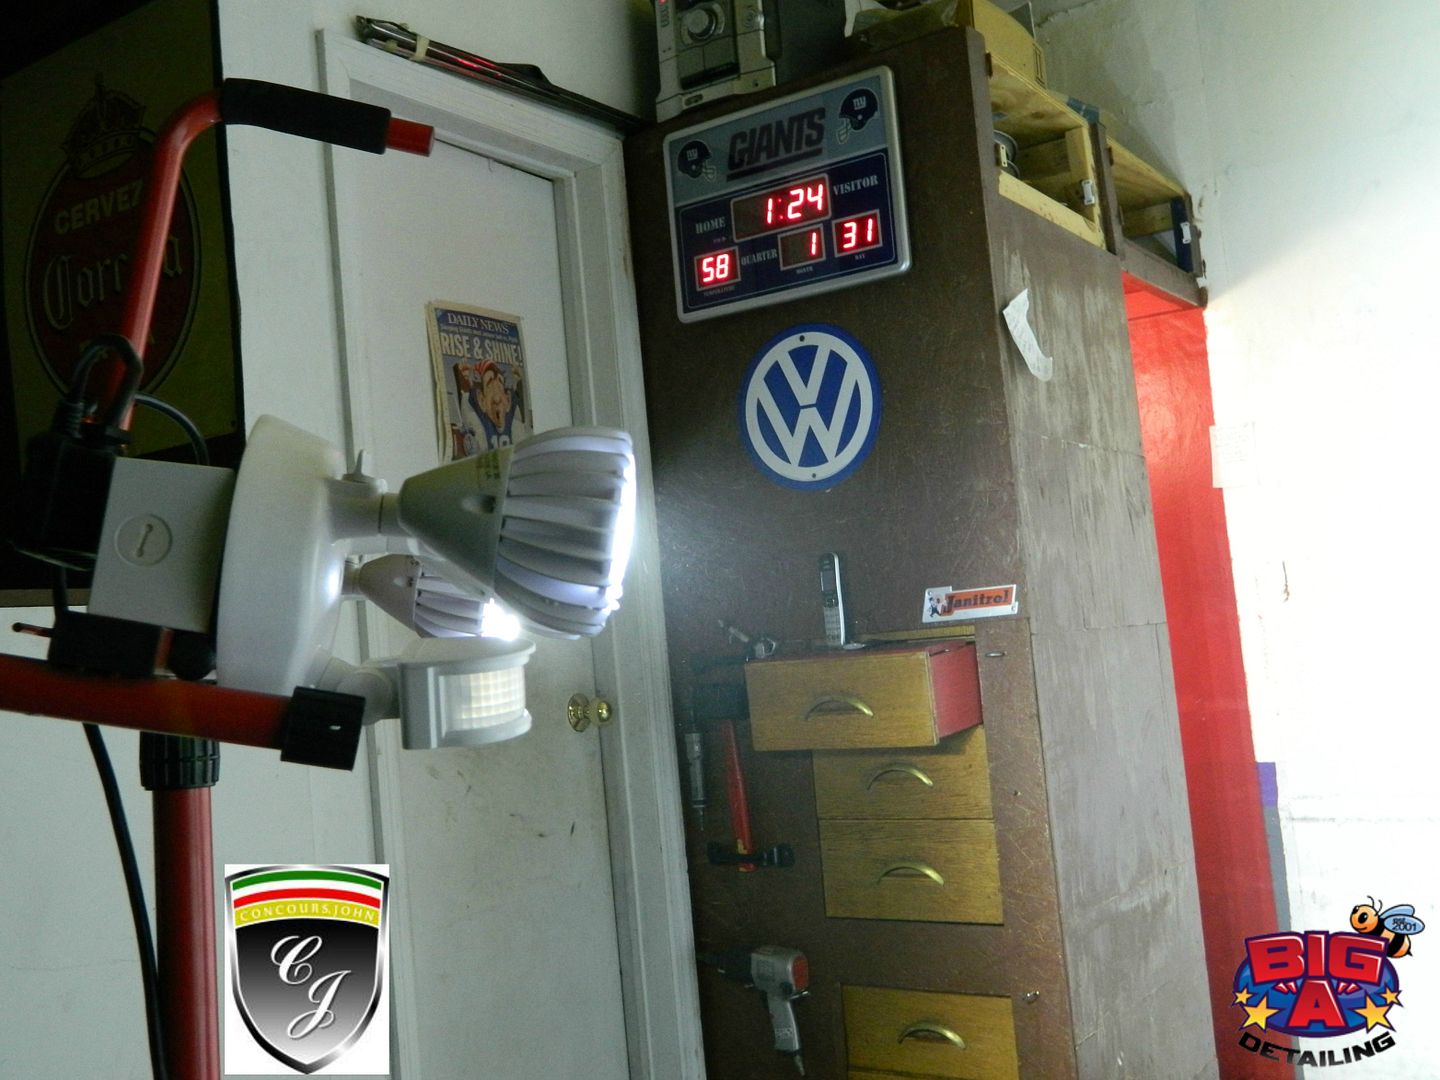
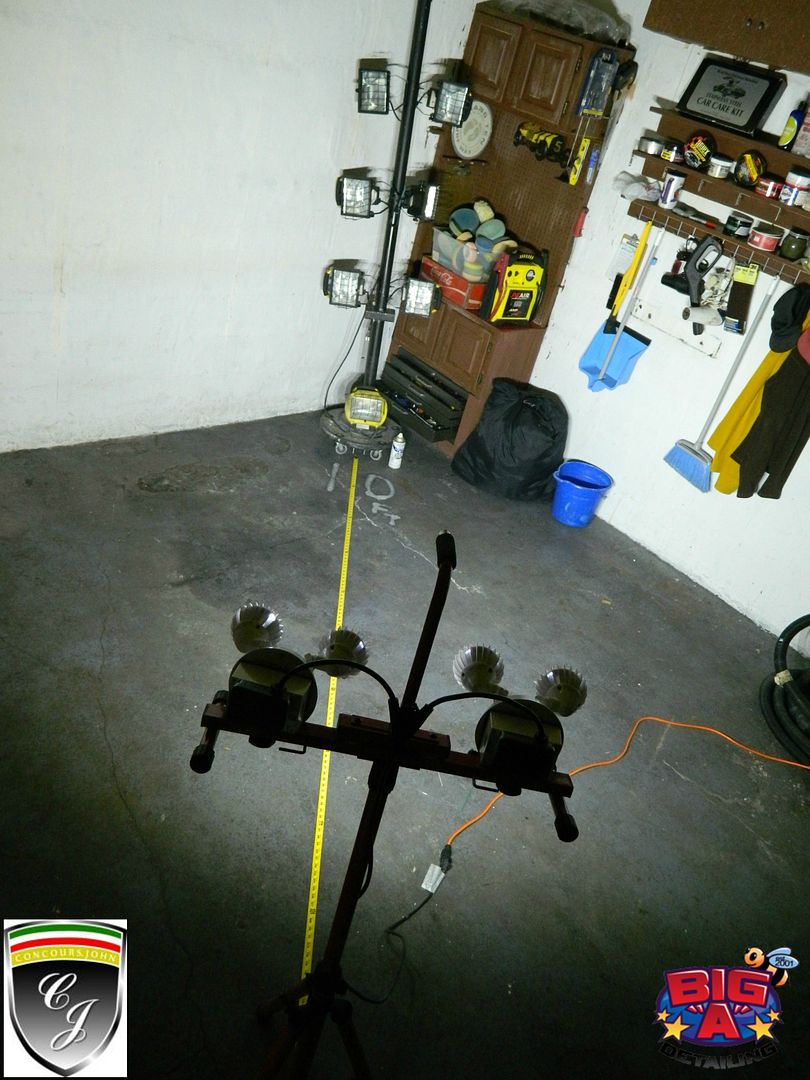
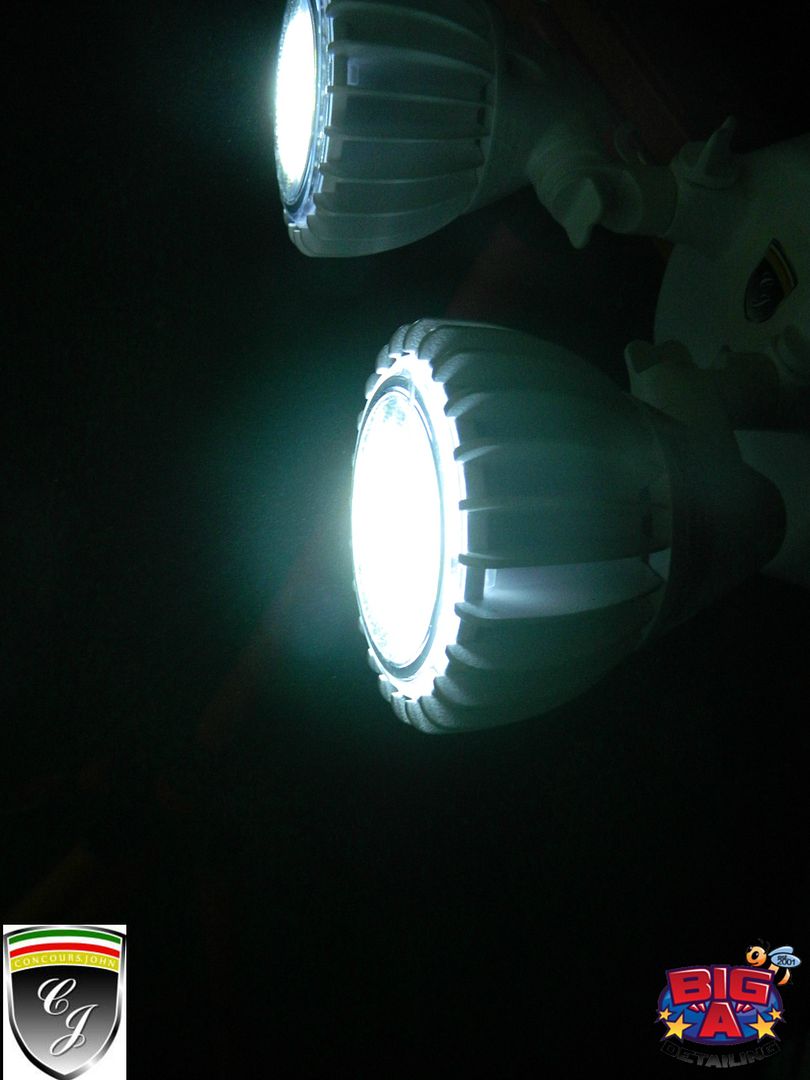
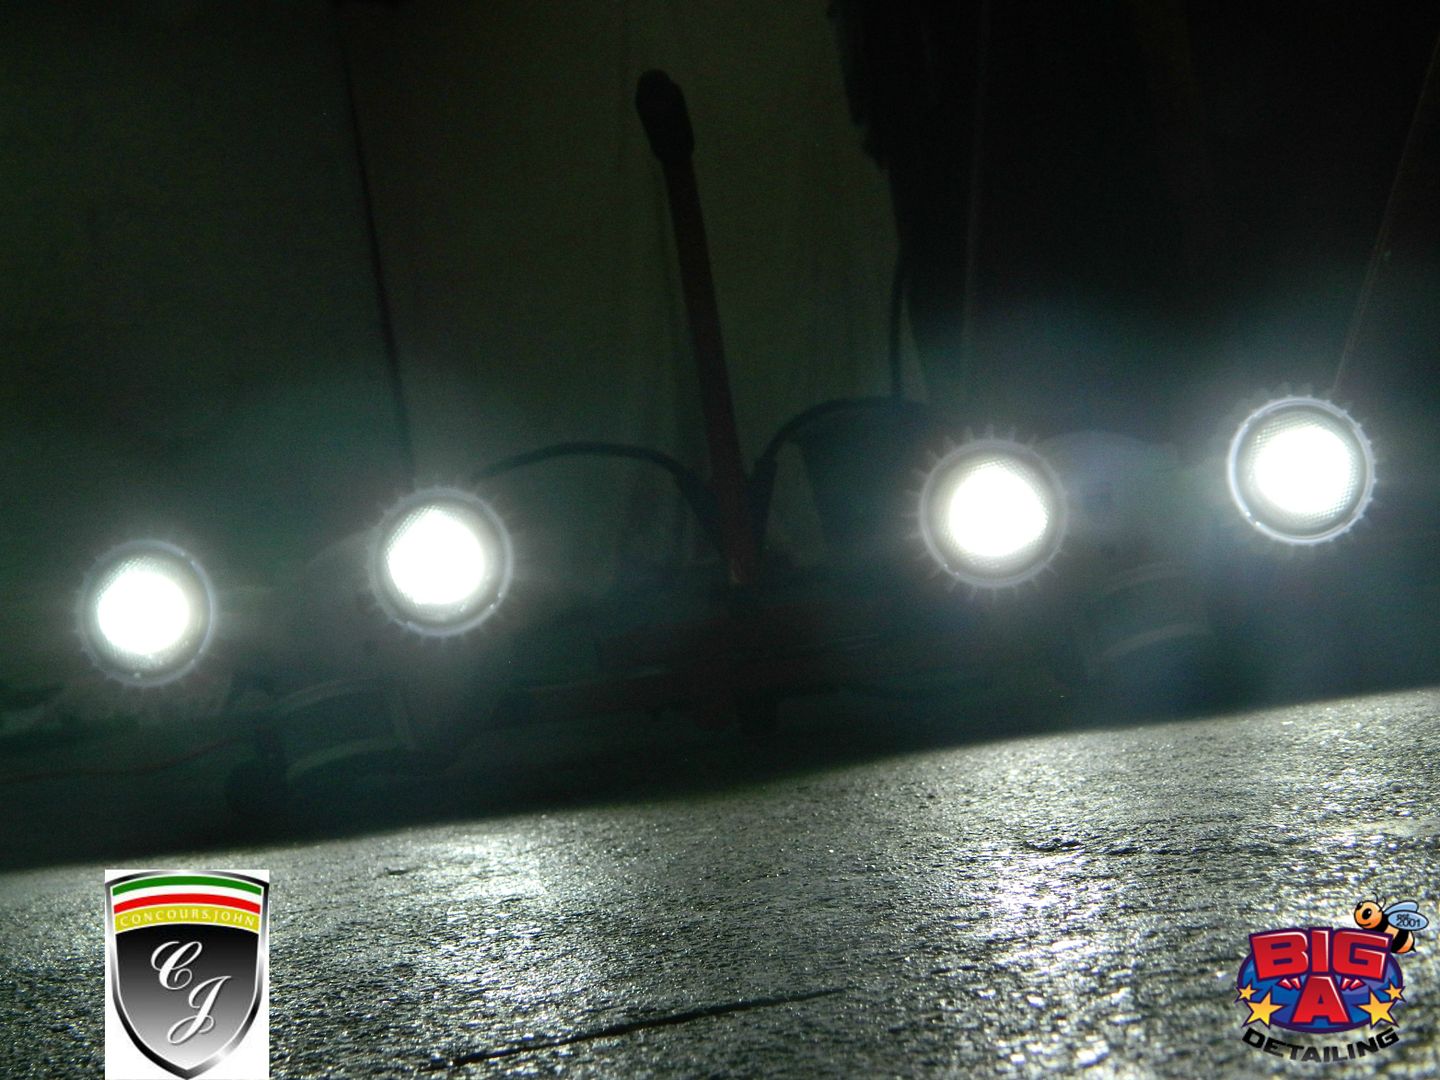
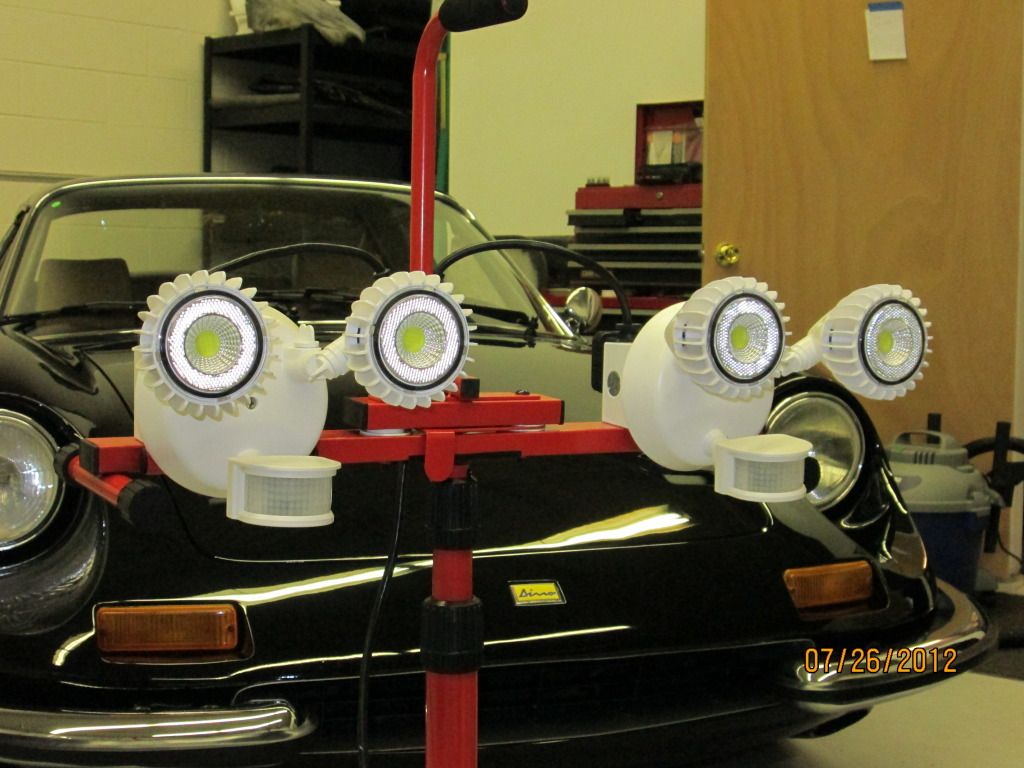
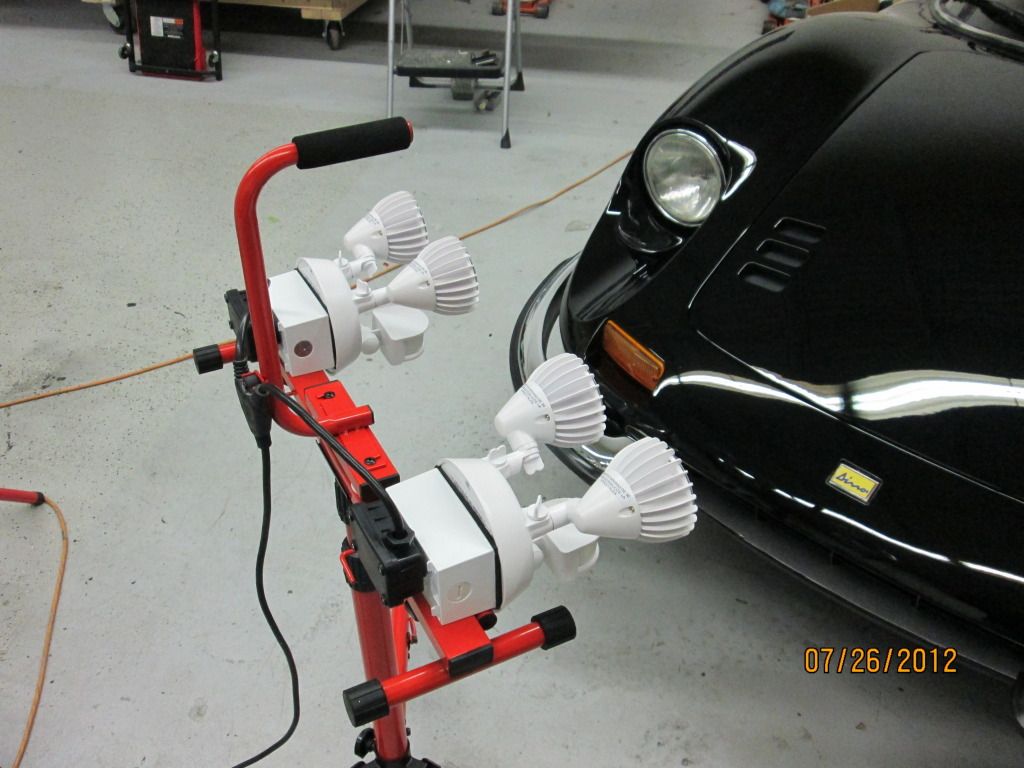
Finished Product
[TABLE="class: ncode_imageresizer_warning"]
[TR]
[TD="class: td1, width: 20"]
[/TD]
[TD="class: td2"]This image has been resized. Click this bar to view the full image. The original image is sized %1%2 and weights %3.[/TD]
[/TR]
[/TABLE]
[TABLE="class: ncode_imageresizer_warning"]
[TR]
[TD="class: td1, width: 20"]
[/TD]
[TD="class: td2"]This image has been resized. Click this bar to view the full image. The original image is sized %1%2 and weights %3.[/TD]
[/TR]
[/TABLE]
[TABLE="class: ncode_imageresizer_warning"]
[TR]
[TD="class: td1, width: 20"]
[/TD]
[TD="class: td2"]This image has been resized. Click this bar to view the full image. The original image is sized %1%2 and weights %3.[/TD]
[/TR]
[/TABLE]
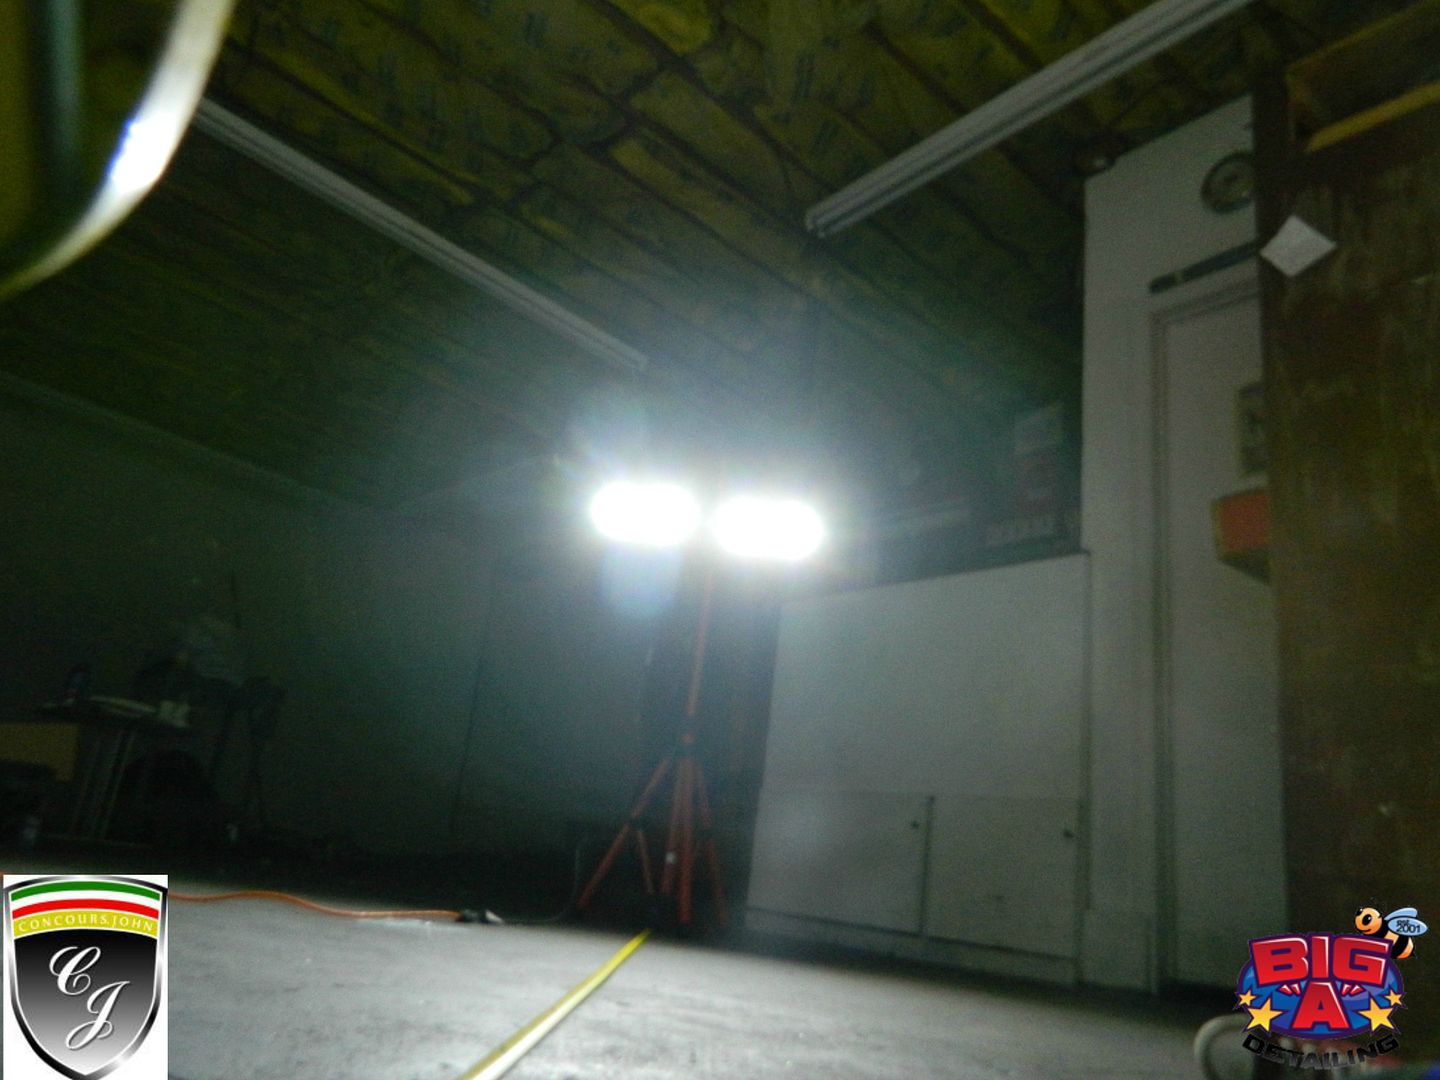
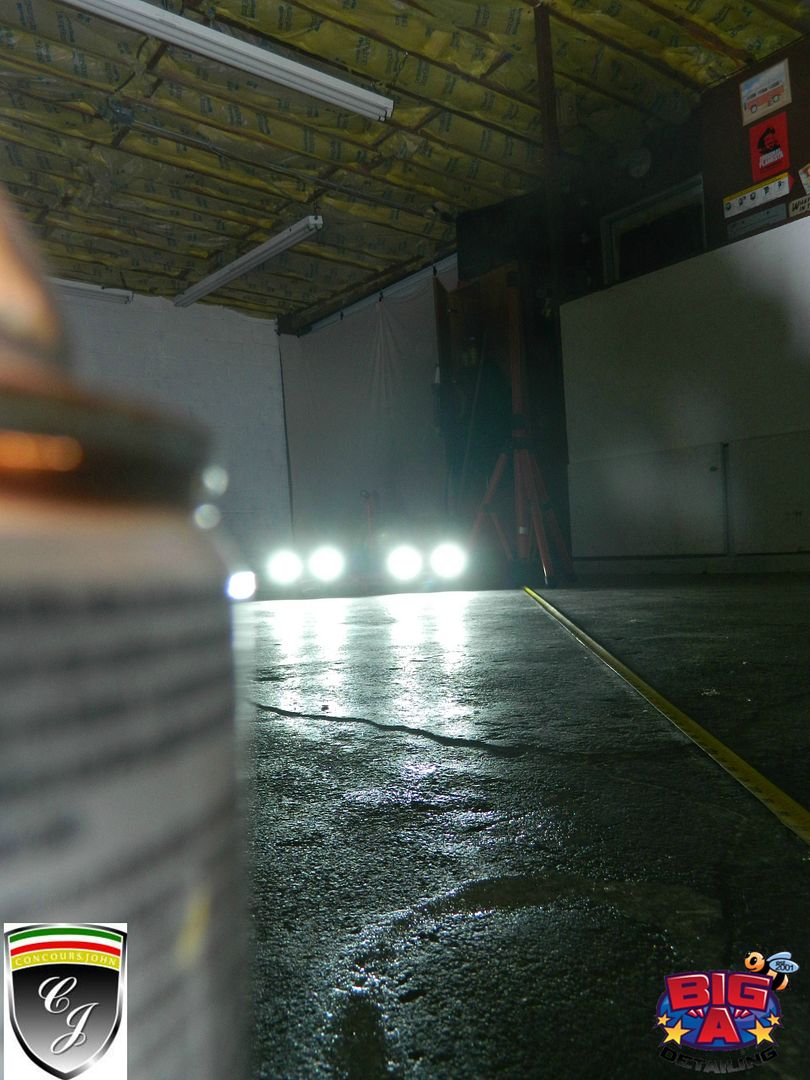
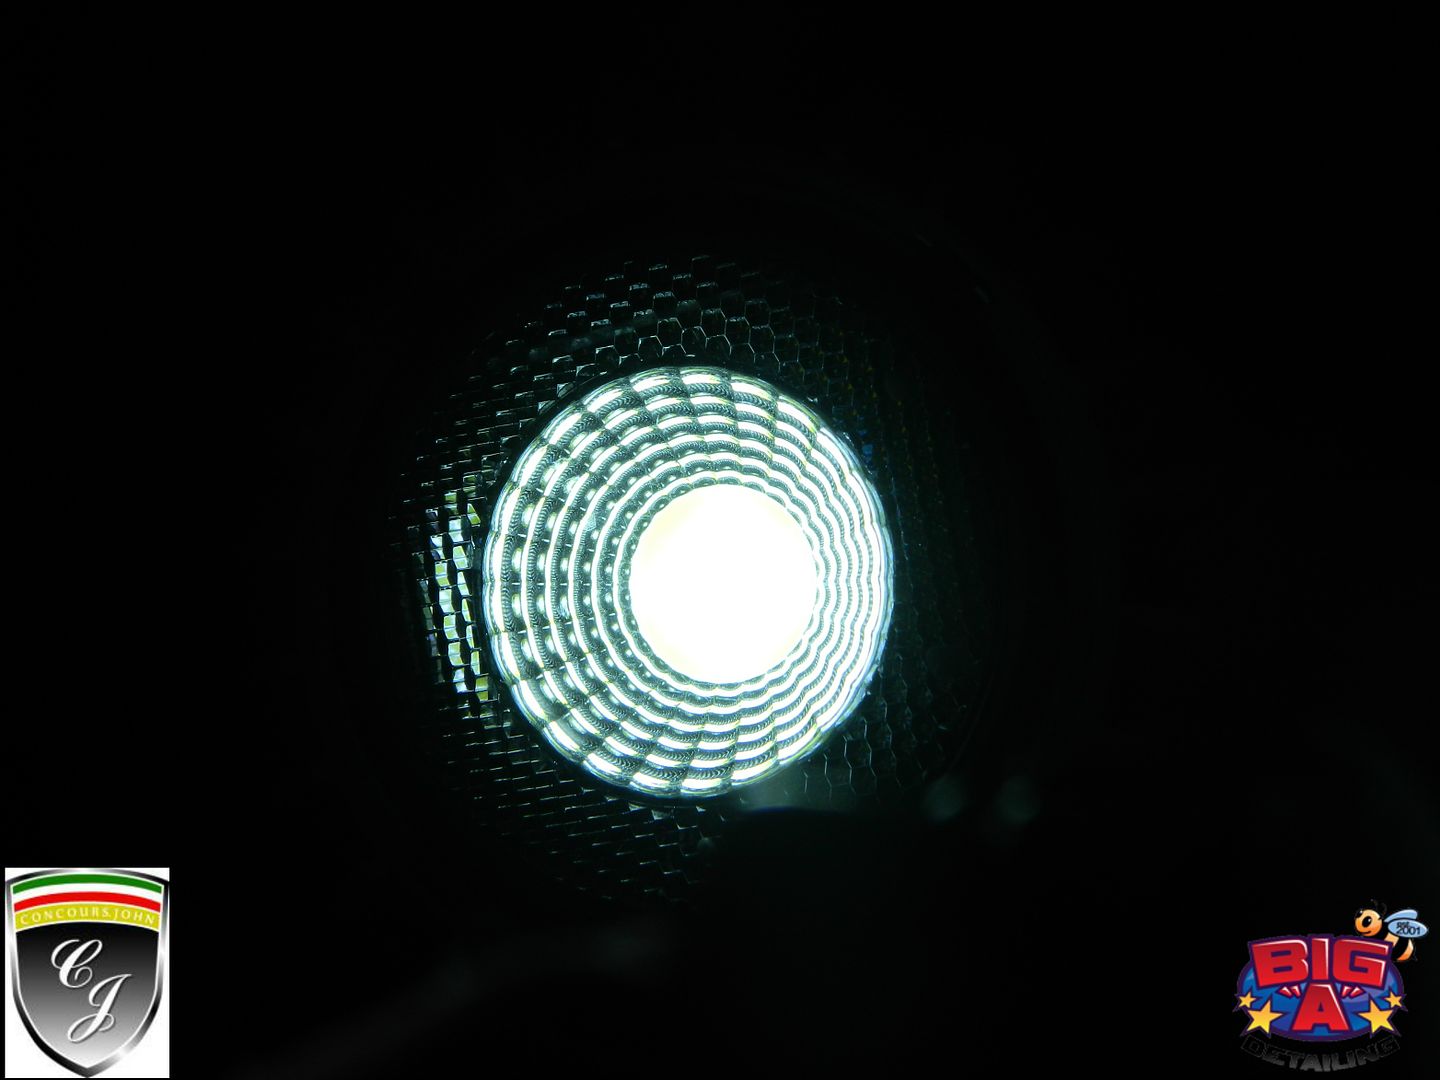
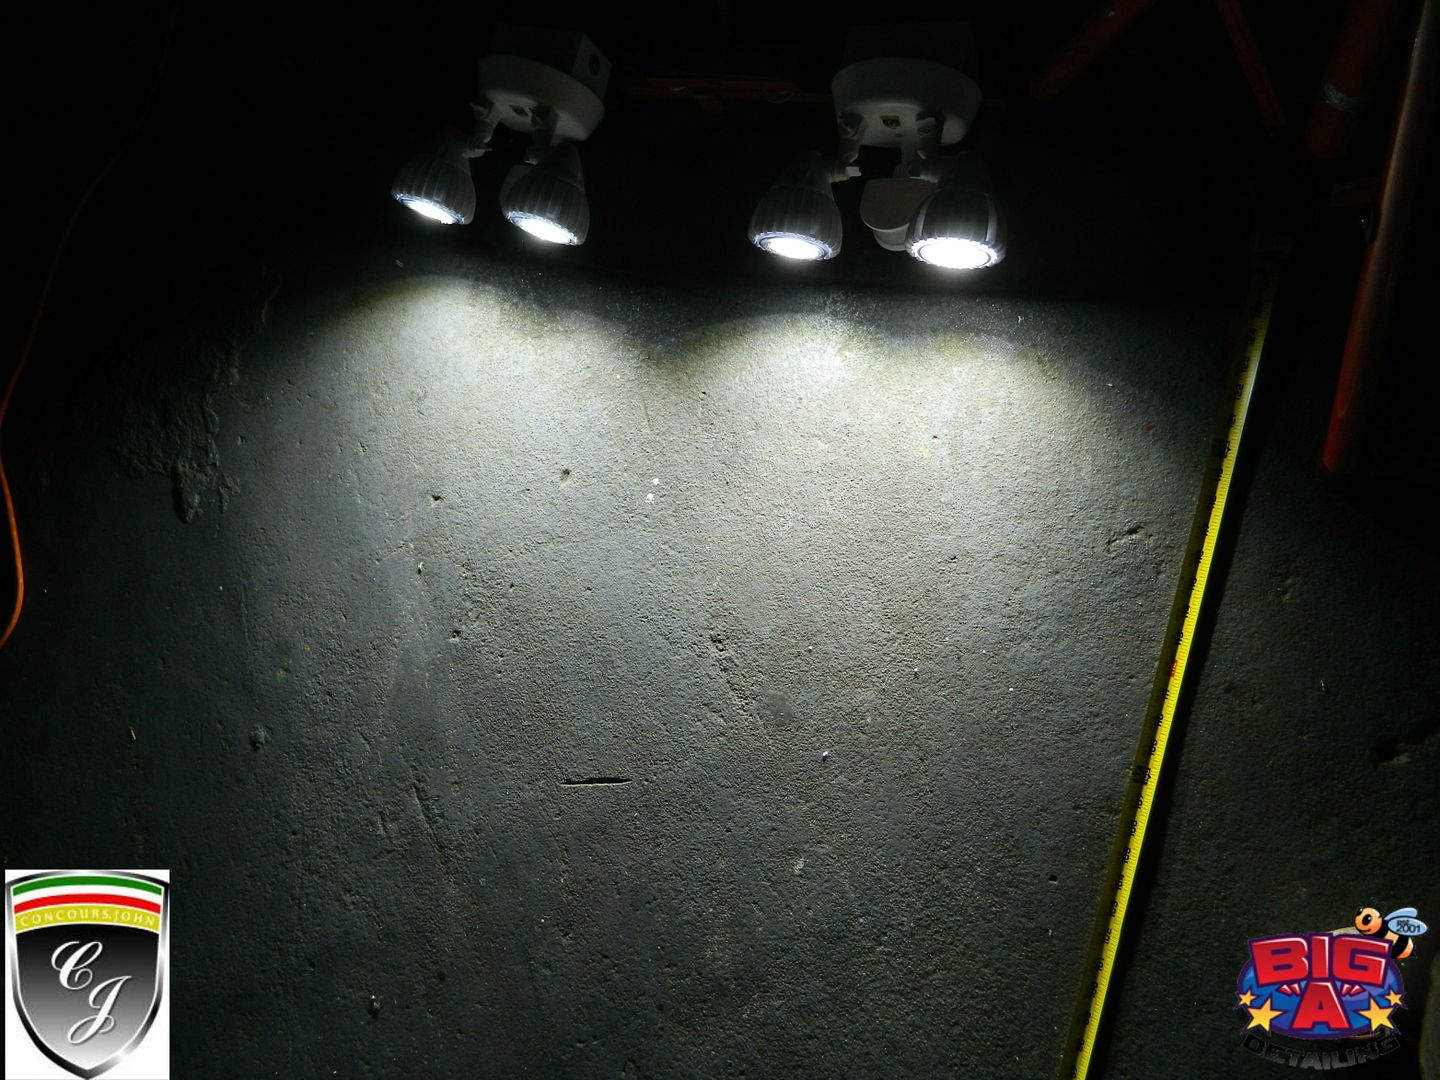
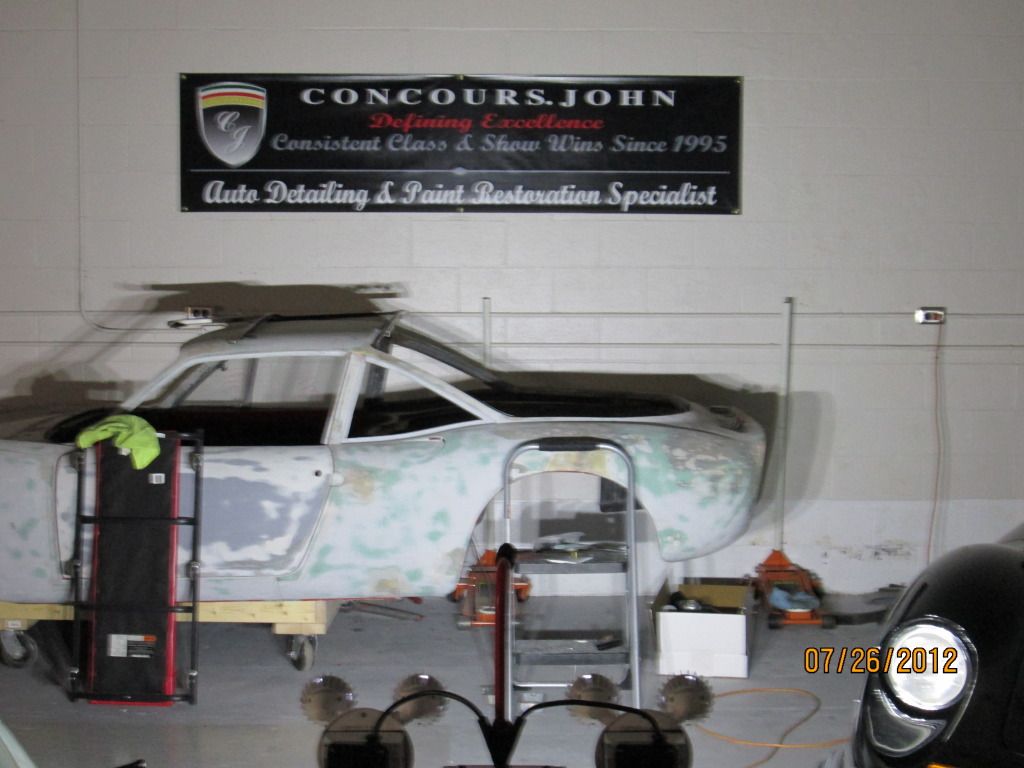
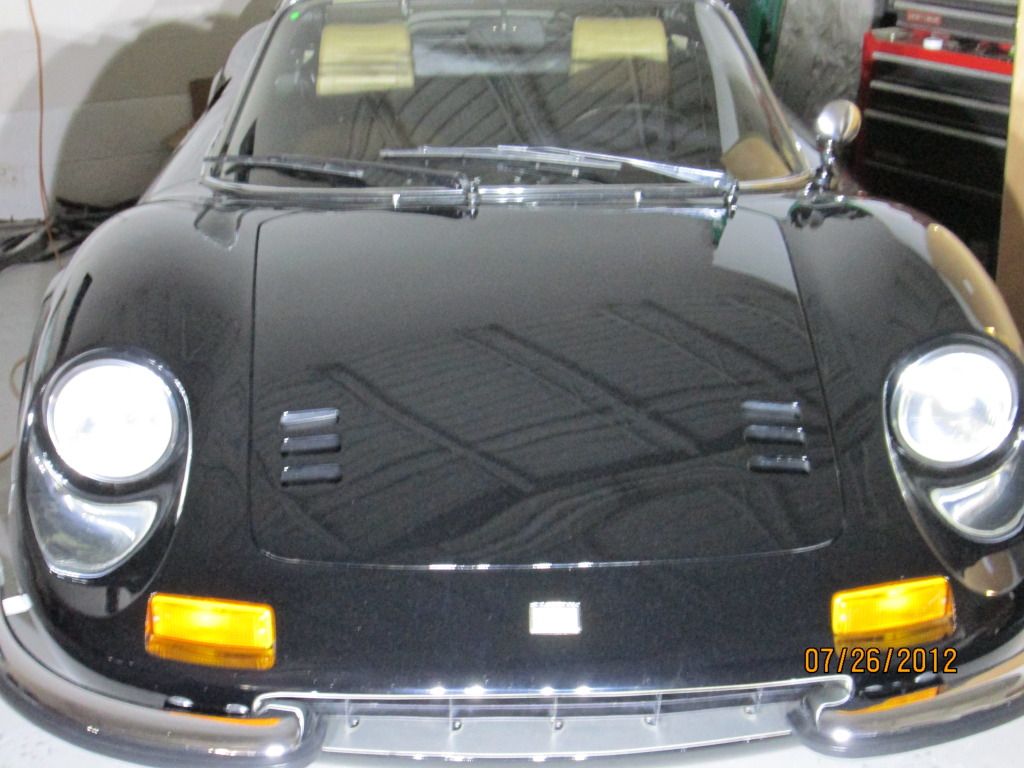
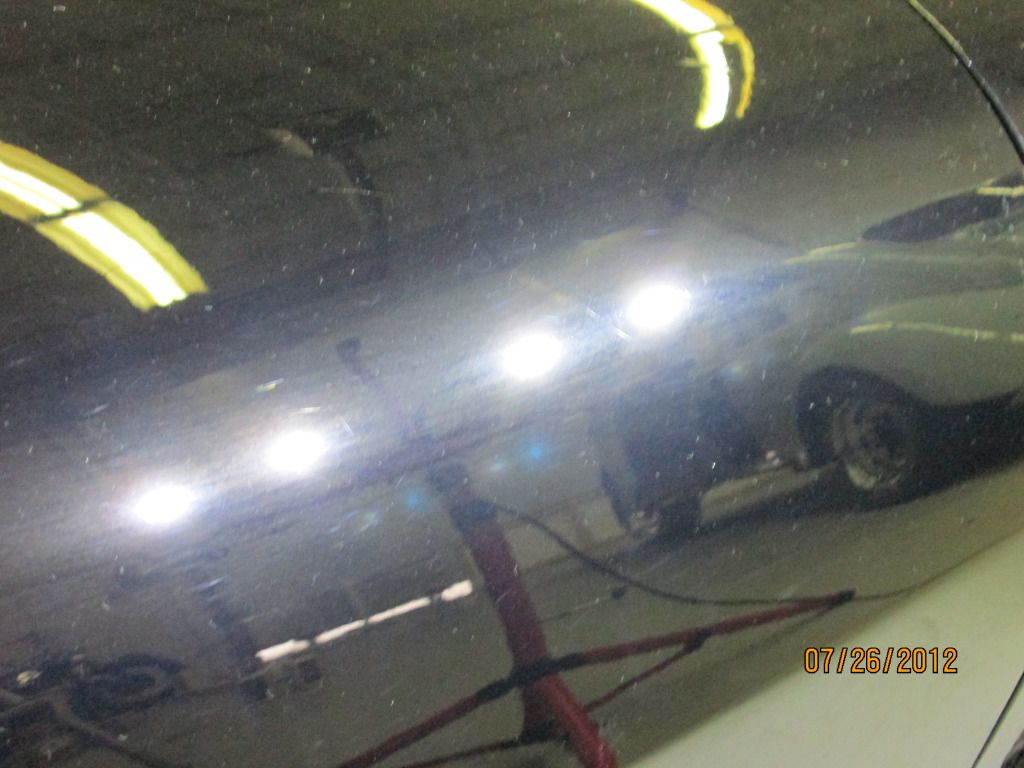
Lets light it up! Nice wash but what about the details.
[TABLE="class: ncode_imageresizer_warning"]
[TR]
[TD="class: td1, width: 20"]
[/TD]
[TD="class: td2"]This image has been resized. Click this bar to view the full image. The original image is sized %1%2 and weights %3.[/TD]
[/TR]
[/TABLE]
[TABLE="class: ncode_imageresizer_warning"]
[TR]
[TD="class: td1, width: 20"]
[/TD]
[TD="class: td2"]This image has been resized. Click this bar to view the full image. The original image is sized %1%2 and weights %3.[/TD]
[/TR]
[/TABLE]
[TABLE="class: ncode_imageresizer_warning"]
[TR]
[TD="class: td1, width: 20"]
[/TD]
[TD="class: td2"]This image has been resized. Click this bar to view the full image. The original image is sized %1%2 and weights %3.[/TD]
[/TR]
[/TABLE]
[TABLE="class: ncode_imageresizer_warning"]
[TR]
[TD="class: td1, width: 20"]
[/TD]
[TD="class: td2"]This image has been resized. Click this bar to view the full image. The original image is sized %1%2 and weights %3.[/TD]
[/TR]
[/TABLE]
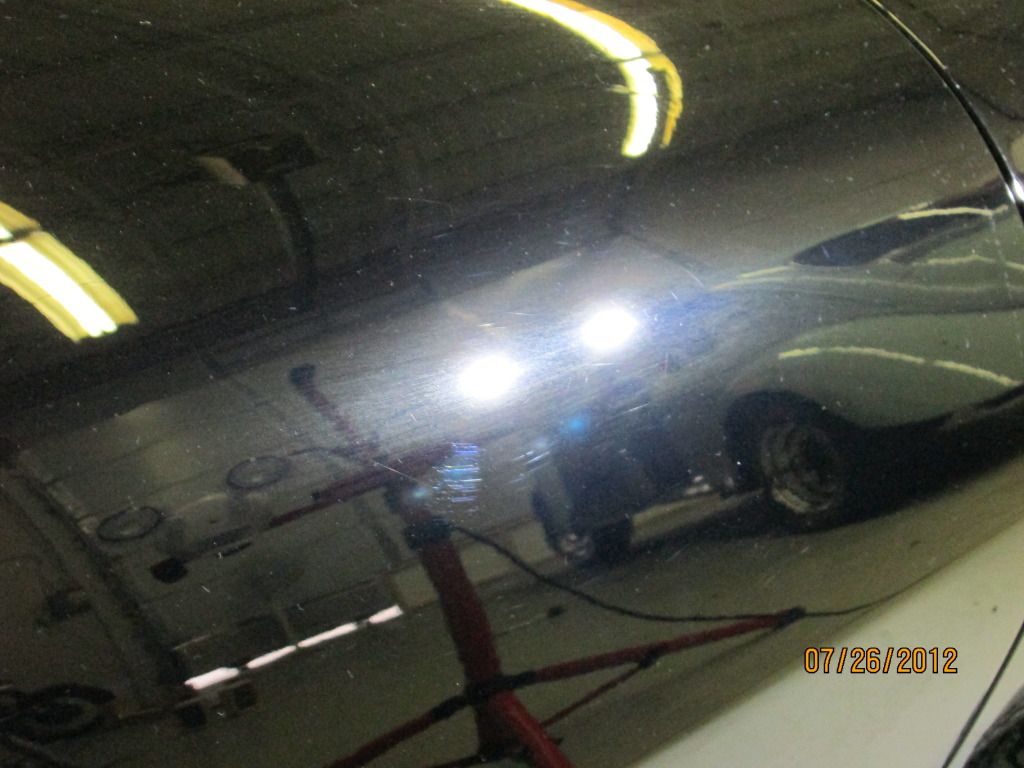
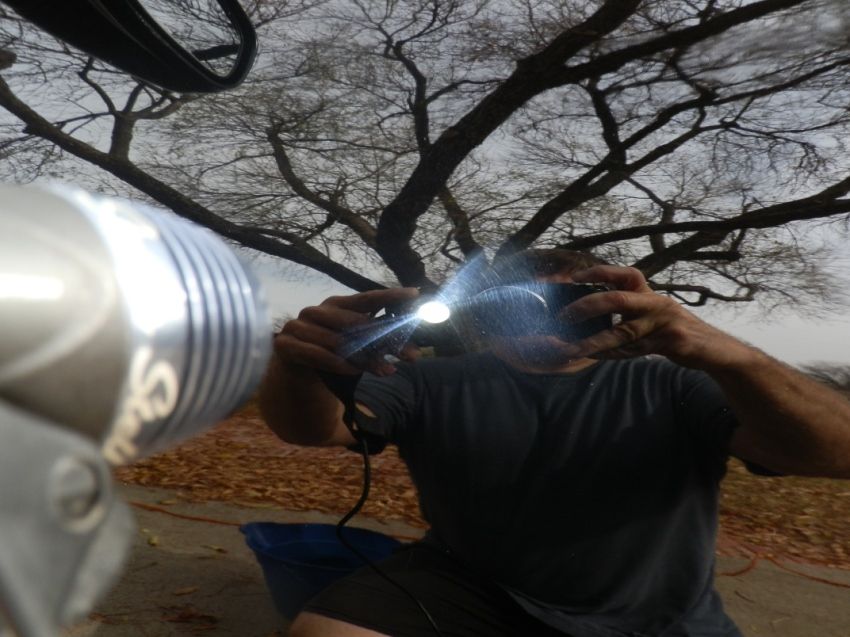
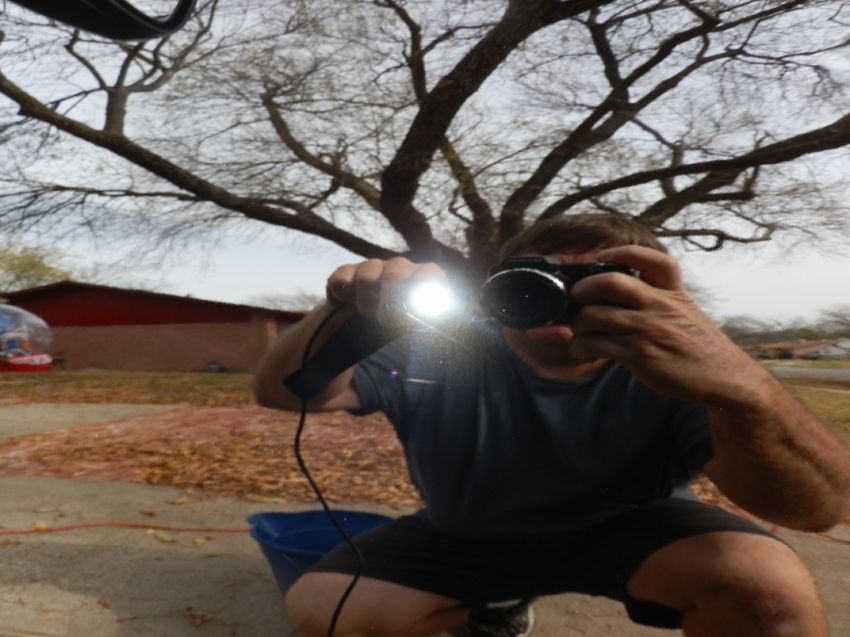
Now on light blue The light was not moved
The Rear
[TABLE="class: ncode_imageresizer_warning"]
[TR]
[TD="class: td1, width: 20"]
[/TD]
[TD="class: td2"]This image has been resized. Click this bar to view the full image. The original image is sized %1%2 and weights %3.[/TD]
[/TR]
[/TABLE]
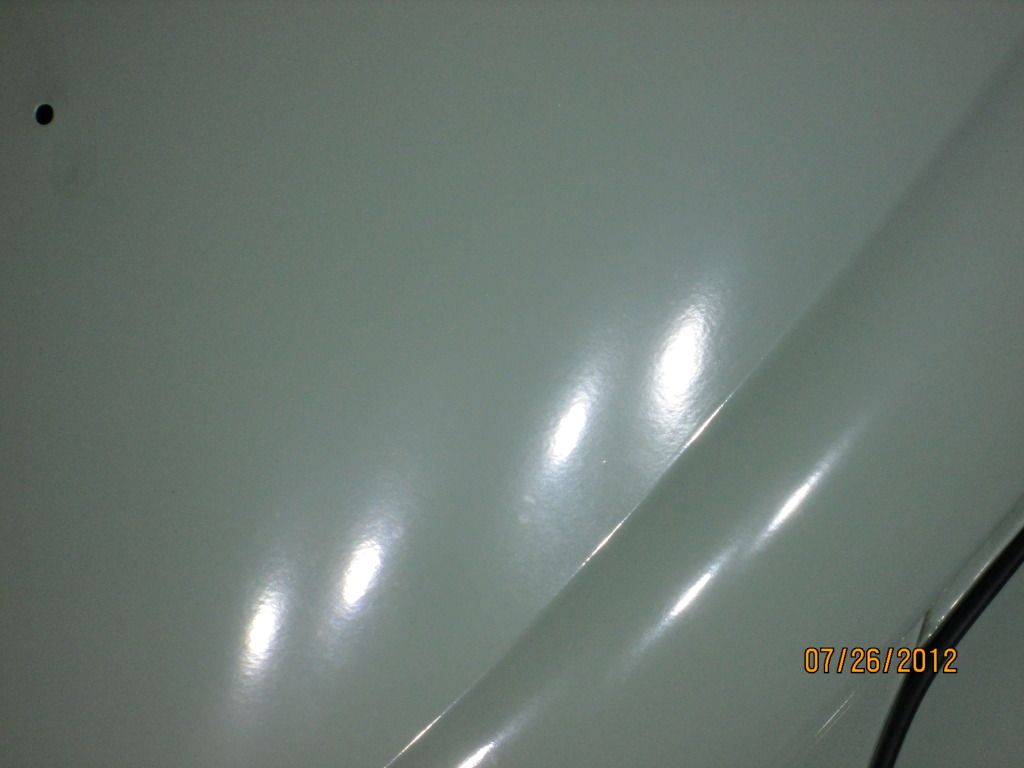
Fender
[TABLE="class: ncode_imageresizer_warning"]
[TR]
[TD="class: td1, width: 20"]
[/TD]
[TD="class: td2"]This image has been resized. Click this bar to view the full image. The original image is sized %1%2 and weights %3.[/TD]
[/TR]
[/TABLE]
Fender
[TABLE="class: ncode_imageresizer_warning"]
[TR]
[TD="class: td1, width: 20"]
[/TD]
[TD="class: td2"]This image has been resized. Click this bar to view the full image. The original image is sized %1%2 and weights %3.[/TD]
[/TR]
[/TABLE]

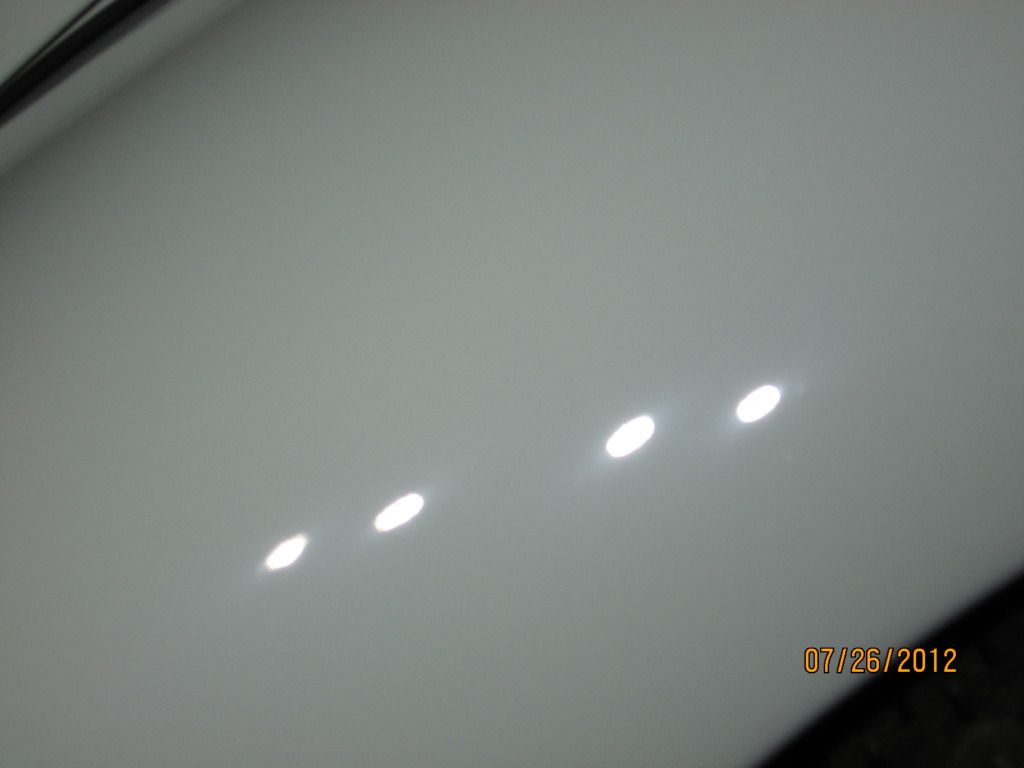
Qtr
[TABLE="class: ncode_imageresizer_warning"]
[TR]
[TD="class: td1, width: 20"]
[/TD]
[TD="class: td2"]This image has been resized. Click this bar to view the full image. The original image is sized %1%2 and weights %3.[/TD]
[/TR]
[/TABLE]
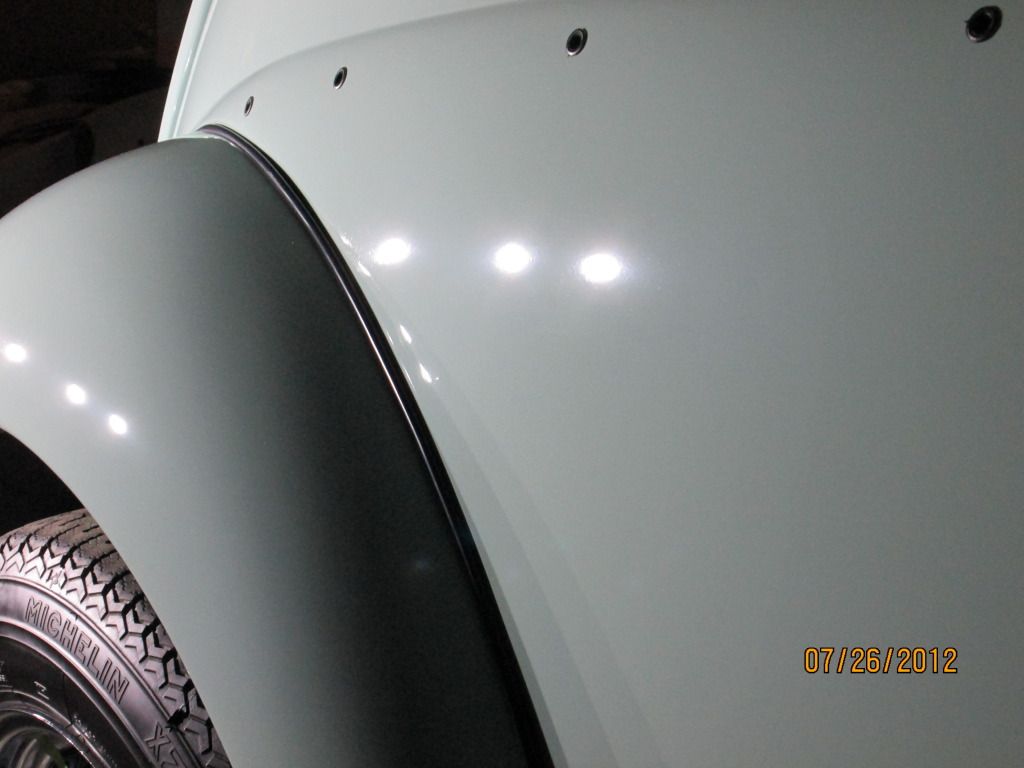
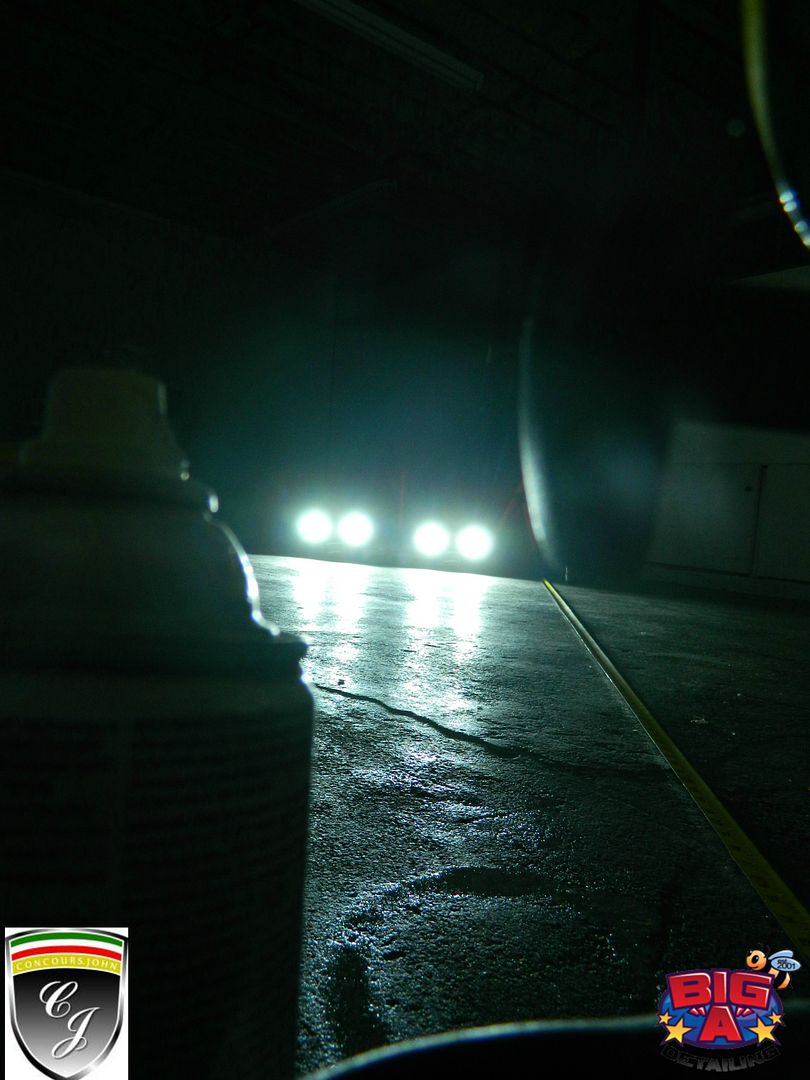
I really like how this light can be placed at 3/4 view and still see all the 3/4 veiw for inspection. This really reduces the amount of time moving fixtures. This also caught the slightest micro marring on the light blue.
These are the first pics with this camera. Im still fiquring out settings but they are better than my phone.
Thanks for looking. Any questions feel free to ask.
One note I have the motion detectors set on 10min. I like this because they stay on as long as there is motion within ten minutes. If I walk away they turn off saving hours on the lights. There are lower settings which will work the cycle resets as long as there is motion without loss of light. The motion sensor could be disabled also. I just like being able to walk away and have the lights turn off on their own.
Another note the lights still detach from tripod on the upper half as intended for lower work without clearance or balance issues with fixtures or wiring.
After the last halogen failed I was stuck with replacement but also came up with an additional light.
The Parts
Home Depot 1200 Halogen Light stand $60.00 You can buy the dual 500w for $35 which will work
[TABLE="class: ncode_imageresizer_warning"]
[TR]
[TD="class: td1, width: 20"]
[TD="class: td2"]This image has been resized. Click this bar to view the full image. The original image is sized %1%2 and weights %3.[/TD]
[/TR]
[/TABLE]
2 Home Depot CMM03120 $80.00 ea
[TABLE="class: ncode_imageresizer_warning"]
[TR]
[TD="class: td1, width: 20"]
[TD="class: td2"]This image has been resized. Click this bar to view the full image. The original image is sized %1%2 and weights %3.[/TD]
[/TR]
[/TABLE]
2 Aluminum case white exposed rectangle enclosures $3.49 ea
1 Bag of enclosure screw in blanks (4) $3.20
I'll be using the Husky stand for the build and the harness and boxes from my dead 2 500w Lutron halogens. The husky lights will go on the Lutron stand. The reason for this is the Husky has flat stock bars to futher support the boxes Ill be using. The Lutron has round stock.
All of this is preformed with no modification to the stands or lights making warranty not an issue. The only thing modified is the $3 boxes. It is all waterproof and look as original (other than white fixture/boxes)
The objective is a seviceable/upgradable yet professional looking assembly. This is also aside from the plug a waterproof build. Great for outside.
First the boxes are drilled to accept the original mounting hardware. I squared mine to match the bolt but a bigger hole with a star washer will work.
[TABLE="class: ncode_imageresizer_warning"]
[TR]
[TD="class: td1, width: 20"]
[TD="class: td2"]This image has been resized. Click this bar to view the full image. The original image is sized %1%2 and weights %3.[/TD]
[/TR]
[/TABLE]
The screw was then pulled flush into the square hole I made.
[TABLE="class: ncode_imageresizer_warning"]
[TR]
[TD="class: td1, width: 20"]
[TD="class: td2"]This image has been resized. Click this bar to view the full image. The original image is sized %1%2 and weights %3.[/TD]
[/TR]
[/TABLE]
The housing is then attached with the original thumb screw through the factory hole.
[TABLE="class: ncode_imageresizer_warning"]
[TR]
[TD="class: td1, width: 20"]
[TD="class: td2"]This image has been resized. Click this bar to view the full image. The original image is sized %1%2 and weights %3.[/TD]
[/TR]
[/TABLE]
The assembly is then mounted to the box per directions with the included
hardware/bracket. (this is no different then changing a fixture at your house)
An exterior outlet seal was used to seal the fixture to the box even though the wiring will be concealed in the factory harness box.
The screw in plug was used and drilled to feed wires though and use the seal that comes off the donor harness boxes.
[TABLE="class: ncode_imageresizer_warning"]
[TR]
[TD="class: td1, width: 20"]
[TD="class: td2"]This image has been resized. Click this bar to view the full image. The original image is sized %1%2 and weights %3.[/TD]
[/TR]
[/TABLE]
[TABLE="class: ncode_imageresizer_warning"]
[TR]
[TD="class: td1, width: 20"]
[TD="class: td2"]This image has been resized. Click this bar to view the full image. The original image is sized %1%2 and weights %3.[/TD]
[/TR]
[/TABLE]
The wires are fed through the gromet (hard to see 1st pic) then holes drilled and tapped using box as template. Box is then mounted.
[TABLE="class: ncode_imageresizer_warning"]
[TR]
[TD="class: td1, width: 20"]
[TD="class: td2"]This image has been resized. Click this bar to view the full image. The original image is sized %1%2 and weights %3.[/TD]
[/TR]
[/TABLE]
[TABLE="class: ncode_imageresizer_warning"]
[TR]
[TD="class: td1, width: 20"]
[TD="class: td2"]This image has been resized. Click this bar to view the full image. The original image is sized %1%2 and weights %3.[/TD]
[/TR]
[/TABLE]
Finished Product
[TABLE="class: ncode_imageresizer_warning"]
[TR]
[TD="class: td1, width: 20"]
[TD="class: td2"]This image has been resized. Click this bar to view the full image. The original image is sized %1%2 and weights %3.[/TD]
[/TR]
[/TABLE]
[TABLE="class: ncode_imageresizer_warning"]
[TR]
[TD="class: td1, width: 20"]
[TD="class: td2"]This image has been resized. Click this bar to view the full image. The original image is sized %1%2 and weights %3.[/TD]
[/TR]
[/TABLE]
[TABLE="class: ncode_imageresizer_warning"]
[TR]
[TD="class: td1, width: 20"]
[TD="class: td2"]This image has been resized. Click this bar to view the full image. The original image is sized %1%2 and weights %3.[/TD]
[/TR]
[/TABLE]
Lets light it up! Nice wash but what about the details.
[TABLE="class: ncode_imageresizer_warning"]
[TR]
[TD="class: td1, width: 20"]
[TD="class: td2"]This image has been resized. Click this bar to view the full image. The original image is sized %1%2 and weights %3.[/TD]
[/TR]
[/TABLE]
[TABLE="class: ncode_imageresizer_warning"]
[TR]
[TD="class: td1, width: 20"]
[TD="class: td2"]This image has been resized. Click this bar to view the full image. The original image is sized %1%2 and weights %3.[/TD]
[/TR]
[/TABLE]
[TABLE="class: ncode_imageresizer_warning"]
[TR]
[TD="class: td1, width: 20"]
[TD="class: td2"]This image has been resized. Click this bar to view the full image. The original image is sized %1%2 and weights %3.[/TD]
[/TR]
[/TABLE]
[TABLE="class: ncode_imageresizer_warning"]
[TR]
[TD="class: td1, width: 20"]
[TD="class: td2"]This image has been resized. Click this bar to view the full image. The original image is sized %1%2 and weights %3.[/TD]
[/TR]
[/TABLE]
Now on light blue The light was not moved
The Rear
[TABLE="class: ncode_imageresizer_warning"]
[TR]
[TD="class: td1, width: 20"]
[TD="class: td2"]This image has been resized. Click this bar to view the full image. The original image is sized %1%2 and weights %3.[/TD]
[/TR]
[/TABLE]
Fender
[TABLE="class: ncode_imageresizer_warning"]
[TR]
[TD="class: td1, width: 20"]
[TD="class: td2"]This image has been resized. Click this bar to view the full image. The original image is sized %1%2 and weights %3.[/TD]
[/TR]
[/TABLE]
Fender
[TABLE="class: ncode_imageresizer_warning"]
[TR]
[TD="class: td1, width: 20"]
[TD="class: td2"]This image has been resized. Click this bar to view the full image. The original image is sized %1%2 and weights %3.[/TD]
[/TR]
[/TABLE]
Qtr
[TABLE="class: ncode_imageresizer_warning"]
[TR]
[TD="class: td1, width: 20"]
[TD="class: td2"]This image has been resized. Click this bar to view the full image. The original image is sized %1%2 and weights %3.[/TD]
[/TR]
[/TABLE]
I really like how this light can be placed at 3/4 view and still see all the 3/4 veiw for inspection. This really reduces the amount of time moving fixtures. This also caught the slightest micro marring on the light blue.
These are the first pics with this camera. Im still fiquring out settings but they are better than my phone.
Thanks for looking. Any questions feel free to ask.
One note I have the motion detectors set on 10min. I like this because they stay on as long as there is motion within ten minutes. If I walk away they turn off saving hours on the lights. There are lower settings which will work the cycle resets as long as there is motion without loss of light. The motion sensor could be disabled also. I just like being able to walk away and have the lights turn off on their own.
Another note the lights still detach from tripod on the upper half as intended for lower work without clearance or balance issues with fixtures or wiring.