2006 Gto

DetailnByDustn

New member
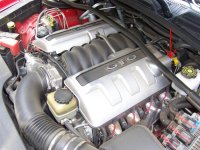
Hey thanks for viewing my thread! Today I got to start on detailing a 2006 Gto! Awesome Car! Very exciting to drive!


Day 1:


First thing I did was take some before pictures. After taking my before pictures, I then started washing the car.


Process:


Presoak, Rinse, Simple Green (Remove Wax), Wash, Clay, Wash, Dry


After trying to wash the inside of one of the wheels, decided to just take it to the shop and put it on jacks and remove the wheels and clean them off the car! A lot better! I let the wheels dwell for about 10 min before scrubbing, helped a lot beside the places that the wheel was starting to rust :( I tried my best to remove all the brake dust, Worked about a solid hour and a half washing the inside and out of these wheels. Still got some work left on them but they look a lot better now!


Before Pics:


100_4612.jpg


100_4615.jpg


100_4616.jpg


100_4618.jpg


100_4619.jpg


100_4621.jpg


100_4622.jpg


100_4624.jpg


100_4626.jpg


100_4613.jpg


100_4614.jpg


100_4617.jpg


After Pics of Car after washing and wheels after cleaning


100_4628.jpg


100_4629.jpg


100_4630.jpg


100_4632.jpg


100_4633.jpg


100_4634.jpg


Got a lot in store for tomorrow! Still got to clean up underneath the wheel wells and clean the brake calipers, along with the interior, waxing! At least a good two days haha
 
Day 2


Sorry about the slow posting, should of waited ill know next time


Okay worked on the outside, engine, and prep the leather today!


Process:

Meg 105 orange css pad

Meg 205 white css pad

Nxt Gen 2.0 blue css pad

Opti-seal


Leather: Leathernique allowing to absorb in the leather over night


Engine:

Apc, Rinse, Start Engine, Dry everything


Tips:

0000 with window cleaner


Okay heres the pics:


100_4646.jpg


100_4648.jpg


100_4649.jpg


100_4650.jpg


100_4652.jpg


Reflection Shots


100_4653.jpg


100_4654.jpg


100_4656.jpg


Leather being treated


100_4657.jpg


100_4659.jpg


Engine


100_4662.jpg


100_4663.jpg


100_4664.jpg


100_4665.jpg


Here is a link to the video, the photos are a little fuzzy old camera but I did take a video that gives the wax a better perspective haha


YouTube - 2006 Pontiac Gto - After Waxing
 
LQ9SS said:
Nice job Dustin!


What was your process with cleaning the engine compartment?


Thank you!


Its really simple, I rinsed the engine, applied 50/50 of apc (simple green) let it set for about 3 min, then agitated the really bad spots with a small brush/rag, rinsed it off, started the engine (helps it evaporate the water, and keeps from hurting the engine), rinsed it off, then dried everything I could reach with a mf towel.


You can apply a simple protectant to it, but most protectants attract dust, so I decided not to worry with it, besides it turned out pretty good.
 
Day 3


Today I worked on the interior of the gto, along with another layer of opti-seal, and the finishing touches, taking pics, etc...


First Interior


303 Protectant

Scottguard on floor mats - repels liquids

Finish with Prestine Clean on Leather, Then treated with 303

Windows - Invisible Glass

Nxt Quick Wax on Door Jambs

Soft Tooth Brush on old wax build up in the cracks, etc...

Woolite 10:1 to clean before protecting with 303


Finishing Touches

More Shine Tire Spray

Back to Black

Quick Wipedown


Final Results! :heelclick


100_4673.jpg


100_4674.jpg


100_4675.jpg


100_4676.jpg


100_4677.jpg


100_4678.jpg


100_4679.jpg


100_4680.jpg


100_4681.jpg


100_4682.jpg


100_4683.jpg


100_4685.jpg


100_4686.jpg


100_4698.jpg


Its always sad having to return it to the owner.... :bawling:
 
If you still have it or know the owner tell him to pull off the driver side plastic fuel rail cover and check the fuel line for wear.


The Plastic cover has been known to rub on the fuel line and eventually rub a hole in it. From looking at the pictures i cant tell if he has done anything to fix the issue.


All you have to do is get a larger diameter section of fuel line and wrap it over the fuel line that is already there. Its a $.20 fix that will save his car from burning to the ground.


It just happened to my 06 but i got lucky and caught it before it rubbed all the way through the line.


The detail looks great BTW :drool:
 
DetailnByDustn said:
Okay, thank you ill tell her right away, Did your plastic covers "flake" like this one did? Thanks Again


The fuel rail covers have not flaked yet but the gray piece on the back bumper flaked badly so i painted it to match the color of the car.
 
Here is the section of fuel line that has the problem. It kinda looks like there is something on there but i cant tell for sure.


attachment.php
 

Attachments

  • fuel line.jpg
    fuel line.jpg
    138.2 KB · Views: 121
DetailnByDustn said:
I see where your talking about, ill point it out to her, did they never send out a recall?


No.


I dont think it ever happened enough to warrant a recall. The GTO forum has close to 30,000 members and there were only 40,000 made so once it was discovered the word spread pretty quick.


Its a Simple fix so most people either removed the covers or added a larger line over the stock one themselves.
 
Dunncsu said:
No.


I dont think it ever happened enough to warrant a recall. The GTO forum has close to 30,000 members and there were only 40,000 made so once it was discovered the word spread pretty quick.


Its a Simple fix so most people either removed the covers or added a larger line over the stock one themselves.


Wow, 30,000 out of 40,000 dang, O okay
 
Back
Top