RustyBumper
New member
This car belongs to my friend's girlfriend. It had been a while since it was last washed and it has never been polished. I had hoped to detail the inside quickly and then polish the paint. However, that was not to be the case. As soon as I opened the door I knew that the inside was going to take me longer. Three hours to be precise! My friend is a dog trainer and she helps him out from time to time. When he's out on the road, she takes their dogs to a local park where we meet once a week for remedial training. They have two long haired retrievers. 
This interior pic doesn't come close to depicting the trouble that awaited me.


As you can see from the above photos, the interior is grey. I was in rush to get started because I knew that I had my work cut out for me, therefore I neglected to take a picture of the back seat. There was so much hair on the back seat that it looked white. The backs of the front seats were the same way. A couple of times I had to shut off my shop vac and clean the air filter because I would hear it begin to struggle.
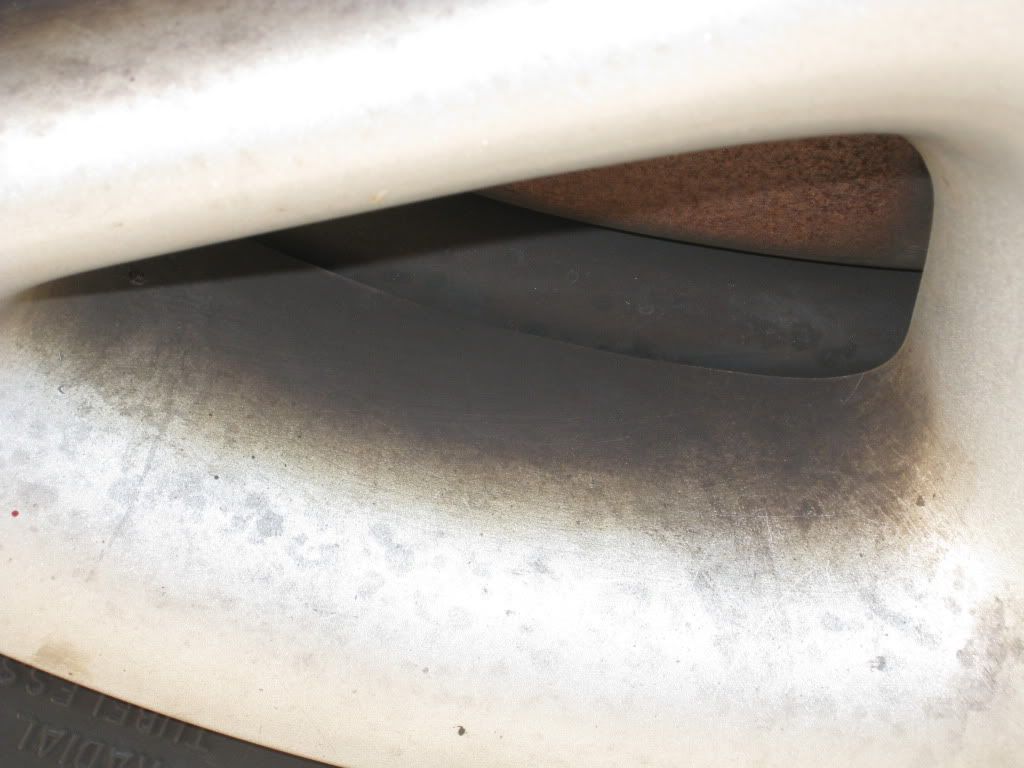
This car was brought down from Michigan state and has had some work done on it. The hood has been replaced, so has the passenger front 1/4 panel as well as the front bumper. The rear passenger's door on the driver's side has also been worked on. Originally I was going to remove the front plate so I could thoroughly was and polish the front bumper, but after taking a look behind it first, I noticed that the paint was coming off in big flakes, so I didn't even bother with it.
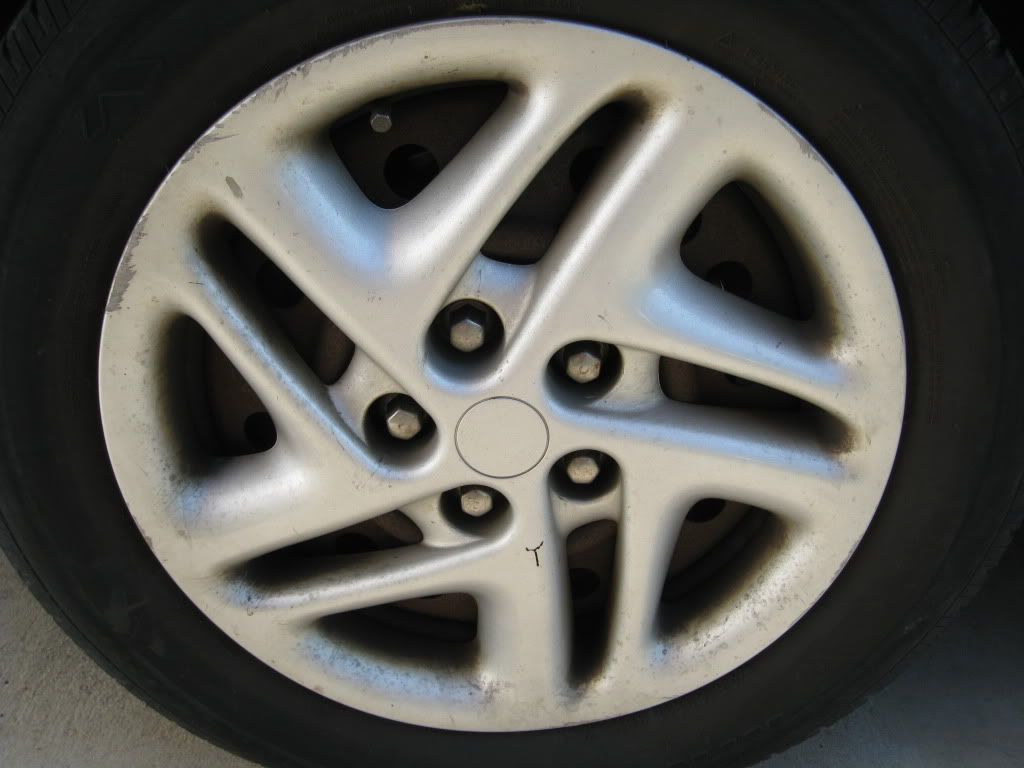
The wheels covers have never recieved a thorough cleaning, so the brake dust hardly budged. I tried using Optimum Power Clean and CG's Diablo Wheel Gel with little to no success. The afore mentioned products were diluted, so next time I'll try hitting them at full strength.

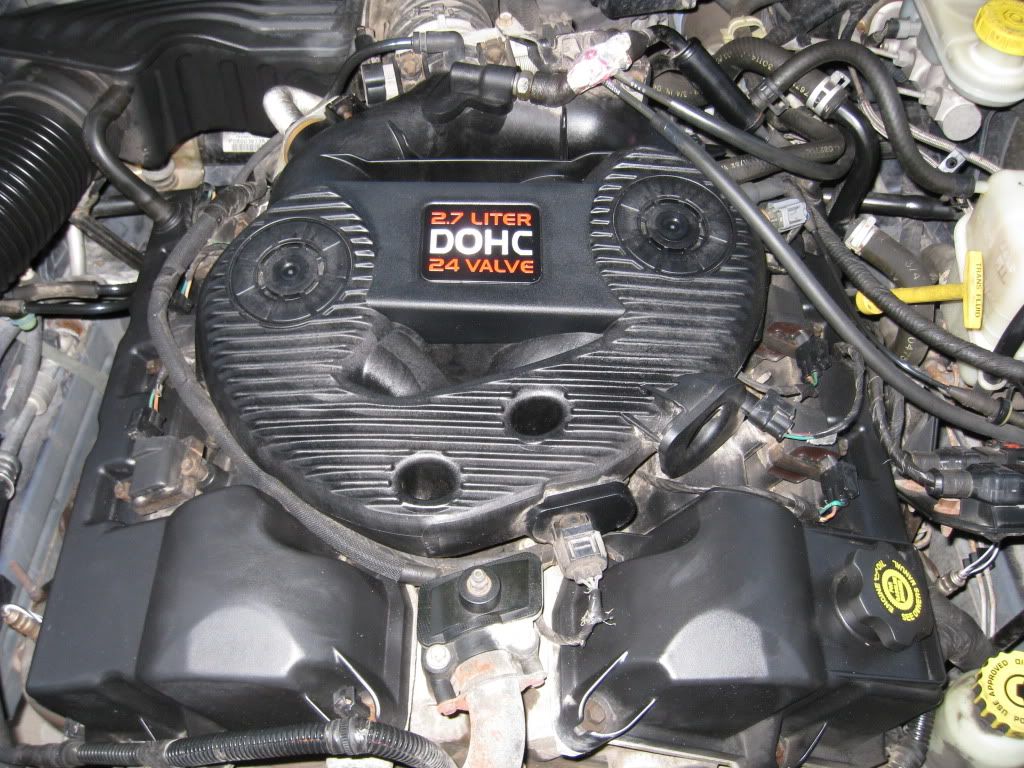
After working on the interior and the wheels, I decided that I would then clean the engine compartment. This was actually the highlight of Friday for me. It was very dirty, but in comparison to the wheels and the interior, it was a piece of cake!! :thumbup: The areas of concern for me were wrapped with foil. The engine was then sprayed down with a good dose of Optimum Power Clean and left to dwell for a couple of minutes. I would have let it dwell longers, but here in S. Texas everything dries quickly. After dwelling for a couple of minutes, the engine was scrubbed down with various brushes and rinsed with low pressure water. After drying everything the engine was then treated with 303.


After the engine was cleaned, I began washing the exterior. I foamed the car down using Optimum Car Wash and a little Optimum Power Clean. It was foamed and rinsed twice...with little effect. lol The car wash then hand washed using the TBM. The car soaped used was OCW along with a Viking mf mitt. The car was dried using a Viking WW.
By the time I was done with the above mentioned steps, the sun was starting to go down and I was also extremely tired. I didn't push enough water that day and I was starting to hurt. I had began to polish the car using my Flex 3401 and M205 when I decided to stop because I was gassed. I told her that she would have to come back another day so I could finish polishing her car. I told her that I would probably need a full day to work on it. The car really needs to be clayed. I didn't do it this day because I was short on time and I had wanted to get an idea of how the paint would polish best.
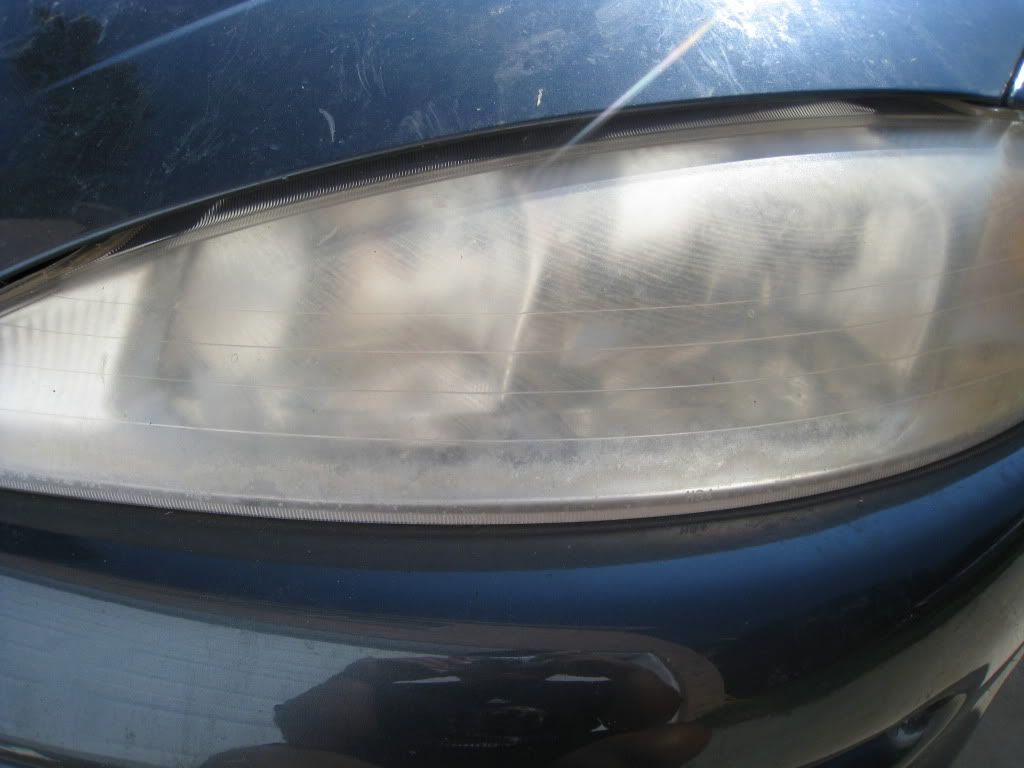
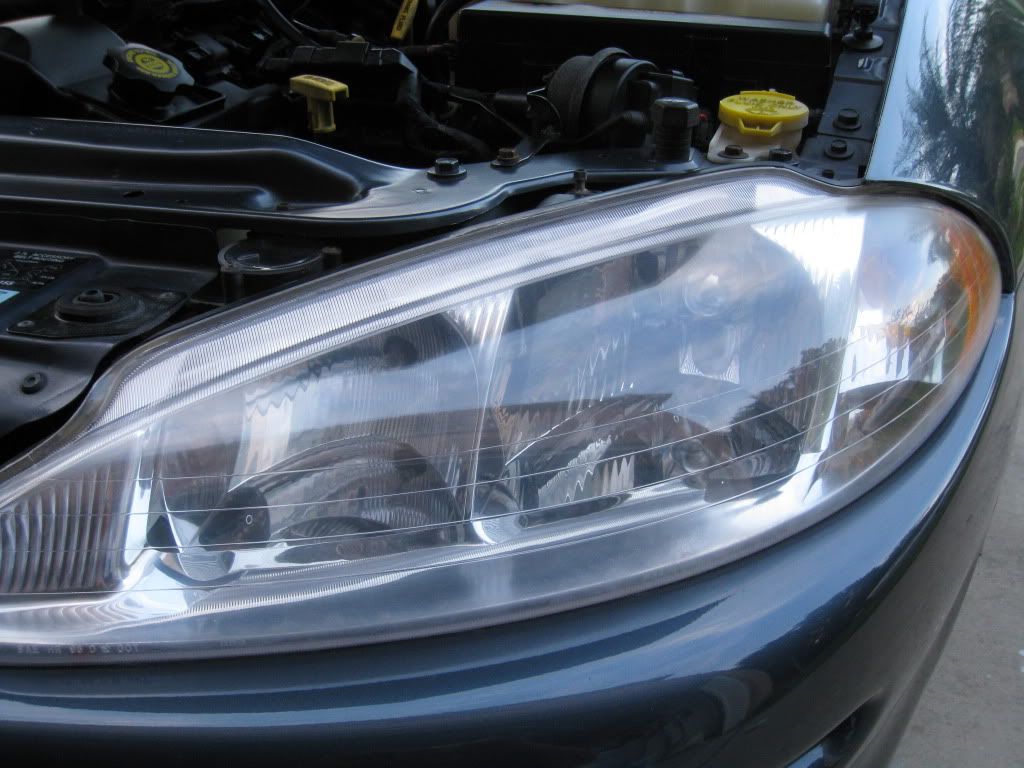
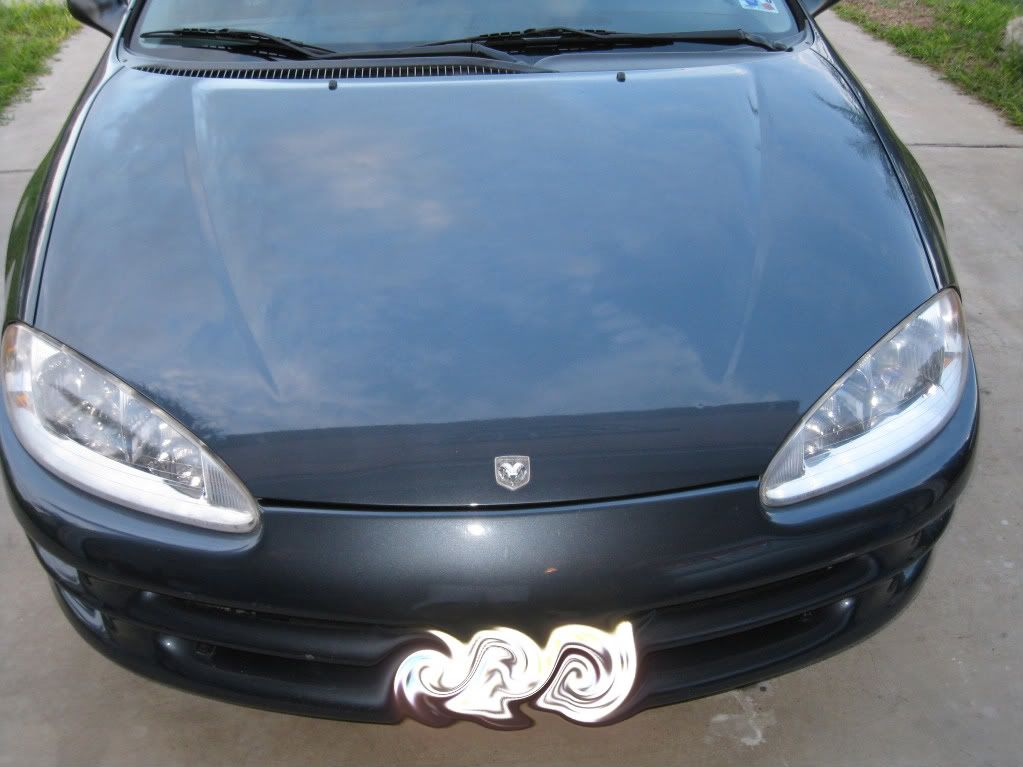
Fast forward to today. She arrived here at about 4:30. The headlights on her car was really bad and I told her that I would try to correct them. She was happy and told that they hardly produced any light for her and that whatever I did to them would be a great improvement over what they were.
My process began by wet sanding the lights using 3M wet/dry paper in the following grits: 800, 1200 and 2000. They were then polished via my Flex 3401 orange pad/105 and white pad/205. The headlights were then sealed with Opti-Seal. One of the headlights still had some defects in it. It looked like pitting and fearing that I might damage it, I didn't try to chase the pitting with the sandpaper. Please give me your input. I value everyone's opinions.")

Well, there you have it. That was my detail for the weekend. Hope you enjoyed and sorry if it was a bit long. I look forward to everyone's input.
This interior pic doesn't come close to depicting the trouble that awaited me.
As you can see from the above photos, the interior is grey. I was in rush to get started because I knew that I had my work cut out for me, therefore I neglected to take a picture of the back seat. There was so much hair on the back seat that it looked white. The backs of the front seats were the same way. A couple of times I had to shut off my shop vac and clean the air filter because I would hear it begin to struggle.
This car was brought down from Michigan state and has had some work done on it. The hood has been replaced, so has the passenger front 1/4 panel as well as the front bumper. The rear passenger's door on the driver's side has also been worked on. Originally I was going to remove the front plate so I could thoroughly was and polish the front bumper, but after taking a look behind it first, I noticed that the paint was coming off in big flakes, so I didn't even bother with it.
The wheels covers have never recieved a thorough cleaning, so the brake dust hardly budged. I tried using Optimum Power Clean and CG's Diablo Wheel Gel with little to no success. The afore mentioned products were diluted, so next time I'll try hitting them at full strength.
After working on the interior and the wheels, I decided that I would then clean the engine compartment. This was actually the highlight of Friday for me. It was very dirty, but in comparison to the wheels and the interior, it was a piece of cake!! :thumbup: The areas of concern for me were wrapped with foil. The engine was then sprayed down with a good dose of Optimum Power Clean and left to dwell for a couple of minutes. I would have let it dwell longers, but here in S. Texas everything dries quickly. After dwelling for a couple of minutes, the engine was scrubbed down with various brushes and rinsed with low pressure water. After drying everything the engine was then treated with 303.
After the engine was cleaned, I began washing the exterior. I foamed the car down using Optimum Car Wash and a little Optimum Power Clean. It was foamed and rinsed twice...with little effect. lol The car wash then hand washed using the TBM. The car soaped used was OCW along with a Viking mf mitt. The car was dried using a Viking WW.
By the time I was done with the above mentioned steps, the sun was starting to go down and I was also extremely tired. I didn't push enough water that day and I was starting to hurt. I had began to polish the car using my Flex 3401 and M205 when I decided to stop because I was gassed. I told her that she would have to come back another day so I could finish polishing her car. I told her that I would probably need a full day to work on it. The car really needs to be clayed. I didn't do it this day because I was short on time and I had wanted to get an idea of how the paint would polish best.
Fast forward to today. She arrived here at about 4:30. The headlights on her car was really bad and I told her that I would try to correct them. She was happy and told that they hardly produced any light for her and that whatever I did to them would be a great improvement over what they were.
My process began by wet sanding the lights using 3M wet/dry paper in the following grits: 800, 1200 and 2000. They were then polished via my Flex 3401 orange pad/105 and white pad/205. The headlights were then sealed with Opti-Seal. One of the headlights still had some defects in it. It looked like pitting and fearing that I might damage it, I didn't try to chase the pitting with the sandpaper. Please give me your input. I value everyone's opinions.
Well, there you have it. That was my detail for the weekend. Hope you enjoyed and sorry if it was a bit long. I look forward to everyone's input.