G35stilez
Ari Gold
I want to start off with the suggestion to go grab a beverage or snack; this is a bit long...
Zack (Zackb911) contacted me a few months back about having his 1990 MB 350 SDL detailed. He has been a long-time member and holds plenty of top name products. He knows the processes, but after trying a PC and some polish on the MB, he decided to give my services a shot instead. It’s not that he doesn’t know what he’s doing, but this paint needed some serious attention. For his other past and current vehicles, he has taken pristine care of them and surely knows his “stuff”. Zack came ~2 hours from Mass to CT and accompanied me for a day of detailing.
The car is a 1990 Mercedes-Benz 350 SDL diesel with just shy of 250,000 miles. The car is an absolute beaut. I recall a conversation we had about mid-day in regards to the utter massiveness of this vehicle. It felt like a limo, but without an aftermarket stretch. Even though it was 16 years old, the interior still felt nice and snug and rather “tight”. This particular Mercedes, Zack equipped with a system to run off cooking oil from McDonald’s, Chinese Food Restaurants, and so on. I was astounded to hear of this technology and amazing fuel economy and cost savings. All in all, there really wasn’t much wrong with it that a solid detail couldn’t fix.
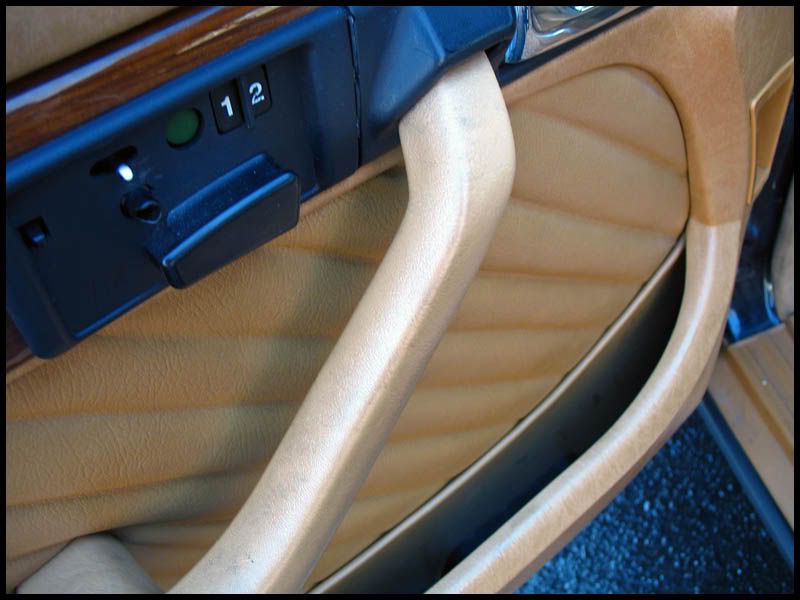
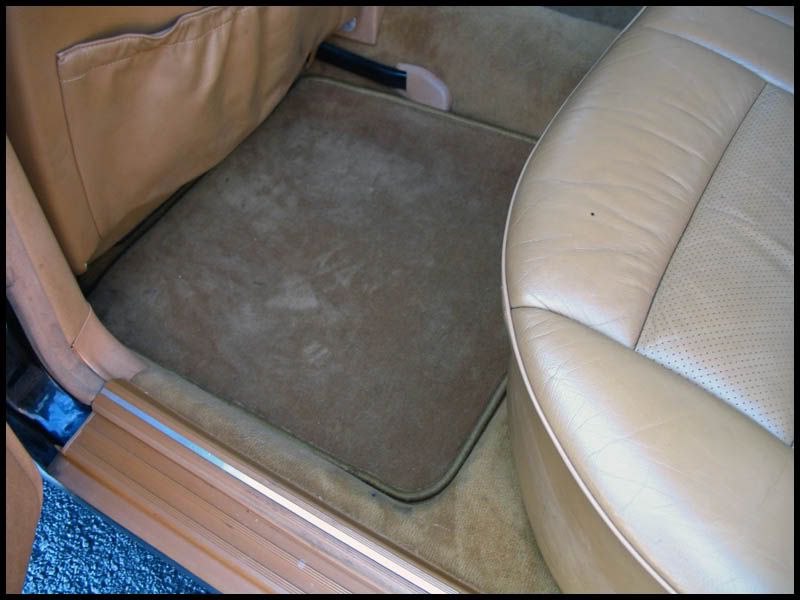
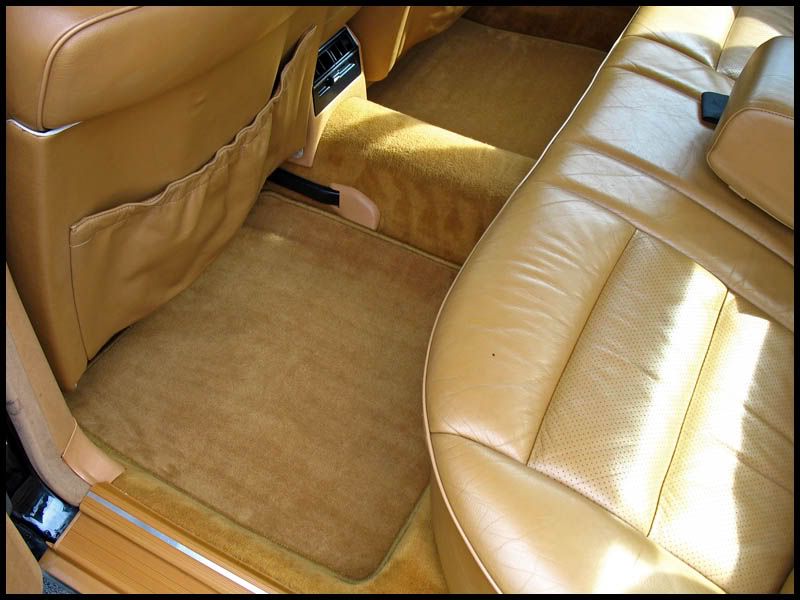
The Interior
Before I even begin, I want to say there are NO camera tricks used below. I took the pictures at the same resolution, same white balance, same ISO, and so on. I resized them using Adobe Photoshop.
Now, the interior was generally soiled and appeared a bit dull to me. The leather wasn’t ripped anywhere, just had normal wear (light for 250k), and deep down dirt. The mats and carpets were pretty dirty, but nothing Oxi couldn’t handle. This total process took me about ~2 hours and included:
Clean
-Vacuum and pre-treat heavy stains with Kids & Pets
-Kids & Pets to clean leather, vinyl, plastic, and rubber
-Amazing Roll-Off cut 3:1 to clean door sills and jams
-Oxi-Clean (1 scoop: 1 gallon) to clean carpets/mats, then misted with IPA cut 50:50, and extracted
Protect
-Poorboy’s PwC on wood grain, chrome, and aluminum trim
-Autoglym Glass Polish on interior windows and mirrors
-Zaino Z26 on leather, vinyl, plastic, and rubber (1 ounce Z16: 7 ounces Z10)
-Zaino Z8 in jams
Before
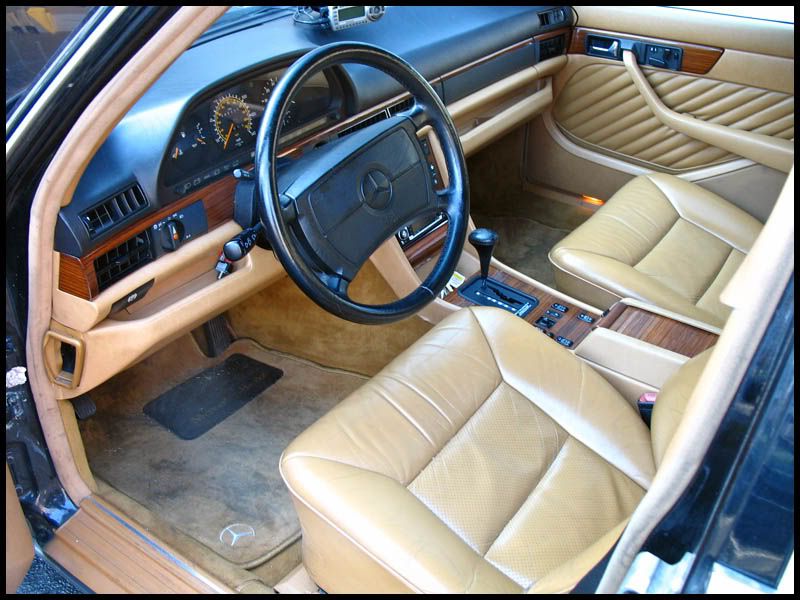
After
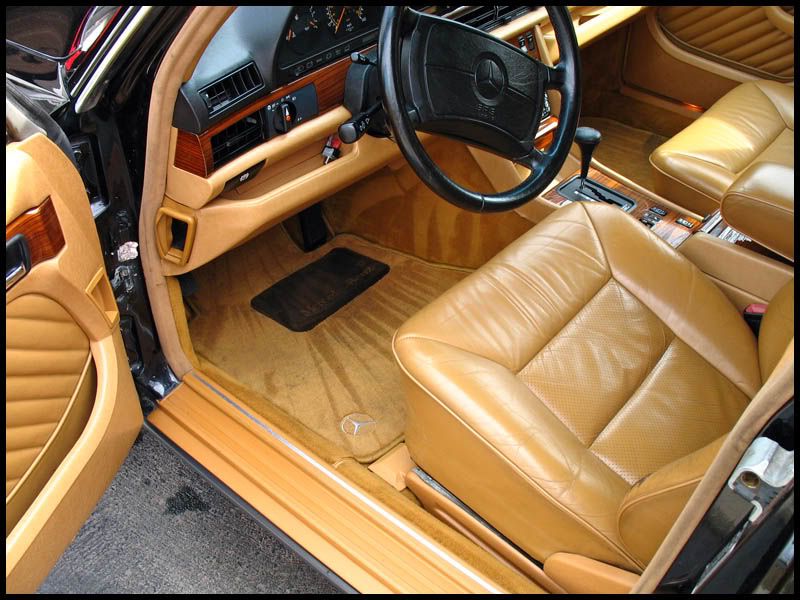
Before
After
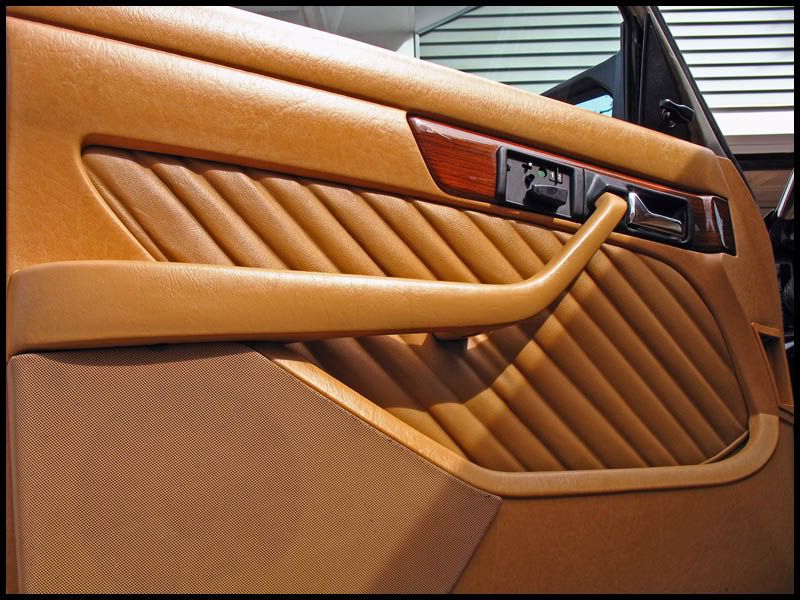
Before
After
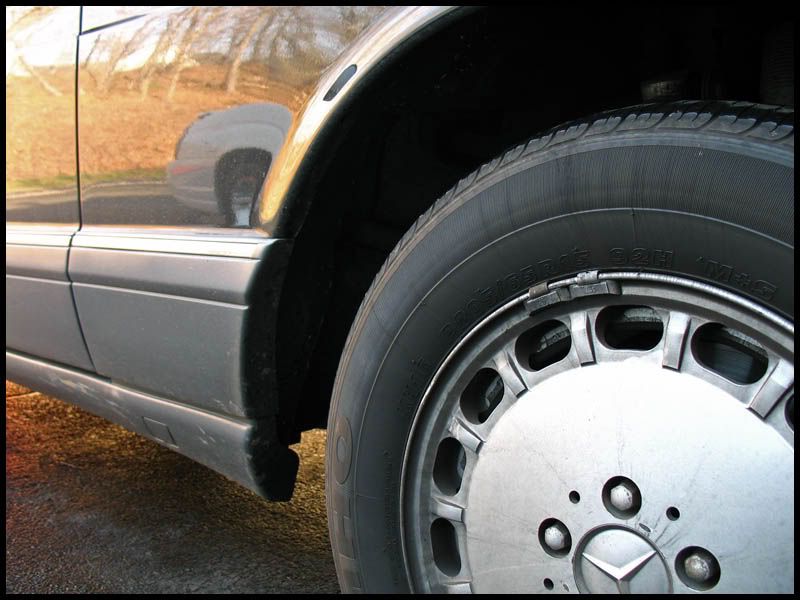
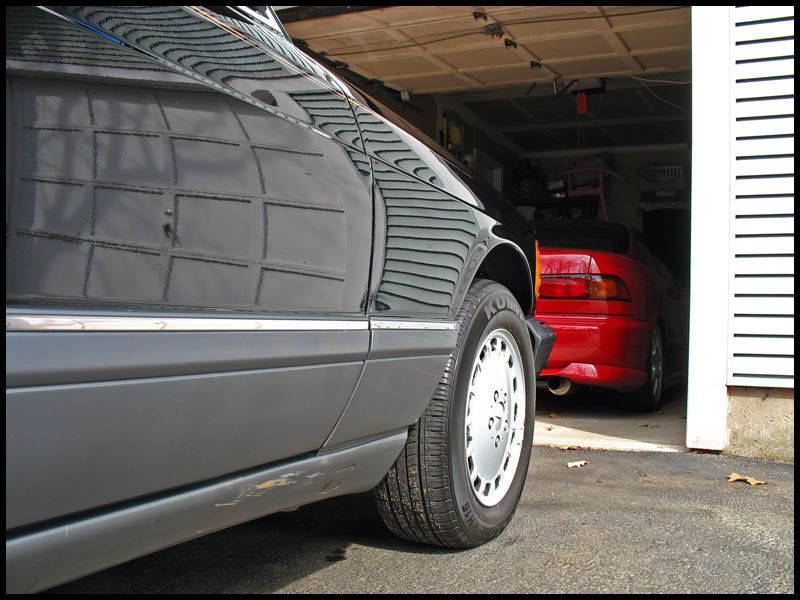
The Exterior
Zack and I joked as I shut the last door and walked over to fill up my bucket with Hyper Wash, “That was the warm-up”. And that it was, as the exterior led to some hidden gems that would take just shy of 5 hours to clean and perfect.
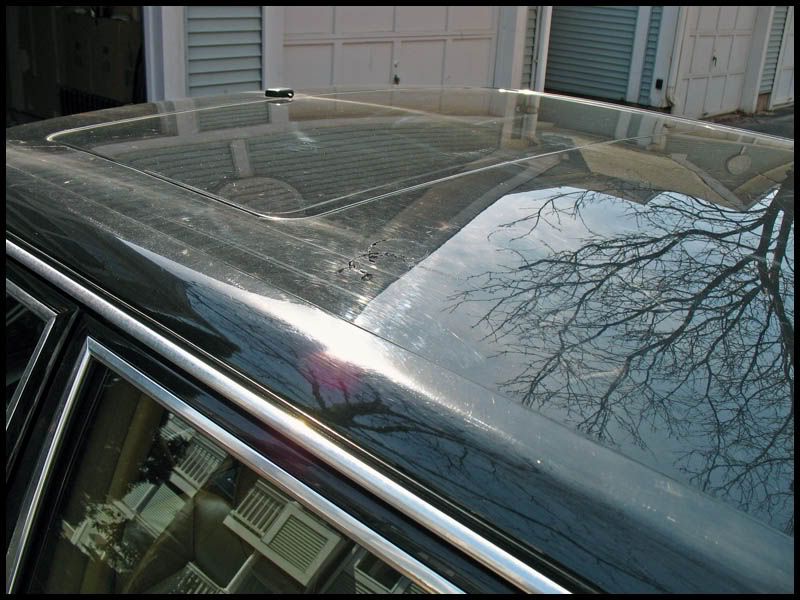
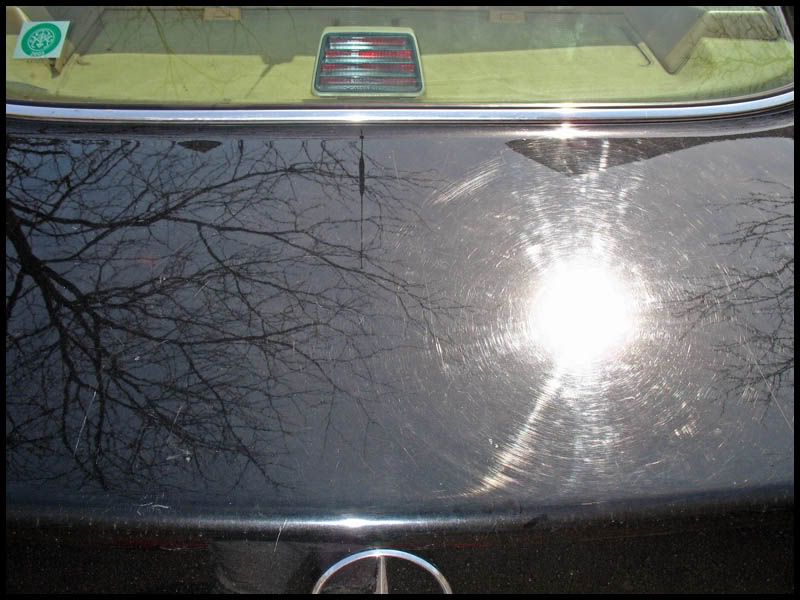
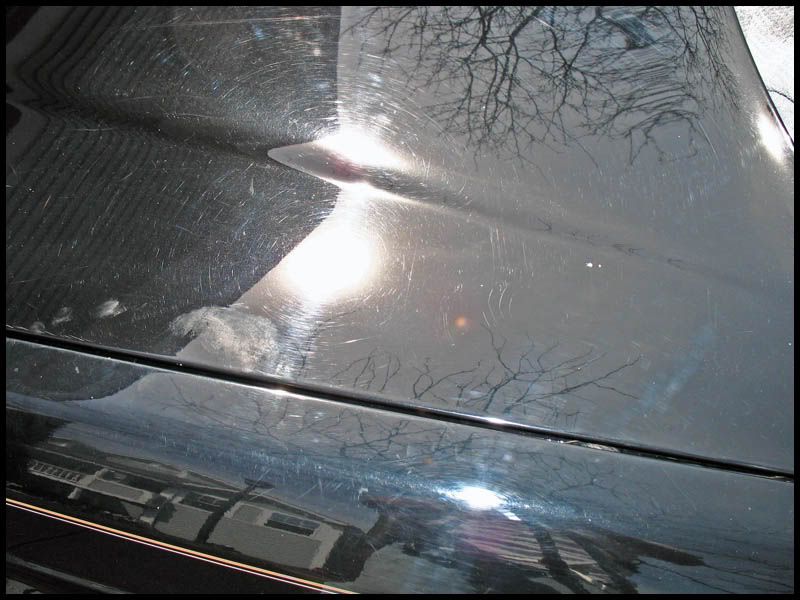
Being 16 years old with mostly original paint and an appearance that it sat mostly outside left a lot to be scared of as I washed and clayed. I started to see many R.I.D.S (Random Isolated Deep Scratches), gashes, scuffs, burnt oil spots, chips, heavy swirling and cobwebbing, oxidation, and poor body work here and there. The one thing the car was very light on was bonded contaminants (yay!). Still, it didn’t mean that this was going to be a breeze.
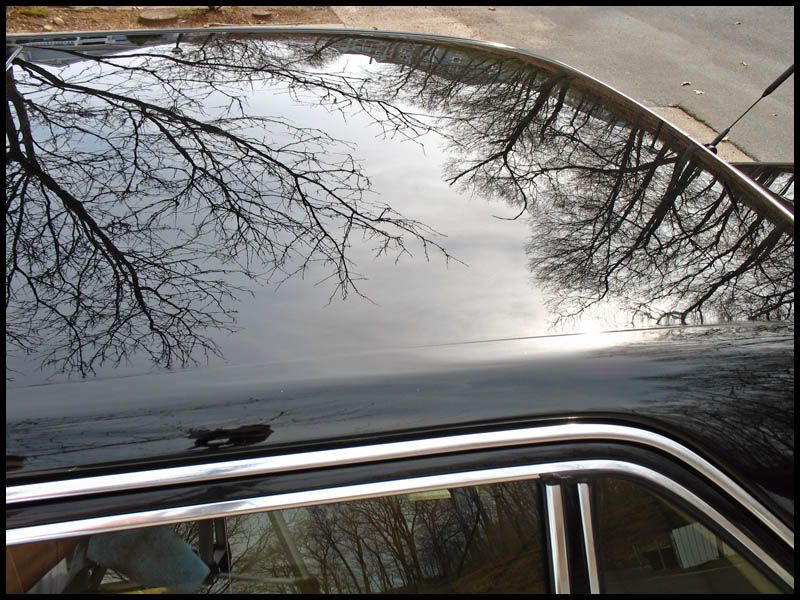
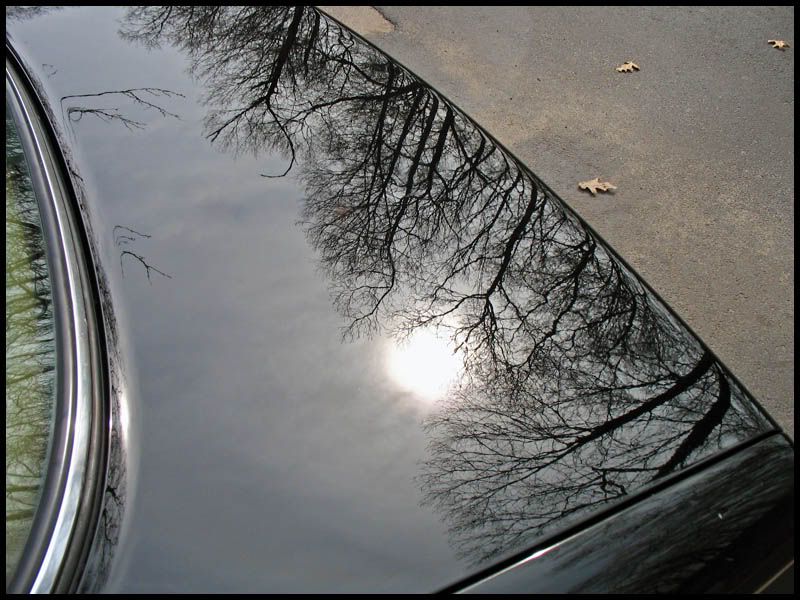
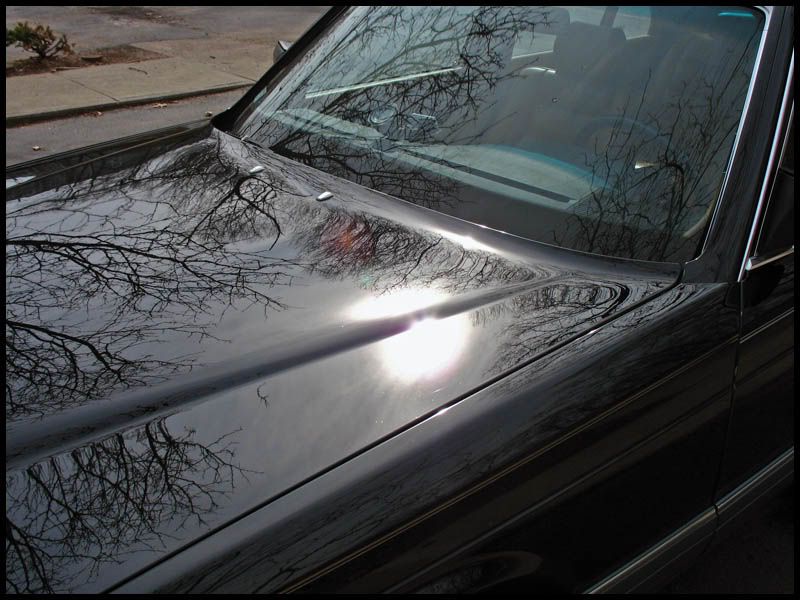
I began buffing about 40 minutes after the initial prep was done and I tried many combos. For some of the paint, Hi-Temp Extreme Cut felt better, others Menzerna Powergloss. I wasn’t about to be switching back and forth, so I made the best of the pad, speed, and compound and buckled down. This paint was EXTREMELY hard. To put it in retrospect, I finished up with Optimum Car Polish, a polishing pad, and 3 passes on the rotary @ 1400 rpm and got almost no hazing…Most paints would have holograms galore, especially black. I then switched to Menzerna FPII (my ringer polish) so it would be perfect.
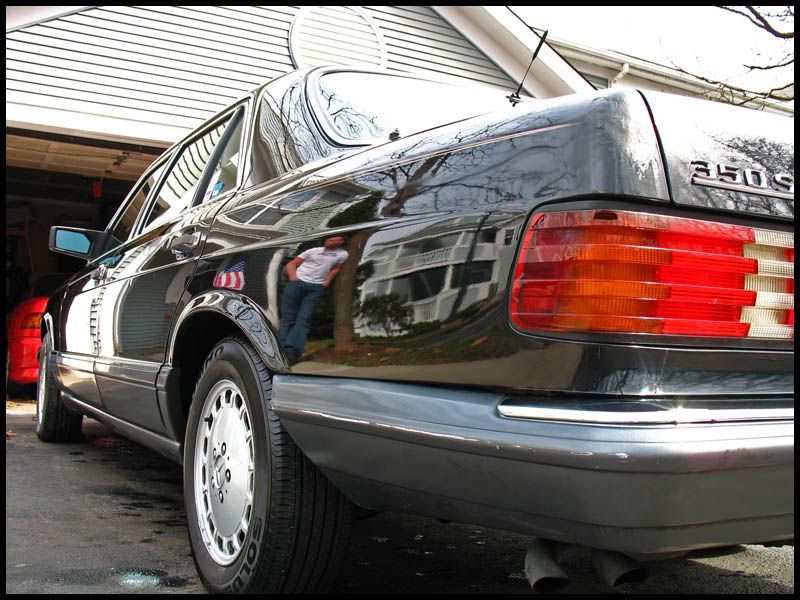
For protection, this car just screamed, “Feed me Zaino” and that I did. Z5 complimented the finish like a donut with coffee. The tires soaked up the Meguiar’s All Season dressing like a champ and gave off a subtle glow to enhance the detailed appearance. In the end, my final processes for the exterior were:
Sanitize
-Meguiar’s Hyper Wash with Black & Decker Pressure Washer assist
-Stoner’s Tarminator on lower panels
-Amazing Roll Off cut 3:1 around diesel exhaust pipe, emblems, license plates, and front grille (soak for 3 minutes, wash away with Hyper Wash and mitt)
-Zaino Z18 Clay with Meguiar’s Hyper Wash as lube
-Top of the Line’s Tire Cleaner cut 50/50 on tires and wells x 2
-Eagle 1 Wheel Acid on wheels x 2
-Top of the Line’s Wheel Wash on wheels x 1
-Amazing Roll Off cut 3:1 on wheels x 1
-Pressure wash clean
Correct
-Menzerna Powergloss via Makita 9227 Rotary and Lake Country Foamed Wool Pad @ 1700 rpm x 3 on horizontal panels
-Hi-Temp Extreme Cut Compound via Makita 9227 Rotary and Lake Country Yellow Cutting Pad x 2 on all panels and wheels
-Menzerna Final Polish II via Makita 9227 Rotary and Lake Country White Polishing Pad x 2 on all panels
-IPA cut 50/50 to wipe down
-Klasse AIO on metal and chrome trim, glass, and lighting
Protect
-Zaino Z5 by hand
-Zaino Z8 by hand
-Meguiar’s All Season Dressing on tires and trim x 2
-CD-2 Engine Detailer in wells
Before
After
Before
After
Before
After
Before
After
Before
After
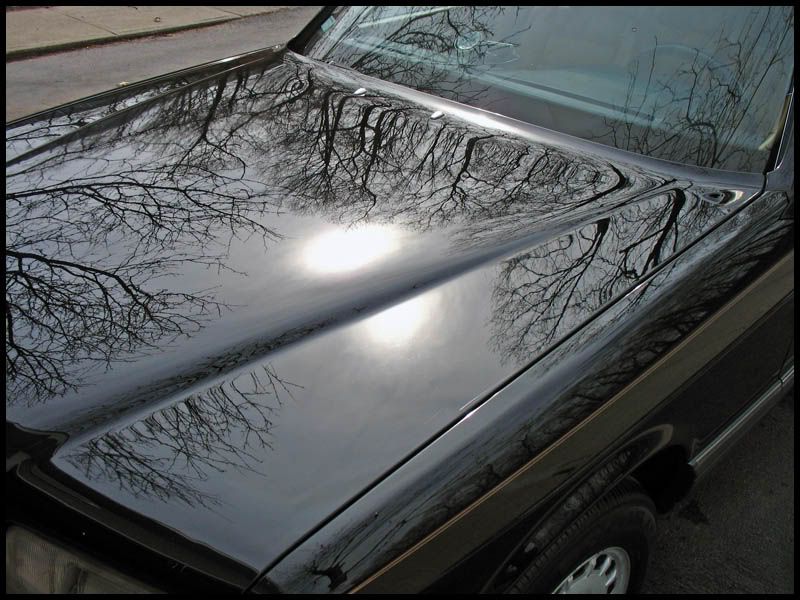
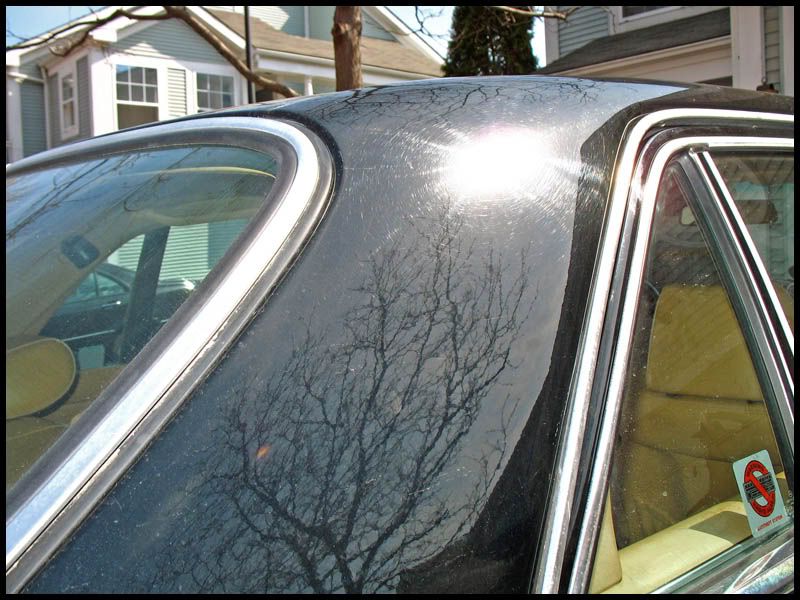
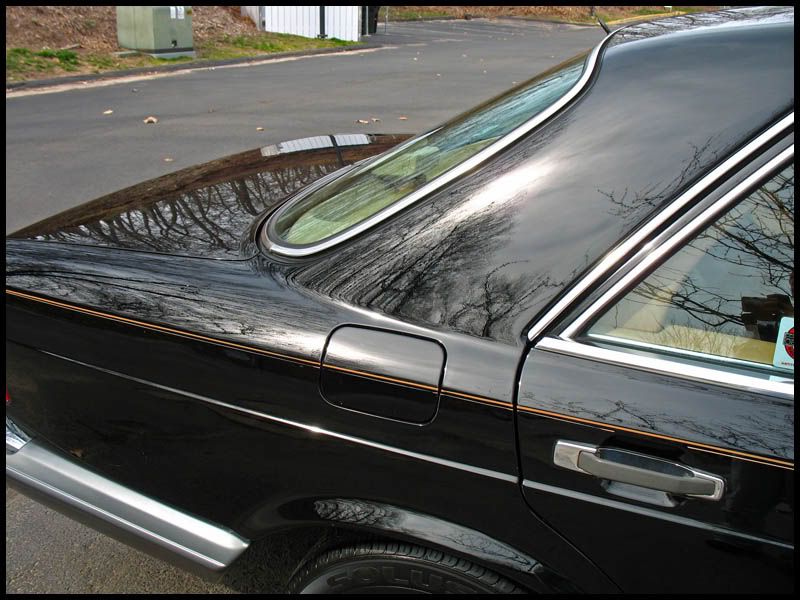
A closer look

I learned a lot of things today, but mainly, “Patience is a virtue”. With some panels having repaints, some not, the compounds and polishes behaved differently. I had to stick to a regimen and bang through the steps. I worked diligently and briskly (a bit under 7 hours total). 98%+ of the defects were removed with only a few stray mars and deep scratches left over. Zack was very pleased with the results and we were both pretty sure it helped the resale value. With that said, the car will be up for sale next week .
Hope you all enjoyed. If you have any questions, comments, or suggestions, please do not hesitate.
Thank you.
Zack (Zackb911) contacted me a few months back about having his 1990 MB 350 SDL detailed. He has been a long-time member and holds plenty of top name products. He knows the processes, but after trying a PC and some polish on the MB, he decided to give my services a shot instead. It’s not that he doesn’t know what he’s doing, but this paint needed some serious attention. For his other past and current vehicles, he has taken pristine care of them and surely knows his “stuff”. Zack came ~2 hours from Mass to CT and accompanied me for a day of detailing.
The car is a 1990 Mercedes-Benz 350 SDL diesel with just shy of 250,000 miles. The car is an absolute beaut. I recall a conversation we had about mid-day in regards to the utter massiveness of this vehicle. It felt like a limo, but without an aftermarket stretch. Even though it was 16 years old, the interior still felt nice and snug and rather “tight”. This particular Mercedes, Zack equipped with a system to run off cooking oil from McDonald’s, Chinese Food Restaurants, and so on. I was astounded to hear of this technology and amazing fuel economy and cost savings. All in all, there really wasn’t much wrong with it that a solid detail couldn’t fix.
The Interior
Before I even begin, I want to say there are NO camera tricks used below. I took the pictures at the same resolution, same white balance, same ISO, and so on. I resized them using Adobe Photoshop.
Now, the interior was generally soiled and appeared a bit dull to me. The leather wasn’t ripped anywhere, just had normal wear (light for 250k), and deep down dirt. The mats and carpets were pretty dirty, but nothing Oxi couldn’t handle. This total process took me about ~2 hours and included:
Clean
-Vacuum and pre-treat heavy stains with Kids & Pets
-Kids & Pets to clean leather, vinyl, plastic, and rubber
-Amazing Roll-Off cut 3:1 to clean door sills and jams
-Oxi-Clean (1 scoop: 1 gallon) to clean carpets/mats, then misted with IPA cut 50:50, and extracted
Protect
-Poorboy’s PwC on wood grain, chrome, and aluminum trim
-Autoglym Glass Polish on interior windows and mirrors
-Zaino Z26 on leather, vinyl, plastic, and rubber (1 ounce Z16: 7 ounces Z10)
-Zaino Z8 in jams
Before
After
Before
After
Before
After
The Exterior
Zack and I joked as I shut the last door and walked over to fill up my bucket with Hyper Wash, “That was the warm-up”. And that it was, as the exterior led to some hidden gems that would take just shy of 5 hours to clean and perfect.
Being 16 years old with mostly original paint and an appearance that it sat mostly outside left a lot to be scared of as I washed and clayed. I started to see many R.I.D.S (Random Isolated Deep Scratches), gashes, scuffs, burnt oil spots, chips, heavy swirling and cobwebbing, oxidation, and poor body work here and there. The one thing the car was very light on was bonded contaminants (yay!). Still, it didn’t mean that this was going to be a breeze.
I began buffing about 40 minutes after the initial prep was done and I tried many combos. For some of the paint, Hi-Temp Extreme Cut felt better, others Menzerna Powergloss. I wasn’t about to be switching back and forth, so I made the best of the pad, speed, and compound and buckled down. This paint was EXTREMELY hard. To put it in retrospect, I finished up with Optimum Car Polish, a polishing pad, and 3 passes on the rotary @ 1400 rpm and got almost no hazing…Most paints would have holograms galore, especially black. I then switched to Menzerna FPII (my ringer polish) so it would be perfect.
For protection, this car just screamed, “Feed me Zaino” and that I did. Z5 complimented the finish like a donut with coffee. The tires soaked up the Meguiar’s All Season dressing like a champ and gave off a subtle glow to enhance the detailed appearance. In the end, my final processes for the exterior were:
Sanitize
-Meguiar’s Hyper Wash with Black & Decker Pressure Washer assist
-Stoner’s Tarminator on lower panels
-Amazing Roll Off cut 3:1 around diesel exhaust pipe, emblems, license plates, and front grille (soak for 3 minutes, wash away with Hyper Wash and mitt)
-Zaino Z18 Clay with Meguiar’s Hyper Wash as lube
-Top of the Line’s Tire Cleaner cut 50/50 on tires and wells x 2
-Eagle 1 Wheel Acid on wheels x 2
-Top of the Line’s Wheel Wash on wheels x 1
-Amazing Roll Off cut 3:1 on wheels x 1
-Pressure wash clean
Correct
-Menzerna Powergloss via Makita 9227 Rotary and Lake Country Foamed Wool Pad @ 1700 rpm x 3 on horizontal panels
-Hi-Temp Extreme Cut Compound via Makita 9227 Rotary and Lake Country Yellow Cutting Pad x 2 on all panels and wheels
-Menzerna Final Polish II via Makita 9227 Rotary and Lake Country White Polishing Pad x 2 on all panels
-IPA cut 50/50 to wipe down
-Klasse AIO on metal and chrome trim, glass, and lighting
Protect
-Zaino Z5 by hand
-Zaino Z8 by hand
-Meguiar’s All Season Dressing on tires and trim x 2
-CD-2 Engine Detailer in wells
Before
After
Before
After
Before
After
Before
After
Before
After
A closer look
I learned a lot of things today, but mainly, “Patience is a virtue”. With some panels having repaints, some not, the compounds and polishes behaved differently. I had to stick to a regimen and bang through the steps. I worked diligently and briskly (a bit under 7 hours total). 98%+ of the defects were removed with only a few stray mars and deep scratches left over. Zack was very pleased with the results and we were both pretty sure it helped the resale value. With that said, the car will be up for sale next week .
Hope you all enjoyed. If you have any questions, comments, or suggestions, please do not hesitate.
Thank you.
") .
.