Being a nice guy ") I'd thought I'd help a friend out and clean his car for him as he hardly has time to clean it. He's a police officer who works the night shifts, and so even though he may have a few days off, he's either too busy or too tired to clean his car. Anyways, the kinda cool thing is that even though he bought his Mazda6 around the same time I bought my Mach1, I think his car has been cleaned half the times as my Mach1, maybe even less.
I'd thought I'd help a friend out and clean his car for him as he hardly has time to clean it. He's a police officer who works the night shifts, and so even though he may have a few days off, he's either too busy or too tired to clean his car. Anyways, the kinda cool thing is that even though he bought his Mazda6 around the same time I bought my Mach1, I think his car has been cleaned half the times as my Mach1, maybe even less.

Since my friend was going on a trip, I made some arrangements to go over and clean it. This was my first mobile detail and boy, was that something. I had a very "lovely" time trying to get everything into my Mach1 (small trunk). I ended up spending a whole day working on his car, although I did take a bunch of breaks the whole time.
My process:
1. Cleaned the wheels and tires - Eagle One's All Wheel & Tire Cleaner and a tire brush I got from the local Checker's
2. Wash - two bucket methods, NXT Car Wash; dried with PakShak WW MF towel.
3. Interior - vacuumed; 303 Protectant on all plastic sufaces. I used my new Bissell Little Green Cleaning Machine on the two front floor mats. That took a long time since I used a 6:1 Woolite Mix and I think I sprayed too much on the mats. It took a while to extract out everything. Left the mats out to dry in the sun while I finished the rest of the car.
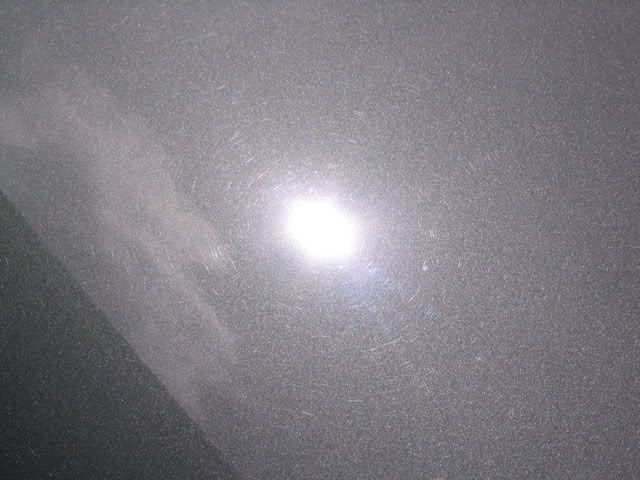
4. Inspection - Out in the sun, here's what I saw, not too bad I thought:
5. Experimental Polishing - With my PC, a polishing pad and SSR 2.5, I did a section of the hood to see how well that combo worked. I then pulled it out into the sun to check my work out, and saw I need to make another couple passes. Tried a couple more passes with the PC, and saw SSR 2.5 and a polishing pad will work so long as I take my time and work the polish.
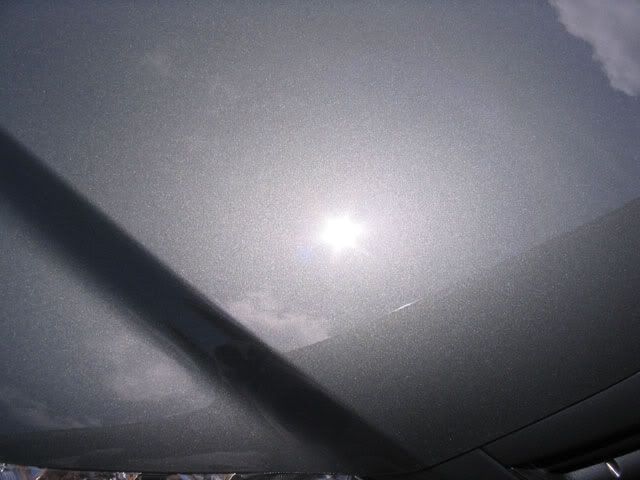
6. Polishing - SSR 2.5 and a polishing pad. I took my time and made sure I made slow passes. After I finished the whole car, I again pulled it out into the sun to check out my work.
Looks pretty good, so I moved the car back into the garage and onto the next step.
7. Sealing - I like using AIO on metallics because, in my experience, it really makes the metallics pop. Plus it would give some nice durability. I applied the AIO with a polishing pad to every thing, paint, windows, black plastic trim, head and tail lights.
8. Waxing - For a topper, I wasn't sure what to use. Should I go with something really sweet, maybe 4* UPP (a good compliment to AIO for metallics IMO)? Or something durable like Megs #16 Pro Wax? Or the can of Zymol Japon Wax my friend has so it would be easy for him to take care of? I ended up deciding to go with something that would be easy for my friend to take care of, but er, it wasn't that easy to put on or to remove (I must be spoiled by my boutique waxes). I think it must've taken me about an hour or so to do. Ugh, but as I was removing the wax, I noticed that the car started looking a little more glossy, I guess since the wax felt a bit oily. When I was done, I had second thoughts, and.....
9. Waxing, Part 2 - ......since I wasn't sure how long the Zymol would last, and since my friend hardly gets time to take care of his car, I wanted something durable, so out came my can of Meg's #16 Wax. It was also a little hard to apply and remove, but easier than the Zymol. It also didn't smell as nice as the Zymol.
10. Misc. - After waxing, I finished up the smaller stuff. Applied AIO+SG to the wheels, and Wheel Wax Extreme Black tire dressing to the tires; 303 Protectant to the door rubber weather seals; AIO to the tailpipes; dressed the wheel well plastic lining
with Armor-All; etc etc.
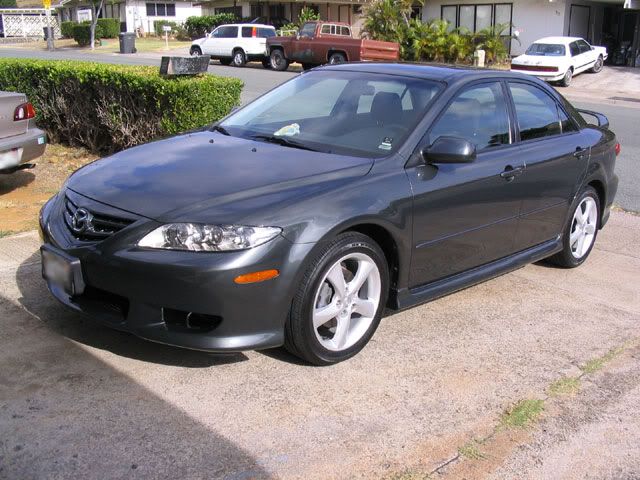
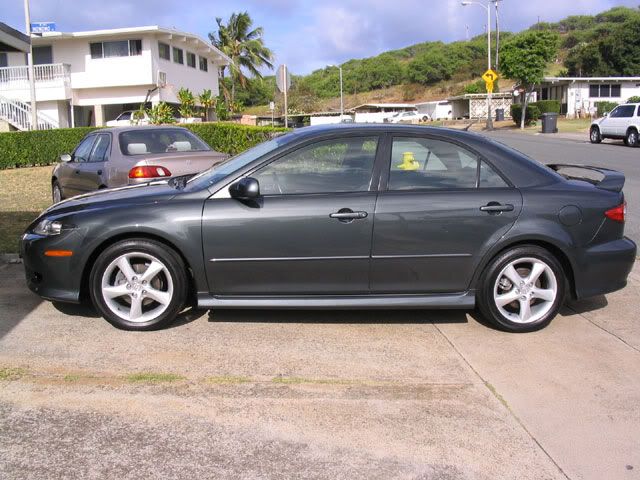
It took me the whole day, and I was wasted afterwards. It seemed like a long time, but I did take quite a few breaks, moved the car in and out of the car port to check my work, and did run home to get my vacuum cleaner and Bissell LGCM. And well, knowing I had a lot of time, I wanted to do a good job and so took my time. And besides, pulling the car out into sun and seeing how nice the car looks is the best part of it all, right? :xyxthumbs
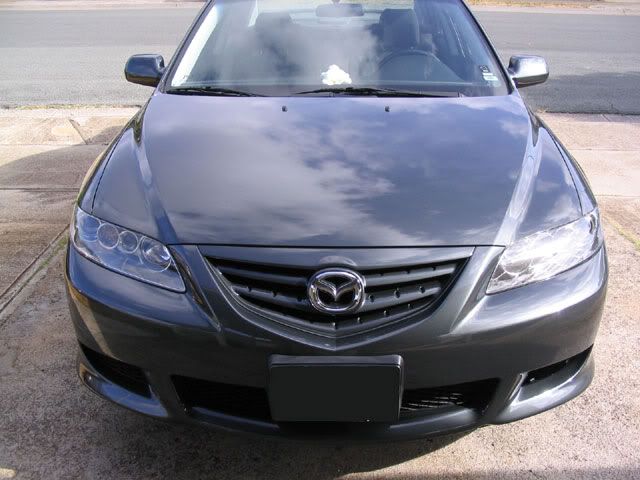
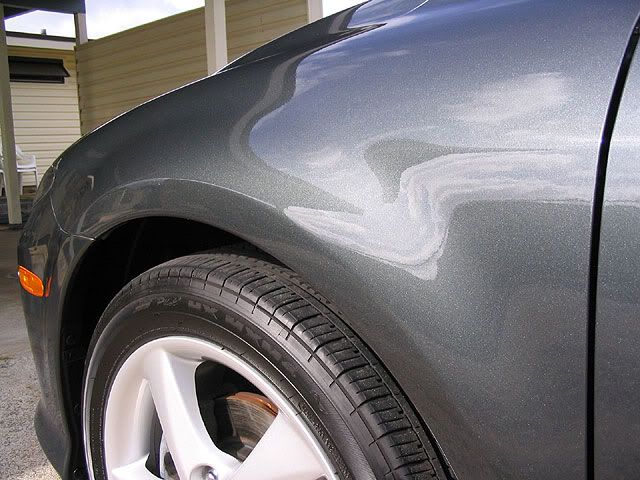
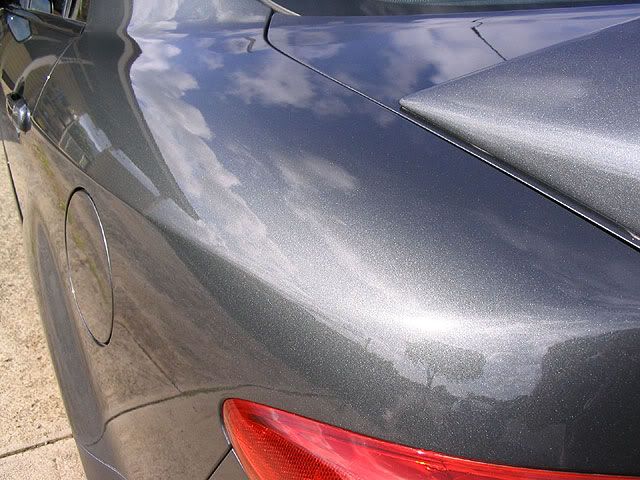
Anyways, onto the pictures. Enjoy!
More pictures to come.
I'd thought I'd help a friend out and clean his car for him as he hardly has time to clean it. He's a police officer who works the night shifts, and so even though he may have a few days off, he's either too busy or too tired to clean his car. Anyways, the kinda cool thing is that even though he bought his Mazda6 around the same time I bought my Mach1, I think his car has been cleaned half the times as my Mach1, maybe even less. Since my friend was going on a trip, I made some arrangements to go over and clean it. This was my first mobile detail and boy, was that something. I had a very "lovely" time trying to get everything into my Mach1 (small trunk). I ended up spending a whole day working on his car, although I did take a bunch of breaks the whole time.
My process:
1. Cleaned the wheels and tires - Eagle One's All Wheel & Tire Cleaner and a tire brush I got from the local Checker's
2. Wash - two bucket methods, NXT Car Wash; dried with PakShak WW MF towel.
3. Interior - vacuumed; 303 Protectant on all plastic sufaces. I used my new Bissell Little Green Cleaning Machine on the two front floor mats. That took a long time since I used a 6:1 Woolite Mix and I think I sprayed too much on the mats. It took a while to extract out everything. Left the mats out to dry in the sun while I finished the rest of the car.
4. Inspection - Out in the sun, here's what I saw, not too bad I thought:
5. Experimental Polishing - With my PC, a polishing pad and SSR 2.5, I did a section of the hood to see how well that combo worked. I then pulled it out into the sun to check my work out, and saw I need to make another couple passes. Tried a couple more passes with the PC, and saw SSR 2.5 and a polishing pad will work so long as I take my time and work the polish.
6. Polishing - SSR 2.5 and a polishing pad. I took my time and made sure I made slow passes. After I finished the whole car, I again pulled it out into the sun to check out my work.
Looks pretty good, so I moved the car back into the garage and onto the next step.
7. Sealing - I like using AIO on metallics because, in my experience, it really makes the metallics pop. Plus it would give some nice durability. I applied the AIO with a polishing pad to every thing, paint, windows, black plastic trim, head and tail lights.
8. Waxing - For a topper, I wasn't sure what to use. Should I go with something really sweet, maybe 4* UPP (a good compliment to AIO for metallics IMO)? Or something durable like Megs #16 Pro Wax? Or the can of Zymol Japon Wax my friend has so it would be easy for him to take care of? I ended up deciding to go with something that would be easy for my friend to take care of, but er, it wasn't that easy to put on or to remove (I must be spoiled by my boutique waxes
). I think it must've taken me about an hour or so to do. Ugh, but as I was removing the wax, I noticed that the car started looking a little more glossy, I guess since the wax felt a bit oily. When I was done, I had second thoughts, and.....9. Waxing, Part 2 - ......since I wasn't sure how long the Zymol would last, and since my friend hardly gets time to take care of his car, I wanted something durable, so out came my can of Meg's #16 Wax. It was also a little hard to apply and remove, but easier than the Zymol. It also didn't smell as nice as the Zymol.
10. Misc. - After waxing, I finished up the smaller stuff. Applied AIO+SG to the wheels, and Wheel Wax Extreme Black tire dressing to the tires; 303 Protectant to the door rubber weather seals; AIO to the tailpipes; dressed the wheel well plastic lining
with Armor-All; etc etc.
It took me the whole day, and I was wasted afterwards. It seemed like a long time, but I did take quite a few breaks, moved the car in and out of the car port to check my work, and did run home to get my vacuum cleaner and Bissell LGCM. And well, knowing I had a lot of time, I wanted to do a good job and so took my time. And besides, pulling the car out into sun and seeing how nice the car looks is the best part of it all, right? :xyxthumbs
Anyways, onto the pictures. Enjoy!
More pictures to come.
")