Mike Phillips
Administrator
Tape it off and avoid a lifetime of ugly...
So many times in my life when I've buffed out a classic car, when I first get to the car and inspect it I find compound and polish residue splattered into impossible to reach areas.
A good example of this is the fresh air intake grill usually right before the front of the windshield.
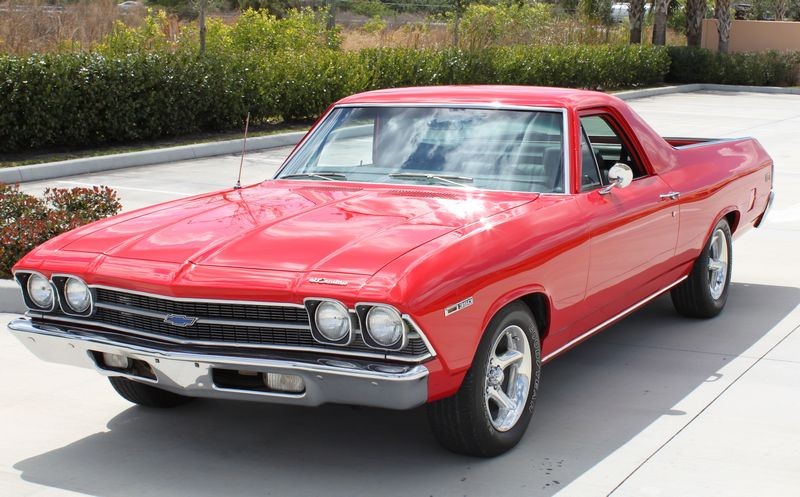
Here's an example, the 1969 El Camino I used for this article on Dampsanding, Damp-Sanding Tools, Tips and Techniques
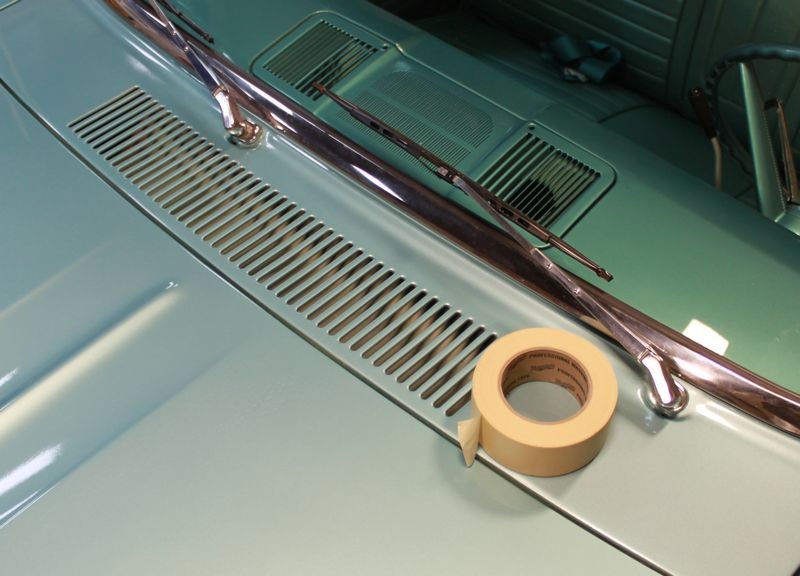
Upon inspecting the paint I found the typical ugly compound and polish residue splattered inside the fresh air grill left by the guy that buffed the paint out before me.
Here's the 1969 El Camino...
Here's the ugly part...

Because the bottom side of the sheet metal where the slots are stamped out are rough and jagged, all the compound and polish residue that was splattered by the rotary buffer has embedded like cement and will be very difficult to fully remove, especially now that it's a few years old...
Close-up...

So while this is a very beautiful 1969 El Camino, every time someone looks at the hood area from the side of the car their eyes will be drawn to the very apparent white compound and polish residue that is encrusted where it's hard to reach and remove.
The first thing I did upon finding the compound splatter inside the grill was to point it out to the owner so he would know that I didn't create the problem and then while he was standing there, I took photos of the crusty splatter so that it was established that the splatter was there before I ever worked on the car.
This is a good best practice for your own detailing business because you don't want to get blamed for The Other Guy's Wax or TOGW
TOGW = The Other Guy's Wax
So here's a tip...
Before machine polishing any vehicle with areas that will be hard and even impossible to detail later should any compound or polish residue be splattered into these areas is to take a few moments to tape, cover and protect these areas from splatter before starting.
For example, here at Autogeek's Show Car Garage we are regularly asked to test out upcoming products for many of the manufactures we represent and then file a report with our results and observations. Yesterday I had 4 different products from 3 different manufactures to test that involved machine sanding and using a rotary buffer.
My test vehicle was our in-house 1964 Ford Falcon which has extreme orange peel, so it offers plenty of real-estate for testing a variety of different products.
As far as I can tell this car has never been machine polished, either before it was repainted nor after it was repainted because there are no signs whatsoever of splatter underneath the fresh air intake grill.
I'm not going to be the first person to get splatter into this area so before starting the testing I simply taped the grill off using Meguiar's Professional Masking Tape, which is a brand new masking tape made especially for use on automotive paints.
Taping off areas like this takes just a little time in the beginning of a detailing project as compared to the massive amount of time it will take to try to remove any splatter after the project is finished. And in some cases, it's all but impossible to remove splatter residue in hard to reach areas, so taping off and covering up ensures no splatter and protects your customer's car's appearance and your reputation.
Zero splatter under the grill of this 1964 Ford Falcon

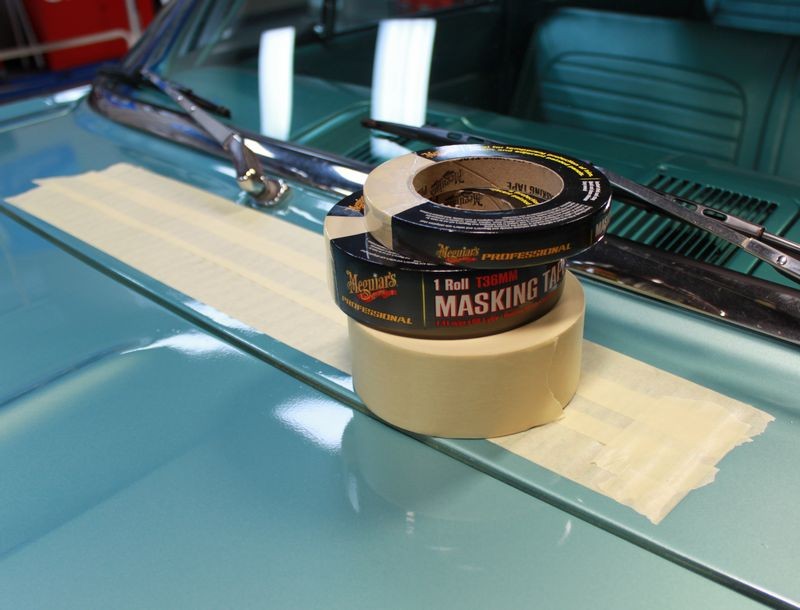
Meguiar's Professional Masking Tape

After the sanding and buffing, remove the tape and no spatter... no ugly... no worries...

")
So many times in my life when I've buffed out a classic car, when I first get to the car and inspect it I find compound and polish residue splattered into impossible to reach areas.
A good example of this is the fresh air intake grill usually right before the front of the windshield.
Here's an example, the 1969 El Camino I used for this article on Dampsanding, Damp-Sanding Tools, Tips and Techniques
Upon inspecting the paint I found the typical ugly compound and polish residue splattered inside the fresh air grill left by the guy that buffed the paint out before me.
Here's the 1969 El Camino...
Here's the ugly part...
Because the bottom side of the sheet metal where the slots are stamped out are rough and jagged, all the compound and polish residue that was splattered by the rotary buffer has embedded like cement and will be very difficult to fully remove, especially now that it's a few years old...
Close-up...
So while this is a very beautiful 1969 El Camino, every time someone looks at the hood area from the side of the car their eyes will be drawn to the very apparent white compound and polish residue that is encrusted where it's hard to reach and remove.
The first thing I did upon finding the compound splatter inside the grill was to point it out to the owner so he would know that I didn't create the problem and then while he was standing there, I took photos of the crusty splatter so that it was established that the splatter was there before I ever worked on the car.
This is a good best practice for your own detailing business because you don't want to get blamed for The Other Guy's Wax or TOGW
TOGW = The Other Guy's Wax
So here's a tip...
Before machine polishing any vehicle with areas that will be hard and even impossible to detail later should any compound or polish residue be splattered into these areas is to take a few moments to tape, cover and protect these areas from splatter before starting.
For example, here at Autogeek's Show Car Garage we are regularly asked to test out upcoming products for many of the manufactures we represent and then file a report with our results and observations. Yesterday I had 4 different products from 3 different manufactures to test that involved machine sanding and using a rotary buffer.
My test vehicle was our in-house 1964 Ford Falcon which has extreme orange peel, so it offers plenty of real-estate for testing a variety of different products.
As far as I can tell this car has never been machine polished, either before it was repainted nor after it was repainted because there are no signs whatsoever of splatter underneath the fresh air intake grill.
I'm not going to be the first person to get splatter into this area so before starting the testing I simply taped the grill off using Meguiar's Professional Masking Tape, which is a brand new masking tape made especially for use on automotive paints.
Taping off areas like this takes just a little time in the beginning of a detailing project as compared to the massive amount of time it will take to try to remove any splatter after the project is finished. And in some cases, it's all but impossible to remove splatter residue in hard to reach areas, so taping off and covering up ensures no splatter and protects your customer's car's appearance and your reputation.
Zero splatter under the grill of this 1964 Ford Falcon
Meguiar's Professional Masking Tape
After the sanding and buffing, remove the tape and no spatter... no ugly... no worries...