CEE DOG
New member
Review: CarPro Fog Fight
Product Description From AG:
CarPro Fog Fight prevents fog from interfering with your visibility! This antifog coating is super hydrophilic and eliminates condensation on interior auto glass. Keep your windshield, windows, and mirrors clean and clear with just one application. CarPro Fog Fight prevents fog due to heat, cold, and humidity.
Introduction:
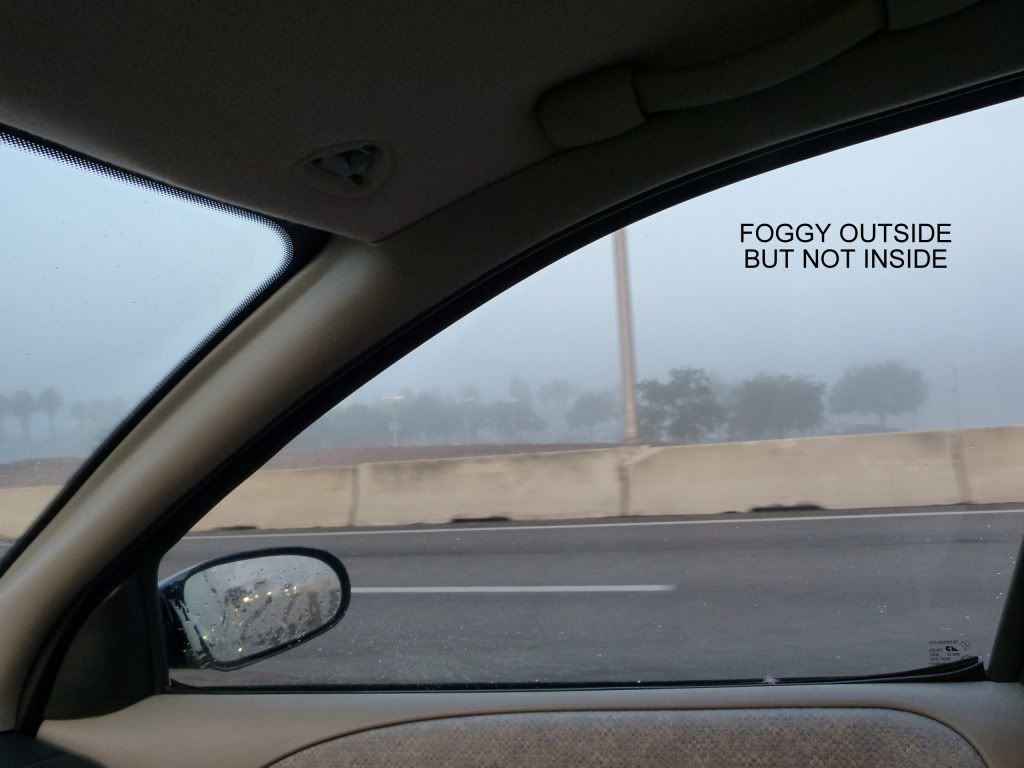
As the proud owner of a convertible I was excited to hear about a new product coming out that would eliminate fog by providing a hydrophilic coating on the inside of the windshield. With a convertible I often get fogged up windows so this seemed like a natural fit. Only a few short months ago it was coming to market in Europe and just weeks ago it landed on our shores as well.
I had been following different threads on the product with all manner of opinions. So when I received my CarPro Fog Fight (CFF) kit from AG last weekend I couldn't wait to put it through some rigorous testing and develop my own opinion as well.
Hydrophilic:
hy·dro·phil·ic coatings have an affinity to water and are usually charged or have polar side groups to their structure that will attract water.
My Understanding:
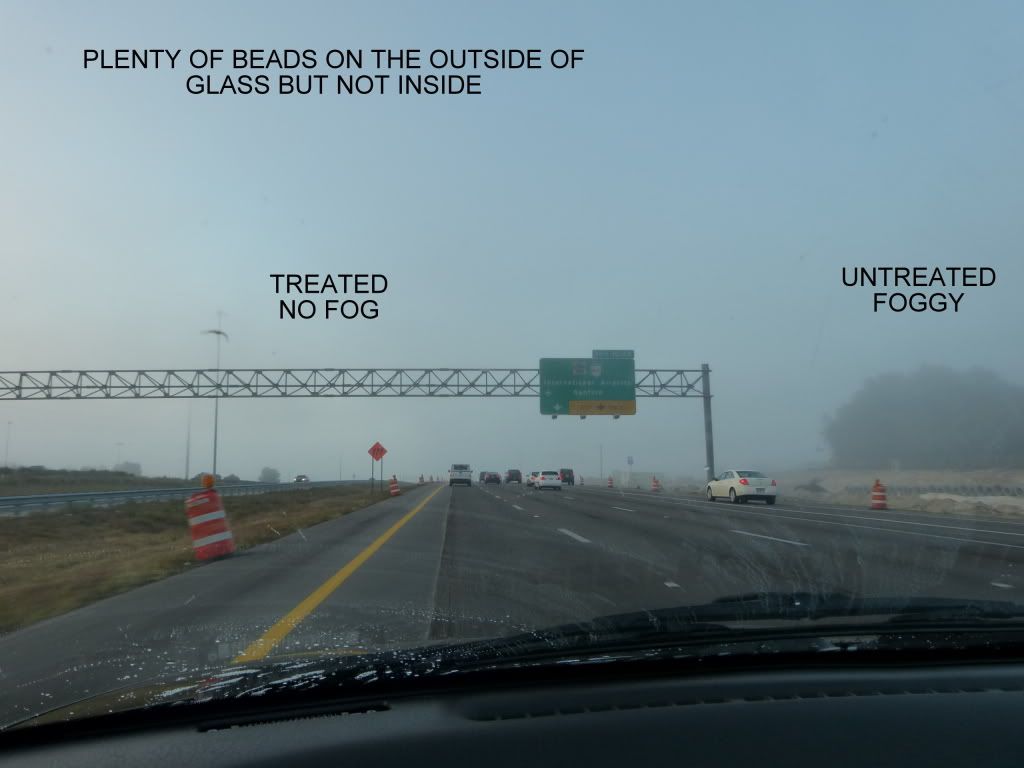
So the way this works is not that it stops the surface from getting wet… quite the opposite. By applying a coating that absorbs moisture it does not allow beads to form. The beads are normally formed by the oxygen and hydrogen atoms of water being repelled by the surface they are attached to. Rather than do battle with the water molecules Fog Fight accepts them as family and absorbs them temporarily.
Details:
1.- Packaging: Plastic bottle with trigger spray nozzle and flip switch beneath trigger
2.- Viscosity: Thin
3.- Color: Clear
4.- Scent: Similar to Eraser
5.- Price (at time of review): 3.4 oz. (100ml) = $8.99
6.-Manufacturer: CarPro
7.-Made in: Korea
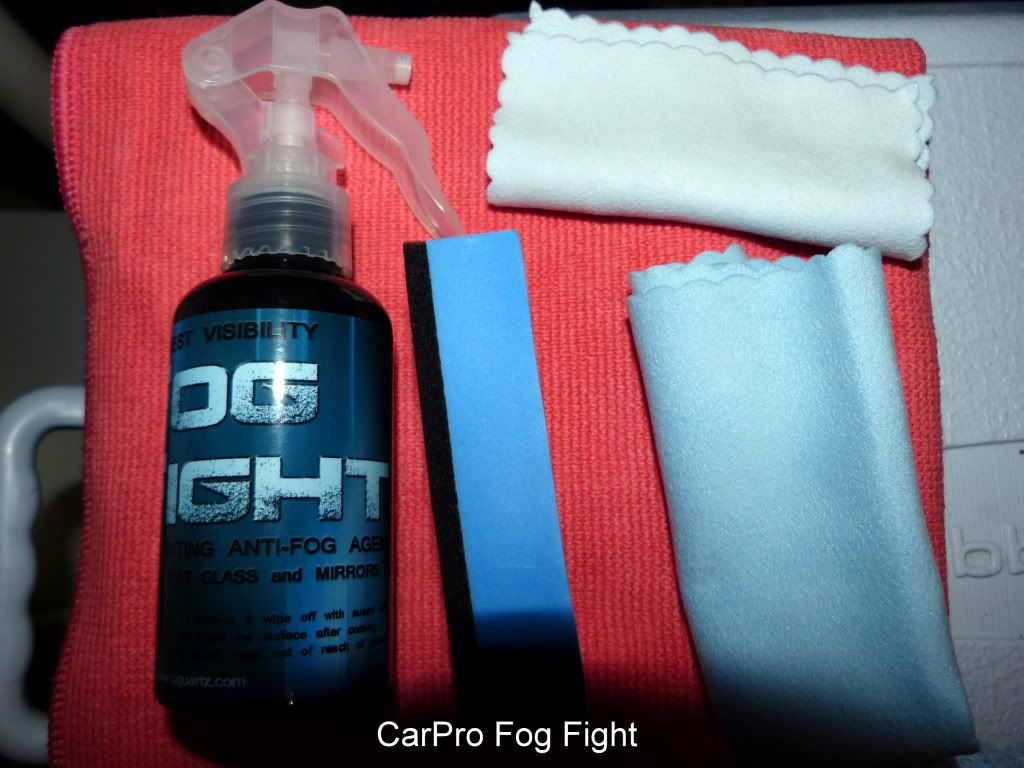
Kit Contents:
(1) 100ml Fog Fight Sprayer
(1) CarPro applicator block
(2) 4" suede mf applicators
(1) 8" suede mf removal cloth
CarPro Fog Fight Kit: (Terry weave towel not included)
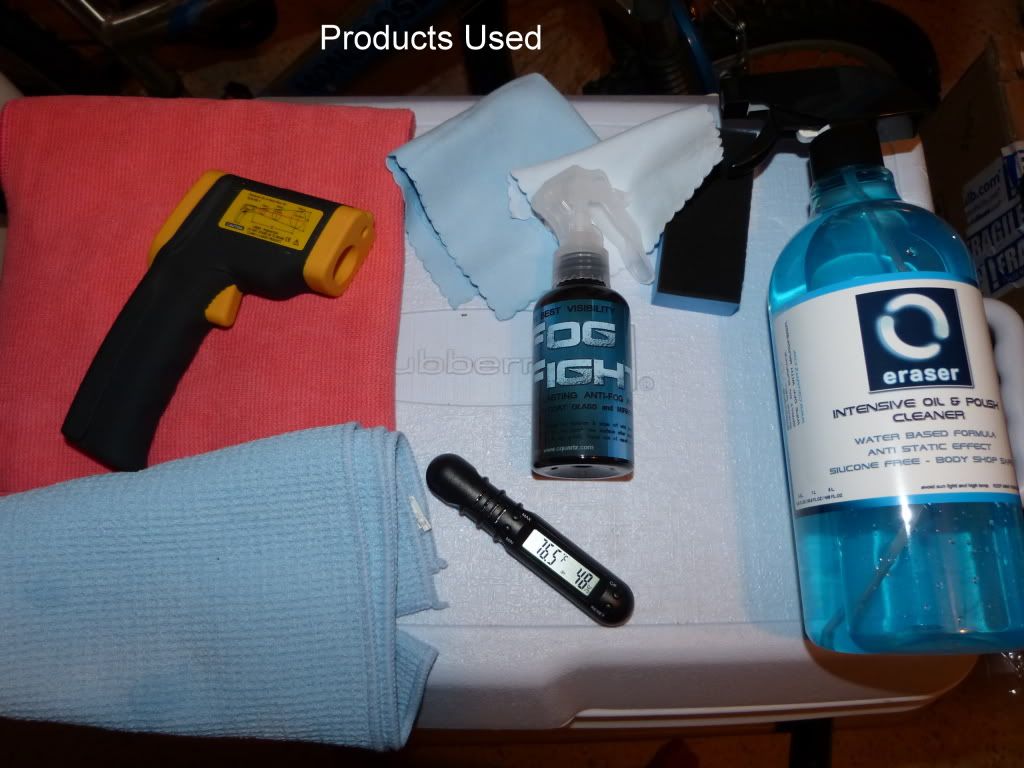
Products Used:
Video CarPro Fog Fight:
Most of this video was created after I had completed all my testing and came back to recreate it with my lessons learned. After this video we will rewind to where I started my testing.
[ame=http://www.youtube.com/watch?v=9iZvwkVfD44&hd=1]CarPro FogFight 1.mp4 - YouTube[/ame]
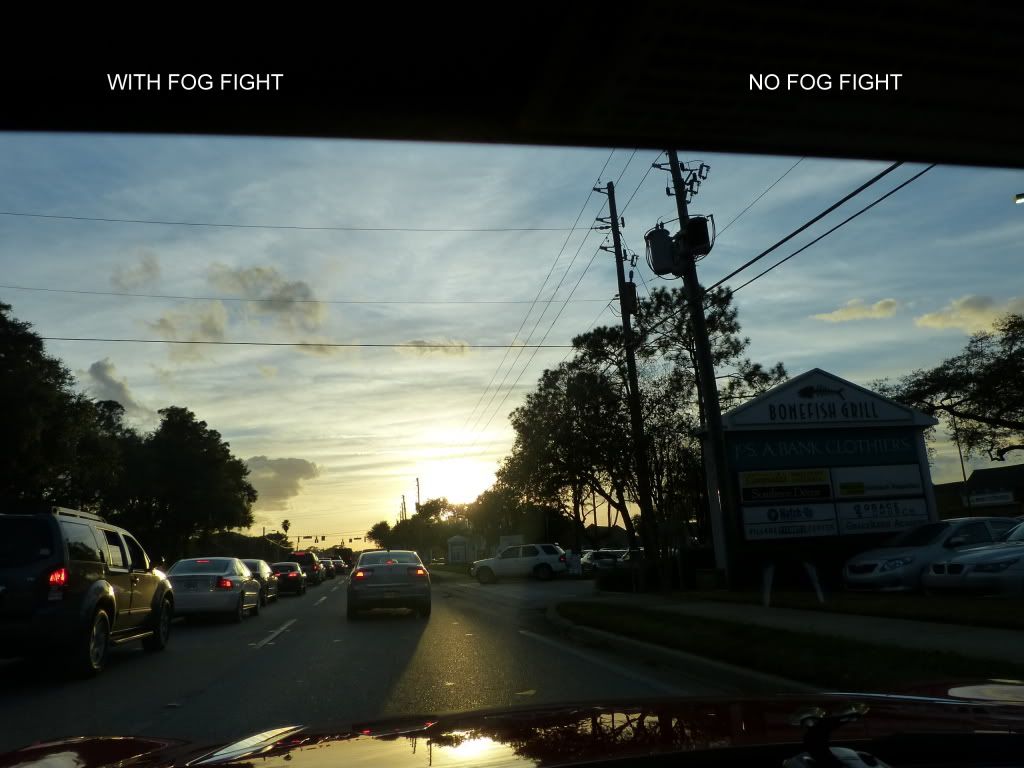
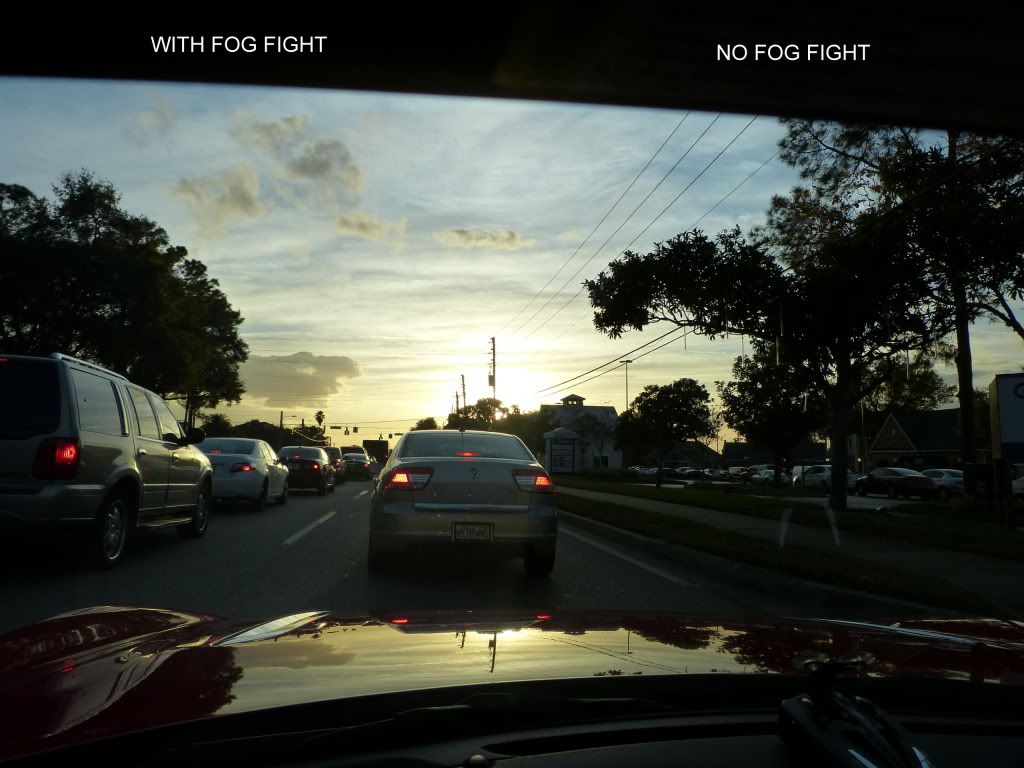
Testing:
Testing took place starting on the bathroom mirror and then on 2 different vehicles. Multiple tests and applications were conducted on each (3 on the mirror & 2 on each car).
I’ll try to condense my testing and observations but I’m sharing them so you can see what I tried and how I came to my conclusions. If you would prefer to skip the bla bla bla and get to my tips and ultimate conclusion feel free to skip the testing (but don’t miss the 3 videos) and move onto the section labeled "My Application Tips", and forward from there through to the “Final Observations”.
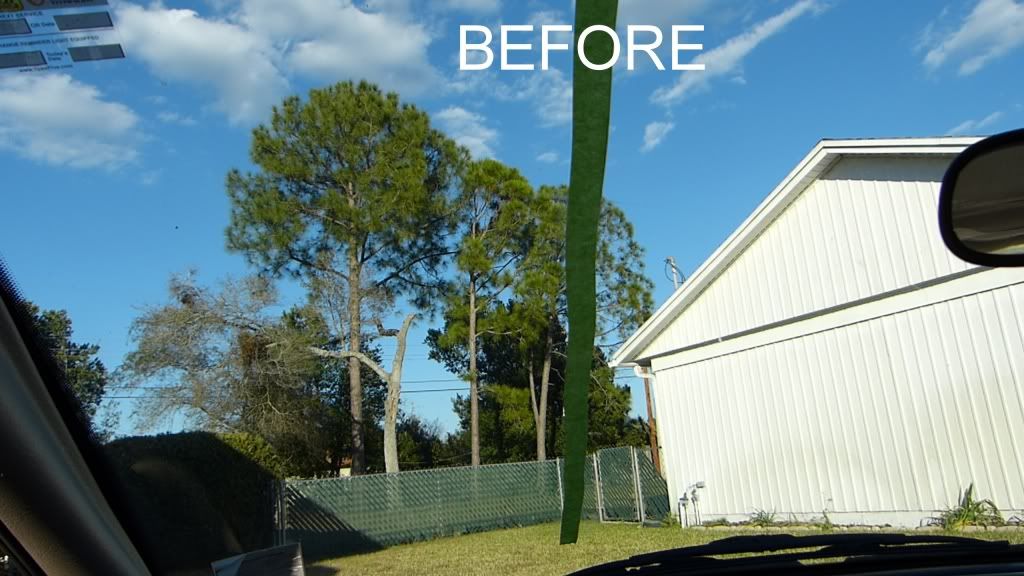
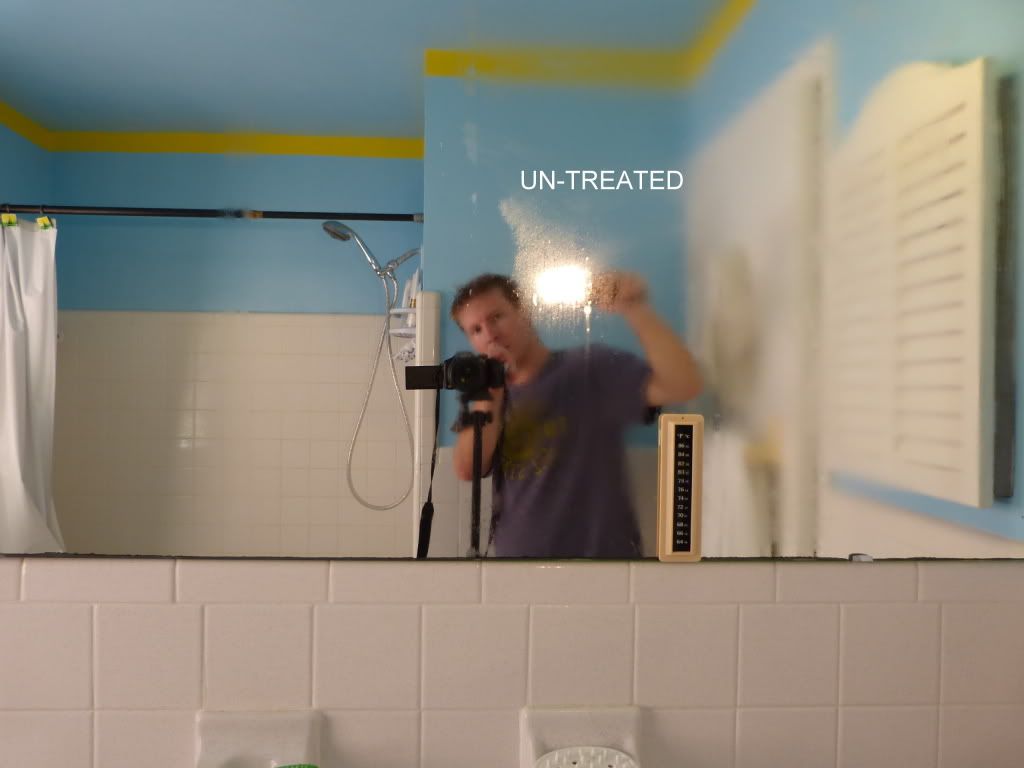
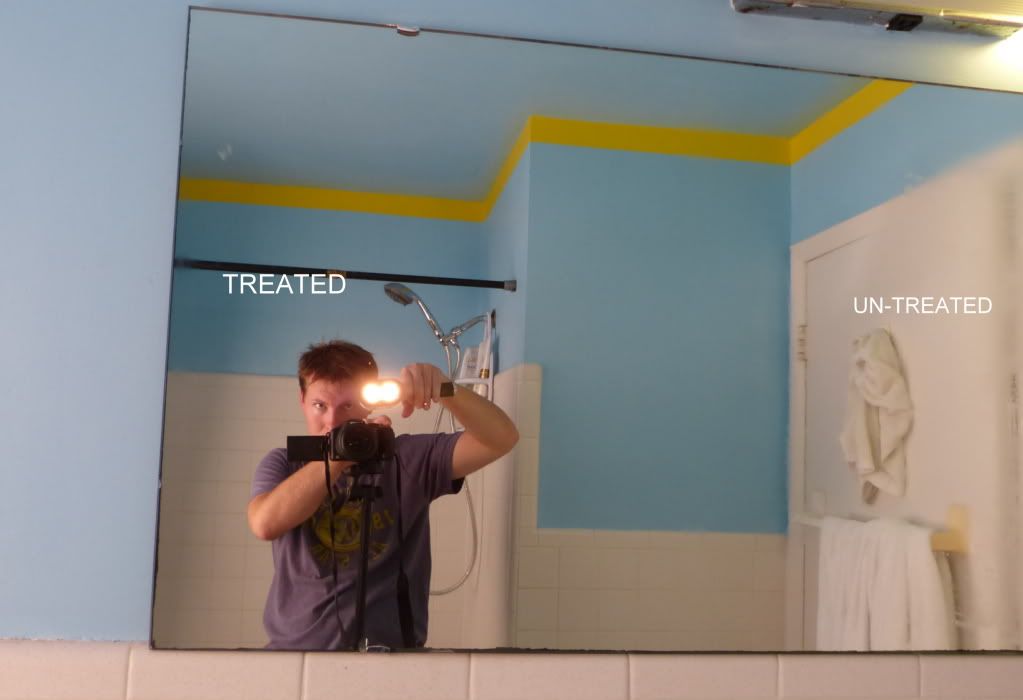
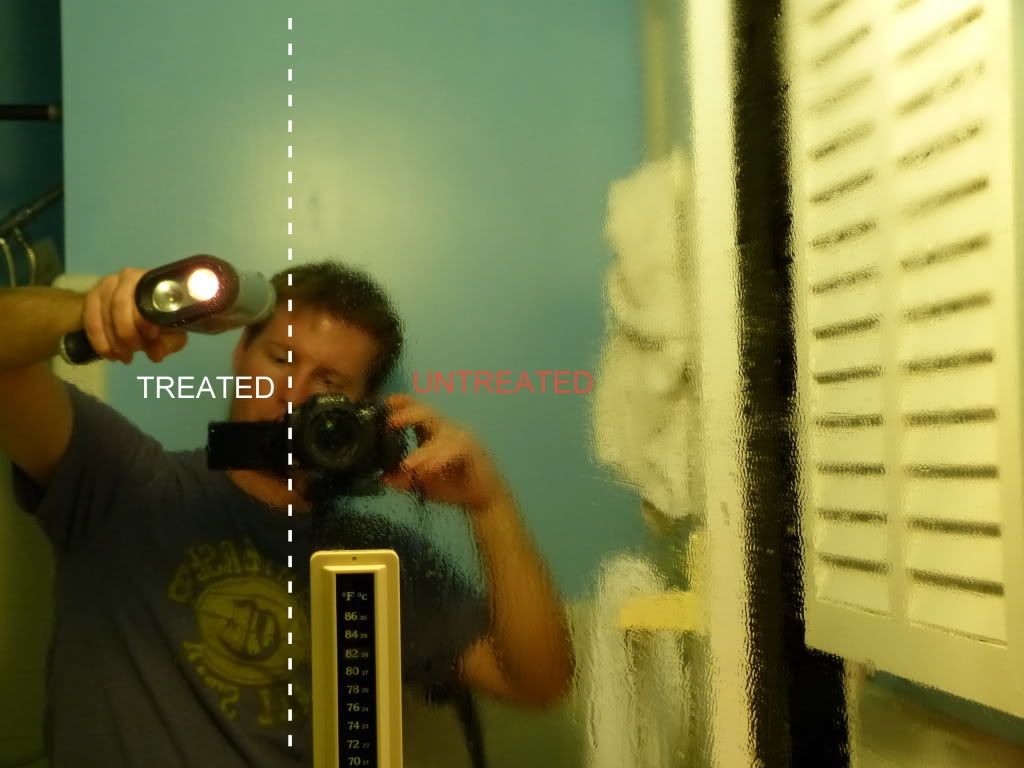
Mirror (Part A):
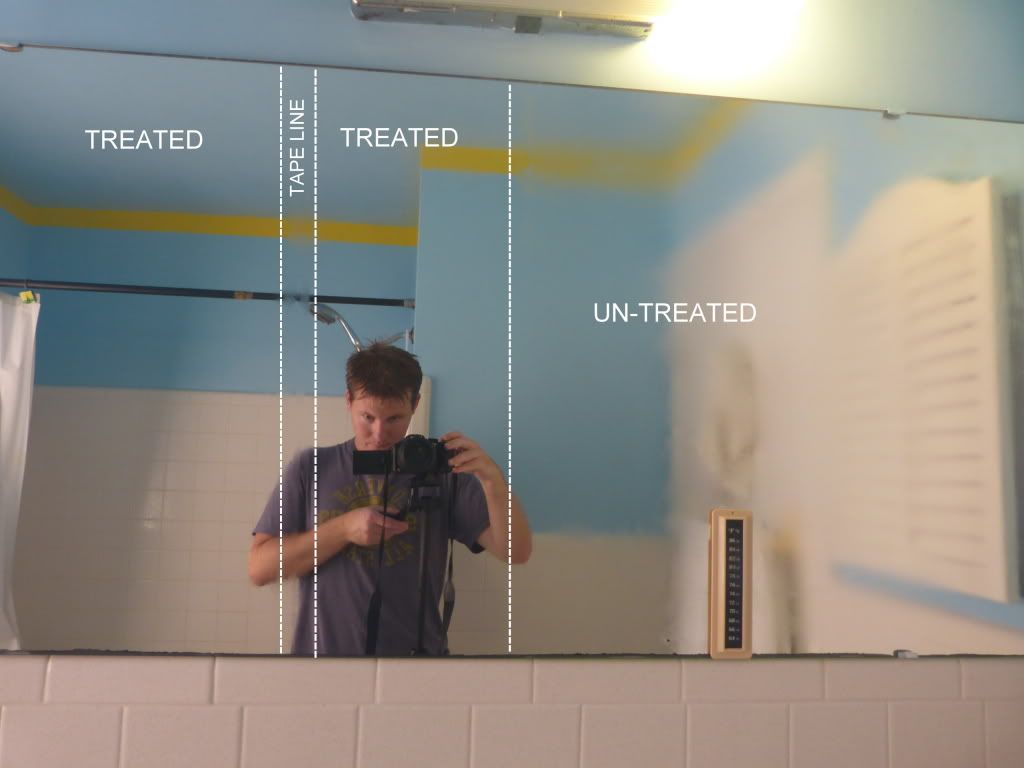
I started my testing on the bathroom mirror because the lighting can be easily controlled and any change in visibility and highlighting of fog is highly visible on a mirrored surface.
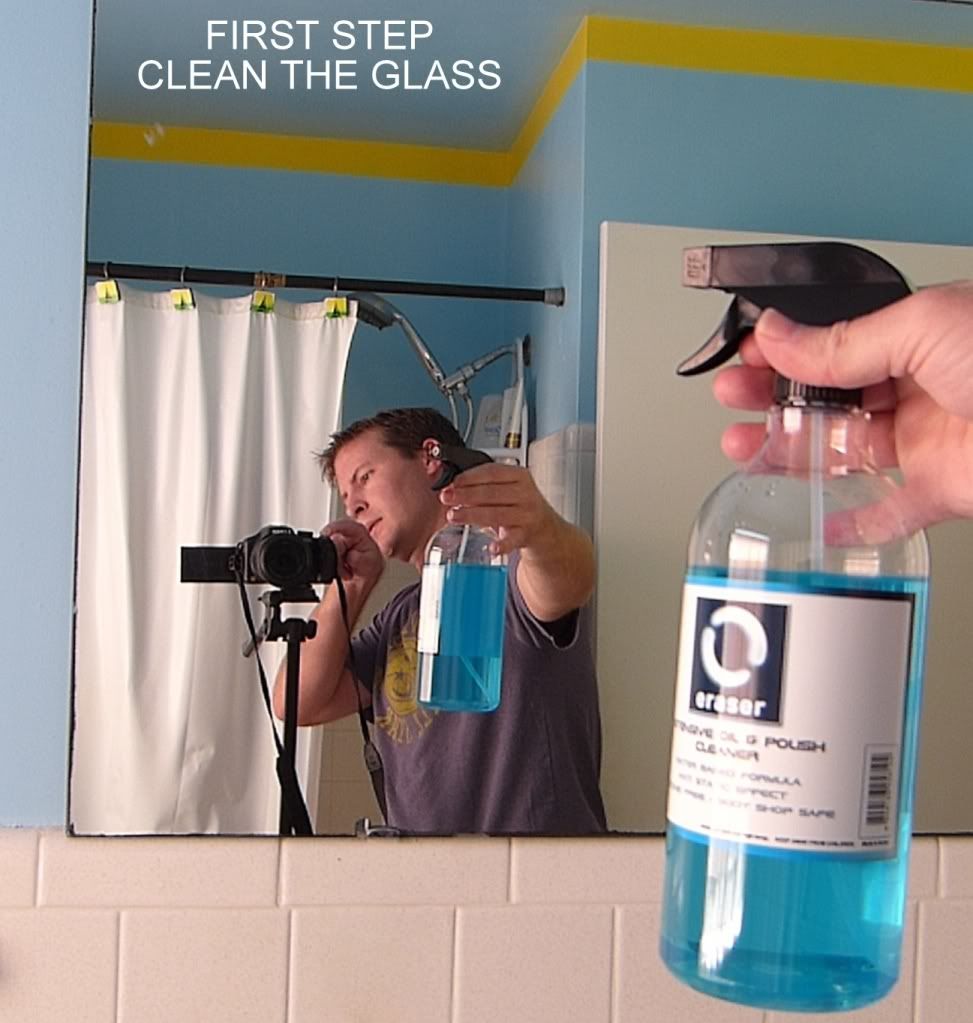
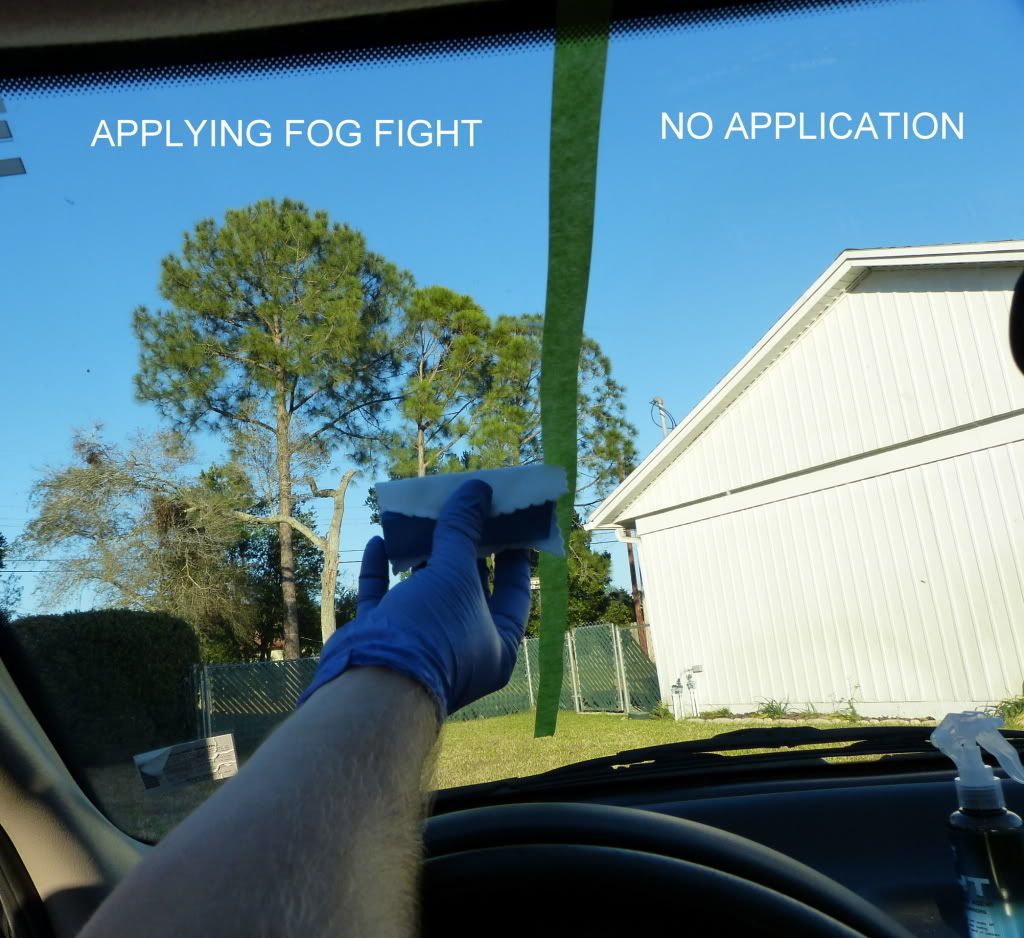
After using Eraser to clean the mirror and wiping it dry I allowed it to sit a minute just to be sure it was dry. Next I applied CFF using approximately 4 squirts total over a 30 square inch area. As I spread the product I could clearly feel the resistance and a feeling of friction as I spread it across the surface. It was not a sticky or unpleasant feel, but certainly grabby.
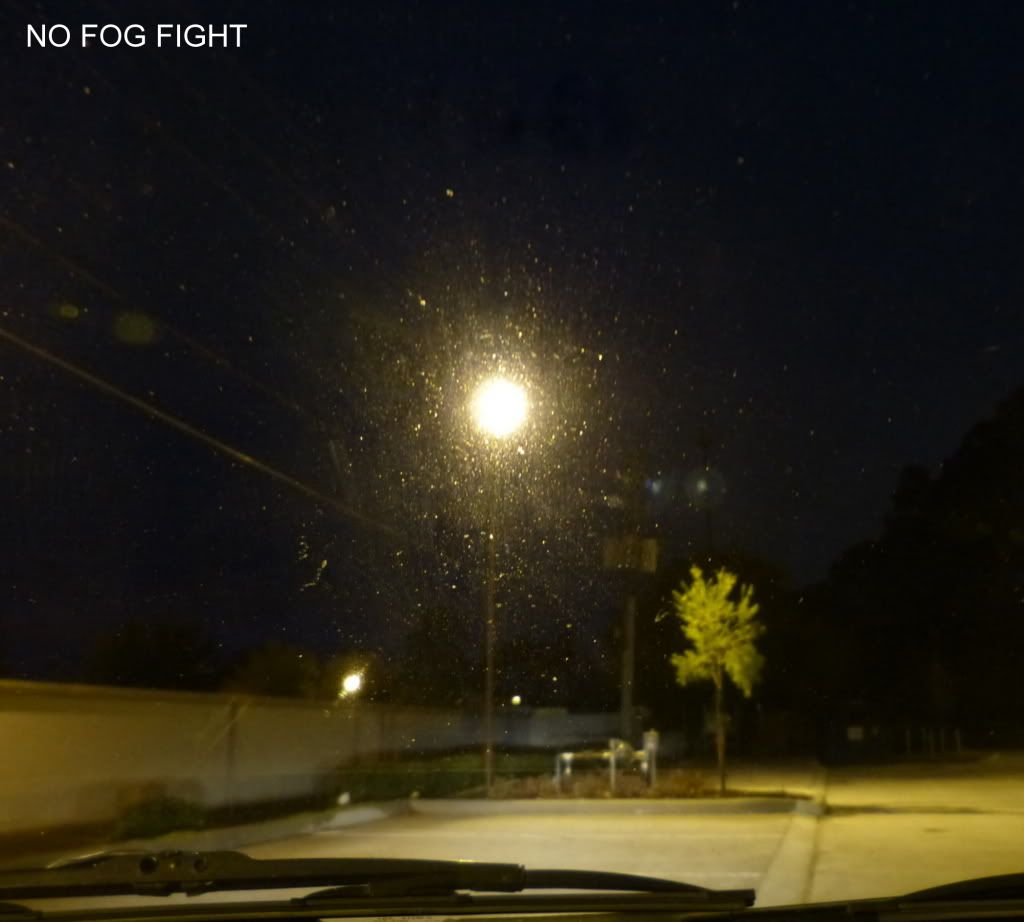
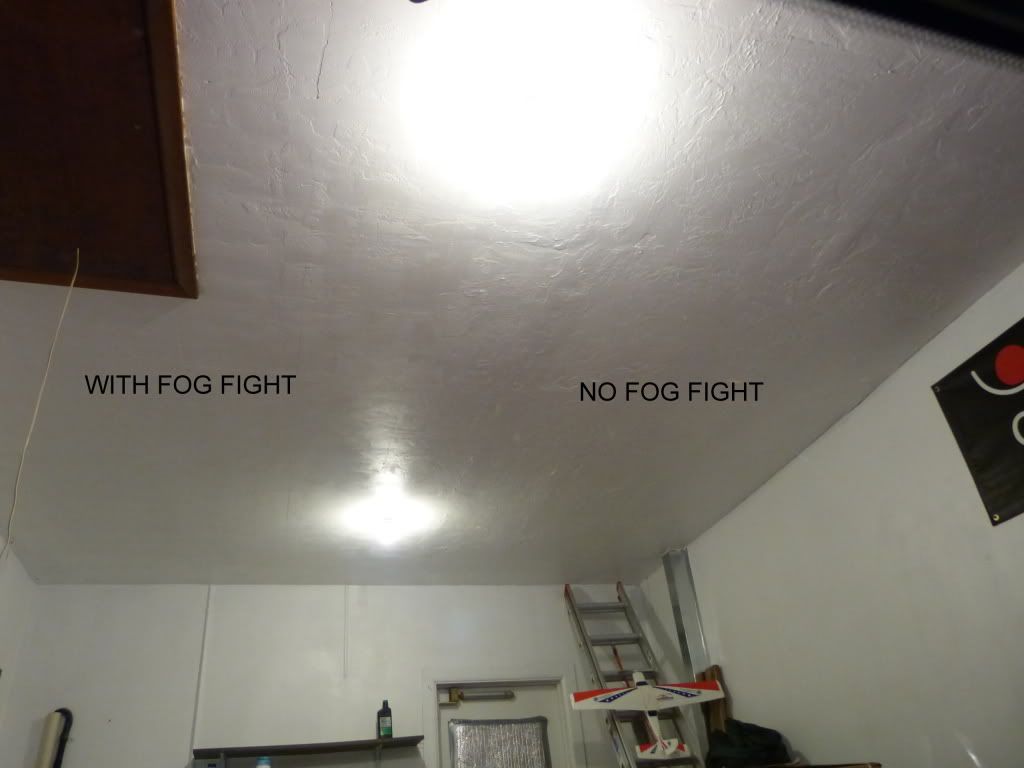
I had setup a few sections so that I could remove the product after a minute on one, ten minutes on the next, and 45 minutes on the last. My first method of removal was to use the mf suede removal towel double wrapped over the applicator and lightly wipe. On the section where I waited one minute it actually worked fine in regular lighting but once I placed a beam of light directly into it, it seemed as though no matter which way I wiped I could not make a perfectly clear surface. Holograms would appear in whichever direction I wiped last. Of course I was being careful not to wipe too hard. Later I would find that I did not have to be nearly as gentle as I had been in the beginning. Other tips would also become apparent.
Hoping for simpler results on the second section I waited until 10 minutes had passed and attempted to remove the slight haze. This time I had better results but I still wanted a little more. I switched to a terry weave mf towel (like you use for polish removal) and this time I wiped a little harder and turned the towel after each time I went over it. I found after about 3 complete passes with different sides of the towel I could find excellent clarity with the rooms regular overhead artificial lighting. When pointing a spotlight directly into it I still had slight holograms but all in all I was satisfied.
The 45 minute test yielded similar results as the 10 minute test and I concluded 10 minutes is fine but if I was to have other things to do on a vehicle for instance it wouldn’t matter if I came back to buff it off later.
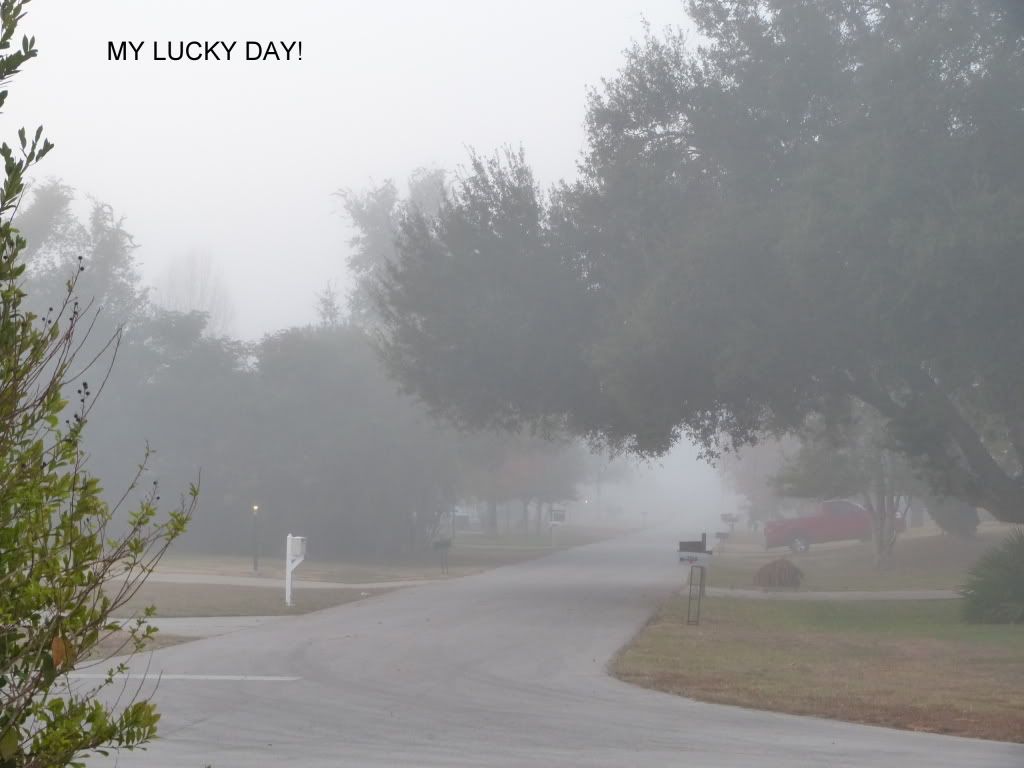
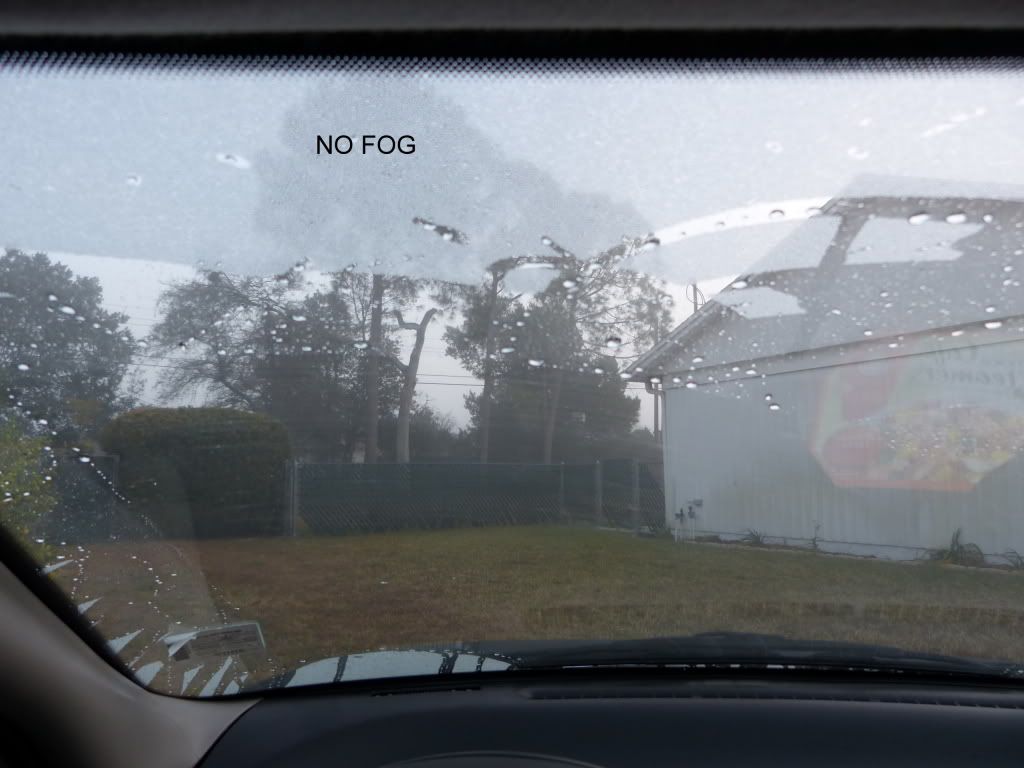
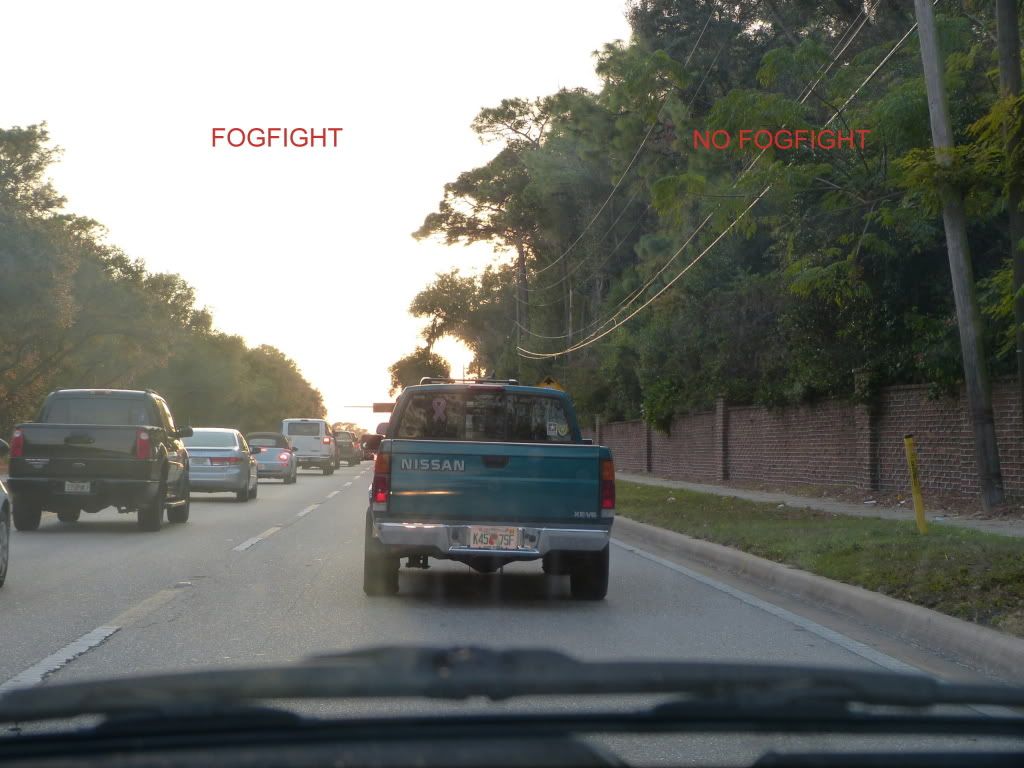
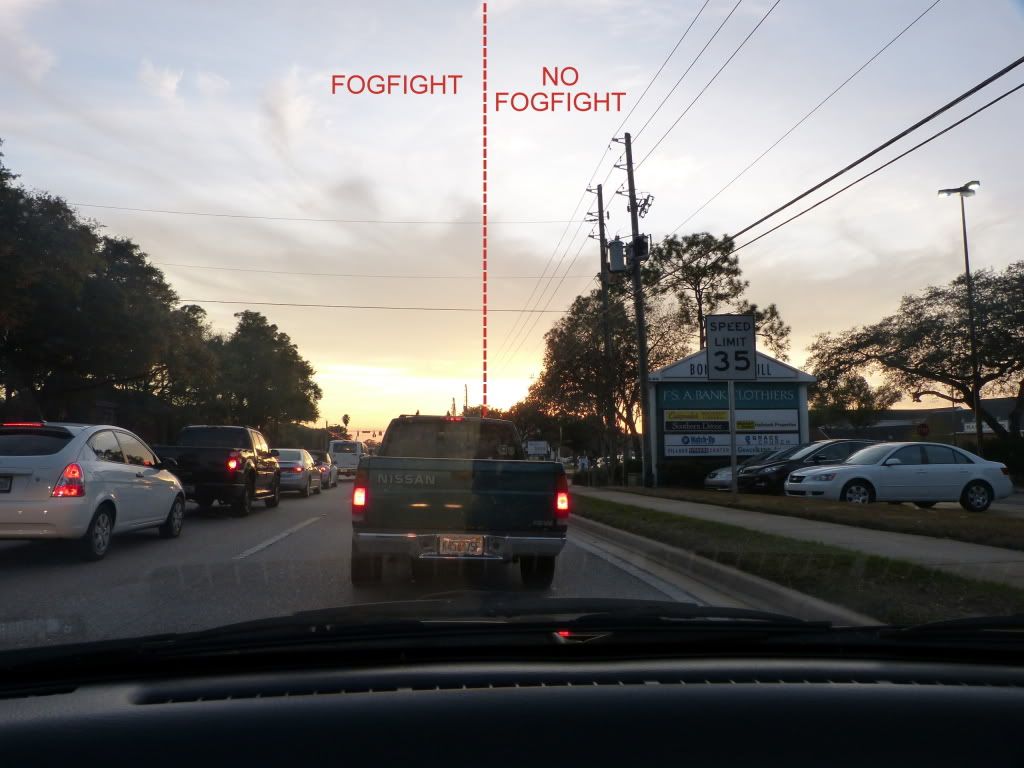
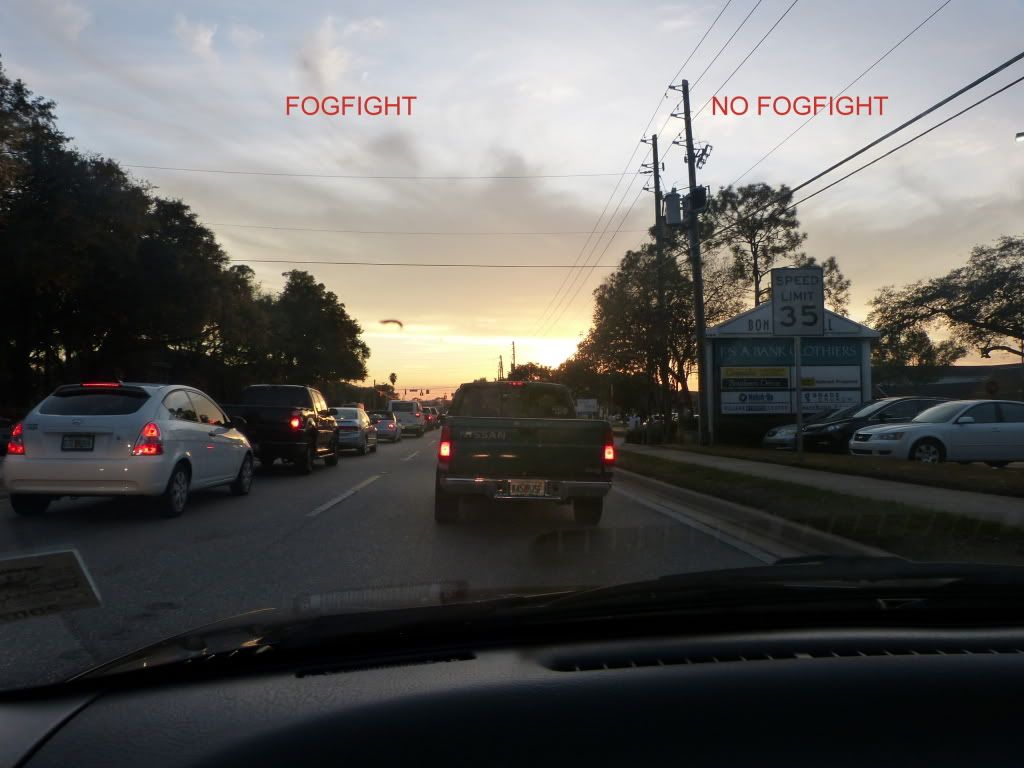
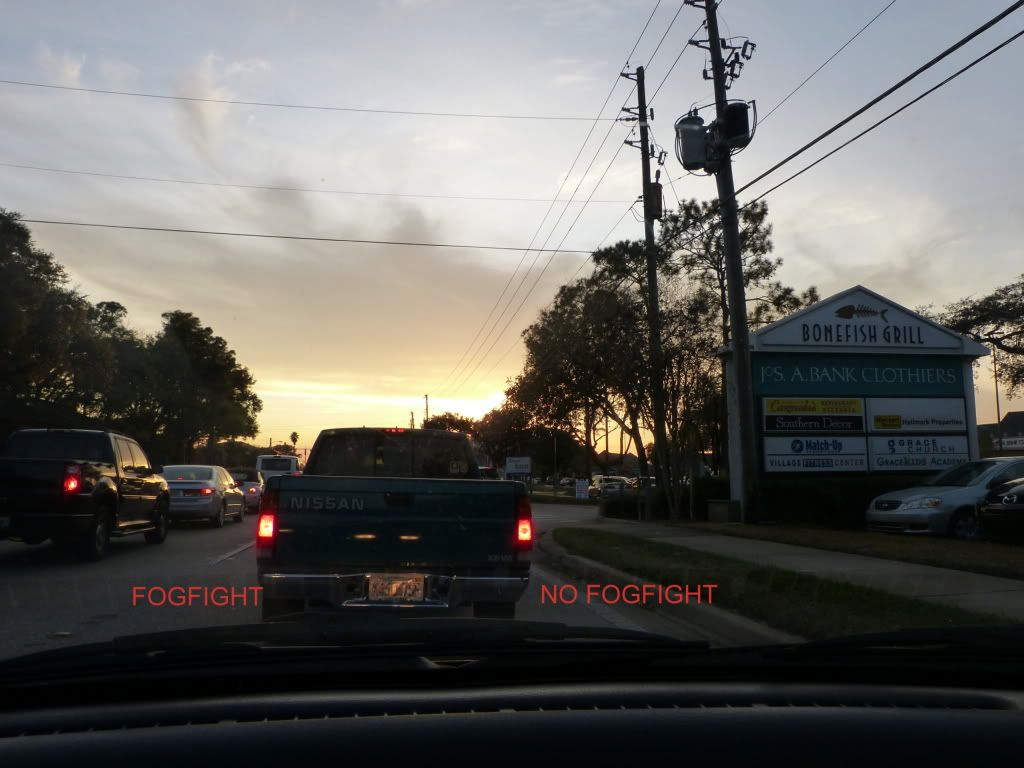
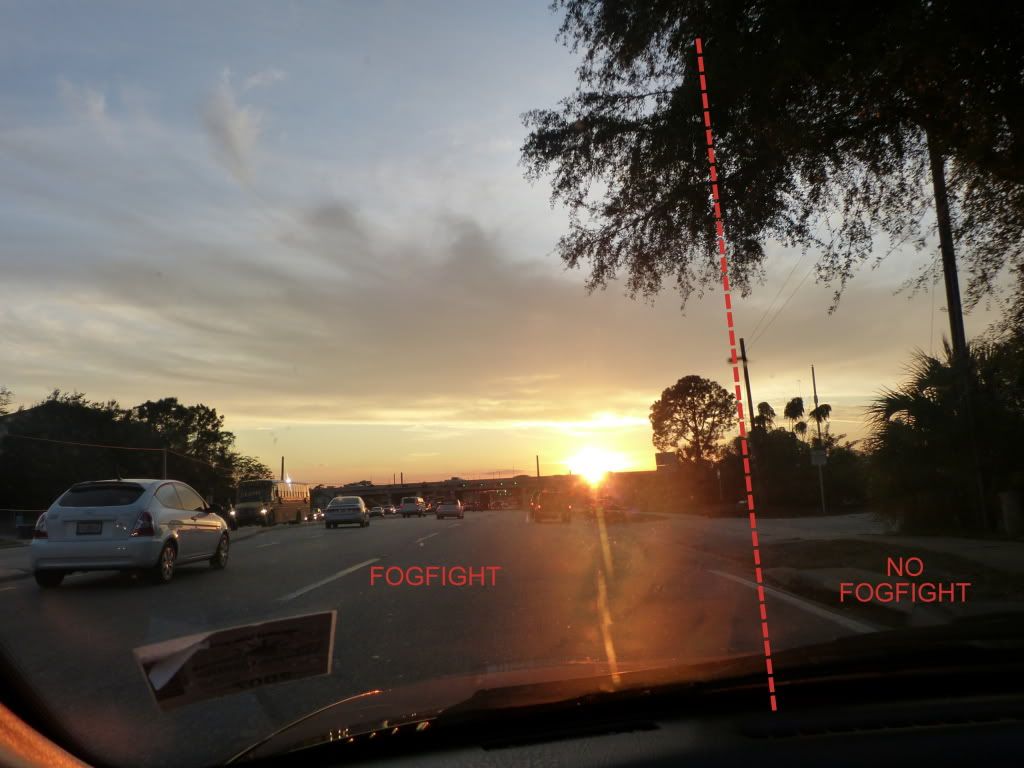
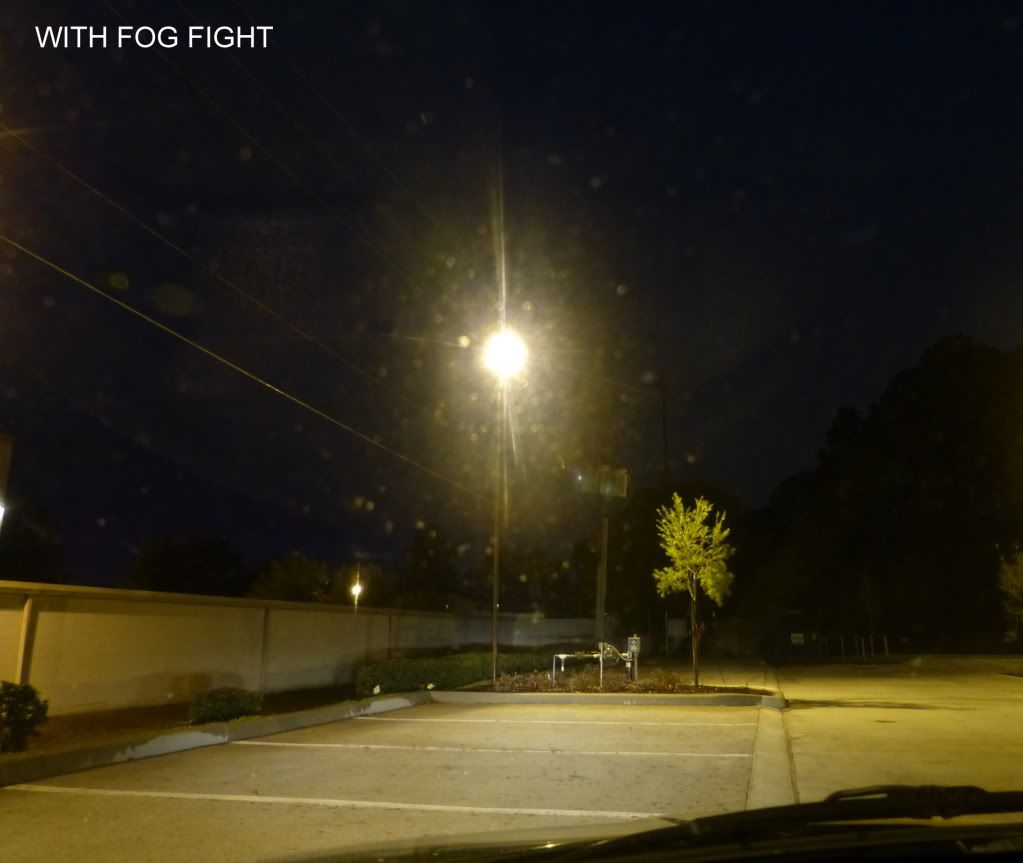
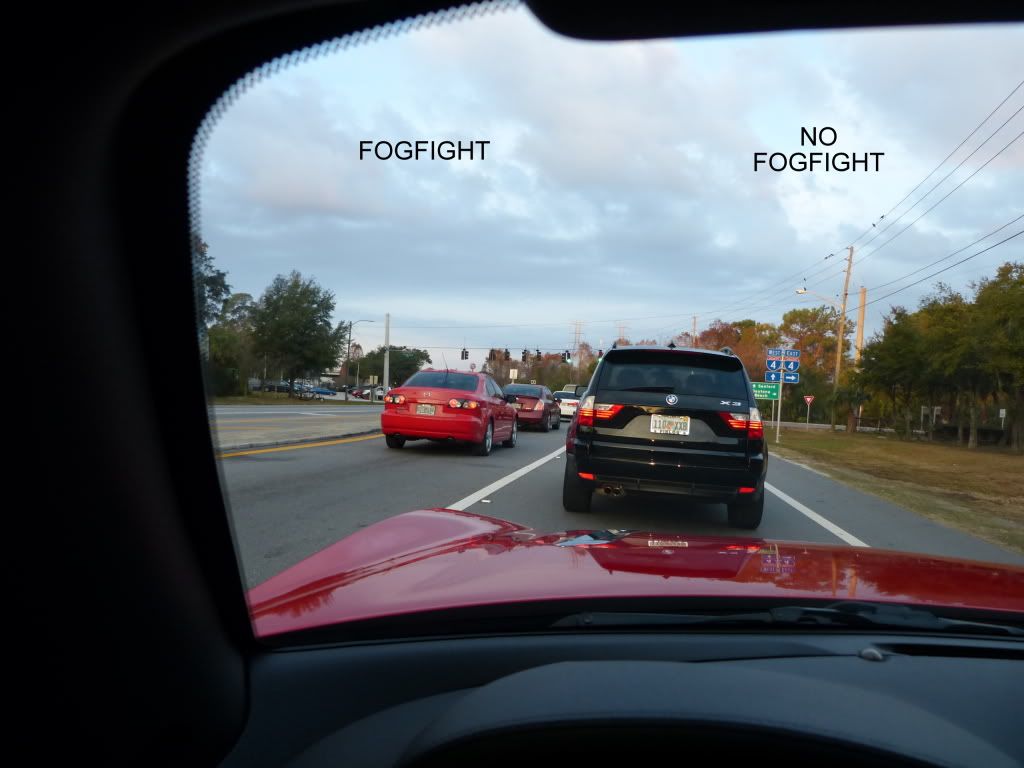
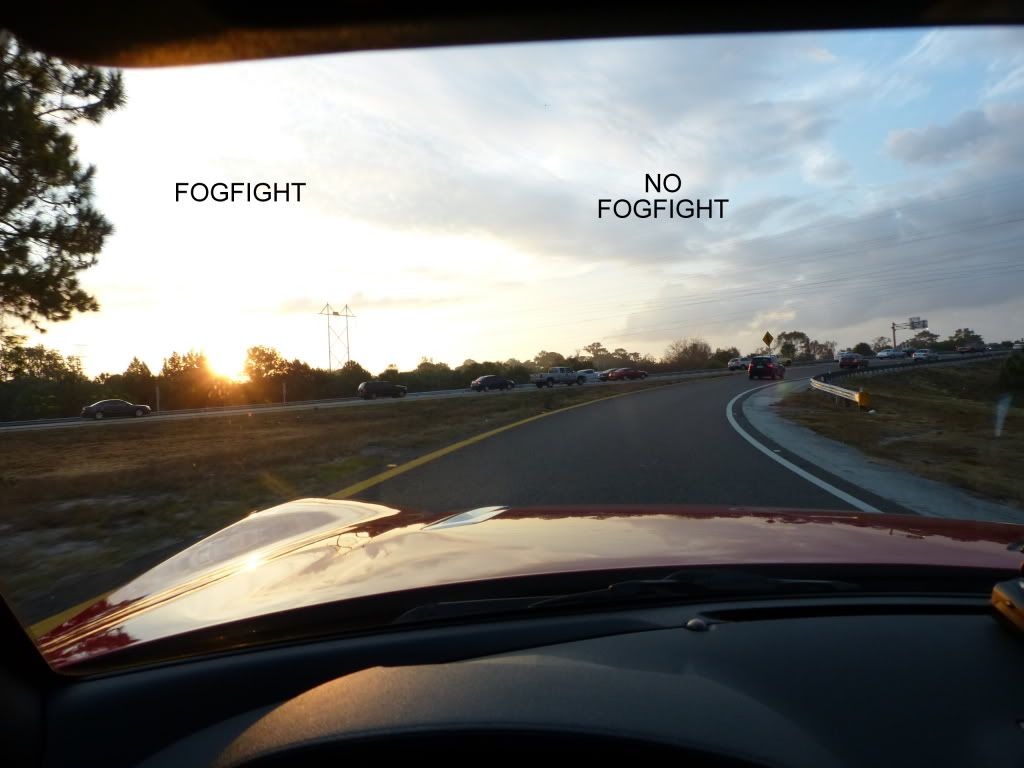
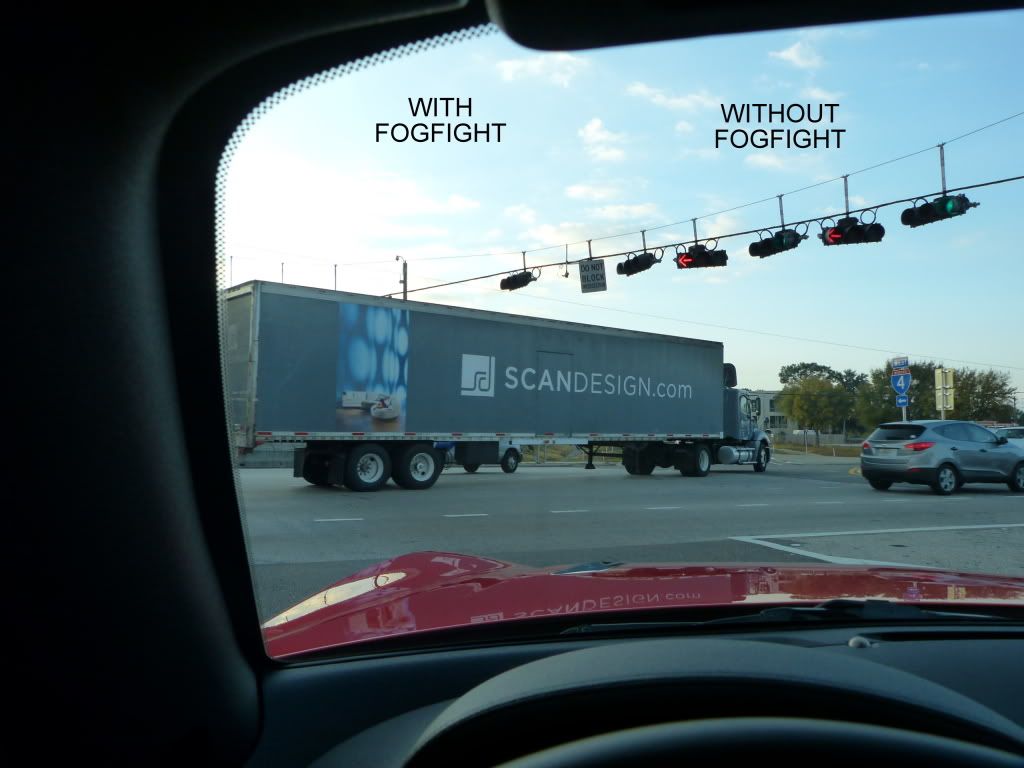
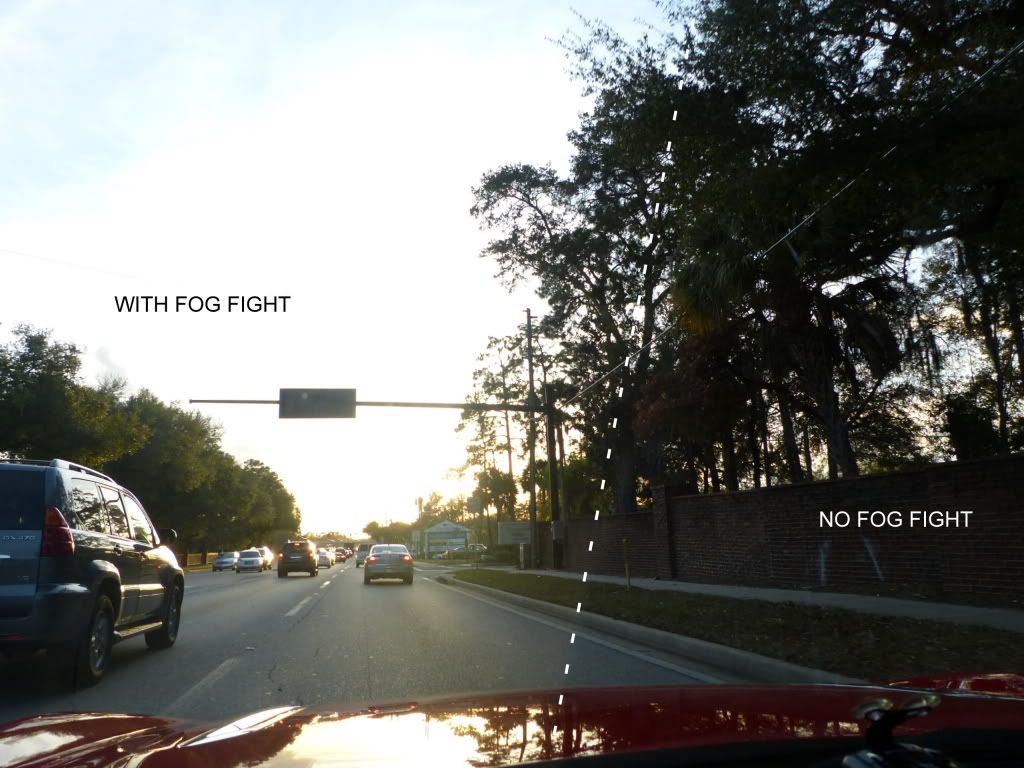
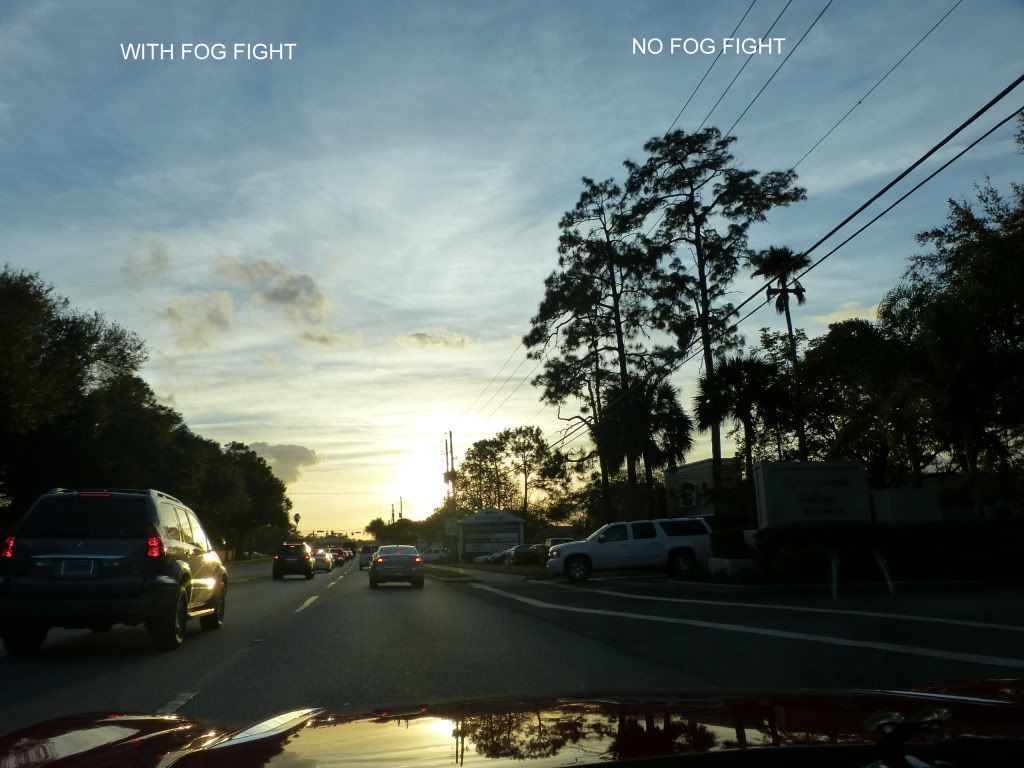
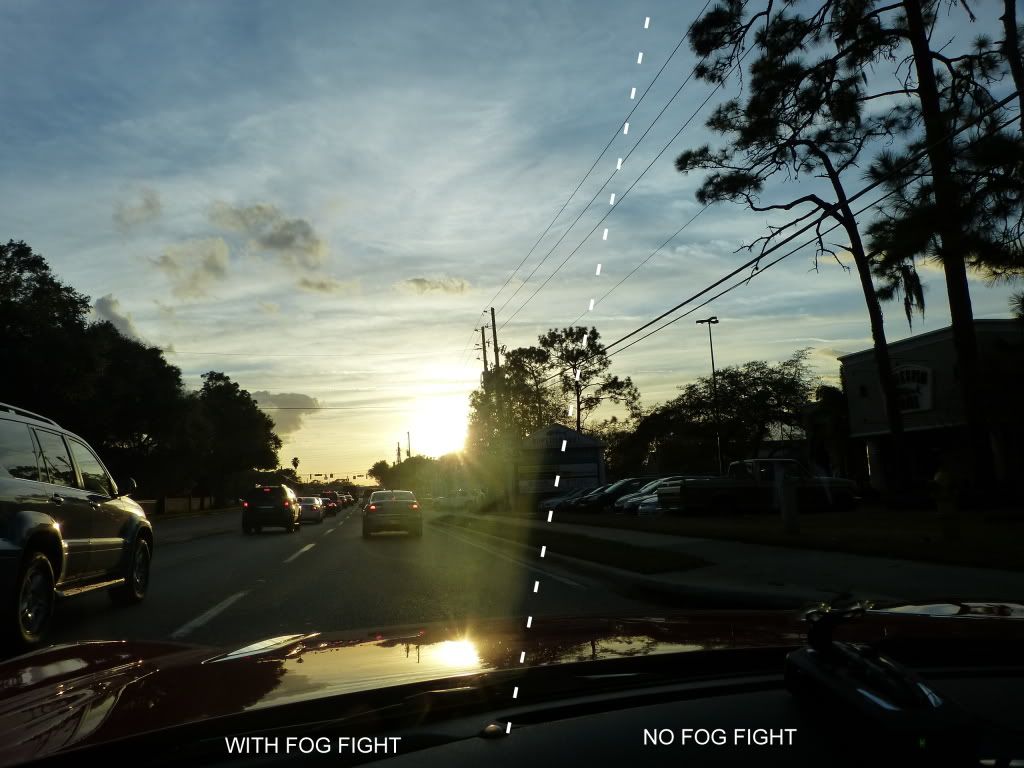
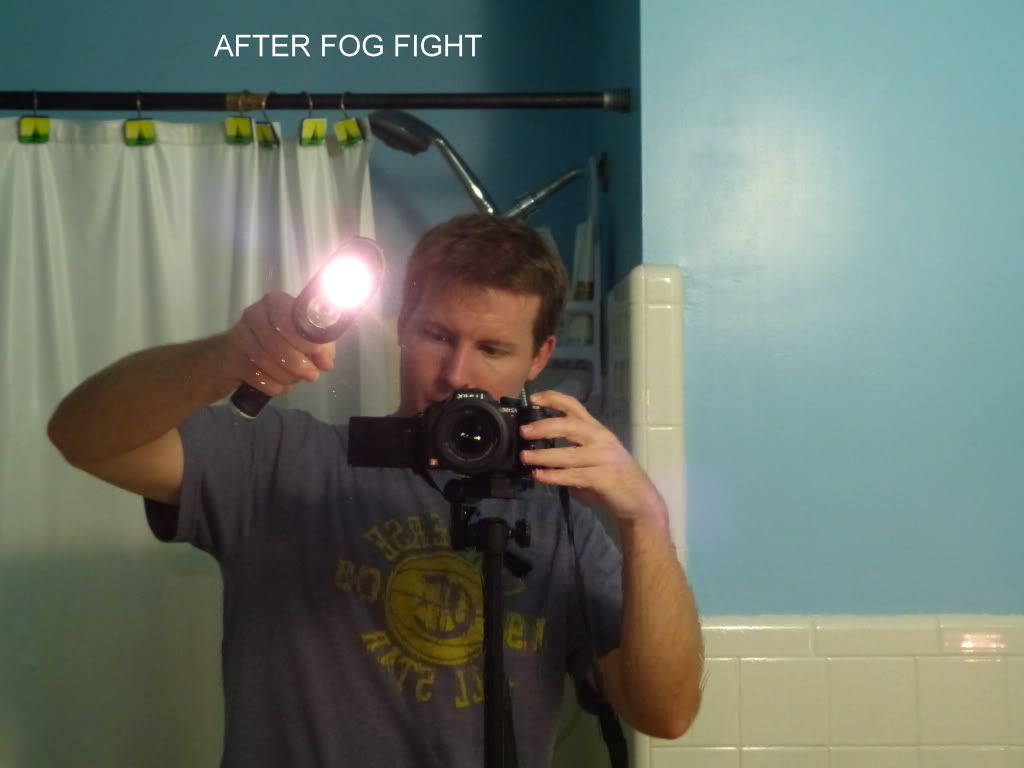
After logical consideration I was happy with the mirror with the knowledge I would never be pointing a spotlight into it therefore the clarity was for all practical purposes perfect in any condition I would see it. I was of course quite impatient and concerned what I might find when using it on my windshield where many different lighting situations are possible. I couldn’t wait to get out to the garage and continue my testing! But first it was time to see the Fog Fight in action on the mirror.
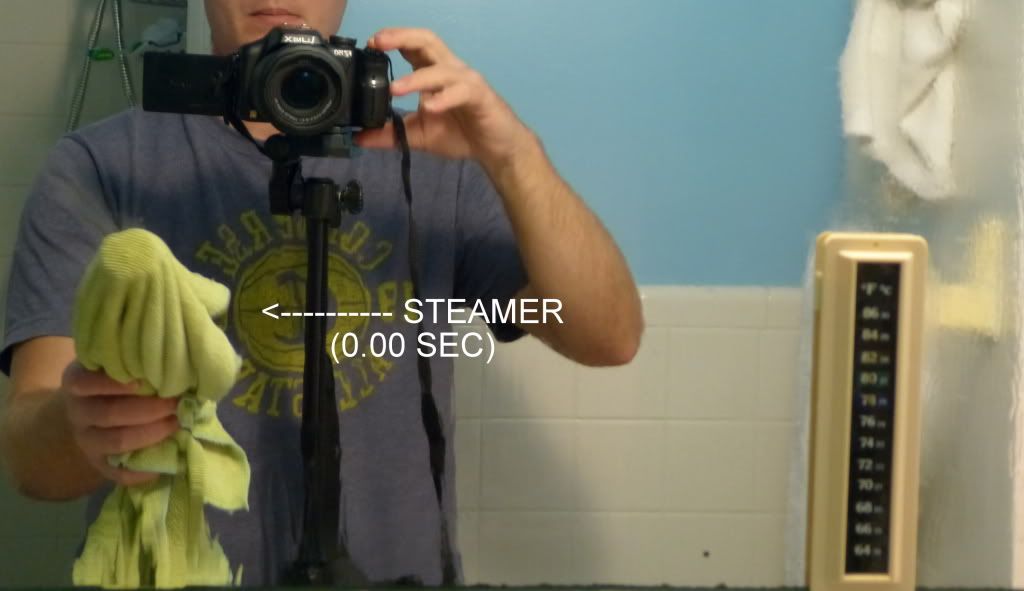
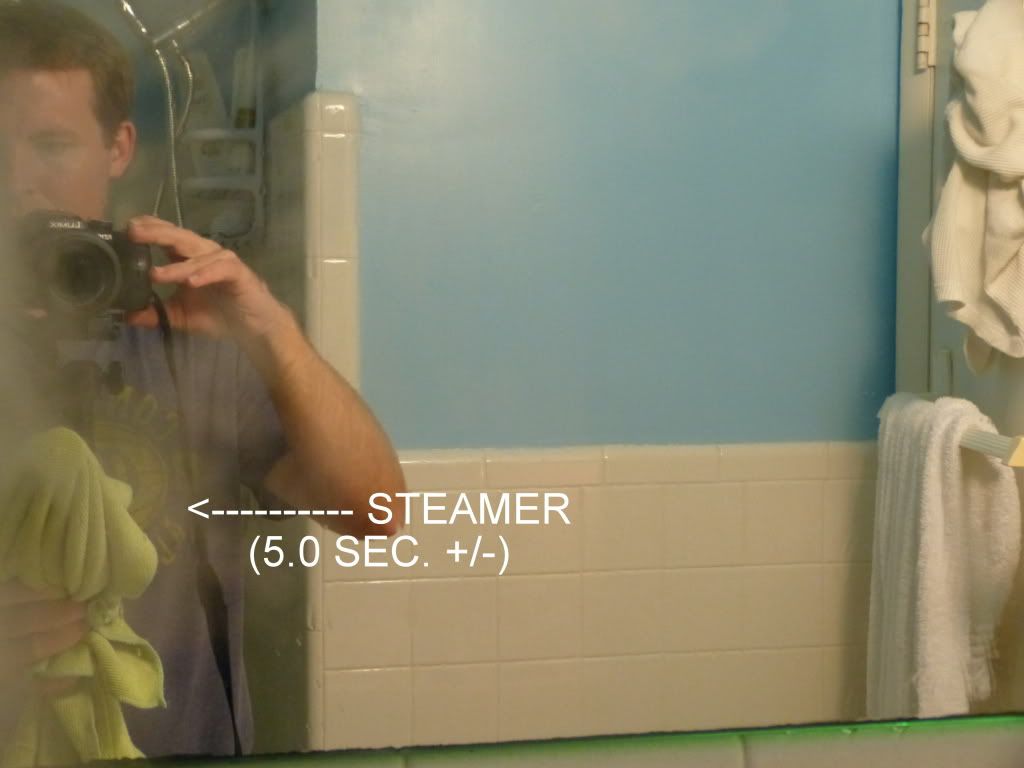
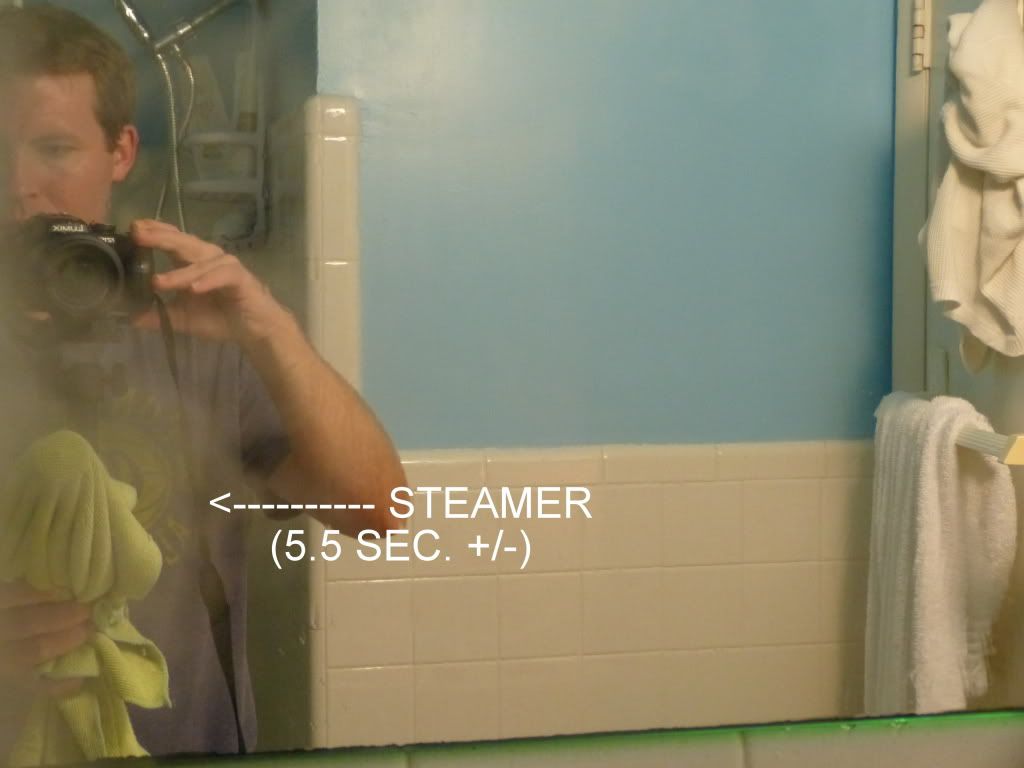
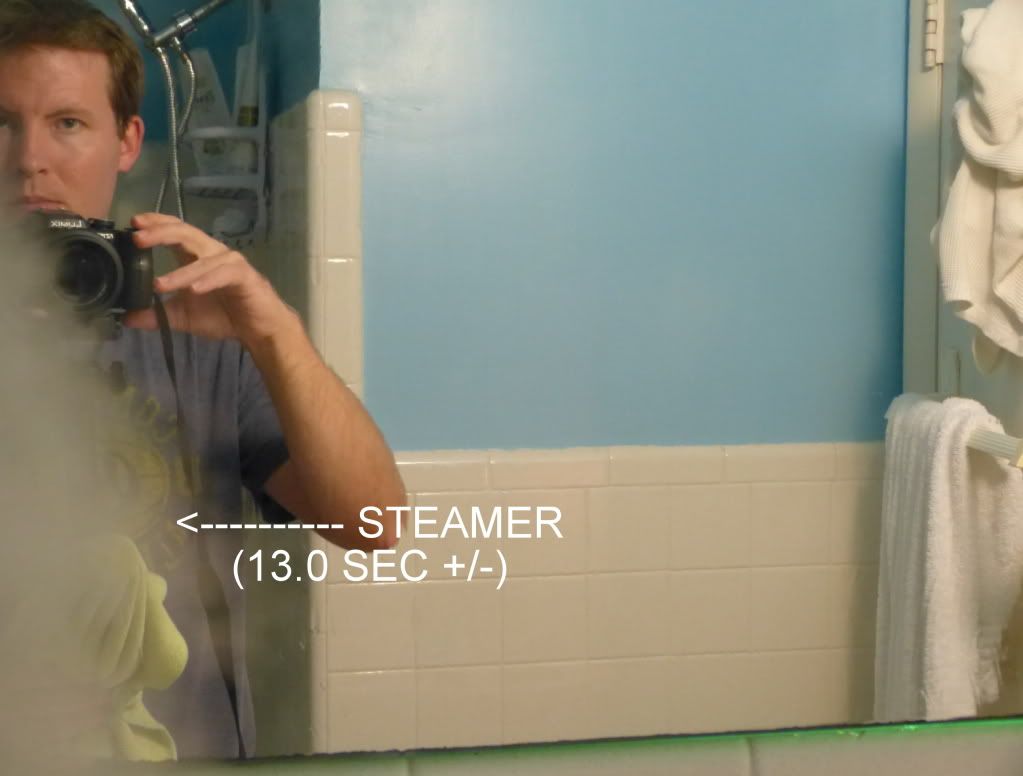
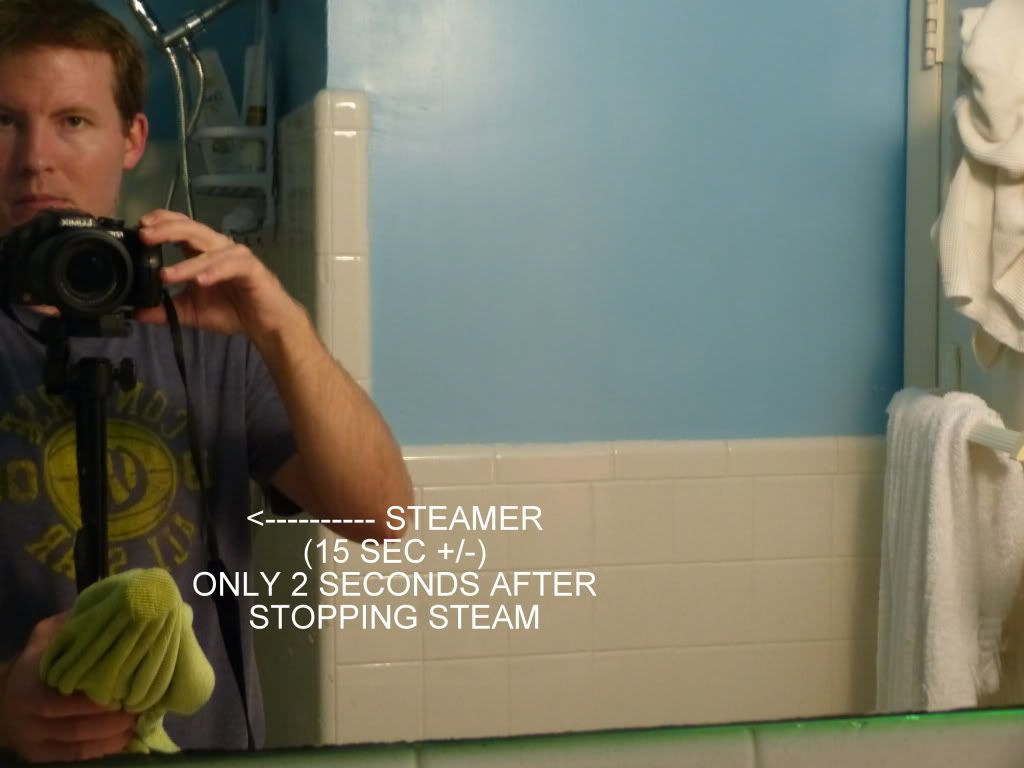
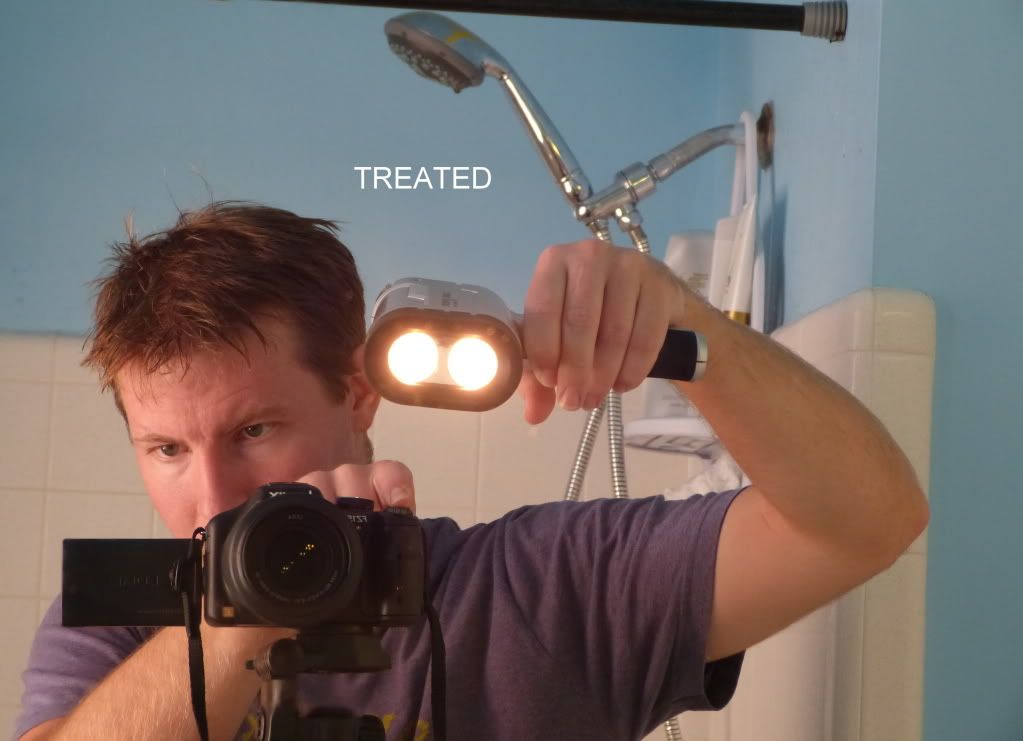
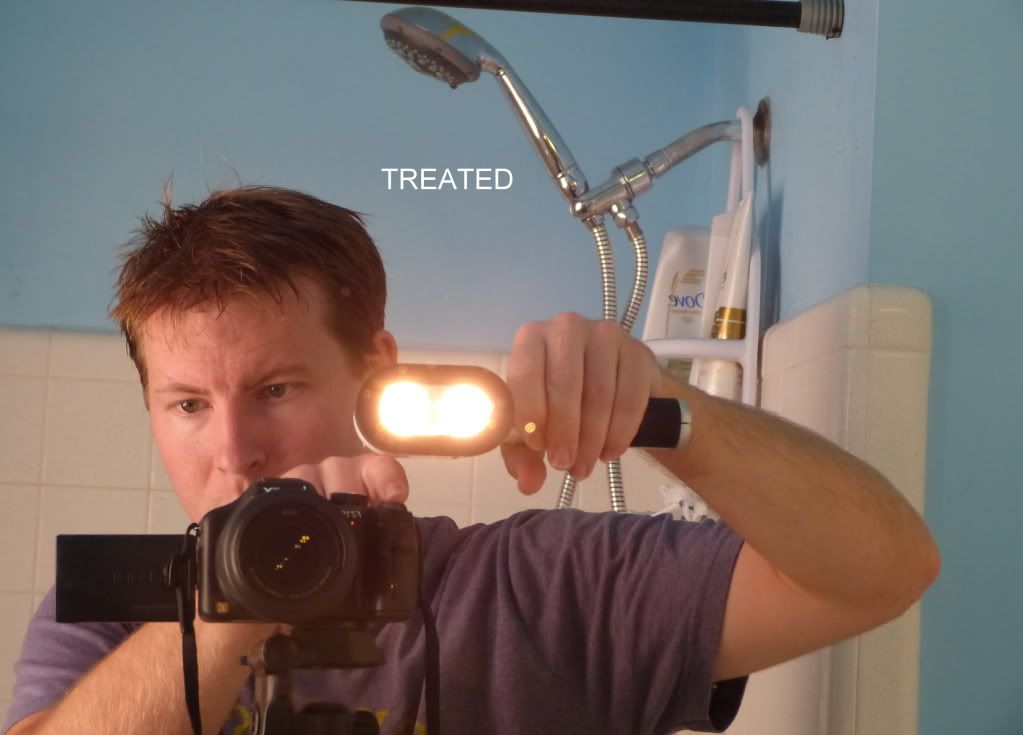

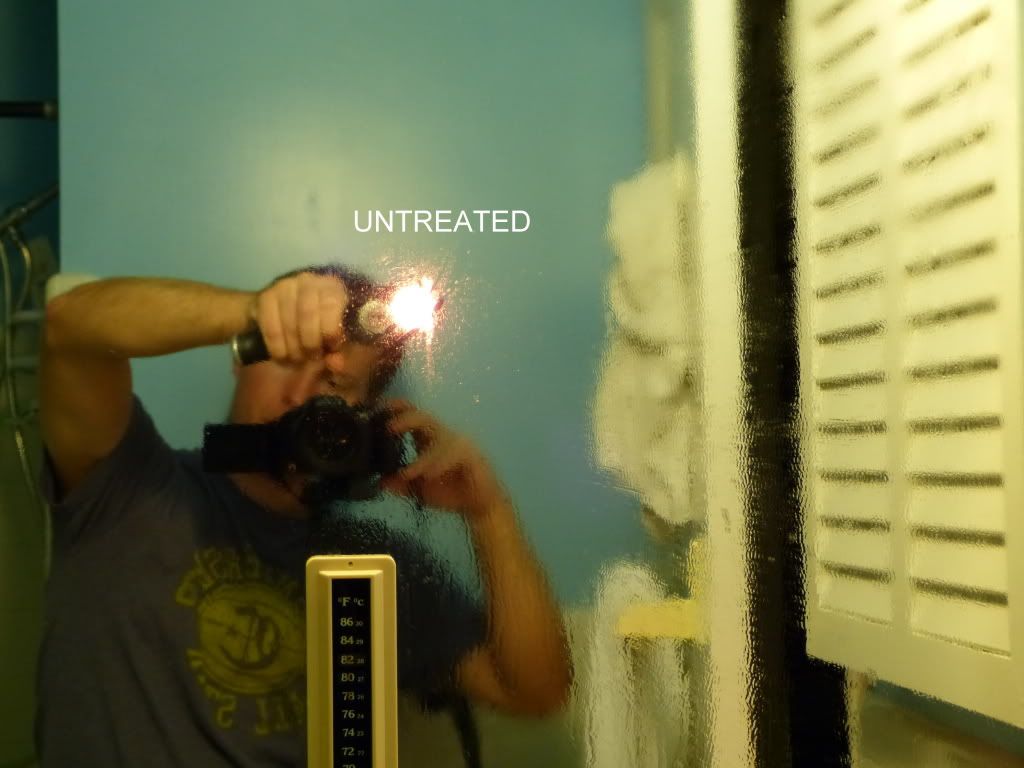
EEK! Don't let moisture get in the camera.
You can see it building on the lens here which made this cool affect but I was getting my camera out of there fast after every time I got some quick pictures. I didn’t want any moisture getting inside my new camera!

Product Description From AG:
CarPro Fog Fight prevents fog from interfering with your visibility! This antifog coating is super hydrophilic and eliminates condensation on interior auto glass. Keep your windshield, windows, and mirrors clean and clear with just one application. CarPro Fog Fight prevents fog due to heat, cold, and humidity.
Introduction:
As the proud owner of a convertible I was excited to hear about a new product coming out that would eliminate fog by providing a hydrophilic coating on the inside of the windshield. With a convertible I often get fogged up windows so this seemed like a natural fit. Only a few short months ago it was coming to market in Europe and just weeks ago it landed on our shores as well.
I had been following different threads on the product with all manner of opinions. So when I received my CarPro Fog Fight (CFF) kit from AG last weekend I couldn't wait to put it through some rigorous testing and develop my own opinion as well.
Hydrophilic:
hy·dro·phil·ic coatings have an affinity to water and are usually charged or have polar side groups to their structure that will attract water.
My Understanding:
So the way this works is not that it stops the surface from getting wet… quite the opposite. By applying a coating that absorbs moisture it does not allow beads to form. The beads are normally formed by the oxygen and hydrogen atoms of water being repelled by the surface they are attached to. Rather than do battle with the water molecules Fog Fight accepts them as family and absorbs them temporarily.
Details:
1.- Packaging: Plastic bottle with trigger spray nozzle and flip switch beneath trigger
2.- Viscosity: Thin
3.- Color: Clear
4.- Scent: Similar to Eraser
5.- Price (at time of review): 3.4 oz. (100ml) = $8.99
6.-Manufacturer: CarPro
7.-Made in: Korea
Kit Contents:
(1) 100ml Fog Fight Sprayer
(1) CarPro applicator block
(2) 4" suede mf applicators
(1) 8" suede mf removal cloth
CarPro Fog Fight Kit: (Terry weave towel not included)
Products Used:
Video CarPro Fog Fight:
Most of this video was created after I had completed all my testing and came back to recreate it with my lessons learned. After this video we will rewind to where I started my testing.
[ame=http://www.youtube.com/watch?v=9iZvwkVfD44&hd=1]CarPro FogFight 1.mp4 - YouTube[/ame]
Testing:
Testing took place starting on the bathroom mirror and then on 2 different vehicles. Multiple tests and applications were conducted on each (3 on the mirror & 2 on each car).
I’ll try to condense my testing and observations but I’m sharing them so you can see what I tried and how I came to my conclusions. If you would prefer to skip the bla bla bla and get to my tips and ultimate conclusion feel free to skip the testing (but don’t miss the 3 videos) and move onto the section labeled "My Application Tips", and forward from there through to the “Final Observations”.
Mirror (Part A):
I started my testing on the bathroom mirror because the lighting can be easily controlled and any change in visibility and highlighting of fog is highly visible on a mirrored surface.
After using Eraser to clean the mirror and wiping it dry I allowed it to sit a minute just to be sure it was dry. Next I applied CFF using approximately 4 squirts total over a 30 square inch area. As I spread the product I could clearly feel the resistance and a feeling of friction as I spread it across the surface. It was not a sticky or unpleasant feel, but certainly grabby.
I had setup a few sections so that I could remove the product after a minute on one, ten minutes on the next, and 45 minutes on the last. My first method of removal was to use the mf suede removal towel double wrapped over the applicator and lightly wipe. On the section where I waited one minute it actually worked fine in regular lighting but once I placed a beam of light directly into it, it seemed as though no matter which way I wiped I could not make a perfectly clear surface. Holograms would appear in whichever direction I wiped last. Of course I was being careful not to wipe too hard. Later I would find that I did not have to be nearly as gentle as I had been in the beginning. Other tips would also become apparent.
Hoping for simpler results on the second section I waited until 10 minutes had passed and attempted to remove the slight haze. This time I had better results but I still wanted a little more. I switched to a terry weave mf towel (like you use for polish removal) and this time I wiped a little harder and turned the towel after each time I went over it. I found after about 3 complete passes with different sides of the towel I could find excellent clarity with the rooms regular overhead artificial lighting. When pointing a spotlight directly into it I still had slight holograms but all in all I was satisfied.
The 45 minute test yielded similar results as the 10 minute test and I concluded 10 minutes is fine but if I was to have other things to do on a vehicle for instance it wouldn’t matter if I came back to buff it off later.
After logical consideration I was happy with the mirror with the knowledge I would never be pointing a spotlight into it therefore the clarity was for all practical purposes perfect in any condition I would see it. I was of course quite impatient and concerned what I might find when using it on my windshield where many different lighting situations are possible. I couldn’t wait to get out to the garage and continue my testing! But first it was time to see the Fog Fight in action on the mirror.
EEK! Don't let moisture get in the camera.
You can see it building on the lens here which made this cool affect but I was getting my camera out of there fast after every time I got some quick pictures. I didn’t want any moisture getting inside my new camera!