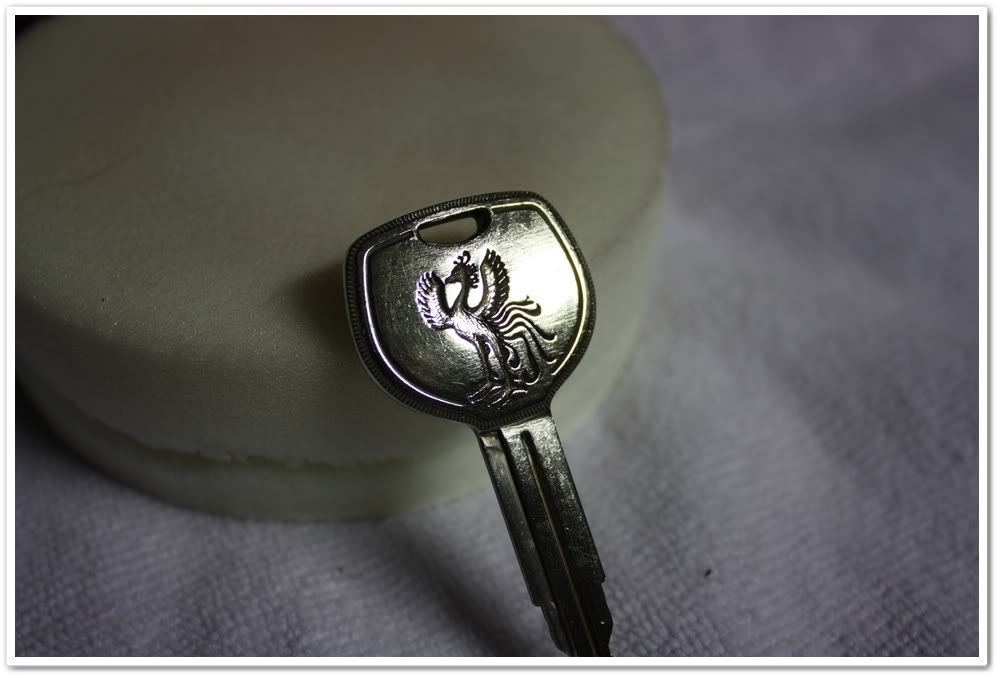
Restoring a rare Toyota Century. Esoteric Auto Detail

TSC17

New member
1979 Toyota Century


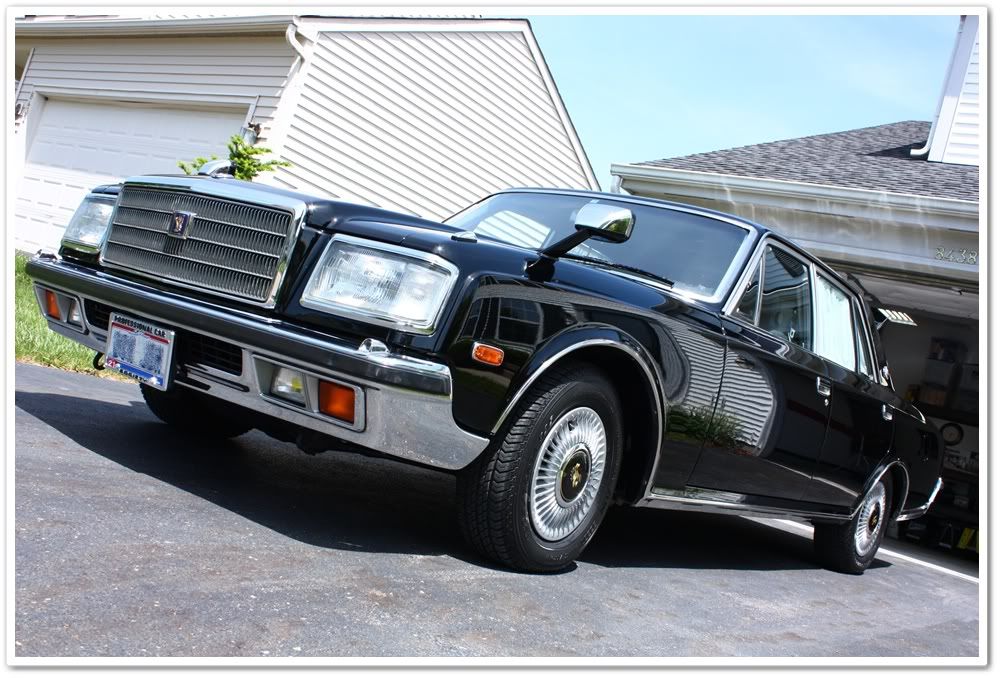
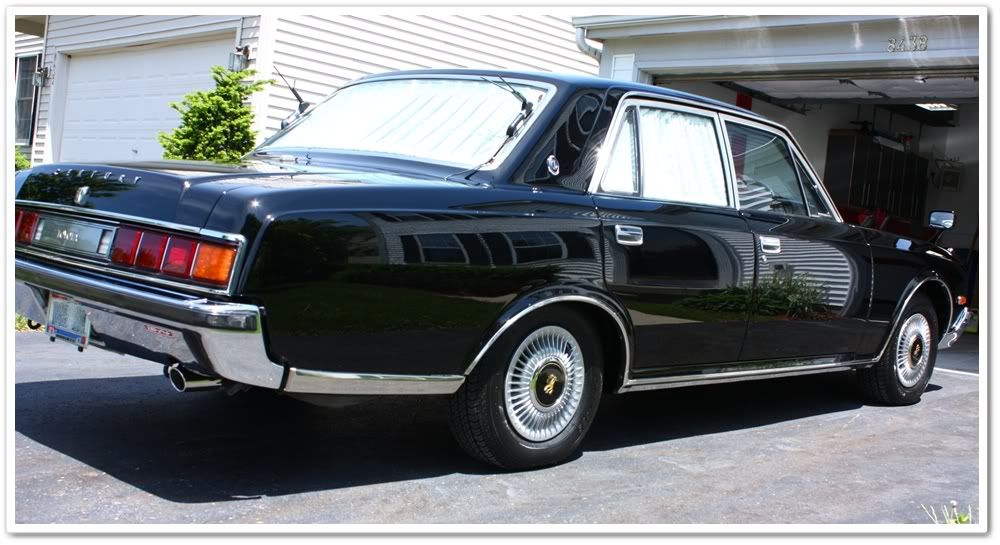
Every now and then we get the opportunity to work on some very special vehicles, and I was pleased to get the chance to restore the finish of one of Japan’s finest luxury cars…the Toyota Century.


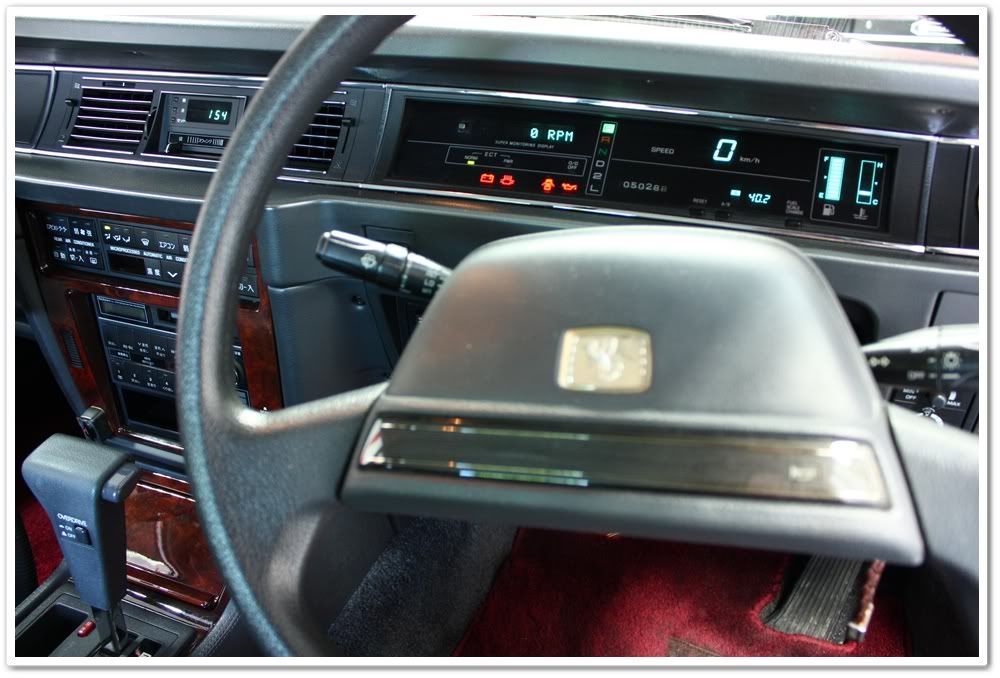
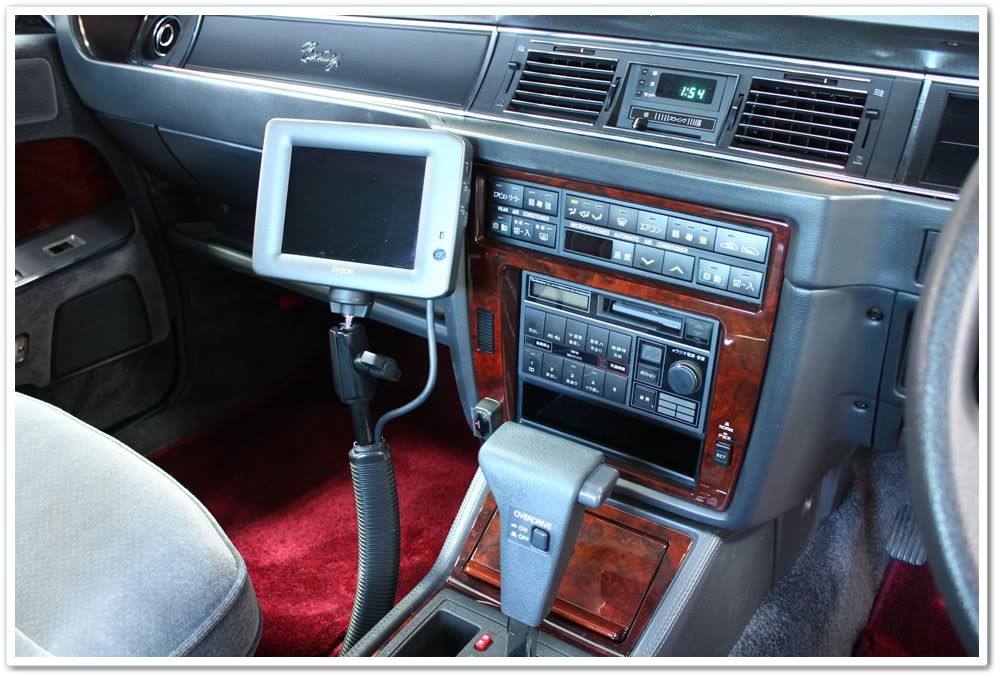
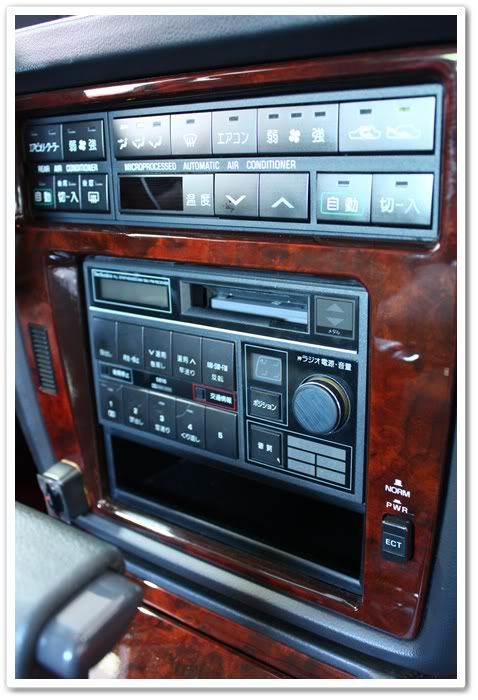
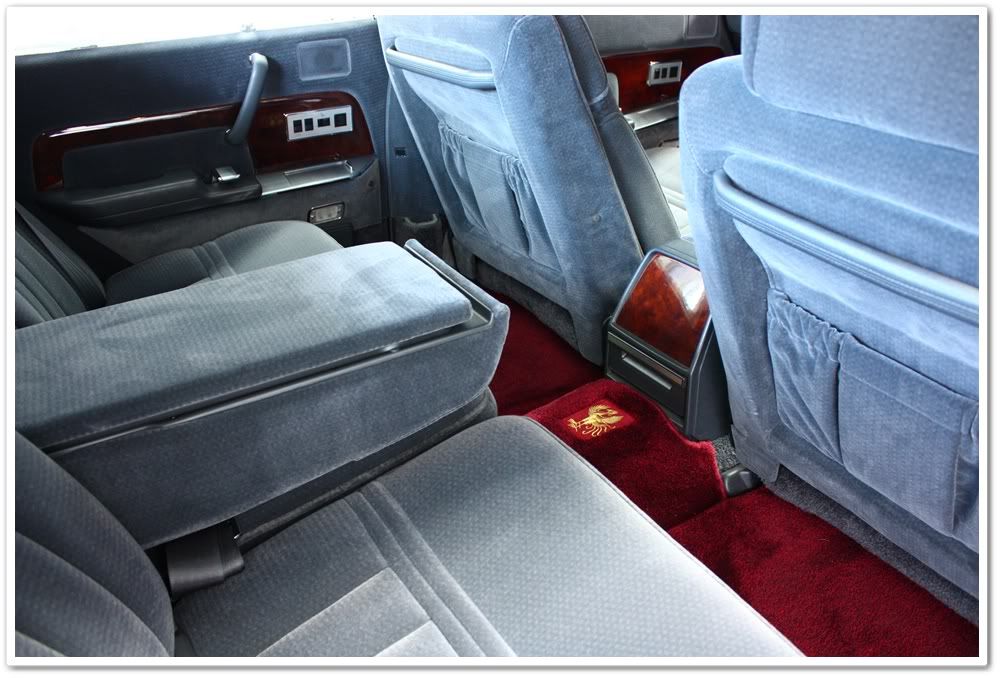
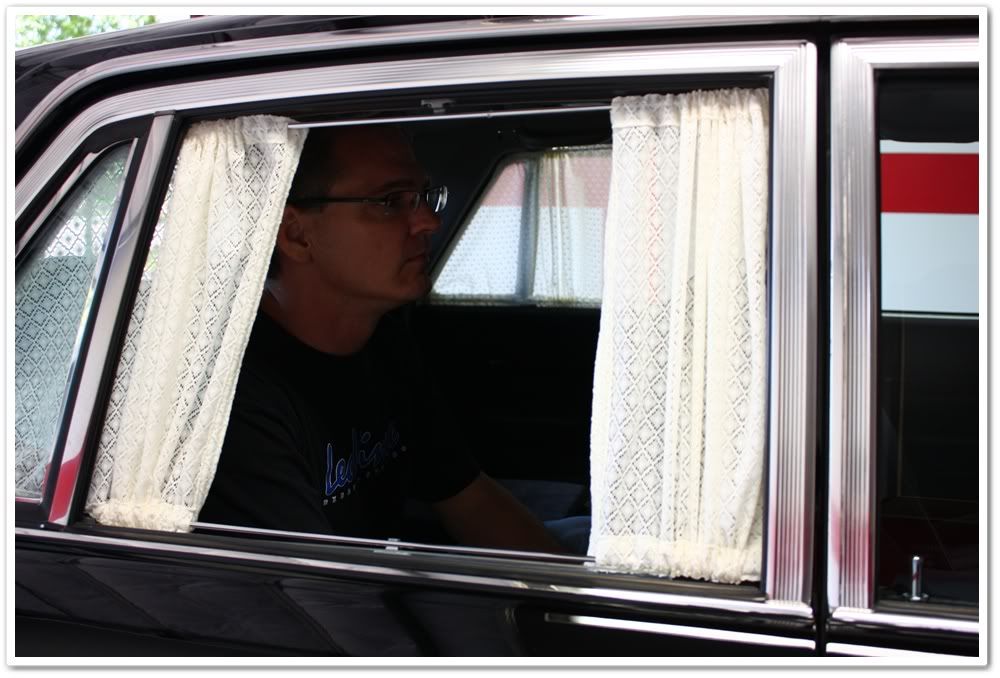
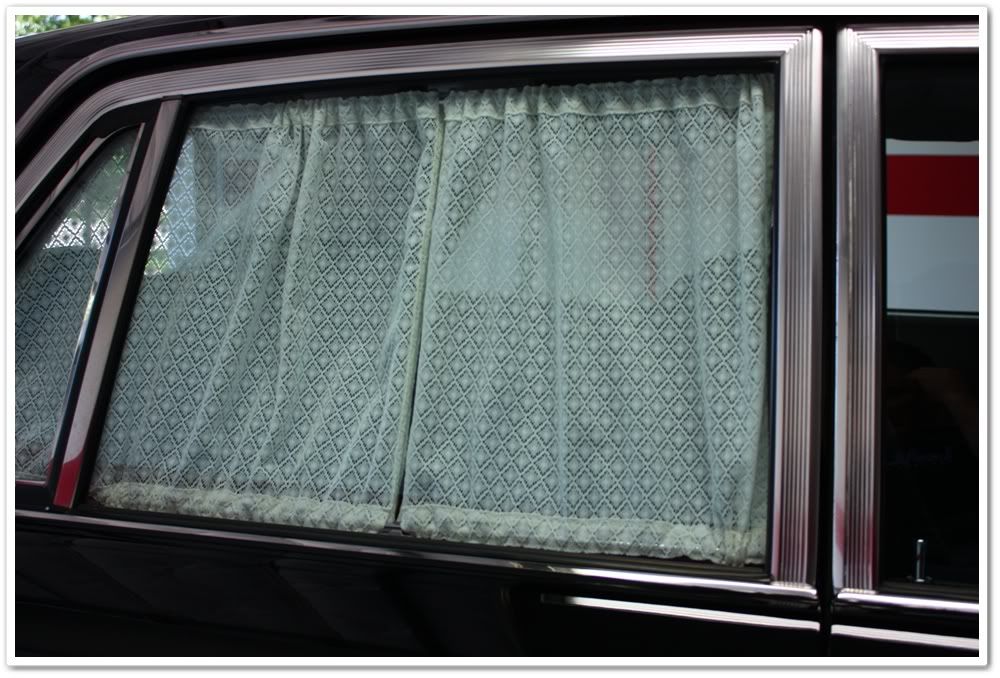
The rare Century is hand-built in limited quantities (usually 200-500 per year), and this body style remained unchanged for 30 years (1967-1997). They are all built to order. This model had a V-8 motor, but in the late nineties it came with a V-12! The amount of power features that they put in a car built in 1979 is simply amazing. How about a power-reclining rear seat that can be controlled from the front? Not only does it have power rear curtains, but they automatically open up when you put the car in reverse.


This vehicle was designed and built for the elite…dignitaries, diplomats, and VIP’s. It’s a major indicator of high status to be seen in the Century. It is also the vehicle of the Emperor (special edition). The design is elegant, understated, and business-like (think of it as a Japanese version of the Rolls Royce or Bentley).


The owner of this particular car has a nice little collection of vehicles, and just had this one imported from Japan in December. He also just brought over a rare Toyota Celica GT-4 WRC that he needs me to work on as well.


For those interested in a bit of history on the Century, I have attached a video that goes into the design and manufacturing process. It’s almost 7 minutes long, but it’s pretty interesting. So if you don’t have time now, then read through the rest of the thread and come back to watch the video!

[ame=http://www.youtube.com/watch?v=s1erJ1eVmLo]YouTube - Toyota Century[/ame]


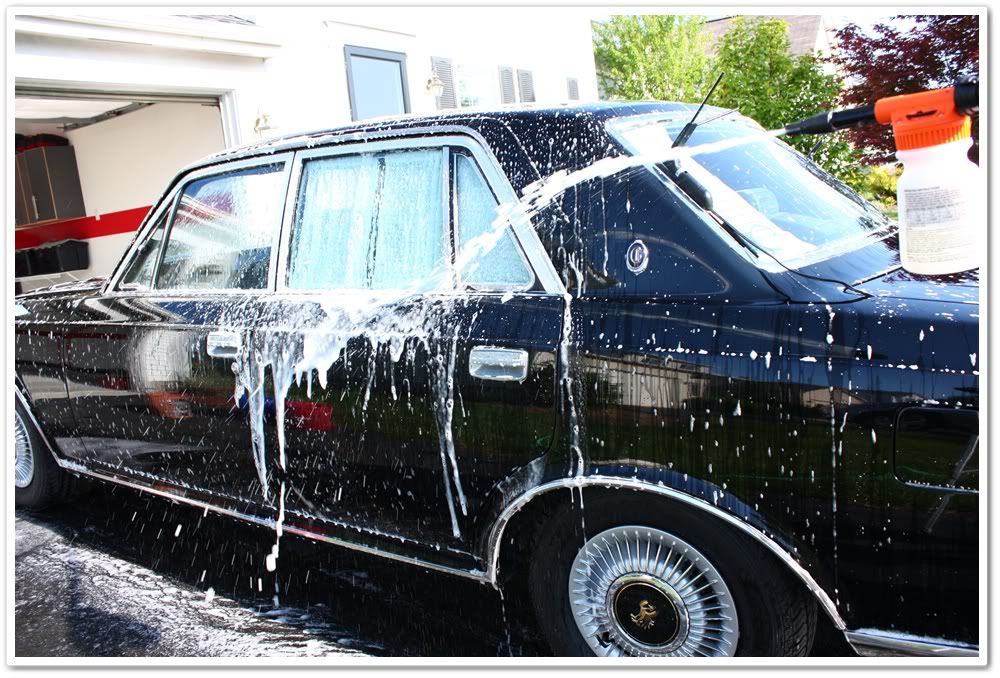
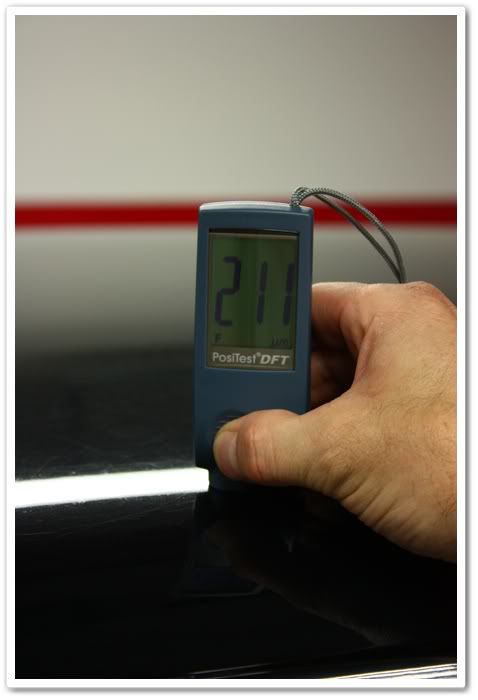
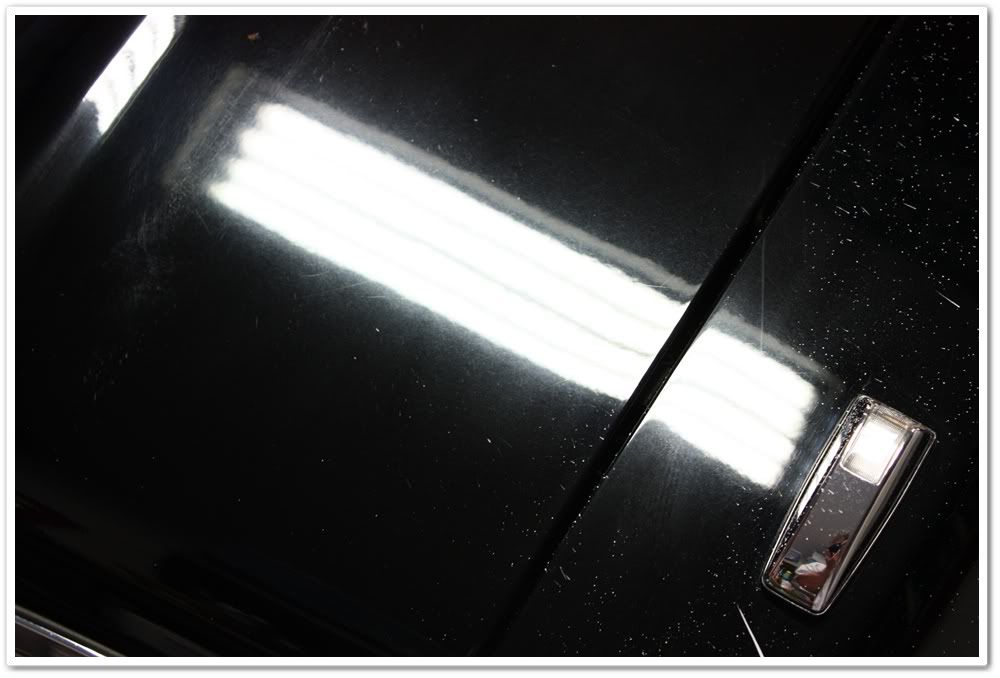
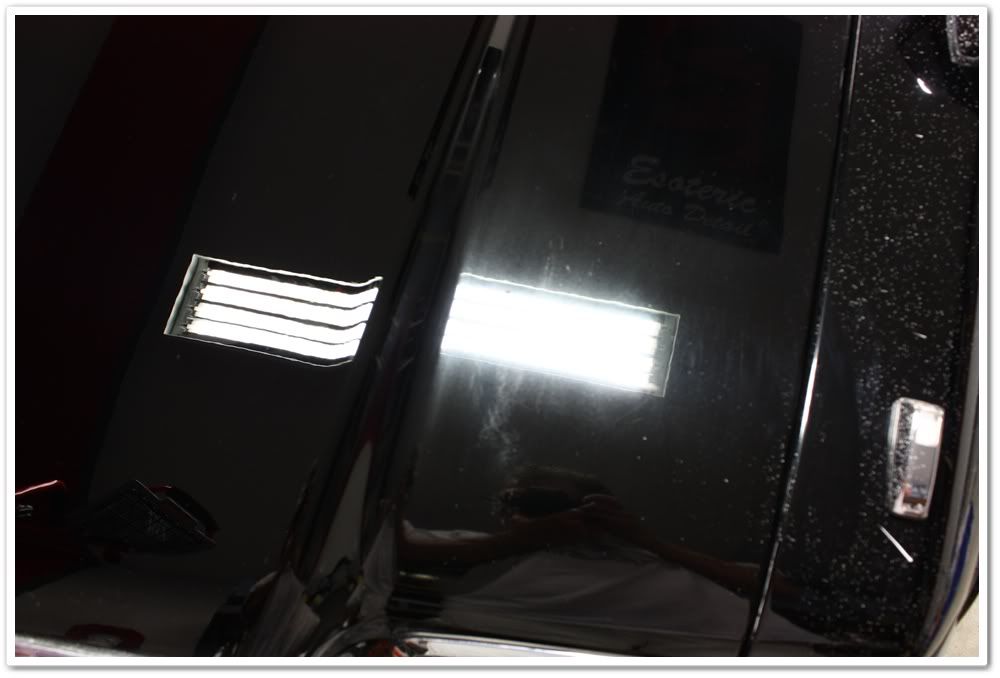
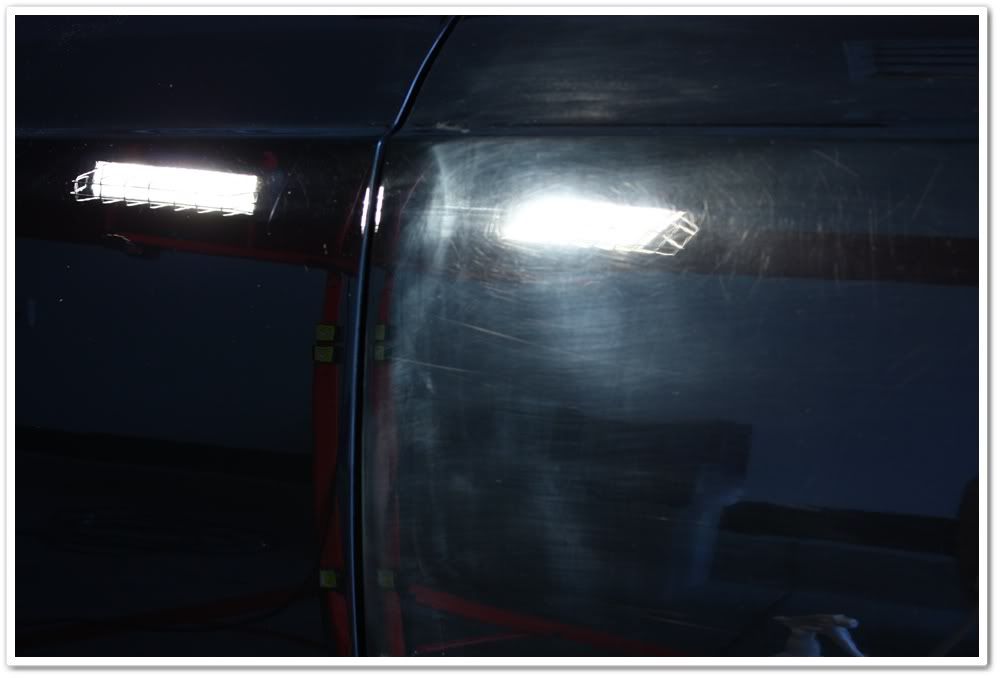
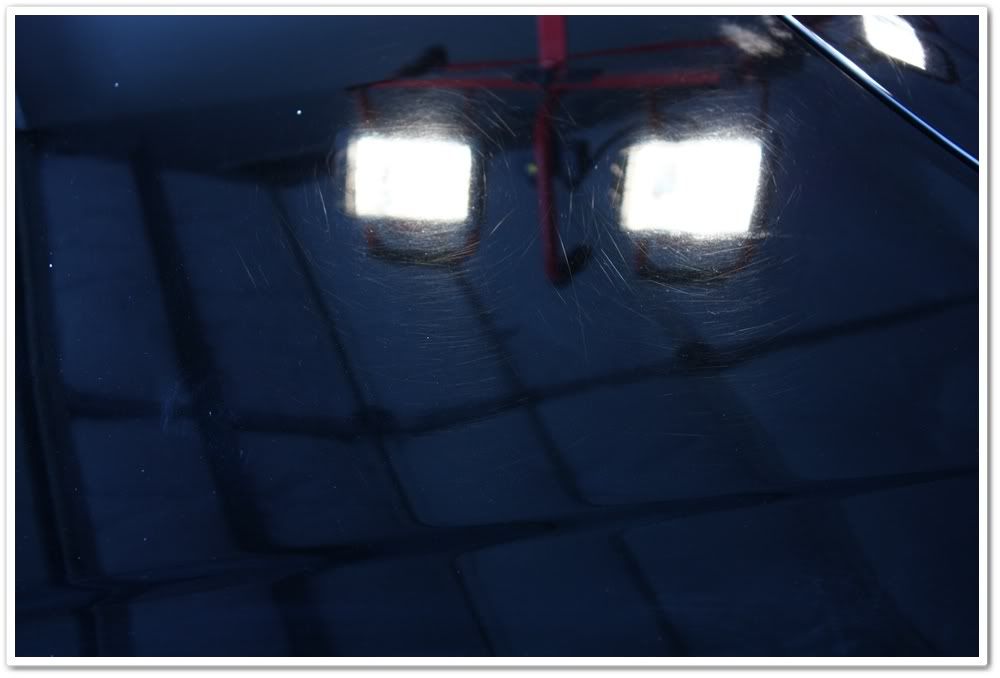
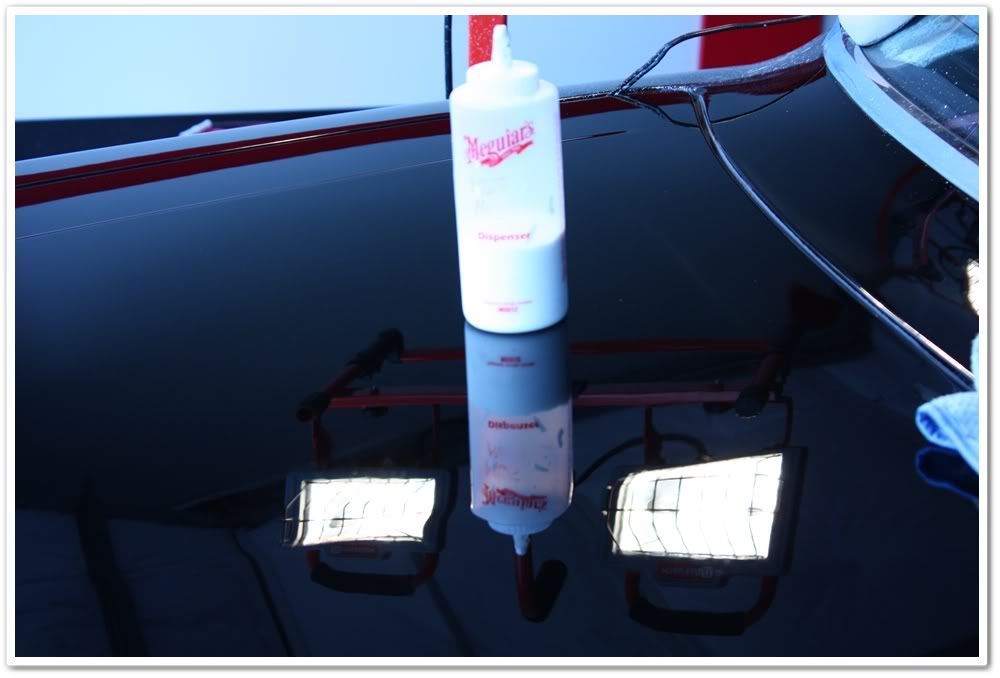
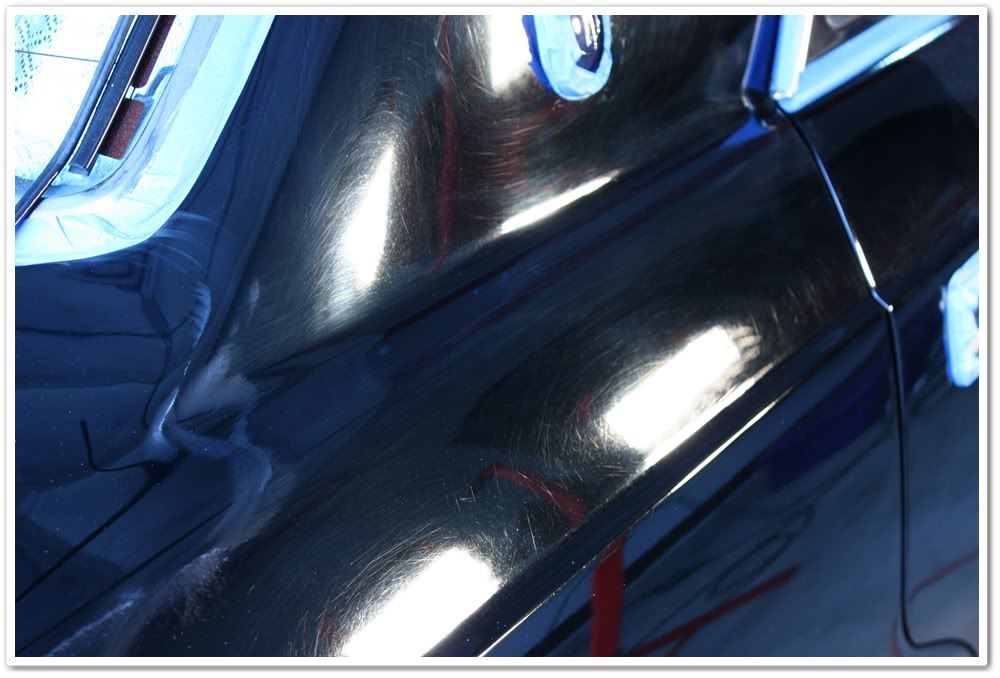
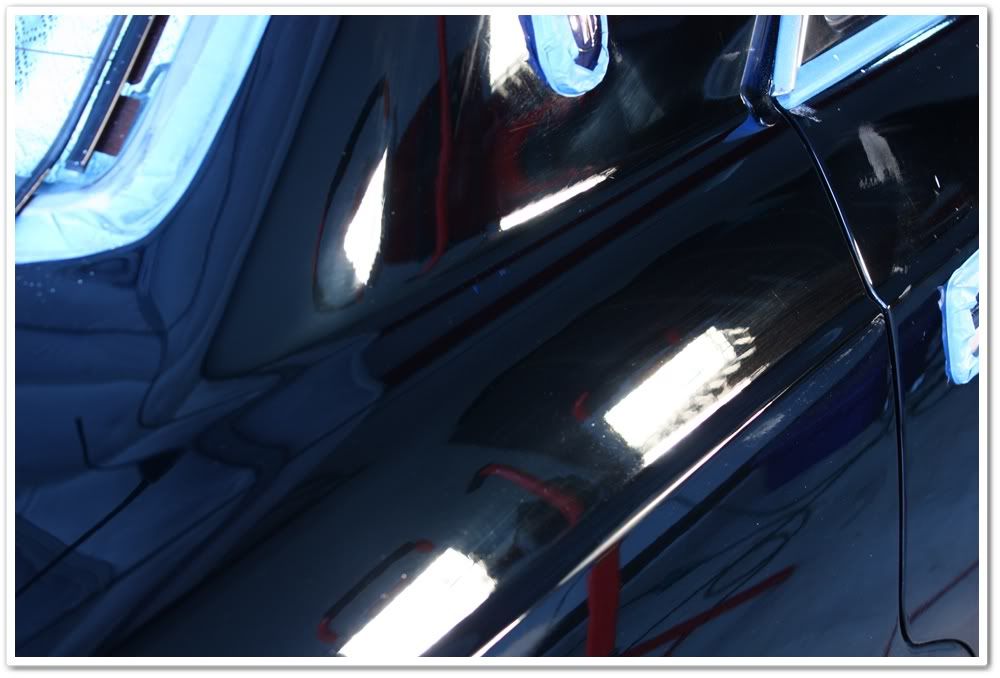
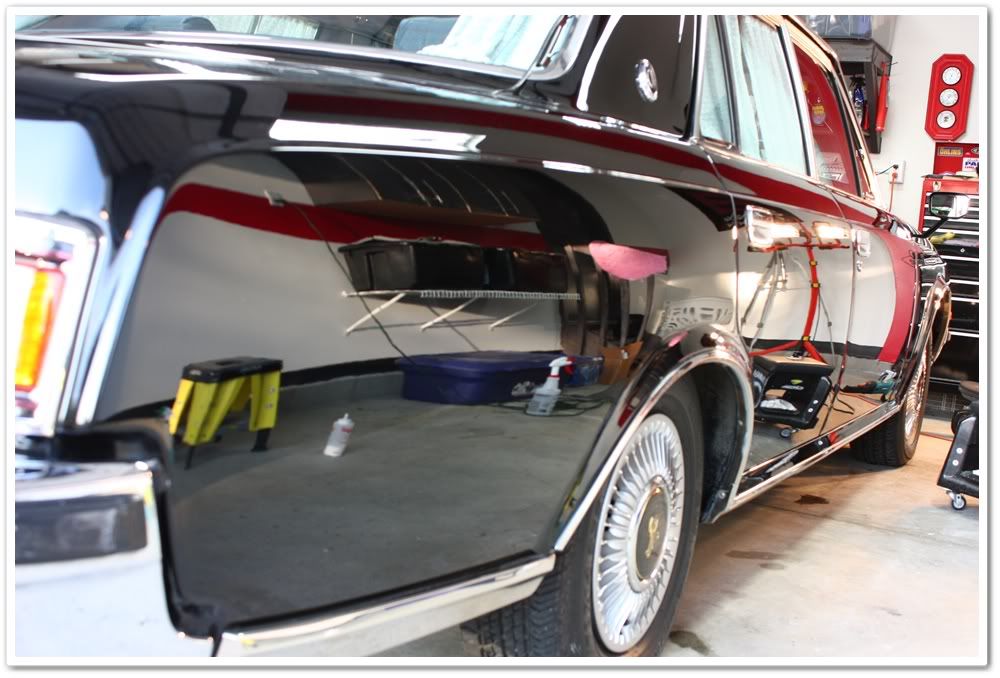
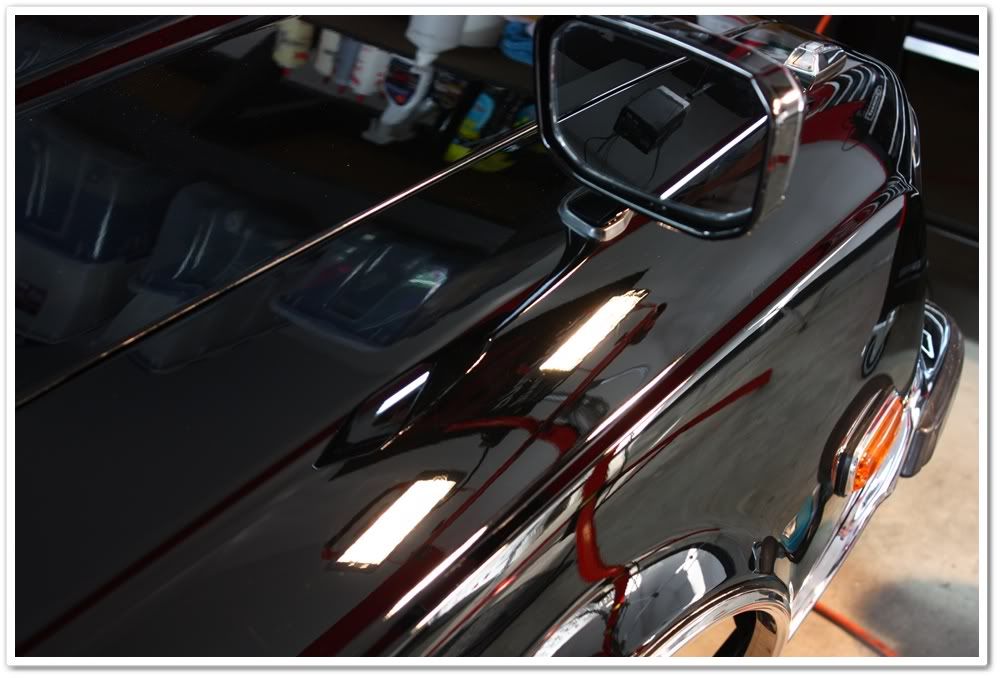
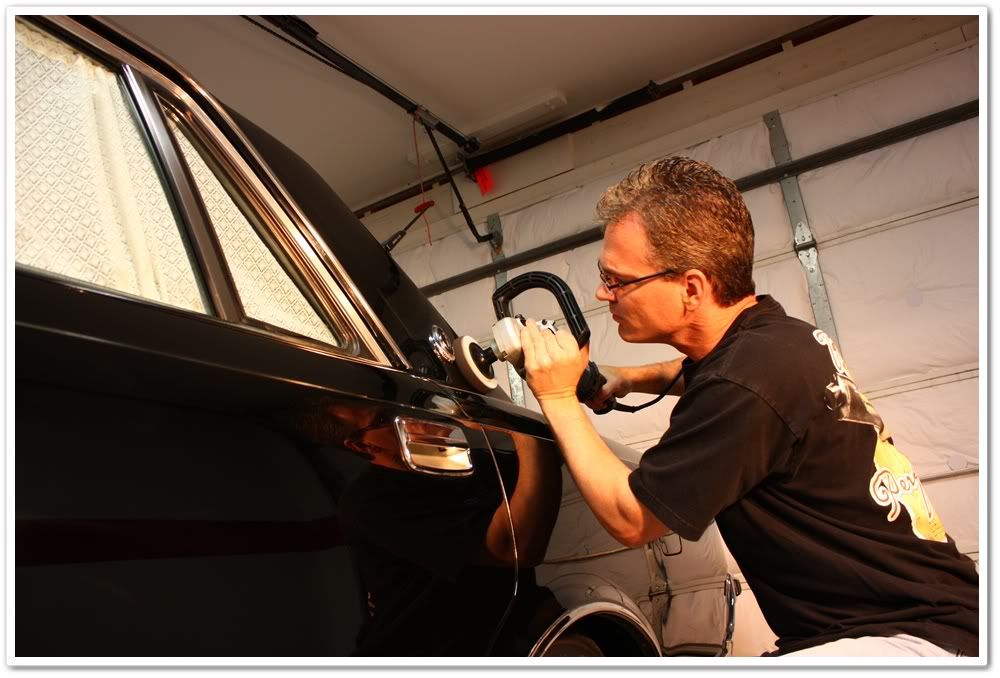
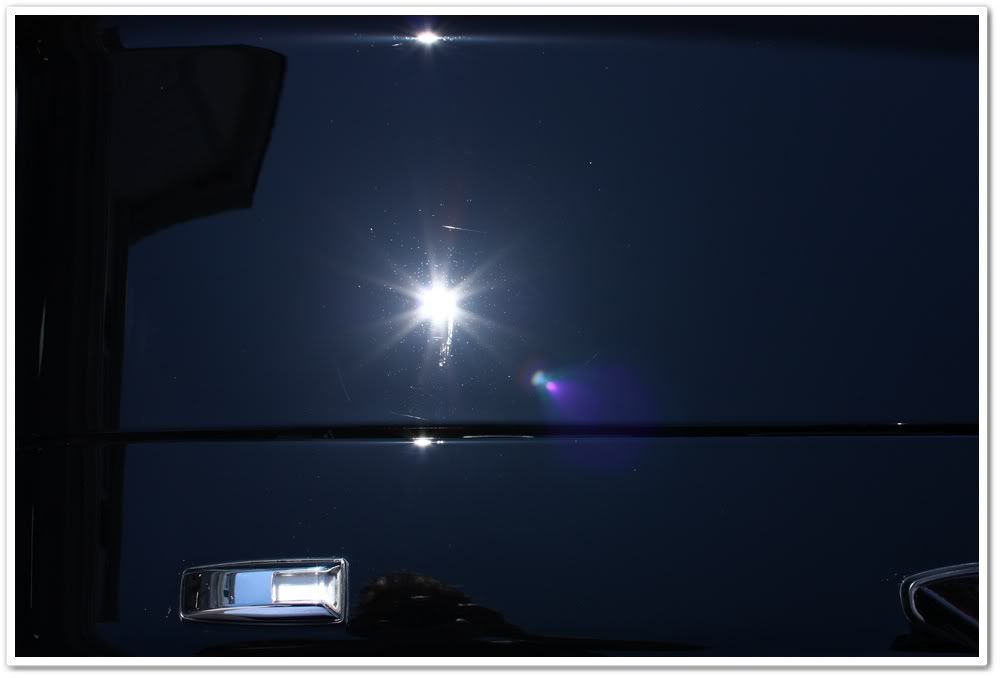
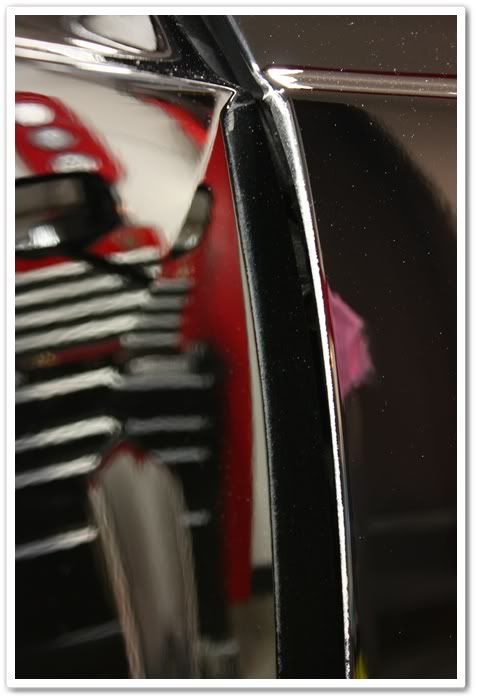
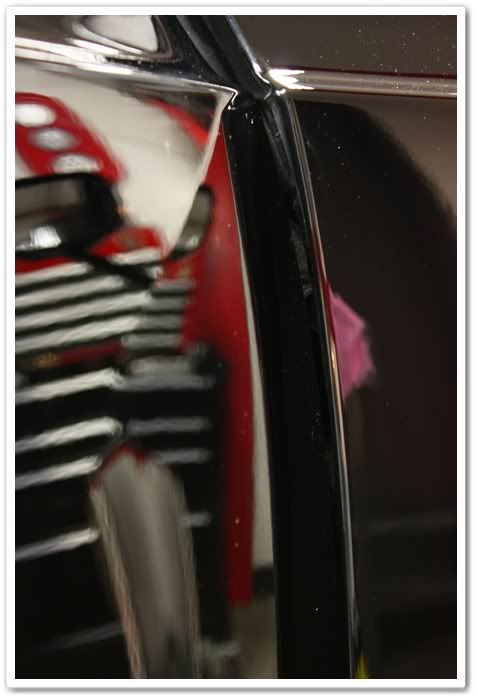
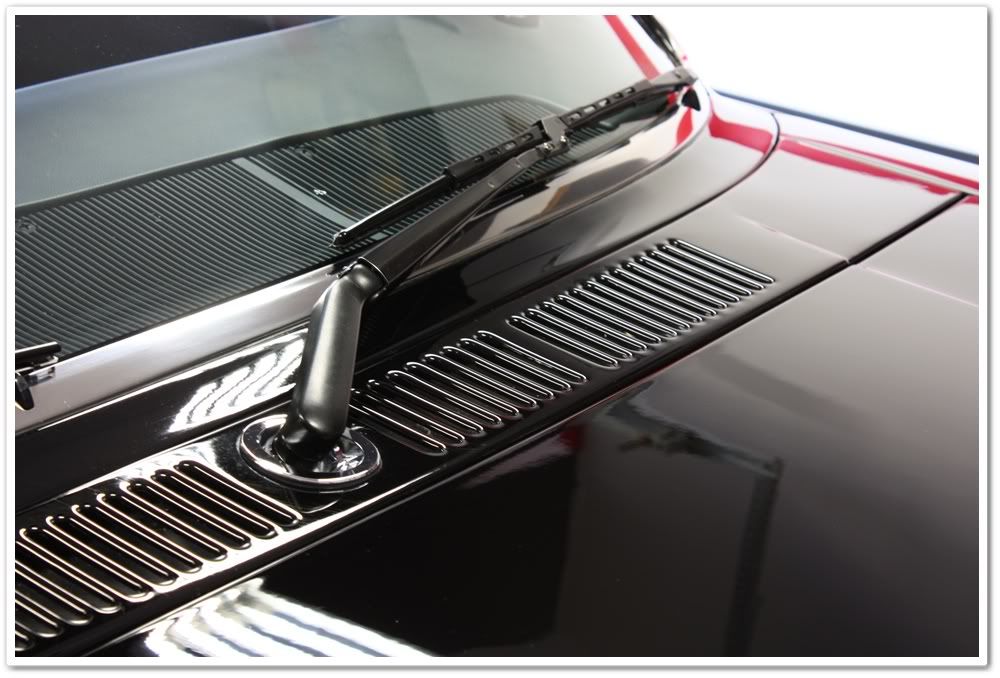
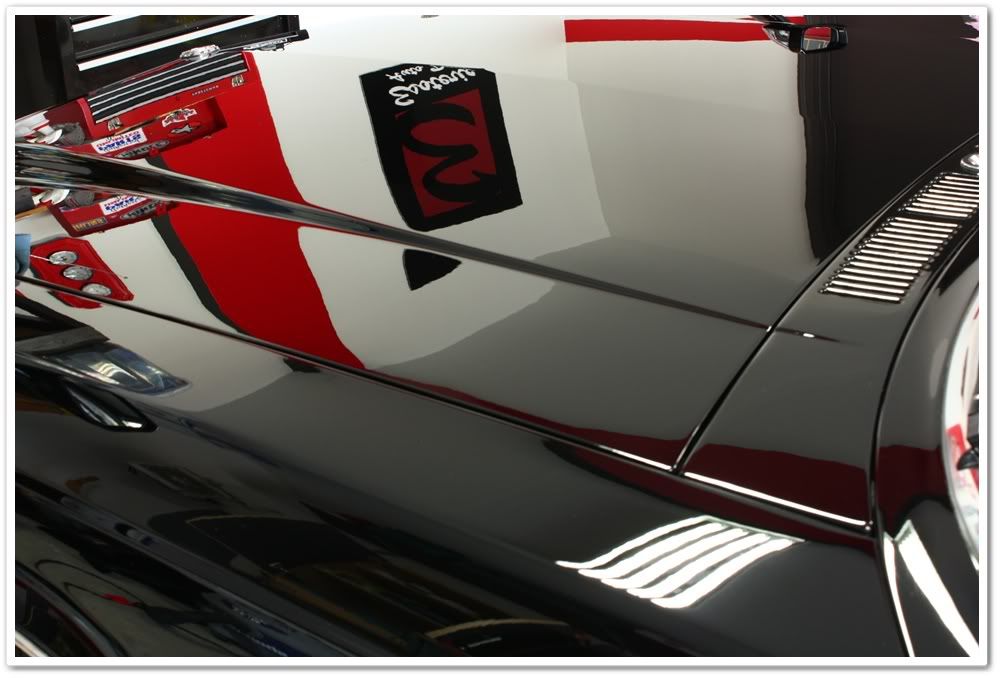
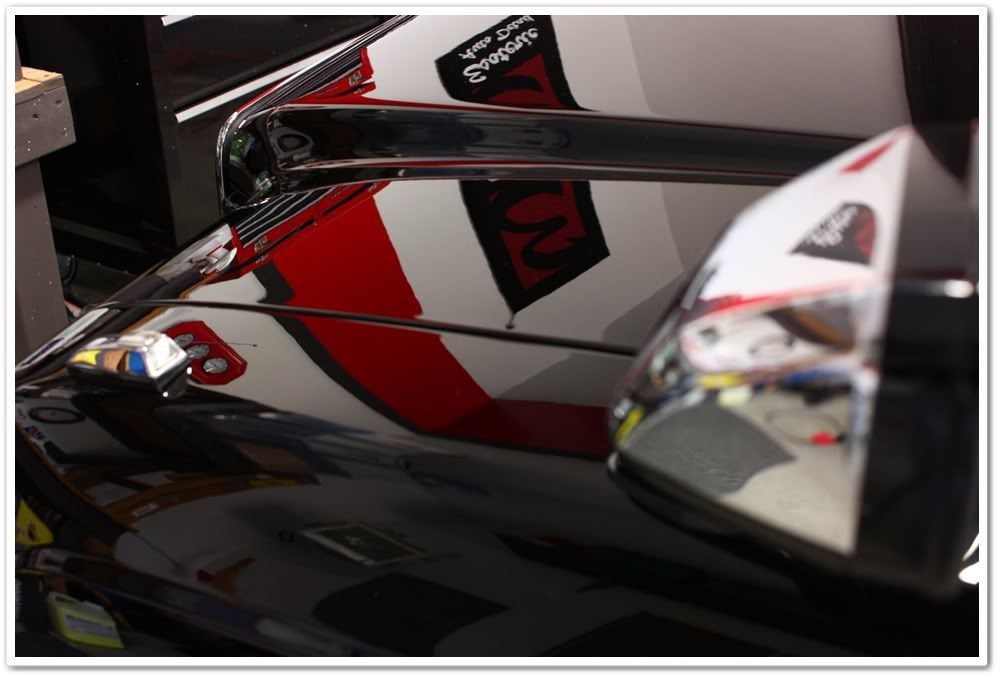
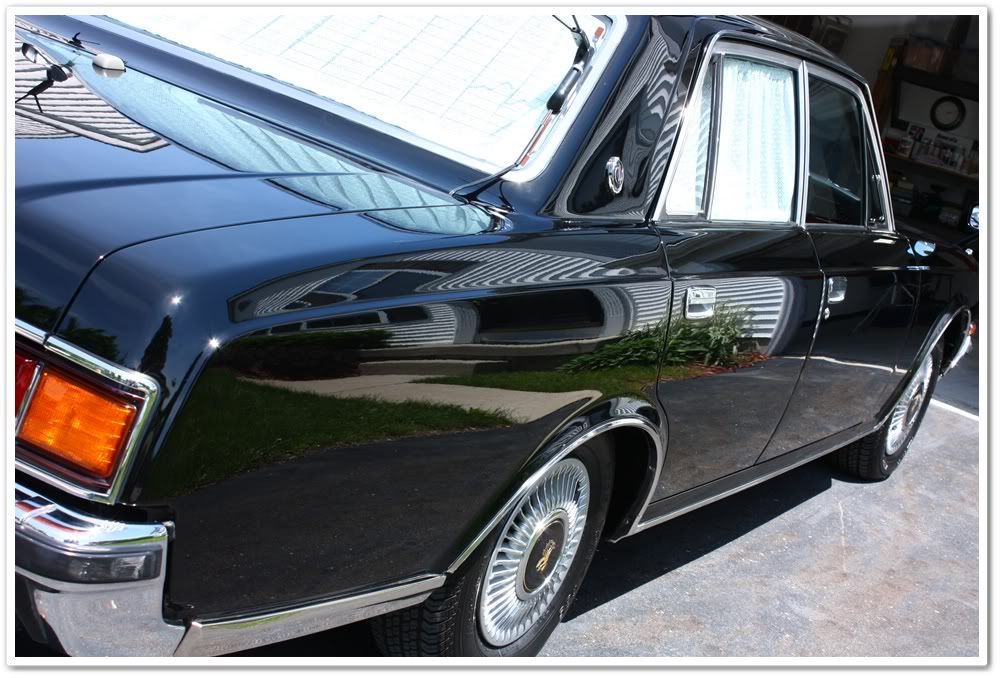
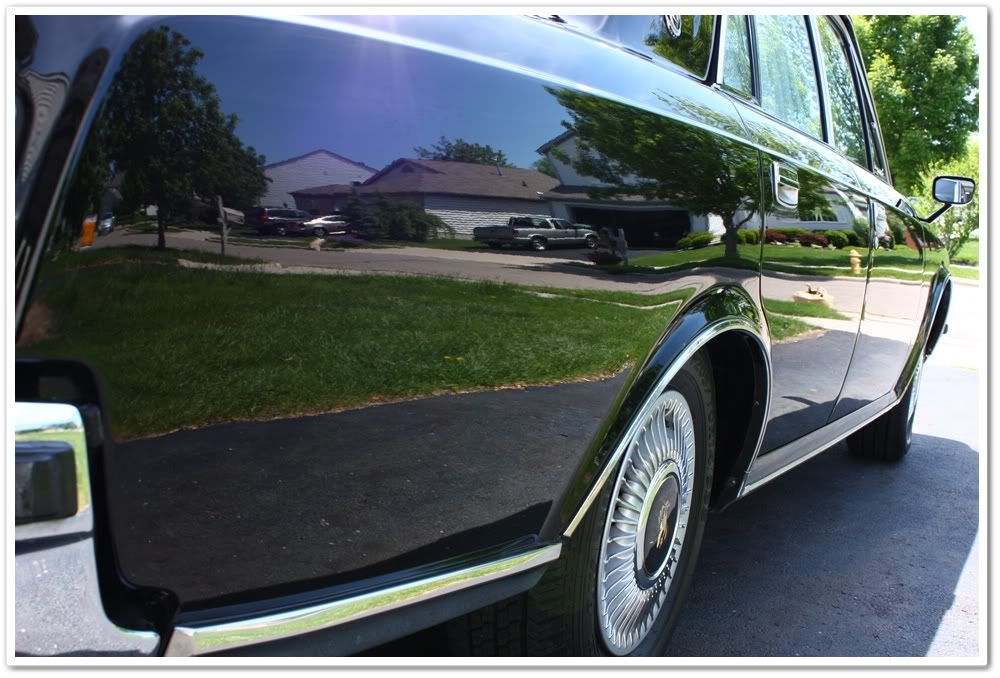
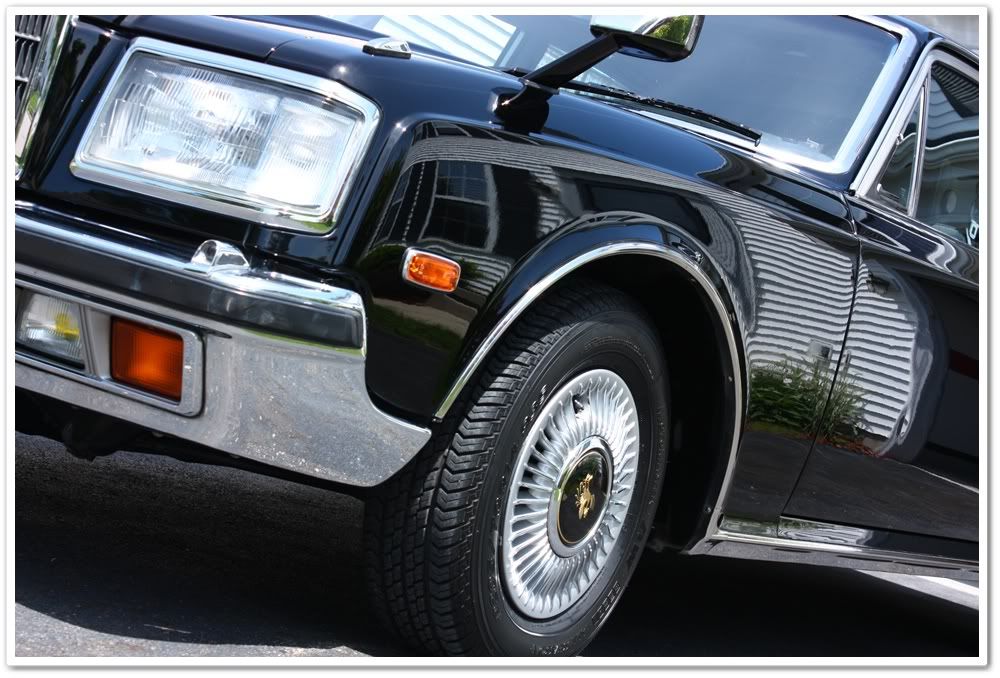
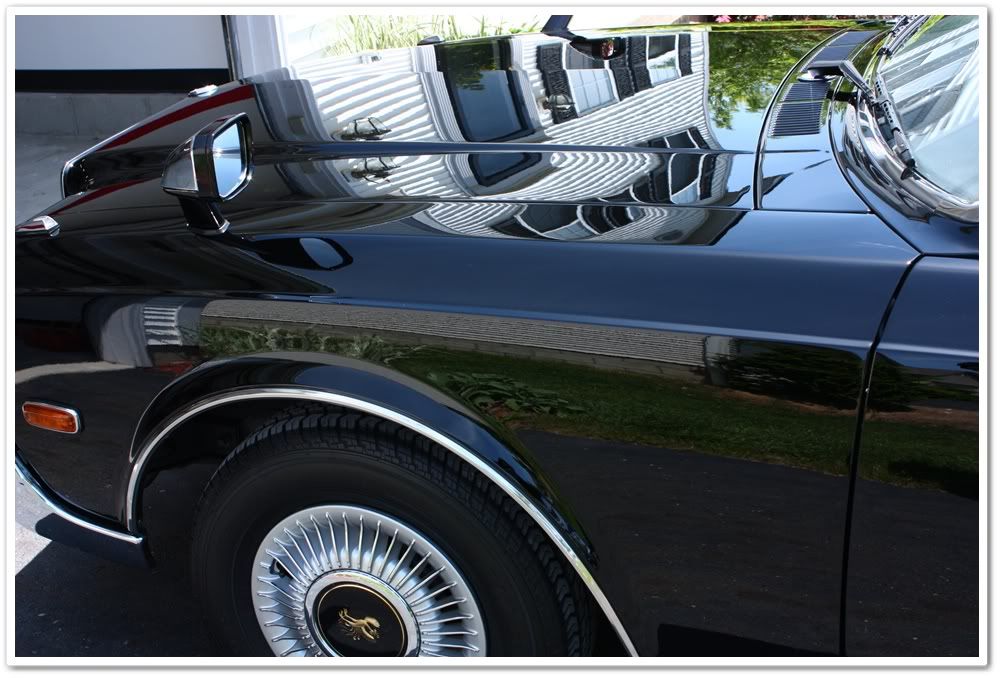
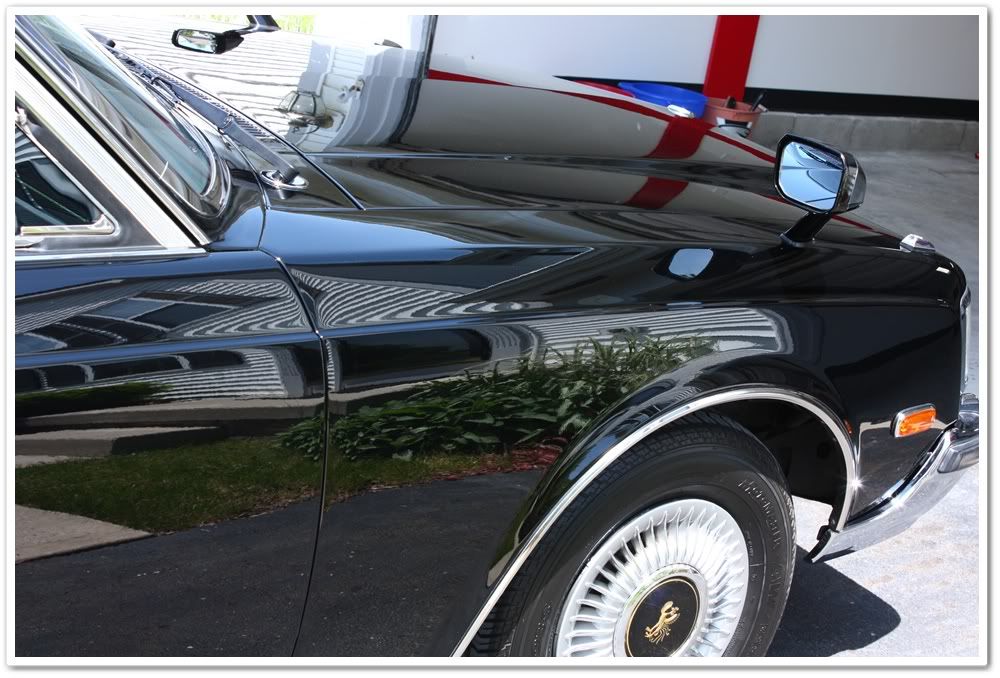
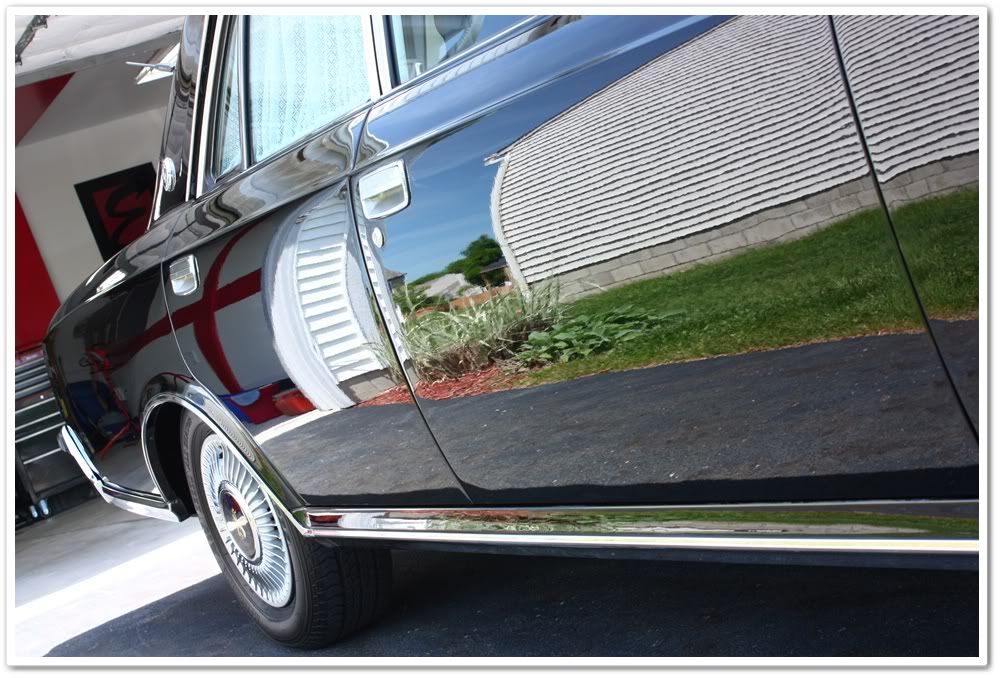
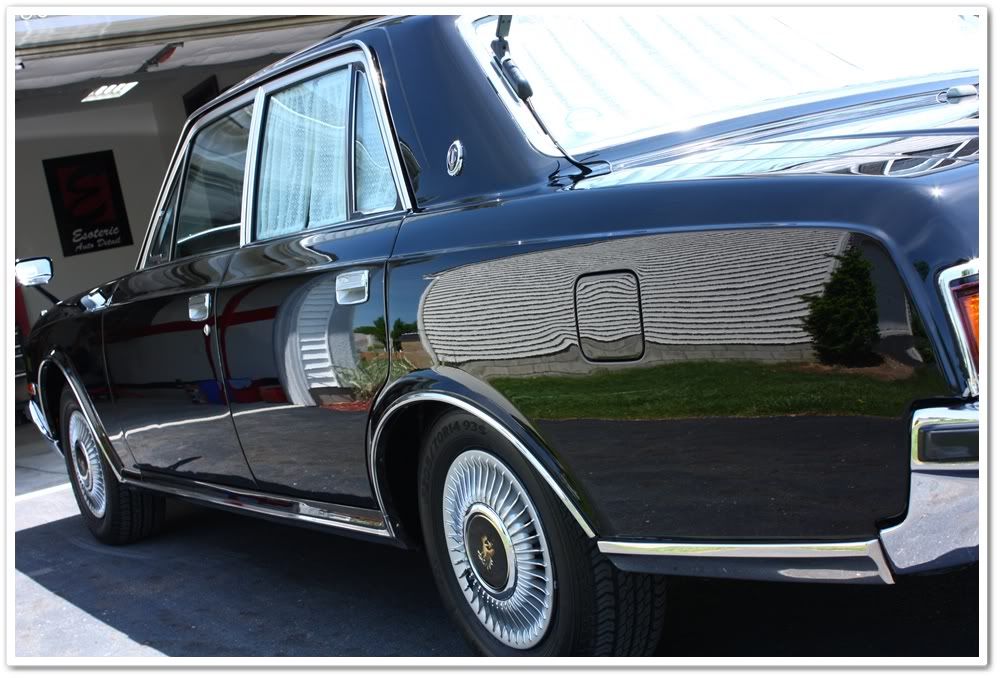
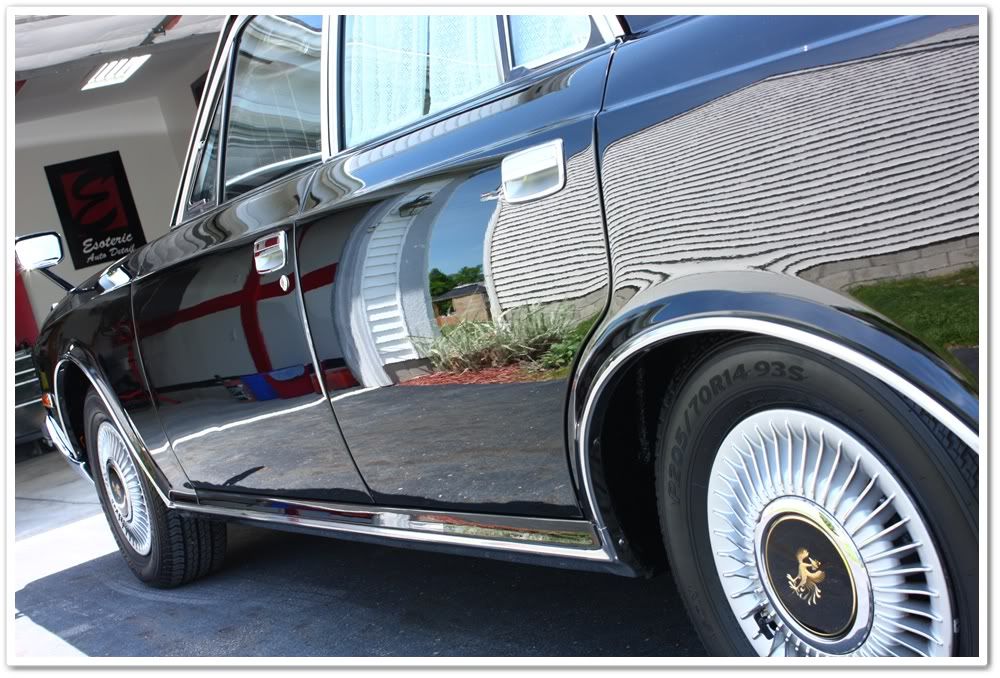
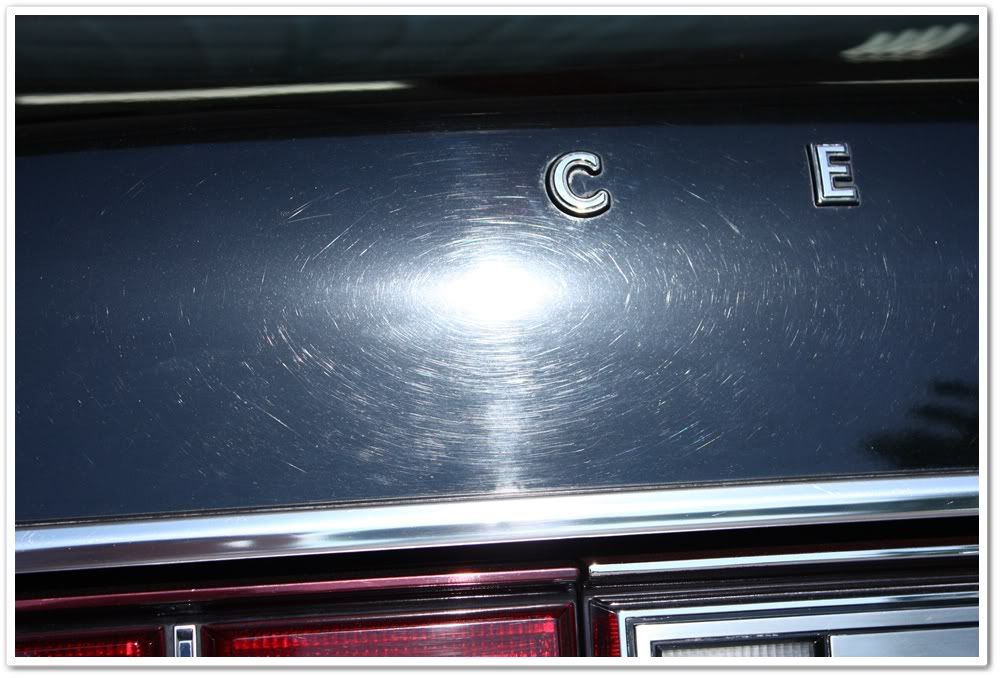
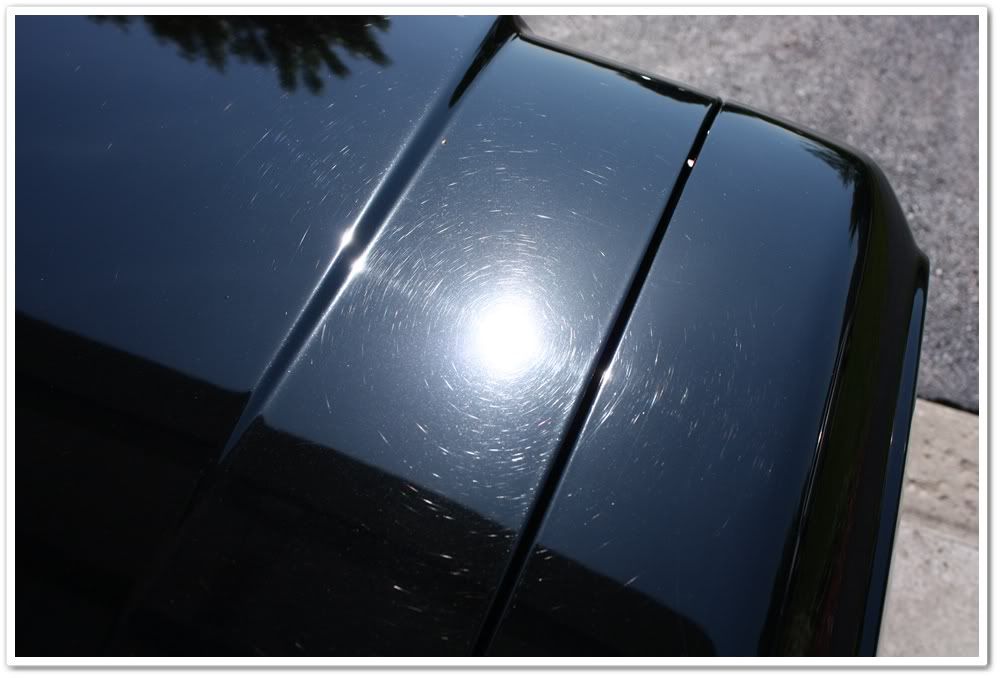
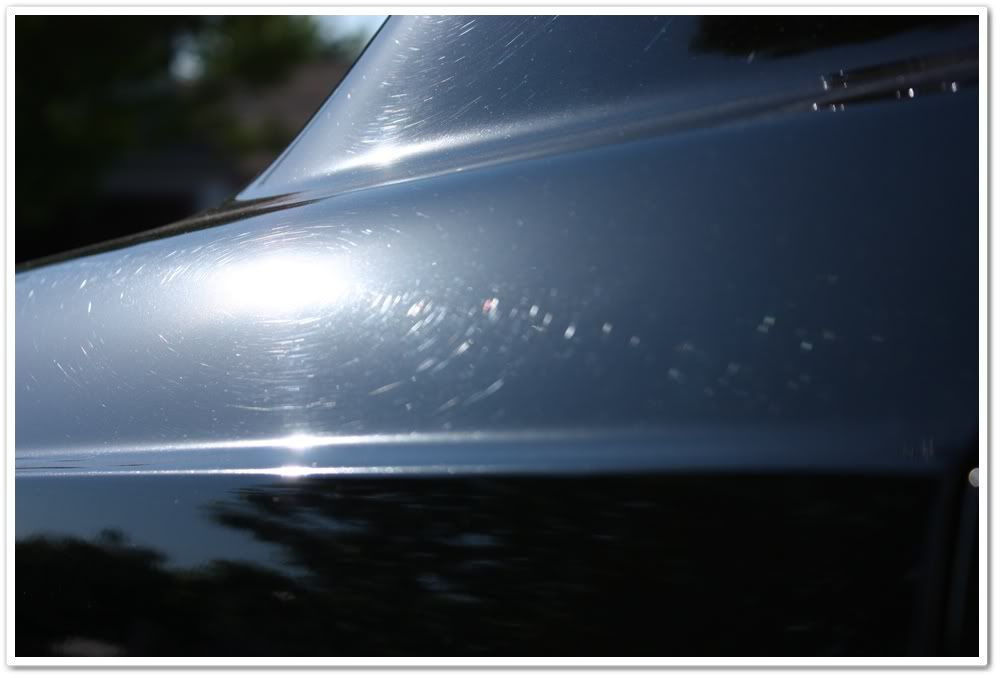
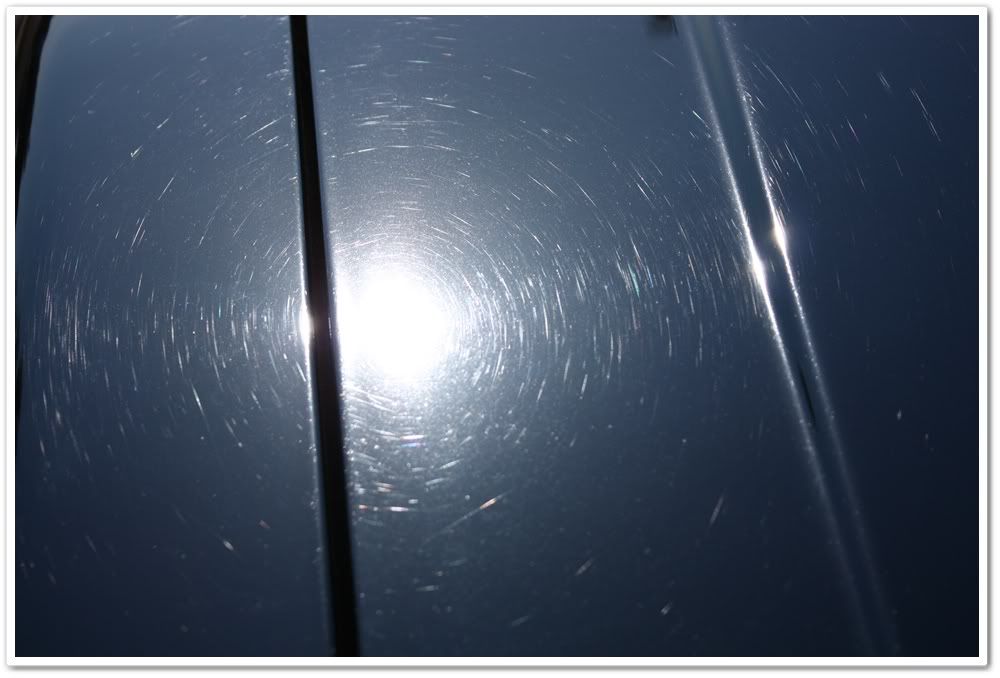
First up, let’s take a closer look at the condition. For a 30 year old vehicle, the finish looked pretty good and had a lot of gloss. Since this was most likely chauffer-driven, I’m sure it was washed and waxed quite frequently.


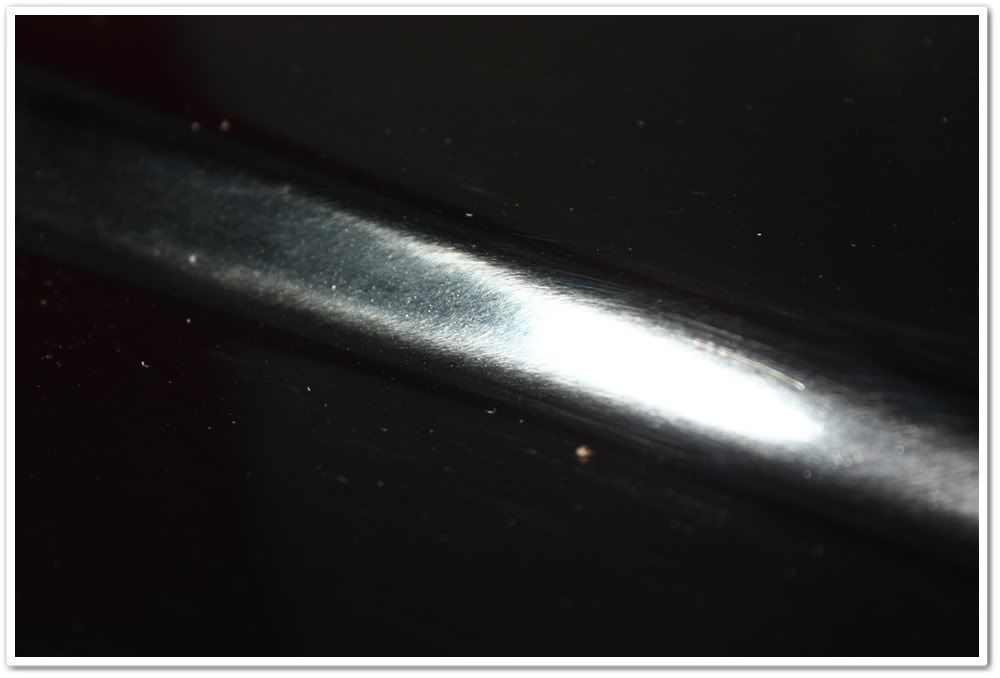
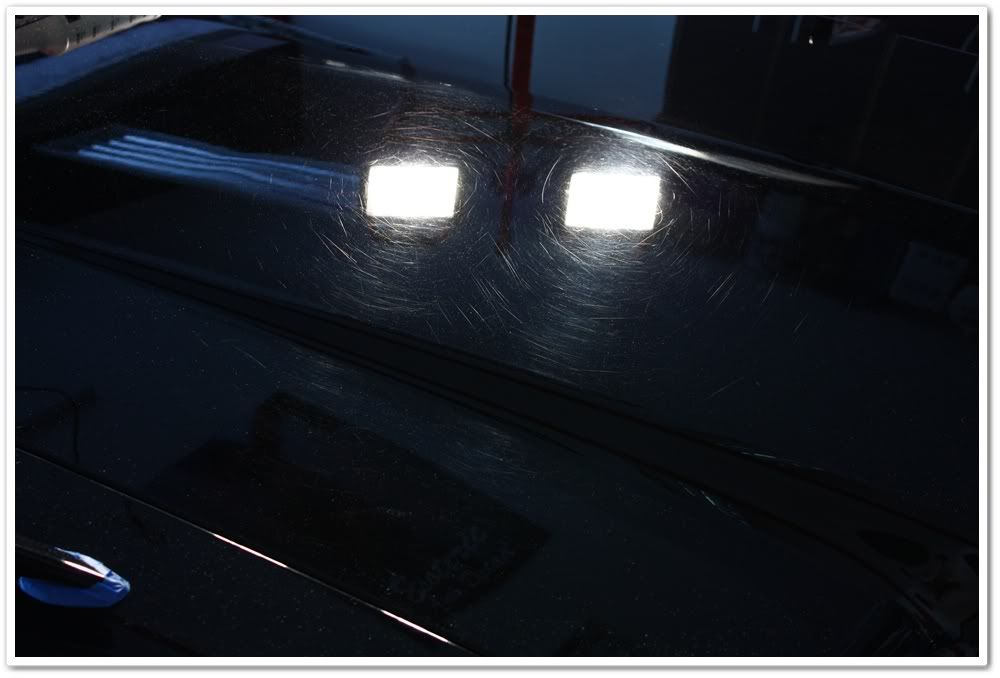
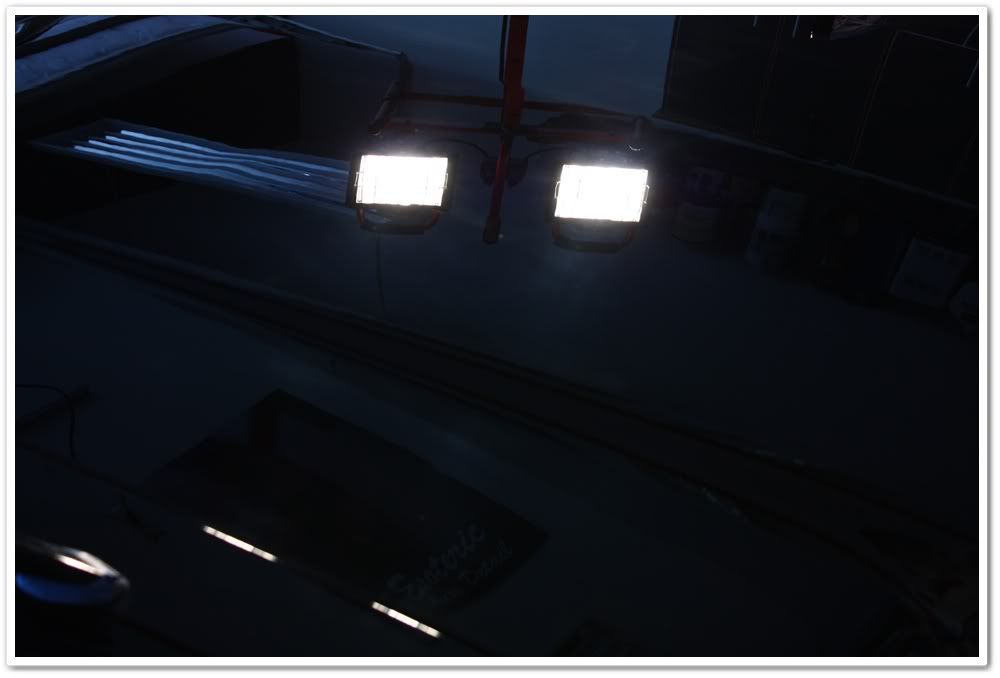
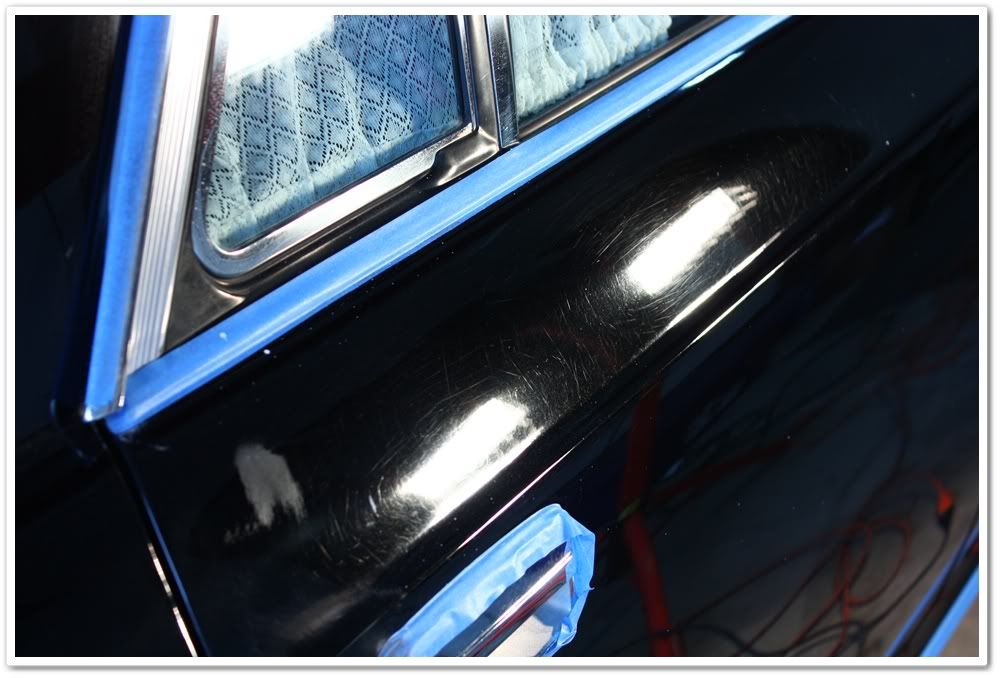
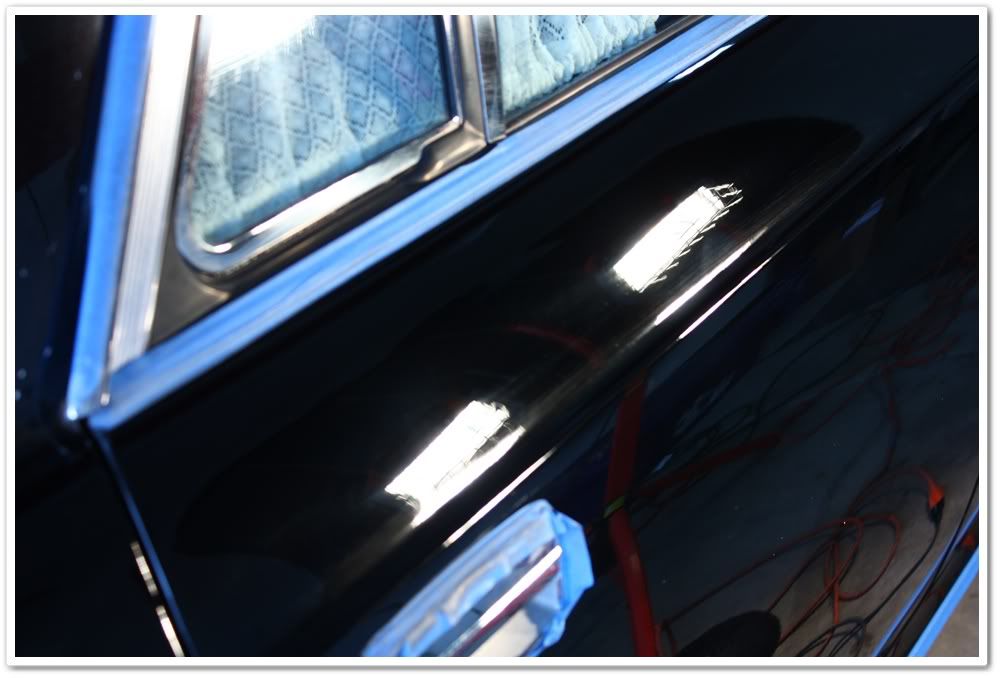
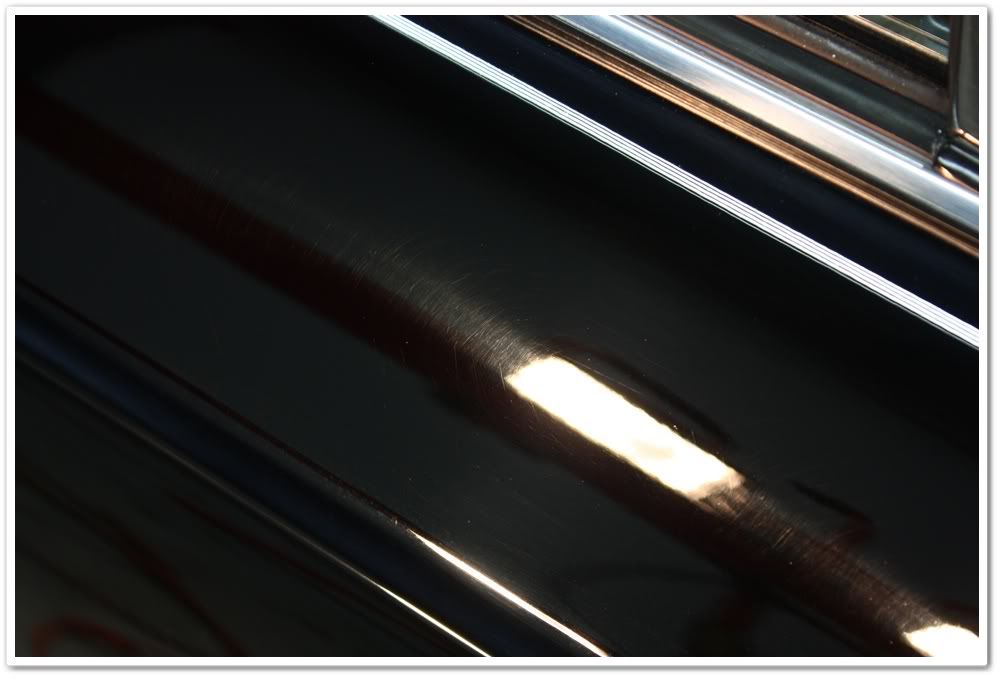
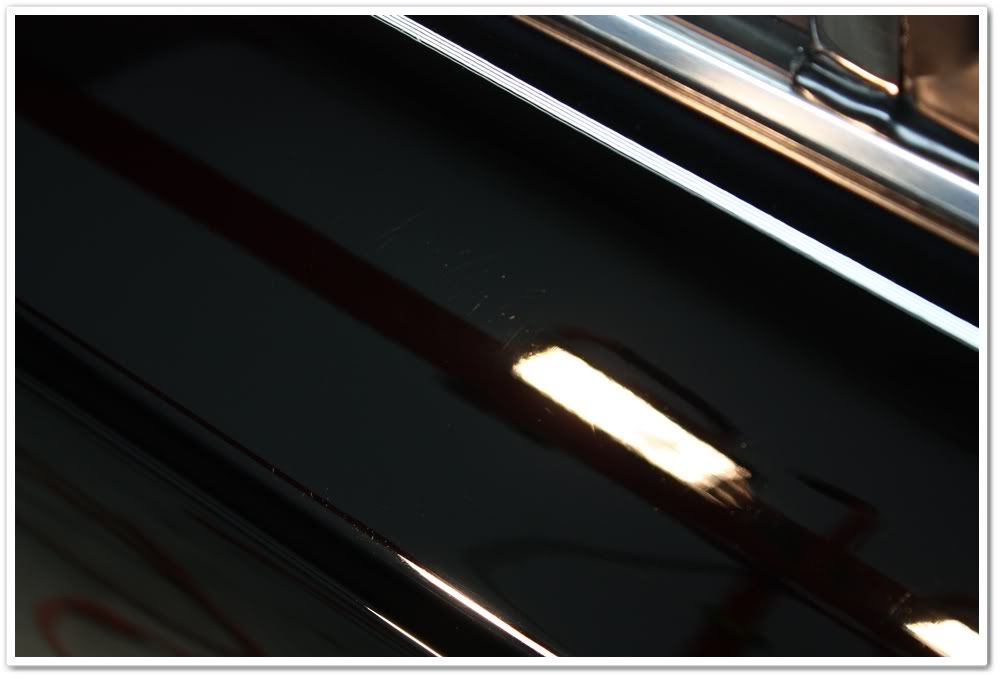
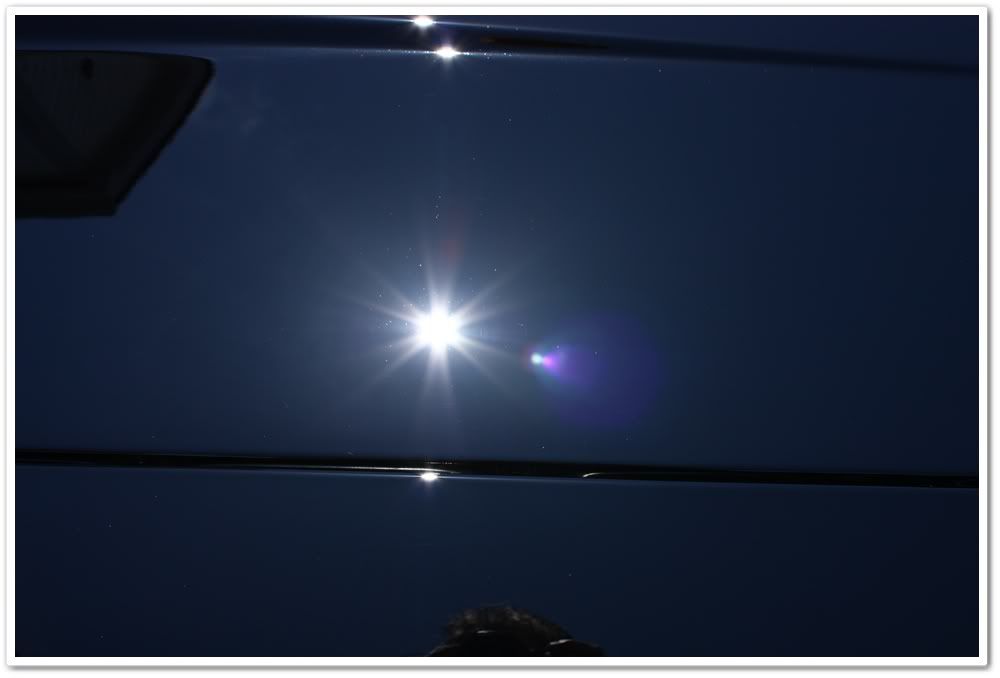
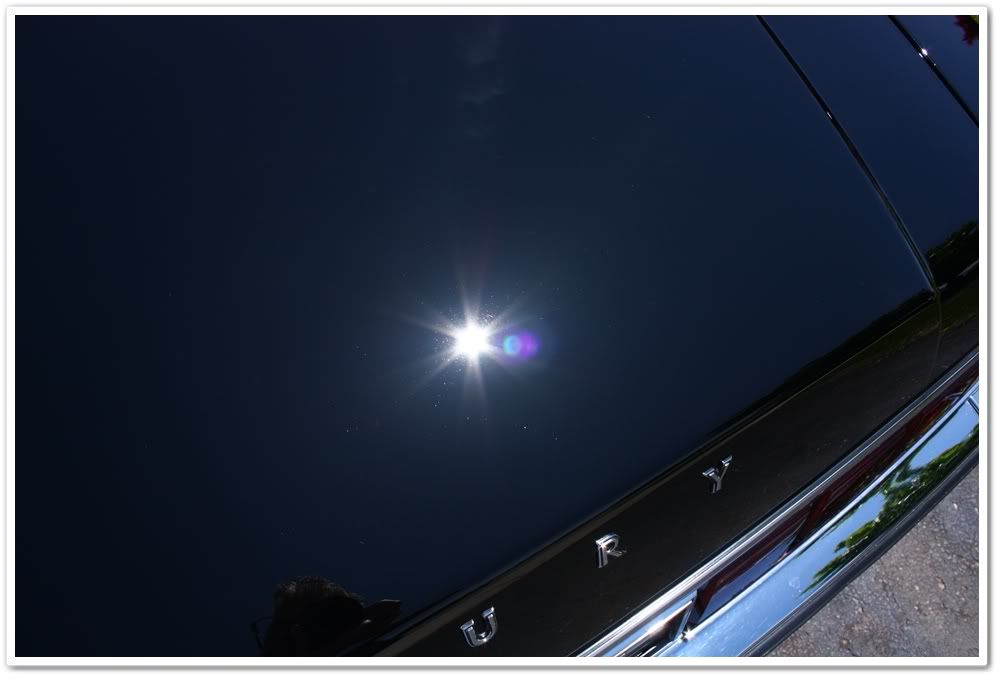
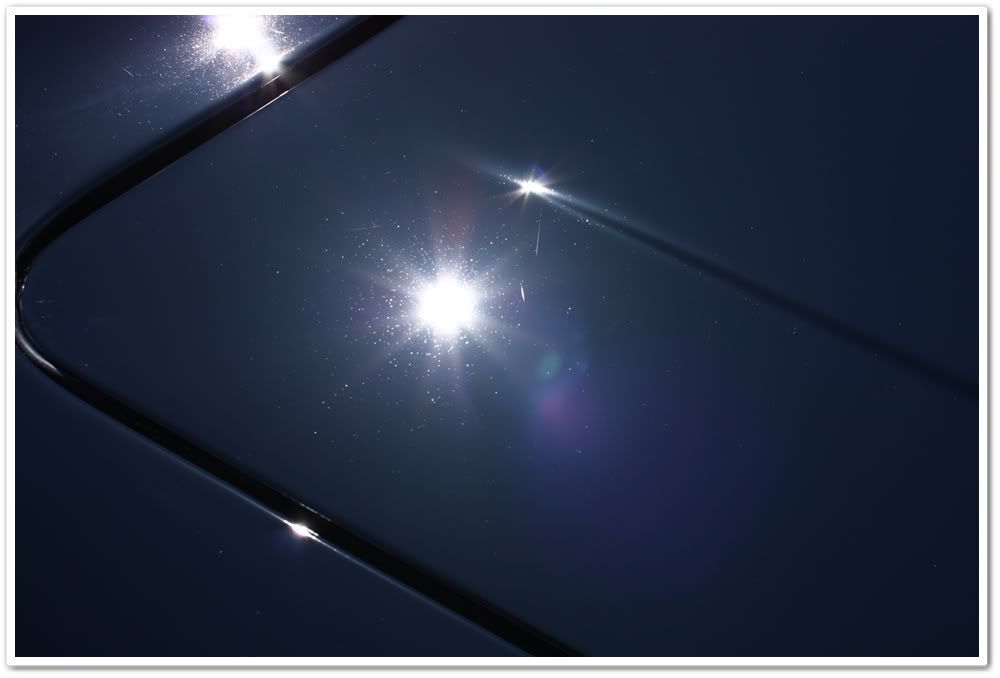
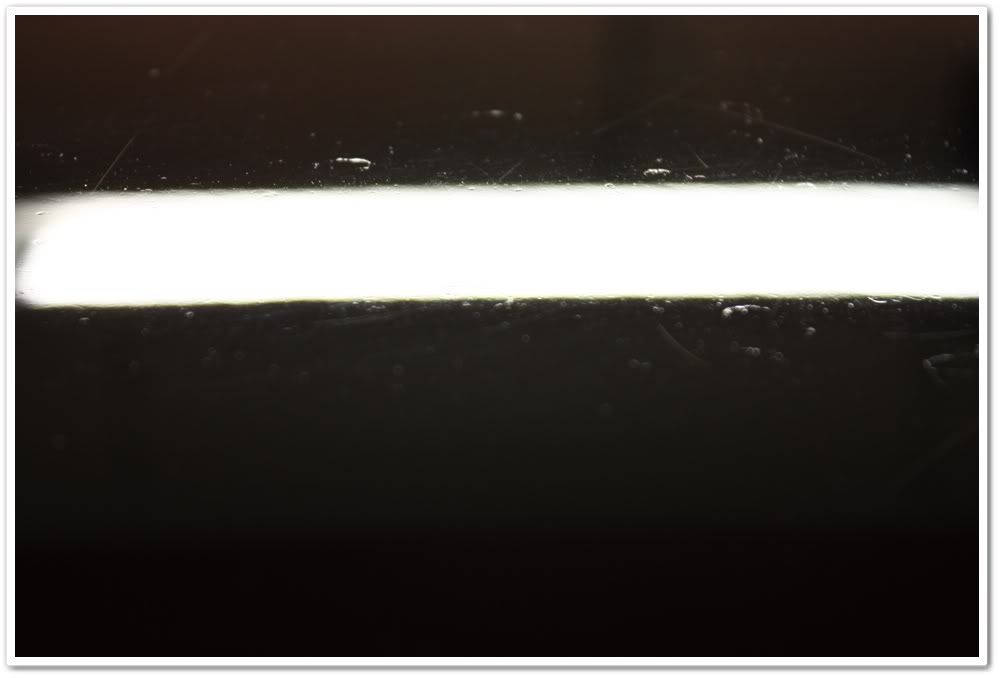
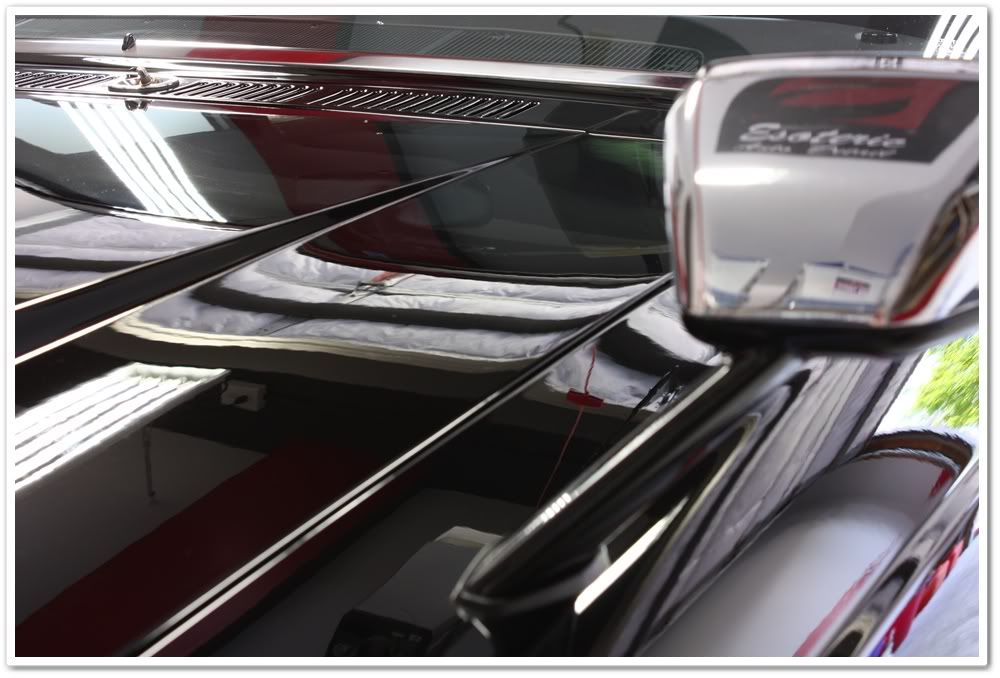
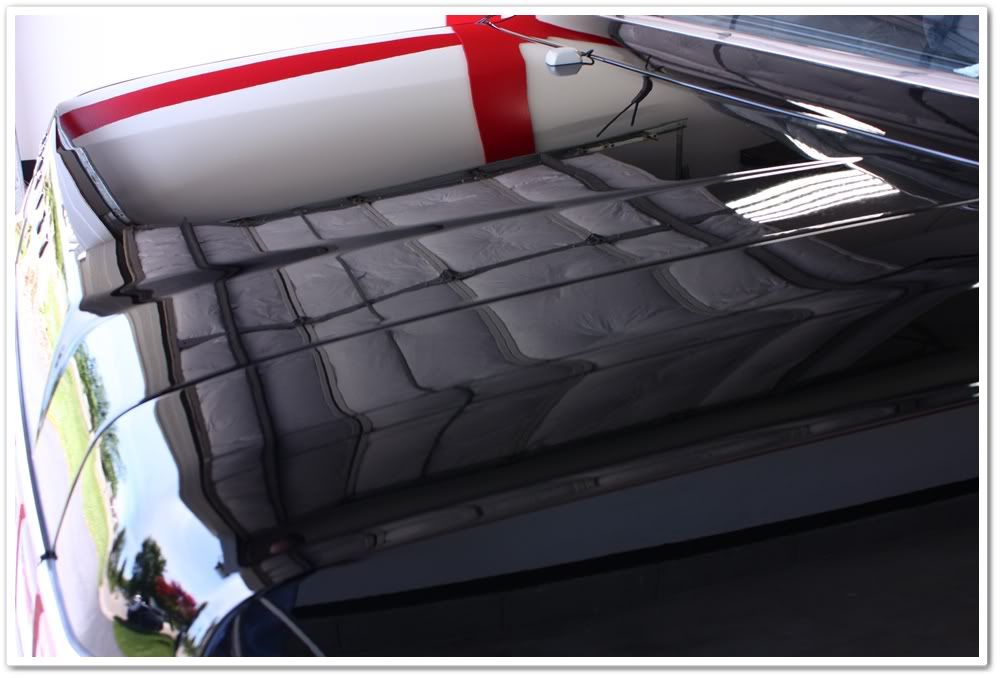
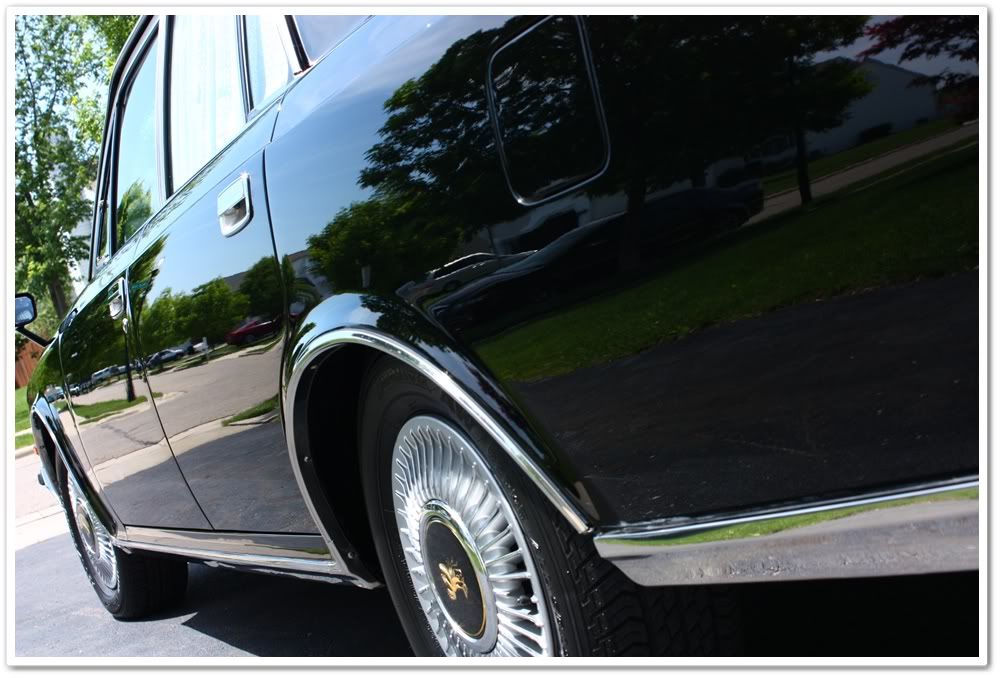
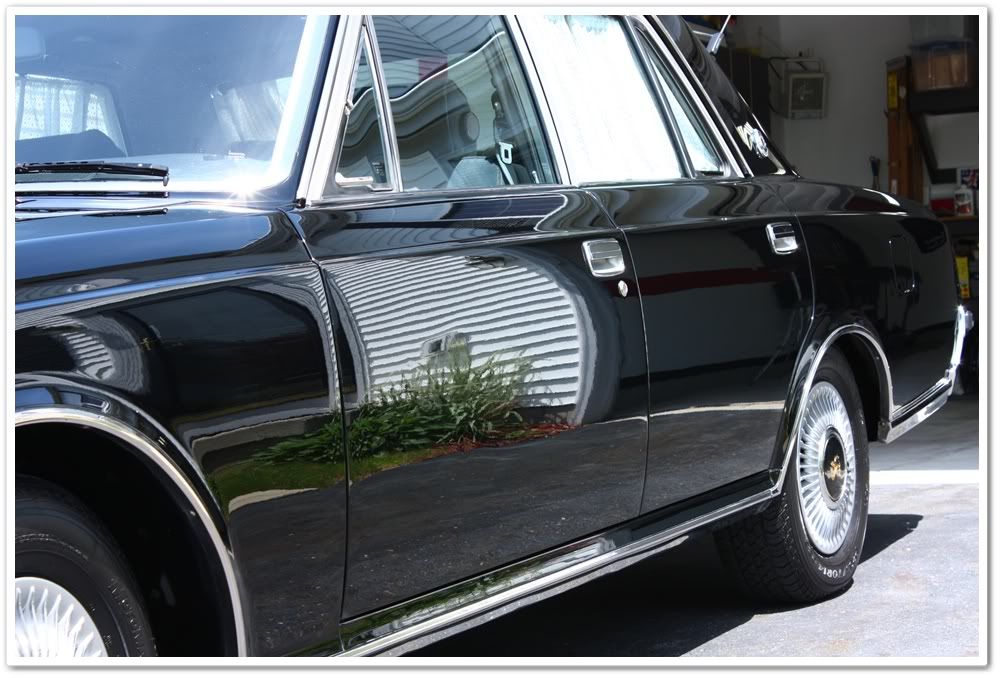
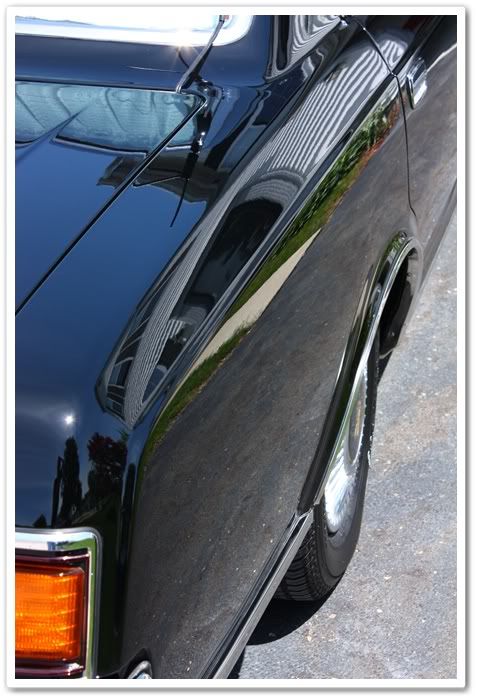
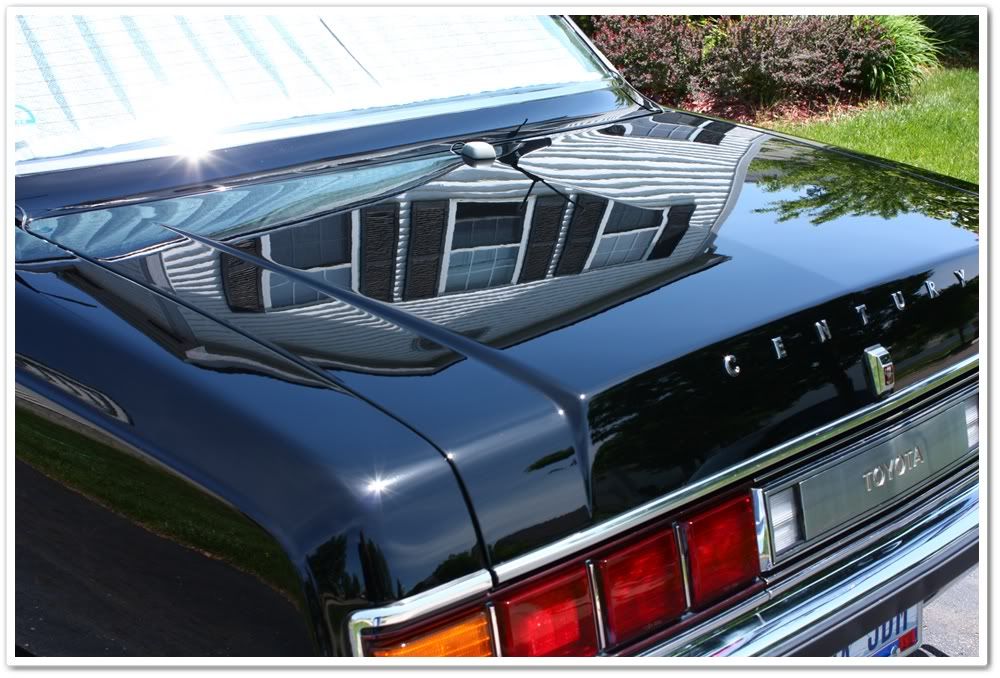
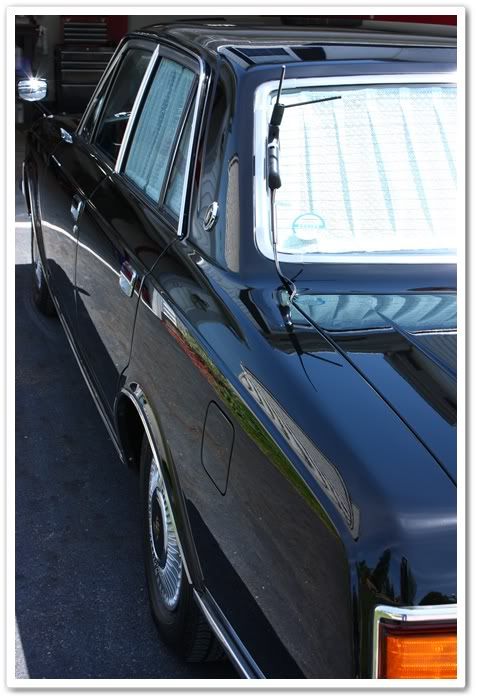
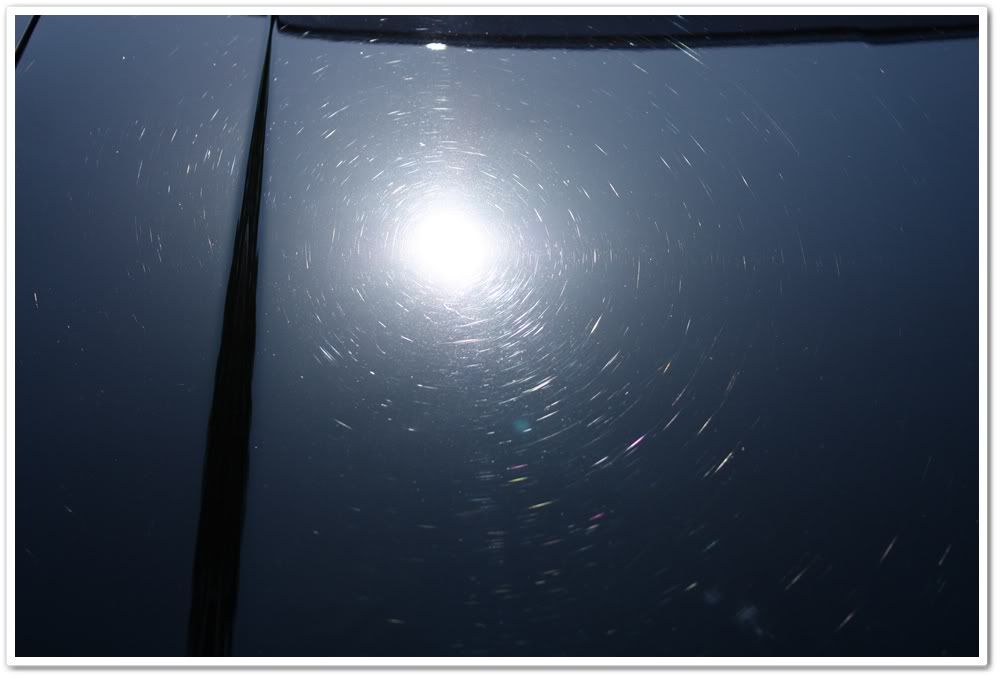
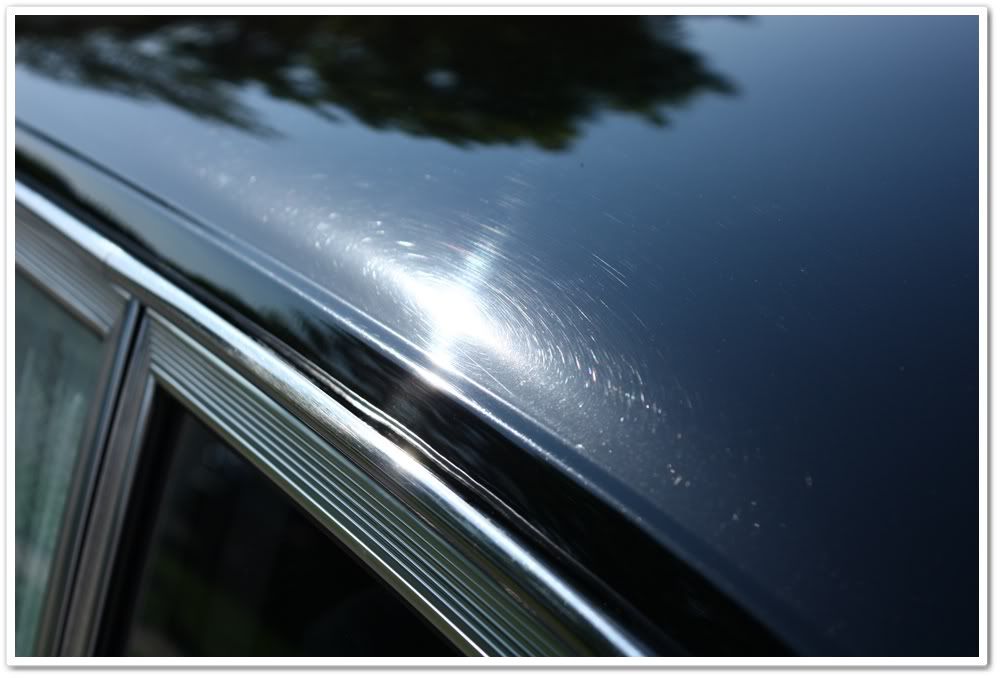
As you can see, it had a bit of a swirl problem!

IMG_3303.jpg


IMG_3306.jpg


IMG_3319.jpg


IMG_3320.jpg


IMG_3321.jpg


IMG_3322.jpg


IMG_3305.jpg


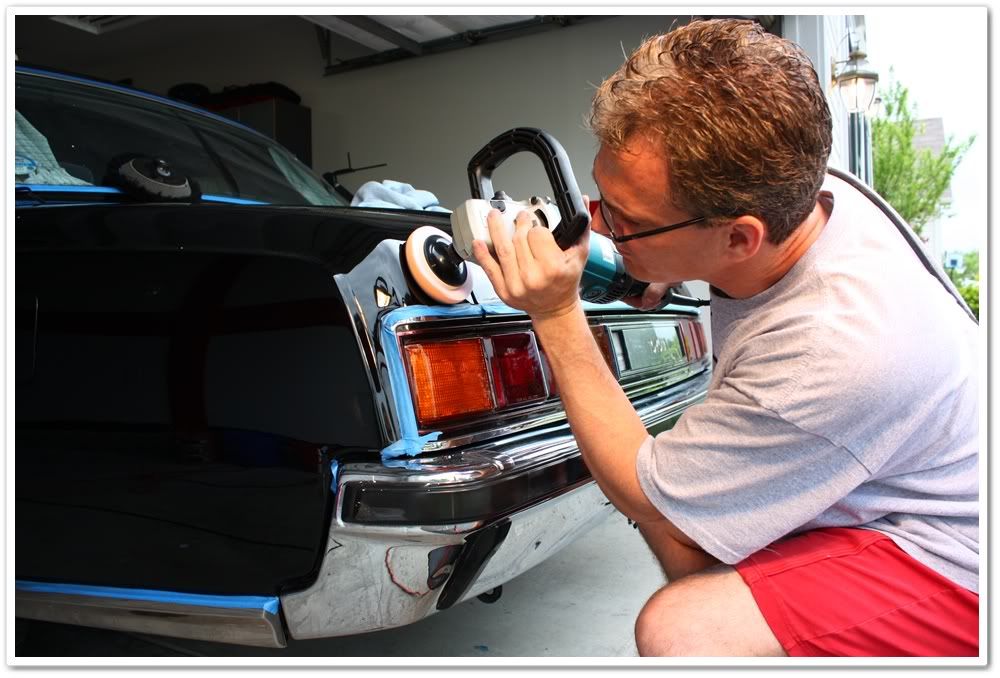
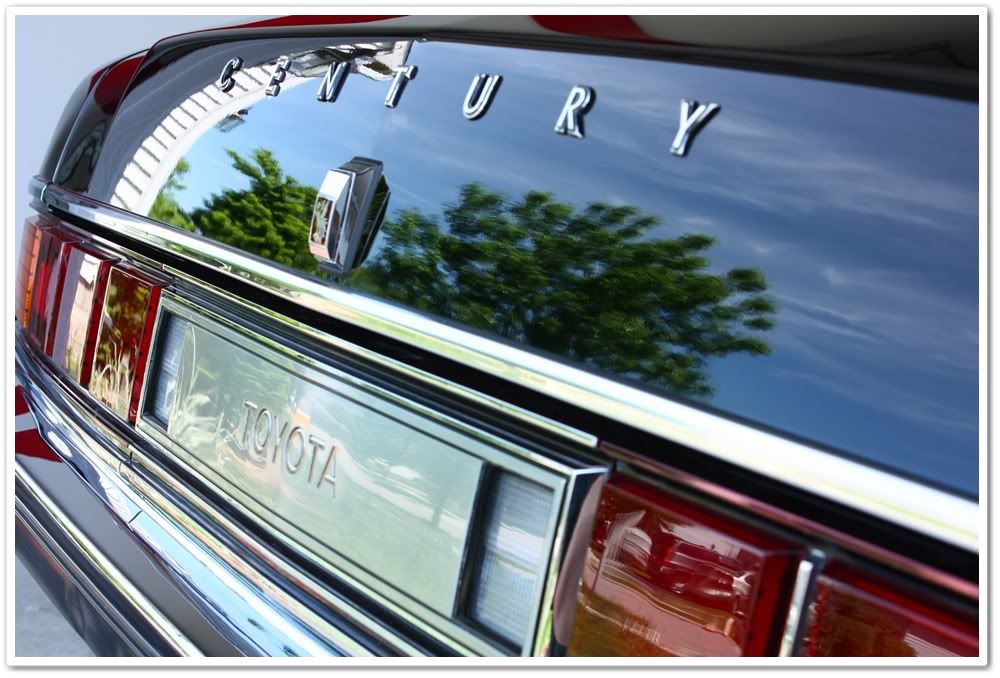
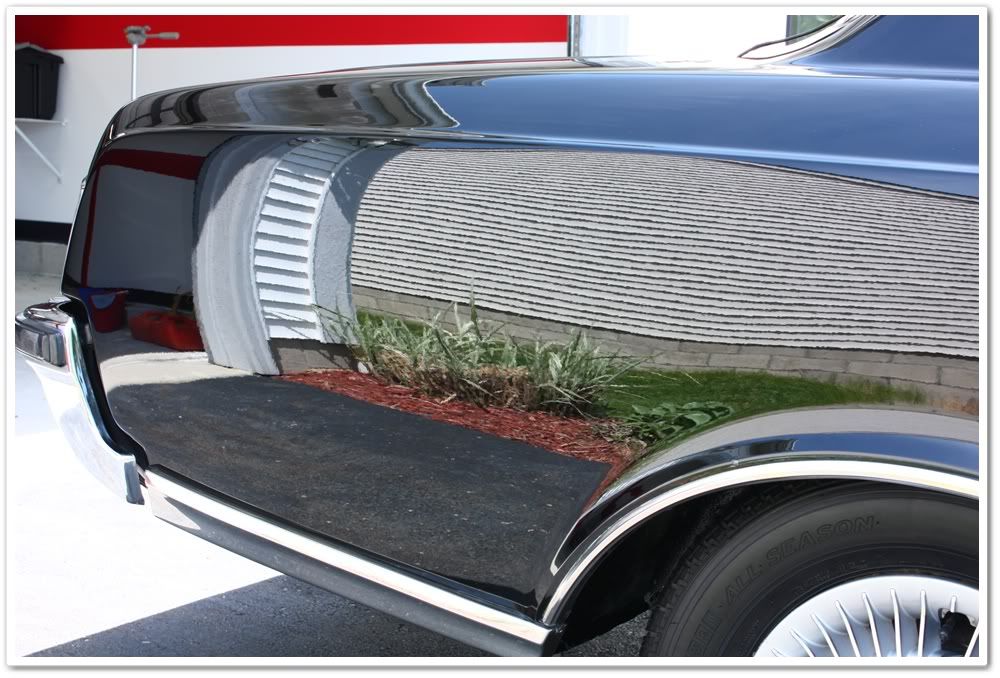
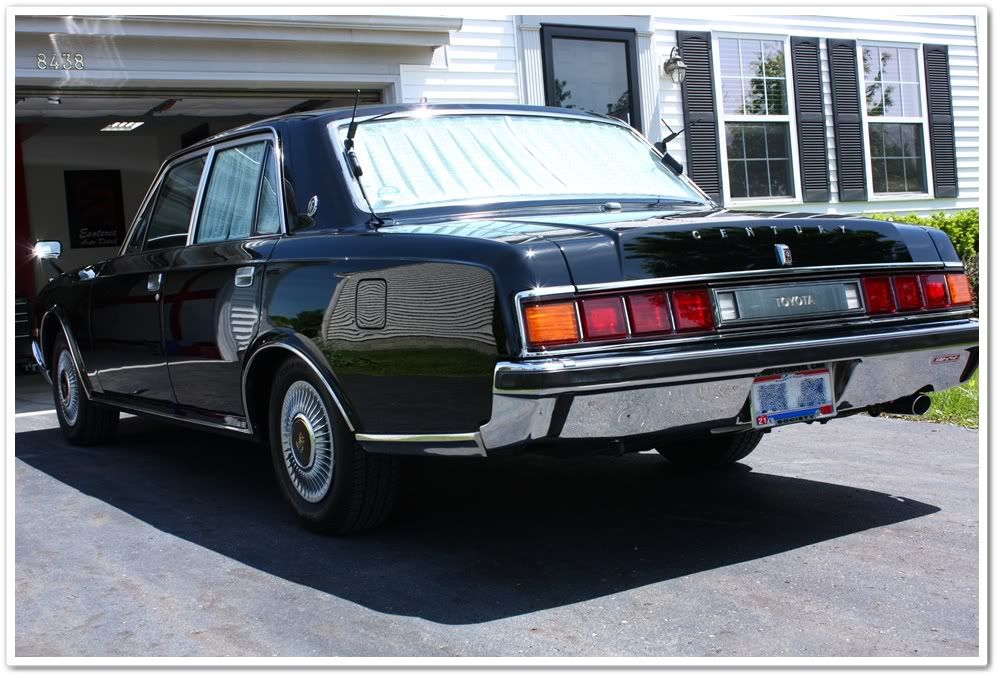
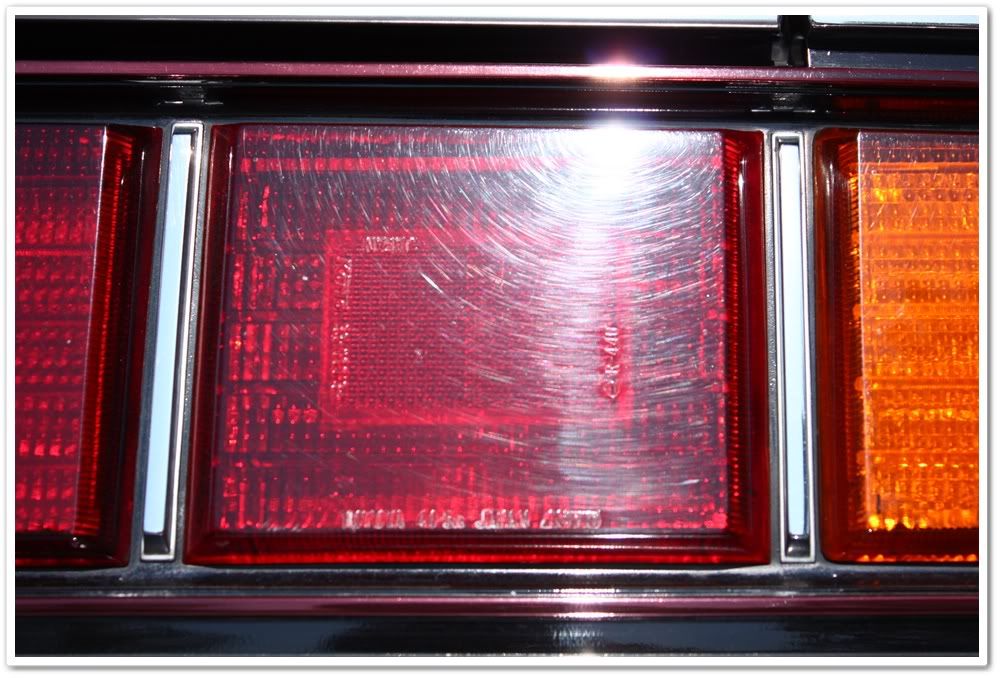
The tail lights were in need of some serious TLC as well.

IMG_3304.jpg


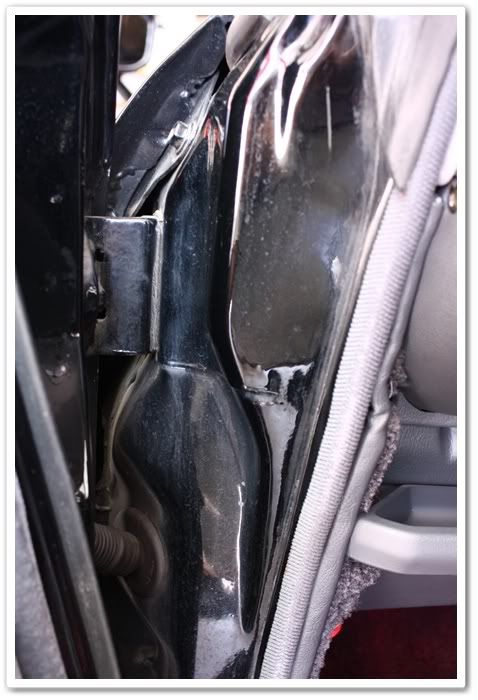
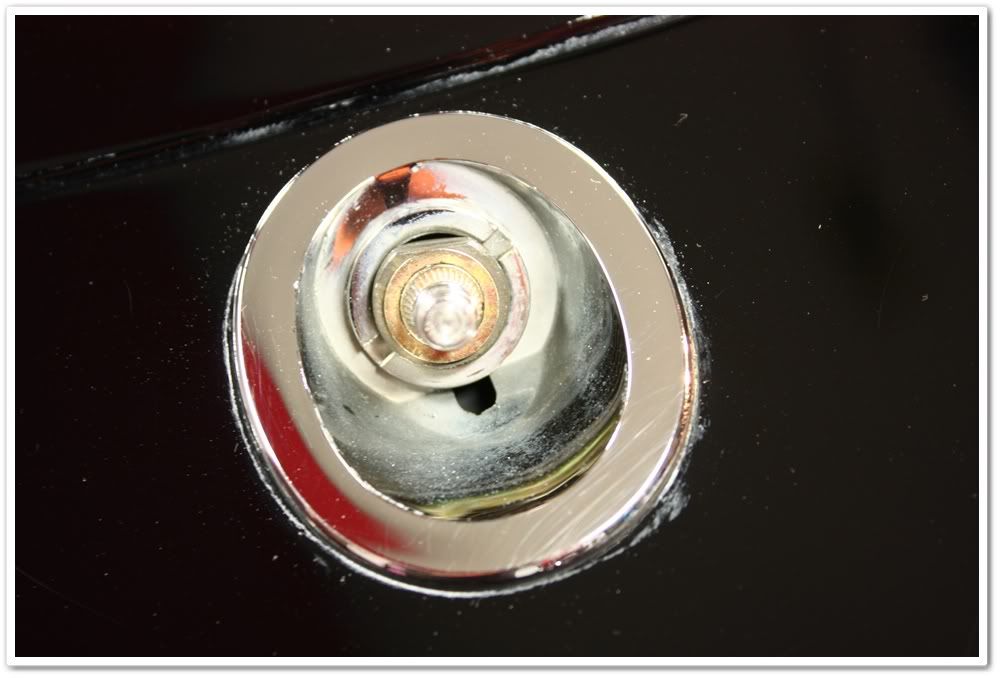
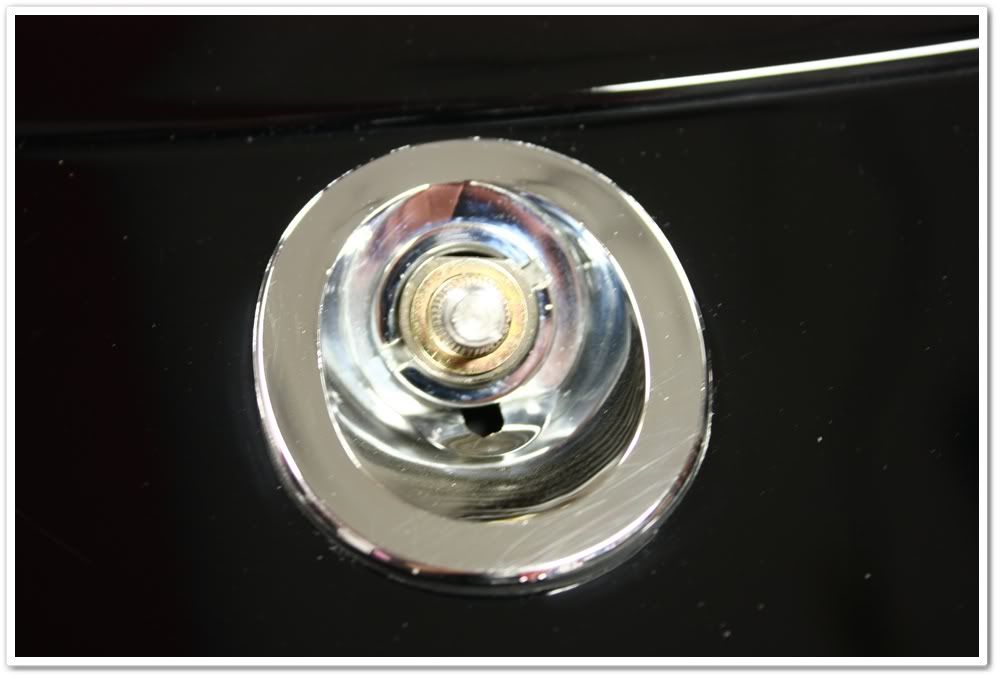
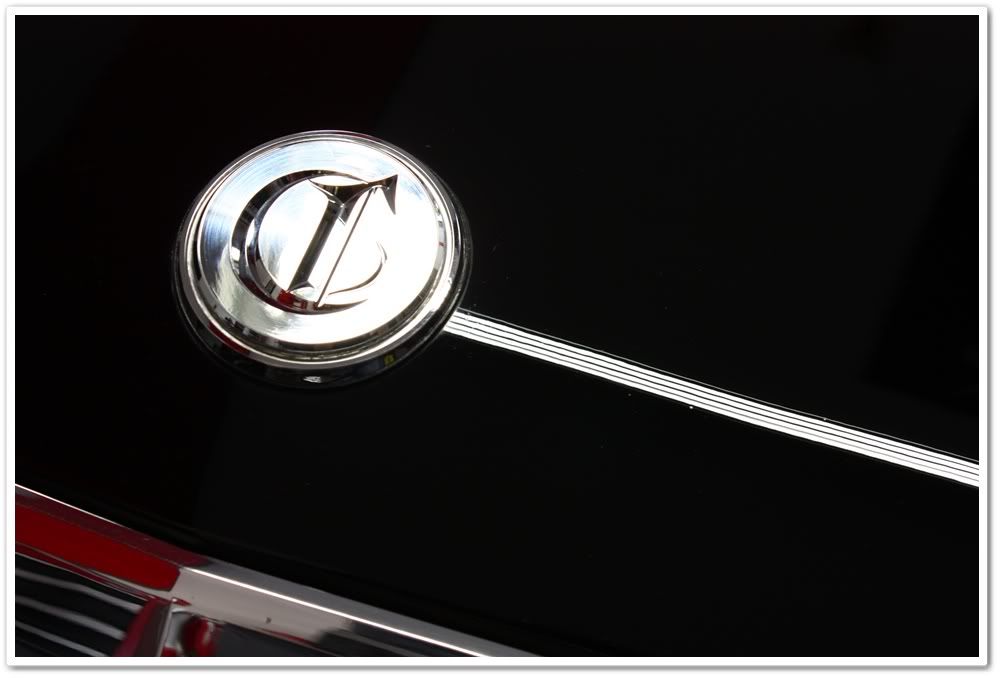
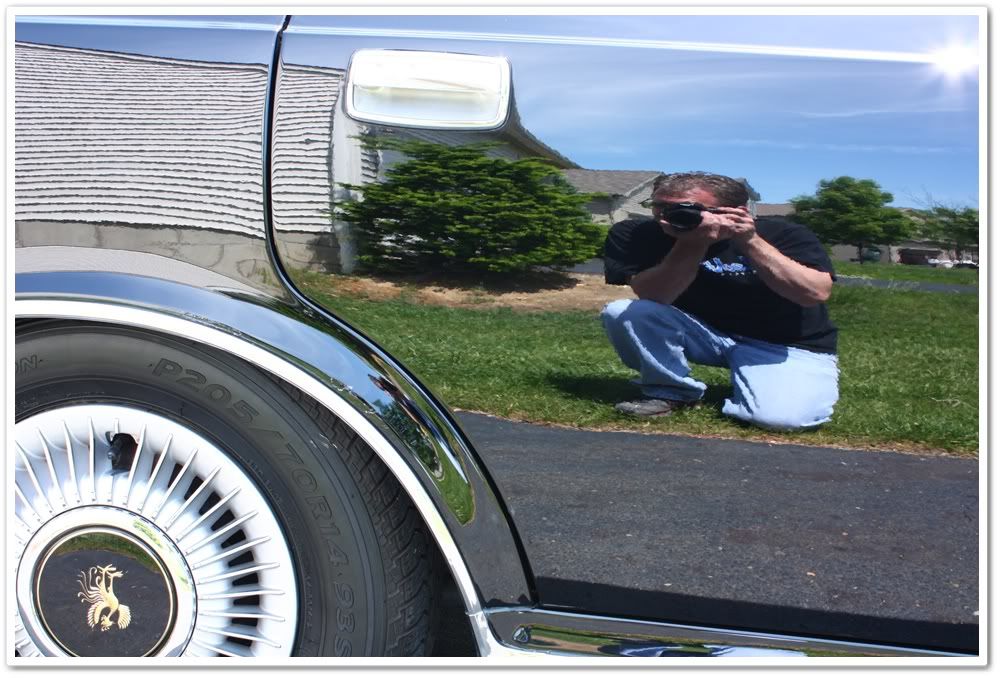
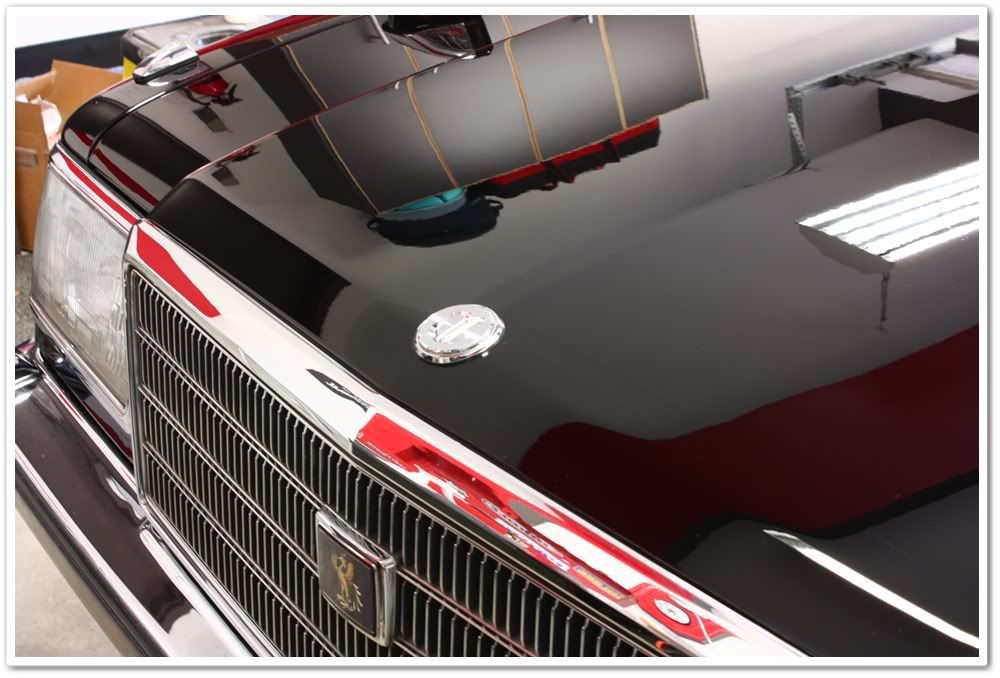
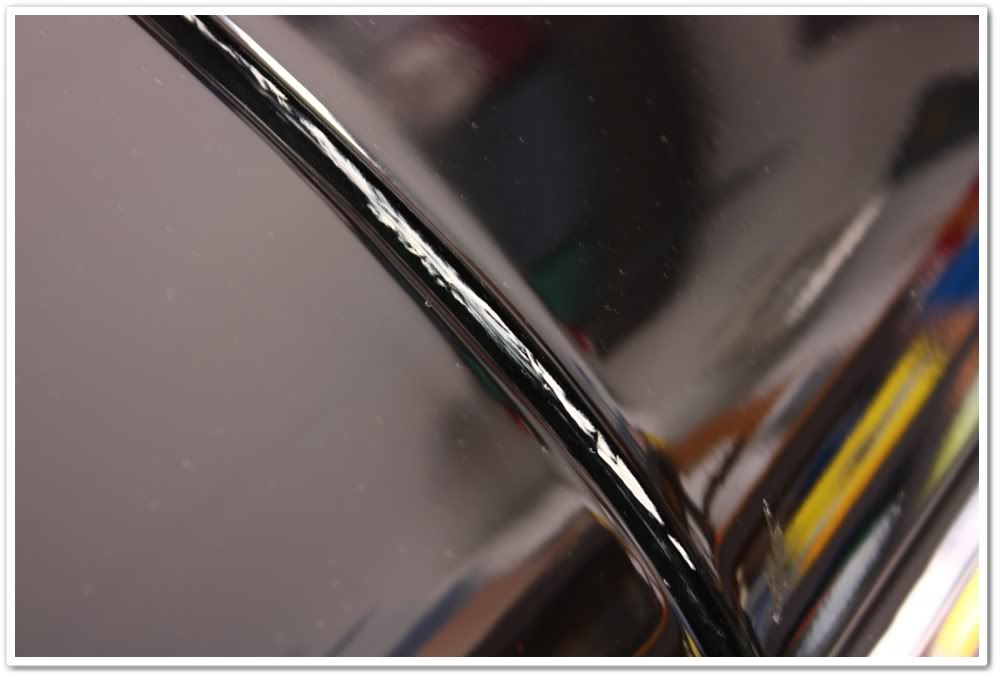
There was also quite a bit of polish and wax buildup in all of the seams, around emblems, and at the edges of the trim.

IMG_3310.jpg
 
I had already done an inspection on the car, and knew it was going to be a lot of work, so I split the workload over a 3 day period.


Day 1:


For the first day, the goal was simply to wash, clay, and to do a test section for polishing to figure out where I would need to start polishing the next morning.


The door jambs were pretty dirty, but not as bad as you would expect for a 30 year old car. I sprayed them down first with P21S Total Auto Wash, and then agitated with my Mini E-Z Detail brush.

IMG_3316.jpg


IMG_3318.jpg


I knew that the paint was frequently waxed, so I gave it a foam bath of Chemical Guys Citrus Wash & Clear at paint prep ratio (2oz/gal) to help strip the wax from the finish. This is a big help when prepping the car for the polishing stage.

IMG_3323.jpg


After washing I pulled it in the garage and spent some time claying the surface to further prep it for polishing. I got a chance to use the new Dodo Juice Born Slippy clay lube, and I have to say that it’s an amazing product! It’s very slick, yet wipes away clean without any “slick� residue.


When you plan on performing heavy compounding, it is important to first check the thickness of the paint to see how much you have to work with. You may find out that there are sections that have been re-painted, or that the finish is too thin to safely do heavy defect removal. When you’re dealing with an old and/or rare vehicle like this one, it’s even more critical.


If you watched the video, you saw that the Century is made with a maximum of 7 layers of paint. If the paint is still original (as it appeared to be), I should expect to see some thick readings.


The hood showed the highest readings, and they were consistent across the entire hood. If this had been repainted at some point, somebody did an unbelievable job. Color matched, texture matched, it had consistent thickness, and the paint reacted to polishing exactly the same as it did on the rest of the car.

IMG_3326.jpg


This is a reading from the roof.

IMG_3325.jpg


The owner and I had already discussed the plan of attack, and I kept in touch with him throughout the process. We both agreed that we should preserve as much paint as possible to ensure it has plenty of life left in it. This isn’t a show car, and he plans on driving it a lot. We knew that there would be some heavier defects that would remain, but if we could achieve an 80%-85% correction rate, we would be happy.


While claying and doing wipedowns, I noticed that the single stage paint was easily marred indicating a soft finish. Even my most plush towels would mar the finish if I used enough pressure (and I thought my black Acura paint was soft!). Given the soft paint, I decided to start off with a light combination for my test polish section. I used Menzerna 106FF and a white pad, but found that it only corrected the very light defects. I stepped up to Super Intensive Polish, but that didn’t achieve much greater results. Hmmmm. So much for “soft� paint! After a few different trials, I found out that I would need to use Megs 105 and a wool pad on the rotary. I first tried the 105 with a PC and an orange pad, but it wasn’t getting rid of the deep defects, and it was horribly marring the finish. On the rotary with wool however, it was achieving a greater rate of correction, and finishing up much nicer.


Here’s what I determined on my test section…this is very odd paint! It acts like a soft paint because the finish was so easily marred, but it acted like a hard paint during correction because it required such an aggressive method to get good results.


If you thought that the finish looked pretty decent from the outside shots, then take a closer look under the lights…they showed a much more extreme story.

IMG_3329.jpg


IMG_3327.jpg


Here you can see the lack of definition in the light reflection…quite hazy.

IMG_3337.jpg


Here’s after completing my test section. This is without any finish polishing, and you can tell just how much of a difference there is from the corrected side on the left, and the un-corrected side on the right.

IMG_3335.jpg


Alright, now that I know that Megs 105 and a wool pad is the winning combination, it’s time to get to bed (I started late in the day) and be ready to go bright and early the next morning.
 
Day 2, 7:30am


First I needed to start off by completely taping off all of the trim and emblems. This car had rubber trim and seals everywhere, so it took 45 minutes just to tape everything off!


I also removed the windshield wipers to gain access to the painted areas below it that I wouldn’t be able to access otherwise. This would also give me the chance to clean the chrome where it mounts.

IMG_3338.jpg


When I started off with the hood, I was finding the deep defects to be extremely difficult to remove. I hit each section 4-5x with M105 and wool before I was even able to get 80-85% correction rate!


Throughout the entire detail, I continually used my DeFelsko DFT paint thickness gage to make sure I wasn’t removing too much paint.


Before:

IMG_3340.jpg


After compounding stage:


IMG_3341.jpg


This is a great shot on the front left of the car showing the difference in the finish just after the compounding stage. Even without any intermediate or finish polishing, the left side is like a completely different color of black.

IMG_3347.jpg


Working my way around to the back, I found the trunk to be exceptionally difficult. I made it look a LOT better, but it had some random scratches that just wouldn’t fully correct without the need for wetsanding.


Before:

IMG_3352.jpg


After compounding:

IMG_3354.jpg


For the back section, I used a 4� orange spot buff pad with Megs 105. I also used this combination on the tail lights (and later finished those up with white/Optimum Polish II).

IMG_3351.jpg


Before:

IMG_3357.jpg


After compounding:

IMG_3358.jpg
 
Before:

IMG_3364.jpg


After compounding:

IMG_3365.jpg


Every section was hit 3-5x with Megs 105/wool to get the desired results!


After I finished the compounding stage (9 hours worth!), here’s what I was able to achieve already! Looking pretty good…

IMG_3373.jpg


IMG_3367.jpg


After compounding, I took it back outside for another CGCWC wash to remove the residue and (lots of) dust from the Megs 105.


I was hoping to make this a 2-step polishing process, so I had to choose the right follow-up product. It had to have enough cut to get rid of the swirls left behind by the 105 and wool, but it needed to finish fine enough for this paint. I also wanted easy removal so that I didn’t risk marring the finish with a MF towel. Because it also has long working times too, I chose Optimum Polish II. On a grey pad at 1000-1400-1000 rpms, it was taking out the wool swirls, and finishing off very nicely. Having said that though, it was very cloudy out so I couldn’t inspect the finish in the sun (not good with black paint).


Before finishing with OPII:

IMG_3386.jpg


After:

IMG_3388.jpg


OK, it’s about 8:30 pm now (started at 7:30 am!), so it’s time to call it a night.


Day 3:


The hard part is done (compounding), so I’m the down slide! It’s time to pick out a few CD’s to get my going…something that goes well with the mood of knowing that the marathon will be finishing soon. I’m thinking a little early 80’s rock: Van Halen Fair Warning (Unchained rocks!) and Sammy Hagar Standing Hampton (Heavy Metal…awesome tune!). I like VH and I like Sammy…I just don’t like them together!


Sorry I went off on a flashback of teenage rock there for a moment (good times, gooood times!).


Back to the detail.


Here I am working with OPII, and a grey 4� spot pad in the tight areas.

IMG_3384.jpg


I finished up with the Optimum Polish about the time the sun came up over the house. Now I could take the car outside and properly inspect it for holograms. Remember, it’s a right-side drive car, so you can probably imagine how many times I went to get in the car on the wrong side!


Once I pulled it outside, I was bummed to find out that I had very light holograms even with the OPII and a grey pad. This paint is definitely challenging!


So I pulled it back in the garage, broke out the Menzerna PO85RD and a red pad and worked it at very slow rpm’s. Back out in the sun again, and I found the finish to be very good with no more holograms!


You’ll notice a few of the deeper scratches that still remain. I’d say I achieved the 80-85% correction we were going after.

IMG_3398.jpg


IMG_3399.jpg


IMG_3400.jpg
 
On this one I placed the sun in the shot so you can see a really deep defect that I could only make “better�.

IMG_3401.jpg


Now that the paint is good, it’s time to take it back in for all of the finishing touches…cleaning out door jambs, emblems, dressing wheel wells and tires (Fade 2 Black and Optimum Opti-Bond), etc, etc.


While I had the wipers off, I decided to bring them back to life a bit because they were looking a bit rough. Besides, you can’t just go down to the auto parts store and get replacement wipers for this car!


I cleaned up the metal with Klasse All-In-One, and treated the plastic parts of it with 303 Aerospace Protectant. The wiper at the top has been polished, whereas the one at the bottom has not.

IMG_3381.jpg


Speaking of wipers, the recessed areas where they attach were rough as well, and cannot be cleaned without removing them first. I cleaned the outer area with alcohol and q-tips, and the inner area got polished with Optimum Metal Polish with a MF towel and q-tips for the tight areas.


Before:

IMG_3396.jpg


A little out of focus, but you can tell it made a huge difference.

IMG_3397.jpg


The key got polished as well

IMG_3383.jpg


Especially when using Megs 105, you’ll find that it get in all of the hiding places, and then turns to concrete! I clean this up with Optimum No Rinse sprayed onto a MF towel, and then wipe it down. This was done in all of the door jambs, the trunk lid, and the hood areas (and anywhere else it can hide).

IMG_3393.jpg


After:

IMG_3394.jpg


The roof had very deep water etching. So deep in fact that it would require heavy sanding to get rid of it. The owner decided to save that for when/if it becomes a show car.

IMG_3391.jpg


OK, we’re getting close to the end…honestly!


I didn’t work on the interior, but I wanted to at least take a few photos for everybody.


Even for 1979 it had digital displays.

IMG_3421.jpg


Navigation/TV display added on at some point:

IMG_3422.jpg
 
Anybody read Japanese?

IMG_3423.jpg


The back seats were very comfortable.

IMG_3424.jpg


Now, if you watched the video, you’ll get a better understanding of this one. Toyota’s marketing department said that the chrome trim around the window was actually designed like a picture frame that will enhance one’s appearance (seriously…go back and watch the video!).


I’ve always been a sucker for clever marketing campaigns, so I had to give it a try. I’ve already written my complaint letter to Toyota because quite frankly, I didn’t find that it did anything to enhance my appearance! L What a scam!

IMG_3426.jpg


Actually, I think this way enhances my appearance!

IMG_3427.jpg


…and the crowd roars with laughter!


After I was done goofing off in the back seat (reclining the seat, playing with the curtains…stuff like that), I finally sealed the finish with Optimum Opti-seal. Afterwards, I carefully gave it a final wipedown with Optimum Gloss Enhancer. The owner only wanted a sealant with no wax.


Now for some “final� after shots.


IMG_3414.jpg


IMG_3417.jpg


IMG_3419.jpg


IMG_3409.jpg


IMG_3411.jpg


IMG_3429.jpg
 
IMG_3460.jpg


IMG_3466.jpg


IMG_3470.jpg


IMG_3444.jpg


IMG_3445.jpg


IMG_3446.jpg


IMG_3448.jpg


IMG_3449.jpg


IMG_3440.jpg


Now THAT is black!

IMG_3405.jpg


All done!


Thanks as always for investing so much time reviewing my work! The owner was very pleased with the outcome…


Total time = 18 hours.
 
Great work! Question for ya; when you said the OPII is 'easy' to remove, and that you didnt want to risk the finish with a MF towel, how did you actually remove it??? Very light MF wipes?


I am having EXACTLY the same problem you had on a Jag in my garage at the moment; hard clear, yet SO scratch sensitive... After compounding with orange/105 I finished up with 205/white. Go to remove it - marring everywhere. Redo with OPII, go to remove it - marring everywhere... Ended up have to finesse the sh*t out of 105/grey to finish, as the 015 has alot less oil in it and takes alot less work to remove... I was / am stumped, and I am dreading pulling the car out tomorrow morning to inspect in the sun because the owner is picking it up at noon lol. So anyways, back on topic, how did you end up removing the uber-oily OPII without marring the finish?
 
DefiningDetails said:
...I am having EXACTLY the same problem you had on a Jag in my garage at the moment; hard clear, yet SO scratch sensitive... After compounding with orange/105 I finished up with 205/white. Go to remove it - marring everywhere. Redo with OPII, go to remove it - marring everywhere... Ended up have to finesse the sh*t out of 105/grey to finish...


I've always wondered of finishing with poliseal (since it leaves almost no residue) followed by an ONR or traditional wash would be good for paint types like this.


Great and very professional job on the yota. I had no idea they made a "century" until is saw this thread. Thanks for the knowledge!
 
MotorCity said:
What an amazing detail on a great car!! Nice work!


Thanks Jason! BTW...did you get my message on the Lambo Gallardo I referred to you?


SoFreshSoClean said:
Amazing work man! Black looks so nice when its done right.


Thanks. This one was such a deep black when I was done. Beautiful paint for sure!


d00t said:
Wow, Todd! Amazing work!! Is that auto climate control I see... on a '79?!


Thanks Aaron. Yes, auto climate control on a '79, along with a laundry list of other auto/power features that most cars didn't see in production until much later.


DefiningDetails said:
Great work! Question for ya; when you said the OPII is 'easy' to remove, and that you didnt want to risk the finish with a MF towel, how did you actually remove it??? Very light MF wipes?


I am having EXACTLY the same problem you had on a Jag in my garage at the moment; hard clear, yet SO scratch sensitive... After compounding with orange/105 I finished up with 205/white. Go to remove it - marring everywhere. Redo with OPII, go to remove it - marring everywhere... Ended up have to finesse the sh*t out of 105/grey to finish, as the 015 has alot less oil in it and takes alot less work to remove... I was / am stumped, and I am dreading pulling the car out tomorrow morning to inspect in the sun because the owner is picking it up at noon lol. So anyways, back on topic, how did you end up removing the uber-oily OPII without marring the finish?


I found that even my Eurow MF towels would mar the finish! I have a few Detailed Image rethickulous towels (super soft and plush), and a very light wipe with them would safely remove the residue without marring. Good luck with your sun inspection!


Derek173 said:
Speechless....... Great Work!


Thanks Derek.


backwoods_lex said:
I've always wondered of finishing with poliseal (since it leaves almost no residue) followed by an ONR or traditional wash would be good for paint types like this.


Great and very professional job on the yota. I had no idea they made a "century" until is saw this thread. Thanks for the knowledge!


Thank you. Most people have never heard of this vehicle.


If I finished up with Poliseal on this, I would have simply wiped it off and be done with it...no need to do ONR afterwards.
 
Fantastic work, Todd! One of your best details to date.


I wish I could've made it to The Bus for this one. Hopefully in the next 4-6, I'll be able to take a trip there.
 
Back
Top