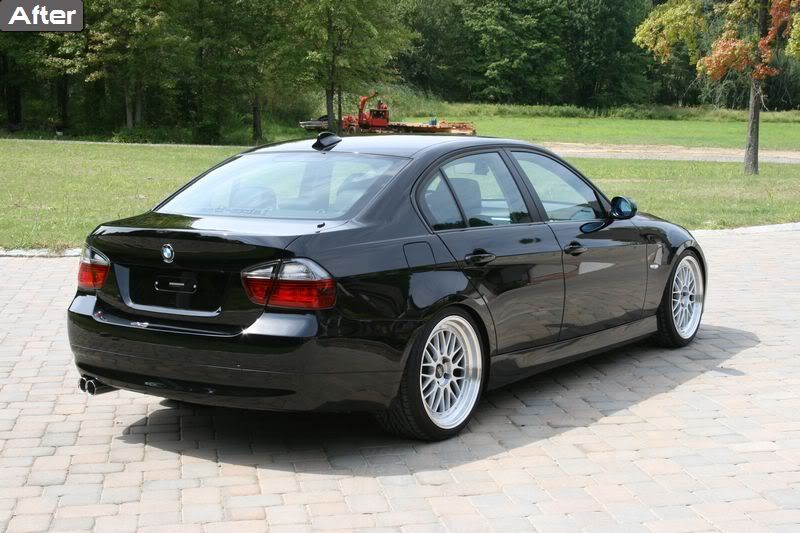
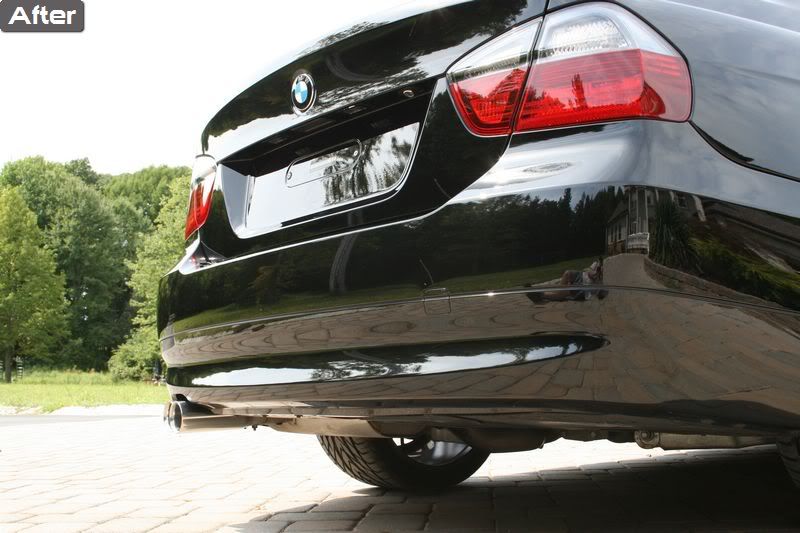
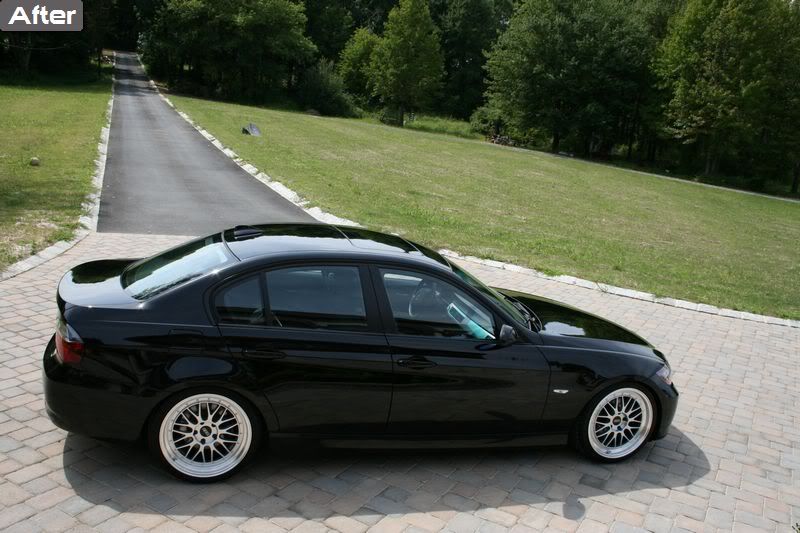
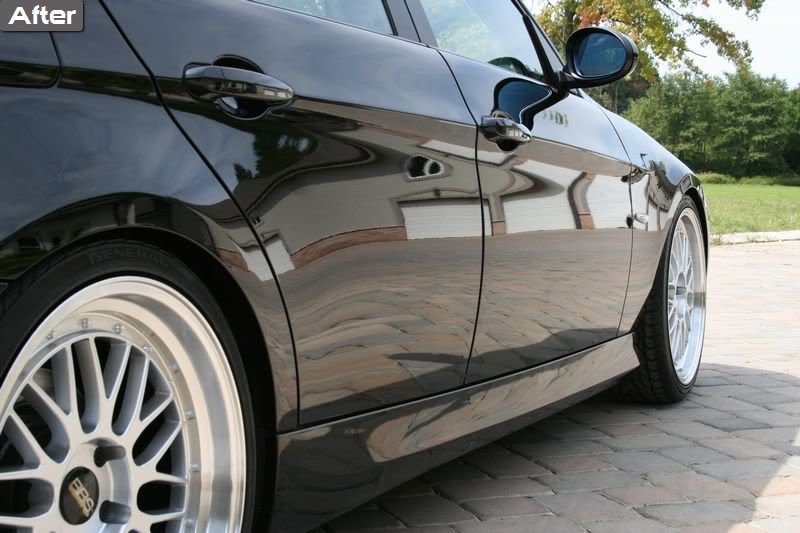
I apologize for the "how to" nature of the write up, as I posted this up on other forums as well, and I know there are many on here that I can learn from so please don't take it the wrong way.
So after a couple weeks, I finally got around to going through and resizing all the pictures that I took during the detail. I enjoyed working on this car as I was not rushed for time and was able to work on it throughout the labor day weekend. Anyway, I hope you guys enjoy the write up.
Exterior:
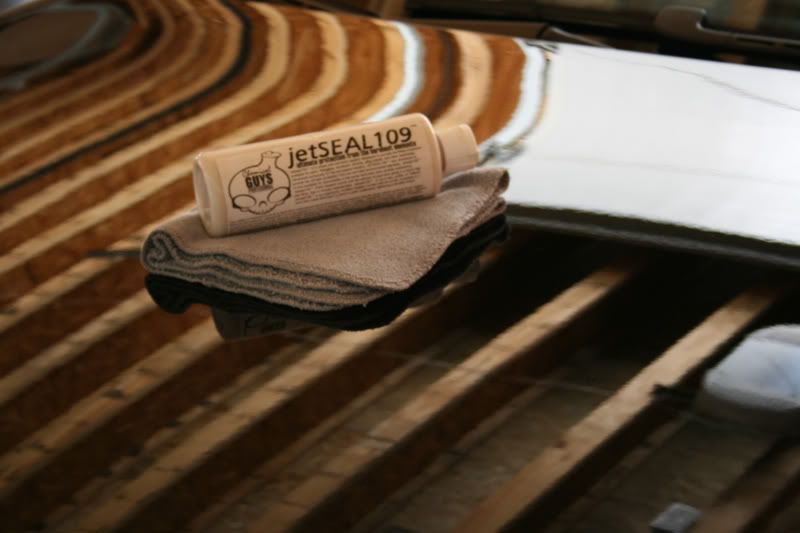
Citrus Wash and Clear
CG Fine Clay
Megs ASD
Collinite 885
Optimum Car Wax on jambs and on top of Collinite
Optimum Instant Detailer for added slickness
Polishing:
Makita Rotary
Meguiar's M105 With Orange Pad
Meguiar's M205 with White Pad
Meguiar's M205 with Black/Gray Pad
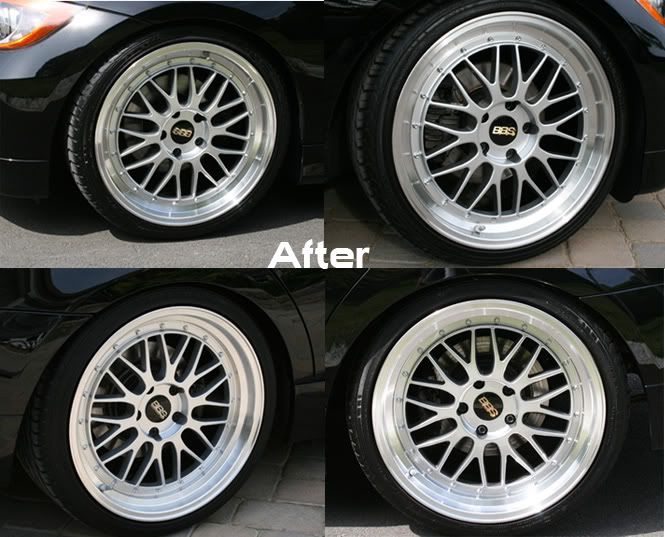
Wheels:
CG Sticky Wheel Gel (Great Alternative to p21s)
Simple Green to clean tires
Optimum Car Wax
AA Tire Dressing
Exhaust Tips:
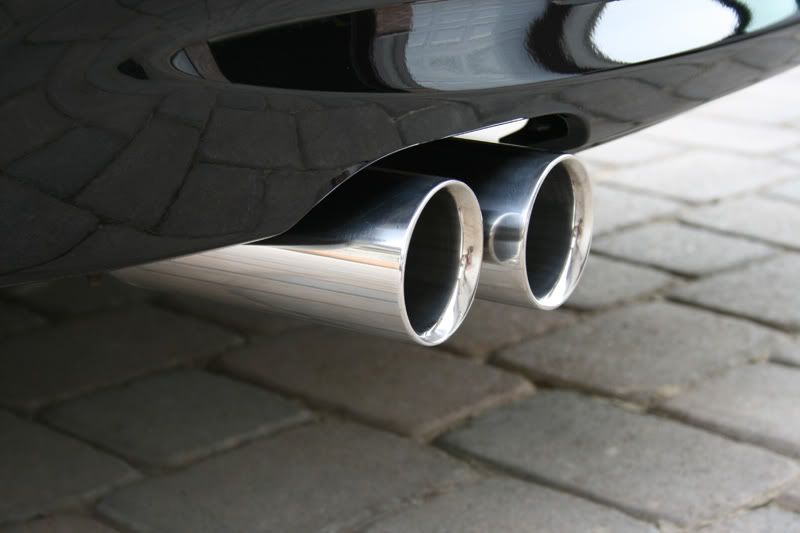
Optimum Metal Polish and 000 Ultra Fine Steel Wool
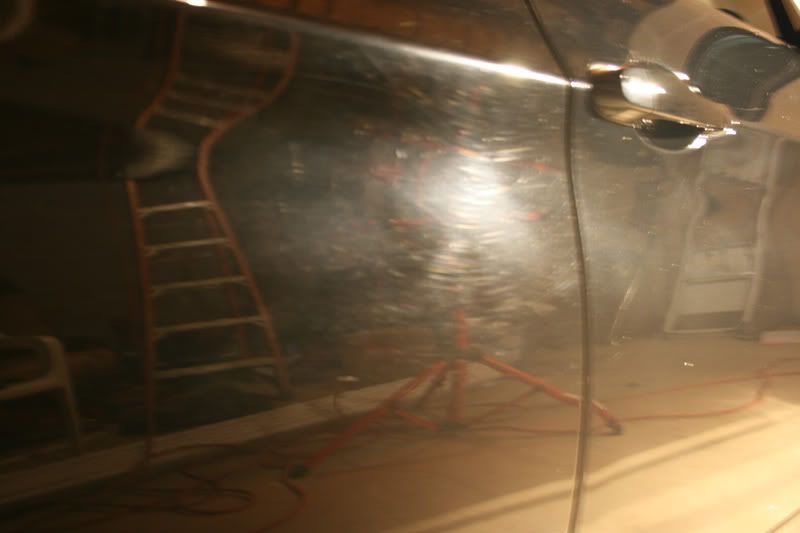
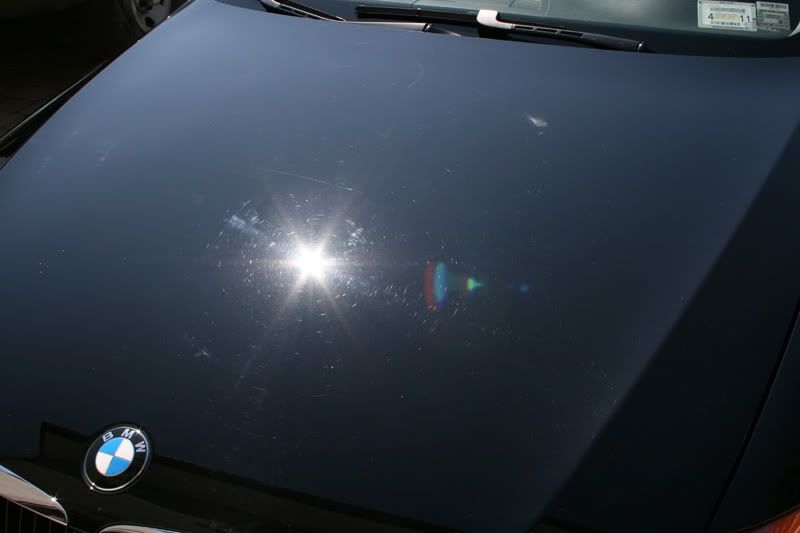
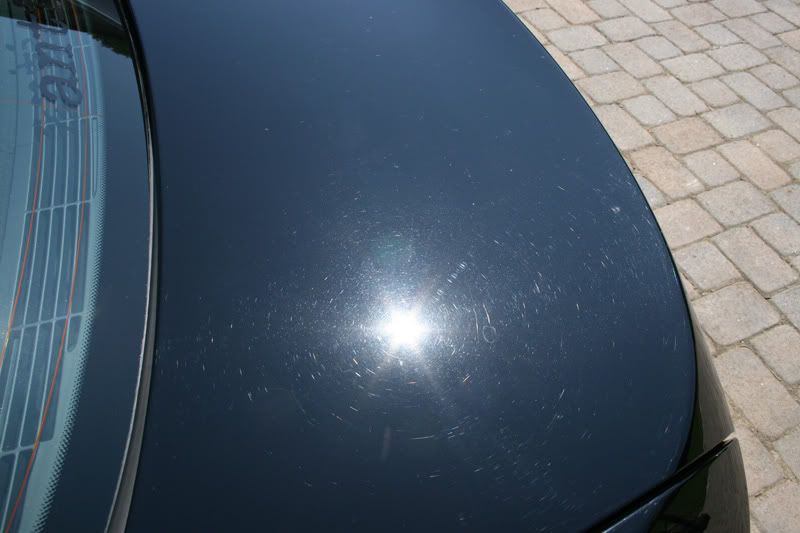
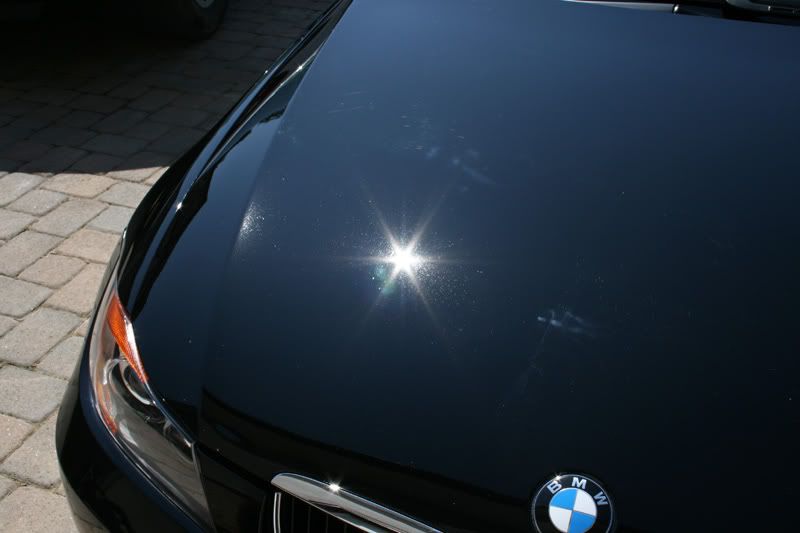
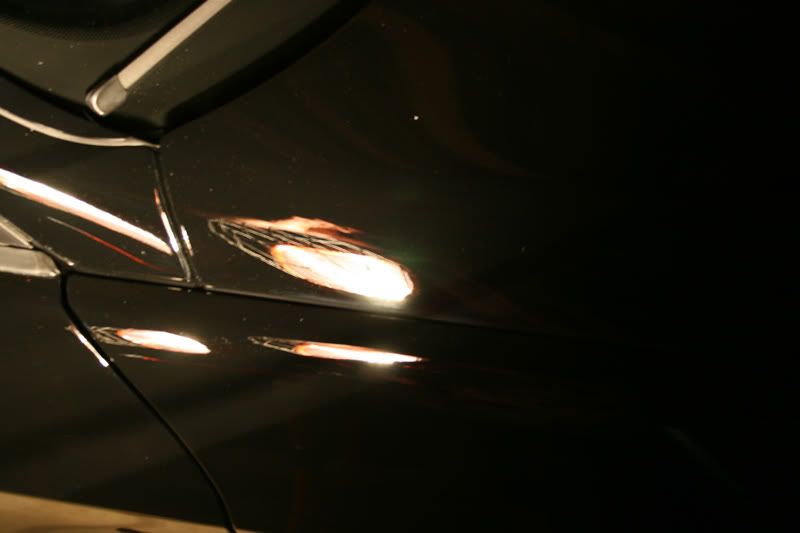
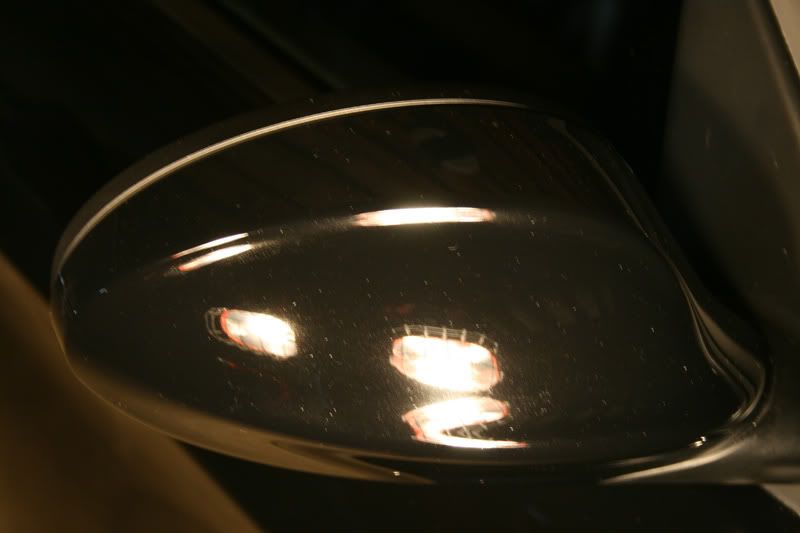
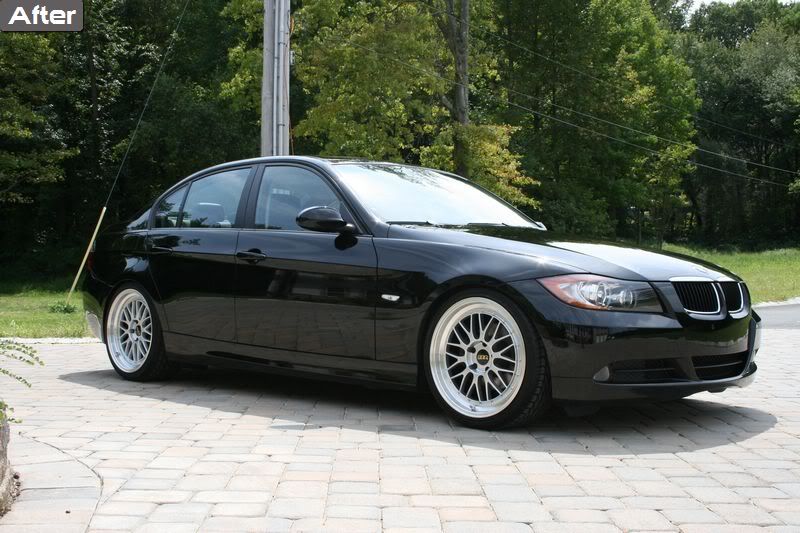
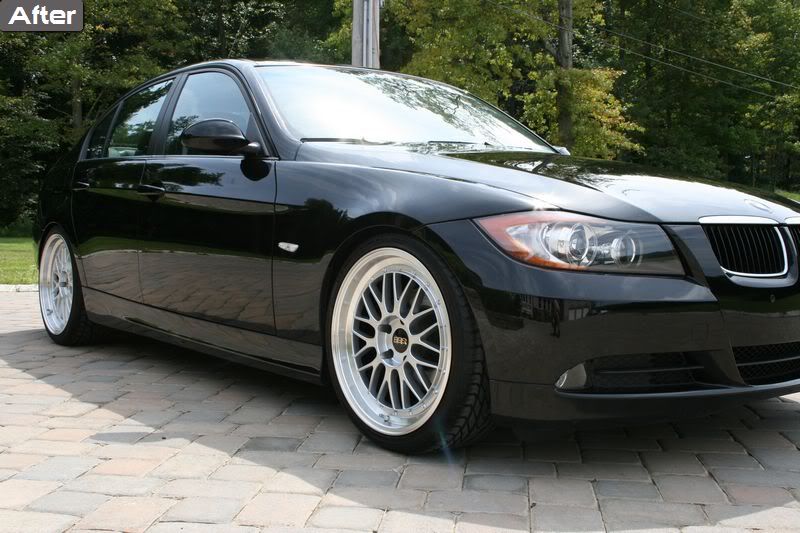
Let's take a look at what I was working with when Mike dropped his car off. I could tell it was very well kept and regularly washed, as it was fairly clean and looked pretty good without any direct sunlight. Under the sun and halogen lights though, all the swirls could be very clearly seen.


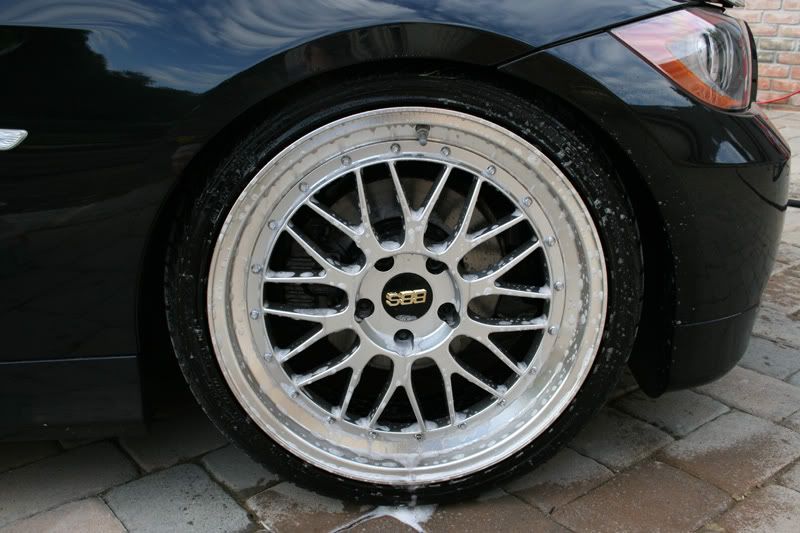
I first started off by giving the car a wash. As with any wash I began with the wheels. After first rinsing off as much dirt and grime as I could, I sprayed the wheels down with some CG Sticky Wheel Gel which seemed to melt away the brake dust and grime before I even touched the wheels.
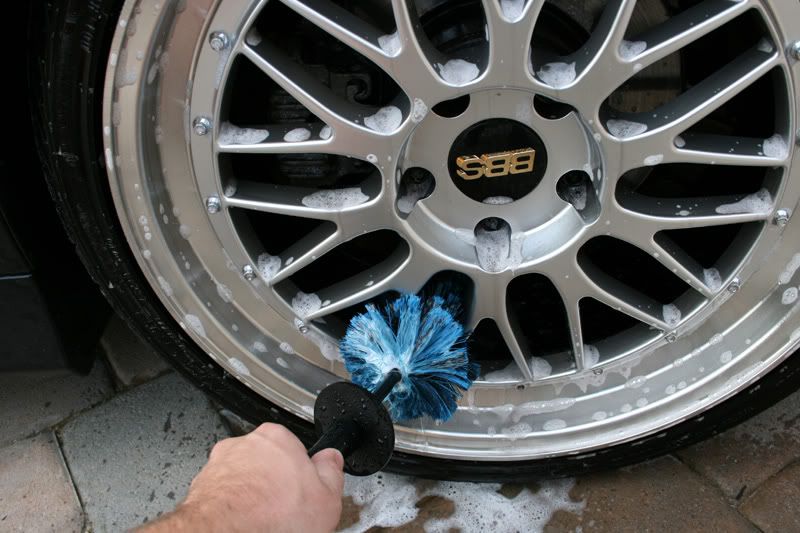
After letting the cleaner dwell, I agitated the wheels with a EZ Detail Brush which makes multi-spoke wheels like these a breeze.
Following this I cleaned the face of the wheels with a dedicated grout sponge, and scrubbed the tires clean with some Meguiars APC at a 4:1 ratio and a nylon brush. I did this for each wheel and rinsed them after before proceeding to the paint.
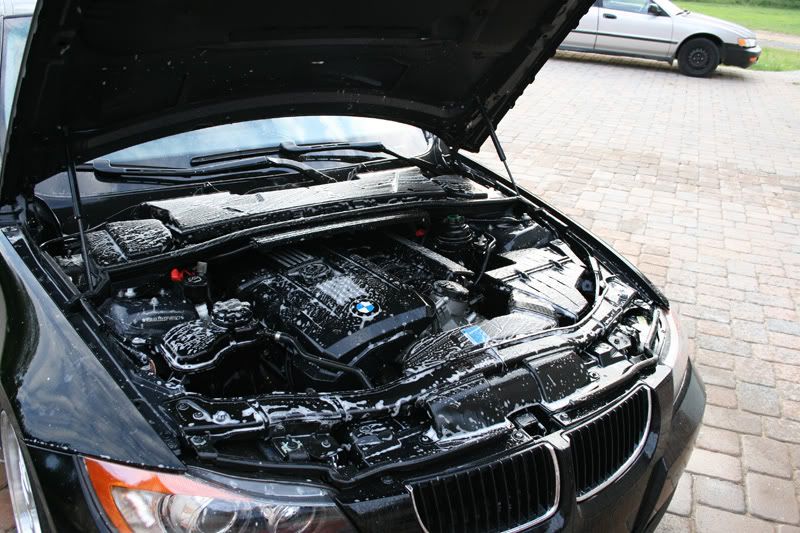
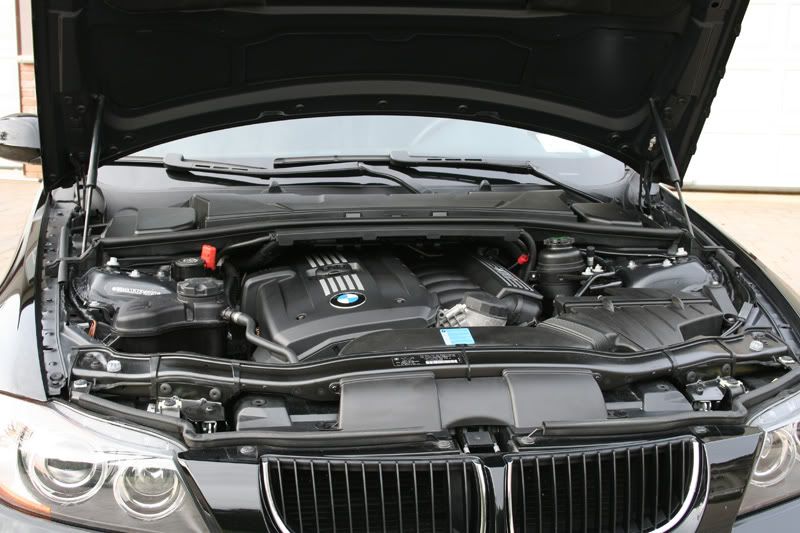
After the wheels, the engine was next. I popped the hood open and sprayed the engine compartment down with 4:1 Megs APC after giving it a rinse. I agitated with the EZ detail brush making sure all dirt and grime was gone.
Whenever I am going to be polishing I want to ensure any existent LSP is taken off the paint, so my wash of choice for this purpose is Chemical Guys Citrus Wash and Clear which will strip any protection at normal dillution.
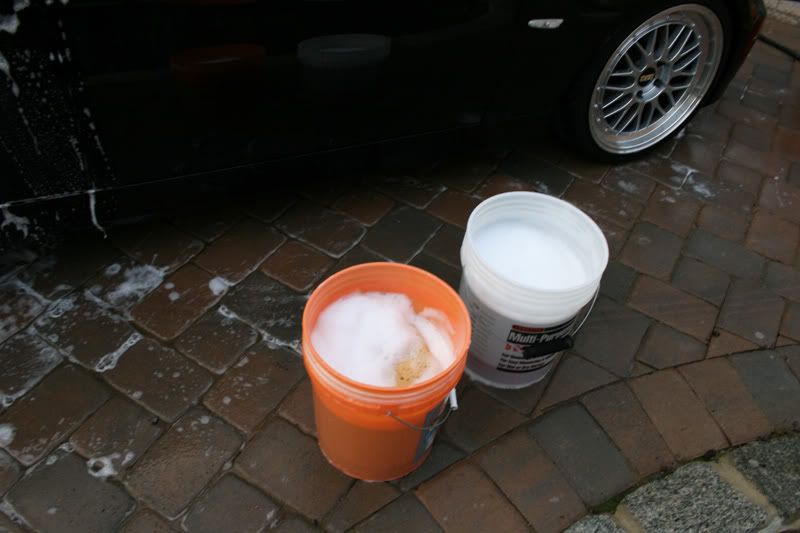
I then proceeded to wash the vehicle using a 2 bucket method starting from the roof and working my way down. In addition, I like to use a seperate wash media for the lower panels than the upper panels. I like to use two different colored buckets to make it much easier to distinguish which is the wash and which is the rinse bucket.
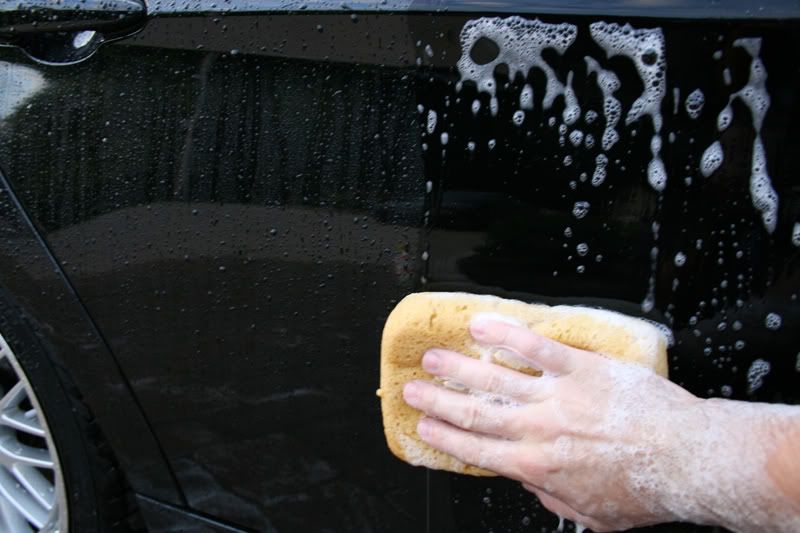
When doing the side panels, I recommend using an up and down motion, especially when doing regular washes in between polishing, because it makes any potential wash marring less noticeable.
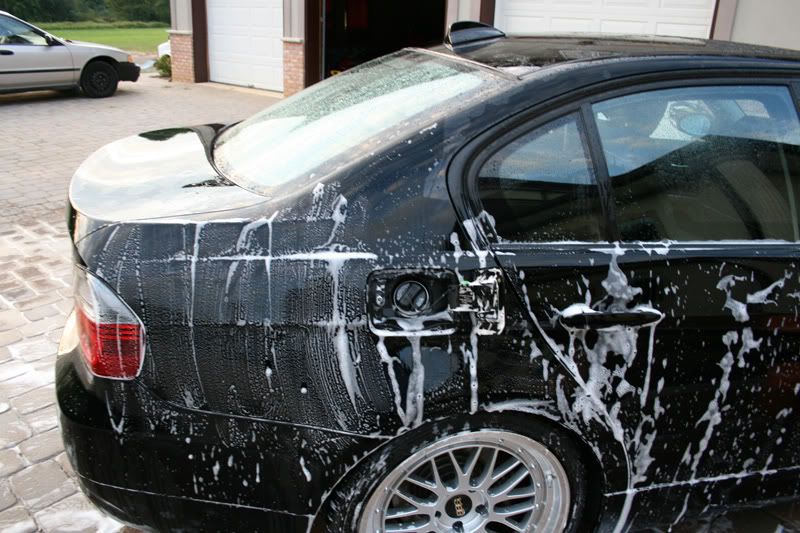
As I go along I make sure to rinse off the suds to prevent spotting from the soap. Once the vehicle is washed I use the sheeting method to get as much water off the car as possible.
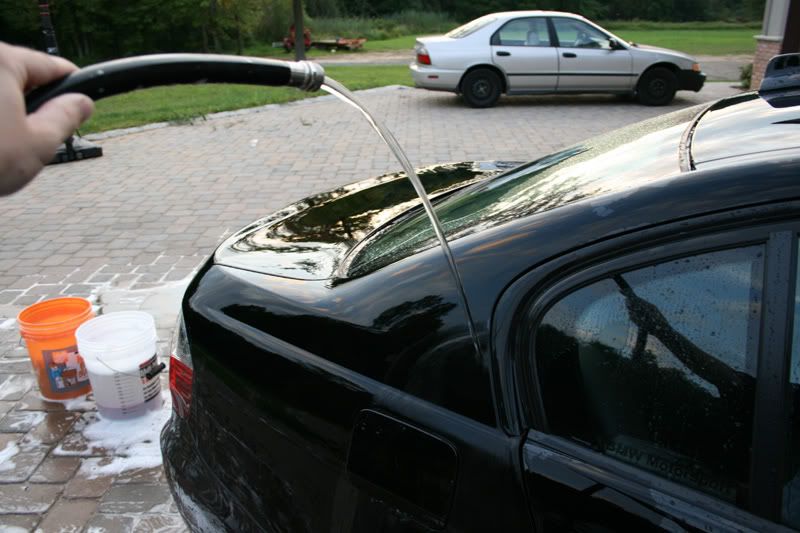
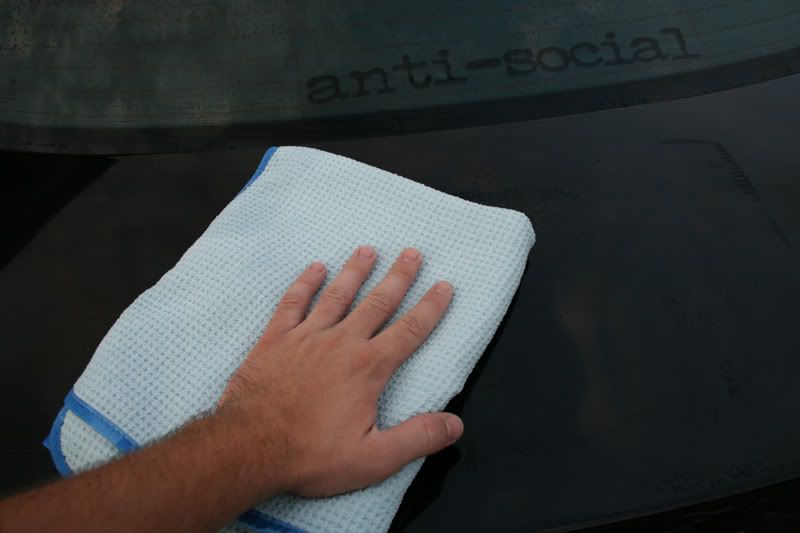
Now it is time to dry the car. For this purpose, I take out my Optimum Instant Detailer, and spray once on the panel I am drying, and follow up with a waffle weave towel. This provides a slicker surface for the towel to glide across, reducing the chance of any marring.

Once the car is dry it's time to pull the car in and clay the paint. Detailed Image Clay with ONR as lube is what I prefer to use.

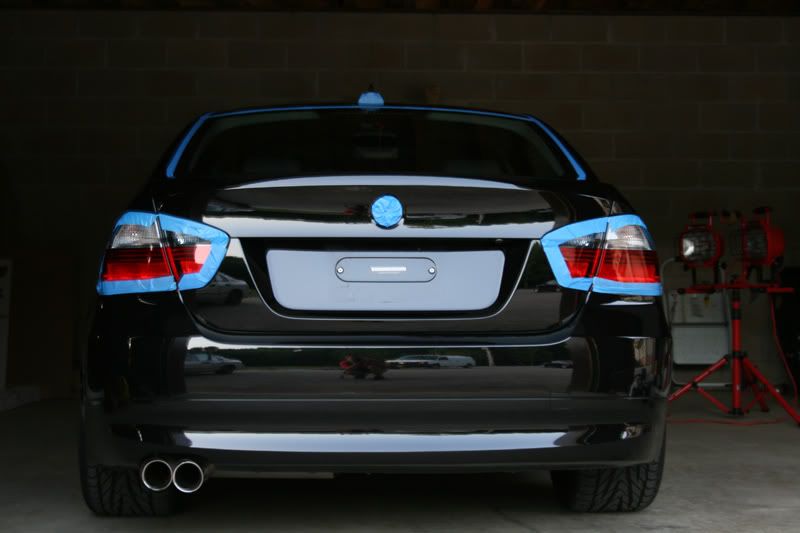
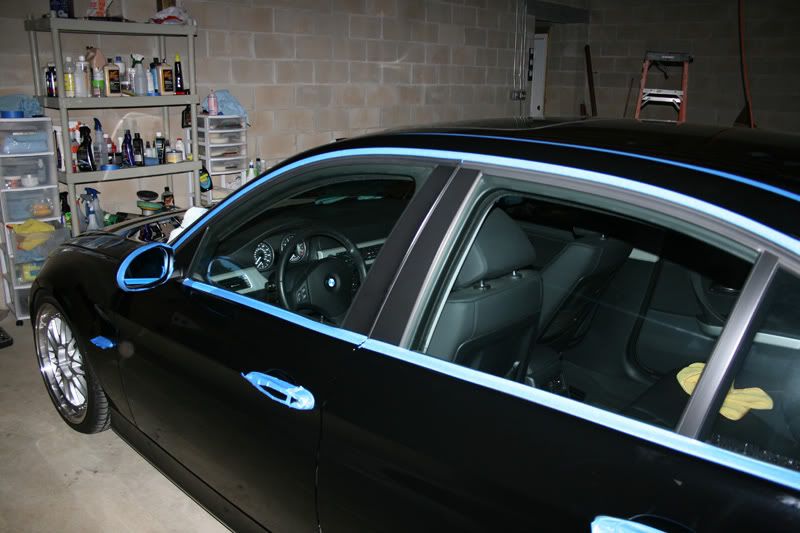
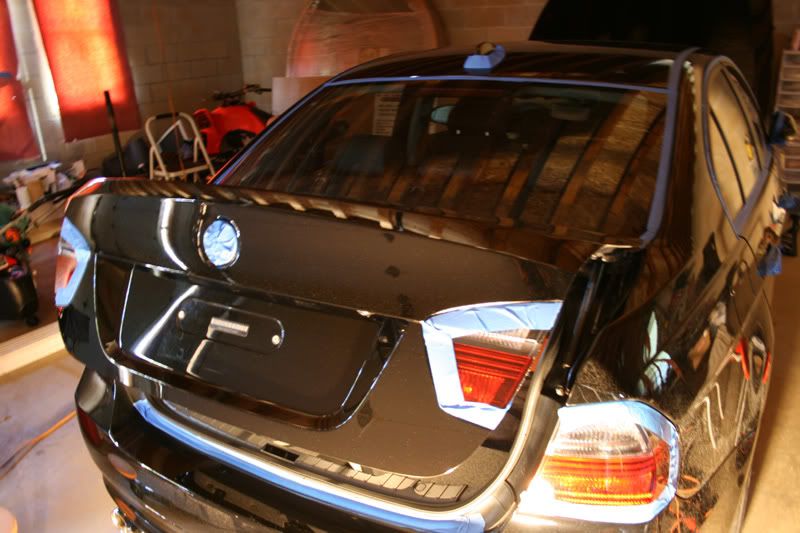
Following the claying, I dry the car off of any left over clay lube, and proceed to tape up all trim that might be damaged by the polisher.
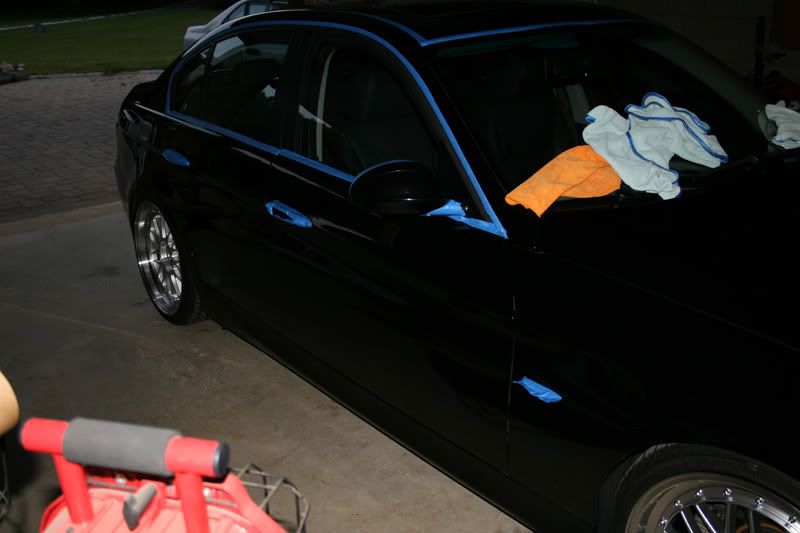
Once this is complete, I proceed to tape off an area that I will use to test different pad and polish/compound combination until I am happy with a result.
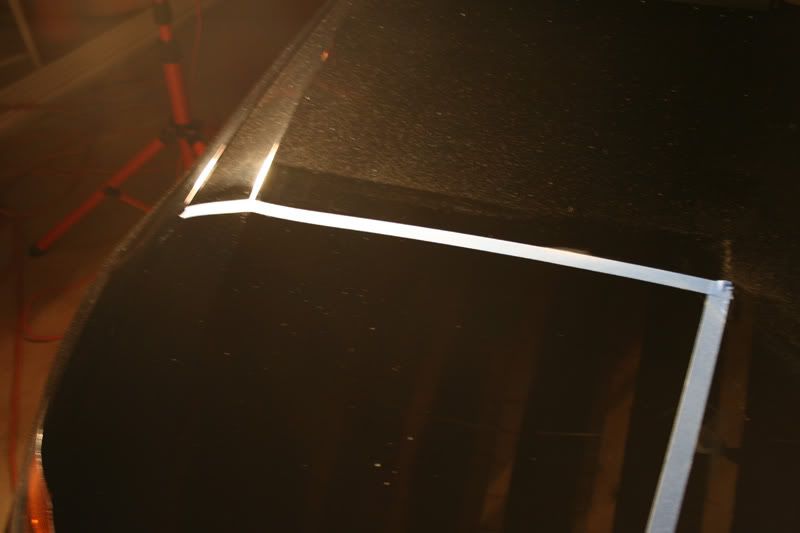
Here is an area taped off:
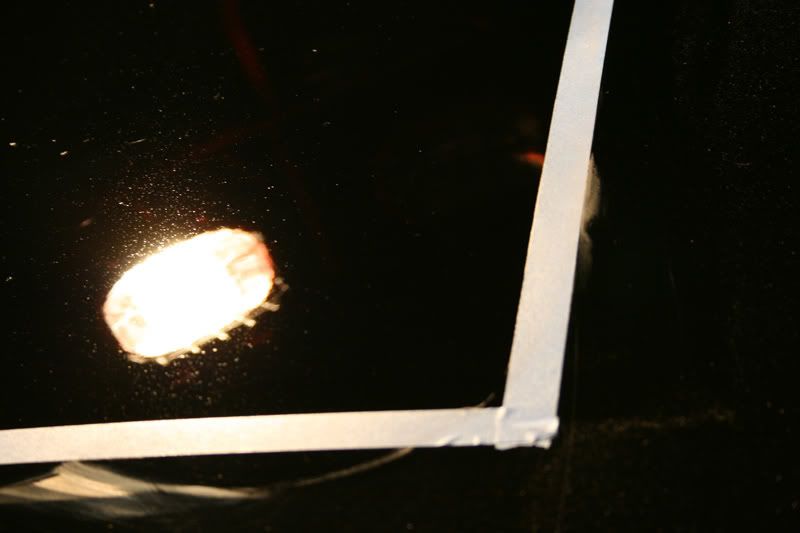
And the result after:
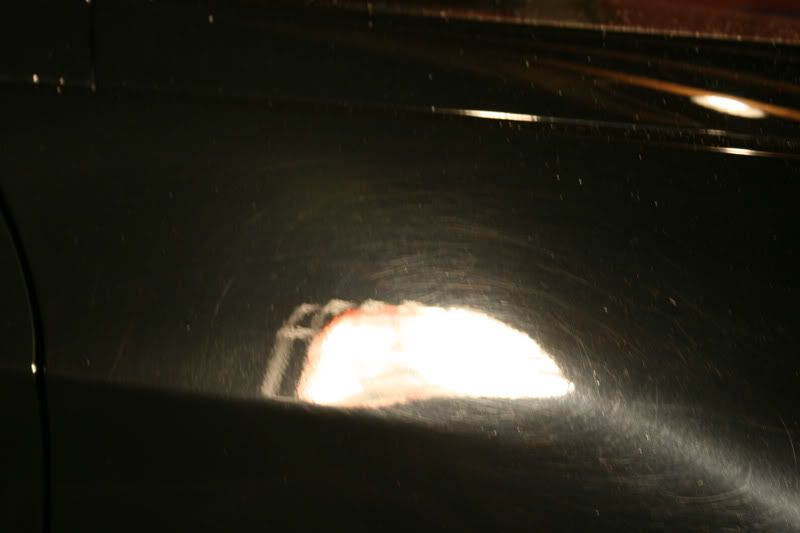
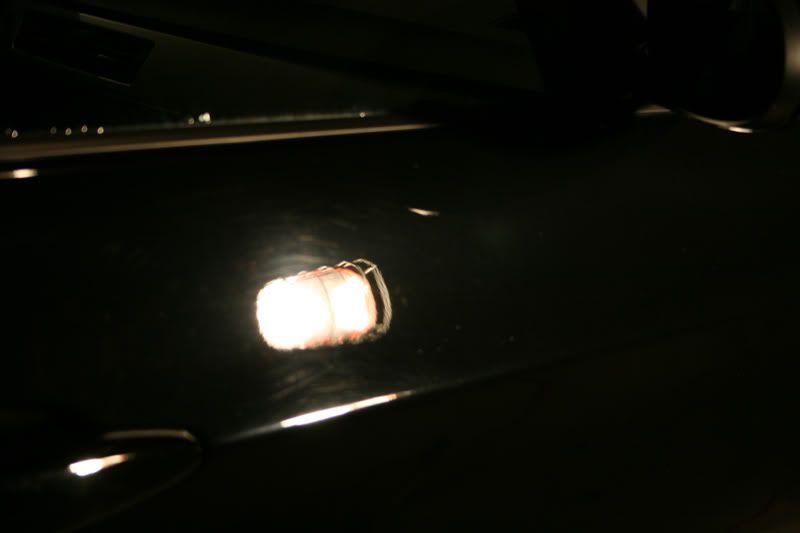
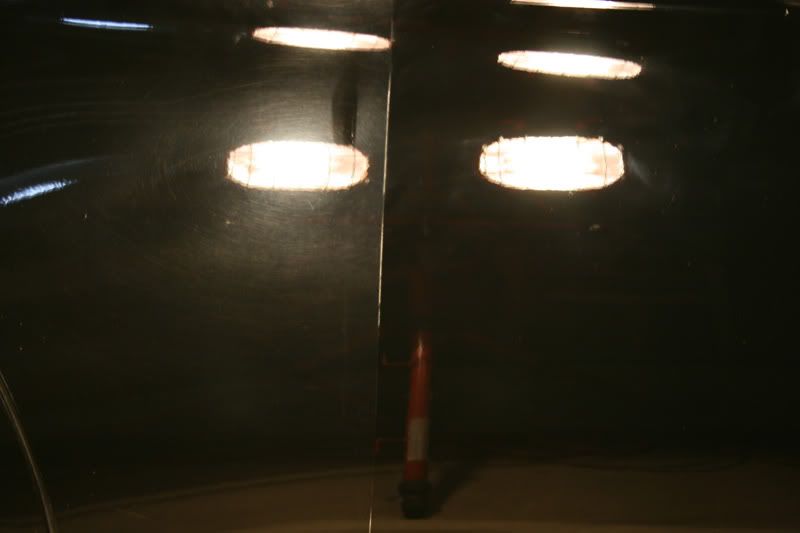
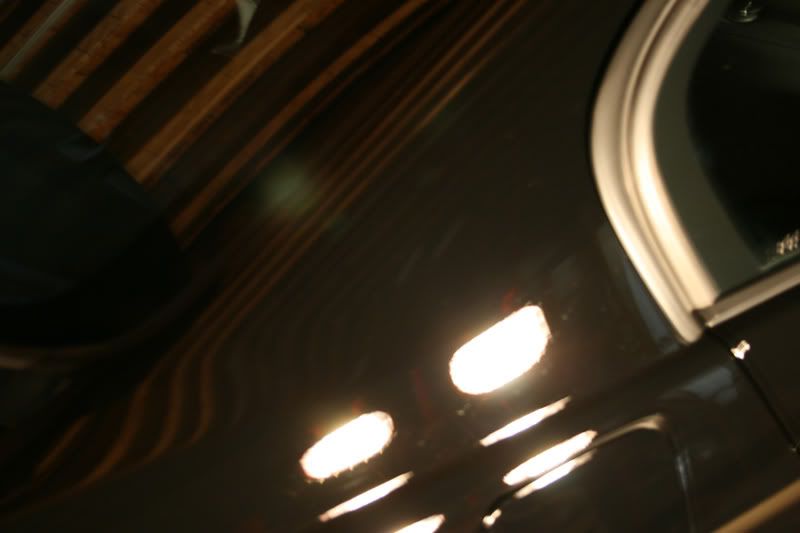
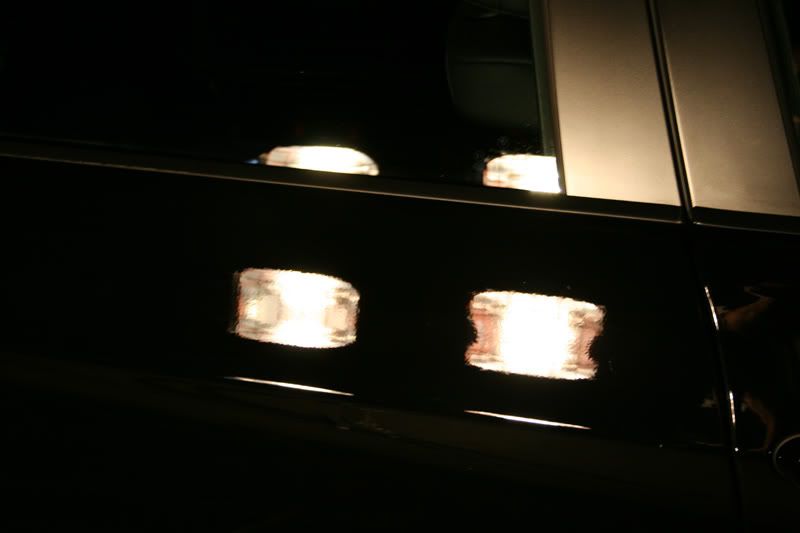
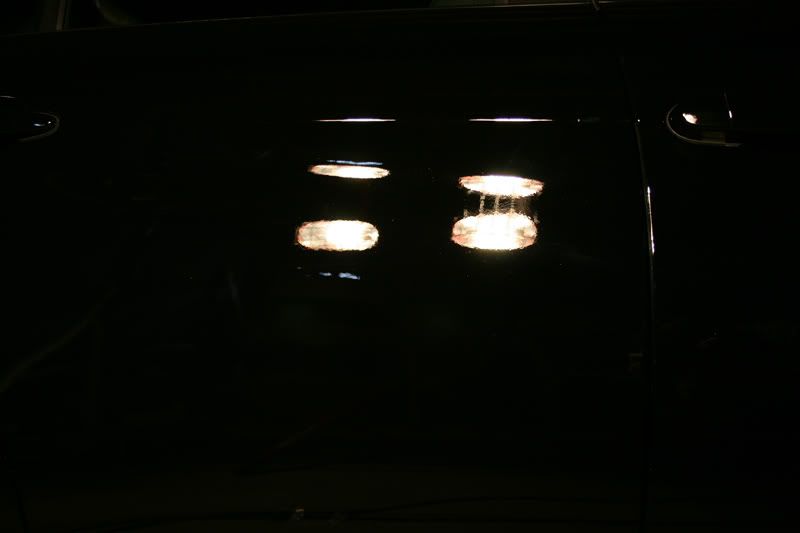
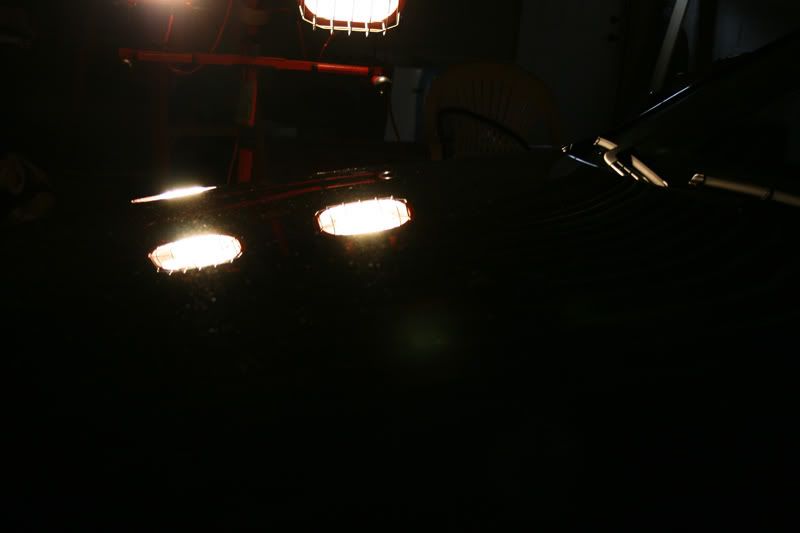
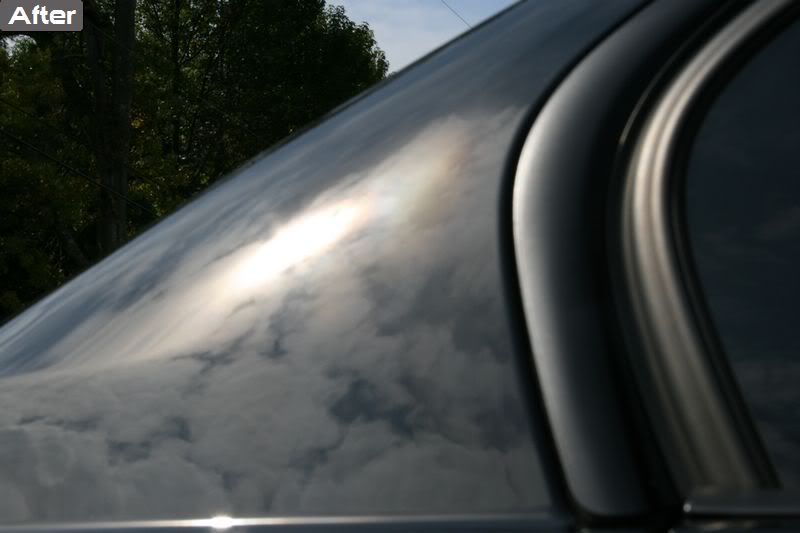
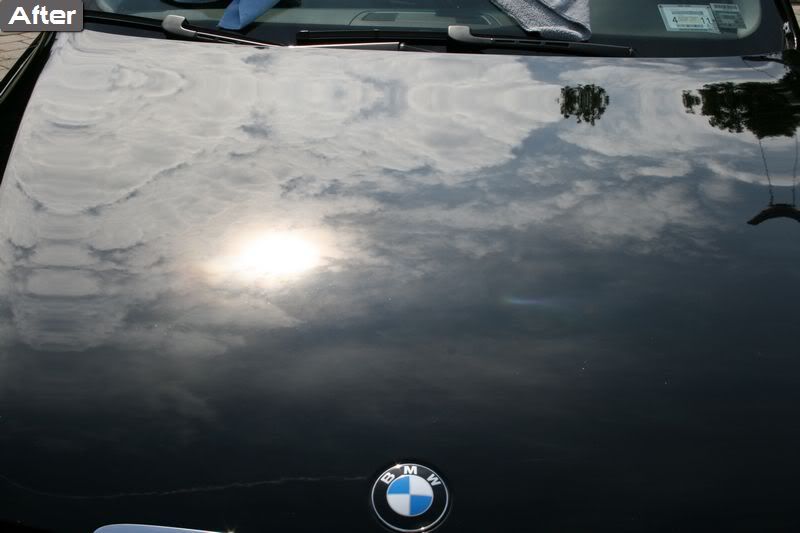
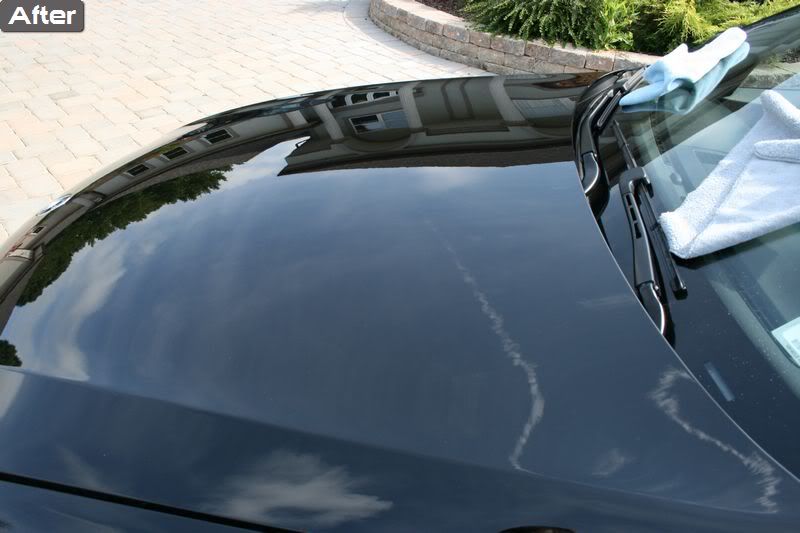
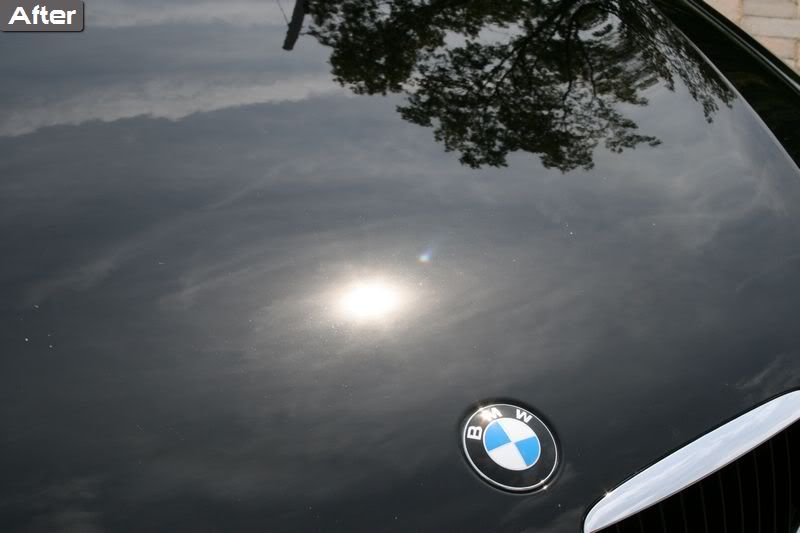
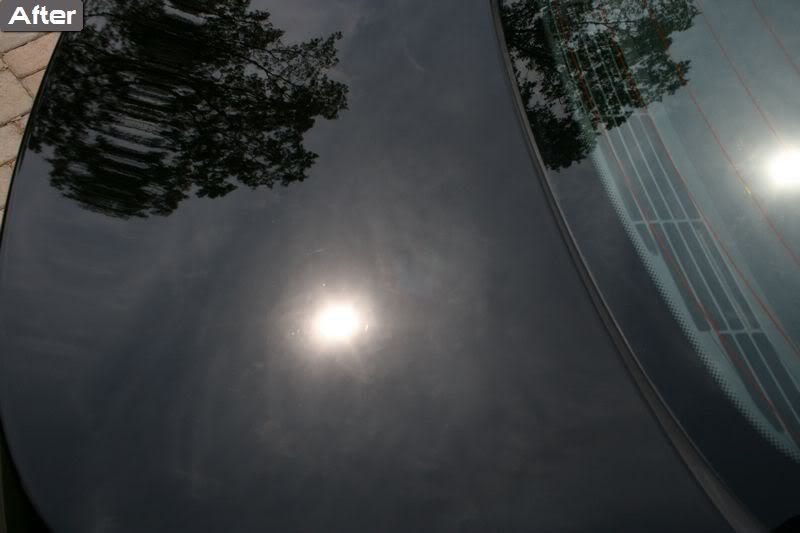
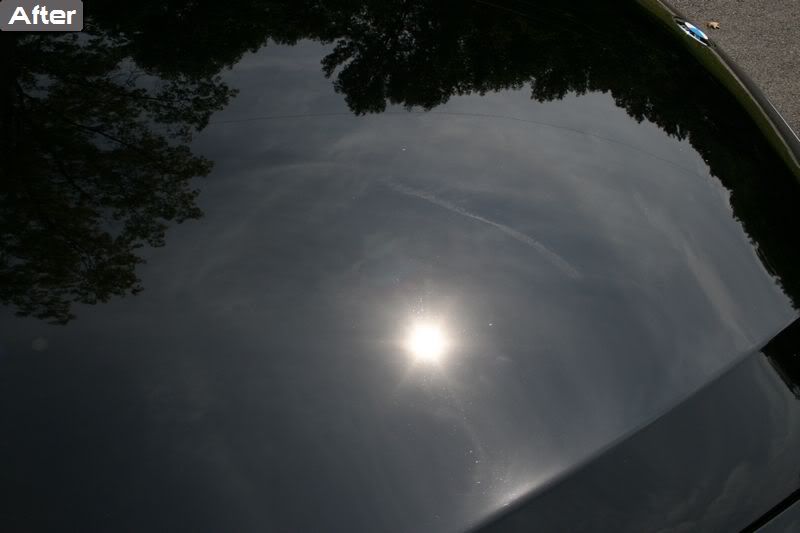
While halogens and camera flashes can show swirls very well, it is best to wipe the surface down with alcohol and pull outside if possible to ensure no machine holograms are left:
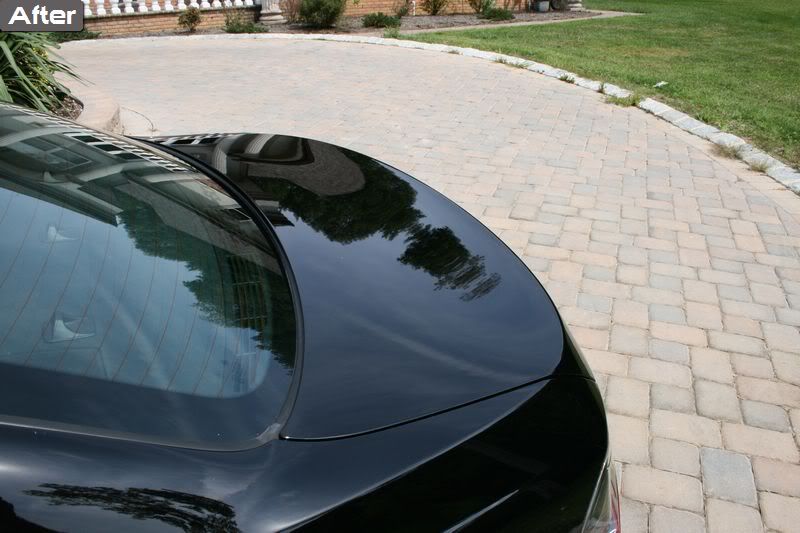
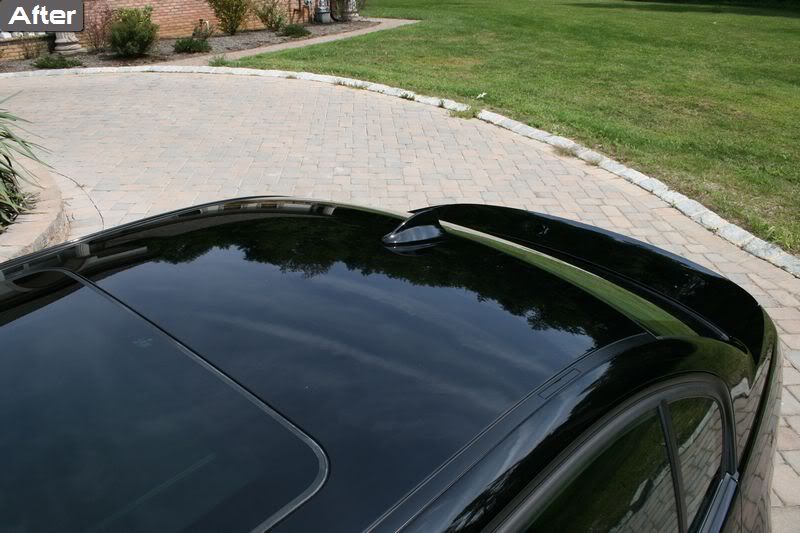
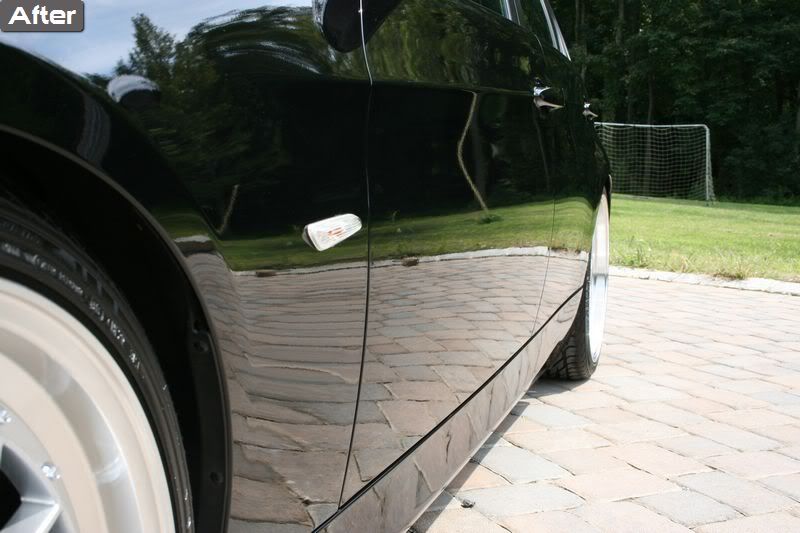
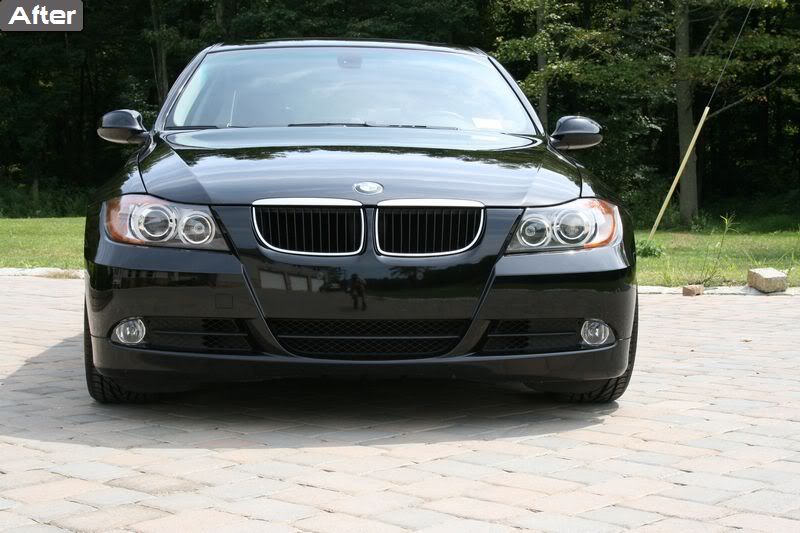
Now that I had my process down, I could proceed with completing the rest of the car step by step, sometimes hitting certain areas with multiple passes of the same pad/polish combo to ensure defect removal.
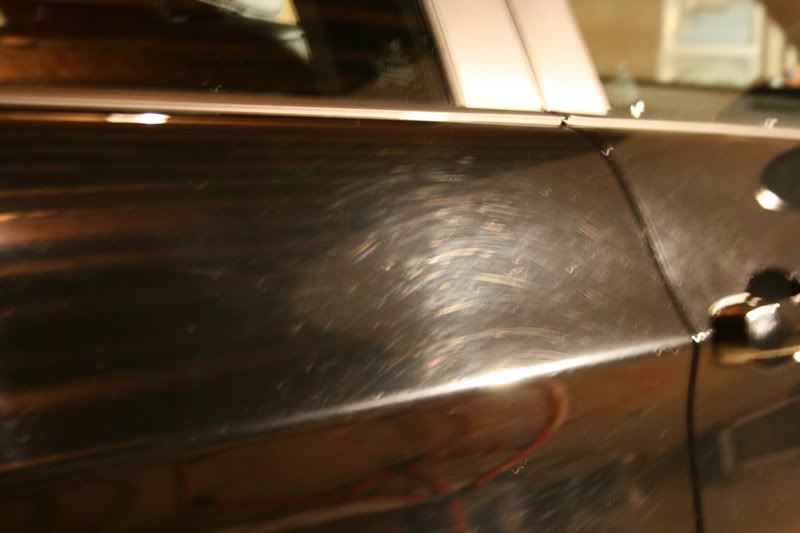
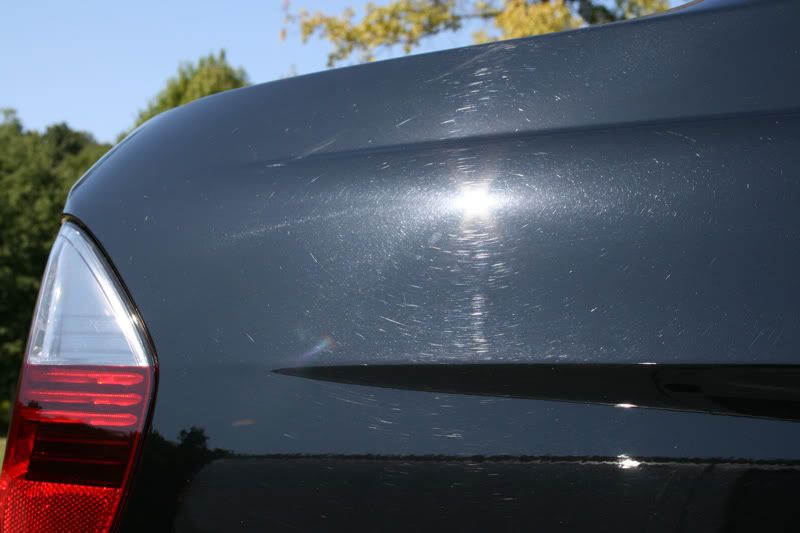
This is a great shot that shows how 1 step of M105 and an orange pad cleared up the deep swirls, only leaving minor swirls from the aggressive polishing combo that would be cleaned up with M205 later on.
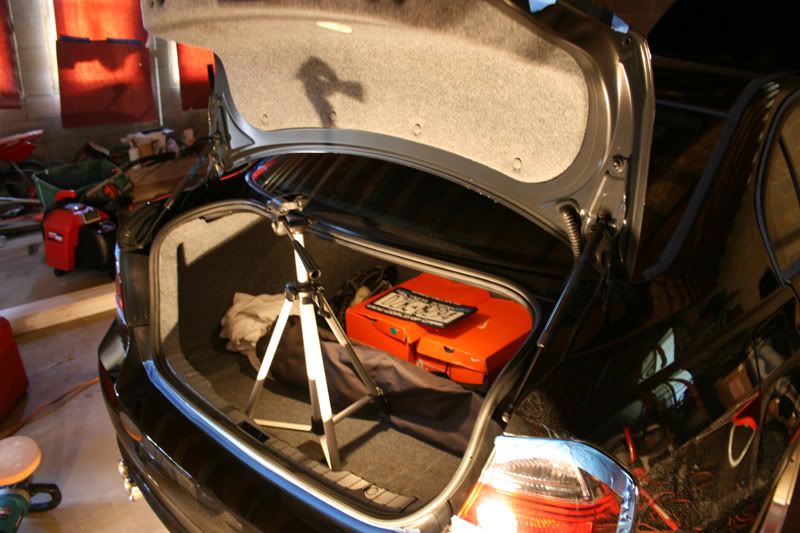
When polishing areas such as the trunk, I like to prop it up to prevent accidental paint burning on the bumper. My camera tripod works perfect for this purpose.
Here I am breaking down the M205 which was the next step after M105.

After each step, I like to do an ONR wash which will remove polishing dust and prep the surface for the next polishing step.
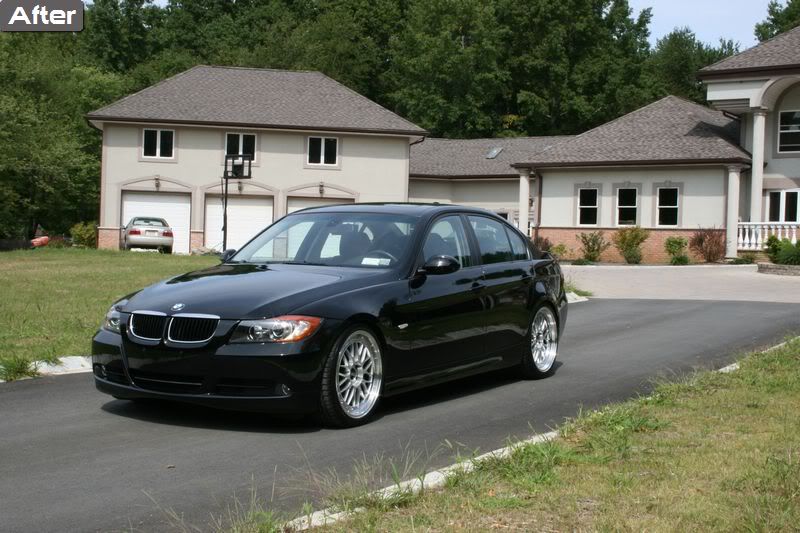
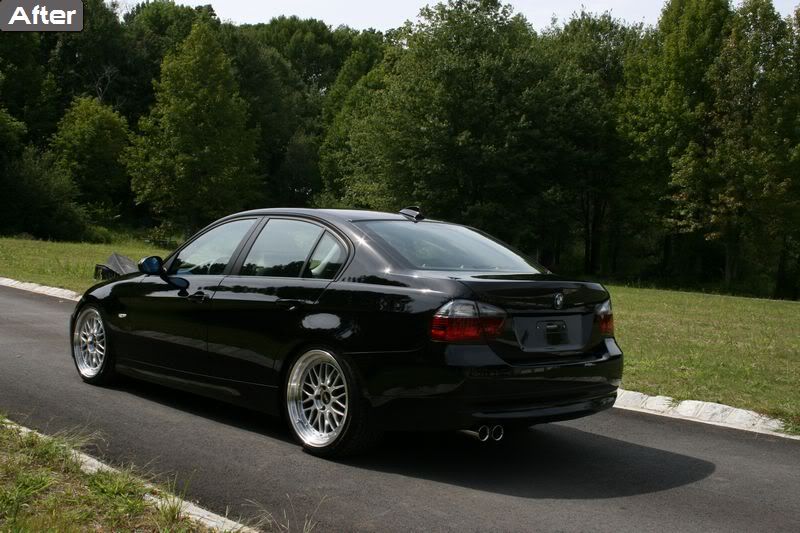
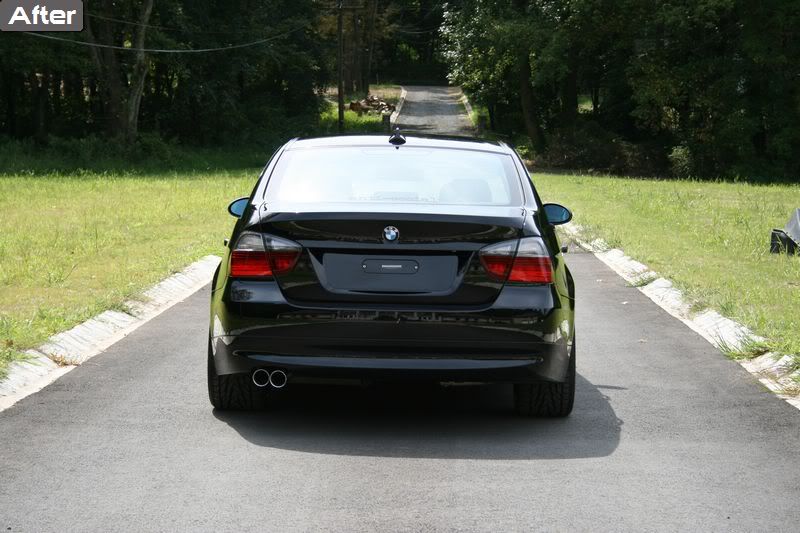
So after a couple weeks, I finally got around to going through and resizing all the pictures that I took during the detail. I enjoyed working on this car as I was not rushed for time and was able to work on it throughout the labor day weekend. Anyway, I hope you guys enjoy the write up.
Exterior:
Citrus Wash and Clear
CG Fine Clay
Megs ASD
Collinite 885
Optimum Car Wax on jambs and on top of Collinite
Optimum Instant Detailer for added slickness
Polishing:
Makita Rotary
Meguiar's M105 With Orange Pad
Meguiar's M205 with White Pad
Meguiar's M205 with Black/Gray Pad
Wheels:
CG Sticky Wheel Gel (Great Alternative to p21s)
Simple Green to clean tires
Optimum Car Wax
AA Tire Dressing
Exhaust Tips:
Optimum Metal Polish and 000 Ultra Fine Steel Wool
Let's take a look at what I was working with when Mike dropped his car off. I could tell it was very well kept and regularly washed, as it was fairly clean and looked pretty good without any direct sunlight. Under the sun and halogen lights though, all the swirls could be very clearly seen.
I first started off by giving the car a wash. As with any wash I began with the wheels. After first rinsing off as much dirt and grime as I could, I sprayed the wheels down with some CG Sticky Wheel Gel which seemed to melt away the brake dust and grime before I even touched the wheels.
After letting the cleaner dwell, I agitated the wheels with a EZ Detail Brush which makes multi-spoke wheels like these a breeze.
Following this I cleaned the face of the wheels with a dedicated grout sponge, and scrubbed the tires clean with some Meguiars APC at a 4:1 ratio and a nylon brush. I did this for each wheel and rinsed them after before proceeding to the paint.
After the wheels, the engine was next. I popped the hood open and sprayed the engine compartment down with 4:1 Megs APC after giving it a rinse. I agitated with the EZ detail brush making sure all dirt and grime was gone.
Whenever I am going to be polishing I want to ensure any existent LSP is taken off the paint, so my wash of choice for this purpose is Chemical Guys Citrus Wash and Clear which will strip any protection at normal dillution.
I then proceeded to wash the vehicle using a 2 bucket method starting from the roof and working my way down. In addition, I like to use a seperate wash media for the lower panels than the upper panels. I like to use two different colored buckets to make it much easier to distinguish which is the wash and which is the rinse bucket.
When doing the side panels, I recommend using an up and down motion, especially when doing regular washes in between polishing, because it makes any potential wash marring less noticeable.
As I go along I make sure to rinse off the suds to prevent spotting from the soap. Once the vehicle is washed I use the sheeting method to get as much water off the car as possible.
Now it is time to dry the car. For this purpose, I take out my Optimum Instant Detailer, and spray once on the panel I am drying, and follow up with a waffle weave towel. This provides a slicker surface for the towel to glide across, reducing the chance of any marring.
Once the car is dry it's time to pull the car in and clay the paint. Detailed Image Clay with ONR as lube is what I prefer to use.
Following the claying, I dry the car off of any left over clay lube, and proceed to tape up all trim that might be damaged by the polisher.
Once this is complete, I proceed to tape off an area that I will use to test different pad and polish/compound combination until I am happy with a result.
Here is an area taped off:
And the result after:
While halogens and camera flashes can show swirls very well, it is best to wipe the surface down with alcohol and pull outside if possible to ensure no machine holograms are left:
Now that I had my process down, I could proceed with completing the rest of the car step by step, sometimes hitting certain areas with multiple passes of the same pad/polish combo to ensure defect removal.
This is a great shot that shows how 1 step of M105 and an orange pad cleared up the deep swirls, only leaving minor swirls from the aggressive polishing combo that would be cleaned up with M205 later on.
When polishing areas such as the trunk, I like to prop it up to prevent accidental paint burning on the bumper. My camera tripod works perfect for this purpose.
Here I am breaking down the M205 which was the next step after M105.
After each step, I like to do an ONR wash which will remove polishing dust and prep the surface for the next polishing step.


")