Mini Cooper S detail with Rasky

Phishy4

New member
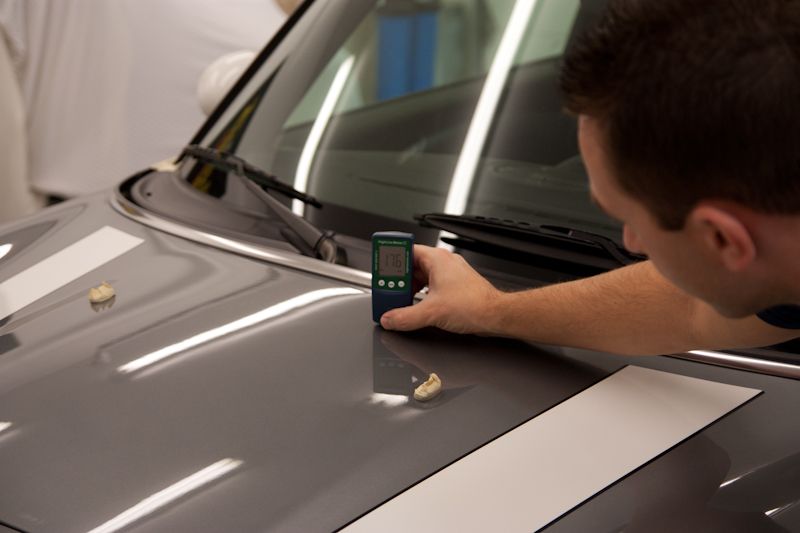
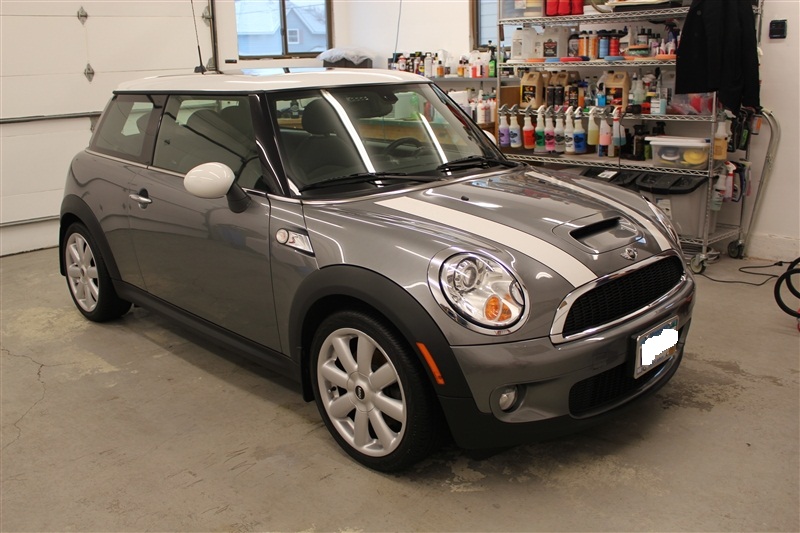
Rasky and I teamed up again for this job, a Mini Cooper S that was in decent shape but definitely in need of some help. It was a basic 1 step/protect but we wound up doing some extra decon and polishing steps to make it really pop and send it out the door in a manner that was satisfactory to both of us. Once again, like with all light color metallics we had some issues getting the paint condition to translate to pictures well (we tried 2 different DSLRs, 3 different lenses, multiple exposure settings, etc). The silver/gray metallic paint was very hard, very contaminated and good at hiding defects, which made having 2 sets of eyes a very good thing. The process was:


- Wash w/ONR

- Tar-x and Iron-x on various body panels

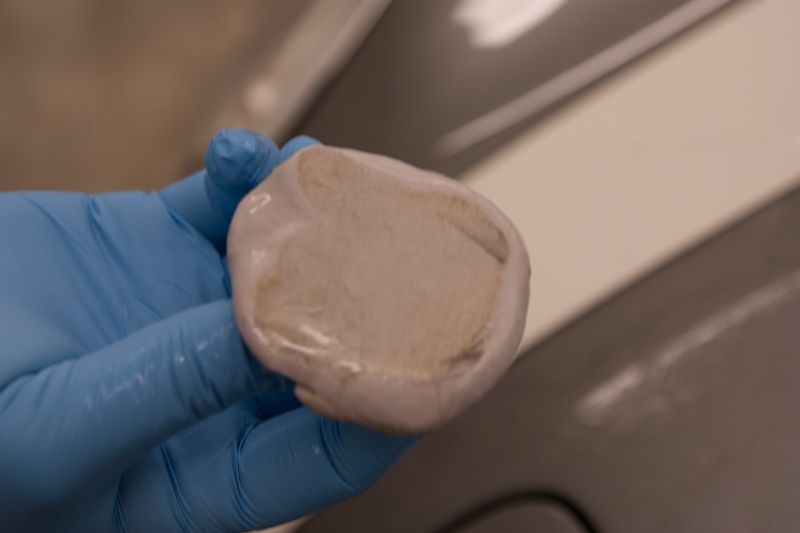
- Clayed with Blackfire Poly Clay and Griots Speedshine as lube

- D300 on a MF Cutting disc via GGDA

- Blackfire to seal, Opti-Guard on plastic trim

- Wheels got everything under the sun (more later in write up)

- Stainless Trim cleaned w/Optimum Metal Polish

- Chrome Cleaned with Mothers Chrome Polish (love this stuff)

- Tires dressed w/Megs Hyper @ 4:1

- Interior vacuumed and wiped down with Megs QID


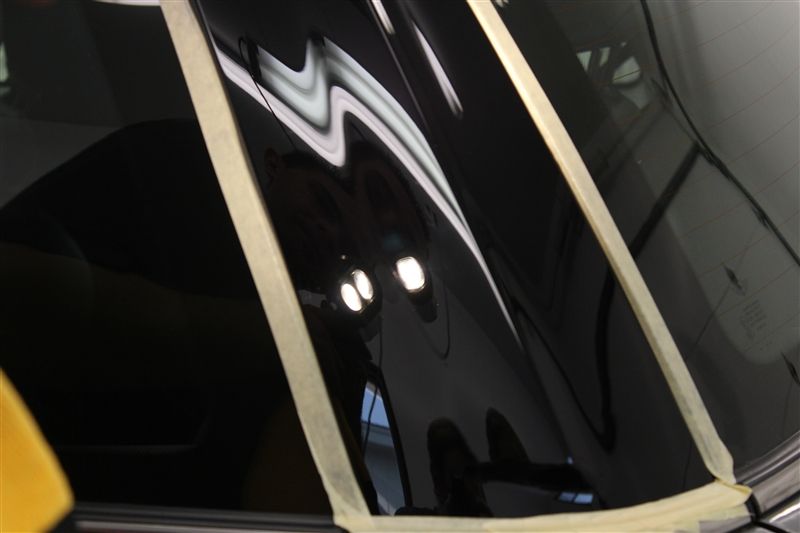
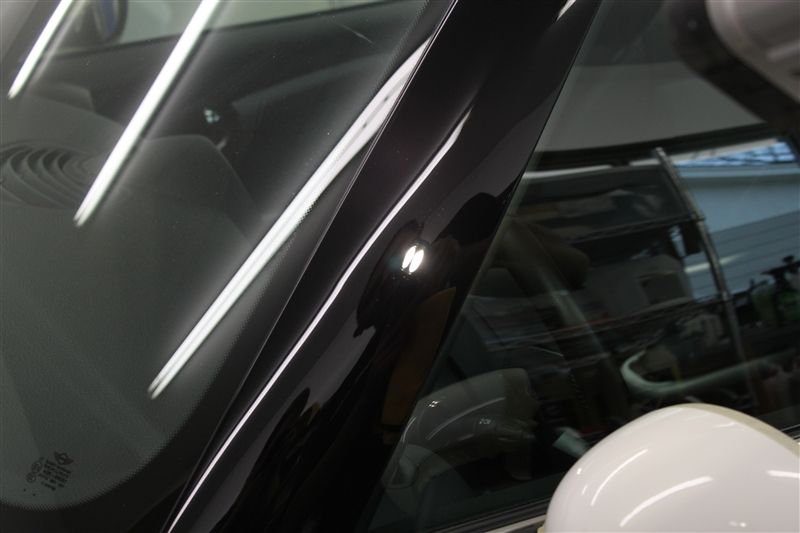
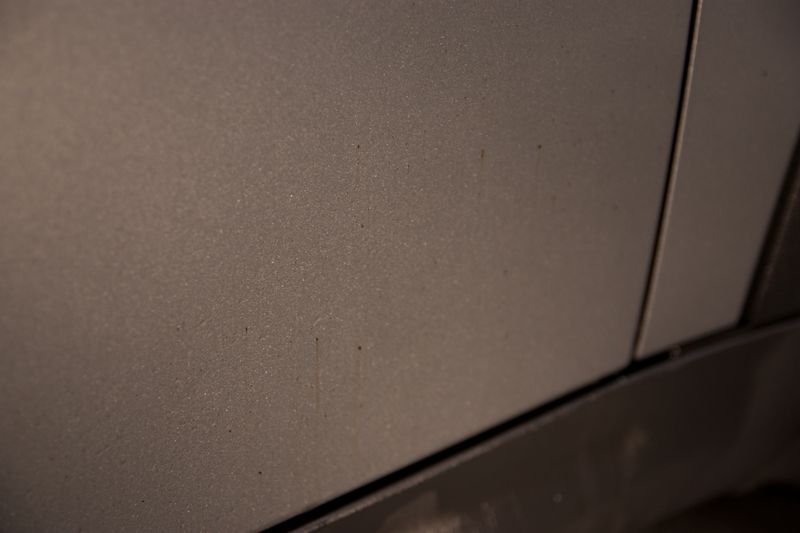
On to the pics. Like I said, we had a very hard time capturing the condition before, but the trim panels and stripes here give a pretty good indication what we were faced with.

resized_IMG_6982.JPG


resized_IMG_6926.JPG


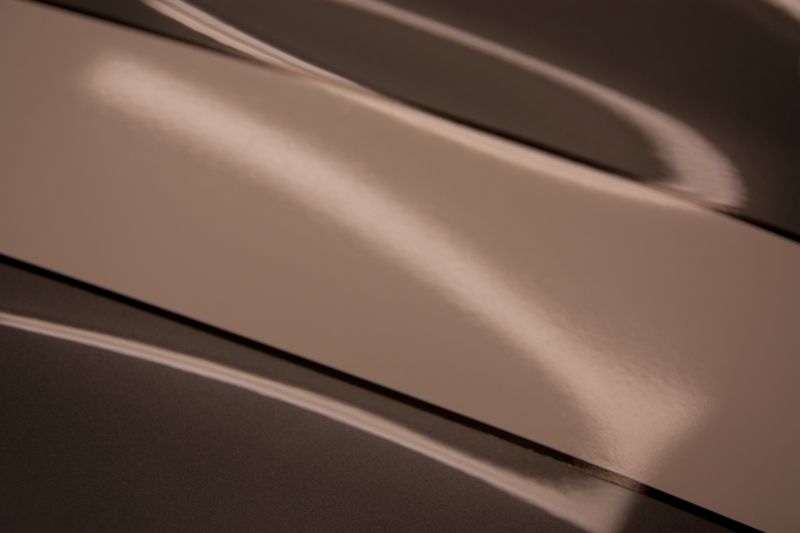
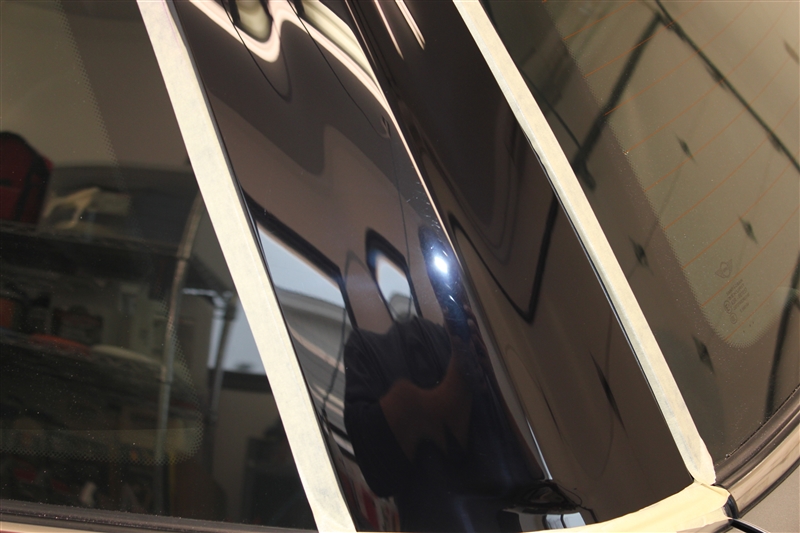
Crop of paint attempting to show swirls.

20120114-_MG_6363.jpg


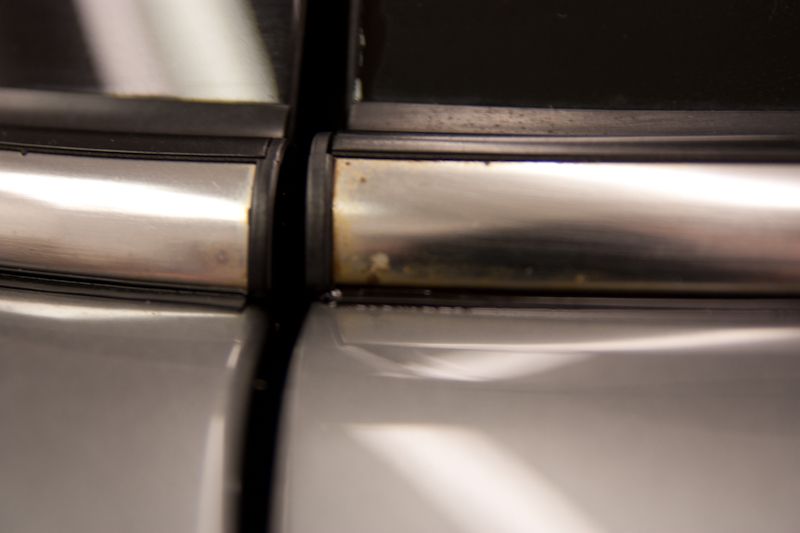
Stainless trim before:

20120113-_MG_6360.jpg


resized_IMG_0507.JPG


After Optimum Metal

resized_IMG_0508.JPG


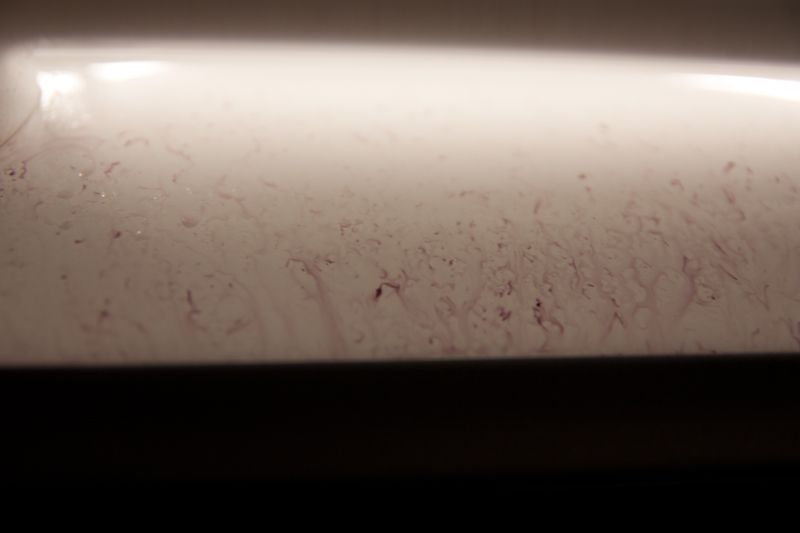
Iron X Working away on the white roof:

20120113-_MG_6357.jpg


Tar-X having it's way with the lower panels:

20120113-_MG_6349.jpg


Clay after 1/2 a panel:

20120113-_MG_6337.jpg


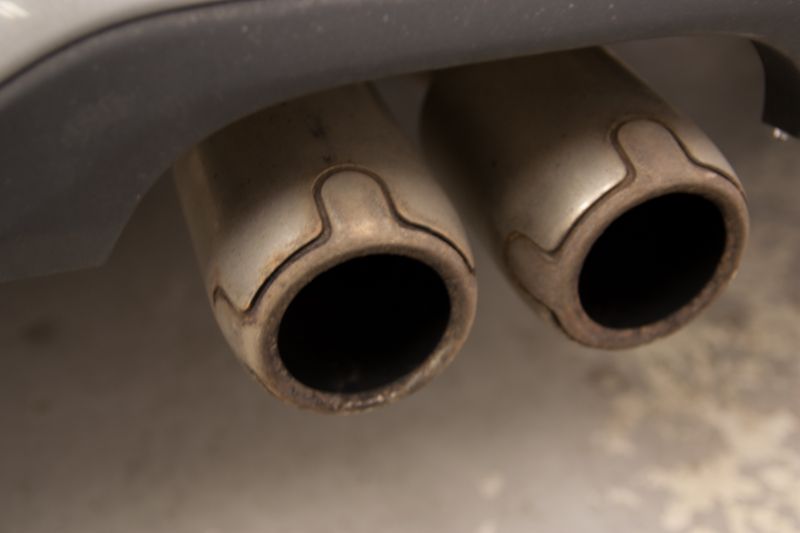
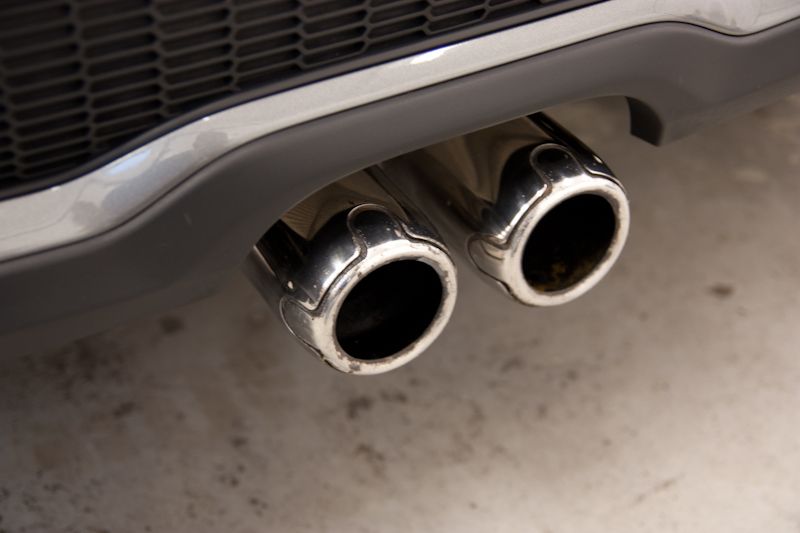
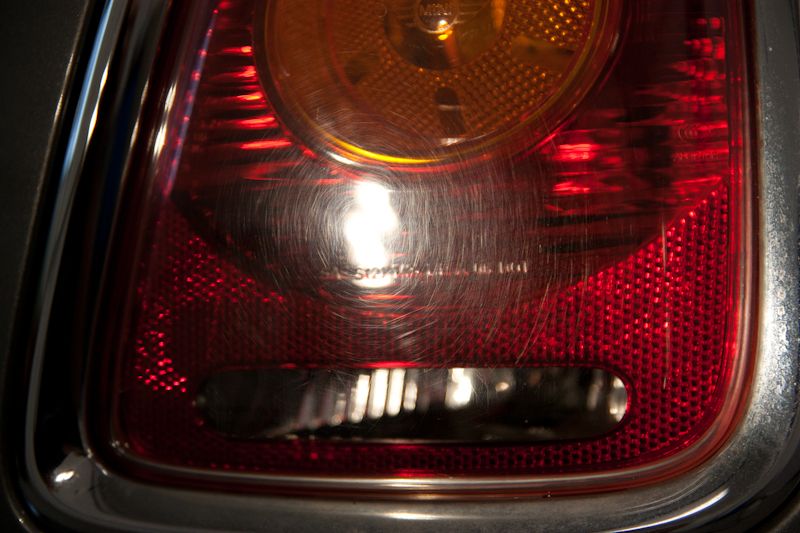
Thrashed tips before:

20120113-_MG_6327.jpg


After a lot of elbow grease, Optimum Metal and 0000 steel wool:

20120114-_MG_6386.jpg


All chrome polished with Mothers Chrome Polish

20120113-_MG_6325.jpg


20120114-_MG_6388.jpg


resized_IMG_7018.JPG


resized_IMG_7023.JPG


resized_IMG_7030.JPG


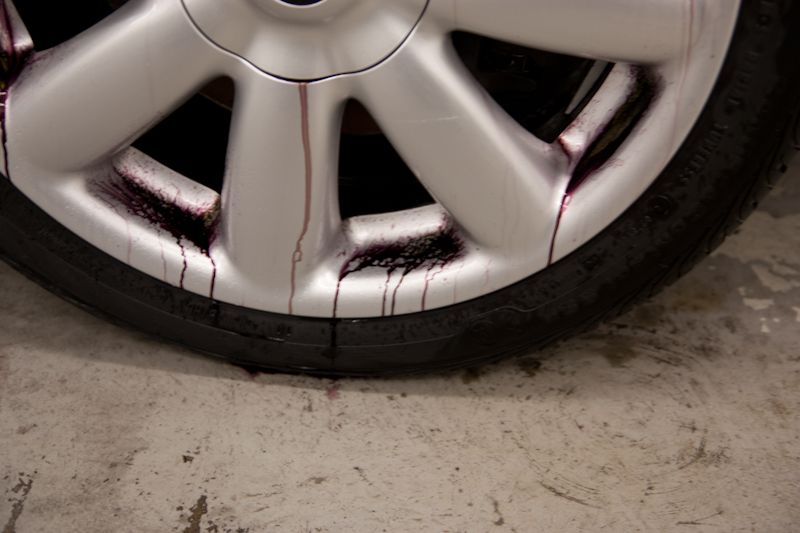
The wheels had the worst brake dust contamination/build up/etching I've ever seen. This is after a Round with Sonax Full Effect (barely touched it)

resized_IMG_0503.JPG


Meg's Wheel Brightener helped considerably:

resized_IMG_0504.JPG


Decided to see if straight Iron-X would even do anything after all that, and the answer was yes it would:

20120113-_MG_6346.jpg


20120113-_MG_6352.jpg


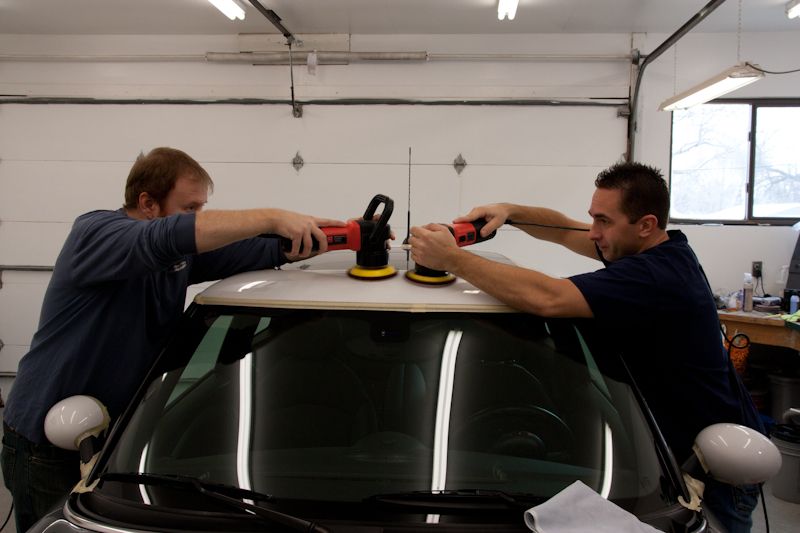
Decontamination complete (or as complete as it was going to get); now time to do some correction............
 
Paint Measured Healthy on all panels:

20120114-_MG_6372.jpg


It's fine as long as the buffers don't touch.......right?

20120114-_MG_6368.jpg


D300/MF doing its job effectively:

resized_IMG_6951.JPG


resized_IMG_6976.JPG


3" Mirka plate and MF pad for the tight spots

resized_IMG_6957.JPG


Trim pieces before and after D300 (they got a final polish with Menz 106 as well, just for reference):

resized_IMG_6994.JPG


resized_IMG_6995.JPG


resized_IMG_6997.JPG


resized_IMG_6999.JPG


Taillights before and after:

20120114-_MG_6375.jpg


resized_IMG_7016.JPG


Rasky Opti-Guarding the wheel arch trim:

resized_IMG_7036.JPG


Wrapped up, sealed and ready to deliver:

resized_IMG_7046.JPG


resized_IMG_7057.JPG


resized_IMG_7044.JPG


resized_IMG_7056.JPG


resized_IMG_7061.JPG


Chad says "Thanks for looking!"

resized_IMG_7038.JPG
 
Great job, guys.


Those wheels were awful. You said you wanted to see if "straight iron-x" would work... do you usually dilute iron-x?
 
Awesome thread! You guys are funny! Nice detail!


PS: I am usually wrong but I found if I turn all lights off and take pictures with the flash or a flashlight, the swirls will show.
 
someidiot said:
Great job, guys.


Those wheels were awful. You said you wanted to see if "straight iron-x" would work... do you usually dilute iron-x?


Thanks! No, it's supposed to be used undiluted, I think he meant we just wanted to see what it would do on it's own after Sonax and Wheel Brightner. ;)


thomasdekany said:
Awesome thread! You guys are funny! Nice detail!


PS: I am usually wrong but I found if I turn all lights off and take pictures with the flash or a flashlight, the swirls will show.


Thanks Thomas, we'll give that a try next time. The ambient light from the windows may have made it harder too.


I also really enjoy working with Justin as we keep each other focused and motivated....some occasional joking around makes for a fun day too. ;)
 
RaskyR1 said:
I also really enjoy working with Justin as we keep each other focused and motivated....some occasional joking around makes for a fun day too. ;)


Nice work! It is way more fun doing jobs with other people. Rick and I spend more time laughing than we do working some days.
 
thomasdekany said:
Awesome thread! You guys are funny! Nice detail!


PS: I am usually wrong but I found if I turn all lights off and take pictures with the flash or a flashlight, the swirls will show.


That's a great idea. I've done that in the past to evaluate cars (kill all the lights and just use a halogen or brinkman to see swirls better), for some reason it never even occurred to me to try that with a camera.
 
Gotta support the Click & Brags... :grouphug:


A compact & tidy write-up, good job on this one.

It must be fun to work with as a team.

A bit stressful wondering if the other guy is doing things "right", but it all works out somehow.


Perhaps on your next rust removal you can spray a little wheel acid onto the bristles of a toothbrush, horse hair brush, or paint brush, and agitate the license plate & bolts. Then use M105 or metal polish. Same for the exhaust.


Very good! :cheer2:
 
Thanks guys!


Kevin Brown said:
Gotta support the Click & Brags... :grouphug:


A compact & tidy write-up, good job on this one.

It must be fun to work with as a team.

A bit stressful wondering if the other guy is doing things "right", but it all works out somehow.


Perhaps on your next rust removal you can spray a little wheel acid onto the bristles of a toothbrush, horse hair brush, or paint brush, and agitate the license plate & bolts. Then use M105 or metal polish. Same for the exhaust.


Very good! :cheer2:


Thanks Kevin!


We did spray on some Car Brite wire wheel cleaner but the plating was already gone and we decided at that point we had already invested enough time into making them look better. ;)


Sent from my iPhone using Tapatalk
 
RaskyR1 said:
Thanks guys!


Thanks Kevin!


We did spray on some Car Brite wire wheel cleaner but the plating was already gone and we decided at that point we had already invested enough time into making them look better.


:redface1:​
 
Kevin Brown said:
:redface1:​


Lol. To be fair it wasn't listed in the process...that stuff has sat on the shelf untouched for years too! Justin says he loves the smell of that product! :b


Sent from my iPhone using Tapatalk
 
Not a Mini fan as I would look like 10 pounds of sh!t in a 5 pound bucket, but if I could lose 50 - 60 pounds, I'd love that car! After ya'll detailed it of course!
 
Nice job you two. I agree about the nice change of pace to work as a team. Especially if you can bounce ideas off of each other. Looks like you all make a nice duo.


Just curious, I did a Mini not too long ago where the body color paint under the hood would literally wipe off with a rag if sprayed with Meg's Super Degreaser (my usual engine cleaner). Did you notice anything similar on this one? I didn't see where you did any engine cleaning but just thought I'd ask. I was so HUGELY suprised by the paint coming off like it was a water color paint. Thought maybe by some fluke it was a common Mini problem? I've never seen any other car do that.
 
JuneBug said:
Not a Mini fan as I would look like 10 pounds of sh!t in a 5 pound bucket, but if I could lose 50 - 60 pounds, I'd love that car! After ya'll detailed it of course!


LOL! Thanks JuneBug!


michakaveli said:
Great job guys! :rockon:


Thanks Chris


VR8 said:
Nice job you two. I agree about the nice change of pace to work as a team. Especially if you can bounce ideas off of each other. Looks like you all make a nice duo.


Just curious, I did a Mini not too long ago where the body color paint under the hood would literally wipe off with a rag if sprayed with Meg's Super Degreaser (my usual engine cleaner). Did you notice anything similar on this one? I didn't see where you did any engine cleaning but just thought I'd ask. I was so HUGELY suprised by the paint coming off like it was a water color paint. Thought maybe by some fluke it was a common Mini problem? I've never seen any other car do that.


Thanks John!


We didn't do anything with the engine bay on this one. I had the hood up in order to coat the plastic trim but other than that it was left untouched (though it needed a cleaning!)


I wonder if it had over spray on it or maybe no clear coat? It does seem odd...if I do another I'll be sure to check on it. ;)
 
I should add that we actually went over the black trim with 2 steps. I think the pics above were after D300. The ones below are after 106fa with tangerine LC pads. Some deeper scratched remained, especially close to the edge, but still a huge improvement.

resized_IMG_7008.jpg


resized_IMG_7005.jpg


Also, here is the after pic on that one white stripe which was etched/stained and it even looked like the material itself was failing. Not 100% but a big improvement.

20120114-_MG_6379.jpg
 
Back
Top