Hey everyone! Some of the newer members may not recognize my name and other previously existing members may not remember me. It might be due to the fact that I haven't posted a Click & Brag since April 8, 2010! 
Why, might you ask? I've been busy, with the journey of life, and adapting to big changes that happen along the path. I lost someone very dear to me, started studying to get into grad school, took a full-time job in a pharmaceautical company, and began grad school. Nonetheless, I still detailed here and there but definitely fell off the map for quite some time and my business suffered heavily as a result. I quit my job in the pharma company after 1.5 years, and got back into being my own boss. B)
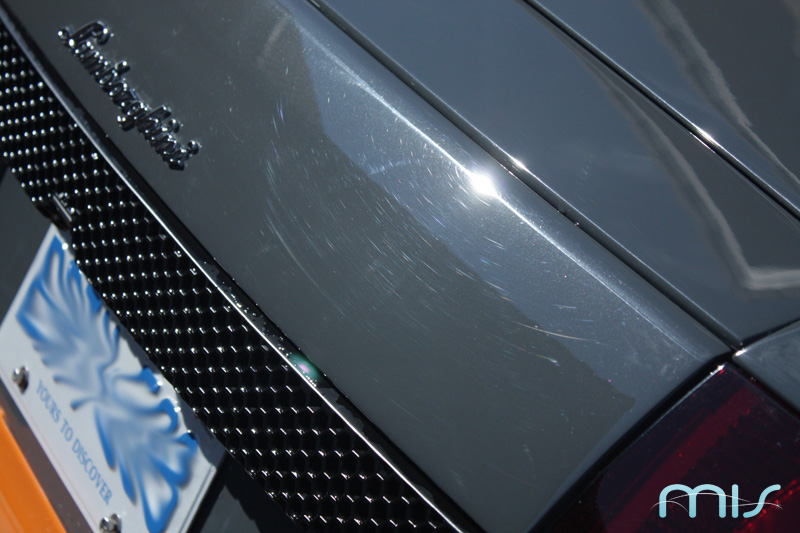
So I figured what better way to make a 'return' than with a truly epic car - a Lamborghini. And not just any Lamborghini, the 25th of 50, LP650-4. The car itself was pretty trashed! Buffer trails, deep swirls, some scratches, wax residue, etc. Let's get into a walk around of the car, shall we?
I showed up and pulled the car out of the garage. What a pain to get this thing started. It seems that if you don't do things at just the right time, the car does not start and the alarm goes off. 5 minutes later, the car is outside.


So, you're probably thinking "how the heck does a brand new car get delivered with that much damage? Here's a story for you in coles notes form: Owner bought the car, decided he did not want it, and had to go through legal proceedings against dealer. Car sat in showroom for quite some time (I believe over a year). Car is 'detailed' prior to delivery, and you have a free DIS add on - dealer-installed swirls.
So I proceeded to wash the car. But wait a minute! Where's the top? Some improvisation was required. I ONR'd the top half of the car, and hand washed the lower half. As a precaution, I placed a sheet over the entire interior to absorb any tiny water droplets that may find themselves inside. I followed the hand wash with a treatment of IronX. Two IPA wipedowns were carried out after bringing the car indoors.
Let's have a closer look now, shall we?


^Hey look, no burned trim! :lol:


<span style="font-family:times;">Correction:
These cars are known for having hard paint, this being no exception. I was actually surprised at how hard it really was. However, these defects were quite deep. My goal with this car was to obviously achieve as close to 100% correction as possible, but minimize the amount of polishing steps. Happy to report that two was needed, but many passes of compounding took place with Megs 105 on the Rupes 21 utilizing Meguiar's MF finishing pads. The amount of RIDS (random isolated deep scratches) were mind blowing. I think in total, I made at least 4 heavy passes with M105. So much so that over the course of the 3 days I worked on this vehicle, I had to rewash my MF pads!
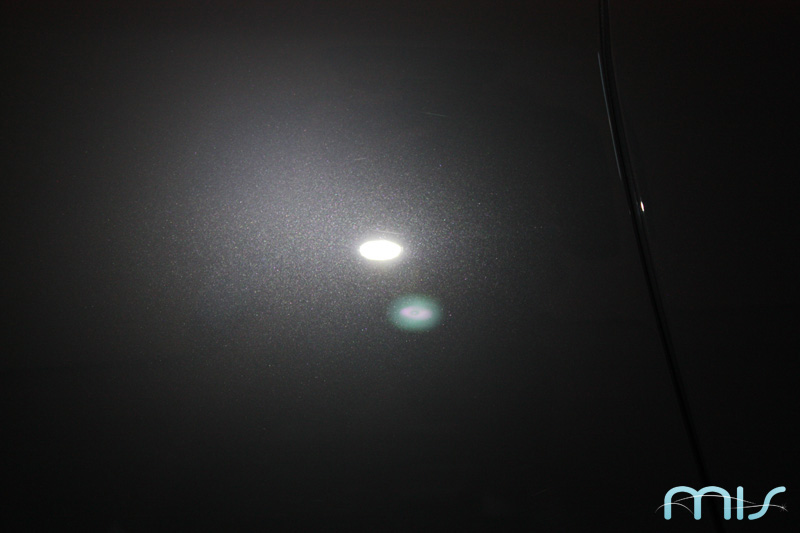
A couple of photos after doing some testing to see what cutting step to go with. M105 finished down well enough, with just a slight haze remaining.


So, myself, Brinkmann, and Rupes continued around the car on a seek and destroy mission.h34r:
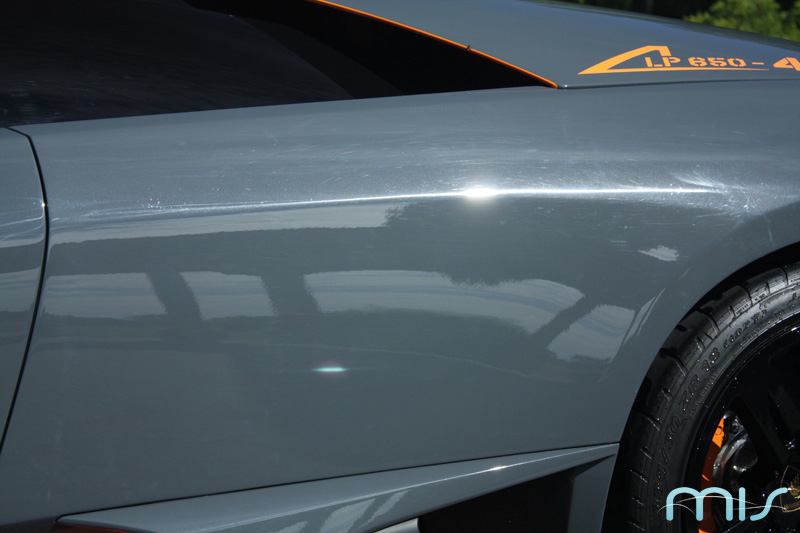
Driver and passenger sides had quite a bit of damage, especially on the edges. I used caution and very light passes to cut through the damage, while doing my best to ensure that a line of haze did not remain along the edge. Each edge has to reflect as clear as flat panels!
Passenger side door:


Passenger side quarter panel:

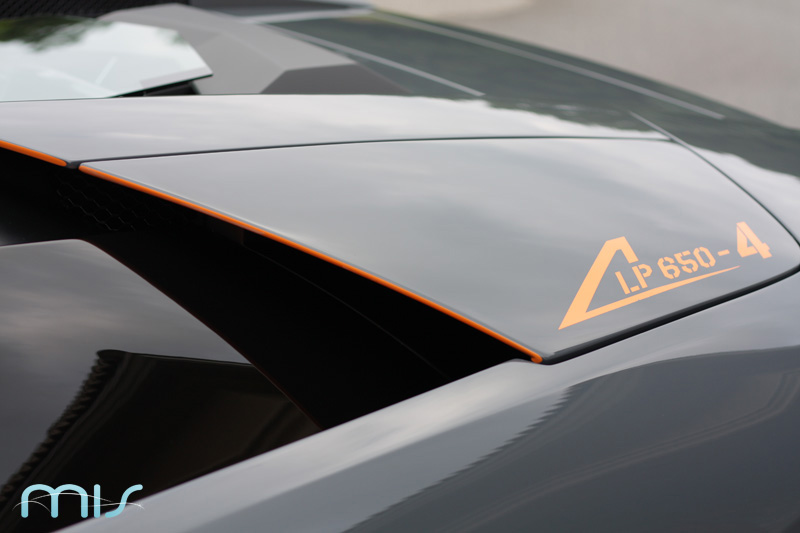
Rear 'deck'


Driver side QP:


Finally, I moved on to compound the last part of the passenger door, and followed up with FG400 on a white LC pad. On this hard paint, FG400 worked perfectly to remove the M105 micromarring, and leave a beautiful finish behind. Here's a before and after of M105+FG400


Things were getting a little messy! :lol:

Moving on to the back of the car, I had some more intricate work to do with regards to the tight areas. Nonetheless, patience, skill, and some carefully executed planning worked well.


Continued on next post...
Why, might you ask? I've been busy, with the journey of life, and adapting to big changes that happen along the path. I lost someone very dear to me, started studying to get into grad school, took a full-time job in a pharmaceautical company, and began grad school. Nonetheless, I still detailed here and there but definitely fell off the map for quite some time and my business suffered heavily as a result. I quit my job in the pharma company after 1.5 years, and got back into being my own boss. B)
So I figured what better way to make a 'return' than with a truly epic car - a Lamborghini. And not just any Lamborghini, the 25th of 50, LP650-4. The car itself was pretty trashed! Buffer trails, deep swirls, some scratches, wax residue, etc. Let's get into a walk around of the car, shall we?
I showed up and pulled the car out of the garage. What a pain to get this thing started. It seems that if you don't do things at just the right time, the car does not start and the alarm goes off. 5 minutes later, the car is outside.
So, you're probably thinking "how the heck does a brand new car get delivered with that much damage? Here's a story for you in coles notes form: Owner bought the car, decided he did not want it, and had to go through legal proceedings against dealer. Car sat in showroom for quite some time (I believe over a year). Car is 'detailed' prior to delivery, and you have a free DIS add on - dealer-installed swirls.
So I proceeded to wash the car. But wait a minute! Where's the top? Some improvisation was required. I ONR'd the top half of the car, and hand washed the lower half. As a precaution, I placed a sheet over the entire interior to absorb any tiny water droplets that may find themselves inside. I followed the hand wash with a treatment of IronX. Two IPA wipedowns were carried out after bringing the car indoors.
Let's have a closer look now, shall we?
^Hey look, no burned trim! :lol:
<span style="font-family:times;">Correction:
These cars are known for having hard paint, this being no exception. I was actually surprised at how hard it really was. However, these defects were quite deep. My goal with this car was to obviously achieve as close to 100% correction as possible, but minimize the amount of polishing steps. Happy to report that two was needed, but many passes of compounding took place with Megs 105 on the Rupes 21 utilizing Meguiar's MF finishing pads. The amount of RIDS (random isolated deep scratches) were mind blowing. I think in total, I made at least 4 heavy passes with M105. So much so that over the course of the 3 days I worked on this vehicle, I had to rewash my MF pads!
A couple of photos after doing some testing to see what cutting step to go with. M105 finished down well enough, with just a slight haze remaining.
So, myself, Brinkmann, and Rupes continued around the car on a seek and destroy mission.
h34r:Driver and passenger sides had quite a bit of damage, especially on the edges. I used caution and very light passes to cut through the damage, while doing my best to ensure that a line of haze did not remain along the edge. Each edge has to reflect as clear as flat panels!
Passenger side door:
Passenger side quarter panel:
Rear 'deck'
Driver side QP:
Finally, I moved on to compound the last part of the passenger door, and followed up with FG400 on a white LC pad. On this hard paint, FG400 worked perfectly to remove the M105 micromarring, and leave a beautiful finish behind. Here's a before and after of M105+FG400
Things were getting a little messy! :lol:
Moving on to the back of the car, I had some more intricate work to do with regards to the tight areas. Nonetheless, patience, skill, and some carefully executed planning worked well.
Continued on next post...


 I was pretty down that the sun was not out during the after pics. I kept saying to myself "This car would look amazing in the sun!" But...I got a lovely surprise near the end that made me VERY happy.


")
")