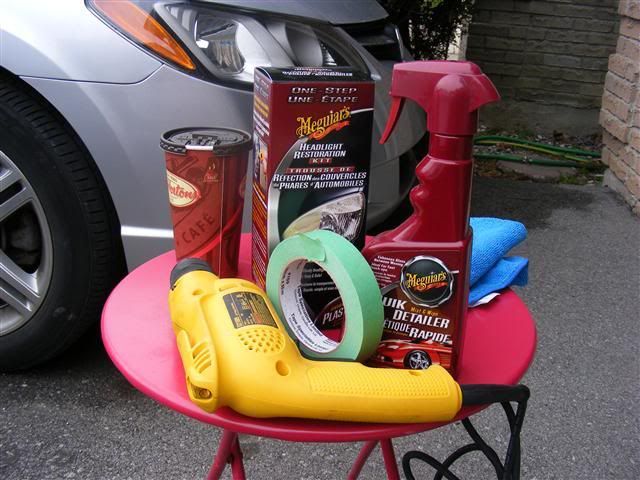
Polishing my headlights has been something I have wanted to do for quite a while. Typically, you would wet-sand them with progressively finer sandpaper in order to remove the oxidized/scratched layers of plastic. What held me back from the wet-sanding method was my lack of a random orbital (RO) polisher. One of these is a MUST if you are going to be doing the wet-sanding method as you will need to high-speed compound the headlights to restore their clarity as the wet-sanding method will leave them totally opaque. The good quality Porter Cable or Makita RO polishers retail for over $200 and can be very dangerous in untrained hands. What I liked about the do-it-yourself kits was that they include a drill attachment which turns any drill into a small polisher. Even though my headlights were not totally hazed (like a cataract), I figured I’d be able to at least improve their clarity slightly. 3M and Megiuar’s are the most popular kits on the market. The kit I chose was the Meguiar’s “Headlight Restoration Kit” which I found at Walmart for $20. This kit has been on the Canadian market for over a year and I have had great results with Meg’s products in the past. The kit is satisfaction guaranteed but at $20, you really don’t have much to lose. If you have severely oxidized or hazed headlights you may need to buy the 3M kit which contains sanding disks and compounding polish. For my headlight polishing needs, the Megiuar’s kit was worth a try.
Prior to beginning, I assembled all the materials I would need for the job. You really only need to supply a drill in order to use the kit but I added a few extras as seen below.
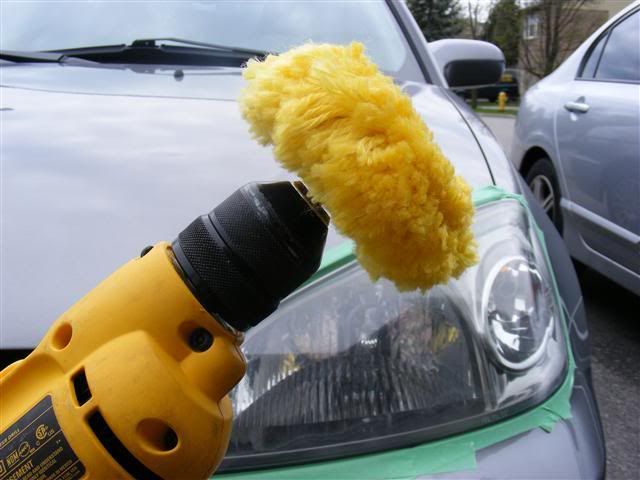
I highly suggest you clean the lights with some sort of quick detailer or at least soap/water prior to polishing them. This helps to remove any surface contamination such as dirt which will get caught in the buffing pad and cause further damage to the lights. I used some of my favourite quick detailer and a clean microfiber cloth. The kit also suggests masking off the paint surrounding the lights using masking or painter’s tape. Doing this helps keep the PlastX polish off the paint and keeps the buffing pad from burning the paint should it contact it during the polishing procedure. Having the tape in place will allow you to get right to the edge of the lights without worrying about damaging the painted surface of the car. Megiuar’s recommends that PlastX not be allowed to remain in prolonged contact with paint. I used painter's tape since I found it more workable. The easiest way to apply it is to slide it between the light housing and the hood/bumper like you are flossing your teeth. If done properly, there should be no tape on the plastic housing itself and the light should be totally isolated. See my photos for examples.
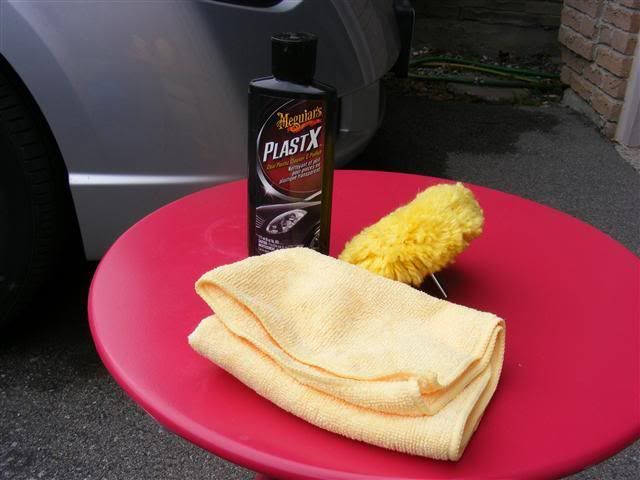
The kit contains a small microfiber towel, a 5 inch buffing pad with drill attachment shank, and a 150 mL bottle of Megiuar’s PlastX polish. The bottle should be enough to do at least 2-3 sets of lights depending on their condition and how many passes you make.
Once the lights were masked off I took some “before” shots for comparison. For some reason, the passenger side headlight was hazier. Keep in mind my headlights were not too bad compared to others I have seen.
Before – Driver’s Side
Before – Driver’s Side Macro
Before – Passenger Side
Before – Passenger Side Macro
With the polishing pad attached to the drill, it was time to begin polishing the lights. I did the driver’s side first. The PlastX is best applied in small drops around the pad. This ensures that the pad is polishing compound is evenly distributed on the pad.
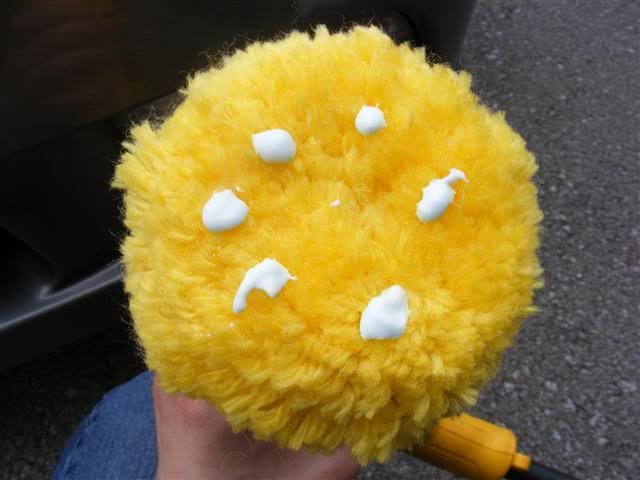
Before starting the drill, spread the material around on the surface of the light. The instructions on the kit say to polish a small area of the light at a time, I went ahead and did one pass of the whole light at once. With the pad contacting the light, start the drill, making sure to keep even pressure on the pad. Move the pad in horizontal motions, back and forth over the surface. Never hold the pad in one spot while polishing. Try to keep the pad rotating at a medium/high speed (I estimate about 1000-1200 RPM). The secret to polishing is the speed at which the pad is spinning. The PlastX compound is mildly abrasive which when combined with the friction generated by the pad against the plastic help to break down the compound and remove the oxidation. Using the drill is the most challenging part of the process as you do not want the pad to skip across the surface but you also do not want to create too much friction which will burn (haze) the plastic. You need to use a firm, but not heavy hand to control the drill so it does not skip. You should be able to feel the pad rotating against the plastic but not being “bogged down” if that makes sense. Remember to try and keep the pad as square to the headlight as possible while polishing.
Below are some of my after photos. You should be able to see that the lenses are now clearer than before. The lighting conditions were not that great (it was overcast) but the results are quite obvious to me when looking at the lights in person. Before I did the polishing I didn’t notice any difficulty while driving at night so I can only assume that there would be no change to the amount of light that is now shining on the road.
After – Driver’s Side
After – Driver’s Side Macro
After – Passenger Side
After Passenger Side Macro
After Passenger Side Macro 2
Front End Shot - After
Front End Shot - After 2
As you can see, there is a definite improvement (especially in the macro shots). My passenger side headlight was the worse of the two with more oxidation and a “ring” at the bottom towards the middle. For the $20 price tag, I feel the kit is definitely worth it even if it didn’t totally restore the headlights to perfect condition. Since the PlastX is not a wax, it was easy to wash out I can use it on other cars (I plan on doing my dad’s headlights as well since he expressed interest in giving the product a try).
Prior to beginning, I assembled all the materials I would need for the job. You really only need to supply a drill in order to use the kit but I added a few extras as seen below.
I highly suggest you clean the lights with some sort of quick detailer or at least soap/water prior to polishing them. This helps to remove any surface contamination such as dirt which will get caught in the buffing pad and cause further damage to the lights. I used some of my favourite quick detailer and a clean microfiber cloth. The kit also suggests masking off the paint surrounding the lights using masking or painter’s tape. Doing this helps keep the PlastX polish off the paint and keeps the buffing pad from burning the paint should it contact it during the polishing procedure. Having the tape in place will allow you to get right to the edge of the lights without worrying about damaging the painted surface of the car. Megiuar’s recommends that PlastX not be allowed to remain in prolonged contact with paint. I used painter's tape since I found it more workable. The easiest way to apply it is to slide it between the light housing and the hood/bumper like you are flossing your teeth. If done properly, there should be no tape on the plastic housing itself and the light should be totally isolated. See my photos for examples.
The kit contains a small microfiber towel, a 5 inch buffing pad with drill attachment shank, and a 150 mL bottle of Megiuar’s PlastX polish. The bottle should be enough to do at least 2-3 sets of lights depending on their condition and how many passes you make.
Once the lights were masked off I took some “before” shots for comparison. For some reason, the passenger side headlight was hazier. Keep in mind my headlights were not too bad compared to others I have seen.
Before – Driver’s Side
Before – Driver’s Side Macro
Before – Passenger Side
Before – Passenger Side Macro
With the polishing pad attached to the drill, it was time to begin polishing the lights. I did the driver’s side first. The PlastX is best applied in small drops around the pad. This ensures that the pad is polishing compound is evenly distributed on the pad.
Before starting the drill, spread the material around on the surface of the light. The instructions on the kit say to polish a small area of the light at a time, I went ahead and did one pass of the whole light at once. With the pad contacting the light, start the drill, making sure to keep even pressure on the pad. Move the pad in horizontal motions, back and forth over the surface. Never hold the pad in one spot while polishing. Try to keep the pad rotating at a medium/high speed (I estimate about 1000-1200 RPM). The secret to polishing is the speed at which the pad is spinning. The PlastX compound is mildly abrasive which when combined with the friction generated by the pad against the plastic help to break down the compound and remove the oxidation. Using the drill is the most challenging part of the process as you do not want the pad to skip across the surface but you also do not want to create too much friction which will burn (haze) the plastic. You need to use a firm, but not heavy hand to control the drill so it does not skip. You should be able to feel the pad rotating against the plastic but not being “bogged down” if that makes sense. Remember to try and keep the pad as square to the headlight as possible while polishing.
Below are some of my after photos. You should be able to see that the lenses are now clearer than before. The lighting conditions were not that great (it was overcast) but the results are quite obvious to me when looking at the lights in person. Before I did the polishing I didn’t notice any difficulty while driving at night so I can only assume that there would be no change to the amount of light that is now shining on the road.
After – Driver’s Side
After – Driver’s Side Macro
After – Passenger Side
After Passenger Side Macro
After Passenger Side Macro 2
Front End Shot - After
Front End Shot - After 2
As you can see, there is a definite improvement (especially in the macro shots). My passenger side headlight was the worse of the two with more oxidation and a “ring” at the bottom towards the middle. For the $20 price tag, I feel the kit is definitely worth it even if it didn’t totally restore the headlights to perfect condition. Since the PlastX is not a wax, it was easy to wash out I can use it on other cars (I plan on doing my dad’s headlights as well since he expressed interest in giving the product a try).