DefiningDetails
New member
2004 Jaguar XJ Vanden Plas
Wow what a gongshow of a detail… Please be sure to read the ‘subsections’ within the photos, or else you will miss the reasons why this Jag was my archnemisis for almost 30 hours… It’s a long read but I really needed to vent…
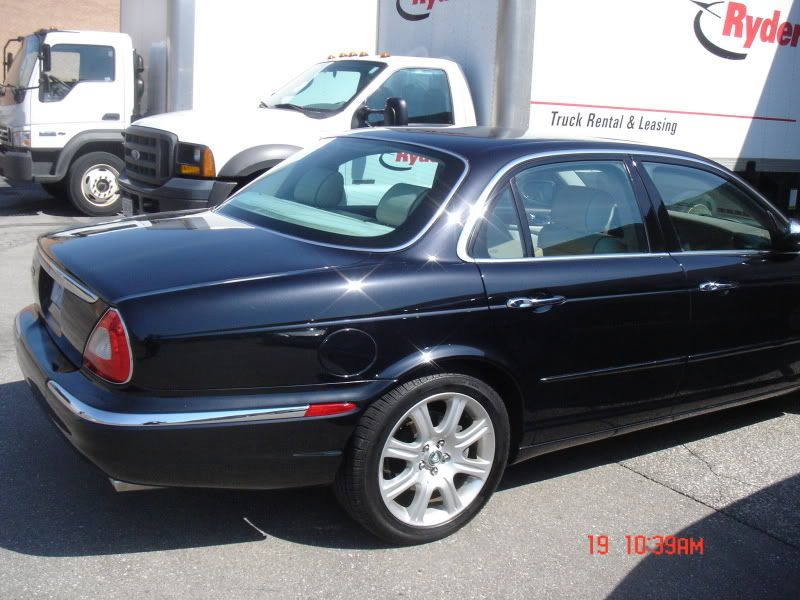
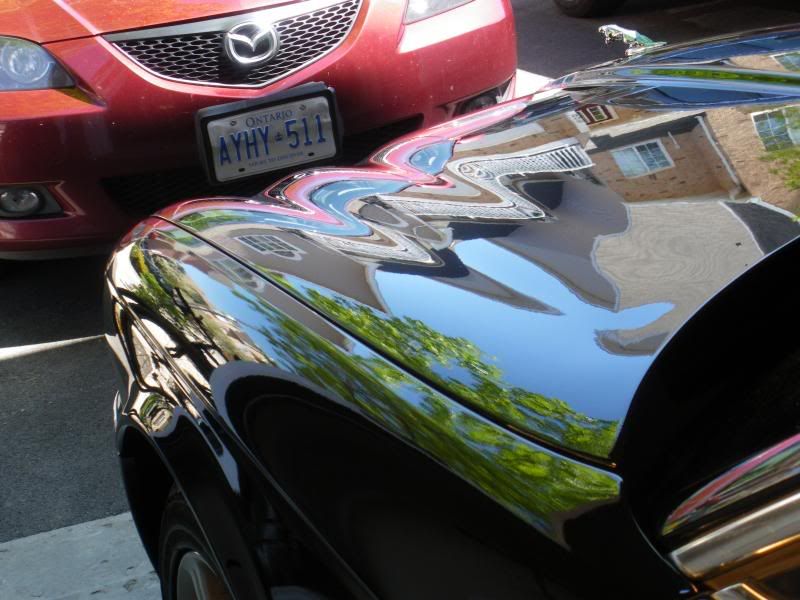
This is the first time the decal I had created for my rear windshield brought me business. The owner of this Jag saw my car in a parking lot, checked the website, and ended up contacting me. I headed out for an inspection of the car, and we agreed upon a 2-step correction; no interior, no wheel cleaning, nothing. Fix the paint, that was my job. There were 2 deep scratches that even wetsanding would not have removed; other than that, the entire car was marred to sh*t but I wasn’t too worried. Now, read back to the part where I said we agreed upon a wham-bam-thank-you-maam 2 step polish lol… let us begin…
Saturday 7am: Compounding. Test spot M105/white. No go… So you want to be a tough guy, eh?, that’s ok… M105/orange with lots o pressure and we were in business! Called it a night at 7pm, cracked a pint and kicked back, the hard part’s done… lay down some finishing polish in the AM and enjoy the rest of the (Canadian) long weekend…
http://i255.photobucket.com/albums/hh135/chstyles/Jaguar
/jag238.jpg
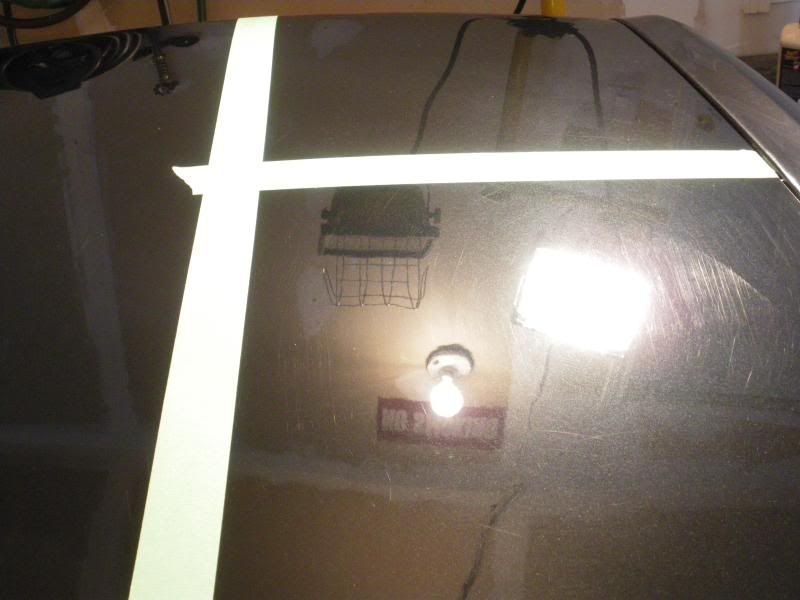
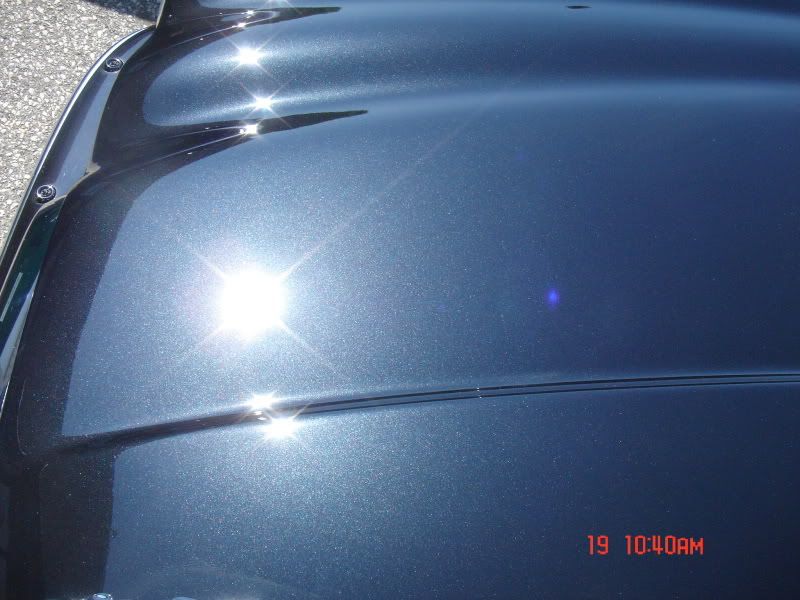
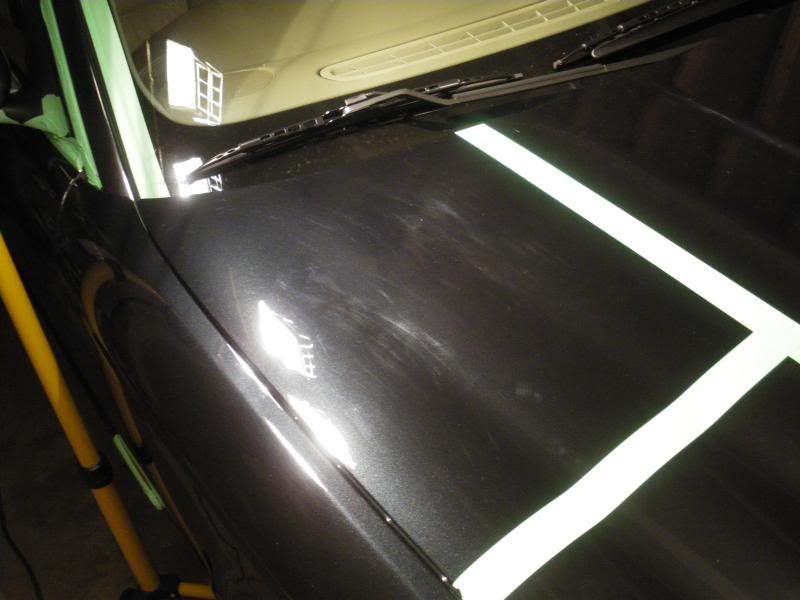
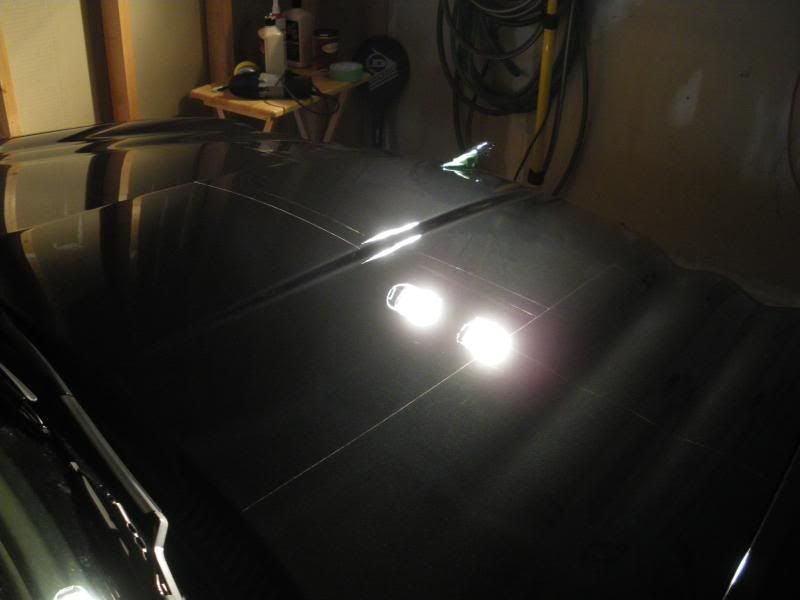
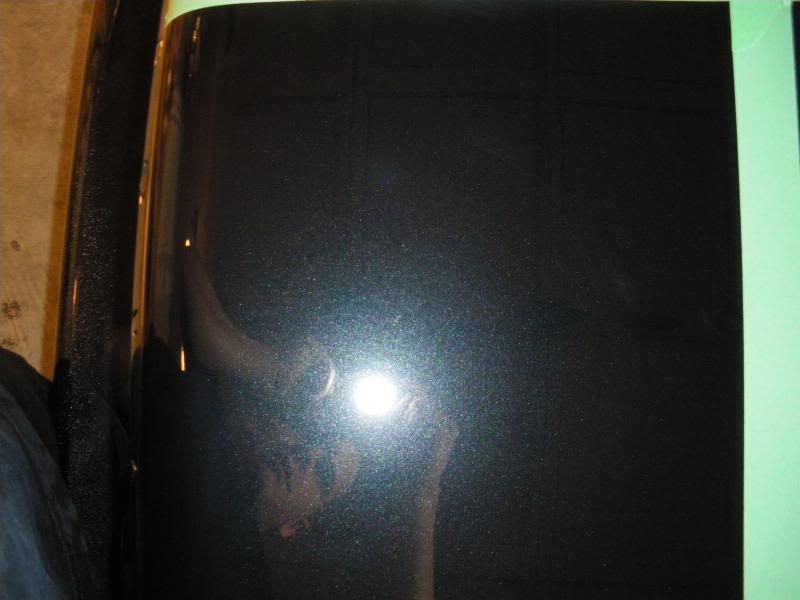
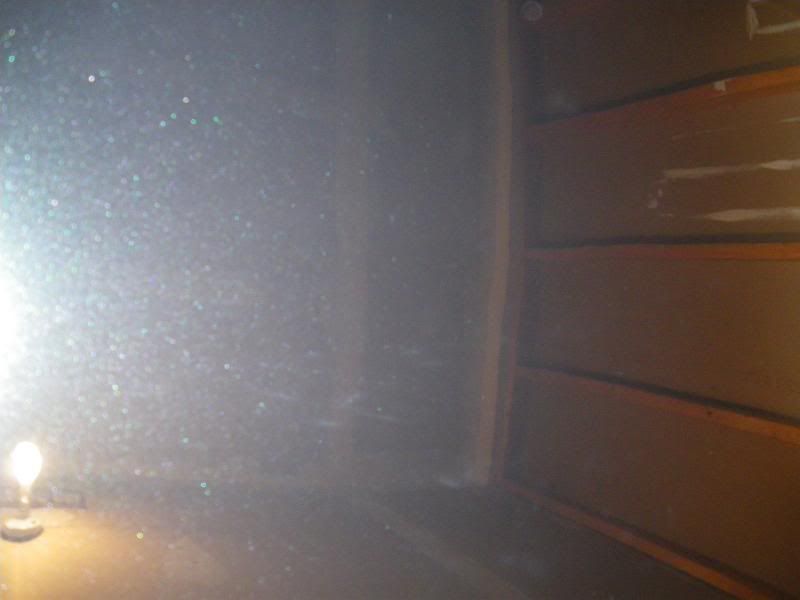
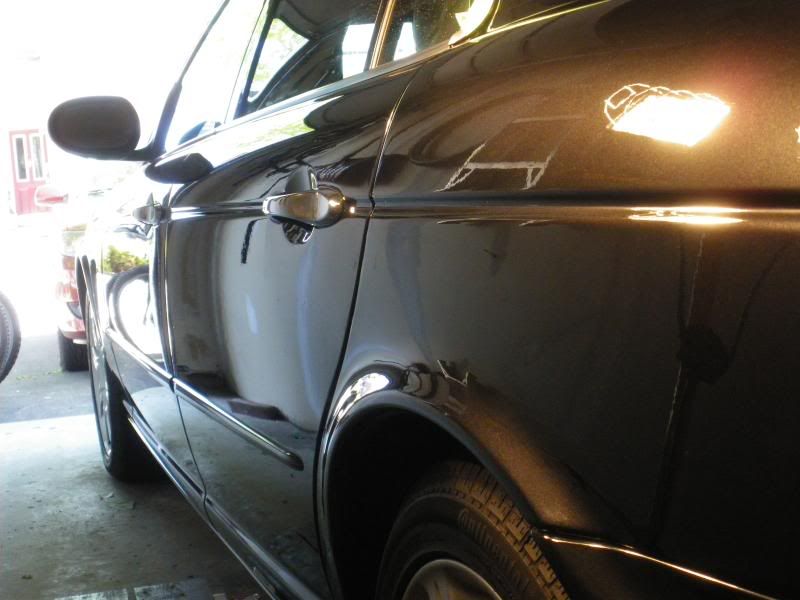
Saturday 7am: So everything is looking great! The 105/orange actually finished out very nicely on this hard clear, I was impressed! I couldn’t wait to lay down some 205 as this was the first time I have ever used it… finished up around 1pm, and pulled her out into the sun to check out my masterful artwork. Jesus H. Christ. The car was marred beyond BELIEF, about 100x worse than when I got the car. In EVERY angle in the sun, the was marring and hologramming over every square inch… the scary part was, not 1 bit of it was visible under halogen or LED lighting… I did capture a LITTLE bit of it with the flash of my camera though after I knew where to look, but no where near what it looked like in the sun. I didn’t get photos in the sun as it didn’t occur to me to take photos of crap lol… I used the flash in the garage to see if I could use the flash to see it, and check my work.
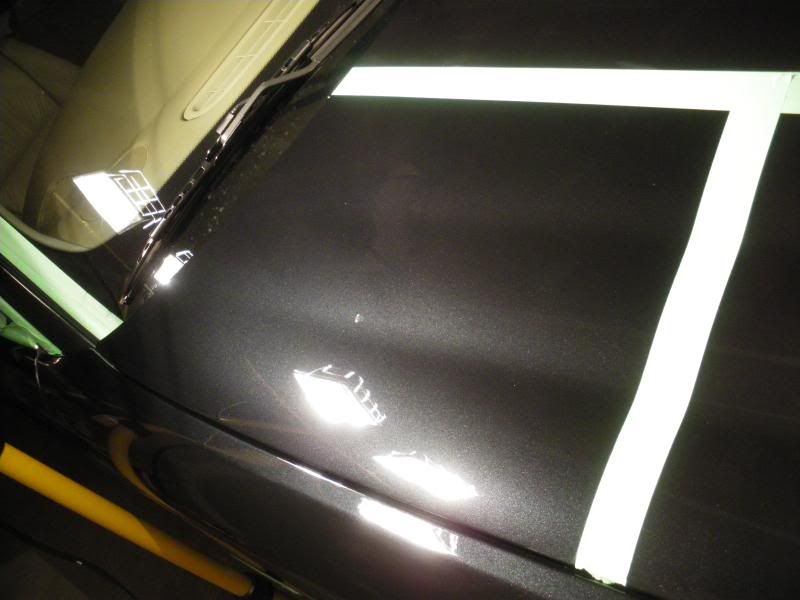
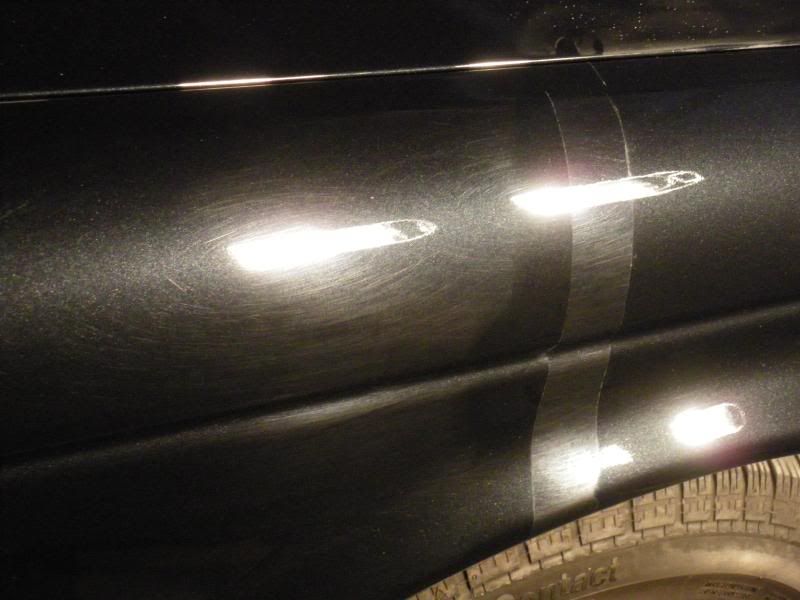
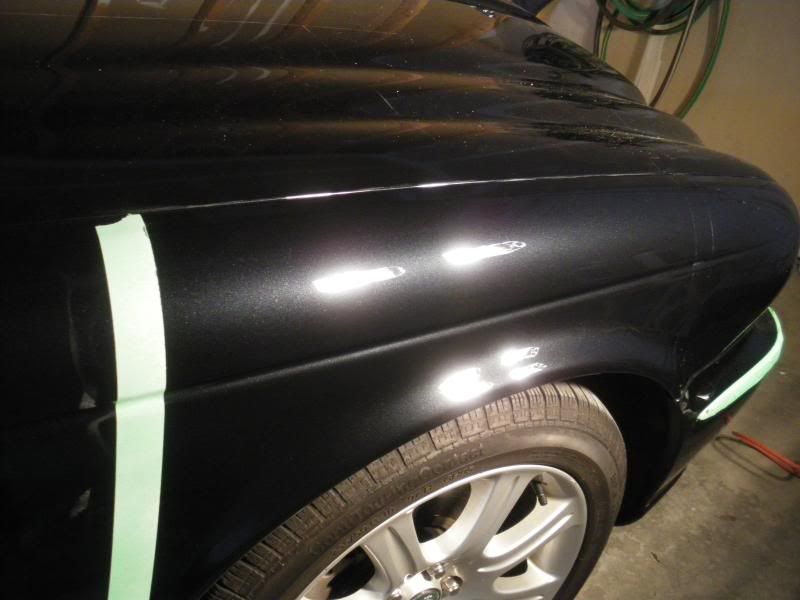
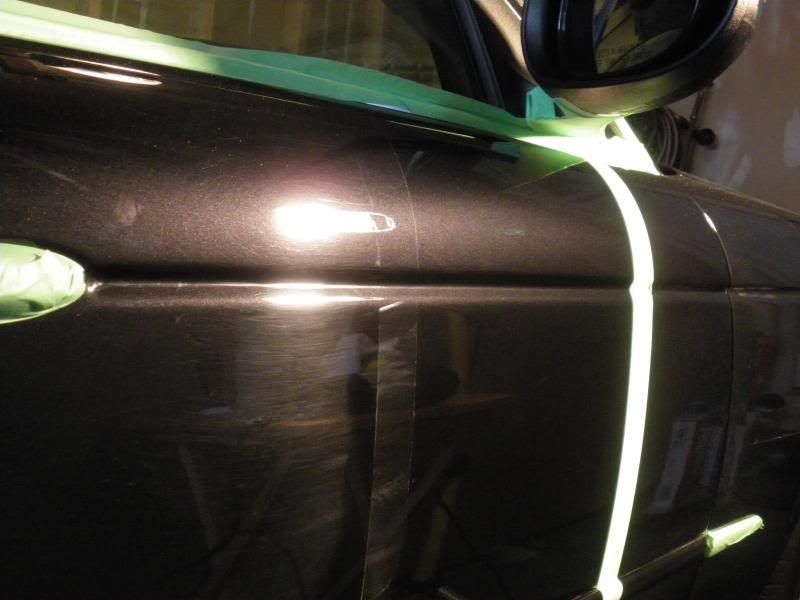
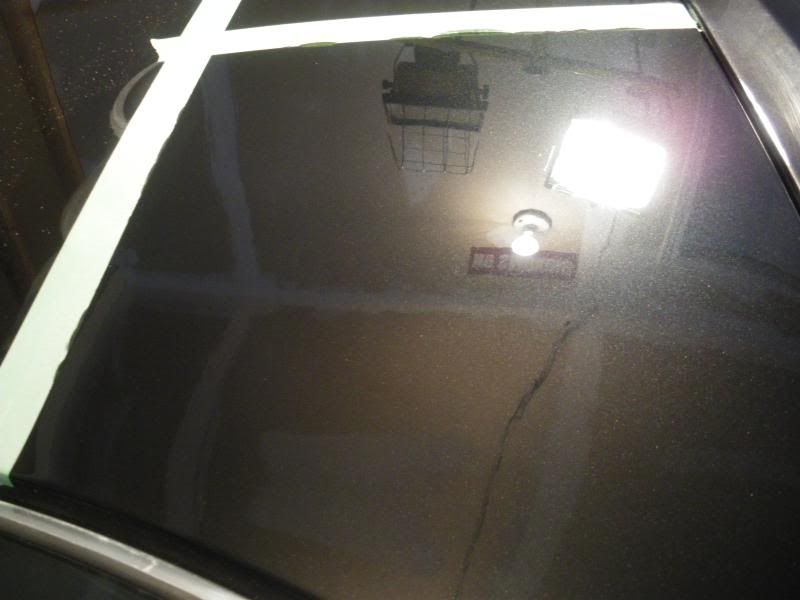
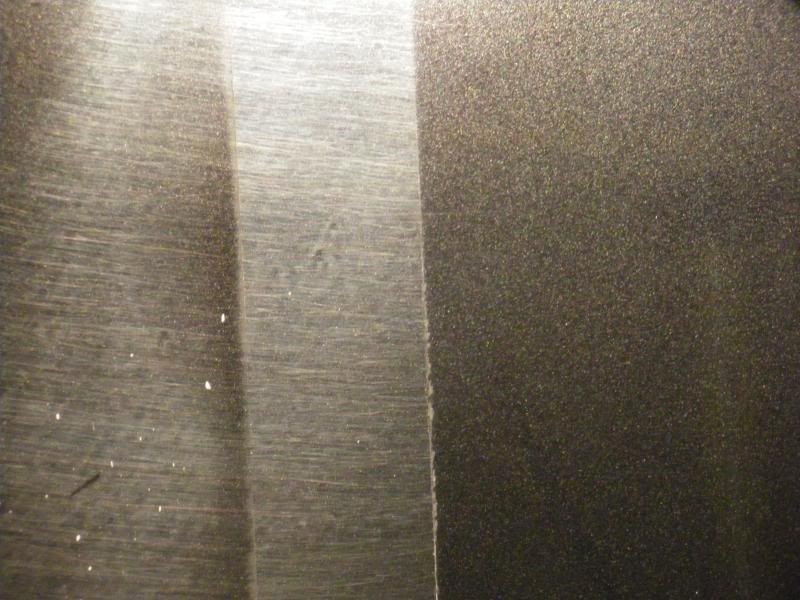
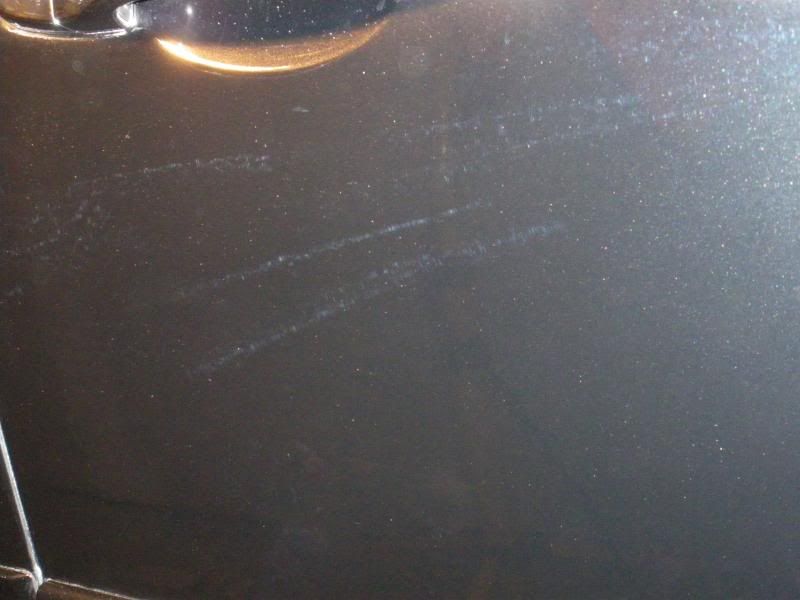
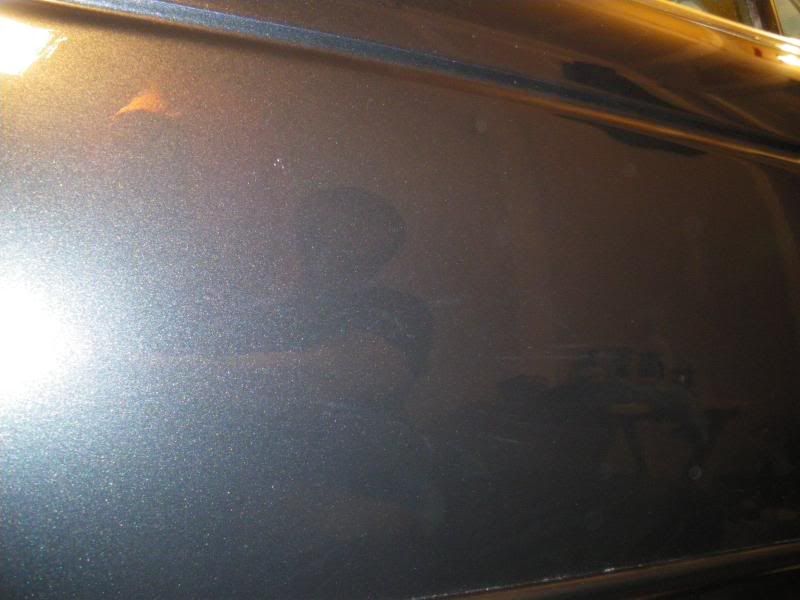
So my next step, I pull the car inside, tape of a 12x12 section that was EXTRA marred, and polish with 205/white again. Wipe down, looks perfect. Back outside, crap. Back inside. I then redid the same area with white/OPII. Pulled it outside and removed the polish in the sun, under a very careful eye… low and behold, the finish was perfect, but the MF TOWEL WAS MARRING THE FINISH!!!!!!!! WHEW, problem solved. Busted out my shag rags (uber plushness, I only use them for buffing off LSP) and did a couple test spots. Success in the sun (on a 12x12 area on the trunk). OK, lets get to it. Re-polished the entire car with OPII and removed polish with shag rag. 6pm, sun is setting and I bring it back out into the sun one last time… or so I though. SCRATCHES EVERYWHERE!!!!!!!!! They looked like holograms but about 100x more apparent and worse. I threw up in my mouth a little bit. It was 6pm, the car was worse than when I got it 2 days ago and the owner was picking it up at noon the next day. I inspected the marring closer, and ran my shag rag across it, and sure enough marring was created exactly where I touched the paint in the same direction I swiped. But wait a minute. I rubbed my finger HARD across the grain of a serried of the marks, and it disappeared…? Was this polishing oil being spread around the finish? I pulled it back inside to inspect… take a peek – you will see where I rubbed across the grain of the marring and it disappeared. You have to know that I pushed REAL hard into the paint for the mark to remove…
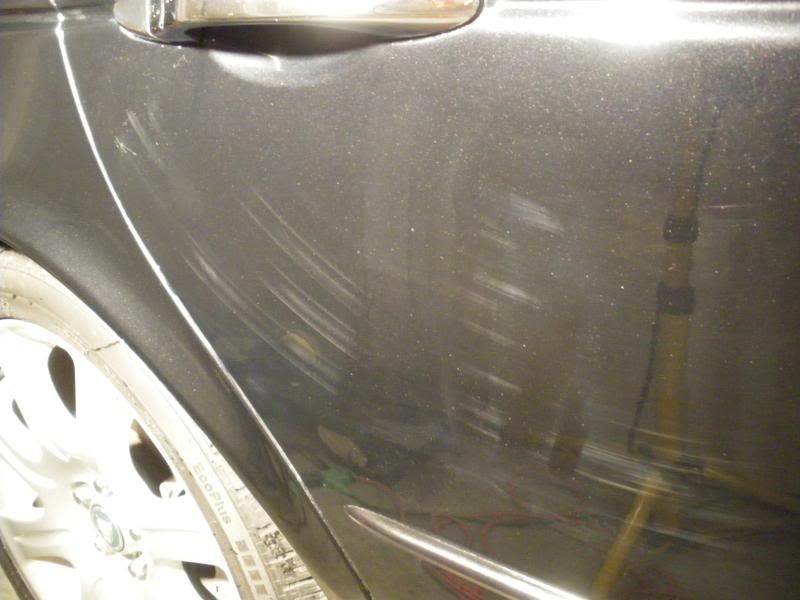

SOOOOOOO once again I thought I was in the clear… Busted out the good ol’ IPA spray (non-diluted). Didn’t do a damn thing (and I am stumped at this point). I grab some ONR spray – nothing. Fill up a spray bottle with ice water and spray on / wipe off. Nothing. The only thing that worked was rubbing the SH*T out of the (what I assume is polishing oil reside) with a not-so-plush MF towel. But of course, then I ACTUALLY marred the paint all to hell. I was about ready to quit the detailing business at this point. Then I thought to myself, when did I see this paint looking pretty much perfect…? Right after M105/orange! There is not much oil in 105, and it wipes off with ease (and it dusts like crazy too). So I do a test panel right where you see the big streak above with 105/black, and I have what looked to be success. Buffed off, looked good. However it is 8pm now with no sun, and I had learned by this point that with this car, I will reserve my judgment until I see sun. Either way, it LOOKED good in the halo’s and LED so away I went, repolishing the car for the 3rd or 4th time and pulled the chute at 1am. Sweet baby jesus let the sun treat me good in the AM as the client is picking up at noon.
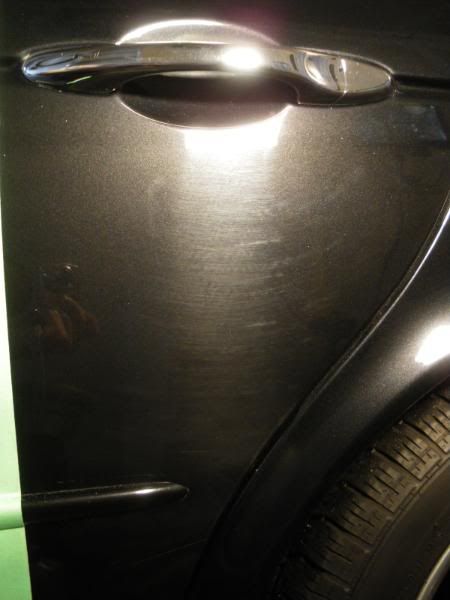
6am. Wake up. Pull car into driveway. Bring coffee pot outside, sit in lawnchair beside Jag and wait. The sun wouldn’t be up for another hour or so, so I just sat and contemplated my existence, wondering what I did in my previous life to deserve such a fantastic car to work on. 7am, sun is up over the houses and I get my first look. Holograms. Much better than before, but holograms from the 105. Client scheduled to pickup in 5 hours. My apologies, but the camera got put away at this point as it was go time to find SOME sort of solution… Pics of this stage; didn’t catch them the night before; invisible in the halogens, invisible in LED and only minutely visible by flash if it is in the right position;
I tried more combos / techniques on the trunk, all to no avail. Same problem every time; polishing oil on the paint, not coming off unless I press real hard, then I end up scratching the paint. One last thing to try; polished the trunk, wiped down VERY LIGHTLY with the oil still on the paint. Load up a black pad with an acrylic glaze and apply via PC. Allow to haze, wipe off with shag rag. I about arrived in my pants. Perfect.
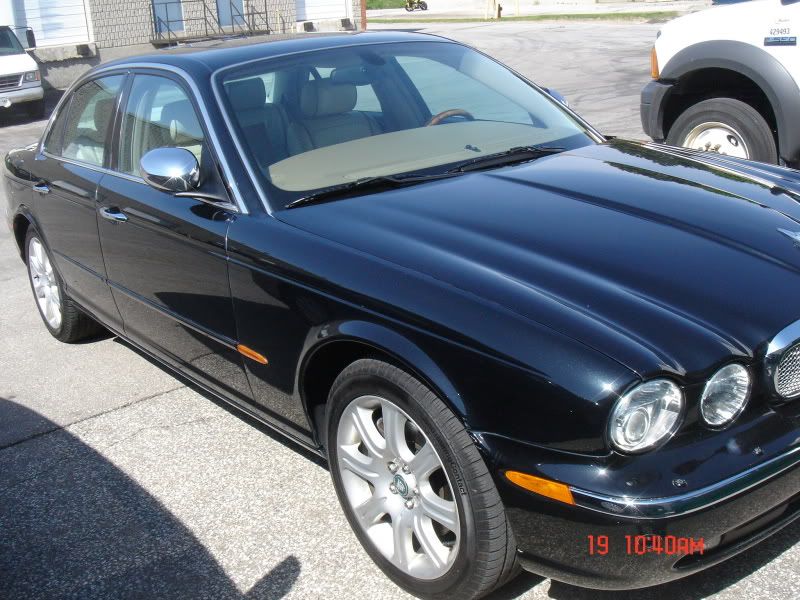
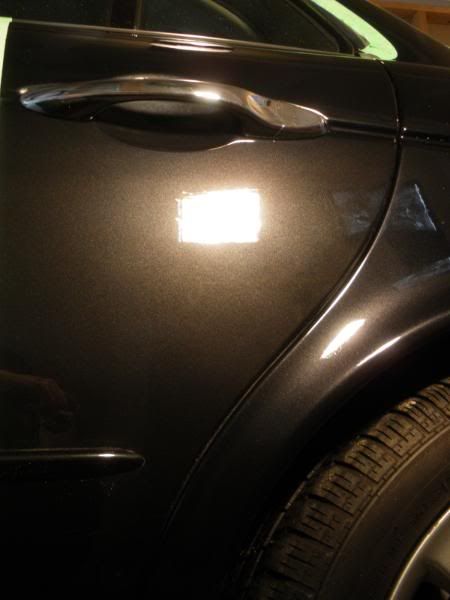
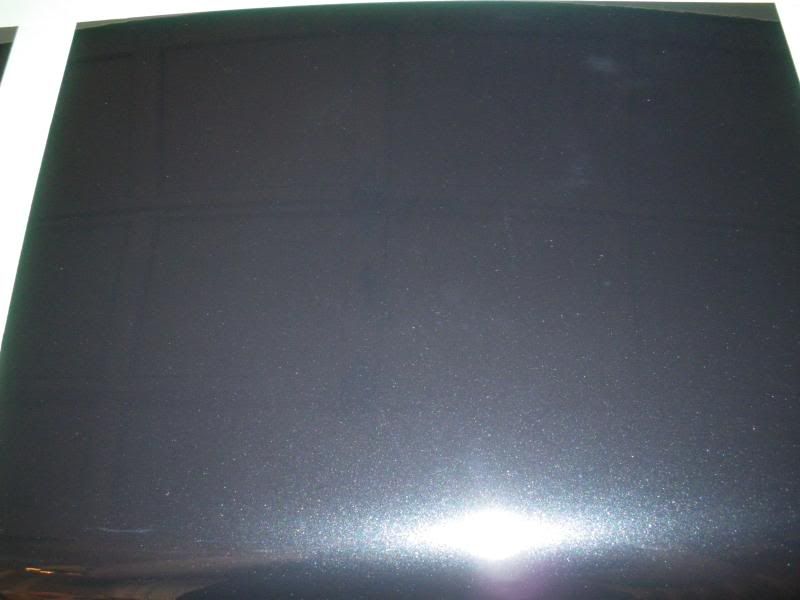
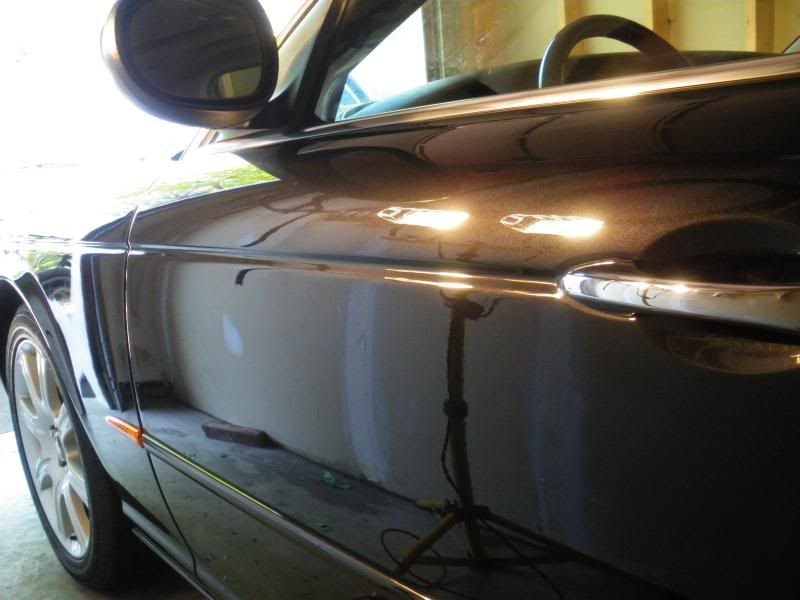
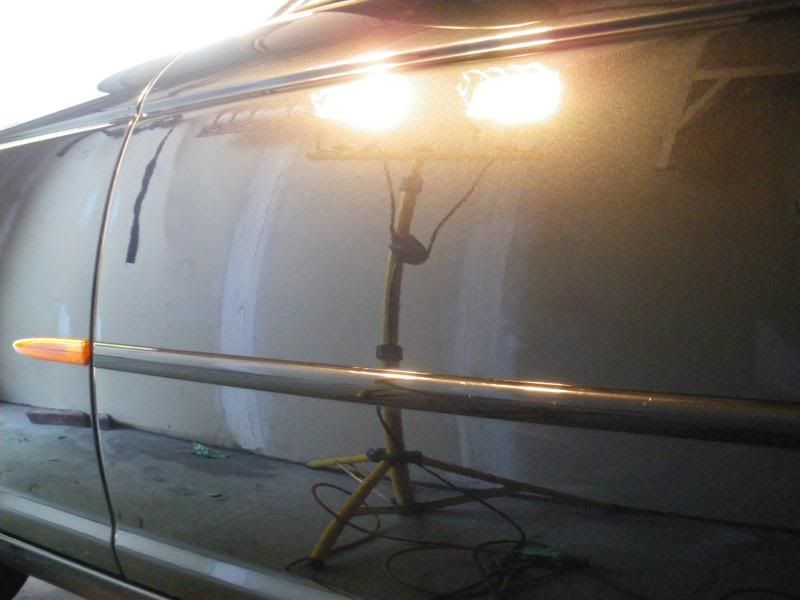
8am. Polish entire car AGAIN with OPII, this time with a 4â€� white pad (just to make it as long as possible LOL) working each section nice and long, breaking down the polish entirely. Lightly buffed the car afterwards to remove most of the polishing residue, then redid the entire car AGAIN with the acrylic glaze. The buffed the entire car by hand and pulled it out into the sun. Perfect from every angle. I am guessing the glaze encapsulated the polishing oil, and when it hardened and I removed the glaze residue, the polish residue came with it. Owner arrive at Noon, as I was just finishing up removing bits of polish and wax from the nooks and crannies. He was blown away and HAPPILY handed over the dough for this ‘2-step’ polish LOL….. Here are the pics after the glaze process; my camera died just to make everything perfect right as I was going to pull out into the sun… how convenient. Owner took his own photos and better damn well send me some.

I am having my 2nd pint of the long weekend as I type this, and it’s Monday at 615pm. I thought I got into this for the ability to work your own hours and enjoy he holidays LOL. Thanks for reading this novel, and I hope this experience ends up helping one of you someday if you run into a clear like to hold onto the oil then scratch all to hell when you try and remove it.
Chris.
Wow what a gongshow of a detail… Please be sure to read the ‘subsections’ within the photos, or else you will miss the reasons why this Jag was my archnemisis for almost 30 hours… It’s a long read but I really needed to vent…
This is the first time the decal I had created for my rear windshield brought me business. The owner of this Jag saw my car in a parking lot, checked the website, and ended up contacting me. I headed out for an inspection of the car, and we agreed upon a 2-step correction; no interior, no wheel cleaning, nothing. Fix the paint, that was my job. There were 2 deep scratches that even wetsanding would not have removed; other than that, the entire car was marred to sh*t but I wasn’t too worried. Now, read back to the part where I said we agreed upon a wham-bam-thank-you-maam 2 step polish lol… let us begin…
Saturday 7am: Compounding. Test spot M105/white. No go… So you want to be a tough guy, eh?, that’s ok… M105/orange with lots o pressure and we were in business! Called it a night at 7pm, cracked a pint and kicked back, the hard part’s done… lay down some finishing polish in the AM and enjoy the rest of the (Canadian) long weekend…
http://i255.photobucket.com/albums/hh135/chstyles/Jaguar
/jag238.jpg
Saturday 7am: So everything is looking great! The 105/orange actually finished out very nicely on this hard clear, I was impressed! I couldn’t wait to lay down some 205 as this was the first time I have ever used it… finished up around 1pm, and pulled her out into the sun to check out my masterful artwork. Jesus H. Christ. The car was marred beyond BELIEF, about 100x worse than when I got the car. In EVERY angle in the sun, the was marring and hologramming over every square inch… the scary part was, not 1 bit of it was visible under halogen or LED lighting… I did capture a LITTLE bit of it with the flash of my camera though after I knew where to look, but no where near what it looked like in the sun. I didn’t get photos in the sun as it didn’t occur to me to take photos of crap lol… I used the flash in the garage to see if I could use the flash to see it, and check my work.
So my next step, I pull the car inside, tape of a 12x12 section that was EXTRA marred, and polish with 205/white again. Wipe down, looks perfect. Back outside, crap. Back inside. I then redid the same area with white/OPII. Pulled it outside and removed the polish in the sun, under a very careful eye… low and behold, the finish was perfect, but the MF TOWEL WAS MARRING THE FINISH!!!!!!!! WHEW, problem solved. Busted out my shag rags (uber plushness, I only use them for buffing off LSP) and did a couple test spots. Success in the sun (on a 12x12 area on the trunk). OK, lets get to it. Re-polished the entire car with OPII and removed polish with shag rag. 6pm, sun is setting and I bring it back out into the sun one last time… or so I though. SCRATCHES EVERYWHERE!!!!!!!!! They looked like holograms but about 100x more apparent and worse. I threw up in my mouth a little bit. It was 6pm, the car was worse than when I got it 2 days ago and the owner was picking it up at noon the next day. I inspected the marring closer, and ran my shag rag across it, and sure enough marring was created exactly where I touched the paint in the same direction I swiped. But wait a minute. I rubbed my finger HARD across the grain of a serried of the marks, and it disappeared…? Was this polishing oil being spread around the finish? I pulled it back inside to inspect… take a peek – you will see where I rubbed across the grain of the marring and it disappeared. You have to know that I pushed REAL hard into the paint for the mark to remove…
SOOOOOOO once again I thought I was in the clear… Busted out the good ol’ IPA spray (non-diluted). Didn’t do a damn thing (and I am stumped at this point). I grab some ONR spray – nothing. Fill up a spray bottle with ice water and spray on / wipe off. Nothing. The only thing that worked was rubbing the SH*T out of the (what I assume is polishing oil reside) with a not-so-plush MF towel. But of course, then I ACTUALLY marred the paint all to hell. I was about ready to quit the detailing business at this point. Then I thought to myself, when did I see this paint looking pretty much perfect…? Right after M105/orange! There is not much oil in 105, and it wipes off with ease (and it dusts like crazy too). So I do a test panel right where you see the big streak above with 105/black, and I have what looked to be success. Buffed off, looked good. However it is 8pm now with no sun, and I had learned by this point that with this car, I will reserve my judgment until I see sun. Either way, it LOOKED good in the halo’s and LED so away I went, repolishing the car for the 3rd or 4th time and pulled the chute at 1am. Sweet baby jesus let the sun treat me good in the AM as the client is picking up at noon.
6am. Wake up. Pull car into driveway. Bring coffee pot outside, sit in lawnchair beside Jag and wait. The sun wouldn’t be up for another hour or so, so I just sat and contemplated my existence, wondering what I did in my previous life to deserve such a fantastic car to work on. 7am, sun is up over the houses and I get my first look. Holograms. Much better than before, but holograms from the 105. Client scheduled to pickup in 5 hours. My apologies, but the camera got put away at this point as it was go time to find SOME sort of solution… Pics of this stage; didn’t catch them the night before; invisible in the halogens, invisible in LED and only minutely visible by flash if it is in the right position;
I tried more combos / techniques on the trunk, all to no avail. Same problem every time; polishing oil on the paint, not coming off unless I press real hard, then I end up scratching the paint. One last thing to try; polished the trunk, wiped down VERY LIGHTLY with the oil still on the paint. Load up a black pad with an acrylic glaze and apply via PC. Allow to haze, wipe off with shag rag. I about arrived in my pants. Perfect.
8am. Polish entire car AGAIN with OPII, this time with a 4â€� white pad (just to make it as long as possible LOL) working each section nice and long, breaking down the polish entirely. Lightly buffed the car afterwards to remove most of the polishing residue, then redid the entire car AGAIN with the acrylic glaze. The buffed the entire car by hand and pulled it out into the sun. Perfect from every angle. I am guessing the glaze encapsulated the polishing oil, and when it hardened and I removed the glaze residue, the polish residue came with it. Owner arrive at Noon, as I was just finishing up removing bits of polish and wax from the nooks and crannies. He was blown away and HAPPILY handed over the dough for this ‘2-step’ polish LOL….. Here are the pics after the glaze process; my camera died just to make everything perfect right as I was going to pull out into the sun… how convenient. Owner took his own photos and better damn well send me some.
I am having my 2nd pint of the long weekend as I type this, and it’s Monday at 615pm. I thought I got into this for the ability to work your own hours and enjoy he holidays LOL. Thanks for reading this novel, and I hope this experience ends up helping one of you someday if you run into a clear like to hold onto the oil then scratch all to hell when you try and remove it.
Chris.
")