zmcgovern45
New member
The owner of this vehicle is a repeat customer. After performing a complete interior and exterior service on another vehicle last year, we were asked to do the same for this one. This vehicle had survived the past 4 years with his daughter at school, and his wife was going to be driving it throughout the upcoming year so they wanted it cleaned up and "rescued from the way a teenager left it".
This car was in need of a great amount of work. The paint was dull and damaged from years of poor car washing, and the interior was in need of a deep cleaning and decontamination. While not perfect, the paint yielded an incredible transformation with a two-step correction process that drastically improved the color and clarity making it look years newer. The paint was protected with a ceramic paint coating for added gloss and durable protection. The interior was thoroughly cleaned to revitalize the leather and plastics. In the end, it looks like a completely different vehicle.
Process
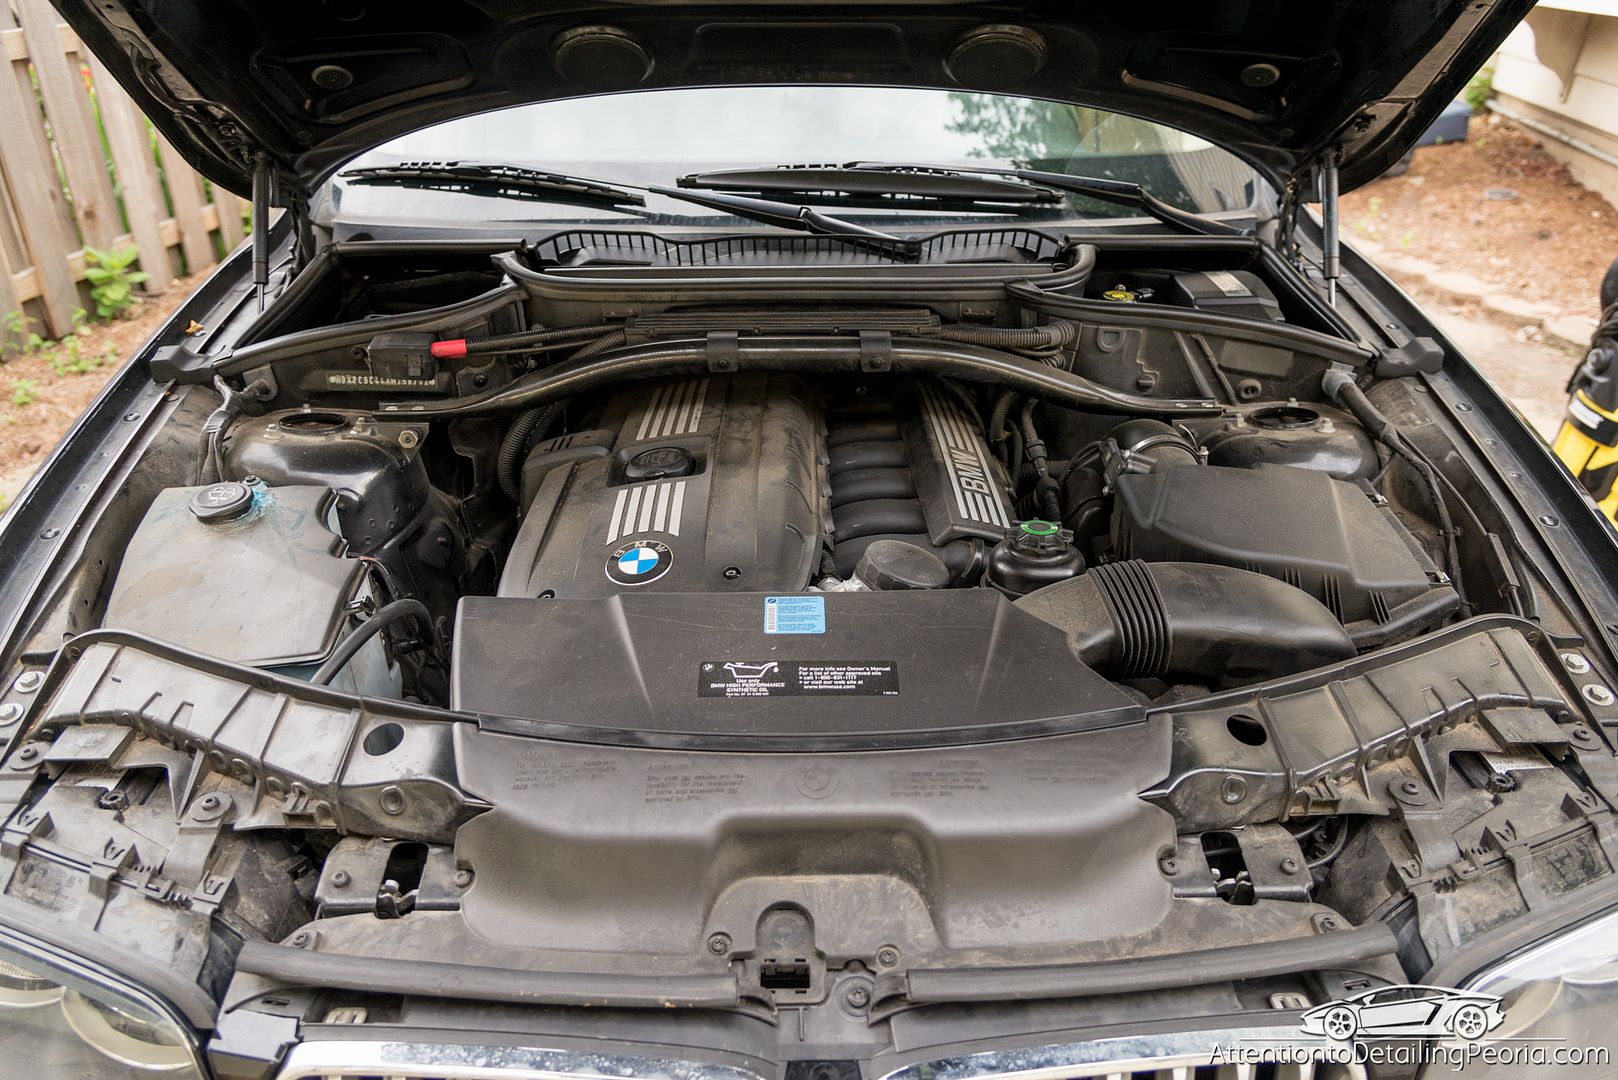
Engine
Rinse
Cleaned with D101 and D108 with various brushes
Rinsed
Blown dry with Blaster Sidekick
Dressed with 303
Exterior
Tires: Tuf Shine Tire Cleaner and Tire Brush
Wheels: Sonax FE, Wheel Woolies, EZ Detail Brush & other brushes
Foam Pre-Soak: CarPro Iron X Snow Soap via DI Foam Lance
Wash: CG Citrus Wash & DI Rethickulous Wash Mitt
Chemical Decon: Iron X Lemon Scent
Mechanical Decon: Medium Grade Speedy Prep Towel with Glide for lubrication
Paint Thickness Readings Taken
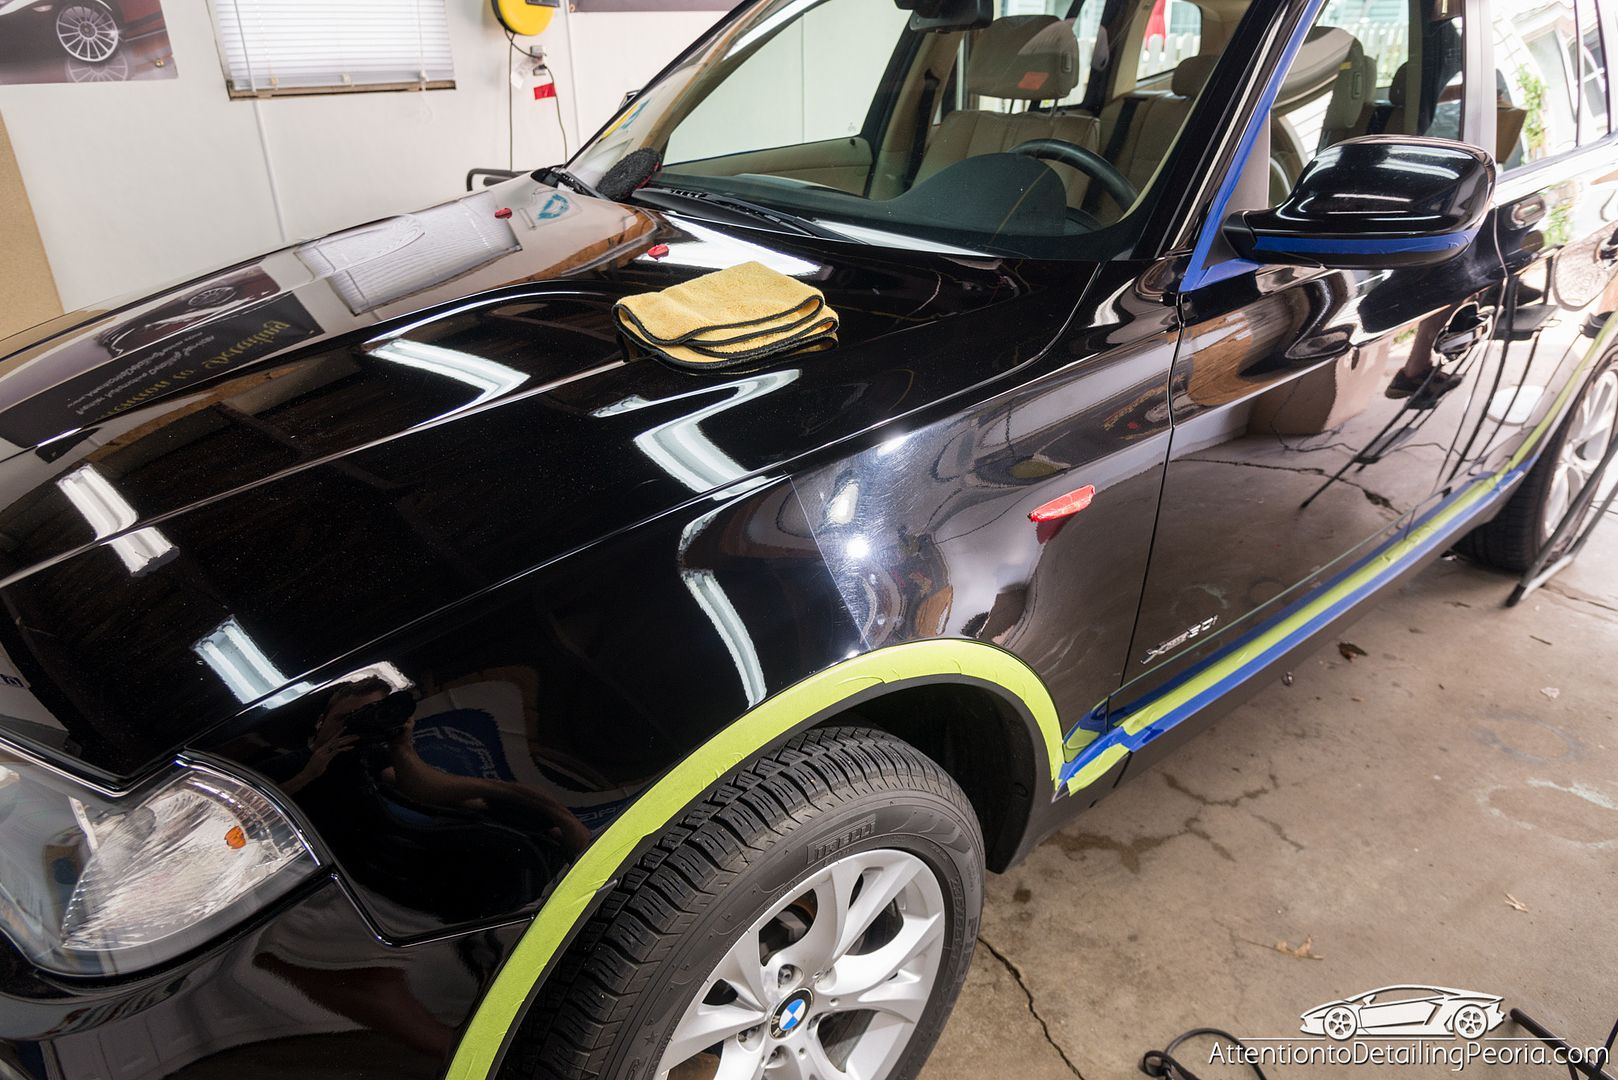
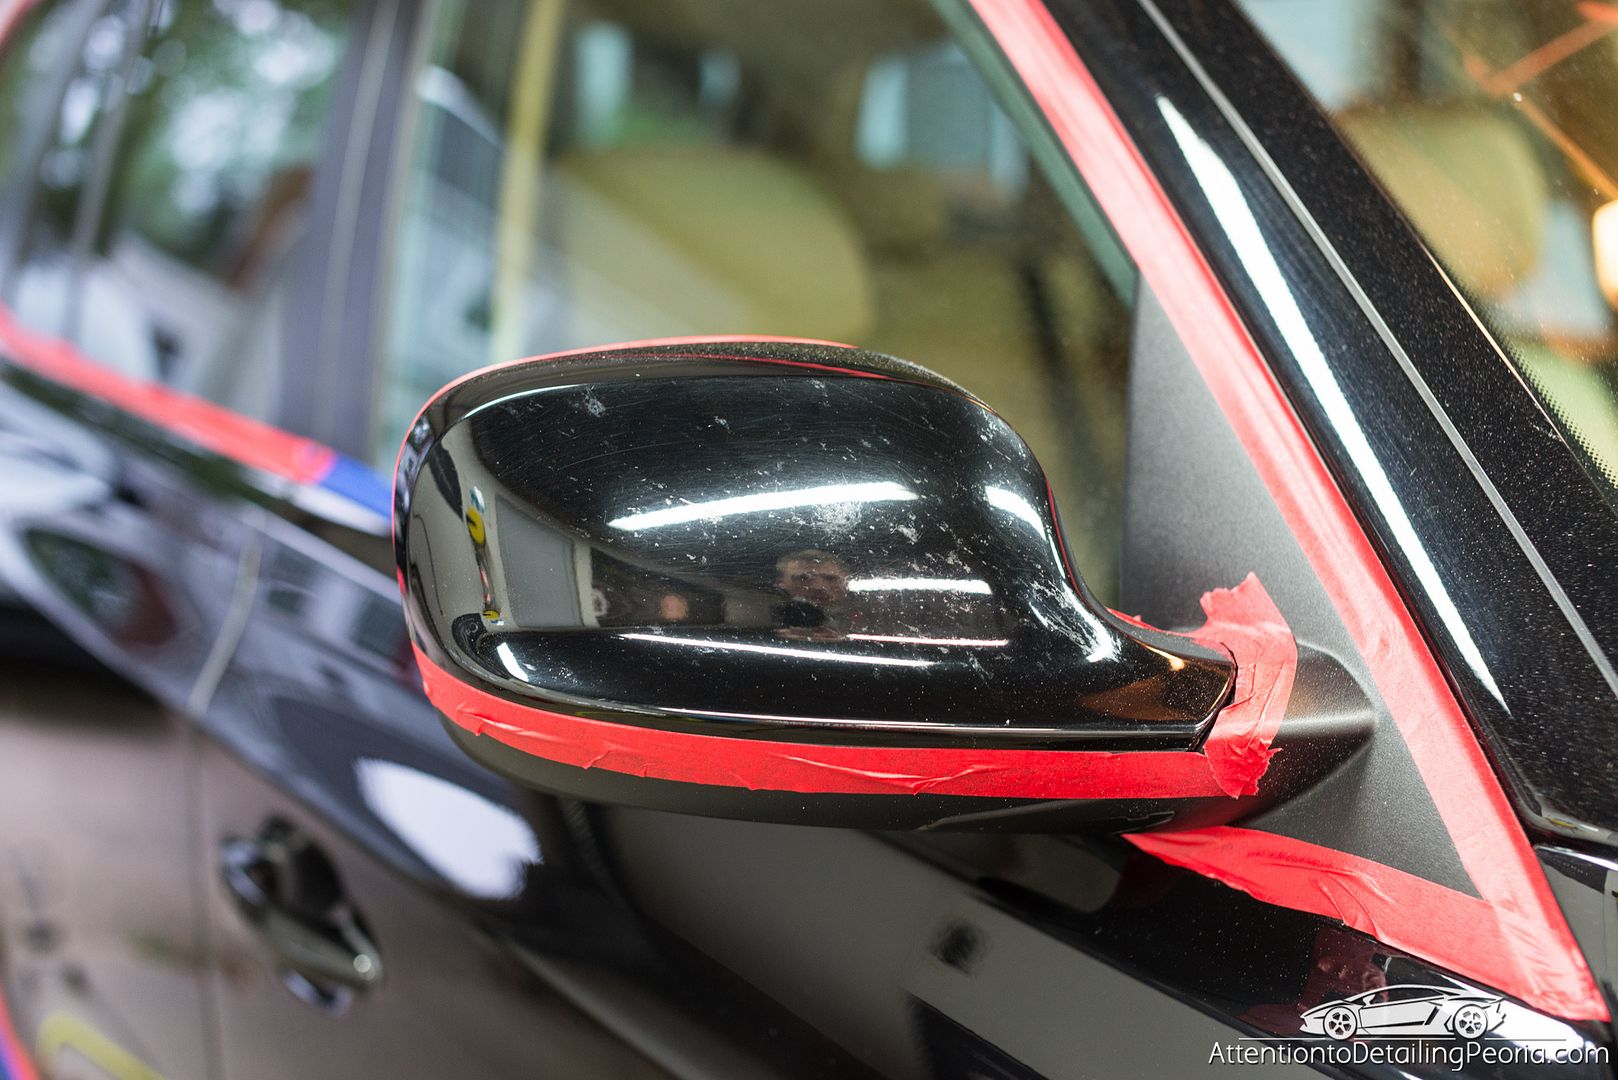
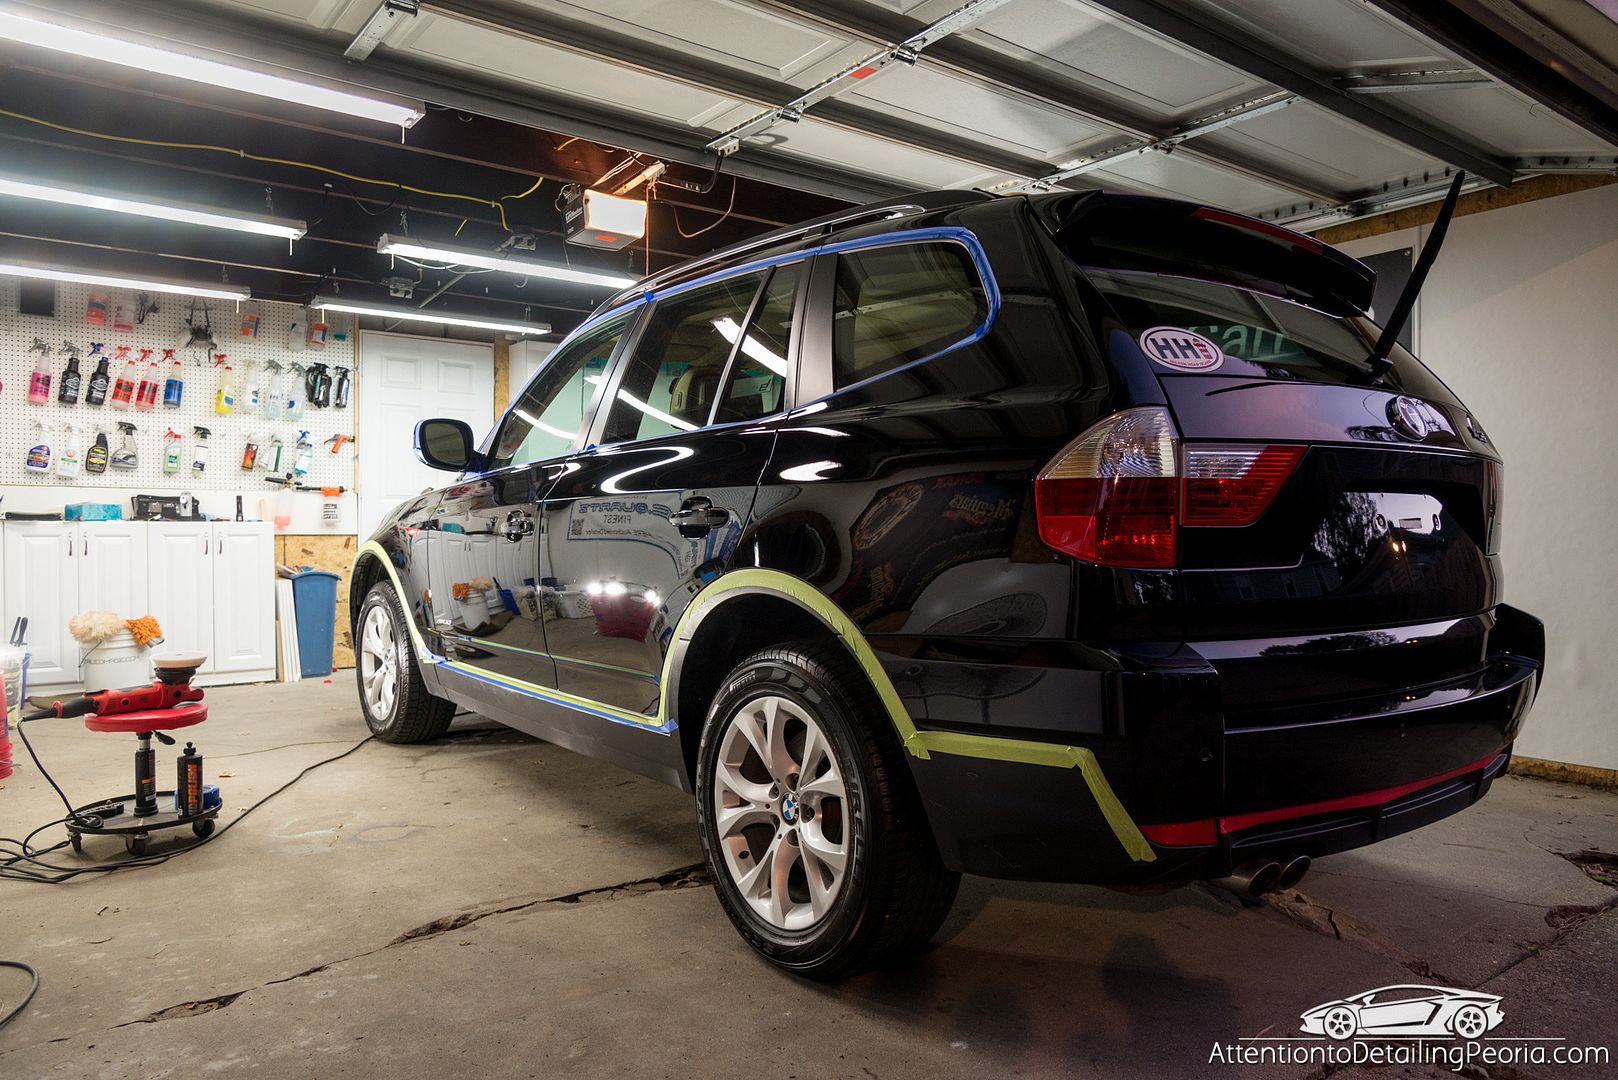
Masked off delicate areas
Compounding: D300 & Meguiar's MF Cutting Discs via G21, LHR21ES, and LHR75e
Polishing: HD Polish on White Rupes Pads & M205 on White LC Pads via G21, LHR21ES, and LHR75e
CarPro Eraser Wipe down
Paint Coating: Optimum Gloss-Coat
Wheel Sealant: CarPro HydrO2
Glass: CarPro Eraser
Tires: CarPro PERL (1:1, 2 coats)
Exhaust Tips: CG Metal Polish
Interior
Blow out cracks and crevices with compressed air
Thorough vacuum
Carpets cleaned with ONR and APC (Meguiar's D101 10:1)
Hard Surfaces cleaned with steam & Einszett Plastic Reigner
Leather cleaned with D101 & Leather brush
303 applied to all surfaces
Feel like I am forgetting some stuff, but that is the majority of it... we had this car for 10 days so it is all kind of a blur.
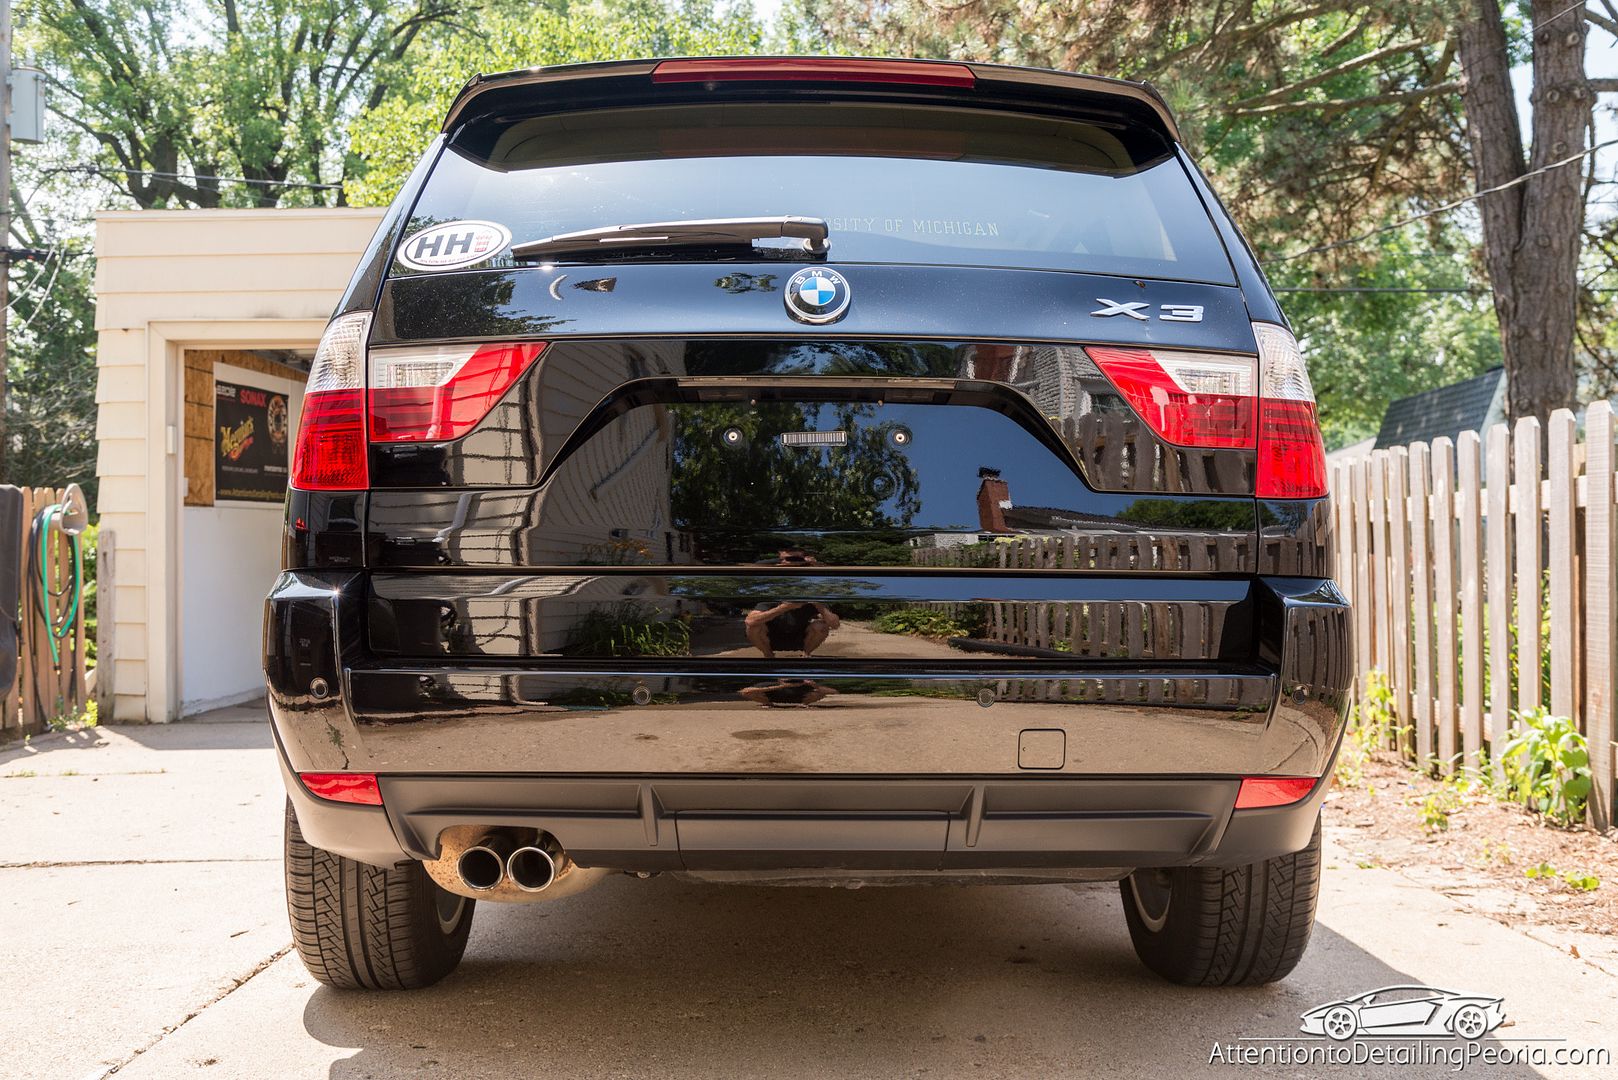
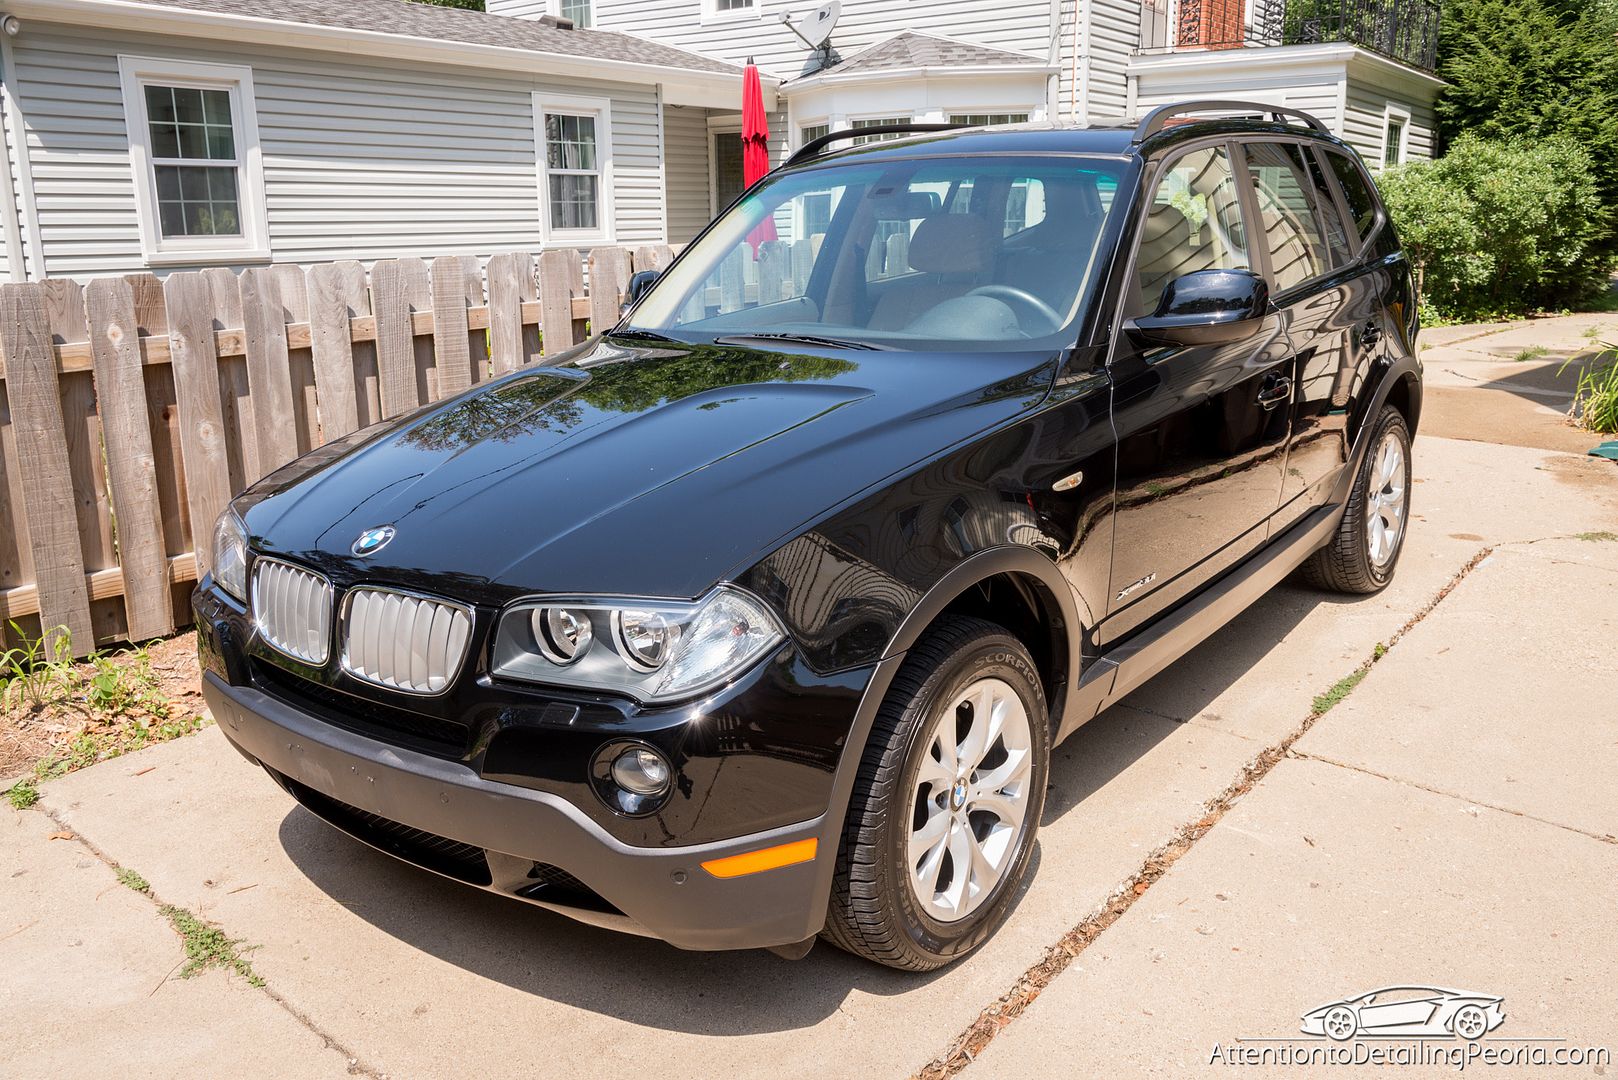
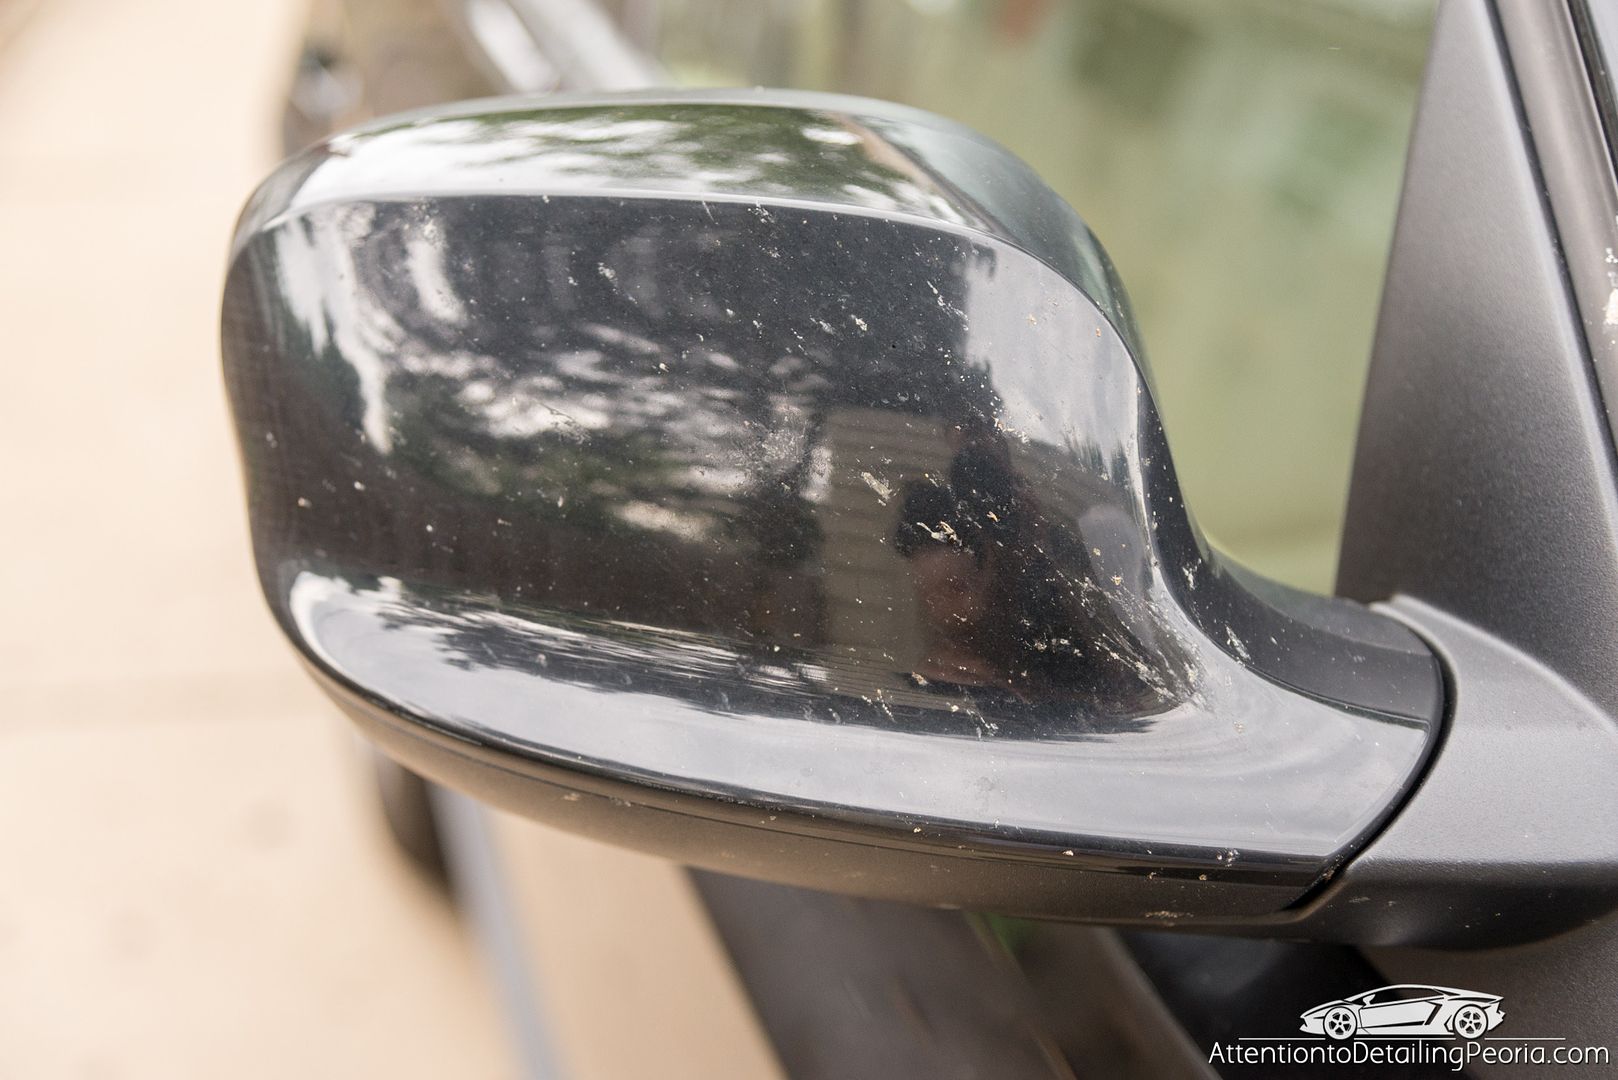
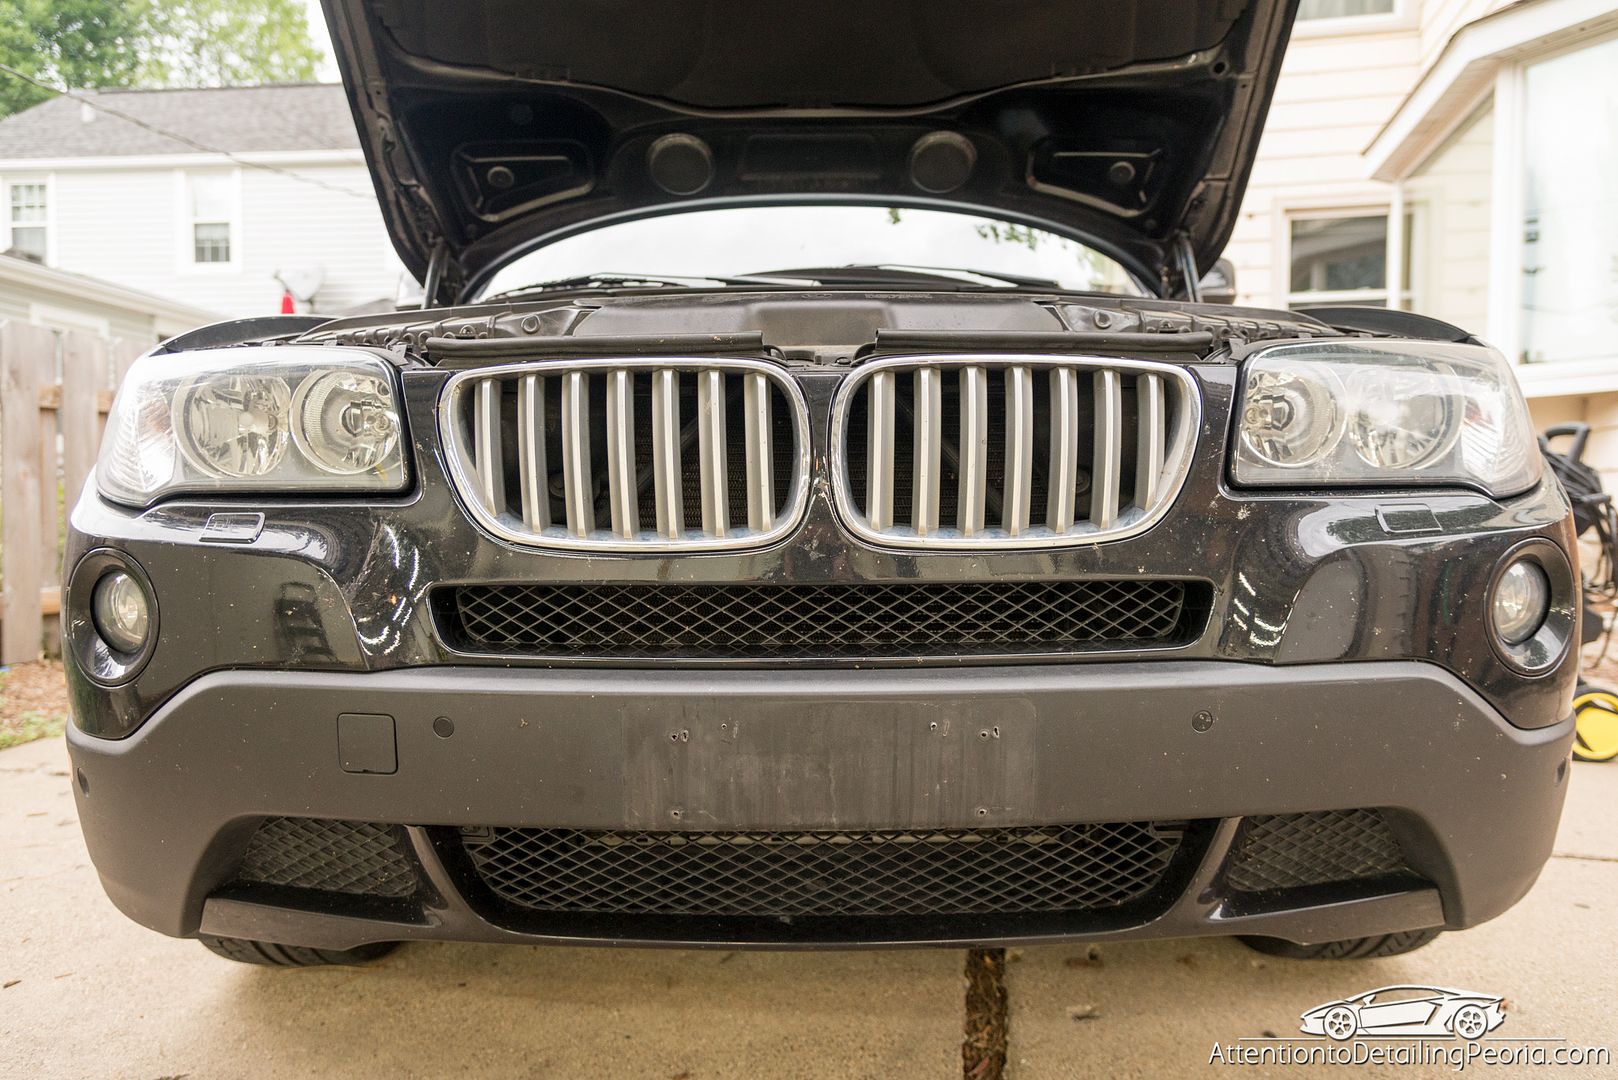
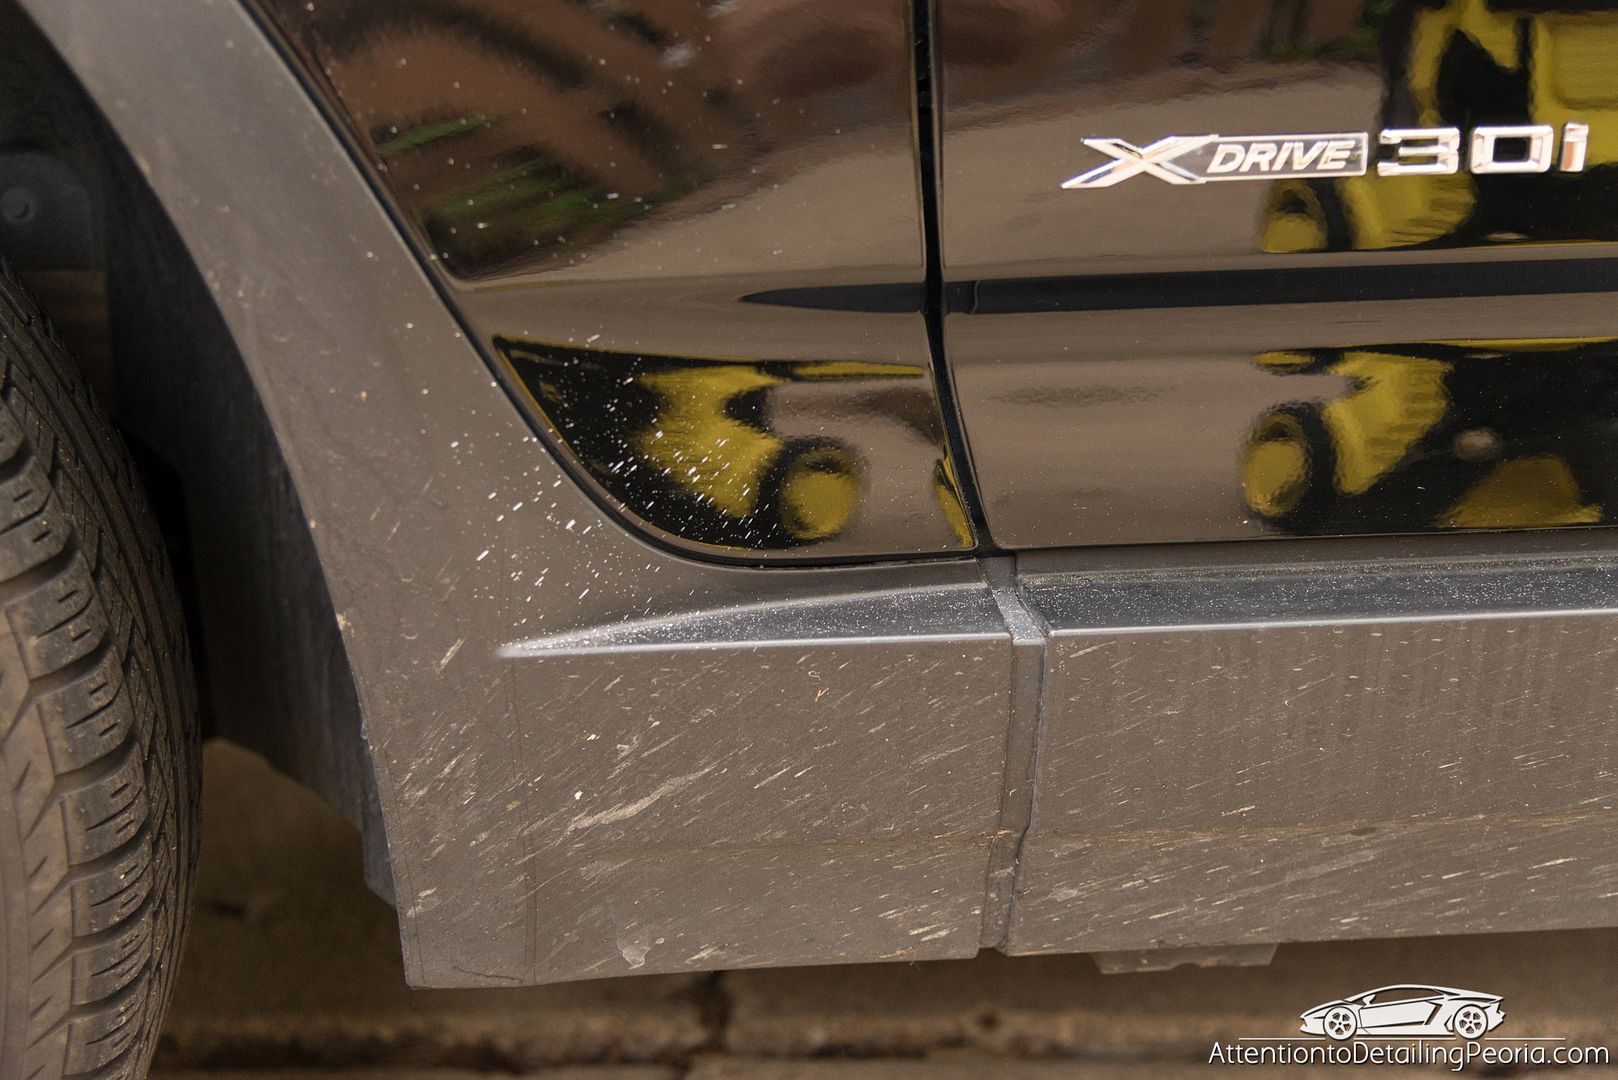
The vehicle arrived with a considerable amount of dirt and debris covering every surface

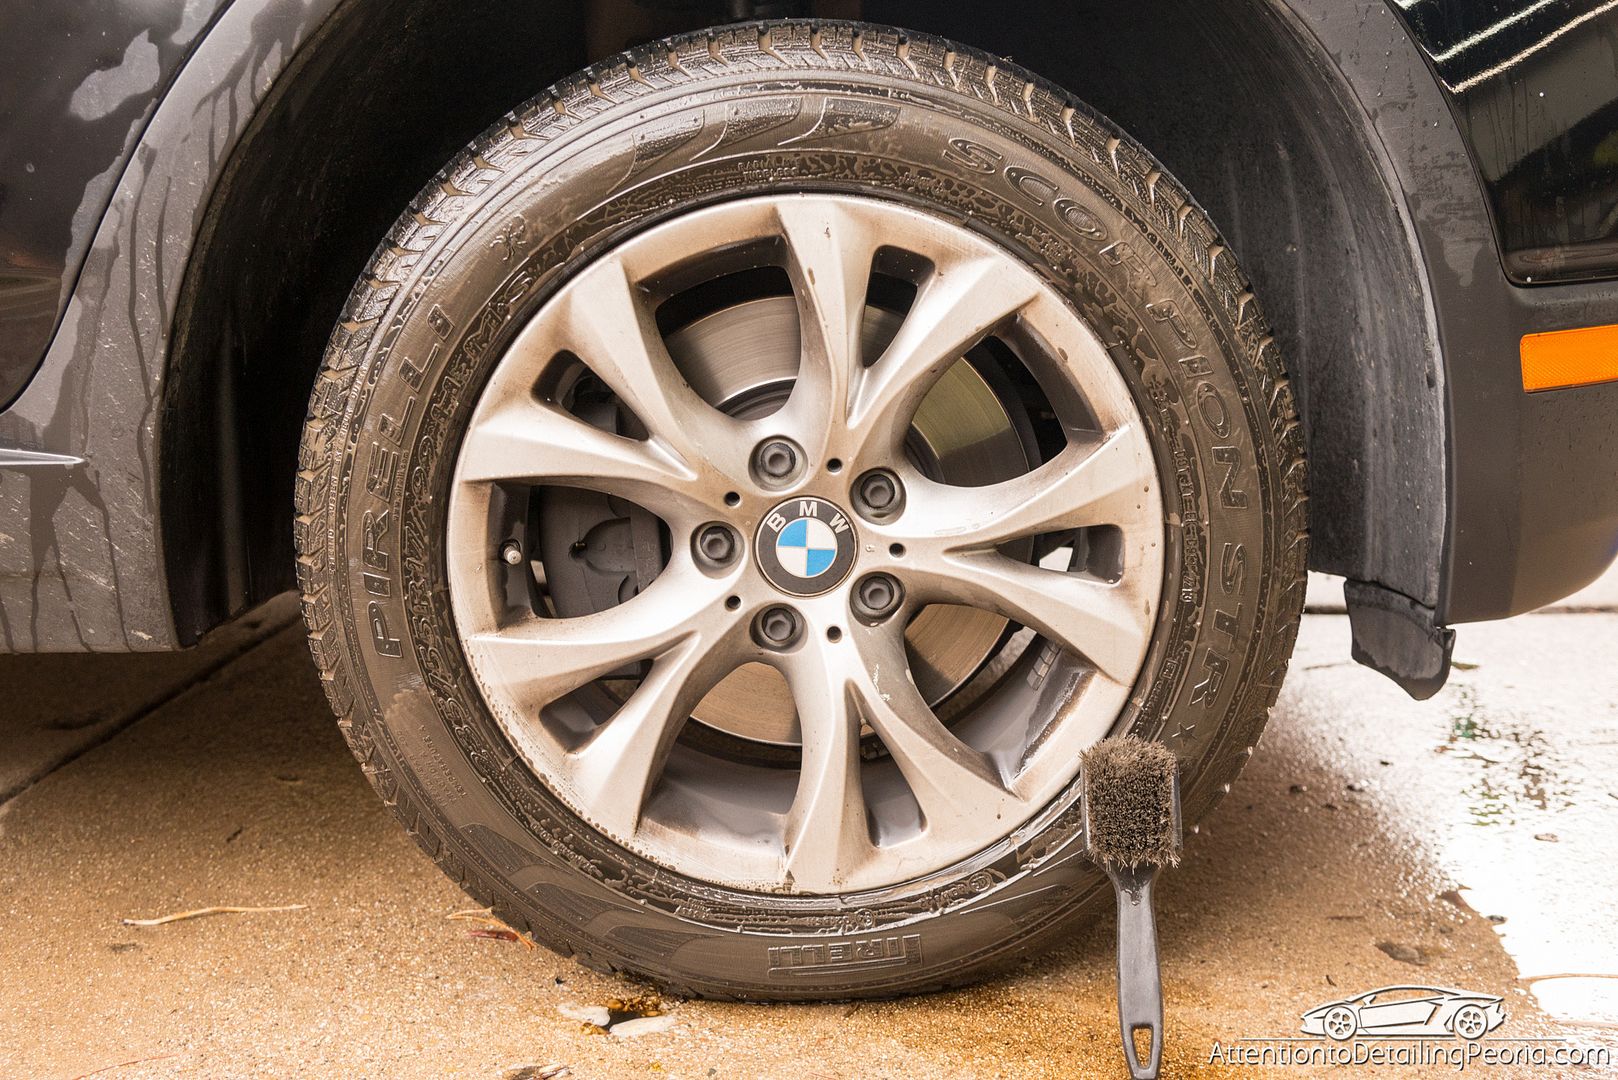
As always, we begin with cleaning the tires. You can see the thick layer of dirt and grime that had accumulated on the rubber.
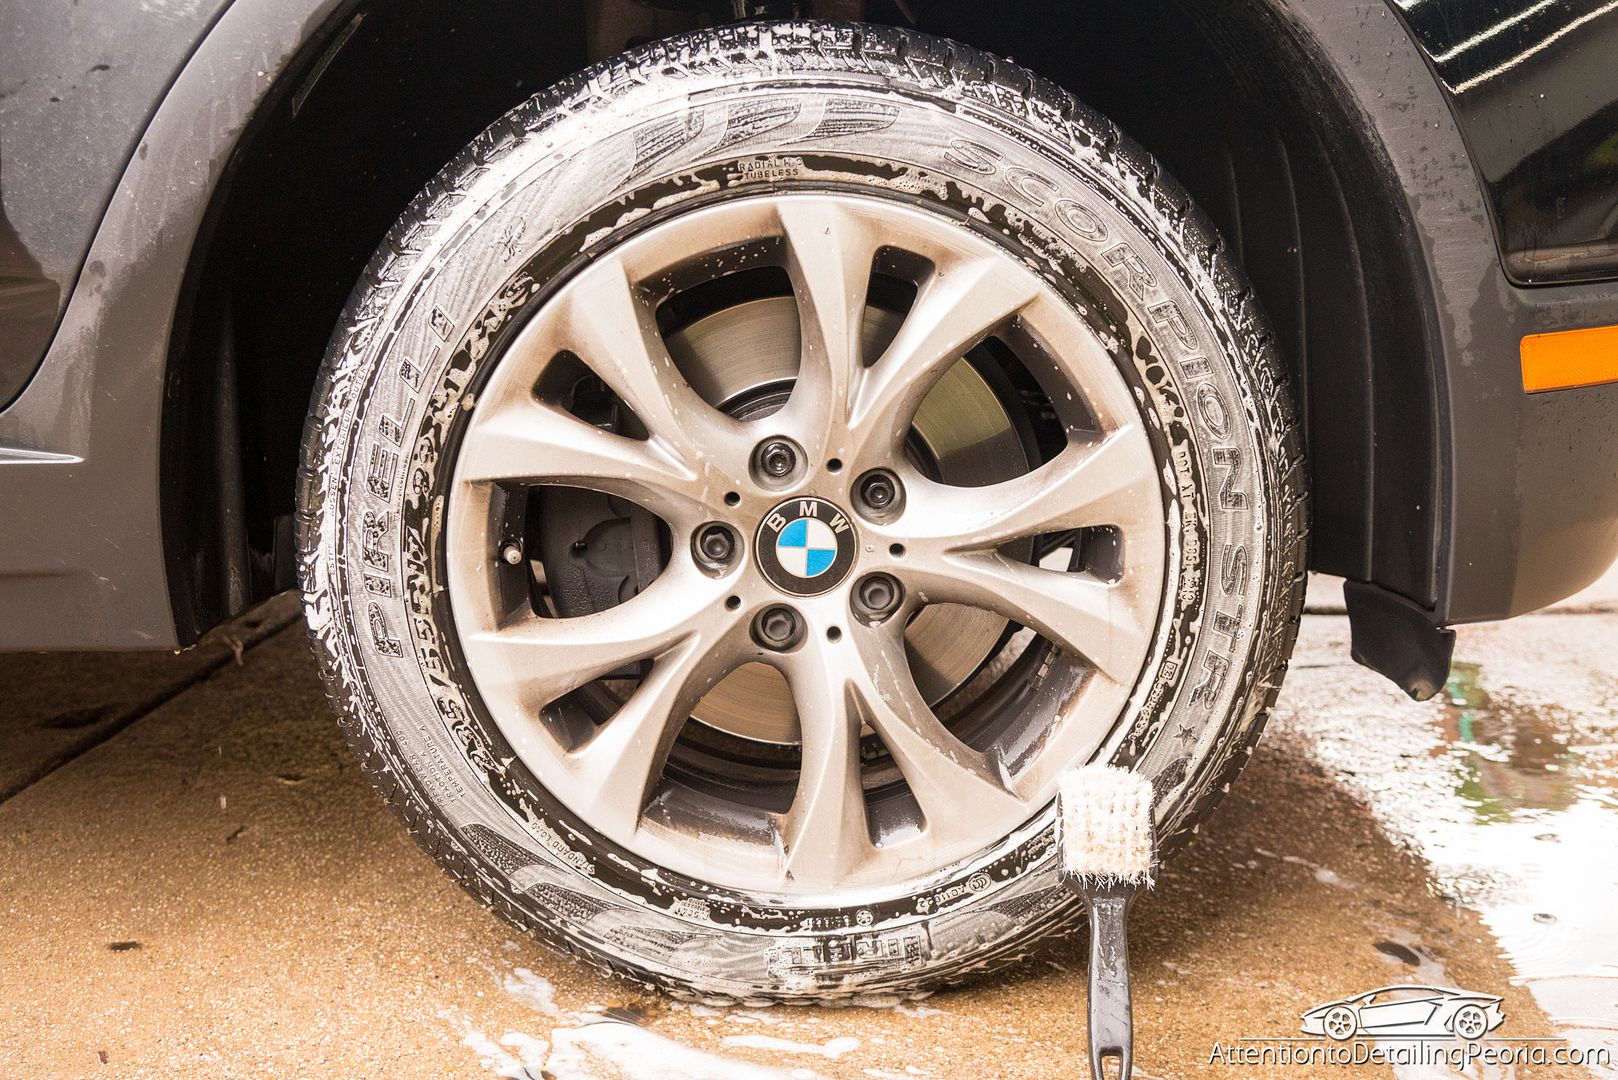
After several rounds of cleaning, the white residue and brush indicate the tires are properly cleaned.
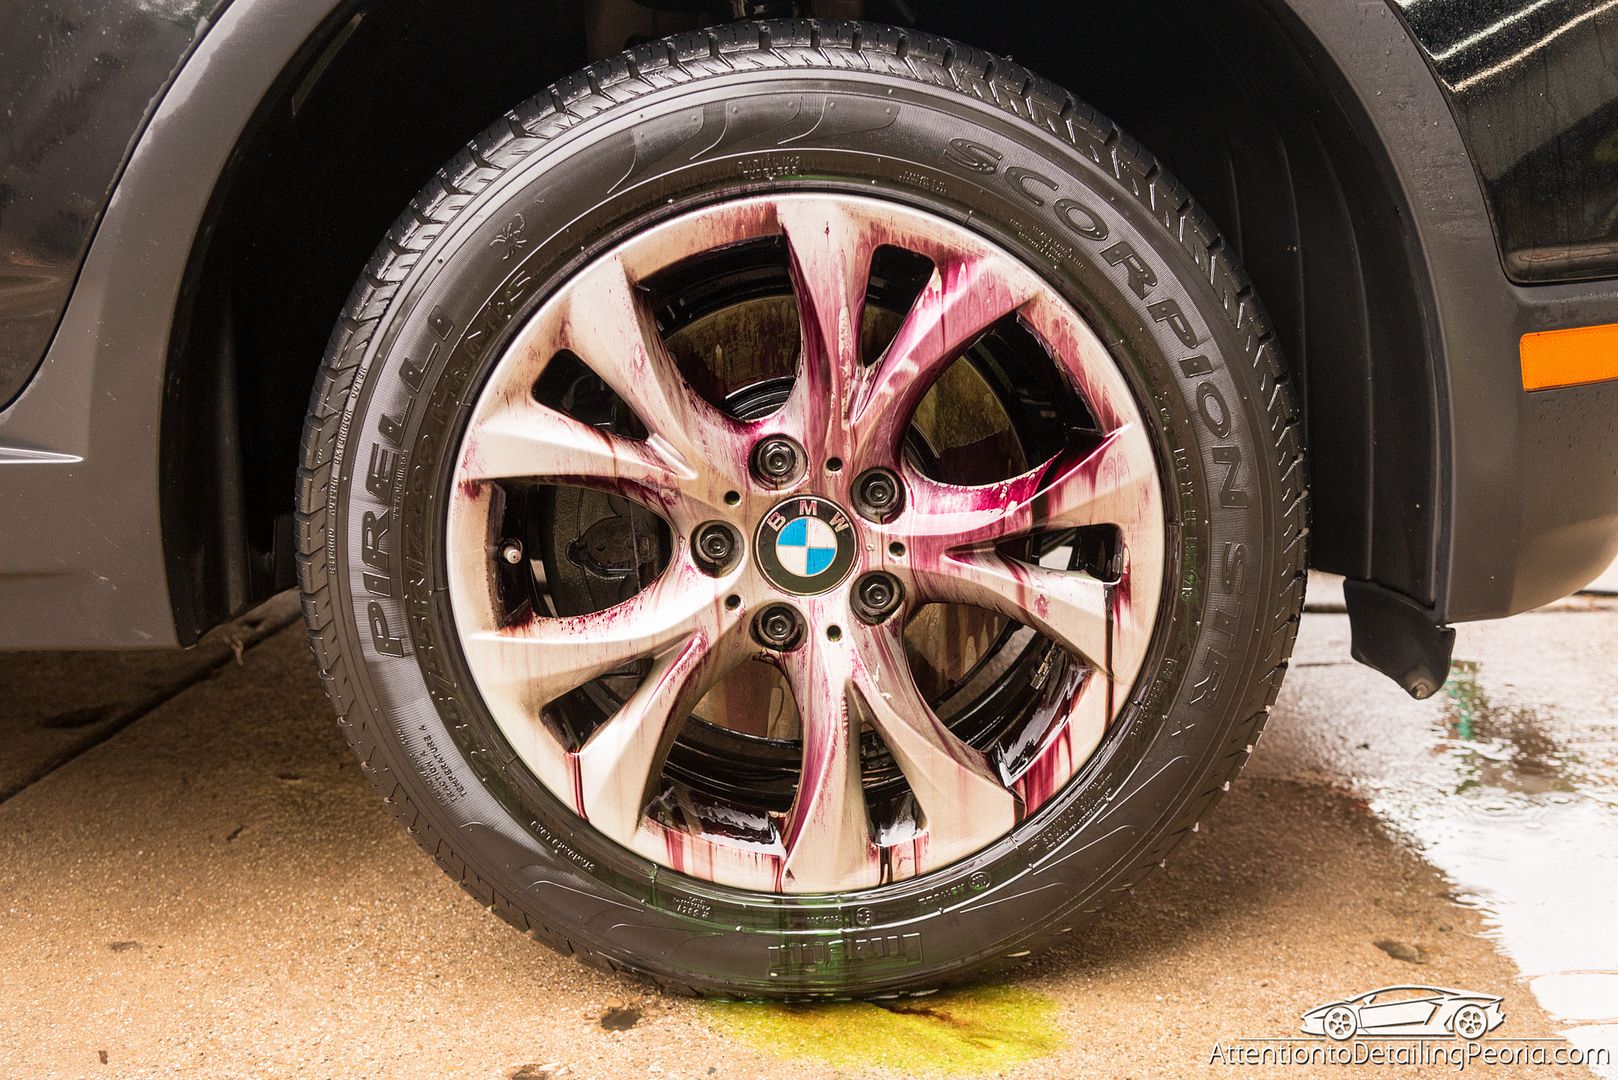
We then turned our attention to the wheels, where a large amount of dirt and brake dust had built up. The wheel cleaner helped to break down the grime before we started cleaning with our brushes.

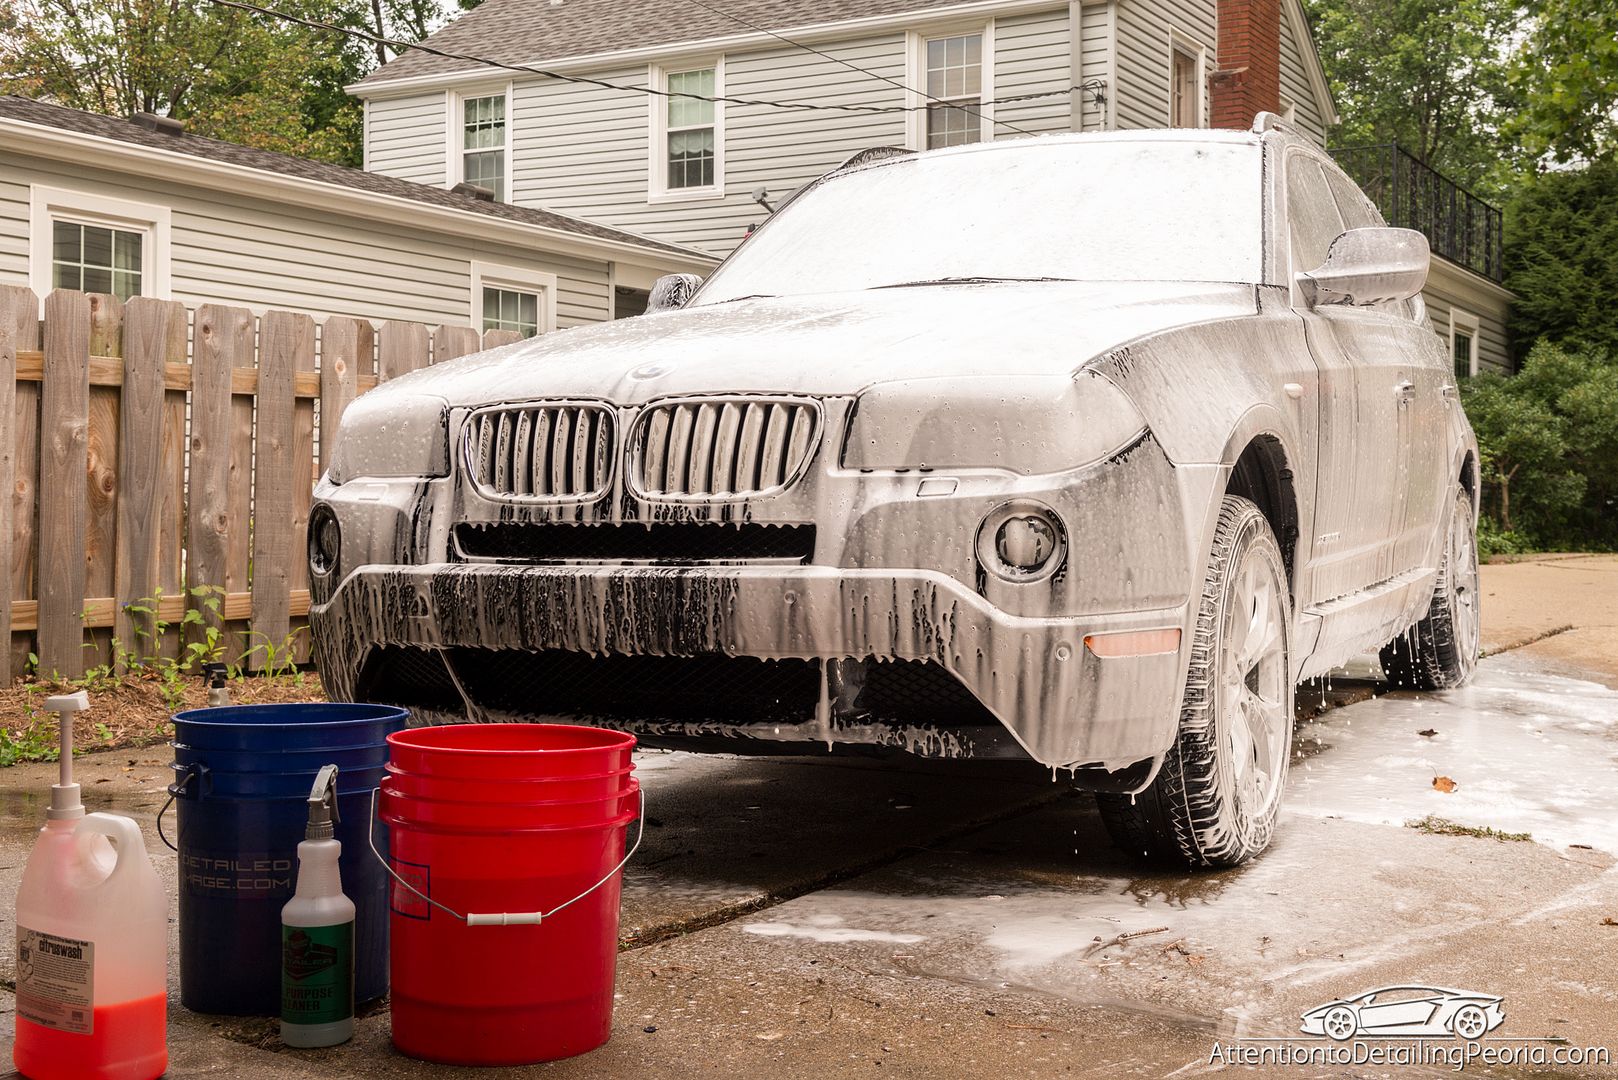
After the wheels and tires were cleaned and sealed, we begain cleaning the paint. The car was soaked with a heavy mixture of shampoo and degreaser to help break down the loose partcles before washing. The car was then thoroughly washed, chemically decontaminated, mechanically decontaminated, washed again, and then dried.
Once cleaned, I began my testing on the paint to find a combination of products that would yield the best results. The difference was going to be great on this paint.
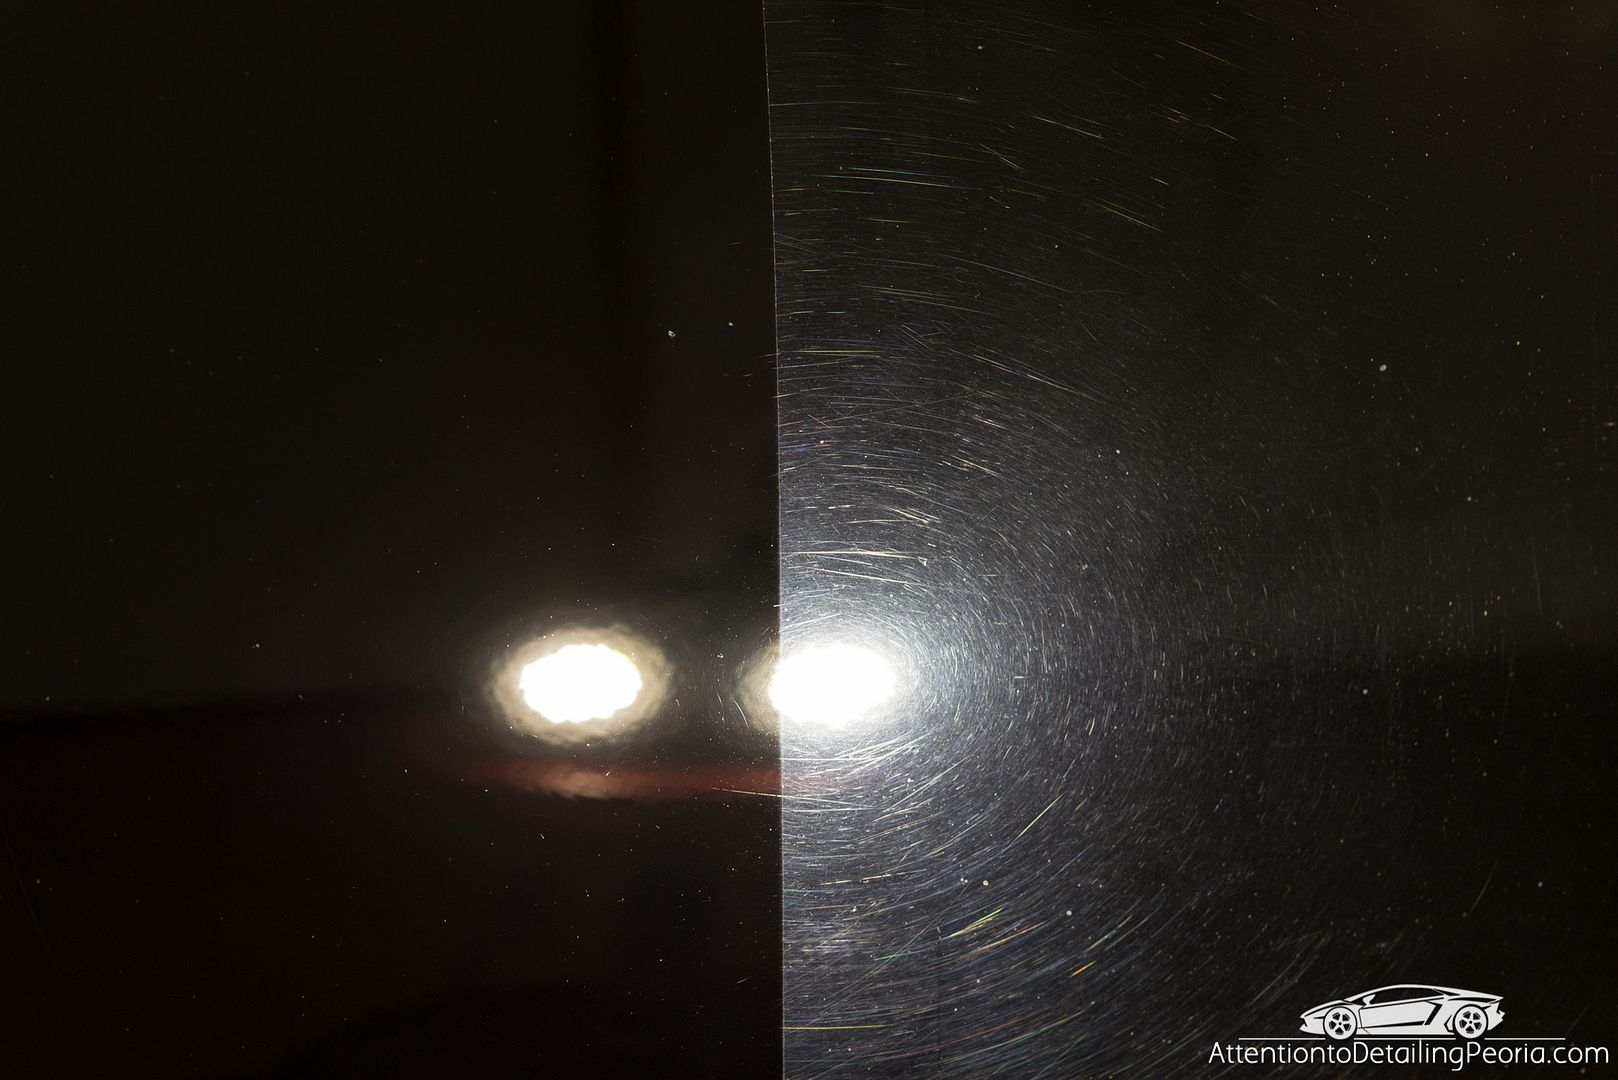
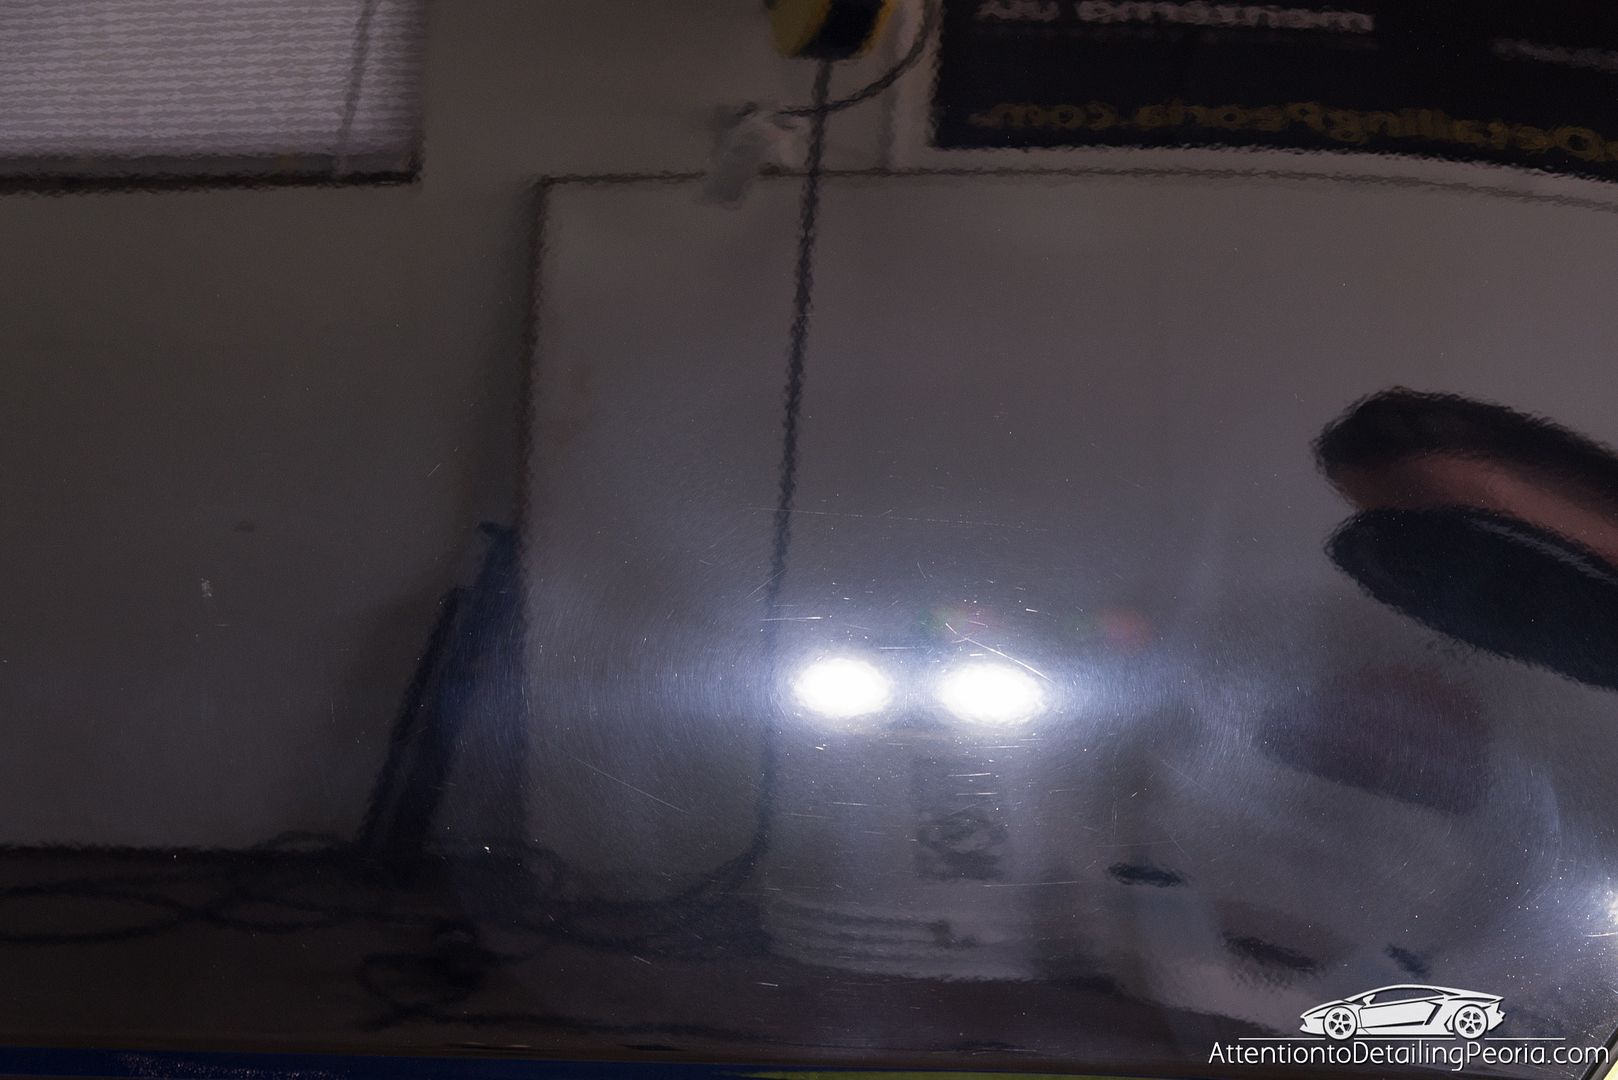
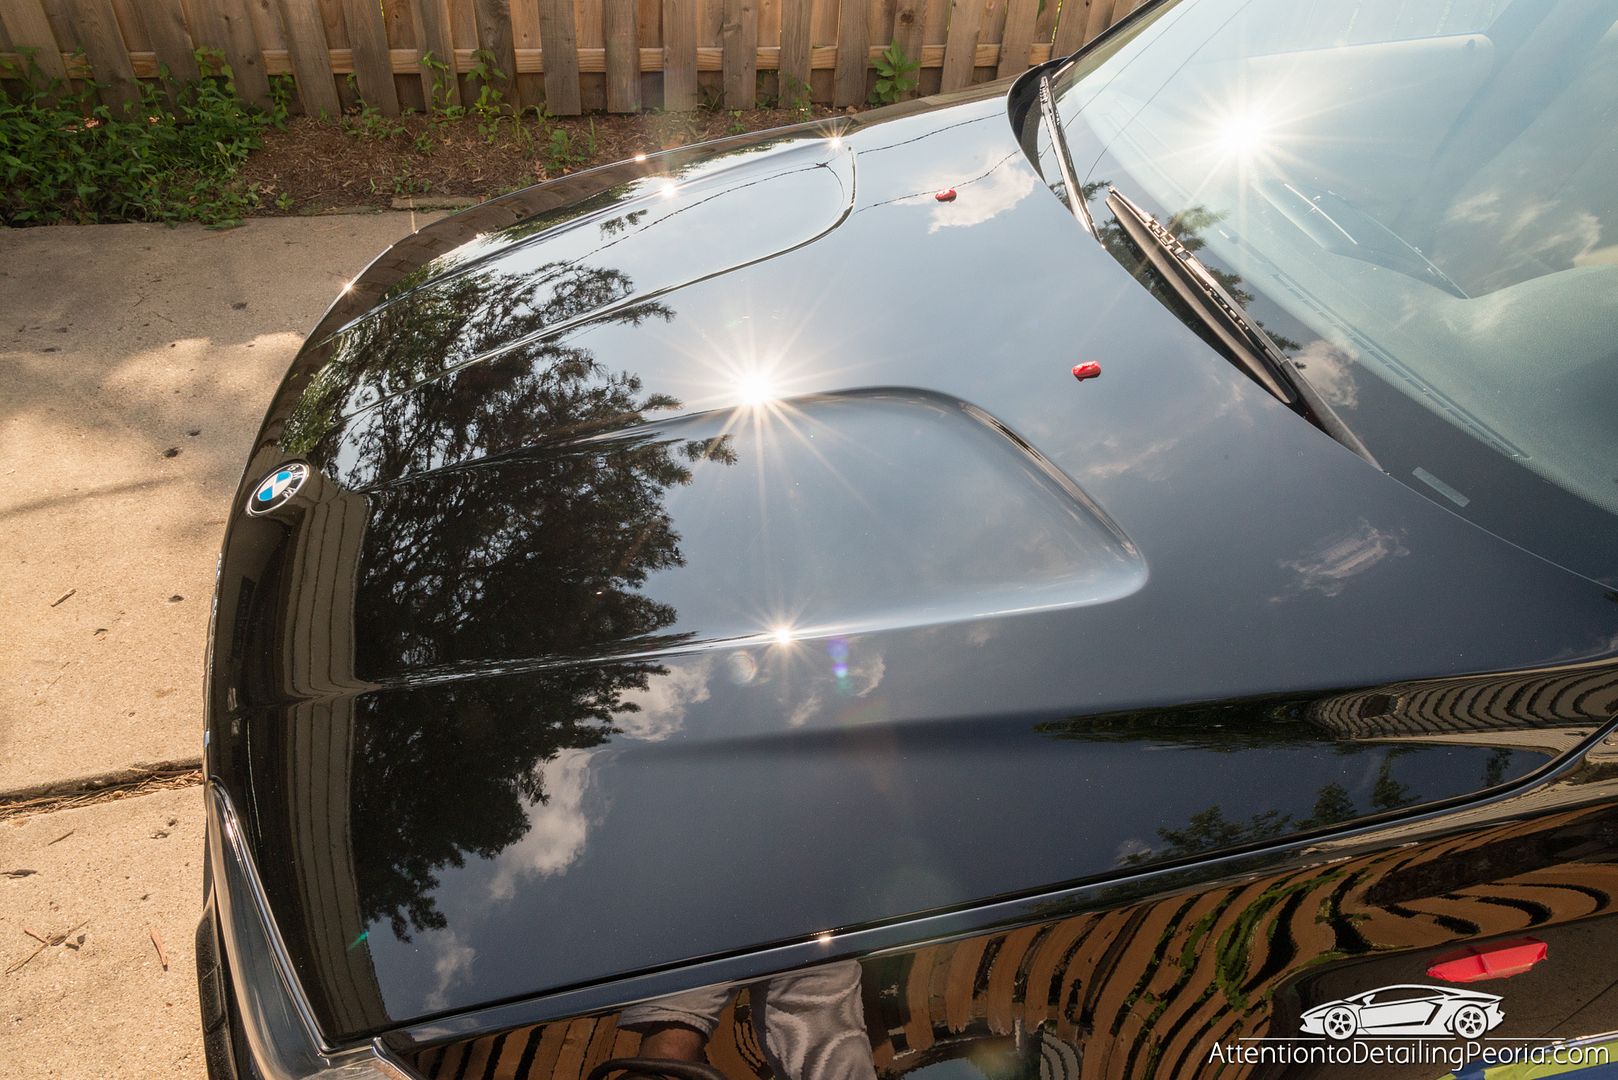
We proceeded to restore the paint one panel at a time. Here you can see the obvious difference in color and clarity in the hood after just compounding.
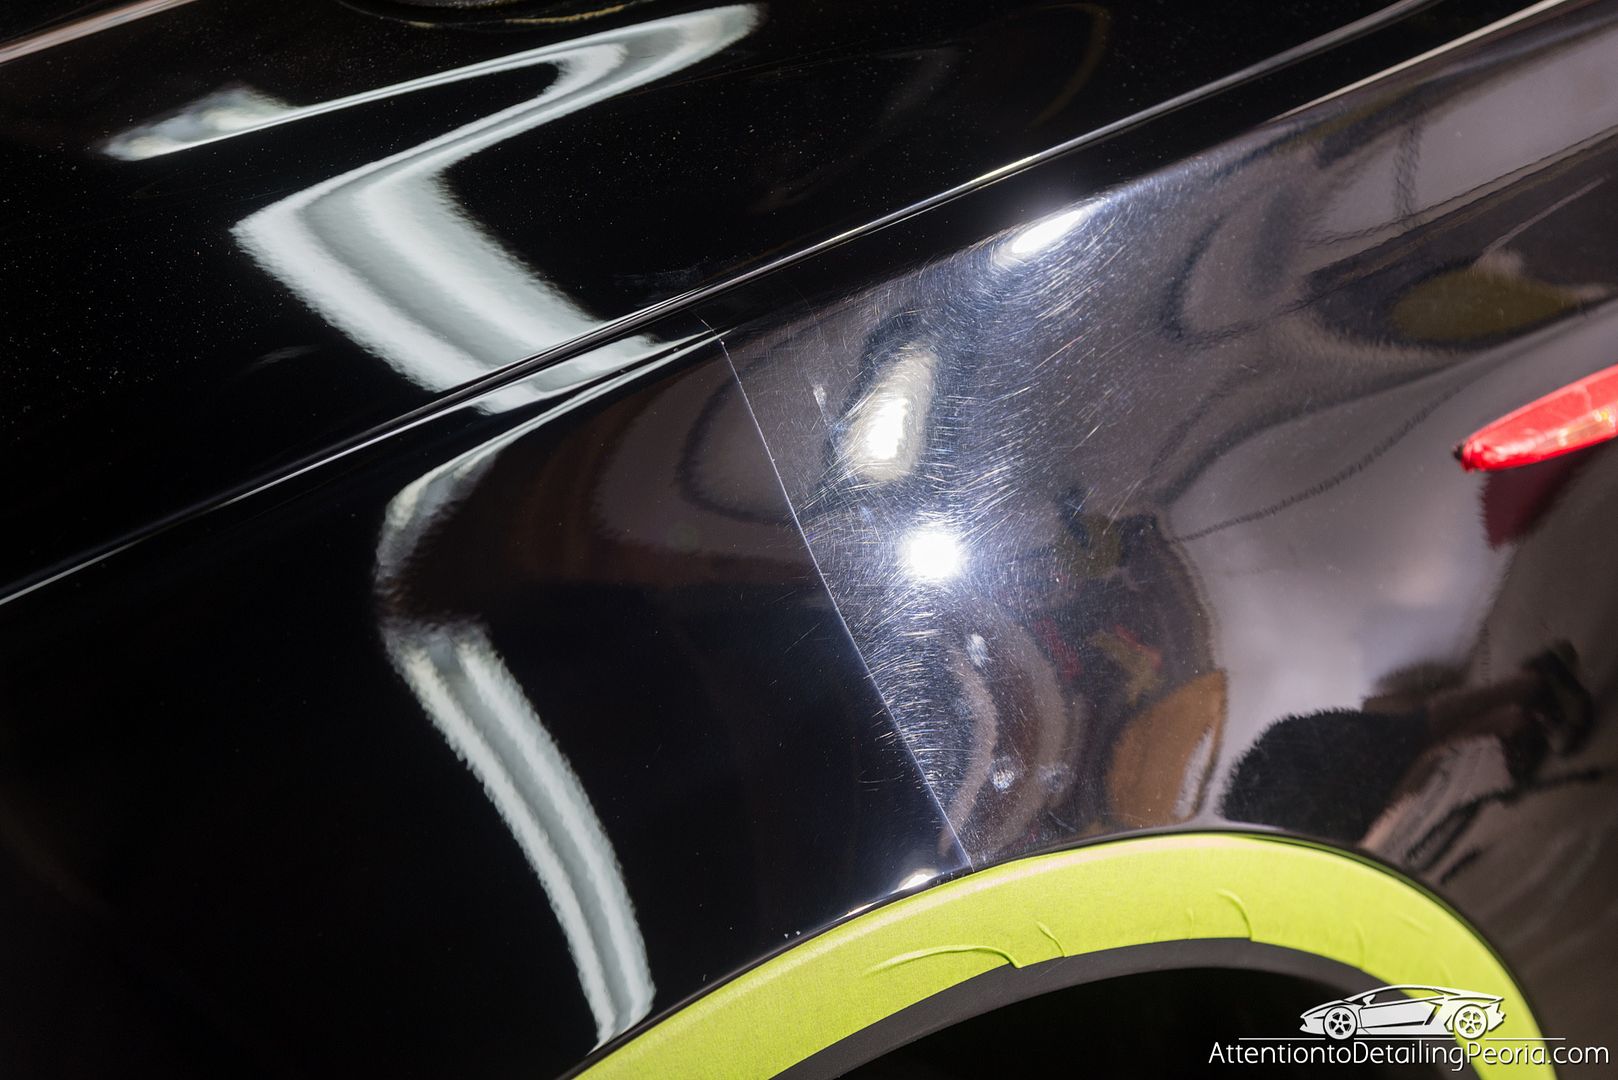
50/50 on hood
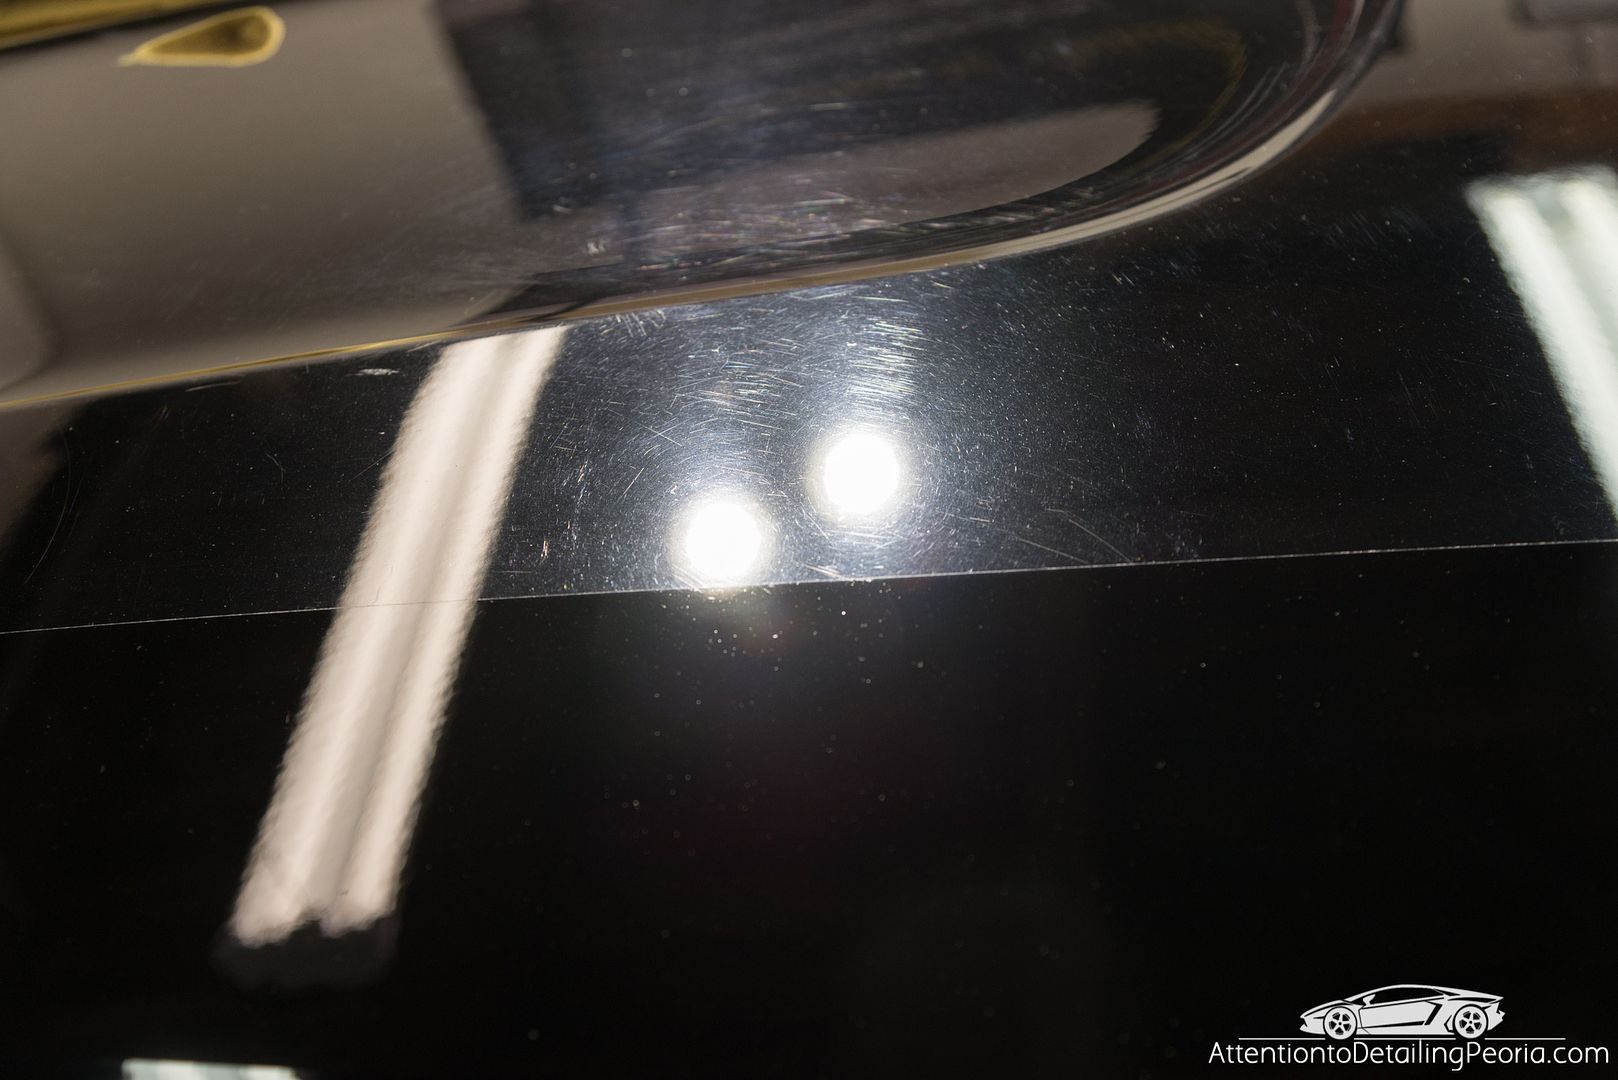
There were still a considerable amount of deeper defects remaining throughout the car, however the gloss is not hindered by these remaining scratches.
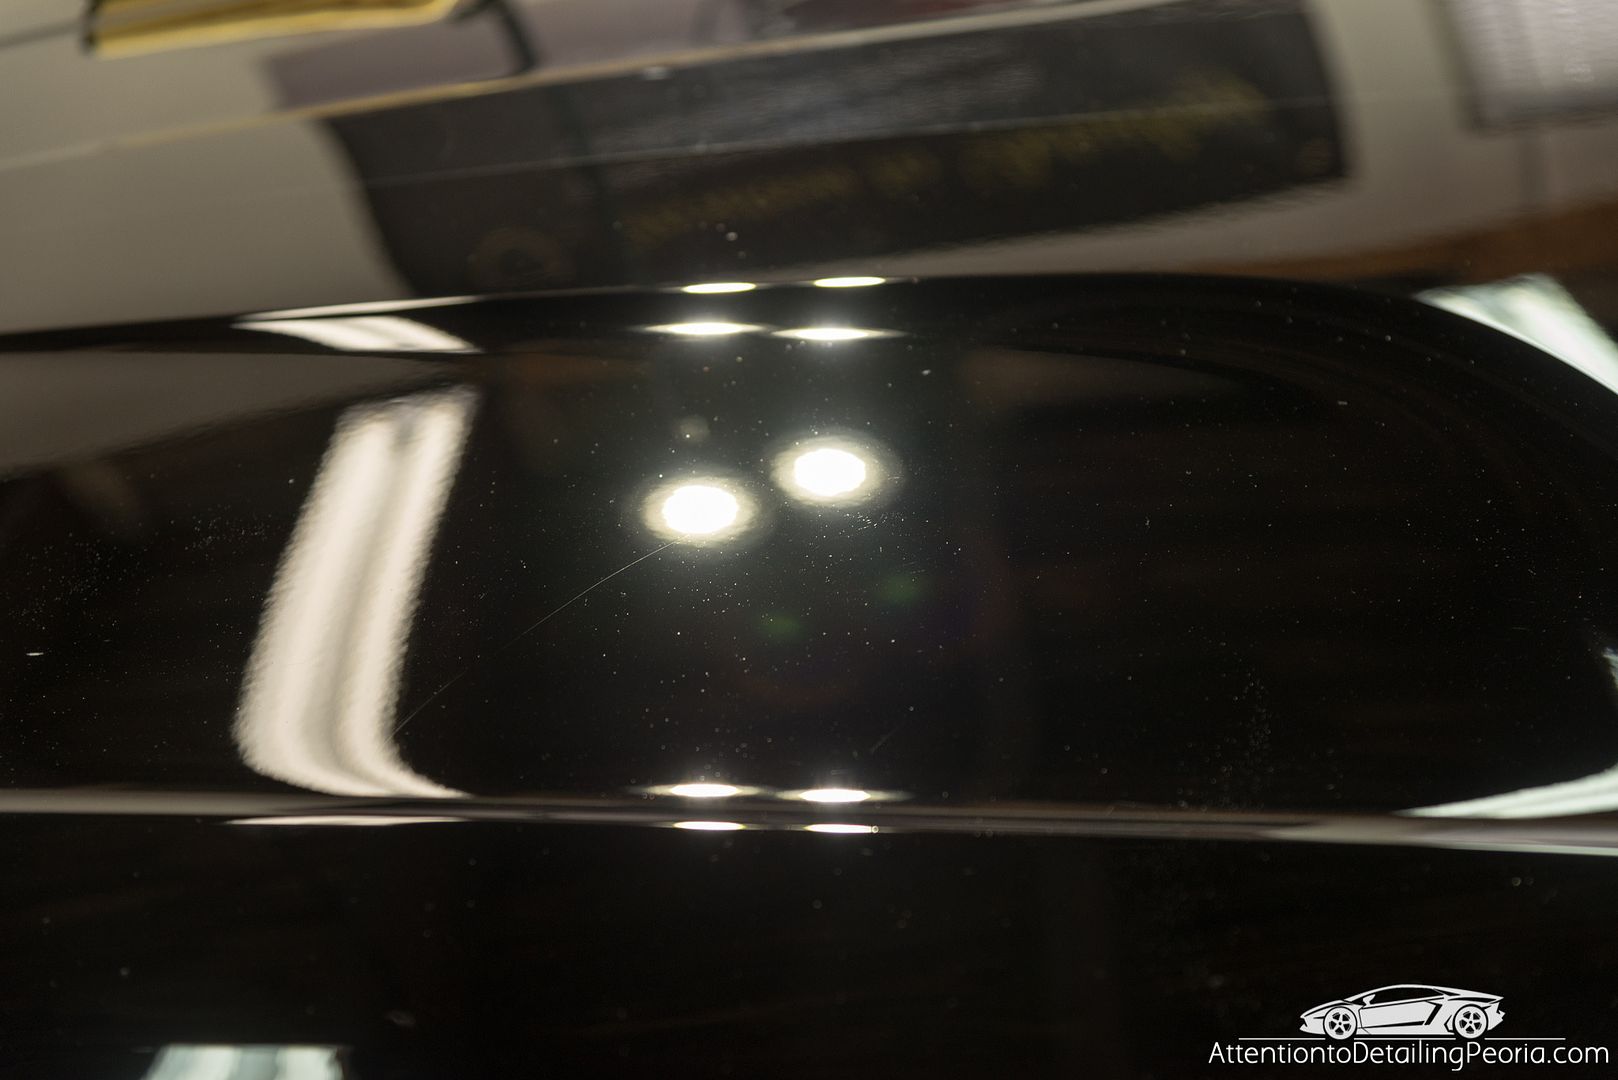
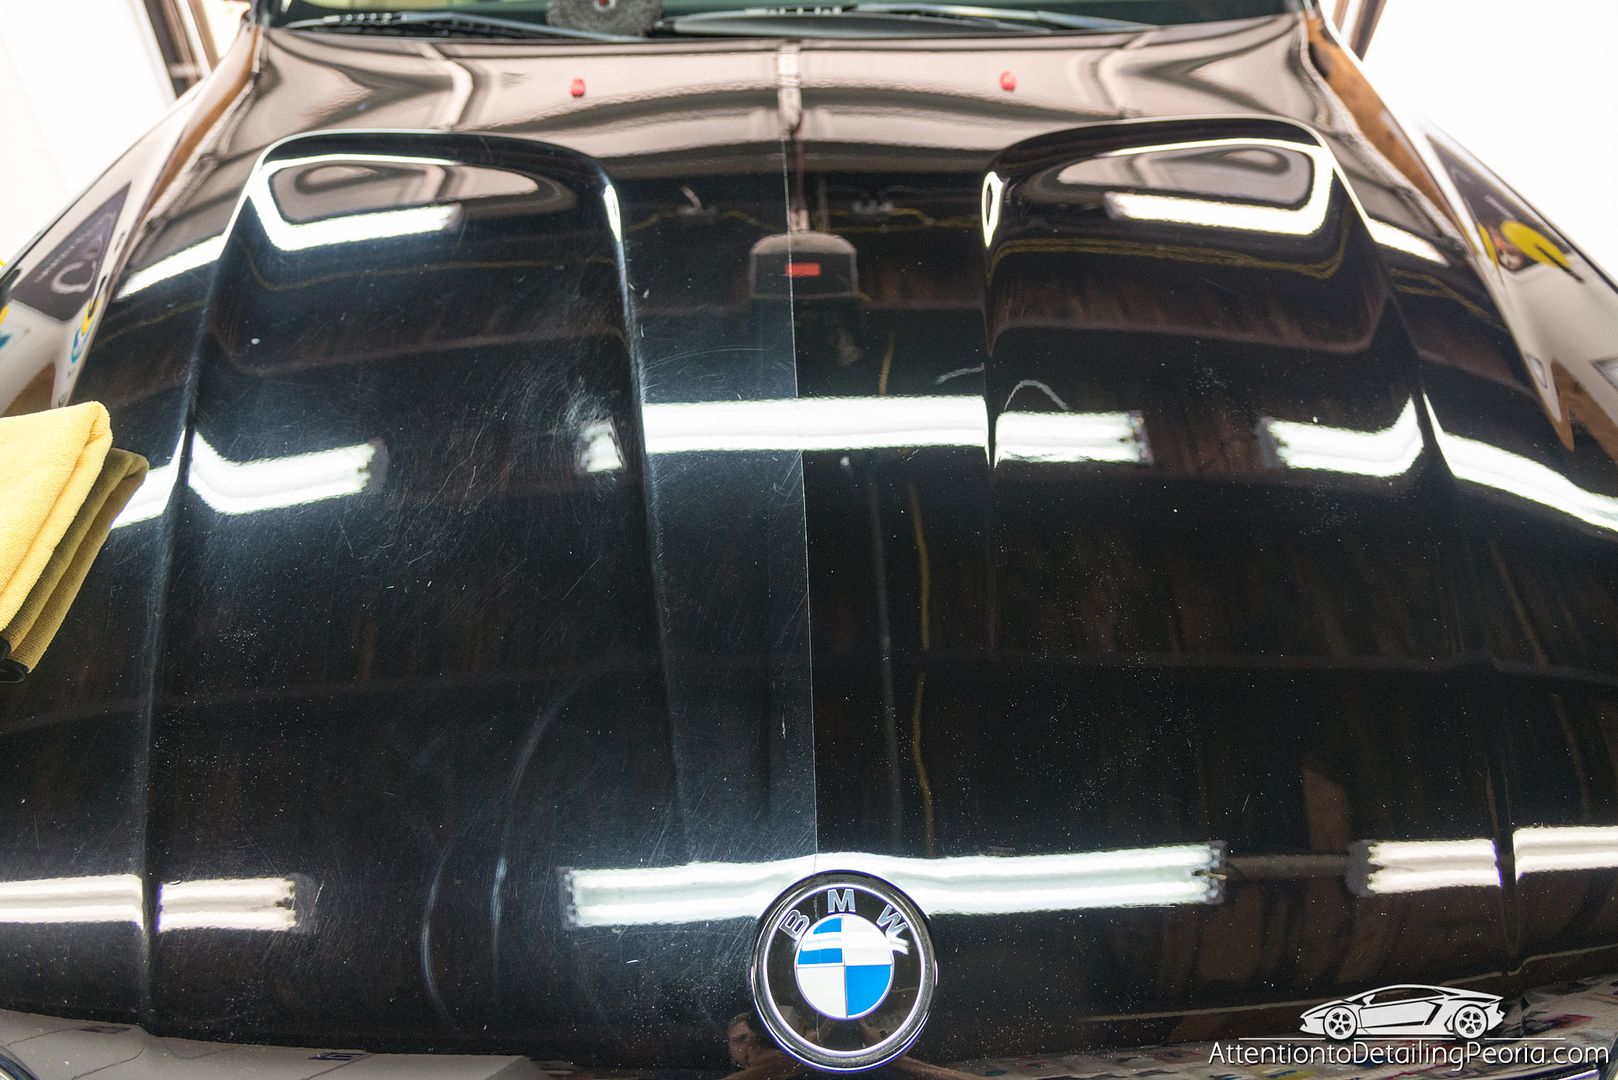
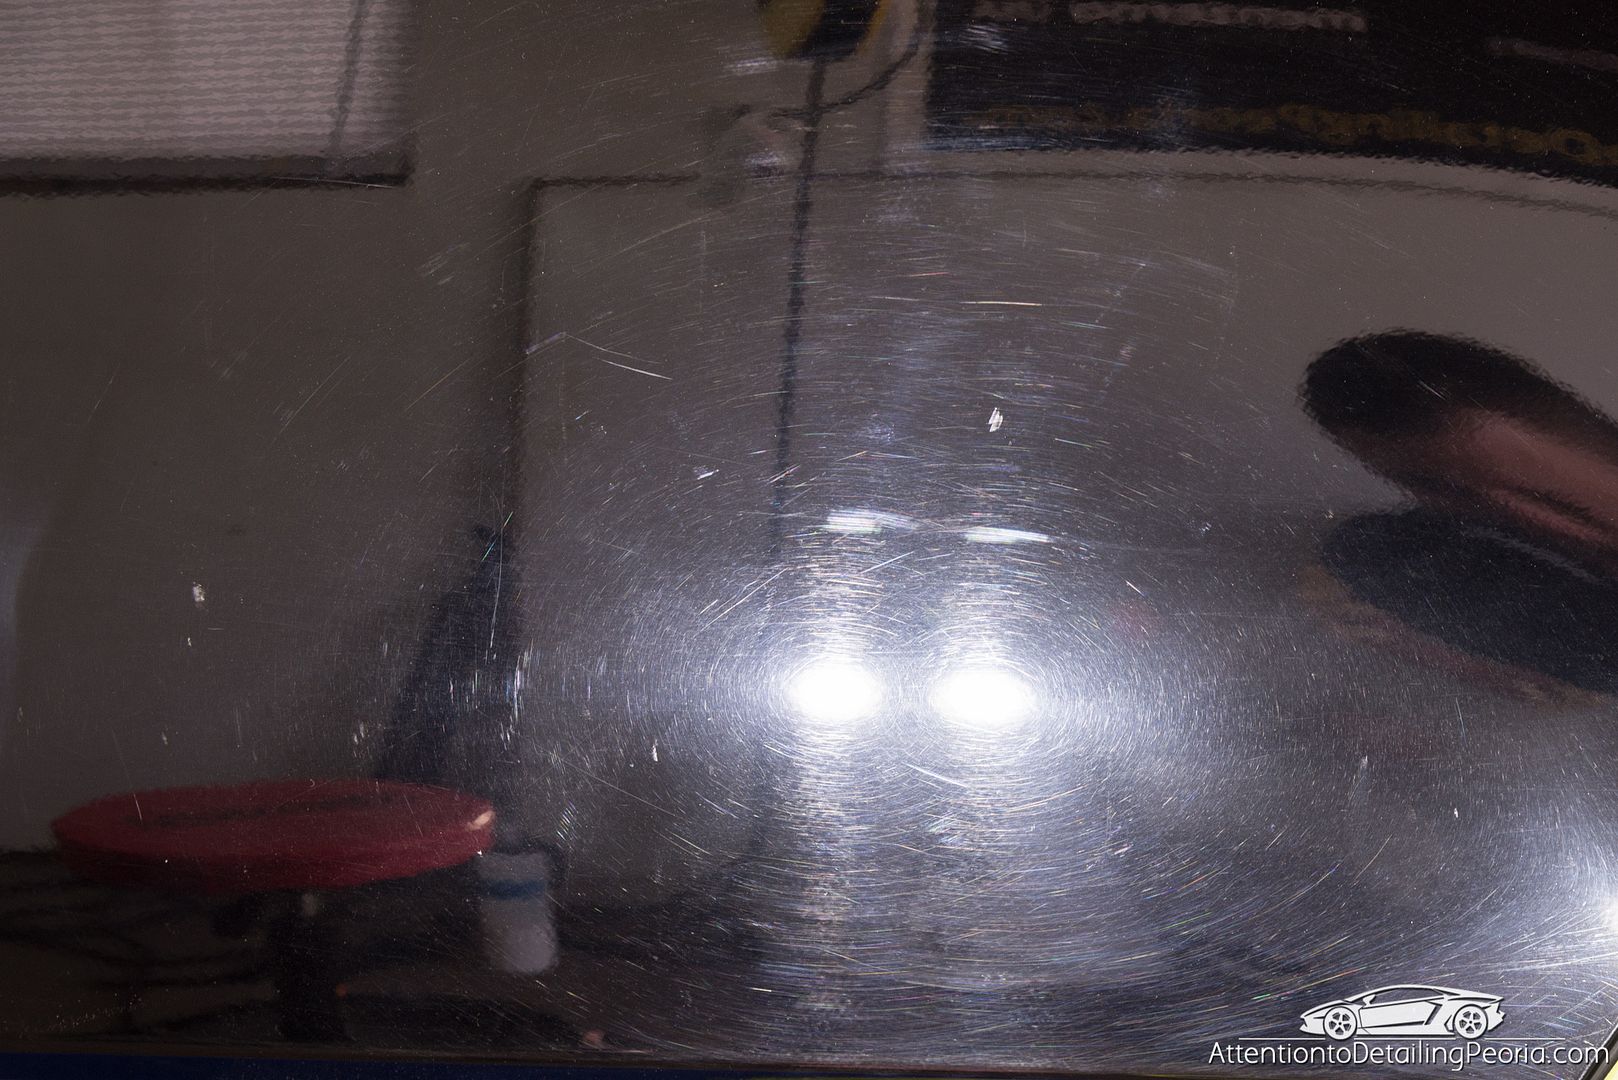
Hood before
Hood after compounding... the hood had a large amount of RIDS that appeared to be from objects being placed on the hood.

50/50 on fender after compounding. Again, notice the deep black that is being restored
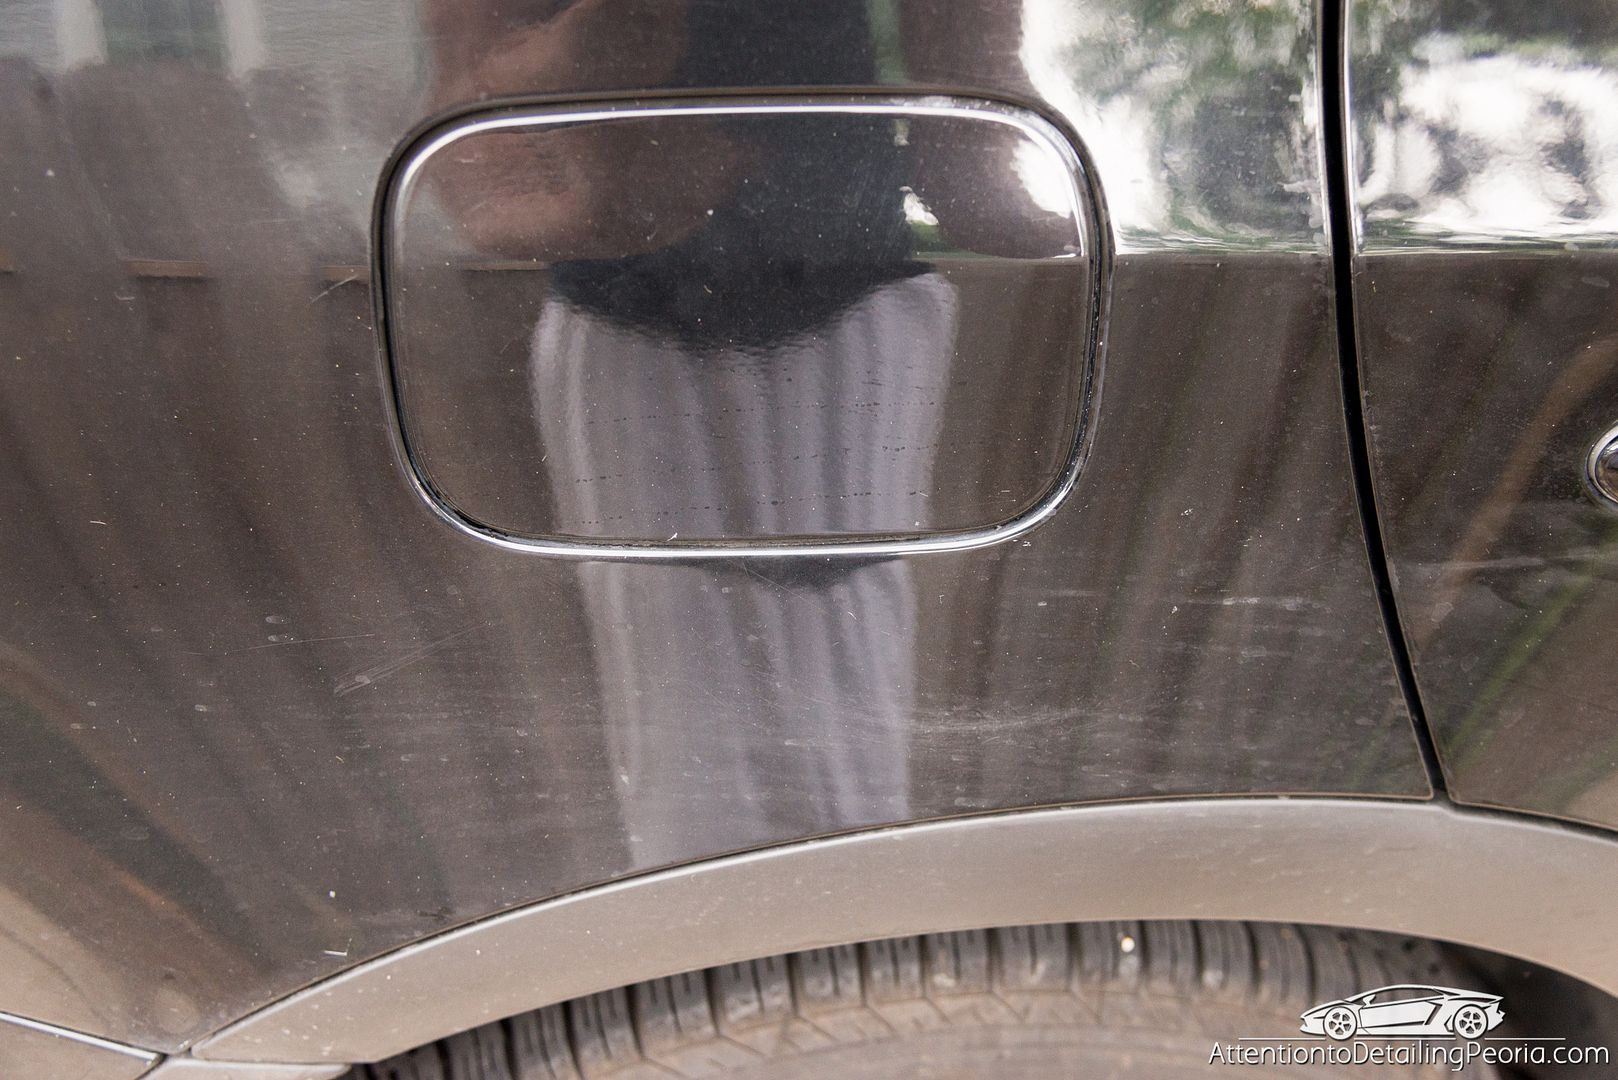
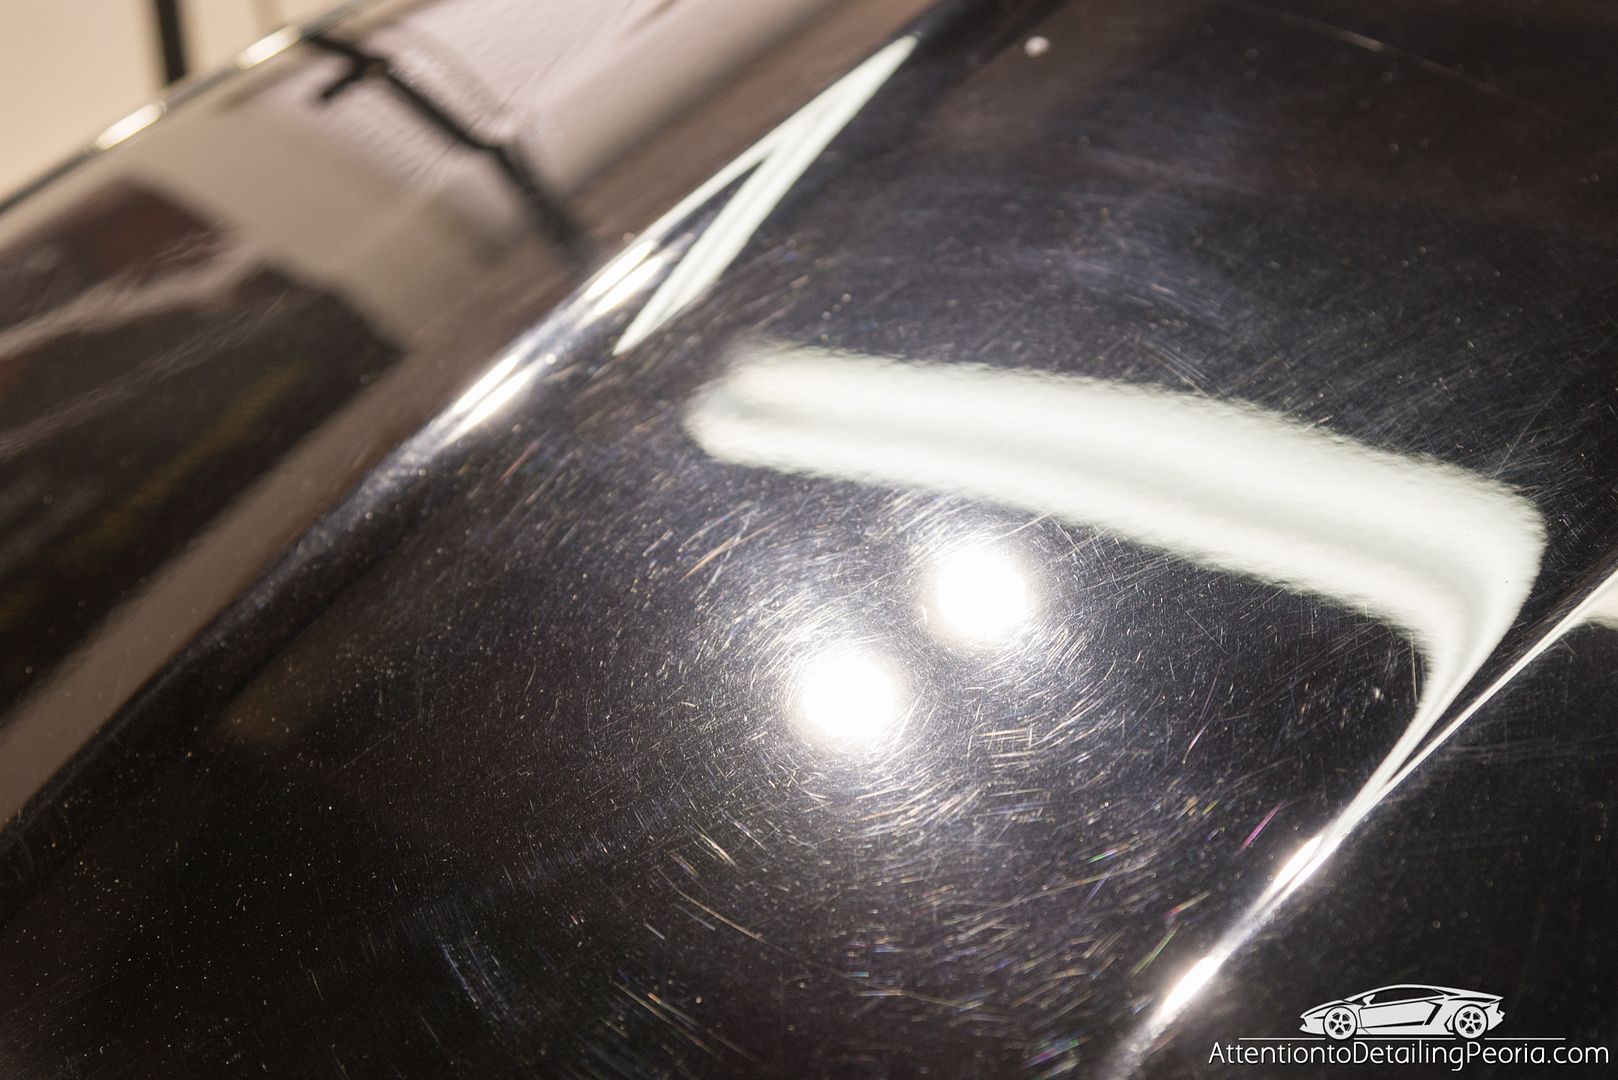
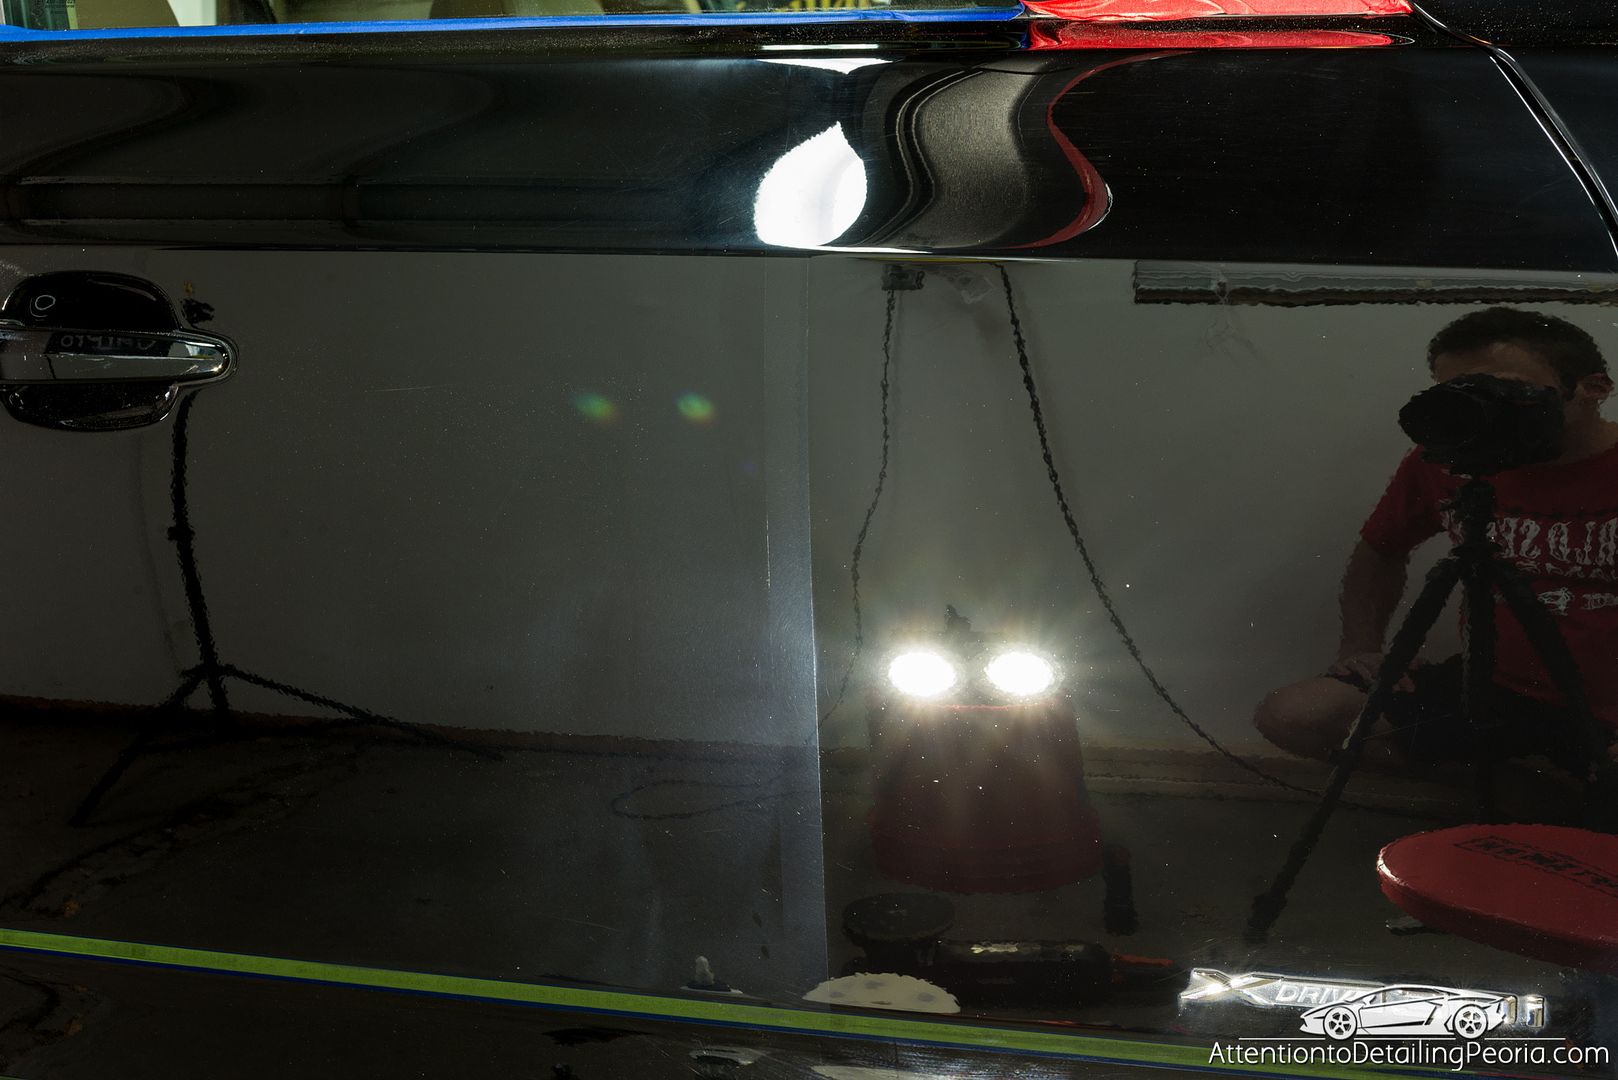
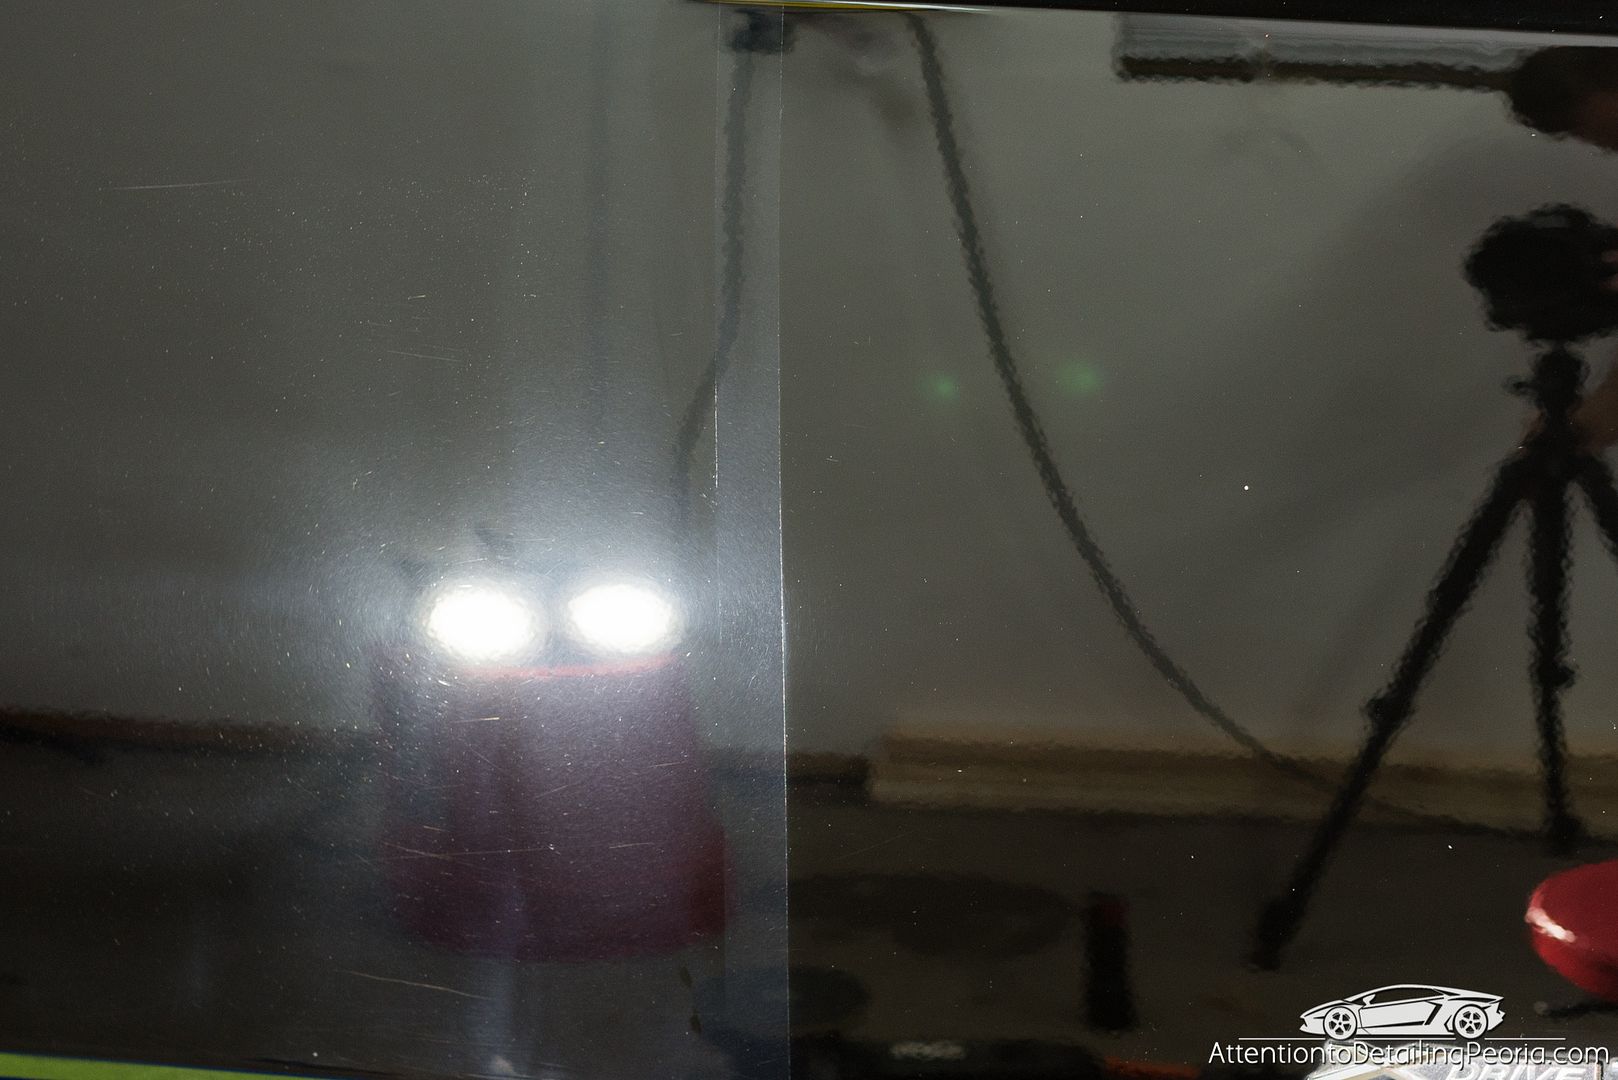
Door before
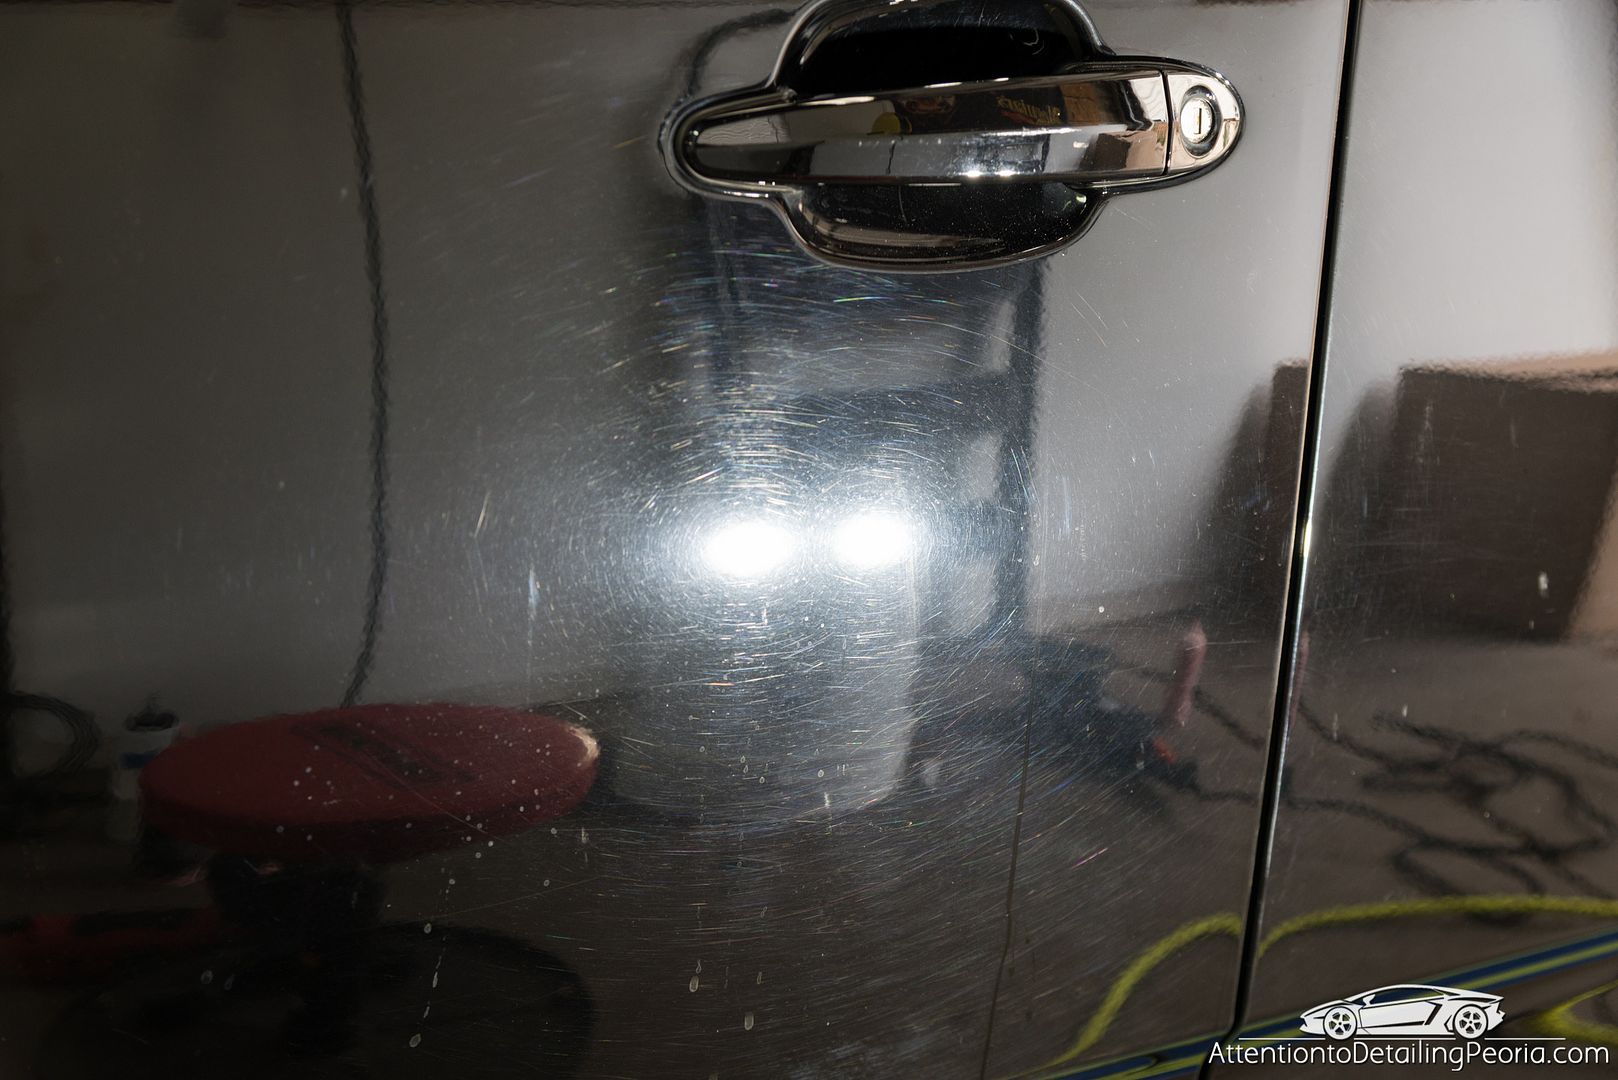
Door after compounding. Noticeable haze/marring is present after the heavier cutting process. This is later refined with a finishing polish.
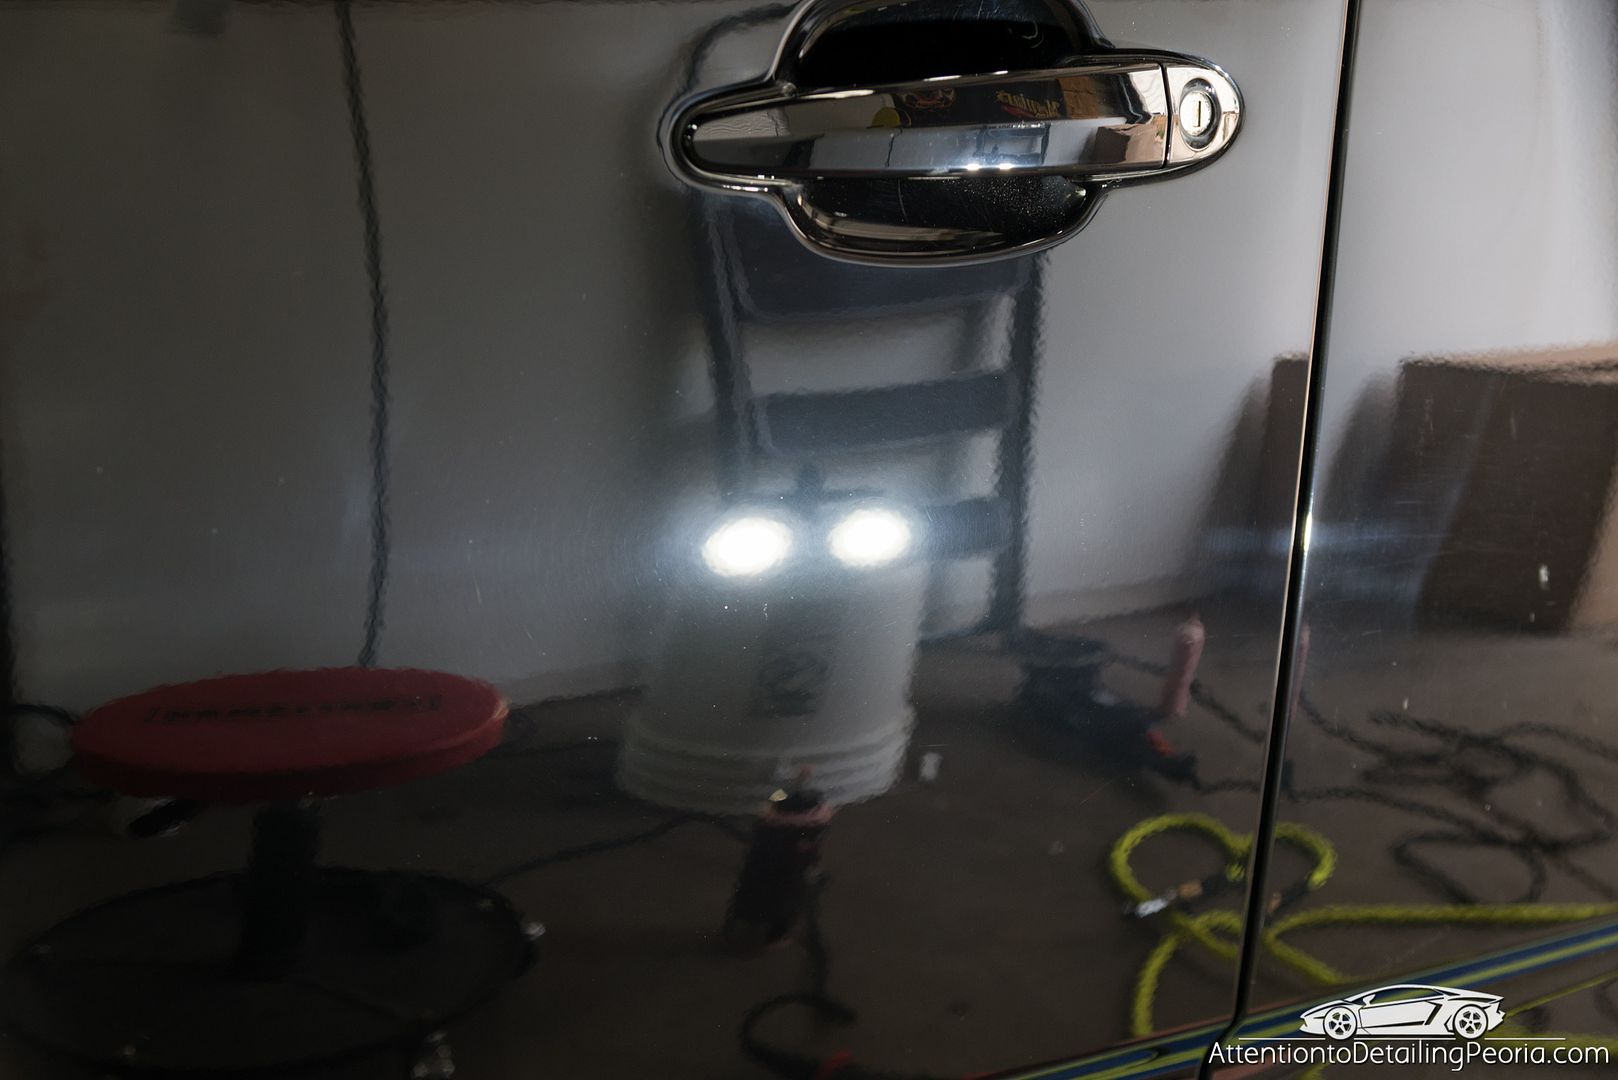
Door before
Door after compounding. Noticeable haze/marring is present after the heavier cutting process. This is later refined with a finishing polish.
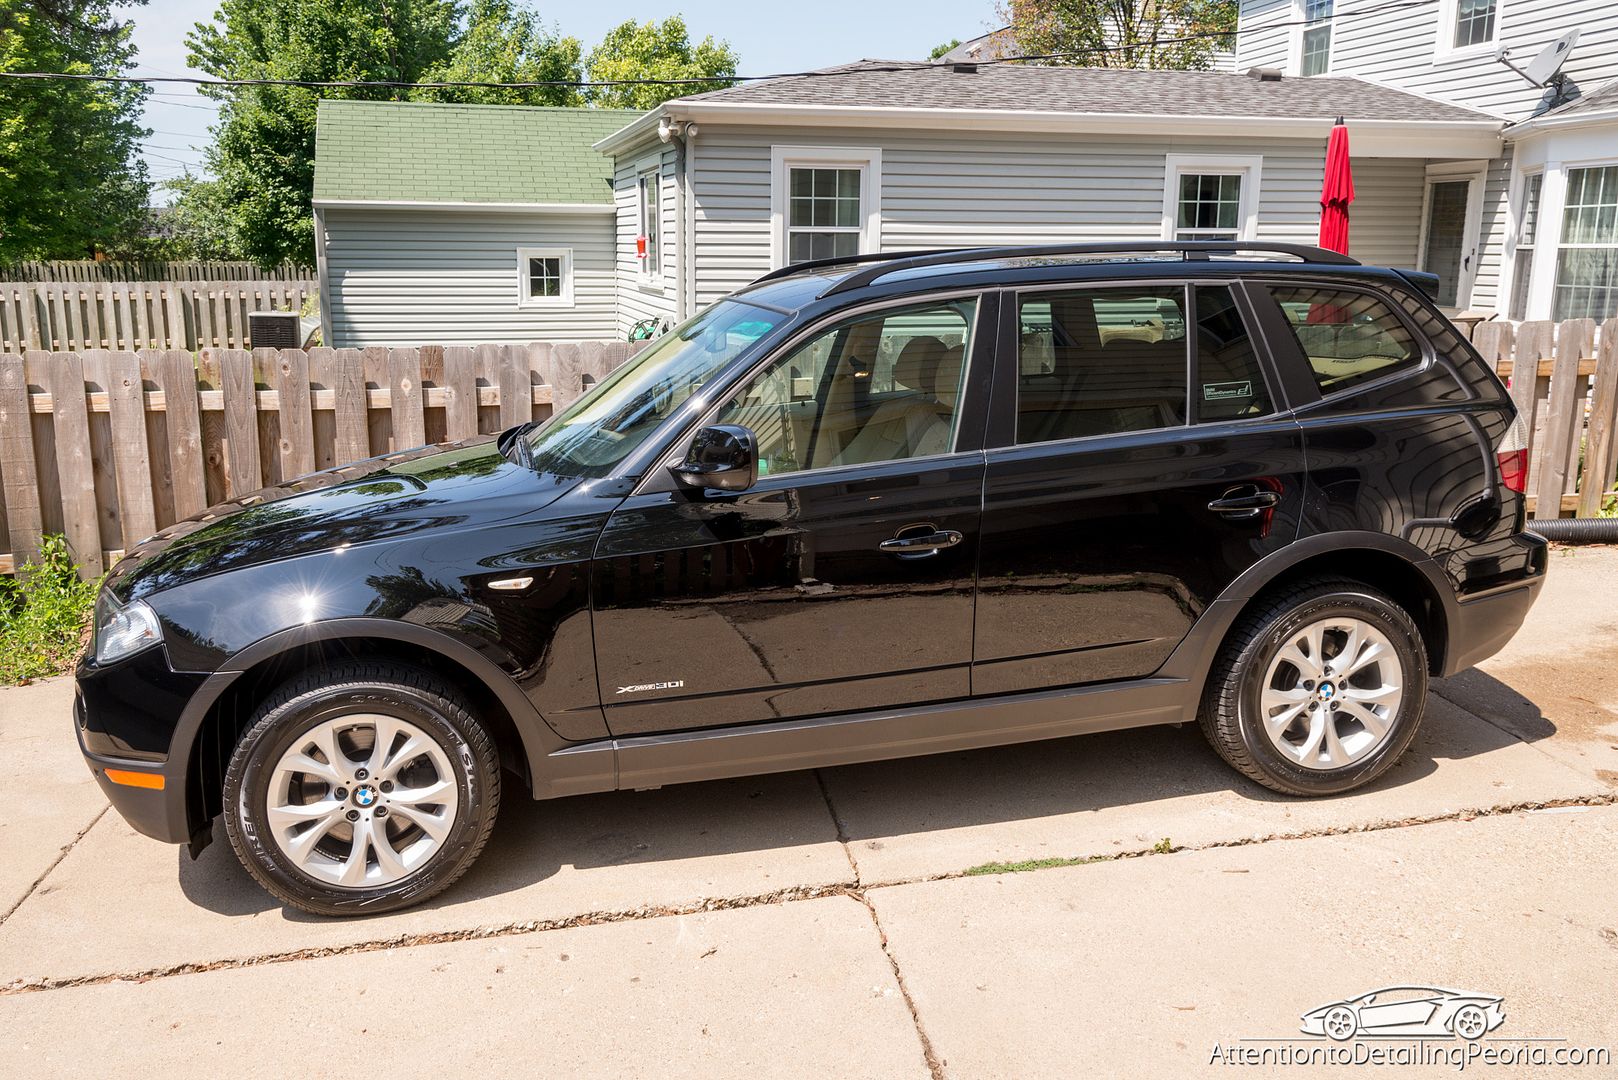
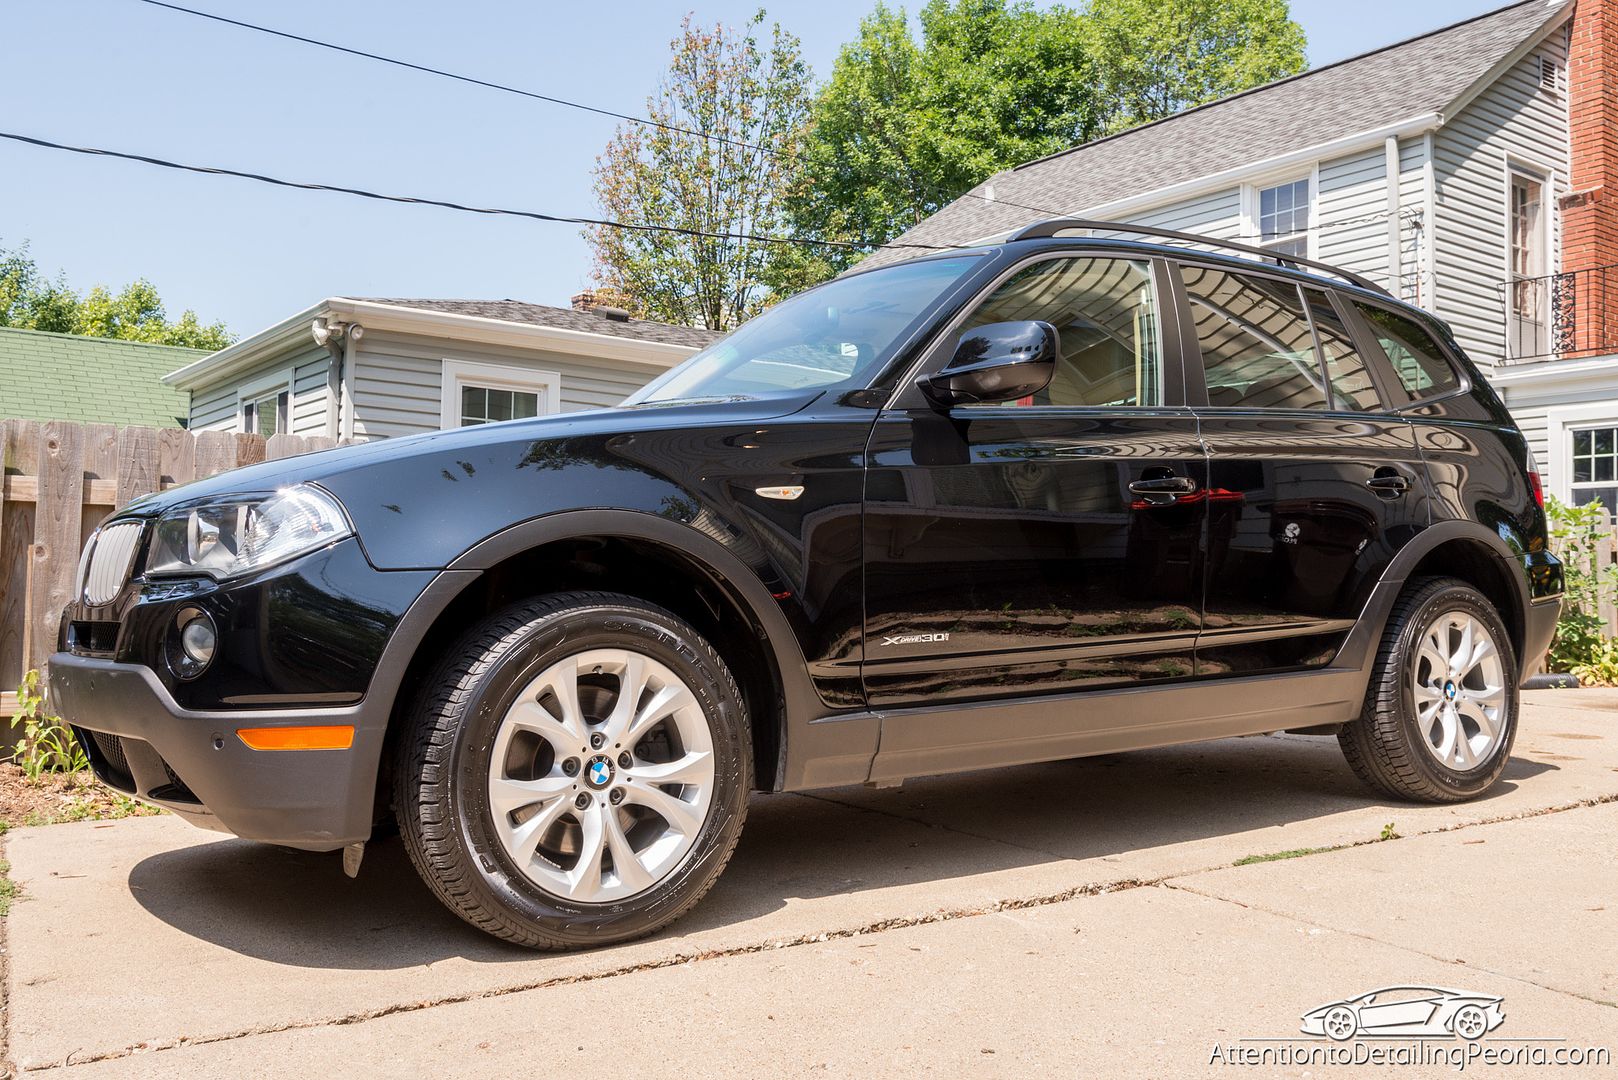
Checking our work in the sun. The paint was looking much better
Bug guts have etched into the paint in several areas. Keep in mind this is after the vehicle has been thorough cleaned and decontaminated. The stains that you see are not above the surface, but rather acid stains that have penetrated the paint causing permanent damage.
A great deal of the damage was removed, however some was deemed too deep to safely remove.

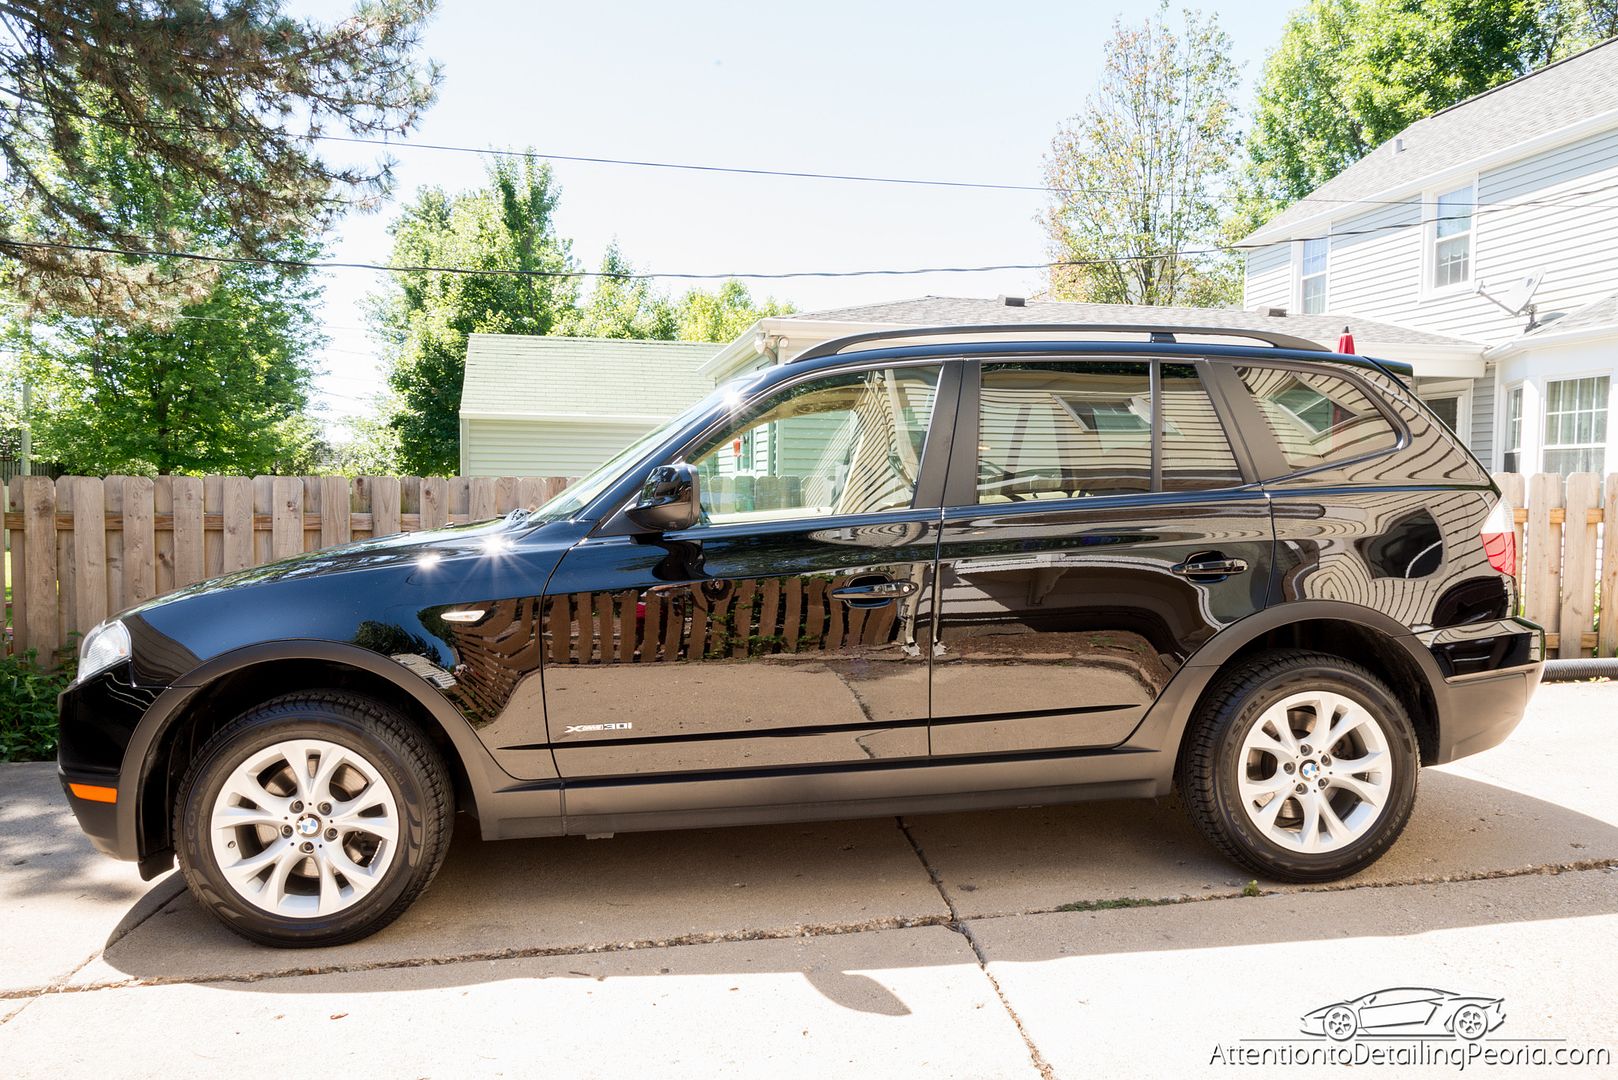
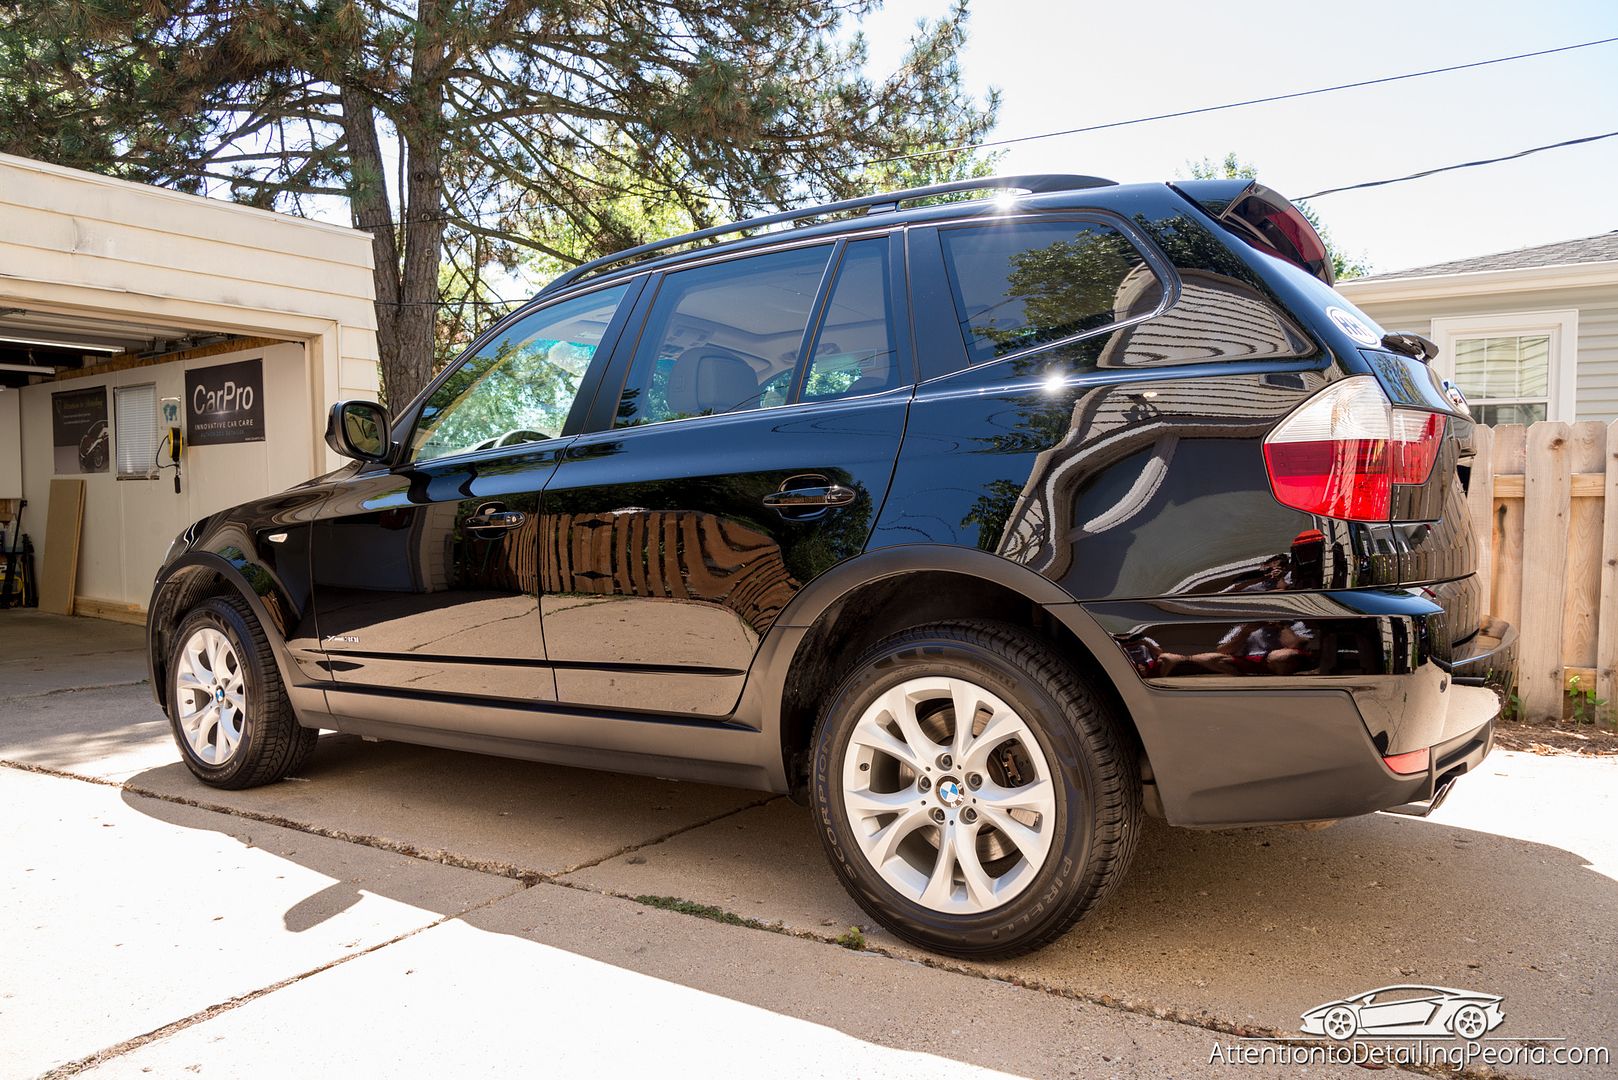
Once the vehicle was compounded, we proceeded with polishing. This process removes any haze left during cutting and restores a clear finish that is even deeper and darker.
The paint was carefully wiped down with a solvento to remove any residual oils from the correction process, and was then coated with a ceramic coating for added gloss and long-term protection.
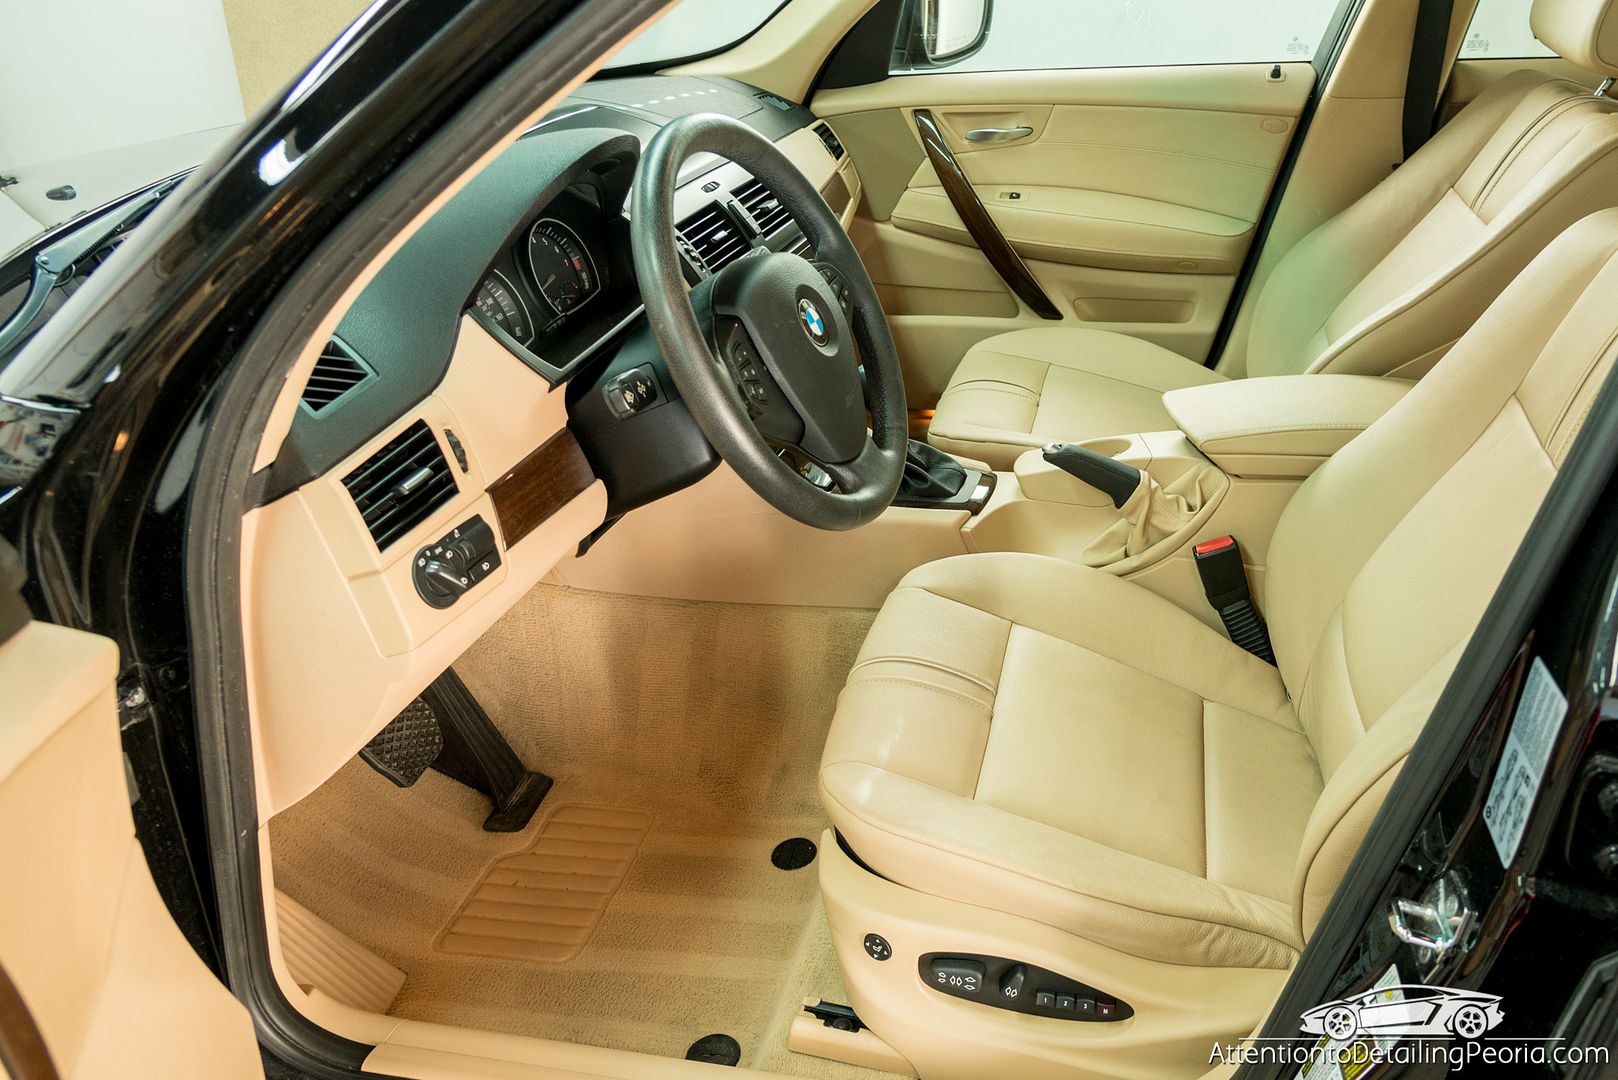
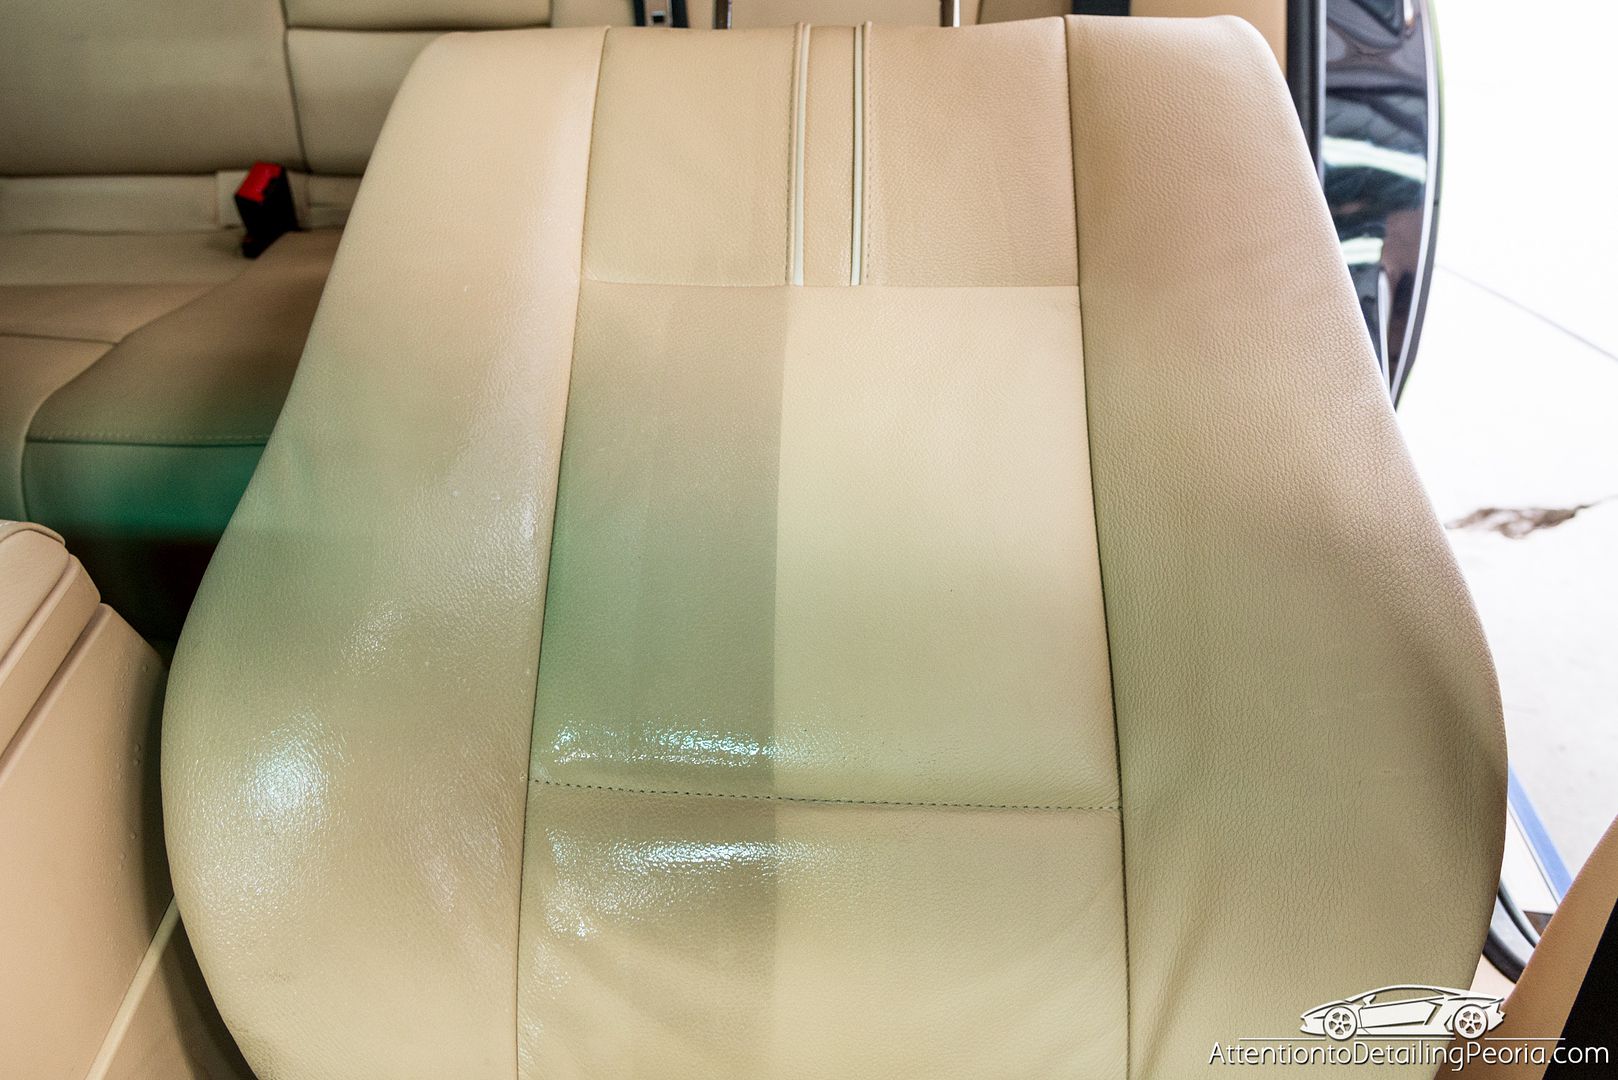
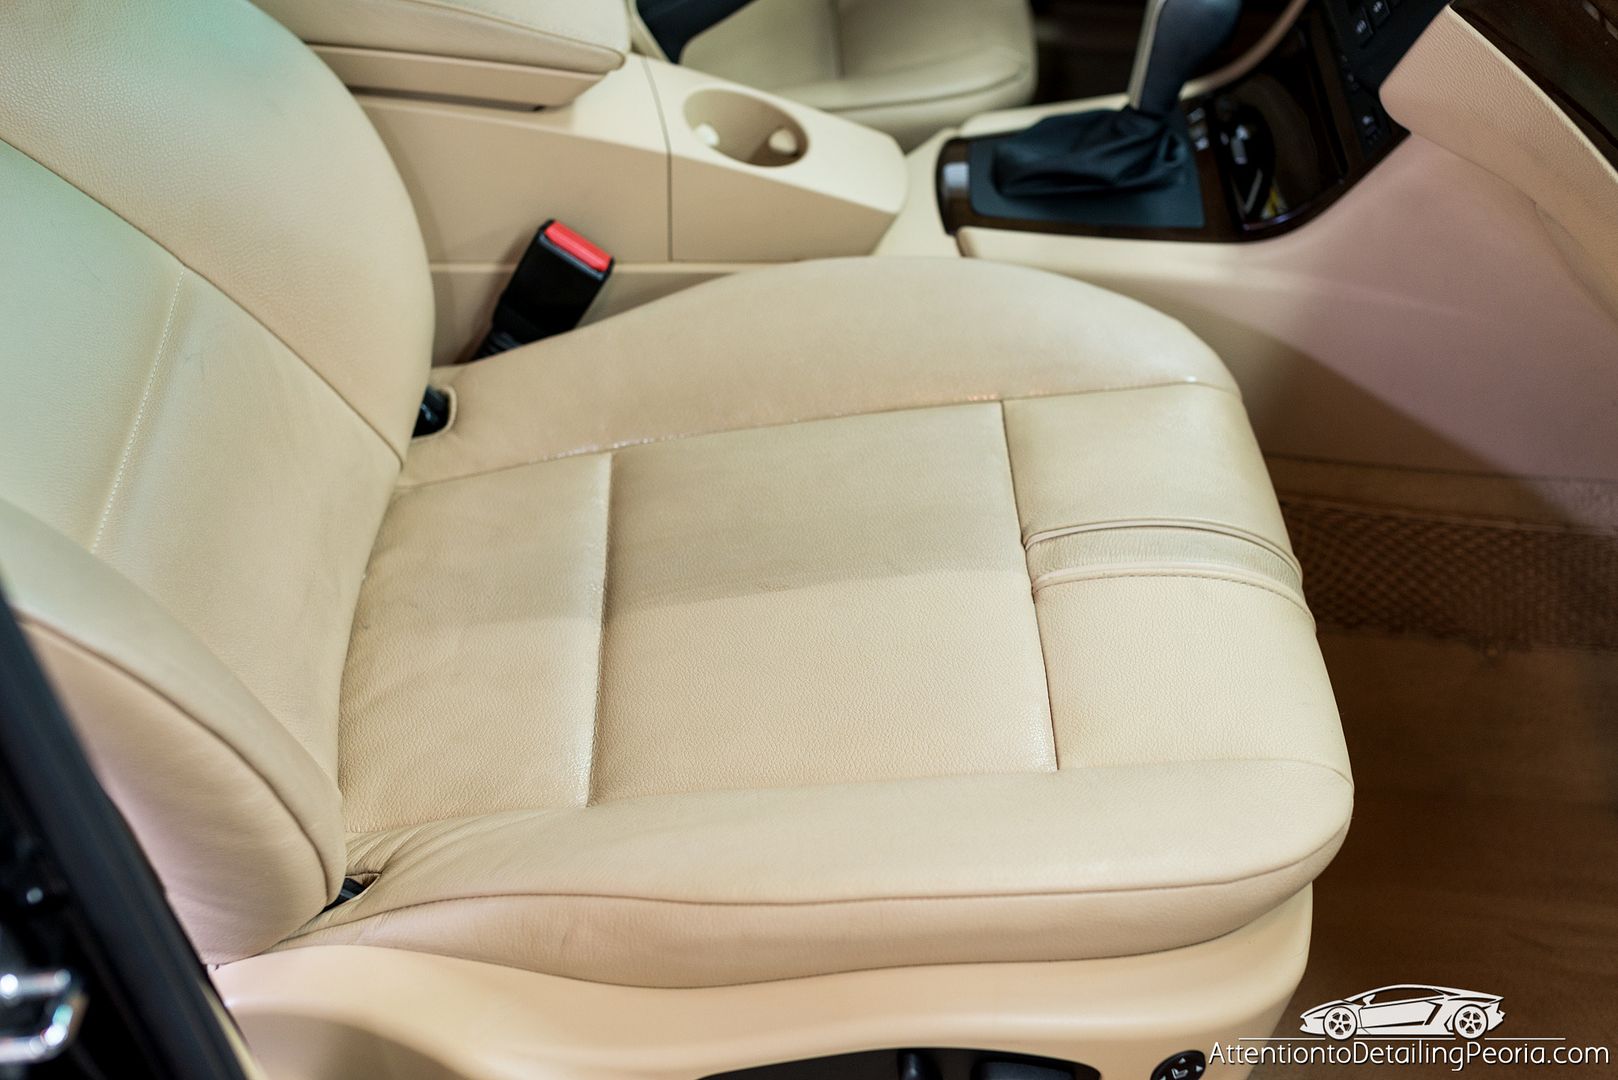
I then turned my attention to the interior where the leather was deep cleaned to remove years of grime. This process restored the original color to the leather and also left it feeling softer.
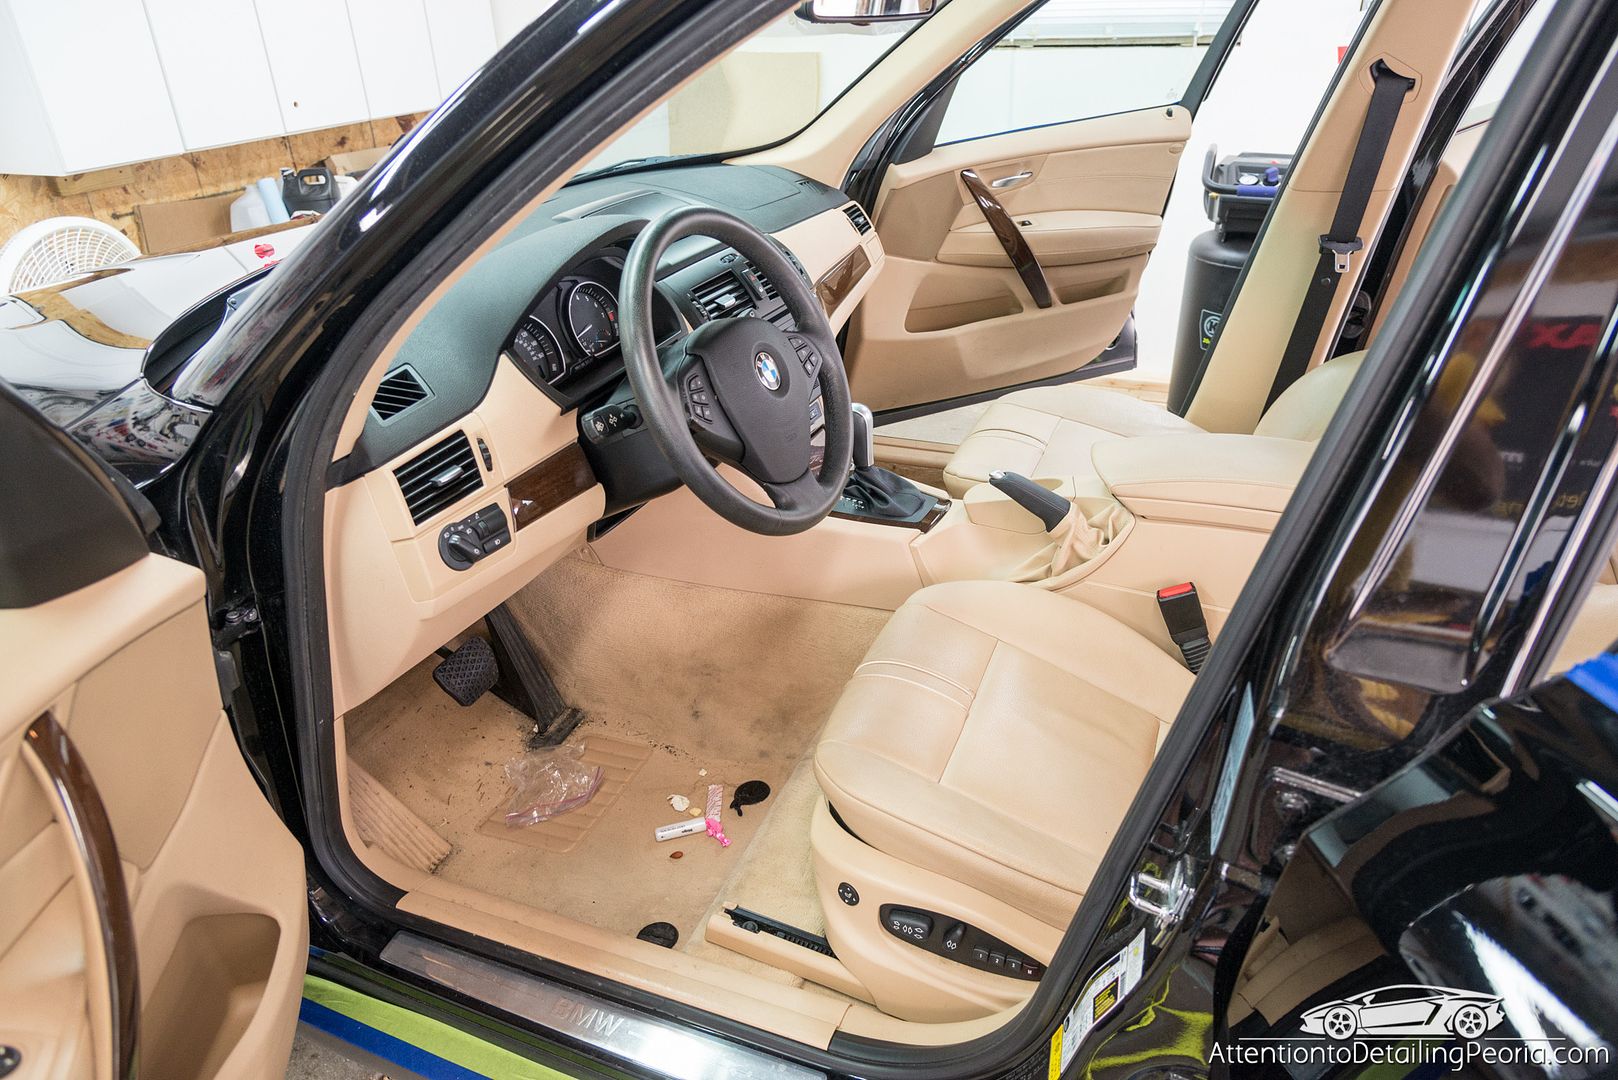
The carpets were lightly soiled and there was dirt and debris throughout.
This car was in need of a great amount of work. The paint was dull and damaged from years of poor car washing, and the interior was in need of a deep cleaning and decontamination. While not perfect, the paint yielded an incredible transformation with a two-step correction process that drastically improved the color and clarity making it look years newer. The paint was protected with a ceramic paint coating for added gloss and durable protection. The interior was thoroughly cleaned to revitalize the leather and plastics. In the end, it looks like a completely different vehicle.
Process
Engine
Rinse
Cleaned with D101 and D108 with various brushes
Rinsed
Blown dry with Blaster Sidekick
Dressed with 303
Exterior
Tires: Tuf Shine Tire Cleaner and Tire Brush
Wheels: Sonax FE, Wheel Woolies, EZ Detail Brush & other brushes
Foam Pre-Soak: CarPro Iron X Snow Soap via DI Foam Lance
Wash: CG Citrus Wash & DI Rethickulous Wash Mitt
Chemical Decon: Iron X Lemon Scent
Mechanical Decon: Medium Grade Speedy Prep Towel with Glide for lubrication
Paint Thickness Readings Taken
Masked off delicate areas
Compounding: D300 & Meguiar's MF Cutting Discs via G21, LHR21ES, and LHR75e
Polishing: HD Polish on White Rupes Pads & M205 on White LC Pads via G21, LHR21ES, and LHR75e
CarPro Eraser Wipe down
Paint Coating: Optimum Gloss-Coat
Wheel Sealant: CarPro HydrO2
Glass: CarPro Eraser
Tires: CarPro PERL (1:1, 2 coats)
Exhaust Tips: CG Metal Polish
Interior
Blow out cracks and crevices with compressed air
Thorough vacuum
Carpets cleaned with ONR and APC (Meguiar's D101 10:1)
Hard Surfaces cleaned with steam & Einszett Plastic Reigner
Leather cleaned with D101 & Leather brush
303 applied to all surfaces
Feel like I am forgetting some stuff, but that is the majority of it... we had this car for 10 days so it is all kind of a blur.
The vehicle arrived with a considerable amount of dirt and debris covering every surface
As always, we begin with cleaning the tires. You can see the thick layer of dirt and grime that had accumulated on the rubber.
After several rounds of cleaning, the white residue and brush indicate the tires are properly cleaned.
We then turned our attention to the wheels, where a large amount of dirt and brake dust had built up. The wheel cleaner helped to break down the grime before we started cleaning with our brushes.
After the wheels and tires were cleaned and sealed, we begain cleaning the paint. The car was soaked with a heavy mixture of shampoo and degreaser to help break down the loose partcles before washing. The car was then thoroughly washed, chemically decontaminated, mechanically decontaminated, washed again, and then dried.
Once cleaned, I began my testing on the paint to find a combination of products that would yield the best results. The difference was going to be great on this paint.
We proceeded to restore the paint one panel at a time. Here you can see the obvious difference in color and clarity in the hood after just compounding.
50/50 on hood
There were still a considerable amount of deeper defects remaining throughout the car, however the gloss is not hindered by these remaining scratches.
Hood before
Hood after compounding... the hood had a large amount of RIDS that appeared to be from objects being placed on the hood.
50/50 on fender after compounding. Again, notice the deep black that is being restored
Door before
Door after compounding. Noticeable haze/marring is present after the heavier cutting process. This is later refined with a finishing polish.
Door before
Door after compounding. Noticeable haze/marring is present after the heavier cutting process. This is later refined with a finishing polish.
Checking our work in the sun. The paint was looking much better
Bug guts have etched into the paint in several areas. Keep in mind this is after the vehicle has been thorough cleaned and decontaminated. The stains that you see are not above the surface, but rather acid stains that have penetrated the paint causing permanent damage.
A great deal of the damage was removed, however some was deemed too deep to safely remove.
Once the vehicle was compounded, we proceeded with polishing. This process removes any haze left during cutting and restores a clear finish that is even deeper and darker.
The paint was carefully wiped down with a solvento to remove any residual oils from the correction process, and was then coated with a ceramic coating for added gloss and long-term protection.
I then turned my attention to the interior where the leather was deep cleaned to remove years of grime. This process restored the original color to the leather and also left it feeling softer.
The carpets were lightly soiled and there was dirt and debris throughout.