Migue
New member
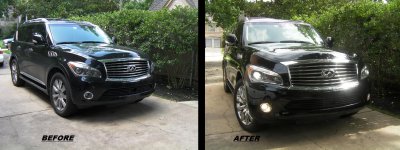
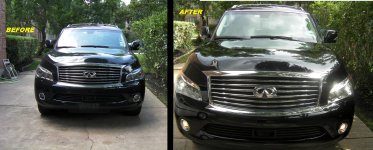
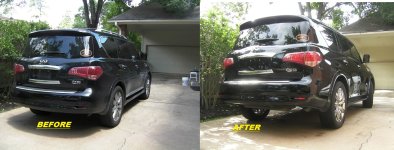
My coworker approached me after finding out i have experience doing body work about correcting a scratch on the whole side of her truck(from a plastic trash can at her House as she was pulling in) , she then also asked me if could detail her truck inside out.
This was done about a month ago but I've been busy steadily studying(reading) and working on(finally) building my business and kept forgetting to do a write up on it.
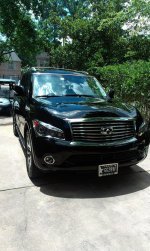
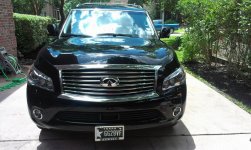
Exterior Process:
-Wheels done with Sonax and brushes/wheel woolies(these are awesome,totally worth the $).
-Wheel Wells with SG, scrubbed and pressure washed.
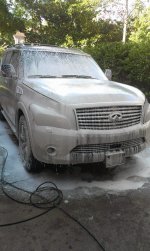
-AR Blue Foam Cannon with just some diluted Meg's Soap,high pressure rinse.
-Griots Brilliant Finish Car Wash for paint with 2 Bucket Wash.
-Nanoskin Blue Sponge for decontaminating ,using Nanoskin Glide as Lube(this stuff smells good!!!).
-MF Dry and DP Air Dryer to remove water from all crevises.
-Tape necessary trim.
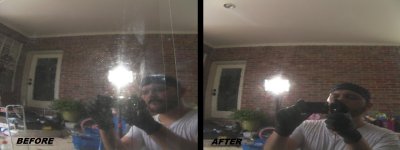
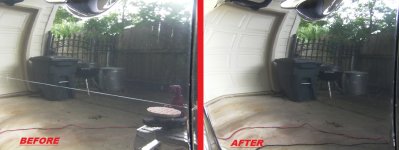
-1 Step Polish with D151 using Flex 3401 and White LC CCS Pads.
-Tires dressed with Black Magic.
Scratch:
-Wet sanded with 3M 3k Gritand a wet sanding block.
-PC with 4" LC CCS Yellow,Orange then White Pads and M105/205 Combo.
Interior(sorry,no pictures):
-Meg's APC 10:1 on all interior hard surfaces.
-Very thorough vacuum .
-Spot Steam Clean w/ Mc Culloch MC1385 .
-Dog hair removal.


She was amazed with results especially since the interior was dirty from having 2 kids and a large dog.
This was done about a month ago but I've been busy steadily studying(reading) and working on(finally) building my business and kept forgetting to do a write up on it.
Exterior Process:
-Wheels done with Sonax and brushes/wheel woolies(these are awesome,totally worth the $).
-Wheel Wells with SG, scrubbed and pressure washed.
-AR Blue Foam Cannon with just some diluted Meg's Soap,high pressure rinse.
-Griots Brilliant Finish Car Wash for paint with 2 Bucket Wash.
-Nanoskin Blue Sponge for decontaminating ,using Nanoskin Glide as Lube(this stuff smells good!!!).
-MF Dry and DP Air Dryer to remove water from all crevises.
-Tape necessary trim.
-1 Step Polish with D151 using Flex 3401 and White LC CCS Pads.
-Tires dressed with Black Magic.
Scratch:
-Wet sanded with 3M 3k Gritand a wet sanding block.
-PC with 4" LC CCS Yellow,Orange then White Pads and M105/205 Combo.
Interior(sorry,no pictures):
-Meg's APC 10:1 on all interior hard surfaces.
-Very thorough vacuum .
-Spot Steam Clean w/ Mc Culloch MC1385 .
-Dog hair removal.
She was amazed with results especially since the interior was dirty from having 2 kids and a large dog.
Attachments
-
 Infinity B4-After. Door Swirls 2.jpg143.7 KB · Views: 124
 -
 Infinity B4-After. Door Swirls.jpg124.9 KB · Views: 123
 -
 Infinity B4-After. Scratch.jpg145.8 KB · Views: 123
 -
 Infinity B4-After. Front.jpg338.7 KB · Views: 125
 -
 Infinity B4-After. Hood.jpg384.8 KB · Views: 123
 -
 Infinity B4-After. Rear Profile.jpg275.8 KB · Views: 123