TTBear
Allan F
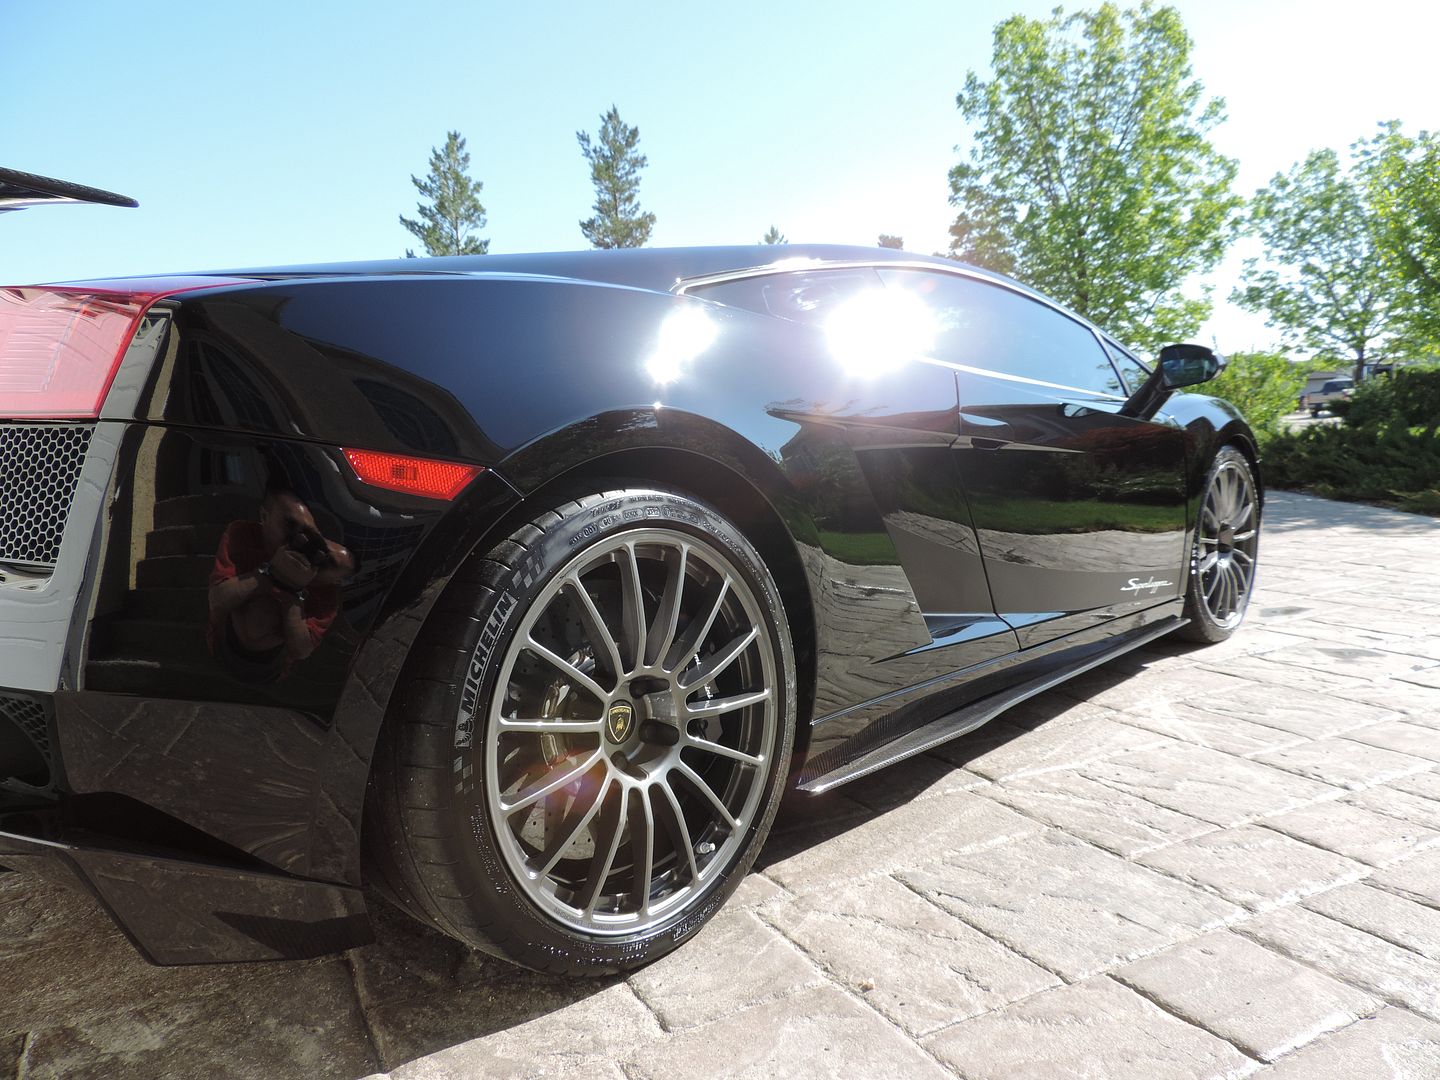
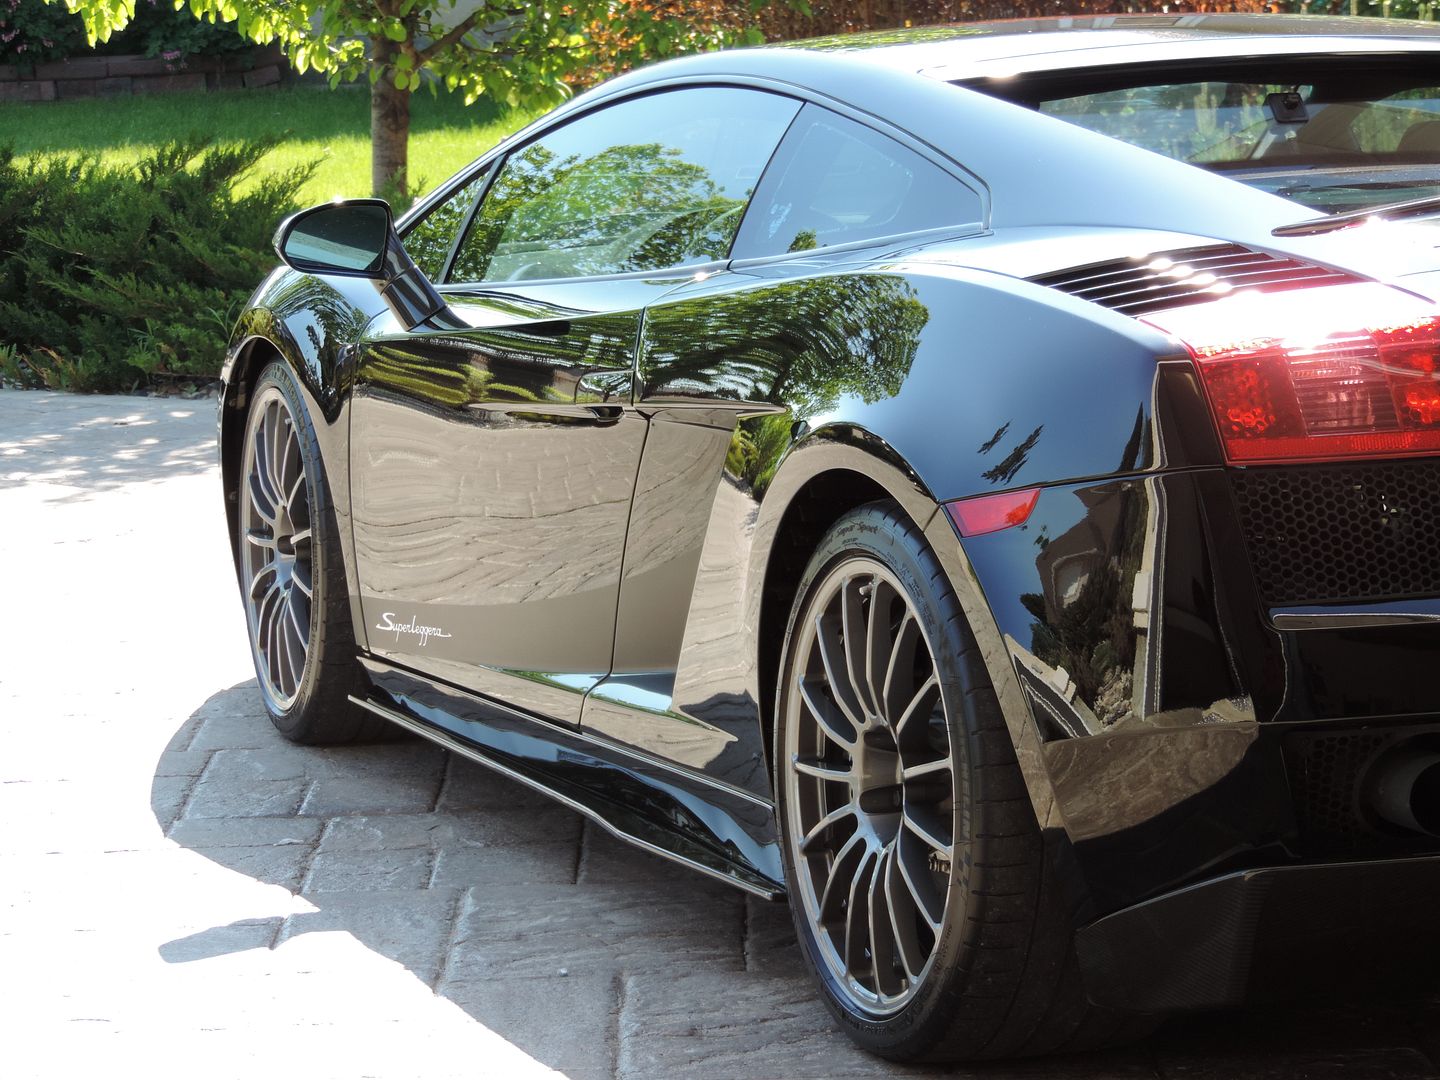
I have been working on this 2008 Lamborghini Gallardo Superleggera over the past couple weeks. As you know, I am (clearly, haha) not a professional detailer, so I do these in my spare time, for friends. This Superleggera’s owner also has a pristine 1987 Countach that I am dying to get stuck into, but perhaps another time…. This car is owned by a friend of mine who got me started as an exotic car owner - if it weren`t for him, I`d still be driving the latest BMW "M" model (which really wouldn`t be such a bad thing - I miss my M3 like you wouldn`t believe!). I wanted this car to be great, for a great guy, a great friend.
He bought this car used. The previous owner had the car “detailed”, and the entire front end was covered in clear bra (unknown brand). To begin with, the car is Lamborghini`s Nero Noctis, which is the same colour as my Gallardo LP560 was, so I was familiar with it. This went a long way to understanding the best way to attack it, as it is an extremely mar-prone paint. This was evident in the massive number of RIDS and holograms all over the car. The current owner is very fastidious about his cars, and his wash techniques are sound, so the damage was likely inflicted early on in the car’s life, prior to it being sold to my friend, I believe.
I took paint readings with my Defelsko depth gauge, and I was a little taken aback at how thin the readings were. On my 2009 Nero Noctis car, I was getting readings anywhere from 120 to 180 microns. On this car, I was getting 80 to 115 mostly, with a few readings hovering around 130 here and there, so I concluded that the car had been worked on, LOTS (and badly, unfortunately). As such, I was wary of going too hard on any areas that I thought would be thin - edges and panel corners, especially. There were lots of areas that required more intensive work, but I tried to limit wet sanding to a bare minimum. In the end, I had to simply improve a few RIDS, rather than eliminate them.
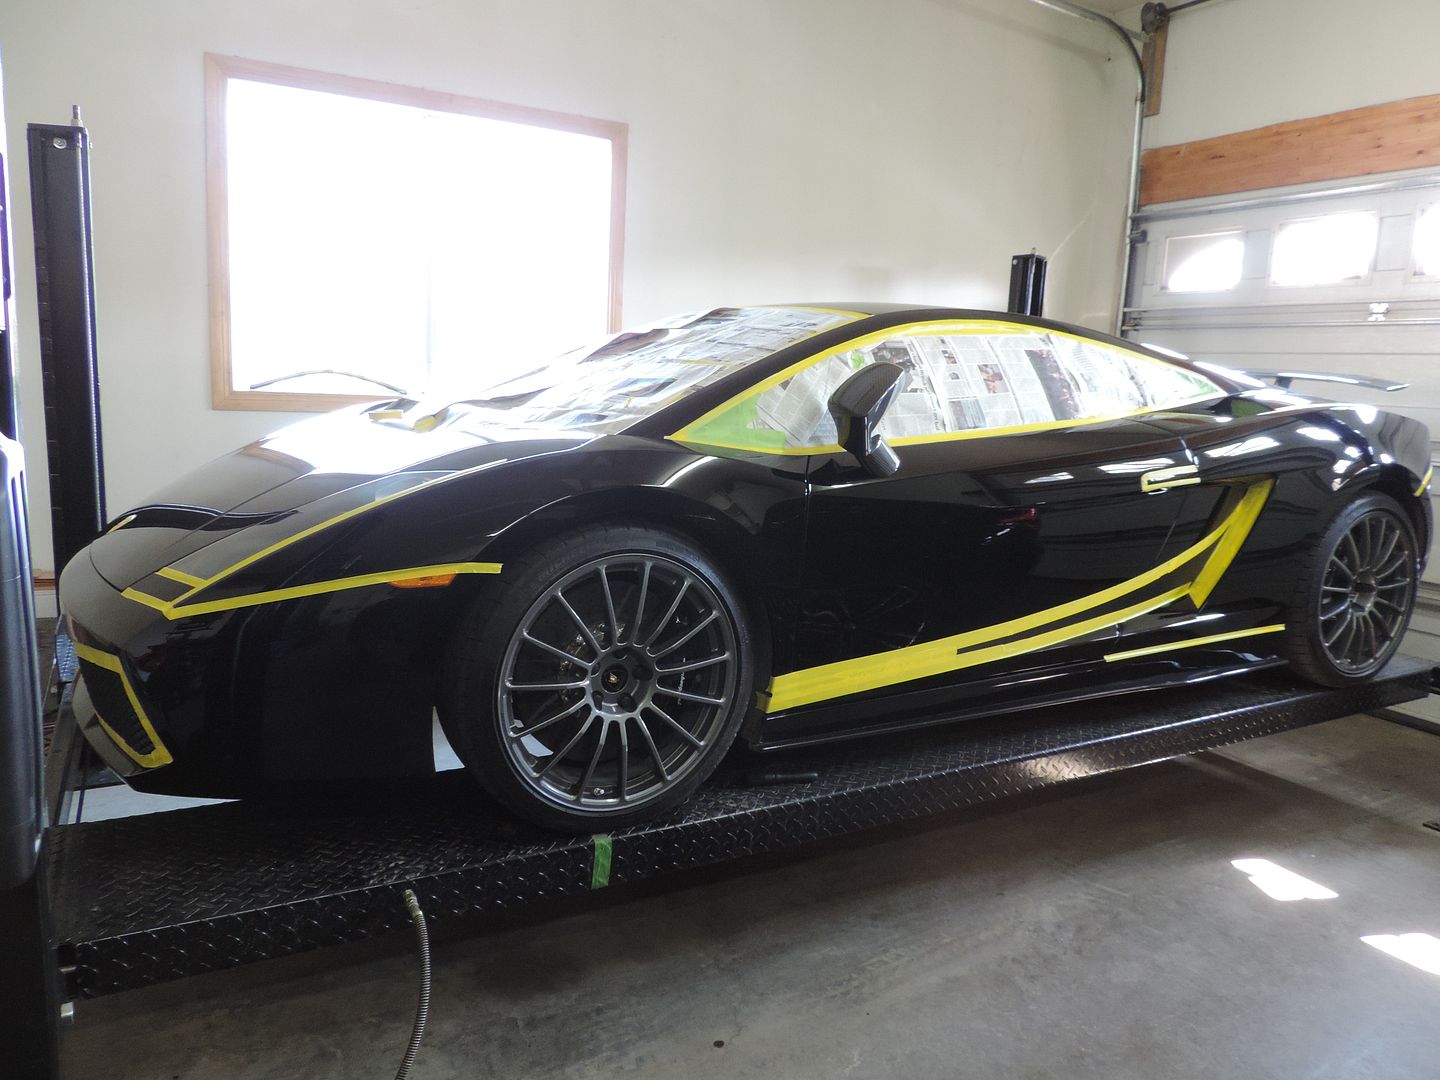
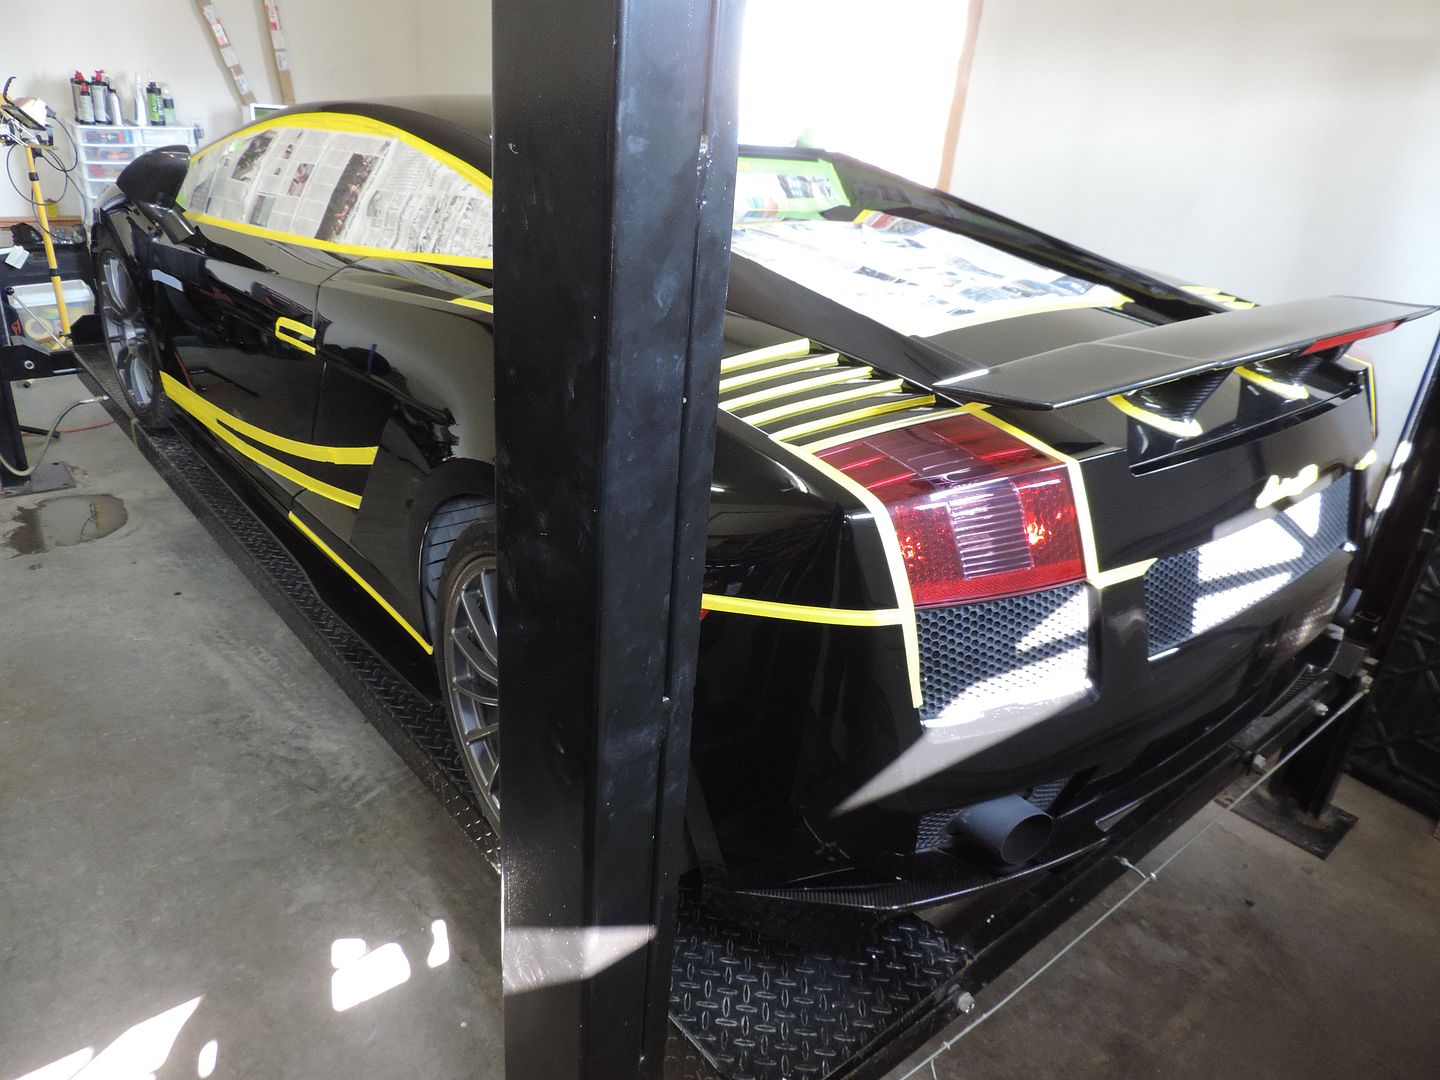
I do tend to be a bit overenthusiastic with my taping haha - I wanted to protect the side windows (the smaller ones behind the main side windows), as they are made out of Perspex, and are $6000 EACH to replace……. the clear engine bonnet cover is also Plexiglass, so I wanted to make sure that I didn’t damage any of these!
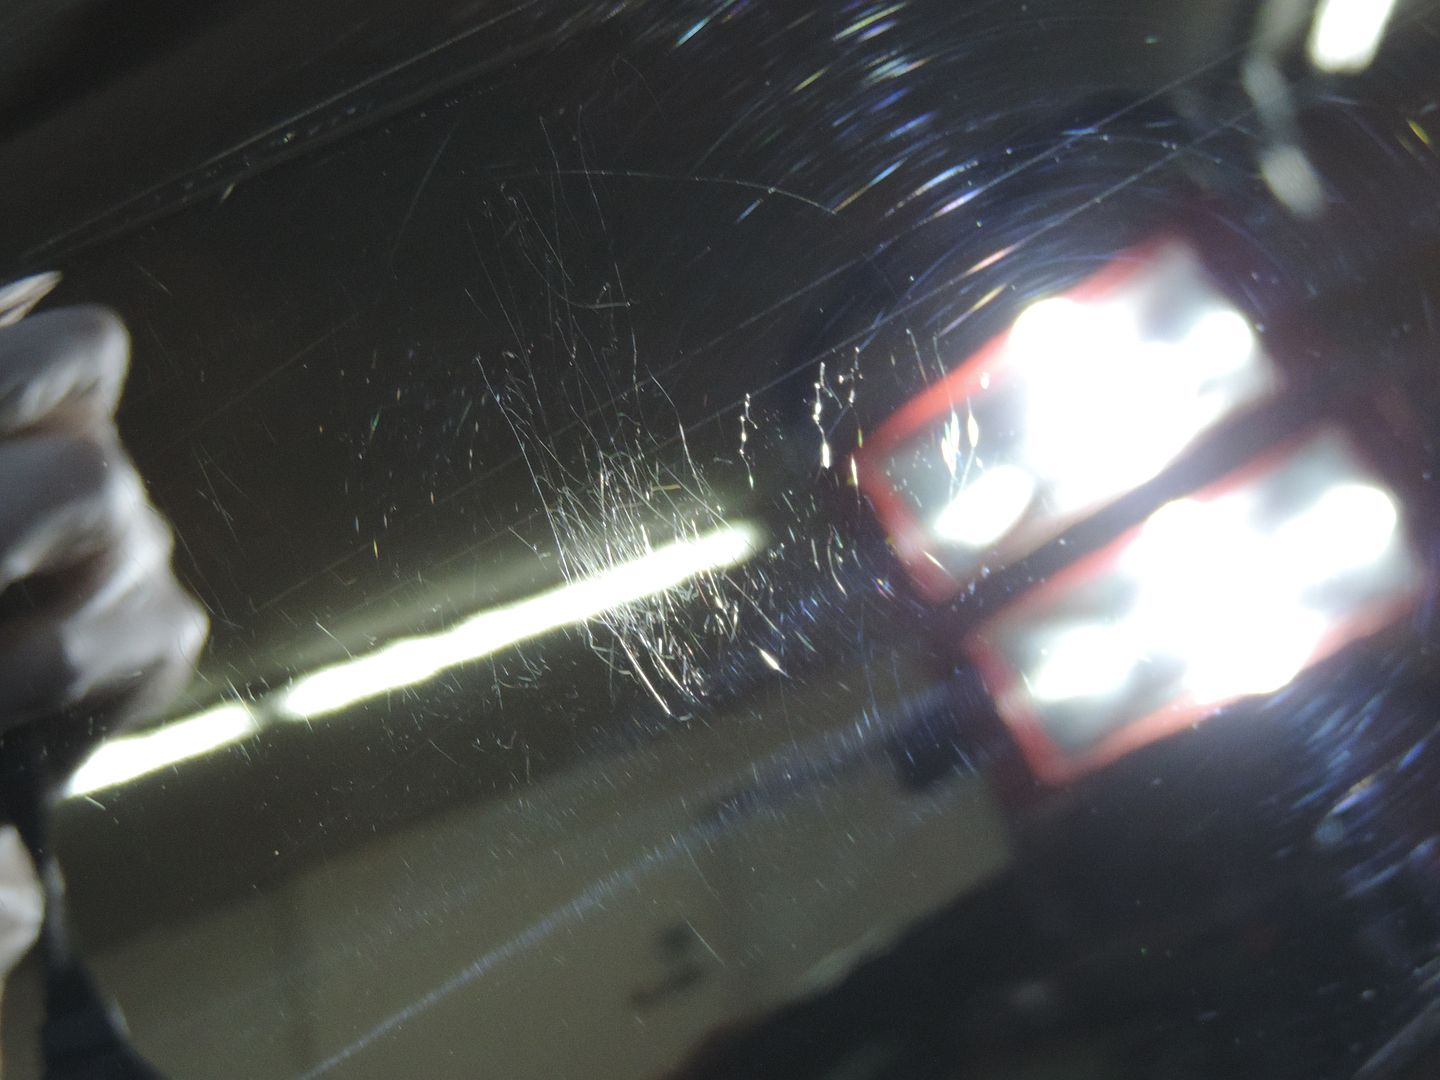
The car’s owner brought the car to an XPel installer to remove the old clear bra, prior to me getting started. When I got it and got started, I was crestfallen. The front end was horrendous, with holograms, and many, many RIDS. These defects were largely covered up with the clear bra, so when it was removed, all of the defects were revealed.
Driver’s side front fender, before:
……and after:
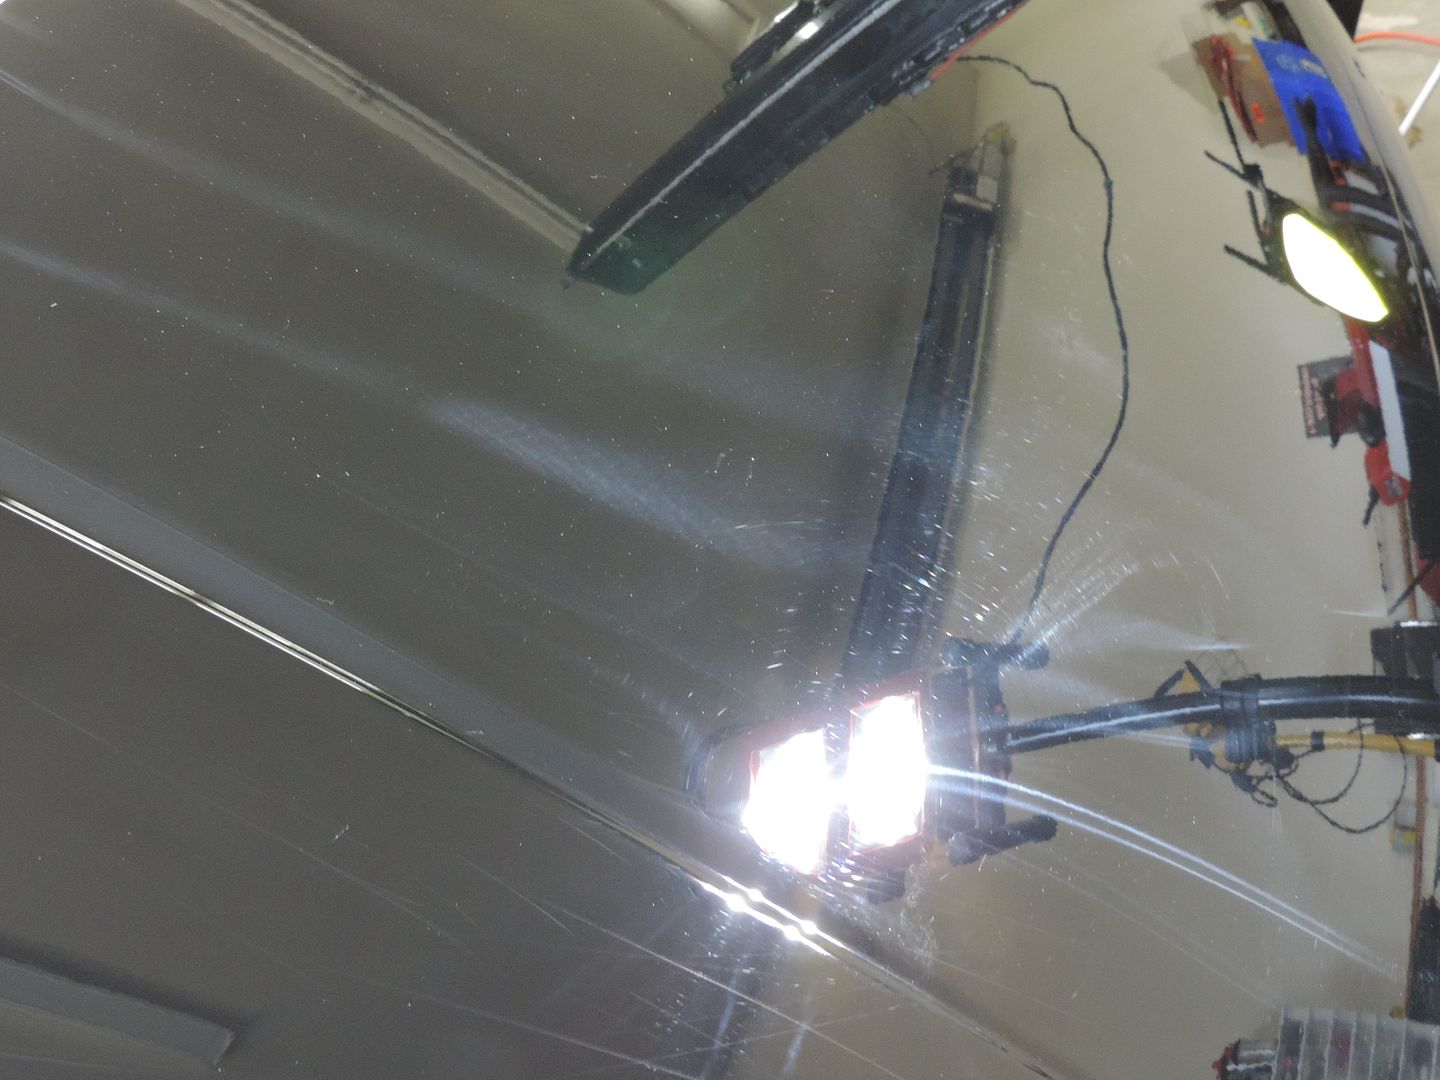
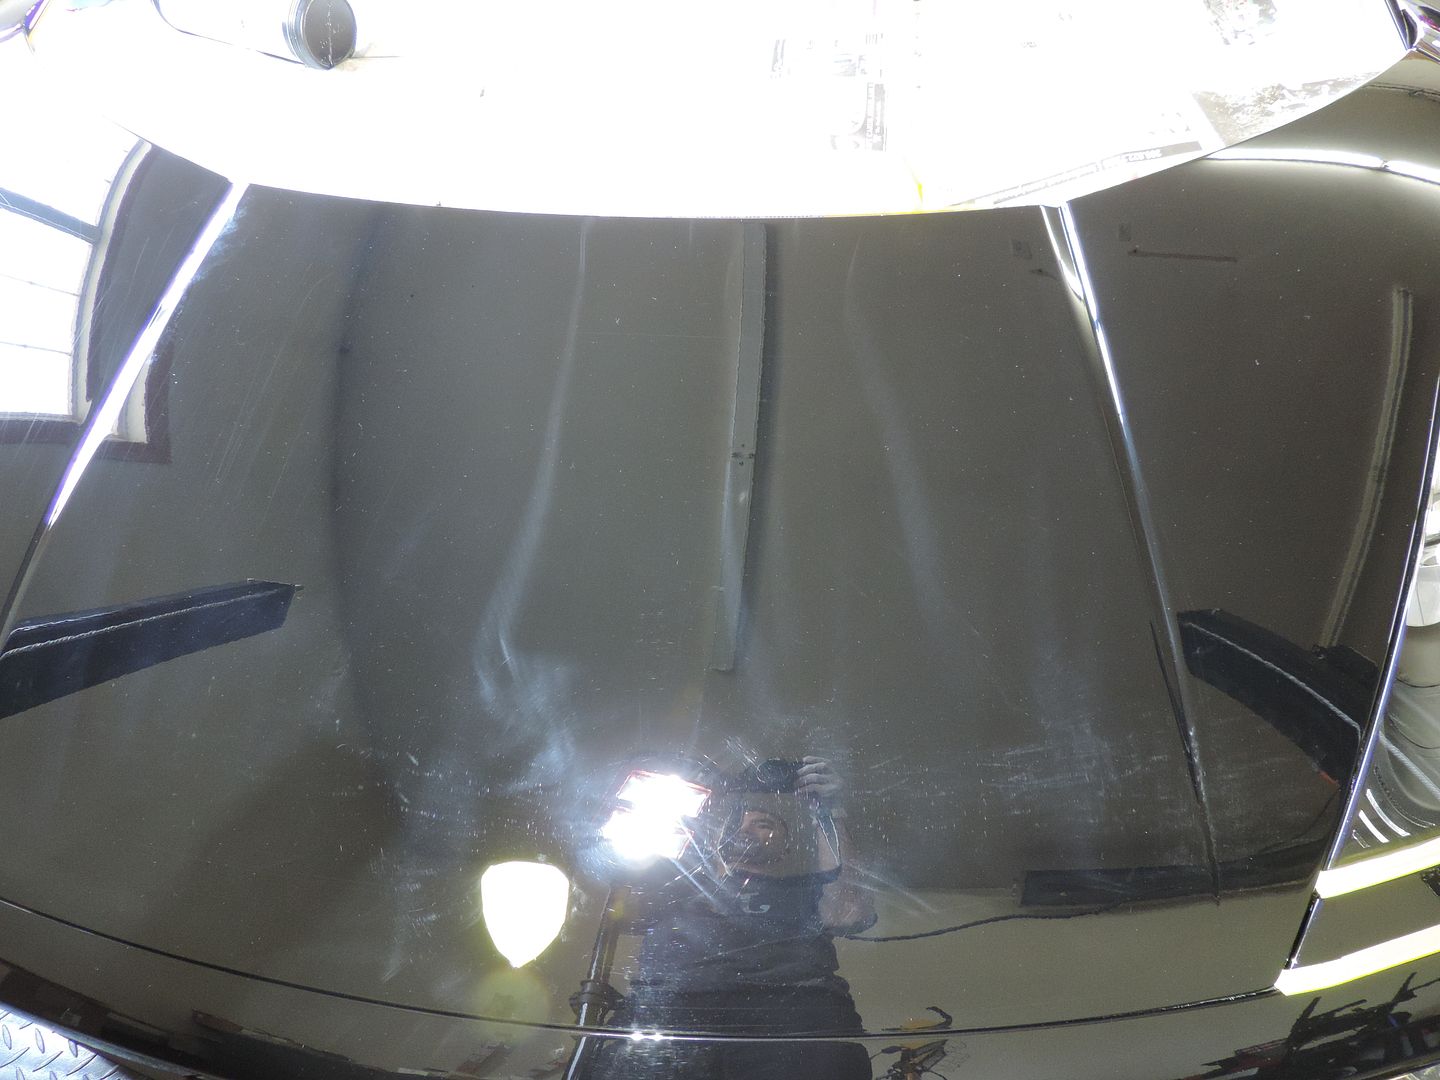
Holograms and RIDS, before:
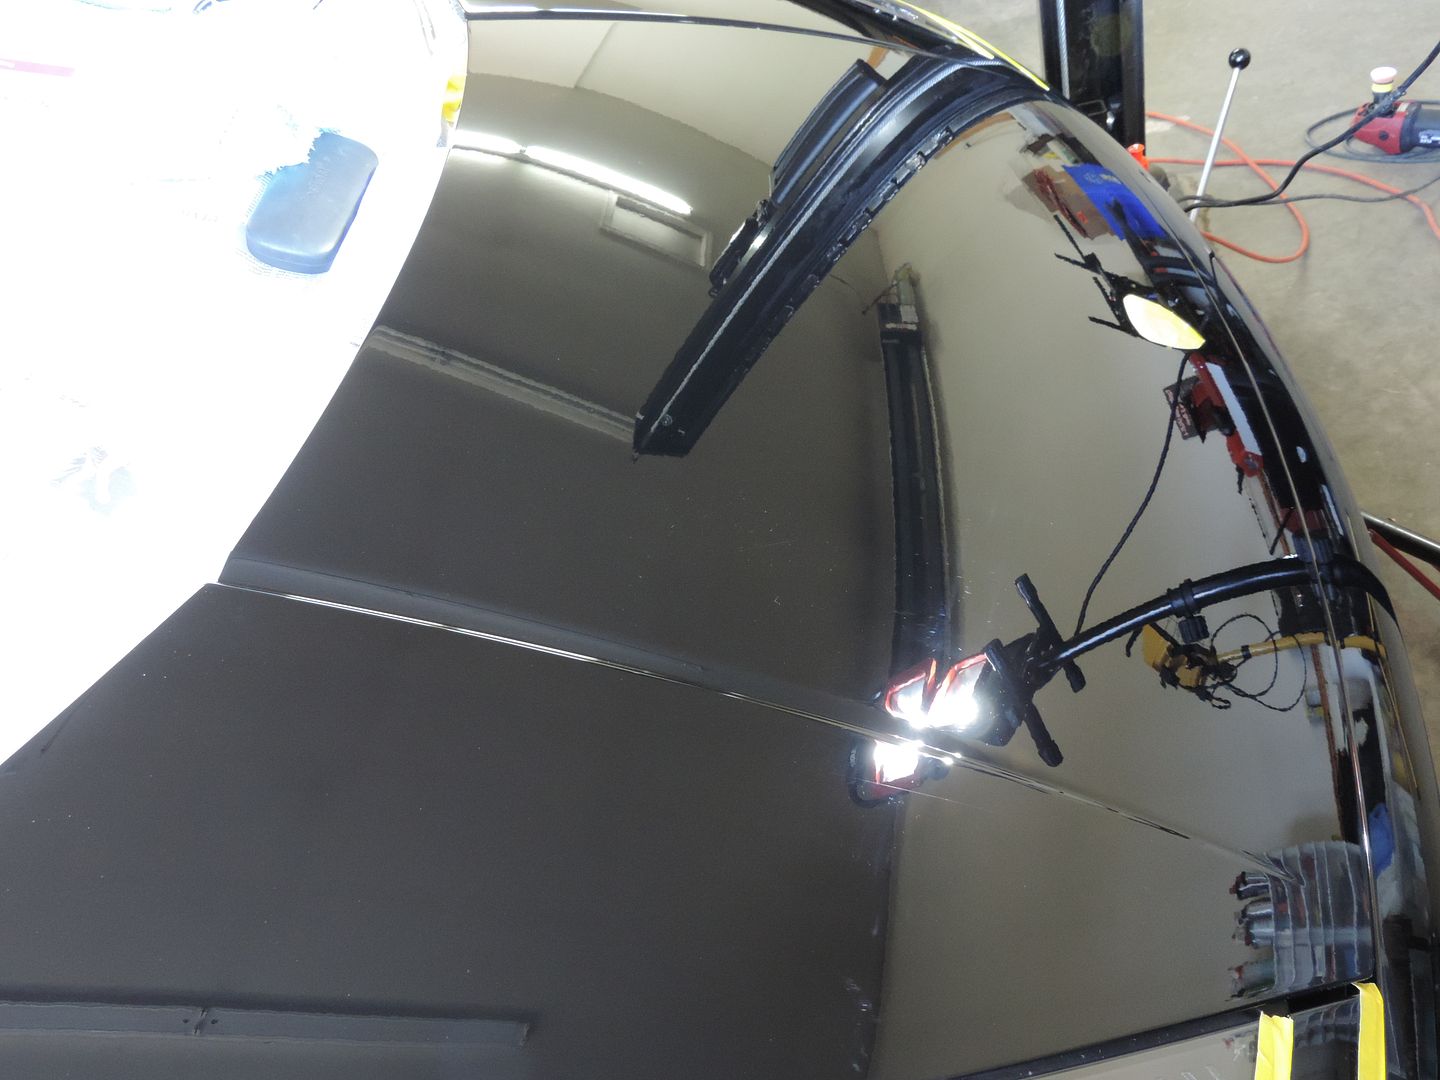
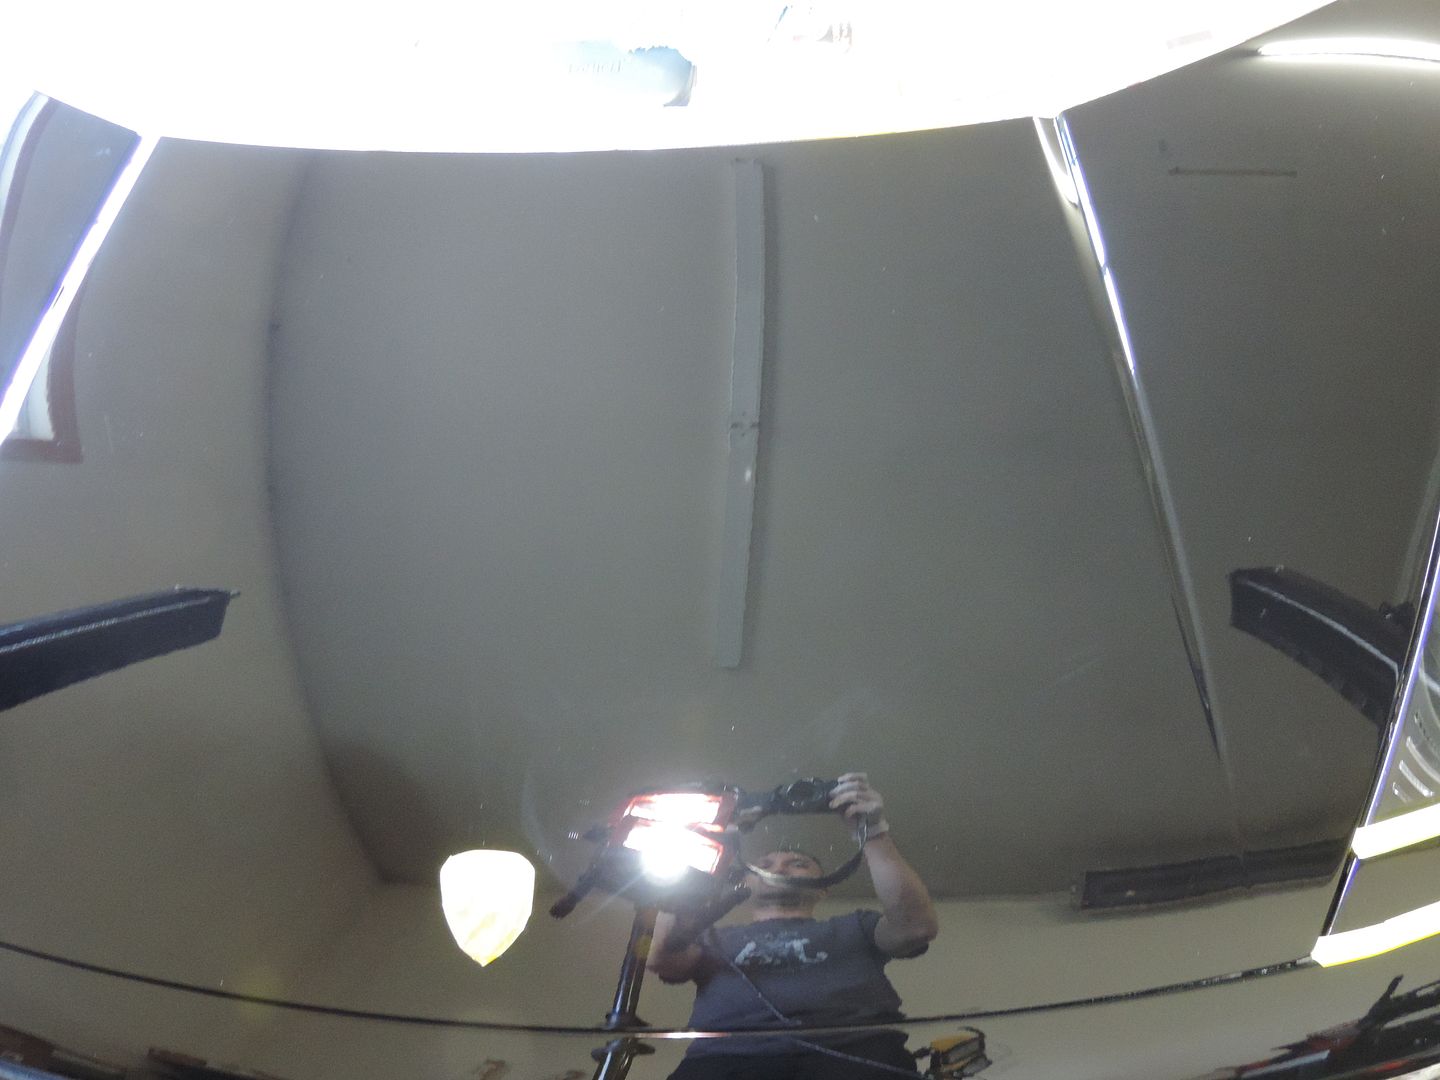
……and after (wet sanding on passenger side of front bonnet):
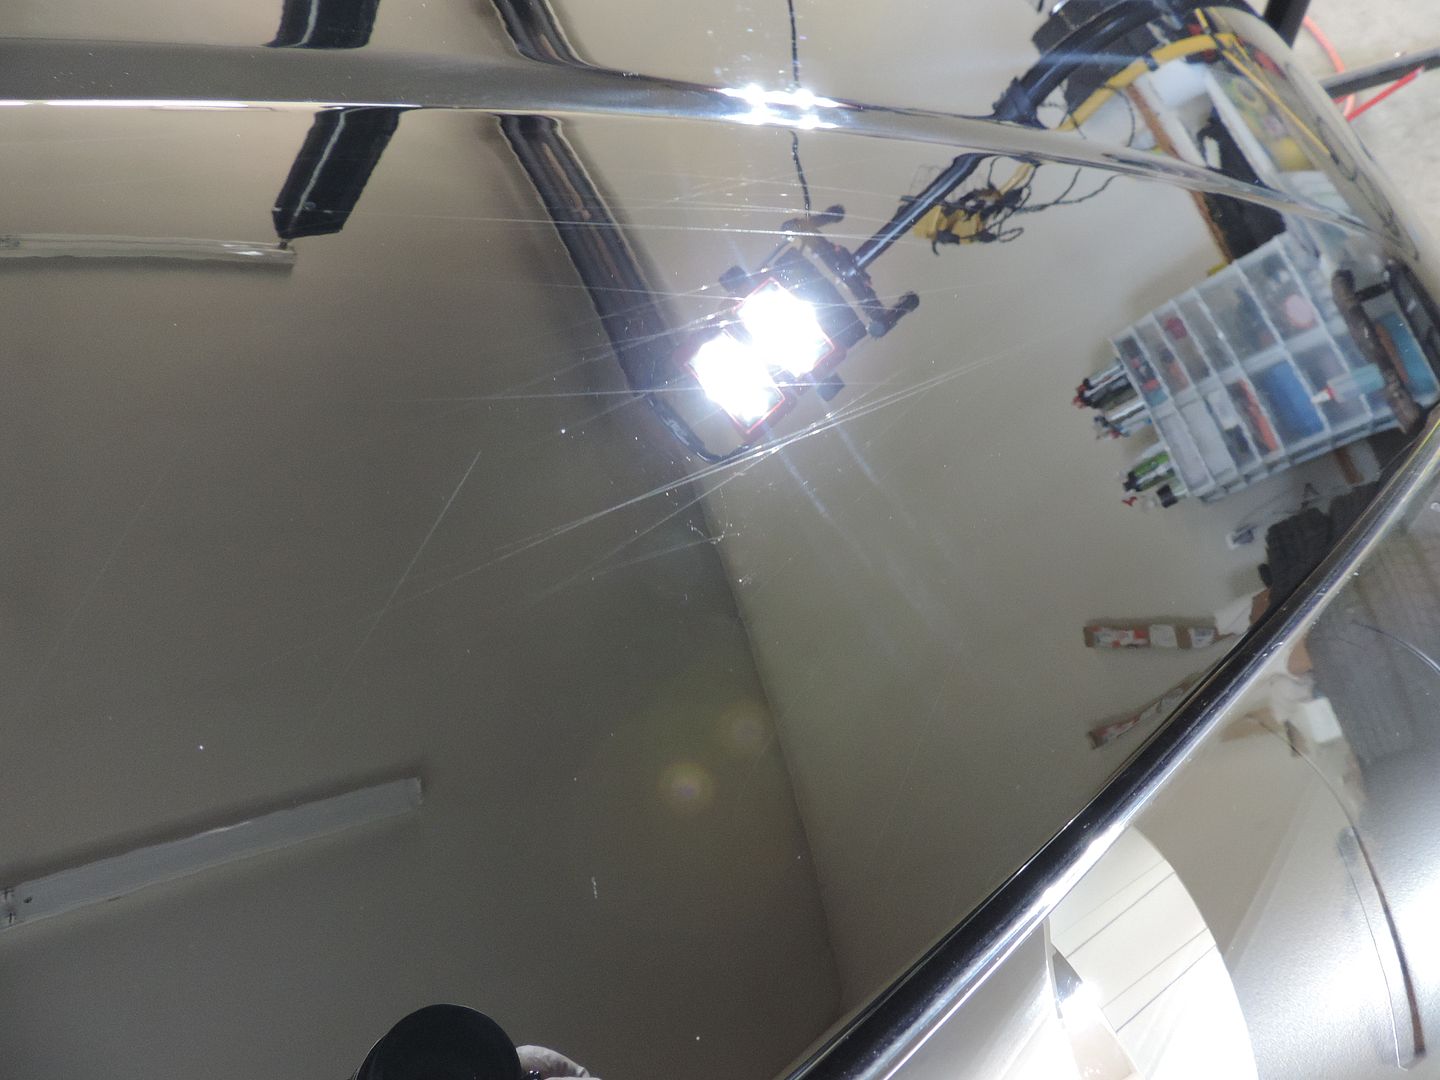
More, before:
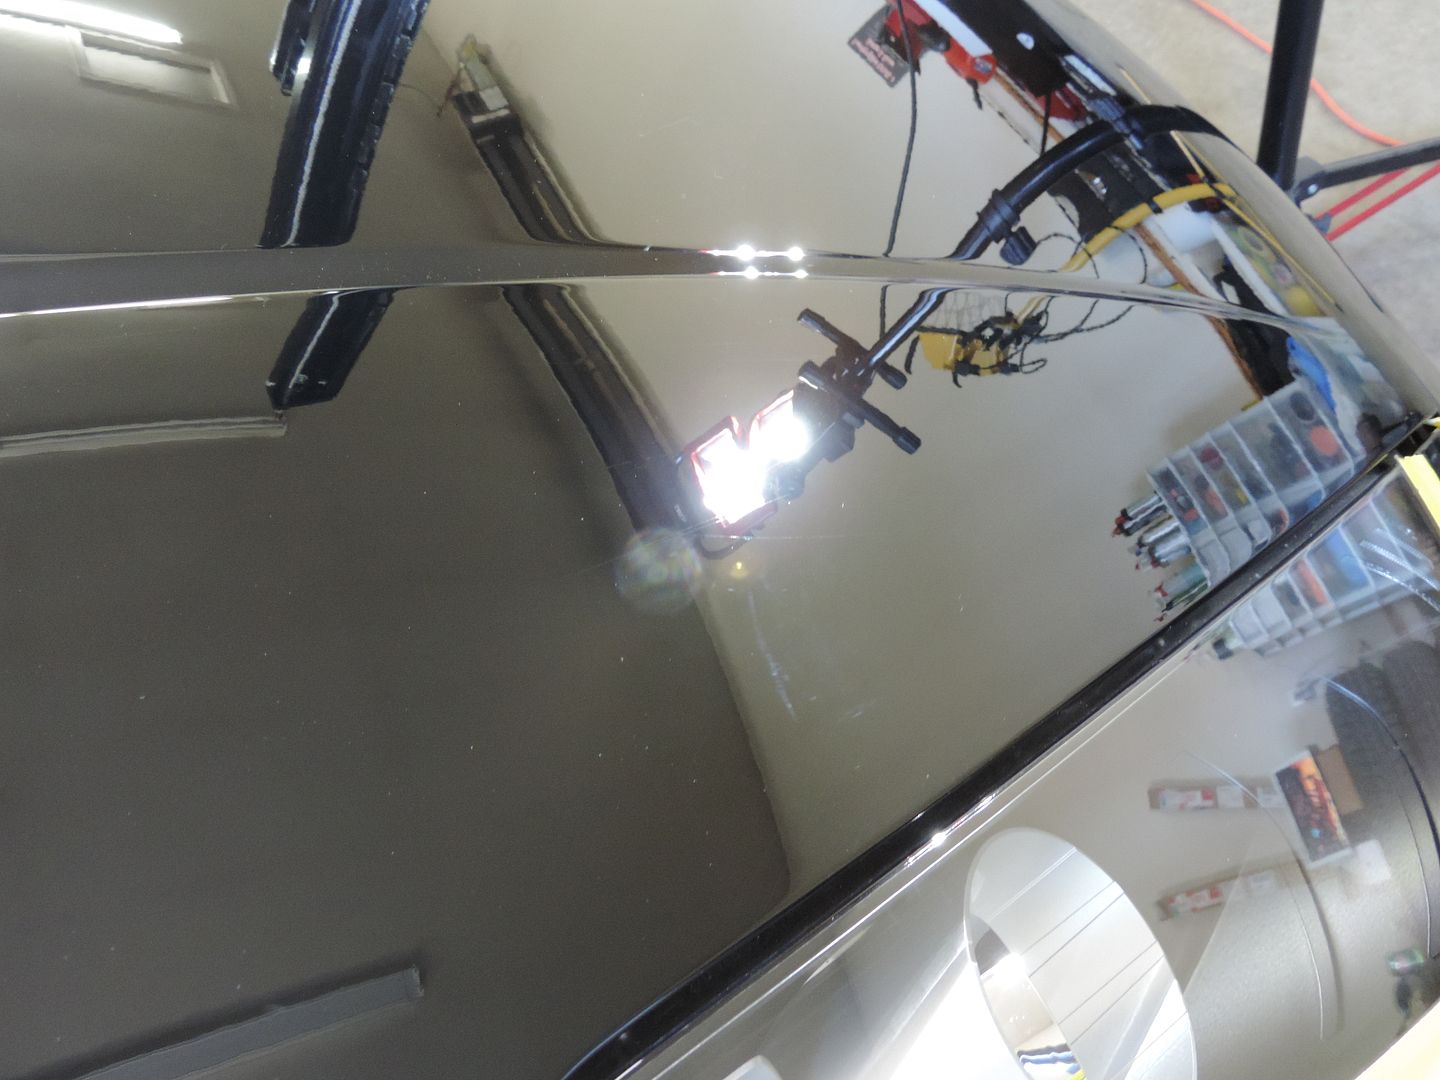
……and more, after:
I really would love to meet the guy that “detailed” the car prior to the clear bra being installed, so I could shake his hand….. and then kick him in the goolies. The holograms on the front bonnet were atrocious!
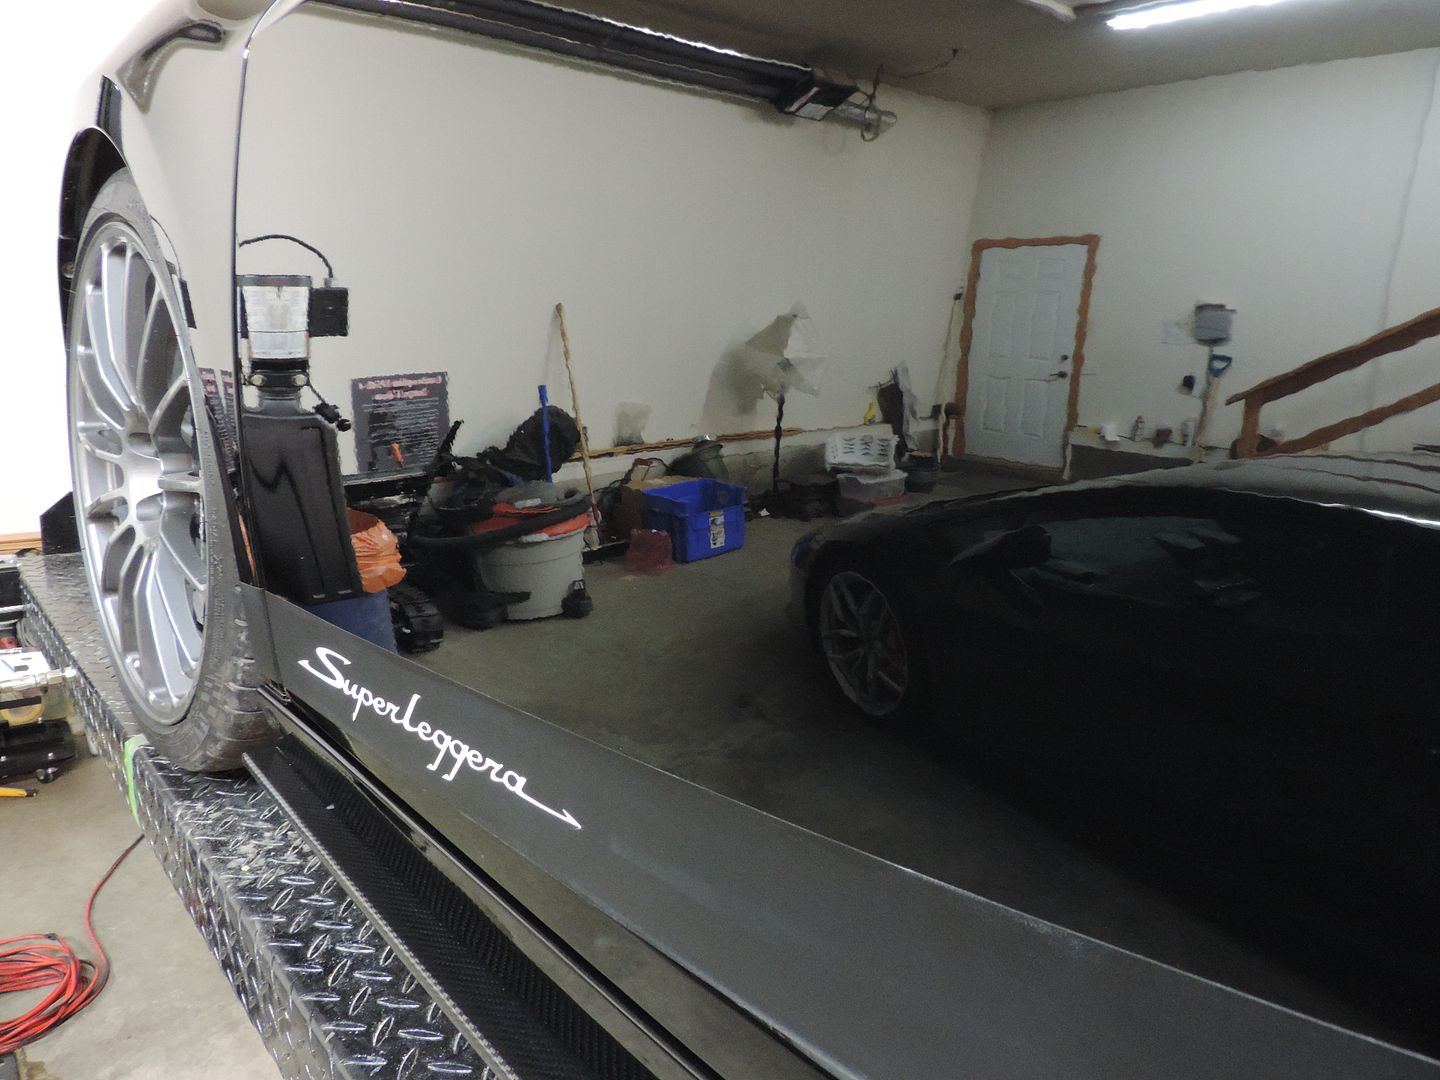
A few pics the night before I pulled it out of the garage into the light of day:
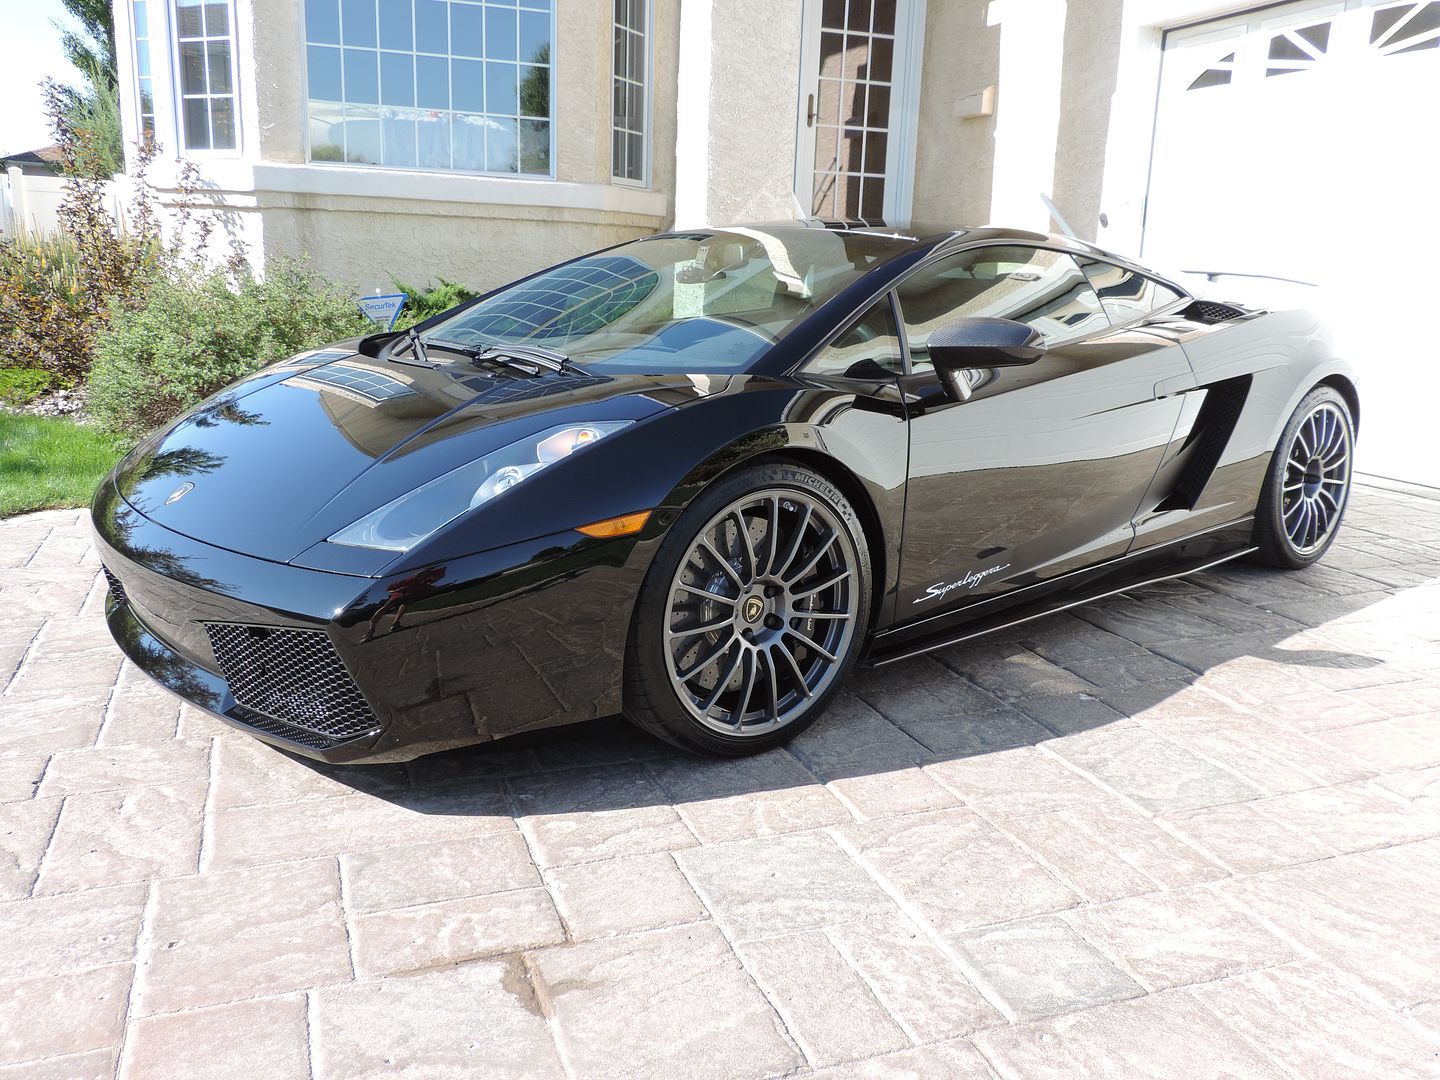
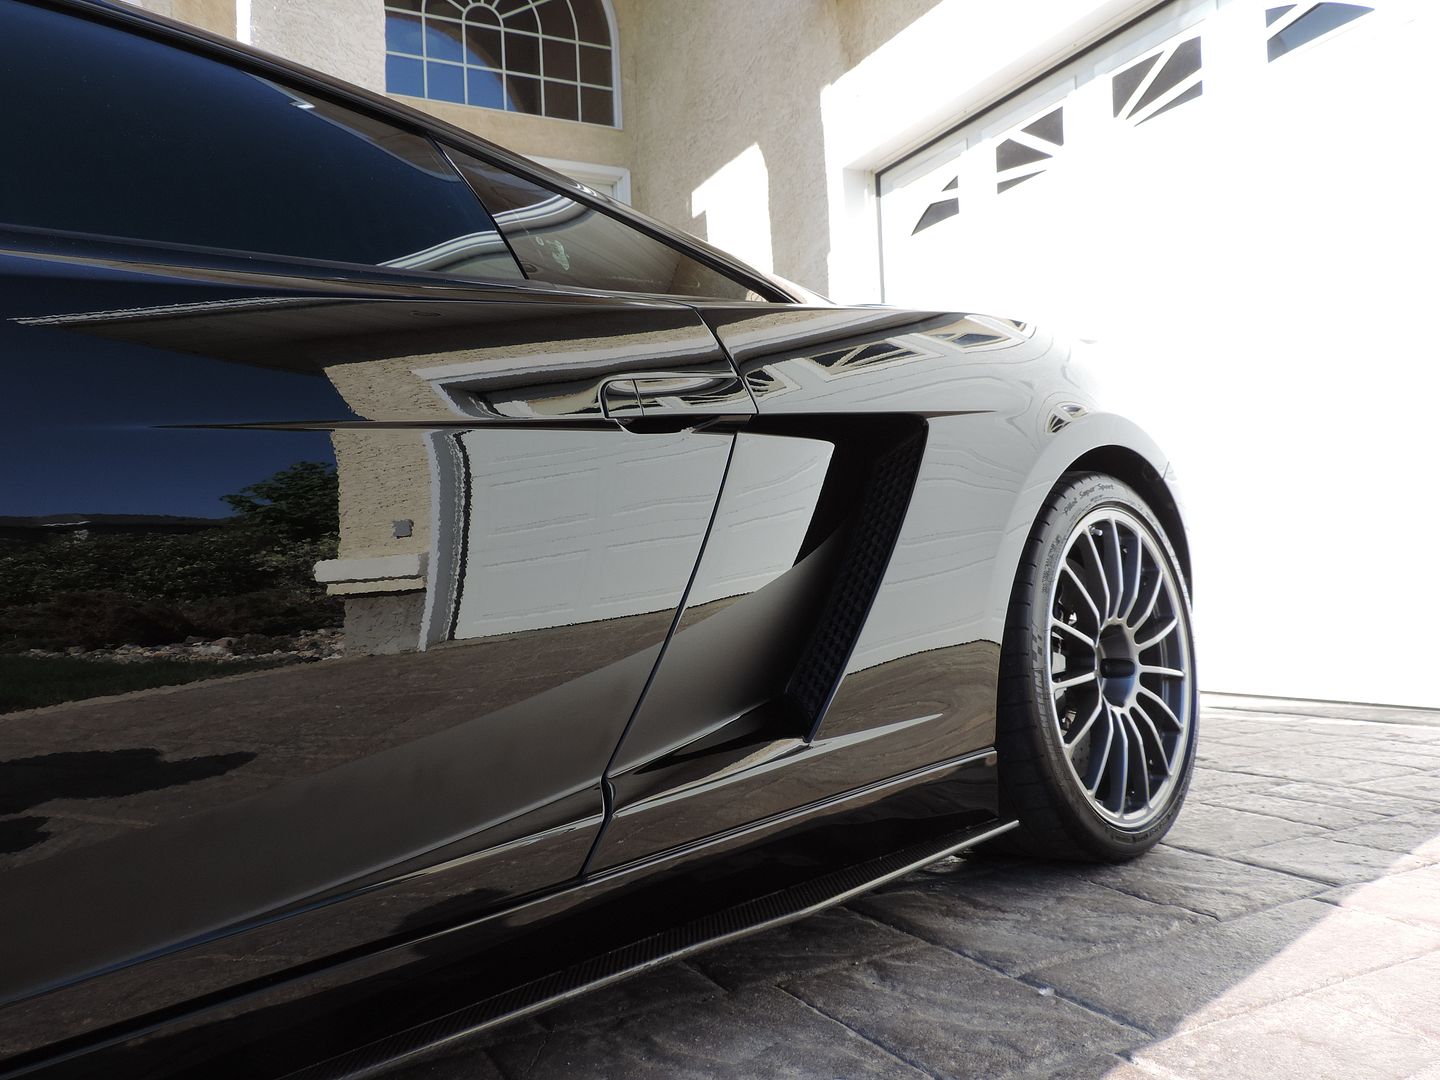
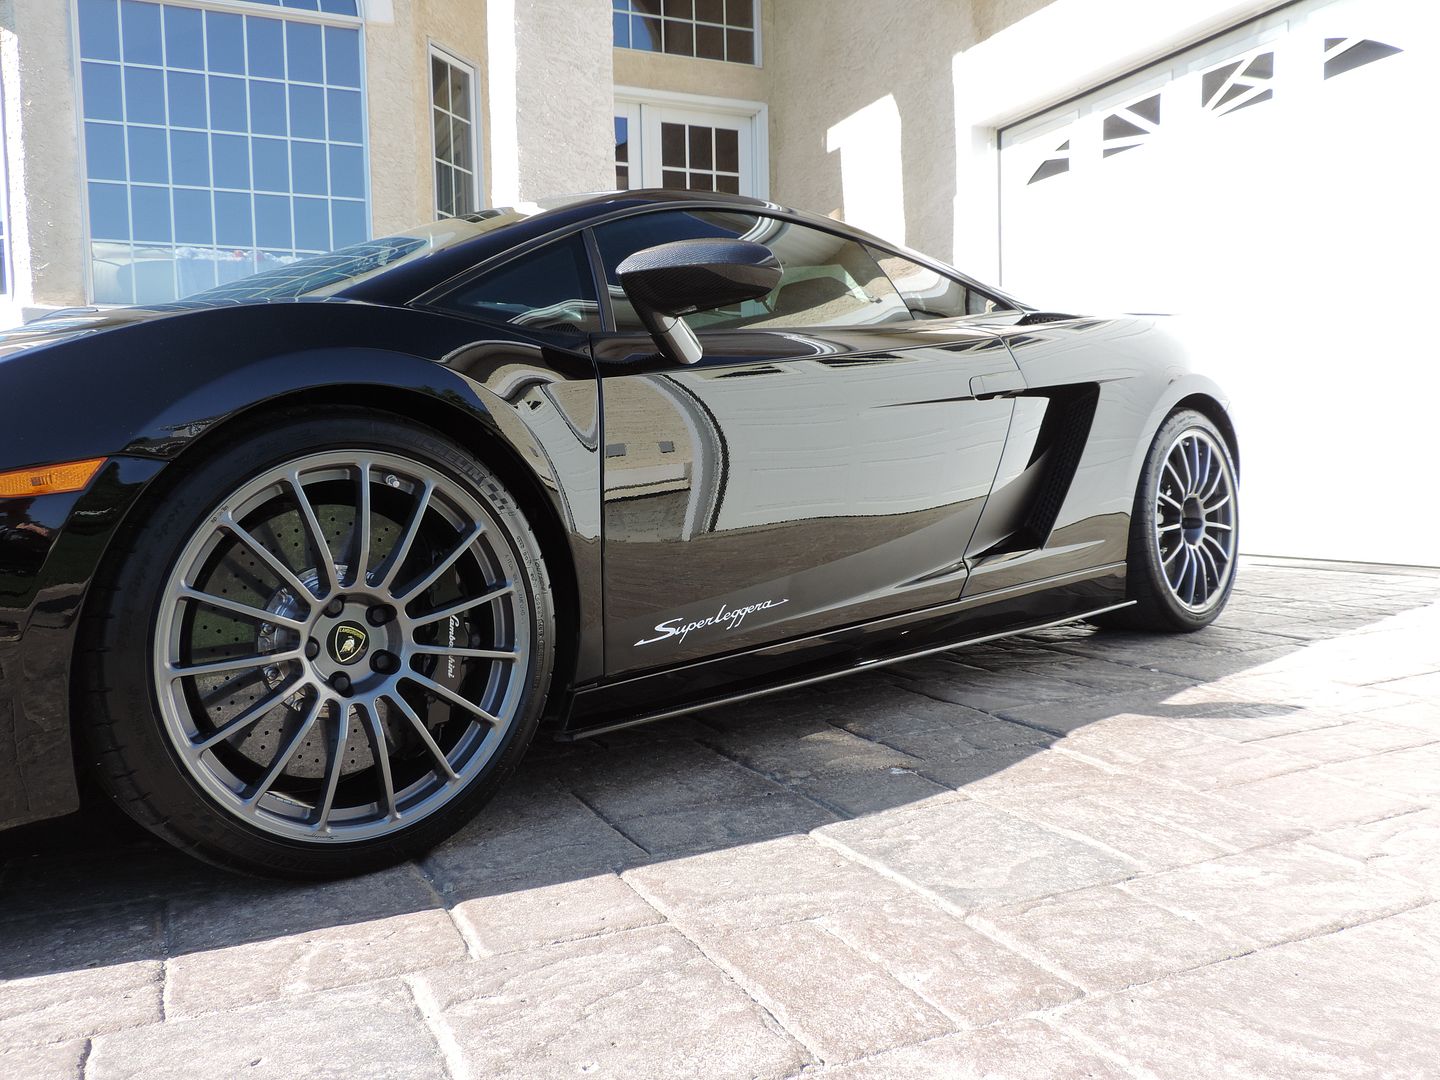
And a few once I had the car outside (sorry - a few of the pictures were taken before I realized I had the front end lift in the "up" position.....


In all, I think I wet sanded perhaps 25 areas or so, sometimes opting to lightly wet sand strategically based on my multitude of depth readings, rather than heavily compound entire panels. Other, lesser scratches were dealt with using a 1” orange Flex pad on my PE8 rotary.
Products used:
-Initial wash: CarPro Iron-X Snow foam
-Decontamination: Nanoskin Autoscrub wash mitt, using ONR as a lubricant.
-Most panels: Menzerna SIP, Flex 3401 with Lake Country orange pad (opted to go with a couple (or more) passes with this, rather than a heavy compounding step), then blue pad/Menzerna Micro Polish on PC, followed by 3” black Flex pad on a PE8 to jewel (took a long time for the whole car, but I like the control I have with the smaller pad)(THANK YOU to The Driver for the tips on jewelling - it worked really well!). Flex PE8 to tight areas (I love this thing!!)
-Wipe down with CarPro Eraser
-LSP - CQuartz UK Edition - not nearly as tricky to apply as I thought it might be!
-Wheel wells: Megs APC+, Aerospace 303
-Wheels: PBL Diamond wheel coating (two coats)
-Windshield: PBL Diamond glass coating (two coats)
Final note - when I was pulling the wheels/tires off for cleaning/coating, I noticed THIS:
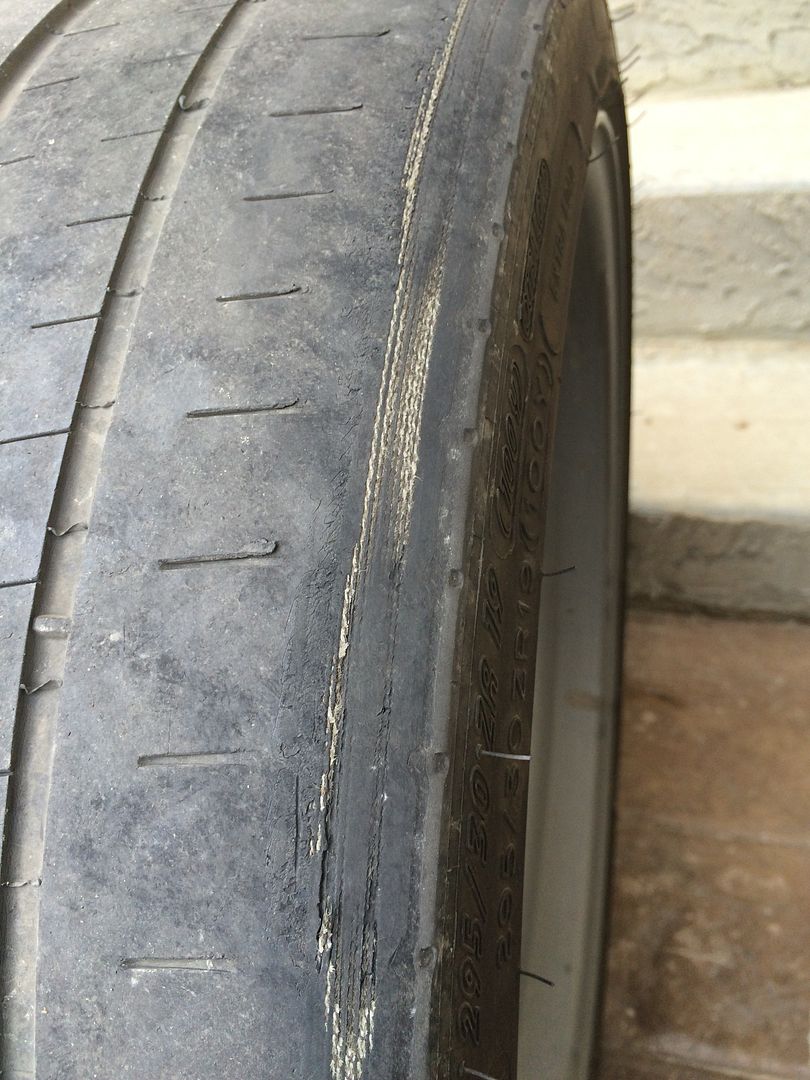
There were about 10,000 miles on the tires, so no wonder. I measured the tread depth at 5/32" at the outside. Looking at the tires when mounted, you`d never have known. We regularly go on long trips with a group from Calgary, who cruise at let`s say... somewhat excessive speeds.....occasionally...... so it was probably a good thing we discovered this prior to going out
I loved doing this car - in all, I think I spent close to 40 hours on it - more because I was being crazy cautious about not going through the clear coat.
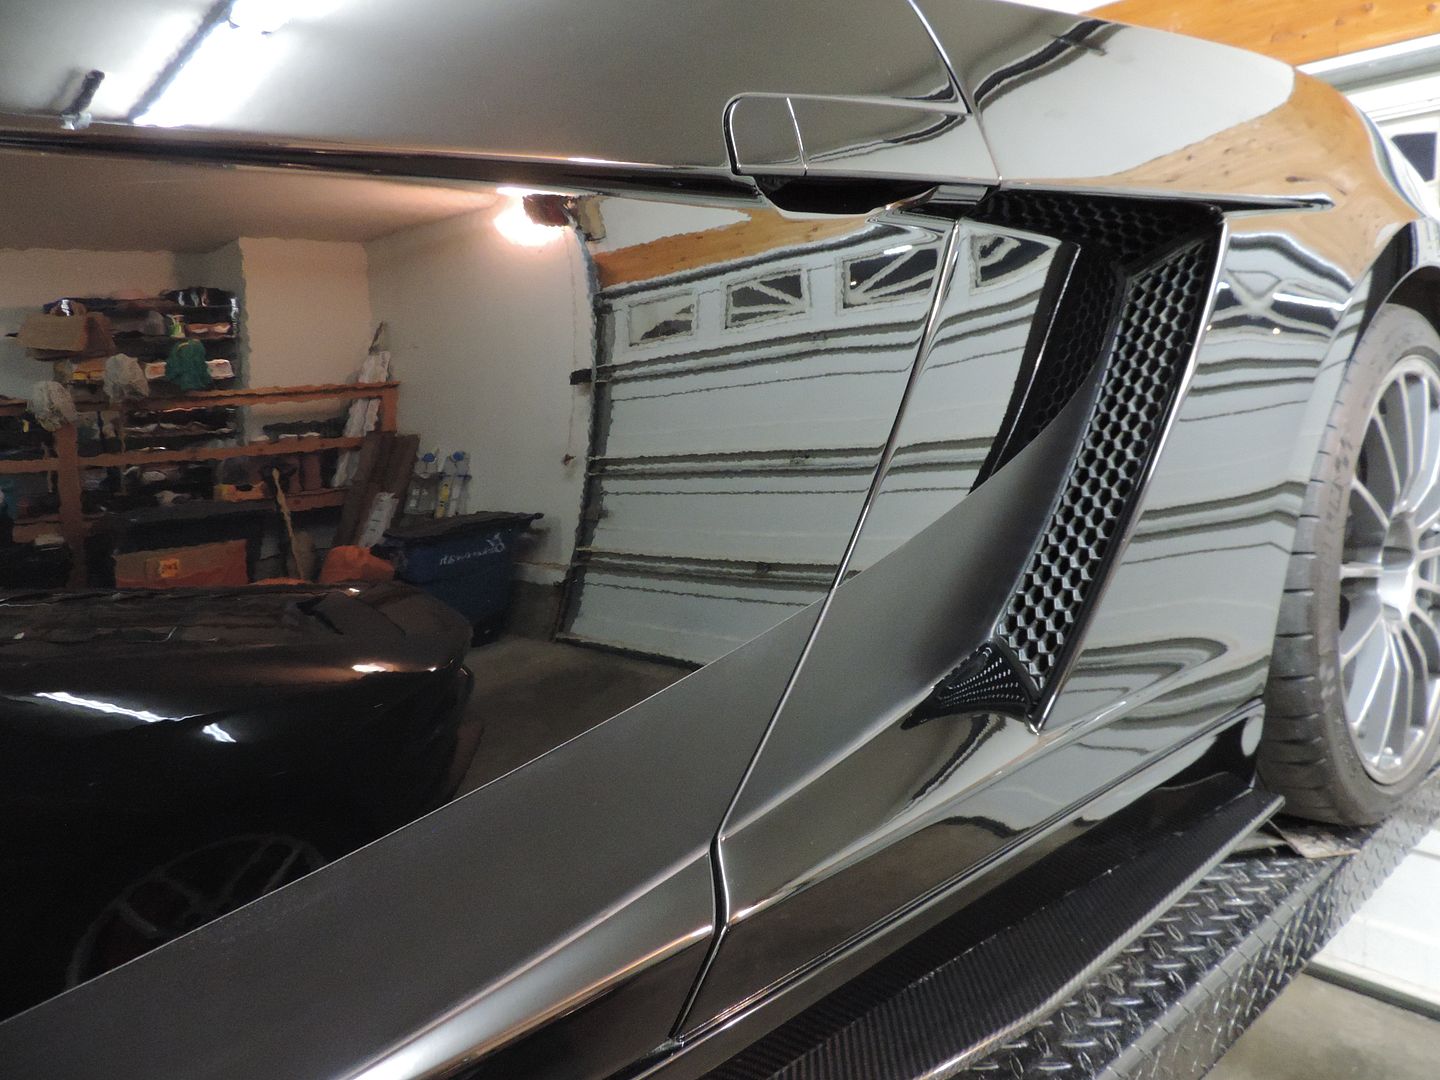
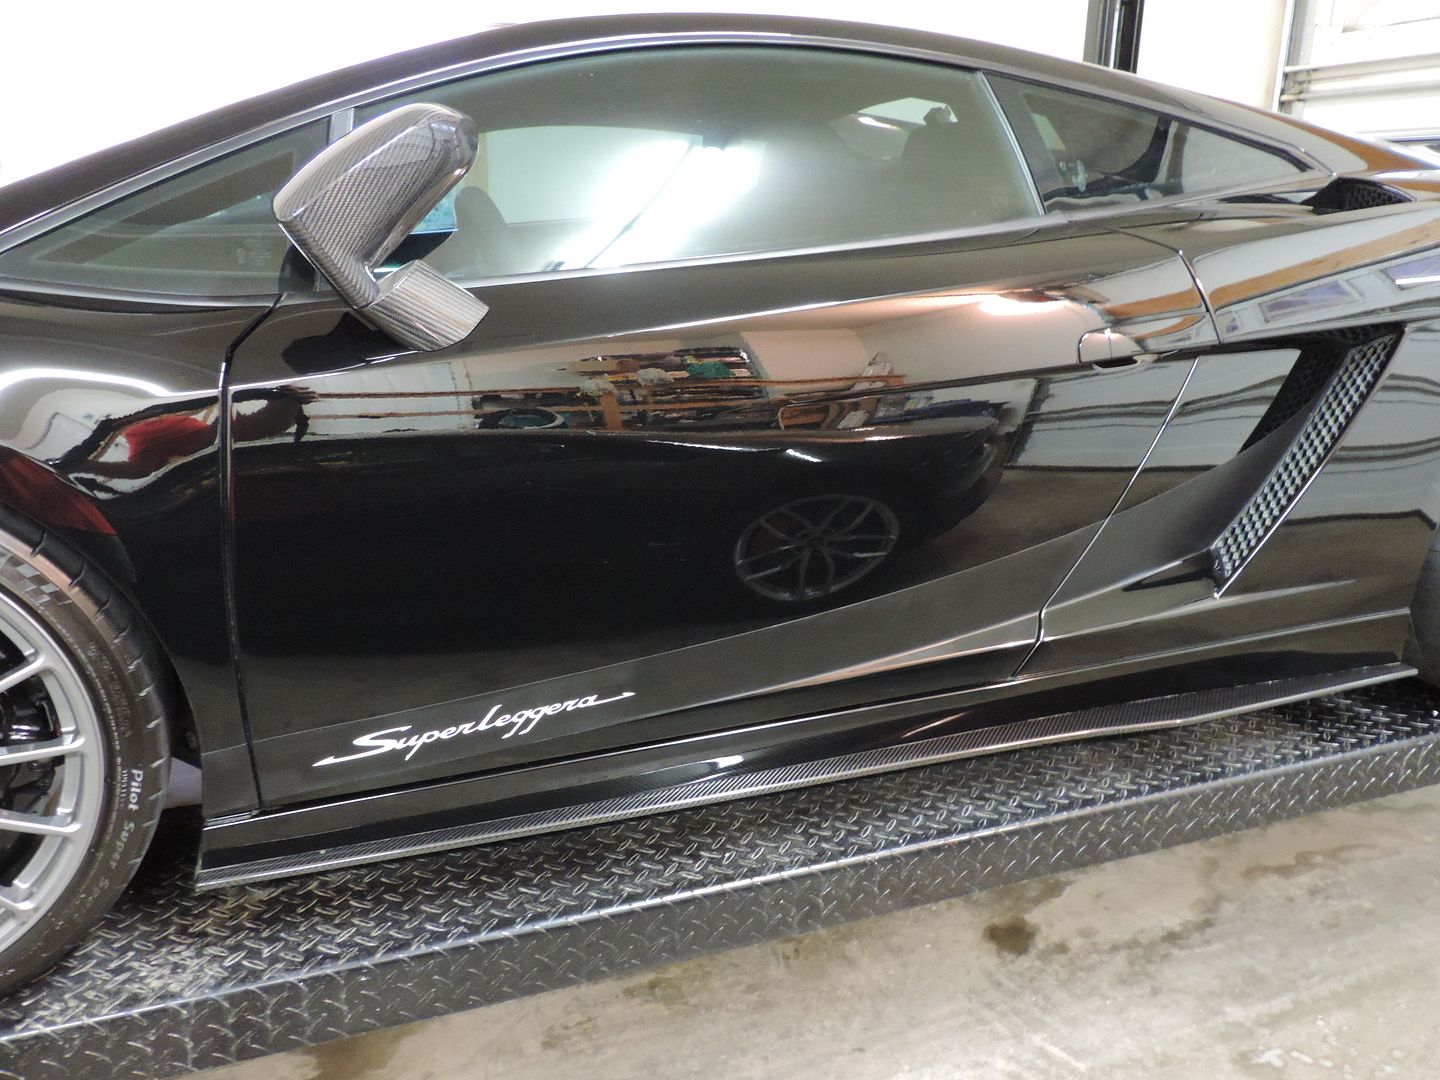
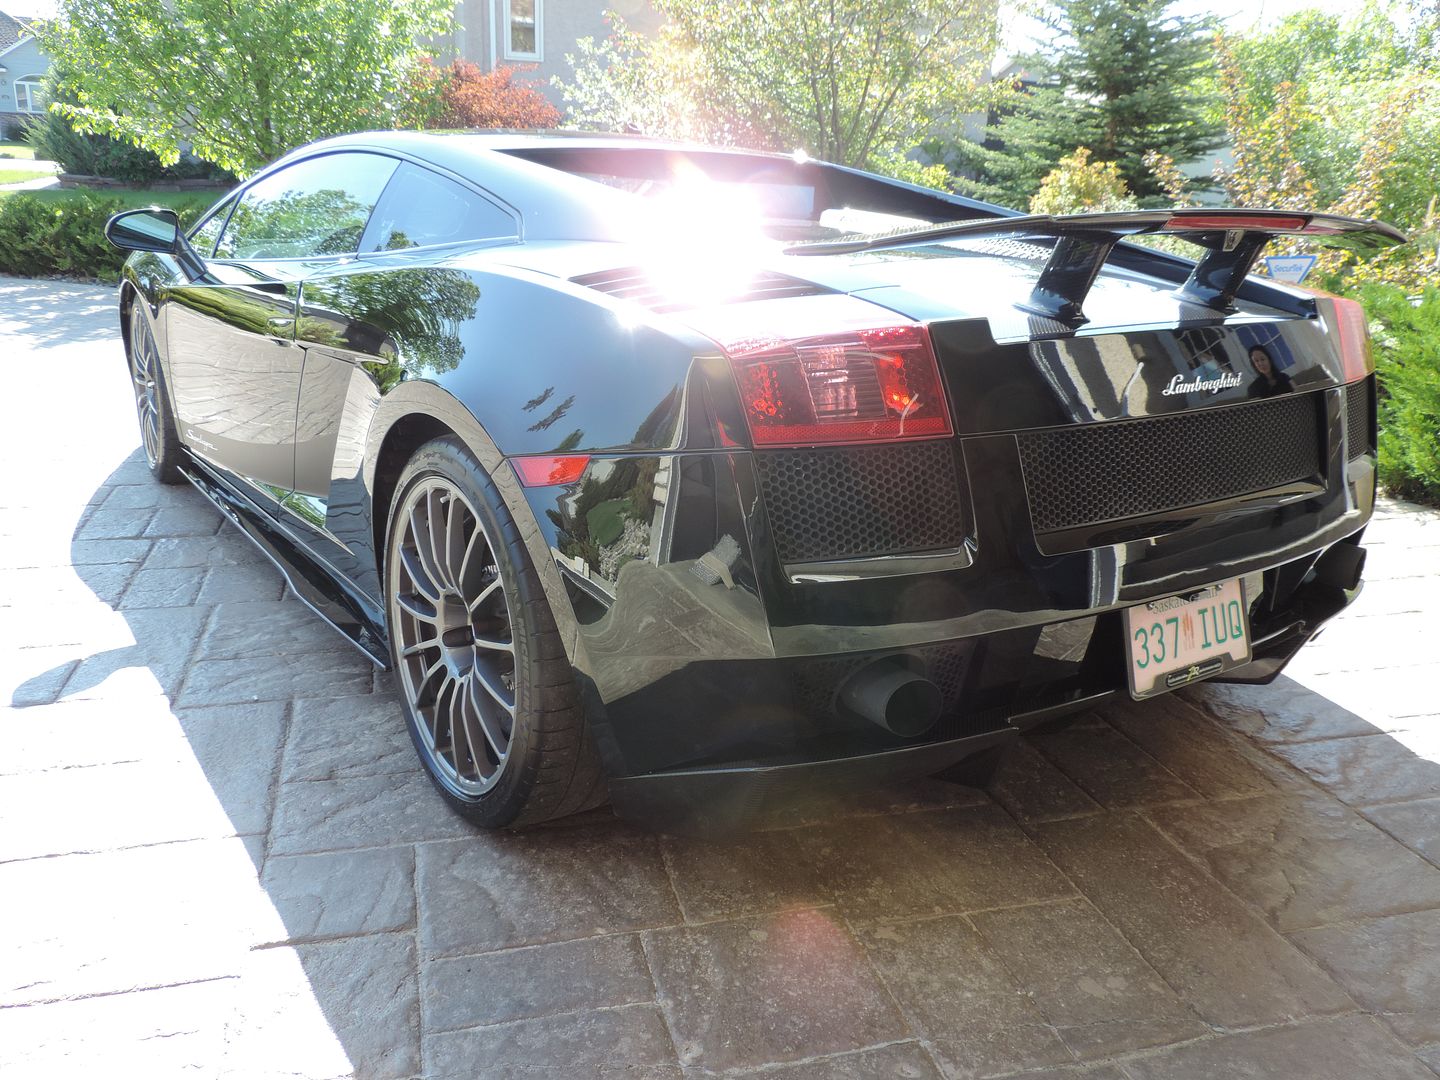
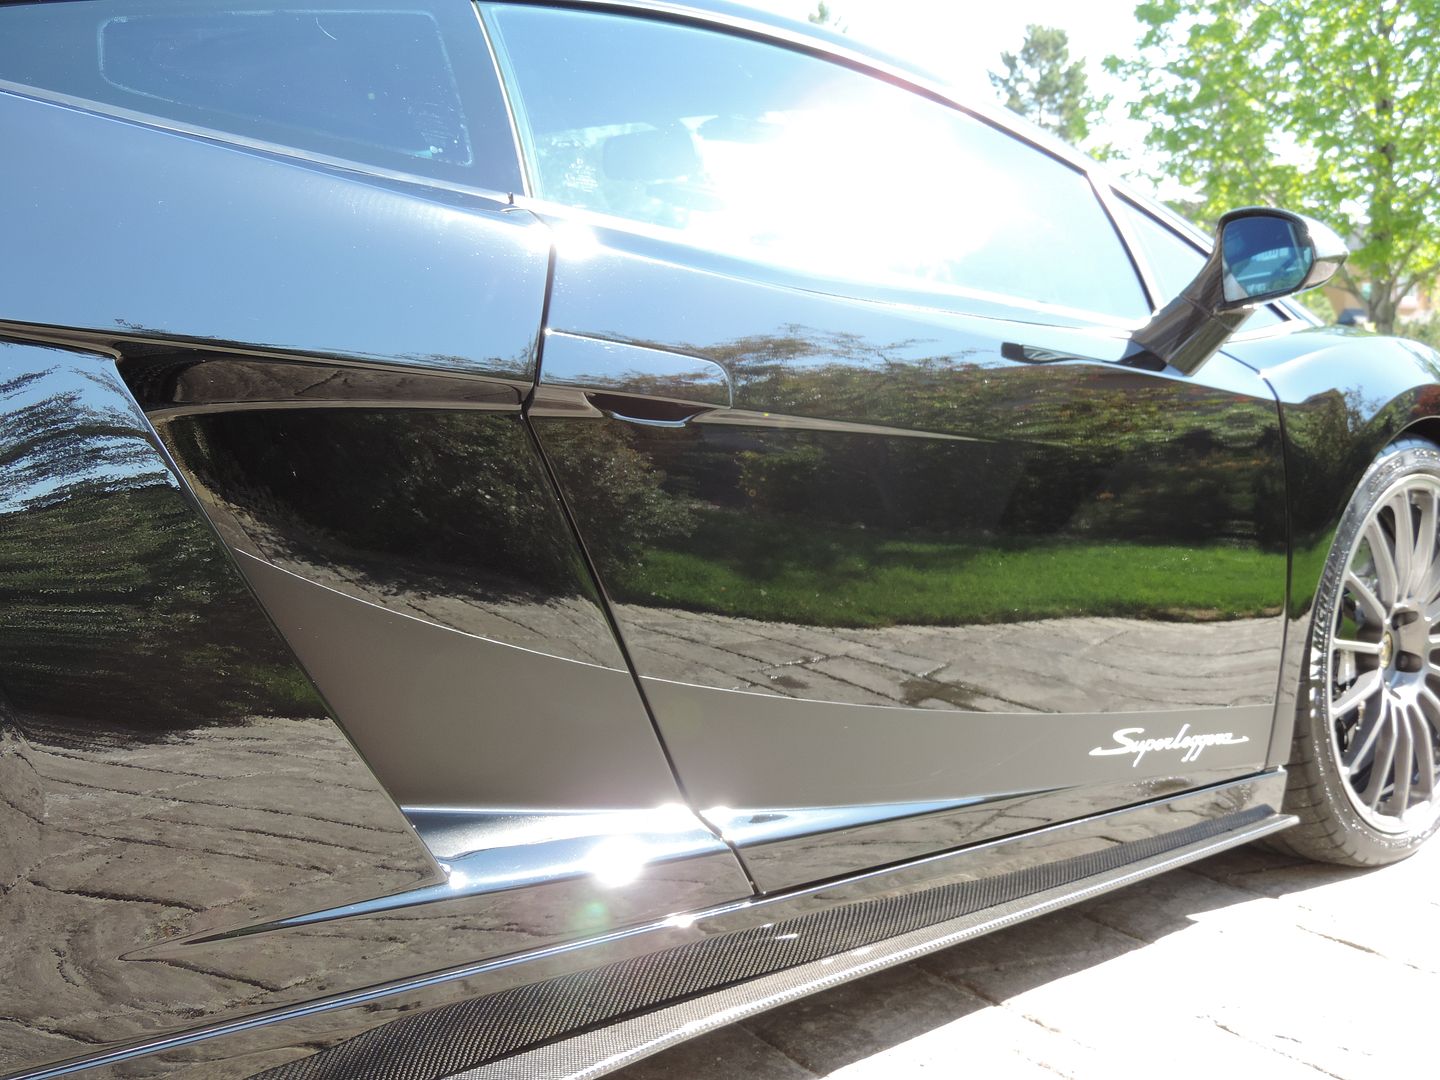
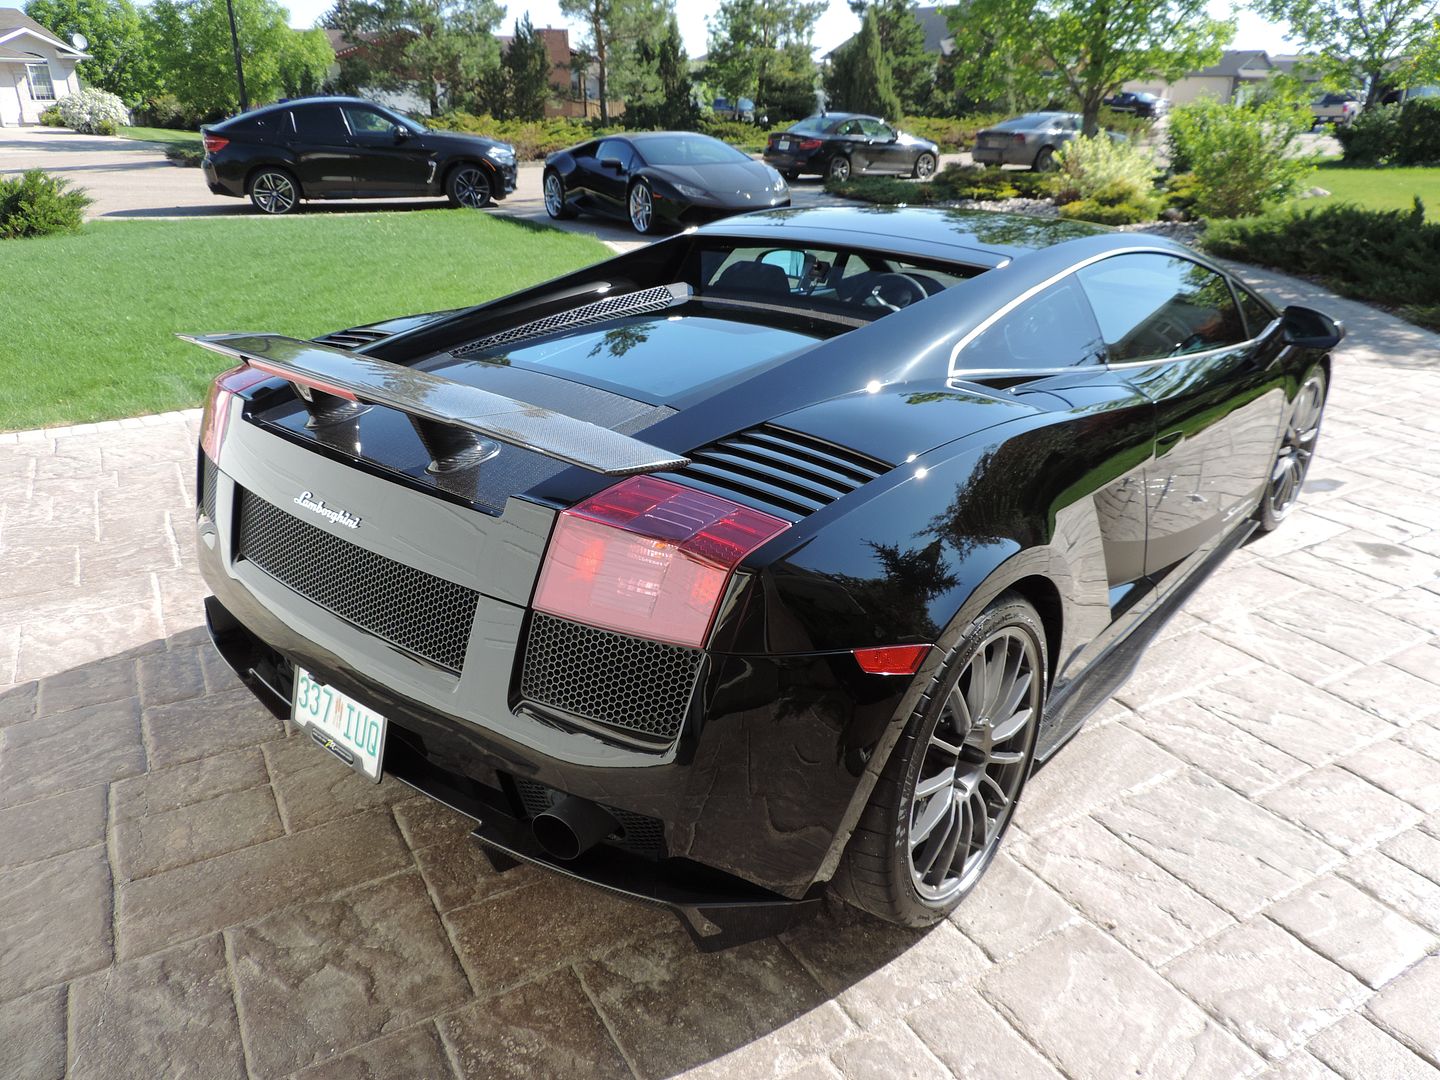
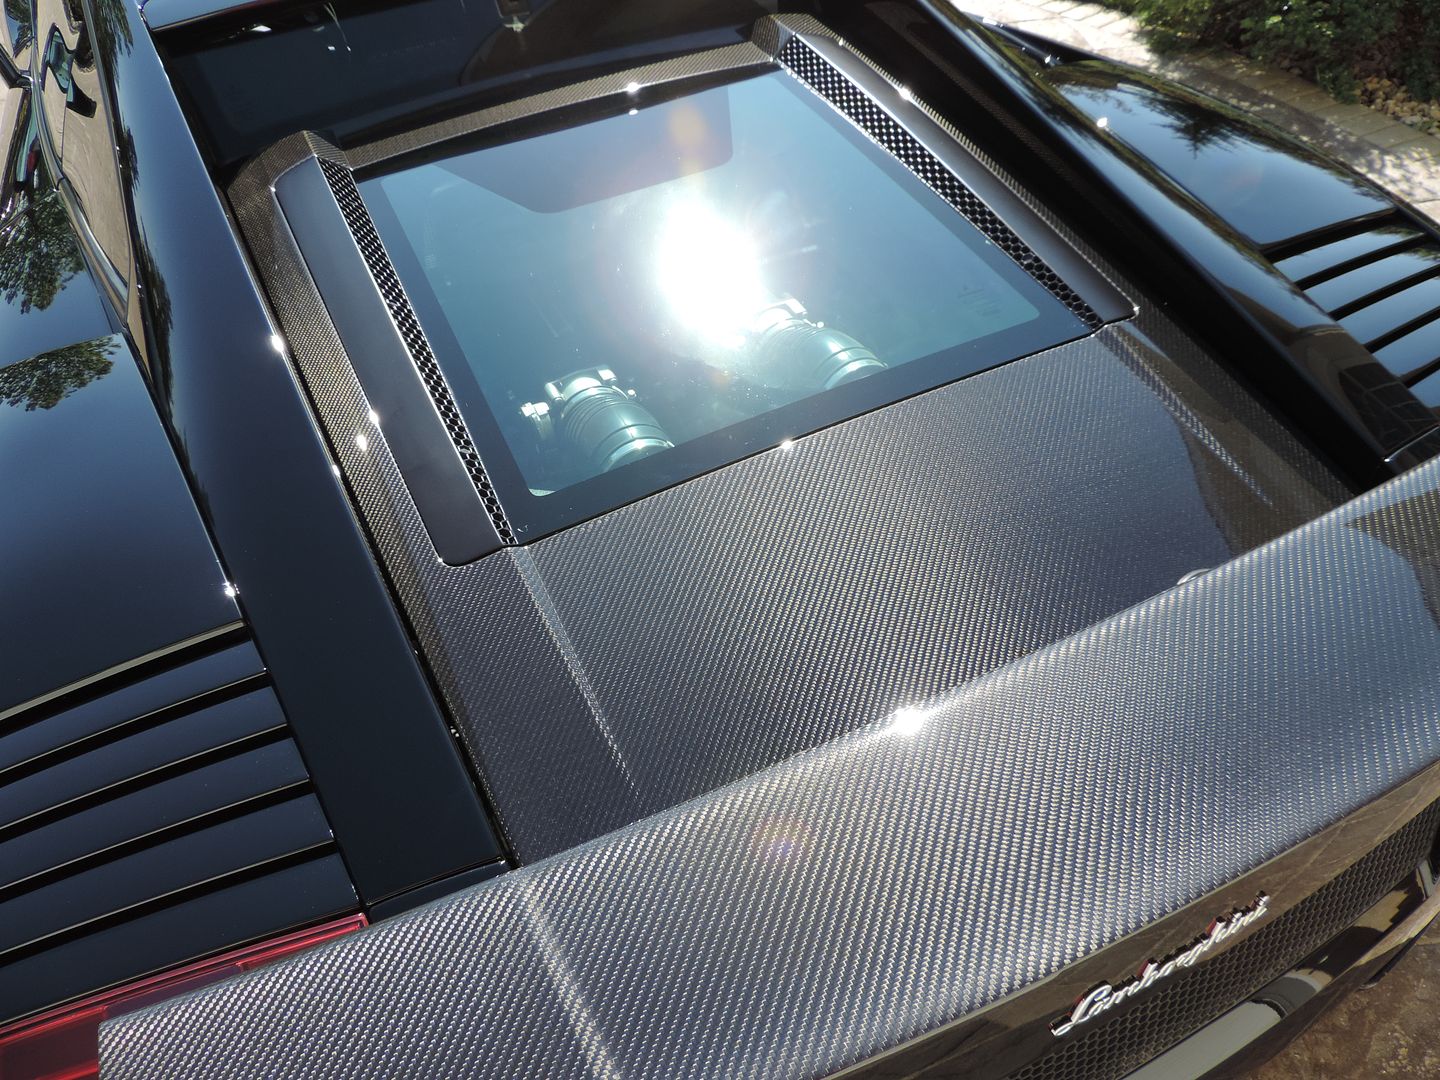
I really wanted this car to be great. I think he was happy with the results. I did have to leave a couple areas less than perfect as I was concerned about clear coat failure, but overall, the car turned out well, I think. The owner was thrilled, which is the big thing. This car was amazing to work on - the amount of carbon fibre is incredible, and it came up looking great! (Sorry, I failed to take pics of the carbon fibre inside, but the entire inner door panels are CF, as are the rear wing, side skirts, and the rear diffuser.
Thanks again, to those of you that had the patience to get to the end of my rather lengthy missive! Thanks for looking!
He bought this car used. The previous owner had the car “detailed”, and the entire front end was covered in clear bra (unknown brand). To begin with, the car is Lamborghini`s Nero Noctis, which is the same colour as my Gallardo LP560 was, so I was familiar with it. This went a long way to understanding the best way to attack it, as it is an extremely mar-prone paint. This was evident in the massive number of RIDS and holograms all over the car. The current owner is very fastidious about his cars, and his wash techniques are sound, so the damage was likely inflicted early on in the car’s life, prior to it being sold to my friend, I believe.
I took paint readings with my Defelsko depth gauge, and I was a little taken aback at how thin the readings were. On my 2009 Nero Noctis car, I was getting readings anywhere from 120 to 180 microns. On this car, I was getting 80 to 115 mostly, with a few readings hovering around 130 here and there, so I concluded that the car had been worked on, LOTS (and badly, unfortunately). As such, I was wary of going too hard on any areas that I thought would be thin - edges and panel corners, especially. There were lots of areas that required more intensive work, but I tried to limit wet sanding to a bare minimum. In the end, I had to simply improve a few RIDS, rather than eliminate them.
I do tend to be a bit overenthusiastic with my taping haha - I wanted to protect the side windows (the smaller ones behind the main side windows), as they are made out of Perspex, and are $6000 EACH to replace……. the clear engine bonnet cover is also Plexiglass, so I wanted to make sure that I didn’t damage any of these!


The car’s owner brought the car to an XPel installer to remove the old clear bra, prior to me getting started. When I got it and got started, I was crestfallen. The front end was horrendous, with holograms, and many, many RIDS. These defects were largely covered up with the clear bra, so when it was removed, all of the defects were revealed.
Driver’s side front fender, before:

……and after:

Holograms and RIDS, before:

……and after (wet sanding on passenger side of front bonnet):

More, before:

……and more, after:

I really would love to meet the guy that “detailed” the car prior to the clear bra being installed, so I could shake his hand….. and then kick him in the goolies. The holograms on the front bonnet were atrocious!


A few pics the night before I pulled it out of the garage into the light of day:


And a few once I had the car outside (sorry - a few of the pictures were taken before I realized I had the front end lift in the "up" position.....


In all, I think I wet sanded perhaps 25 areas or so, sometimes opting to lightly wet sand strategically based on my multitude of depth readings, rather than heavily compound entire panels. Other, lesser scratches were dealt with using a 1” orange Flex pad on my PE8 rotary.
Products used:
-Initial wash: CarPro Iron-X Snow foam
-Decontamination: Nanoskin Autoscrub wash mitt, using ONR as a lubricant.
-Most panels: Menzerna SIP, Flex 3401 with Lake Country orange pad (opted to go with a couple (or more) passes with this, rather than a heavy compounding step), then blue pad/Menzerna Micro Polish on PC, followed by 3” black Flex pad on a PE8 to jewel (took a long time for the whole car, but I like the control I have with the smaller pad)(THANK YOU to The Driver for the tips on jewelling - it worked really well!). Flex PE8 to tight areas (I love this thing!!)
-Wipe down with CarPro Eraser
-LSP - CQuartz UK Edition - not nearly as tricky to apply as I thought it might be!
-Wheel wells: Megs APC+, Aerospace 303
-Wheels: PBL Diamond wheel coating (two coats)
-Windshield: PBL Diamond glass coating (two coats)
Final note - when I was pulling the wheels/tires off for cleaning/coating, I noticed THIS:

There were about 10,000 miles on the tires, so no wonder. I measured the tread depth at 5/32" at the outside. Looking at the tires when mounted, you`d never have known. We regularly go on long trips with a group from Calgary, who cruise at let`s say... somewhat excessive speeds.....occasionally...... so it was probably a good thing we discovered this prior to going out
I loved doing this car - in all, I think I spent close to 40 hours on it - more because I was being crazy cautious about not going through the clear coat.
I really wanted this car to be great. I think he was happy with the results. I did have to leave a couple areas less than perfect as I was concerned about clear coat failure, but overall, the car turned out well, I think. The owner was thrilled, which is the big thing. This car was amazing to work on - the amount of carbon fibre is incredible, and it came up looking great! (Sorry, I failed to take pics of the carbon fibre inside, but the entire inner door panels are CF, as are the rear wing, side skirts, and the rear diffuser.
Thanks again, to those of you that had the patience to get to the end of my rather lengthy missive! Thanks for looking!
")
