..........including the Zenith Point Rotary Technique:buffer:
Introduction
The rotary can be used as a very effective tool for paintwork correction. In the wrong hands it can produce spectacularly poor results as we all too often see! At best swirl marks and holograms can be imparted and at worst burn through or destruction of painted panels. The latter is fortunately rare and the rotary operator has to ignore clear warning signs for this to occur.
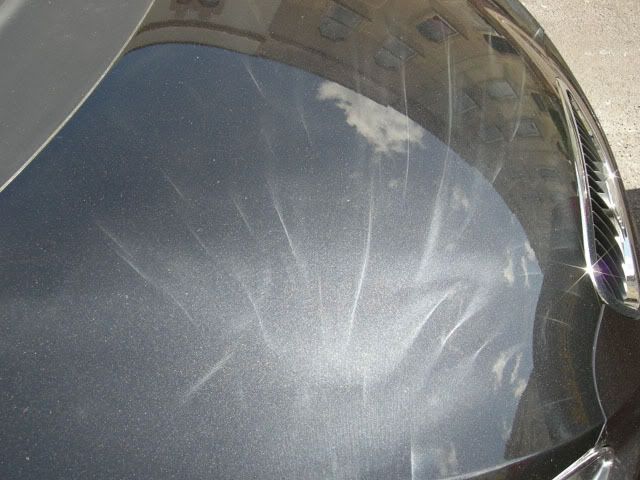
The above picture shows buffer trails and holograms on a member’s car imparted by a body shop during ‘polishing’.
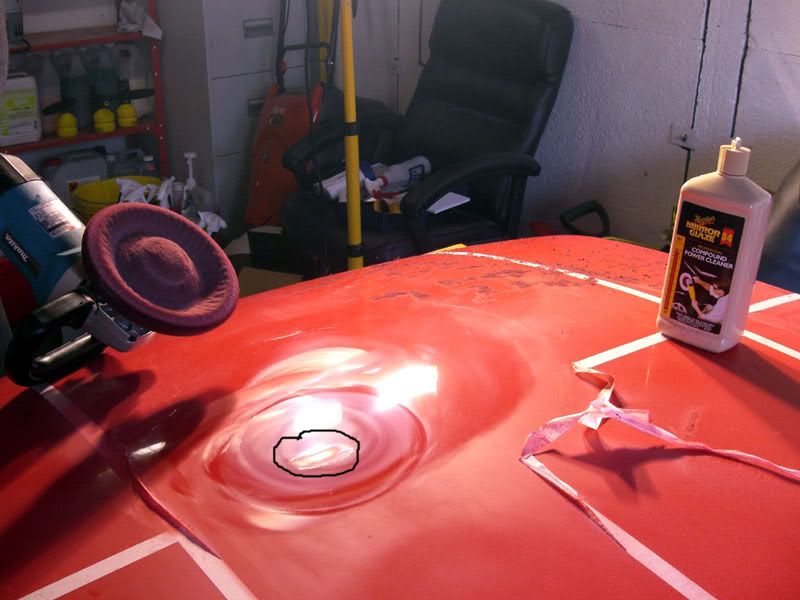
The above picture shows intentional burn through on a panel!
The rotary polisher has previously suffered from a bad name – from people who have used it and made the above mistakes but more so from people who have never picked one up but are happy to pass on internet myth and rumour!
Given the power of rotary tools and the low thickness of automotive paints (typically 100-130um) the need to take accurate paint thickness measurements cannot be stressed enough. The role of the paint thickness gauge (PTG) is essential in determining thin spots where more care must be taken and also to assess paint removal when reducing or removing scratches in the paint.
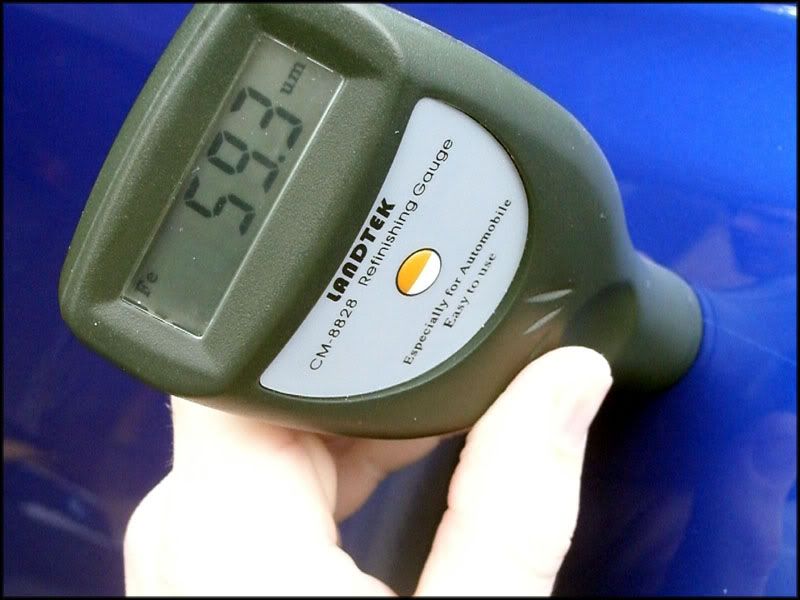
The picture above shows a thin spot in the paint polished by a previous rotary operator – the thin spot is also a different shade of blue entirely demonstrating that you don’t have to burn through to irrevocably damage the paint.
Why Rotary?
Given the above why not use a porter cable dual action polisher (PC)? Whilst far safer the PC cannot match the rotary for speed of defect removal. The rotary will perform far more satisfactorily on harder paint types like Audi, VAG, BMW and some Porsche paints. A professional detailer has to be competent in rotary use to perform effective defect removal on hard paints in a given amount of time. Would you pay someone for two days work when someone else could do it in one day?
It has also been said that the rotary finishes down sharper than a random orbital due to its ability to break down polishes more evenly. This is more noticeable on solid colours as the flake in metallic paints can effectively hide minor micro marring.
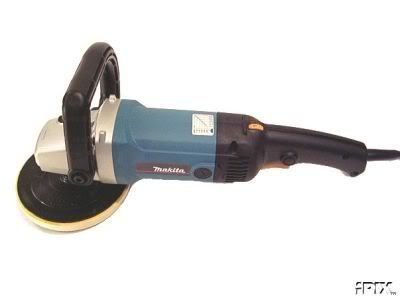
Rotary Types
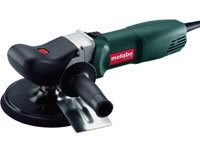
As with all things in life rotaries vary in quality and you effectively get what you pay for. At the top end you will find the likes of Makita and Metabo which have essential features such as electronic speed control. This means that the torque of the motor increases as you apply pressure to the head of the tool thus it is able to maintain a constant speed regardless of pressure applied. This is not essential for defect removal but when finishing down by rotary a constant low speed will help in avoiding holograms. The constant speed will also help reduce ‘buffer hop’ – see below.
Cheaper rotaries do not always have this feature but in skilled hands can still be used effectively. Other useful features of rotary polishers include soft start. This allows you to feather the speed by using trigger control. Most rotaries will allow you to vary the speed from anywhere between 600rpm to 3000rpm. Some older rotary types are fixed speed or may have two fixed speeds. These are often quite high speeds of 1500rpm plus. These are not always suitable for finishing work.
Pads/Polishes
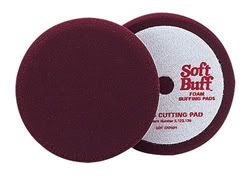
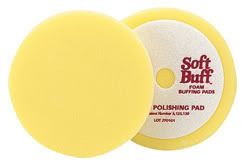
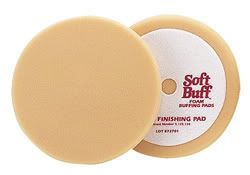
Personally I prefer a flat pad for use with the rotary and now exclusively use Meguiars cutting, polishing and finishing pads. I find these very easy to use as a system and would thoroughly recommend them. Downside they are not cheap But then not many good things are in life
 ") . In true radio one style – other pad types are available!
. In true radio one style – other pad types are available!
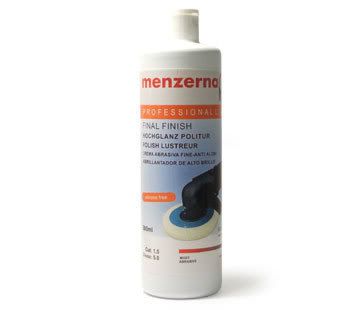
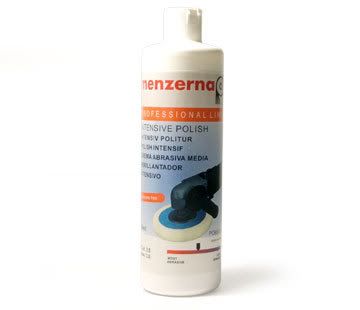
I have used polishes from almost every manufacture and have found two makes that stand out. The Menzerna and Meguiars polishes are well suited to rotary use and are my particular favourites. The ceramiclear Menzerna Intensive polish has to be my favourite followed by Meguiars #83 for medium to high defect removal with Menzerna final finish as a great finishing polish.
For serious cutting work Megs #84 - #85 are outstanding with a wool pad but tend to leave marring/swirls with a foam cutting pad. Menzerna power gloss is chalky and difficult to use but does produce god results if worked well enough. Using the highly lubricated ceramiclear Menzerna intensive polish gives you an increased work time and more often than not using multiple applications of this will cut as well as the heavyweights detailed above.
Basic handling techniques
This is not a complete guide - that only comes from practice
Common mistakes
The Zenith Point Technique
Disclaimer: This is only one technique! It works well for me. There are many other techniques I have used which also work but this is the technique I have settled upon after experimenting. There will be numerous other techniques that work as well maybe even better but for now I am happy to stick with this as it gives me the results I want safely and reasonably fast.
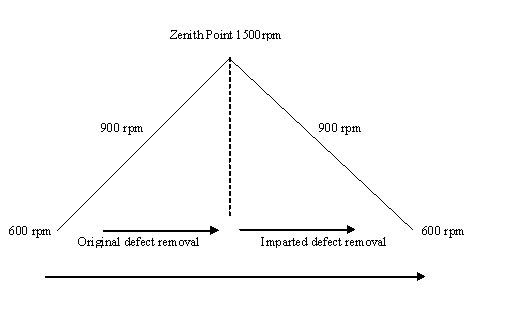
It works upon a ‘zenith’ principle as demonstrated below. The rpm of the rotary starts off slow at 600 rpm through to 900rpm and up to a zenith of maybe 1200-1500rpm and then after reaching the zenith point I work back down the scale through 900rpm and finish at 600rpm.
The zenith point (1200-1500rpm+) is the point at which maximum defect removal occurs. At these speeds its fair to say that some defects such as holograms may be imparted so by going back down the scale not only have you removed the original defects but you are now removing any defects imparted by reaching the zenith point. An LSP ready finish can be achieved by all but the harshest polishes. An added bonus is that when using a finer grade polish you are simply adding to the gloss rather than having to remove any defects left by the previous polish.
Final Finish
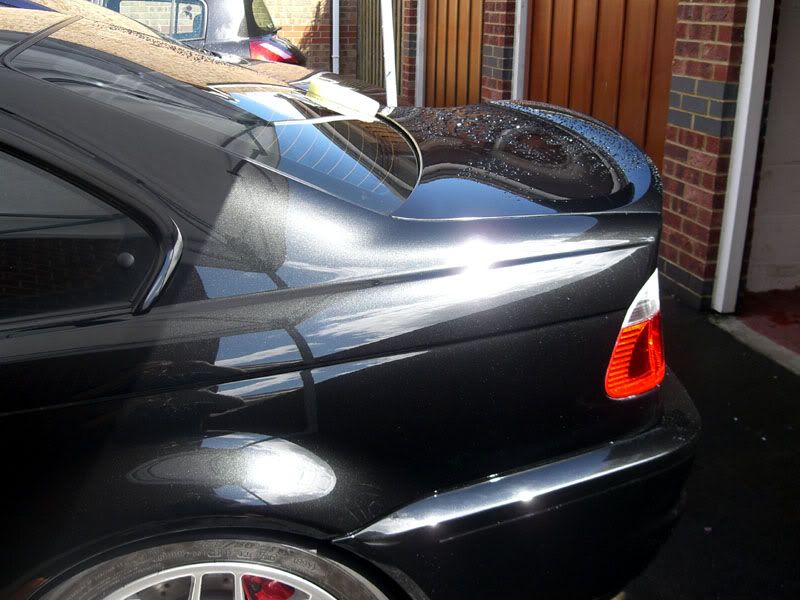
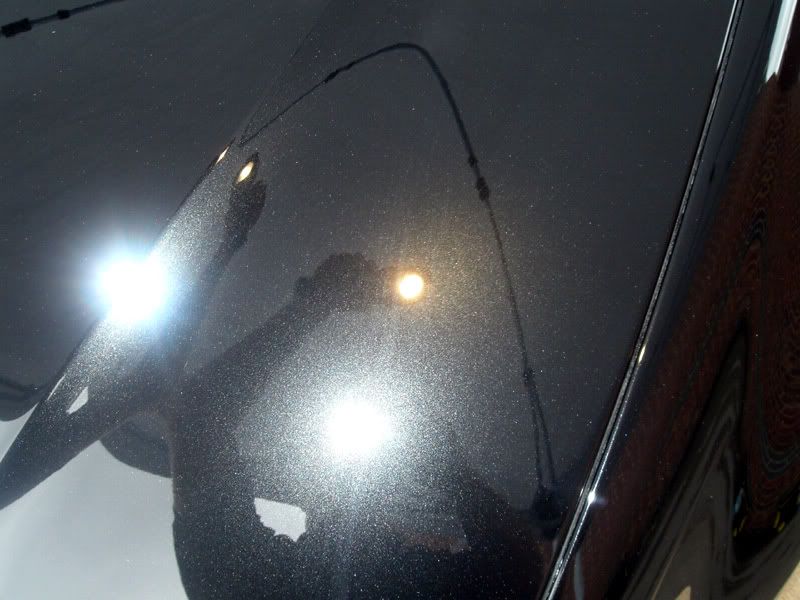
By using the above techniques you should be able to achieve flawless sharp finishes that withstand close scrutiny under both direct sunlight and artificial lights. A far cry from the many ‘show room’ or body shop polished cars we see far too often on here in need of correction!

Introduction
The rotary can be used as a very effective tool for paintwork correction. In the wrong hands it can produce spectacularly poor results as we all too often see! At best swirl marks and holograms can be imparted and at worst burn through or destruction of painted panels. The latter is fortunately rare and the rotary operator has to ignore clear warning signs for this to occur.
The above picture shows buffer trails and holograms on a member’s car imparted by a body shop during ‘polishing’.
The above picture shows intentional burn through on a panel!
The rotary polisher has previously suffered from a bad name – from people who have used it and made the above mistakes but more so from people who have never picked one up but are happy to pass on internet myth and rumour!
Given the power of rotary tools and the low thickness of automotive paints (typically 100-130um) the need to take accurate paint thickness measurements cannot be stressed enough. The role of the paint thickness gauge (PTG) is essential in determining thin spots where more care must be taken and also to assess paint removal when reducing or removing scratches in the paint.
The picture above shows a thin spot in the paint polished by a previous rotary operator – the thin spot is also a different shade of blue entirely demonstrating that you don’t have to burn through to irrevocably damage the paint.
Why Rotary?
Given the above why not use a porter cable dual action polisher (PC)? Whilst far safer the PC cannot match the rotary for speed of defect removal. The rotary will perform far more satisfactorily on harder paint types like Audi, VAG, BMW and some Porsche paints. A professional detailer has to be competent in rotary use to perform effective defect removal on hard paints in a given amount of time. Would you pay someone for two days work when someone else could do it in one day?
It has also been said that the rotary finishes down sharper than a random orbital due to its ability to break down polishes more evenly. This is more noticeable on solid colours as the flake in metallic paints can effectively hide minor micro marring.
Rotary Types
As with all things in life rotaries vary in quality and you effectively get what you pay for. At the top end you will find the likes of Makita and Metabo which have essential features such as electronic speed control. This means that the torque of the motor increases as you apply pressure to the head of the tool thus it is able to maintain a constant speed regardless of pressure applied. This is not essential for defect removal but when finishing down by rotary a constant low speed will help in avoiding holograms. The constant speed will also help reduce ‘buffer hop’ – see below.
Cheaper rotaries do not always have this feature but in skilled hands can still be used effectively. Other useful features of rotary polishers include soft start. This allows you to feather the speed by using trigger control. Most rotaries will allow you to vary the speed from anywhere between 600rpm to 3000rpm. Some older rotary types are fixed speed or may have two fixed speeds. These are often quite high speeds of 1500rpm plus. These are not always suitable for finishing work.
Pads/Polishes
Personally I prefer a flat pad for use with the rotary and now exclusively use Meguiars cutting, polishing and finishing pads. I find these very easy to use as a system and would thoroughly recommend them. Downside they are not cheap
But then not many good things are in life . In true radio one style – other pad types are available!
I have used polishes from almost every manufacture and have found two makes that stand out. The Menzerna and Meguiars polishes are well suited to rotary use and are my particular favourites. The ceramiclear Menzerna Intensive polish has to be my favourite followed by Meguiars #83 for medium to high defect removal with Menzerna final finish as a great finishing polish.
For serious cutting work Megs #84 - #85 are outstanding with a wool pad but tend to leave marring/swirls with a foam cutting pad. Menzerna power gloss is chalky and difficult to use but does produce god results if worked well enough. Using the highly lubricated ceramiclear Menzerna intensive polish gives you an increased work time and more often than not using multiple applications of this will cut as well as the heavyweights detailed above.
Basic handling techniques
This is not a complete guide - that only comes from practice
- Spend time centring the pad on the rotary – spin it at a low speed such as 600rpm to ensure it is properly centred. Higher speeds can give the illusion the pad is centred as the centrifugal forces force the foam out slightly making it appear more central.
- For a right handed user hold the handle of the rotary in the right hand and place the left hand on the head of the polisher as seen below.
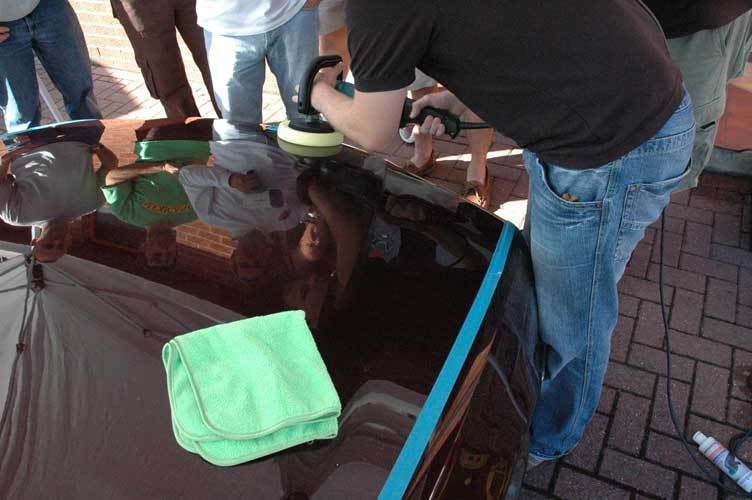
- The rotary should be moved with the right arm and the left hand should only be used to hold the head to the paintwork and apply pressure. Practice one handed to ensure you are using the right arm to move the polisher.
- The rotary should be moved from left to right in an arc. By moving it to the right it naturally moves upwards. By moving to the left it naturally arcs downwards. This arc movement is totally different from using a PC in horizontal and vertical passes. With practice this arc movement will become second nature. The arm should move slowly and smoothly keeping the pad flat to the paint at all times. On curved panels this isn't possible so more focus on smooth non jerky arm movements is essential.
- Season the pad first! As you would season a wok before use. This takes the pre spritz of the pad one stage further and effectively ensures any polish applied does not soak too far into the pad. Spray a dry pad with detail spray and work it onto a panel until the pad is warm and slightly moist!
- Only apply very small amounts of polish. In particular the ceramiclear Menzerna polishes are very well lubricated and take a long time to break down so only a tiny amount is needed. Apply the small amount in a cross shape on the pad but only very thin lines and a 20 pence size amount is ample to prime the pad with even smaller amounts needed afterwards.
- Pressure. How much pressure to apply to the head of the polisher is difficult to say a text document and will vary according to defects. For those PC users coming to a rotary the amount of pressure needed is far less than you might apply with a PC. The rotary can for the most part work under its own weight or very light pressure from the left hand. Stubbon swirls may need more pressure again something that will come with experience.
- Clean the rotary pad regularly! Ensure any dried polish is removed by spinning it at 1500rpm and placing a toothbrush or megs triple duty detail brush across the foam pad. If working on single stage paint and the pad becomes clogged with dead paint spray the pad with lots of QD and then spin at 900rpm placing an old m/f against the pads surafce to take away the dead paint. Change pads regularly.
- Get comfortable!! If you are uncomfortable you will not be able to fully focus on the job in hand! When working on side panels a kneeling stance is more stable than crouching so a soft piece of foam or something similer to support the knees is essential.
- When working on side panels and curved panels the left hand will need to support the head of the polisher and press the pad firmly against the panel. More presure wil be needed here as the pad won't have the weight of the polisher over it. Again move the polisher in arc like strokes.
- Plastics! Is a rotary safe to use on plastics - yes but far more care is needed! Plastics just will not cope with the heat produced like a metal panel can. Indeed if you 'over cook' the painted plastic the surface will wrinke up! -Ask me how I know! . Once the plastic reaches a certain heat it It will wrinkle up without warning and very fast! This is irrecoverable! My advice is to test this on a plastic scrap pane so you can guage the amount of beans you can give it. On real cars stop after each pass and allow the plastic to cool (this takes ages) before attempting another pass! Plastics should not be allowed to get any warmer than luke warm whereas a metal panel can get as hot as you can safely touch with no adverse effects.
- Working close to plastic bump strips on car doors can be tricky to fully remove swirls. If you can take these off all the better! If not once taped off try tilting the pad so that more pressure is applied close to the edge with the edge of the foam pad doing some of the polishing work. NB This will impart holograms so as a final pass go back over with the flat of the pad.
- Paint is thinner at the edges of panels so care must be taken. If polishing across edges (such as on a car bonnet where the line of the bonnet meets the front wings) then tape off the edge of the panel not being polished. Alternativly lift the bonnet up and have someone hold it so you can confidentally polish up to the edge without running over teh edge of the front wing!
- Don't try and de swirl too large an area at once. I typically divide a bonet into 6-8 sections. However once deswirled and onto the finishing polish much larger sections can be done at once for example a whole door or half a bonnet.
Common mistakes
- Incomplete Polish breakdown. The overriding principle to create a great finish is to break the polish down fully. By not breaking it down fully you may scour the surface of the paint imparting defects. Knowing when a polish is fully broken down comes with experience but a good yard stick is when the polish has gone clear and is very easy to wipe off. Ensure any unbroken polish pushed to the outer edges of your work area are not picked up by the pad in the final pass as this wil not break down the polish imparting holograms.
- Swirls are imparted by using too harsh a polish that is not broken down properly. If this happens you may have used too much polish or it may have dried. If this happens try removing the polish residue from the panel, spritz the pad with QD only (no more polish) and polish again using the remnants of the polish left in the pad to break it down properly.
- Holograms or micro marring are again imparted due to polish that hasn’t been properly broken down or too high speeds. Following the advice above or below should cure these.
- Buffer hop is when the rotary jumps across the paints surface usually due to insufficient polish/lubrication and as the foam pad ‘bites’ the paint it jumps! Try spreading the polish more evenly across the pad, add more polish or QD.
- Splatter: Ok not always a mistake as techniques including slow cut with consumer intensive polish and G3 require a hefty splash of water/QD. However when using highly lubricated polishes from Meguiars and Menzerna splatter is a sign that you’ve used too much polish or you have cranked the speed up to too fast, too soon!
The Zenith Point Technique
Disclaimer: This is only one technique! It works well for me. There are many other techniques I have used which also work but this is the technique I have settled upon after experimenting. There will be numerous other techniques that work as well maybe even better but for now I am happy to stick with this as it gives me the results I want safely and reasonably fast.
It works upon a ‘zenith’ principle as demonstrated below. The rpm of the rotary starts off slow at 600 rpm through to 900rpm and up to a zenith of maybe 1200-1500rpm and then after reaching the zenith point I work back down the scale through 900rpm and finish at 600rpm.
The zenith point (1200-1500rpm+) is the point at which maximum defect removal occurs. At these speeds its fair to say that some defects such as holograms may be imparted so by going back down the scale not only have you removed the original defects but you are now removing any defects imparted by reaching the zenith point. An LSP ready finish can be achieved by all but the harshest polishes. An added bonus is that when using a finer grade polish you are simply adding to the gloss rather than having to remove any defects left by the previous polish.
Final Finish
By using the above techniques you should be able to achieve flawless sharp finishes that withstand close scrutiny under both direct sunlight and artificial lights. A far cry from the many ‘show room’ or body shop polished cars we see far too often on here in need of correction!
")