RaydiantDetail
New member
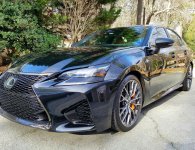
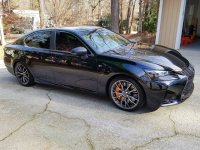
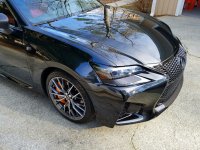
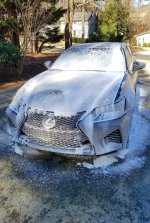
The owner of this Lexus GSF contacted me originally for a detail. After looking at the car and speaking about what the owner was looking for we settled on an Essence + Coating combo. That way I could provide some necessary correction within their budget and lay down a primer prior to coating. The front half of the car had a PPF wrap installed when the car was purchased but the paint was not corrected prior to laying down the PPF and it was also rough and needed a solid decon. The car could have also used a wheels off and wheel coating as these brakes produce a massive amount of brake dust but that was not in the budget at this time.
On to the process and pictures.
Wash: Pre-soak with DP foam soap, 2BM method with Megs Hyper Wash, CarPro Wool Wash Mitt, assortment of brushes
Wheels: Megs Wheel Brightener, assortment of wheel woolies, dedicated wheel brushes and wash mitt, Hydro 2 Lite for protection
Tires: Tuf Shine Tire Cleaner, Tuf Shine Tire Brush, and Megs D161 for dressing
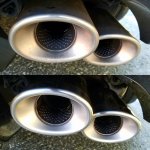
Exhaust: Polished with Nevr-Dull and sealed with Hydro 2 (I prefer doing this prior to washing the car now)
Decontamination: Duragloss #471, Carpro Iron X, Griots Garage Poly Clay, and Griots FAST prep mitt
Paint Correction: Carpro Essence with Griots Orange Correcting Pad, Griots G21, Rupes Mini with Griots 3inch orange pads, Rupes Ibrid Nano with blue rupes pads (Rotary and DA mode), PPF wrap was polished with the CarPro Gloss Pads and Essence, the top of the trunk needed a bit of extra love so I hit it with Boss Correcting Cream and Orange pad, and finished with Essence on the Boss Yellow Pad.
Paint Prep: CarPro Eraser
Paint Coating: Optimum Gloss-Coat on paint, CF trim (coated and un-coated), headlights and tail lights. This was my first time using Gloss Coat and it was sooooo easy to apply. I started the application around midnight and it was about 1 degree Celsius (lol I am still Canadian in many ways and I don`t get this Fahrenheit business). It still self leveled around the 1 minute mark and I could easily see the high spots which also came off very easily with very little pressure. I also got a little more confident after doing the front and I was able to do entire panels like doors with no issues.
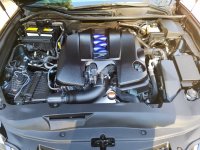
Cosmetic Engine Detail: Megs APC 4:1, dedicated brushes, protected with 303 Aerospace
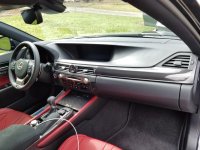
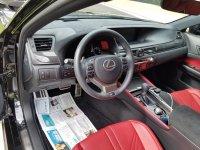
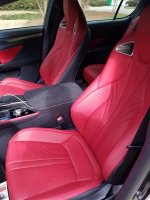
Basic Interior: Vacuum, McKees 37 QID on dash, doors, and seats - the interior just had some light dust and dirt, nothing major required
Total working time: Approx. 12 hours
Total cure time: 12 hours
As always please enjoy and your feedback is always welcomed and appreciated. I also want to apologize for the lack of before and after pictures on this one. I was really working against the clock as the car had to be ready by Sunday afternoon around Noon and I wasn`t able to start till later in the day due to the car being dropped off late.
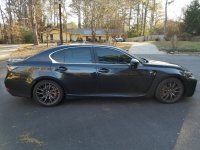
Before photos - prior to wash


Washing/ Decon Process
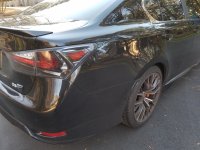
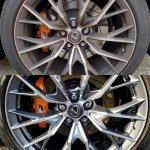
Wheels before and after

Exhaust tips before and after

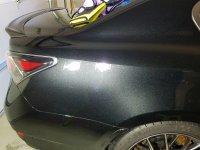
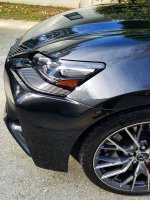
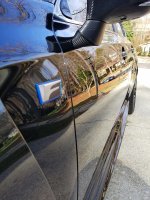
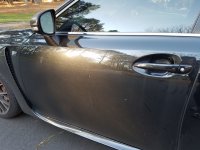
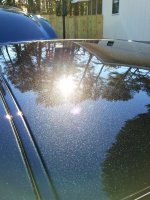
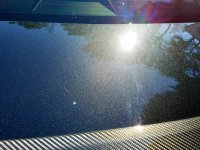
Inspecting the paint post wash - a few panel shots
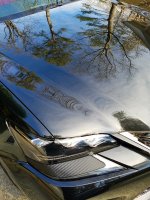
Roof

Trunk lid

On to the process and pictures.
Wash: Pre-soak with DP foam soap, 2BM method with Megs Hyper Wash, CarPro Wool Wash Mitt, assortment of brushes
Wheels: Megs Wheel Brightener, assortment of wheel woolies, dedicated wheel brushes and wash mitt, Hydro 2 Lite for protection
Tires: Tuf Shine Tire Cleaner, Tuf Shine Tire Brush, and Megs D161 for dressing
Exhaust: Polished with Nevr-Dull and sealed with Hydro 2 (I prefer doing this prior to washing the car now)
Decontamination: Duragloss #471, Carpro Iron X, Griots Garage Poly Clay, and Griots FAST prep mitt
Paint Correction: Carpro Essence with Griots Orange Correcting Pad, Griots G21, Rupes Mini with Griots 3inch orange pads, Rupes Ibrid Nano with blue rupes pads (Rotary and DA mode), PPF wrap was polished with the CarPro Gloss Pads and Essence, the top of the trunk needed a bit of extra love so I hit it with Boss Correcting Cream and Orange pad, and finished with Essence on the Boss Yellow Pad.
Paint Prep: CarPro Eraser
Paint Coating: Optimum Gloss-Coat on paint, CF trim (coated and un-coated), headlights and tail lights. This was my first time using Gloss Coat and it was sooooo easy to apply. I started the application around midnight and it was about 1 degree Celsius (lol I am still Canadian in many ways and I don`t get this Fahrenheit business). It still self leveled around the 1 minute mark and I could easily see the high spots which also came off very easily with very little pressure. I also got a little more confident after doing the front and I was able to do entire panels like doors with no issues.
Cosmetic Engine Detail: Megs APC 4:1, dedicated brushes, protected with 303 Aerospace
Basic Interior: Vacuum, McKees 37 QID on dash, doors, and seats - the interior just had some light dust and dirt, nothing major required
Total working time: Approx. 12 hours
Total cure time: 12 hours
As always please enjoy and your feedback is always welcomed and appreciated. I also want to apologize for the lack of before and after pictures on this one. I was really working against the clock as the car had to be ready by Sunday afternoon around Noon and I wasn`t able to start till later in the day due to the car being dropped off late.
Before photos - prior to wash
Washing/ Decon Process
Wheels before and after
Exhaust tips before and after
Inspecting the paint post wash - a few panel shots
Roof
Trunk lid
Attachments
-
 20170128_083928.jpg168.8 KB · Views: 165
 -
 20170128_084049.jpg349.2 KB · Views: 165
 -
 20170128_084000.jpg399.4 KB · Views: 163
 -
 20170128_084039.jpg424.5 KB · Views: 163
 -
 20170128_084151.jpg319.9 KB · Views: 162
 -
 IMG_20170128_100842_829.jpg264.4 KB · Views: 163
 -
 IMG_20170128_134557.jpg115.8 KB · Views: 160
 -
 20170128_120528.jpg191.3 KB · Views: 27
 -
 20170128_132232.jpg162.1 KB · Views: 162
 -
 20170128_132312.jpg375.8 KB · Views: 161