cf2121
New member
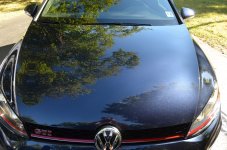
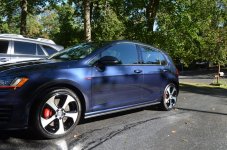
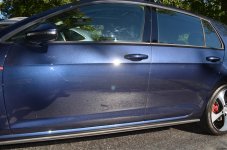
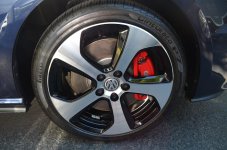
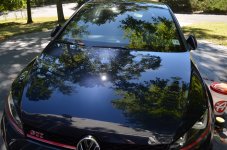
I was contacted by the owner of this new GTI on reddit about a month ago. He wanted to get his new car prepped for winter, but later decided to with a correction and coating to really get it ready and protected for winter.
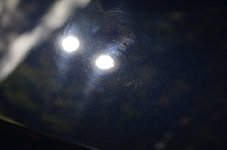
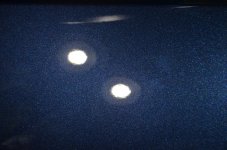
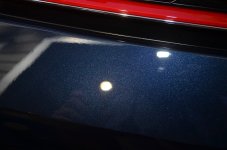
The car was in pretty good shape to begin with. No major swirling, a few random spots on the car is all. It was actually covered in rotary holograms more than anything. Wax too; there was wax in all the crevices and on most of the trim. Here is a video from my Instagram showing the holograms: https://www.instagram.com/p/BKou998Db7I/?taken-by=finnsfinedetails
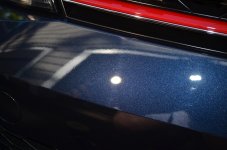
Because it was mostly swirl free, I decided to use Essence to prep it for the coating.
There was plenty of paint on the GTI, it measured anywhere from 180 to 210 microns. Lowest point was the trunk. Essence hardly took anything off.
---
Products used:
Wheels , tires, wheel wells:
Carpro Reset
Nanolex Wheel Cleaner & Iron Remover
Optimum Ferrex
Meguiar’s D101 4:1
Various brushes
Gyeon Q2 Tire Gel
Carpro Hydro2 (lsp)
Carpro Reload (lsp)
Wash:
Carpro IX Snow Soap (presoak)
Carpro Reset
Decontamination:
Optimum Ferex
Wolfgang Uber Rinseless 1:16
Adam’s Visco Clay
Correction:
Rupes 21
Rupes Mini
Rupes Nano
Carpro Essence
Meguiar’s M205 (test spot)
Ultima Final Polish (test spot)
Rupes Yellow Pads
Meguiar’s Microfiber Cutting pads
3m automotive tape
LSP:
Mckees 37 Paint Coating
Glass:
Meguiar’s Glass Cleaner Concentrate
Nanoskin Rain (lsp)
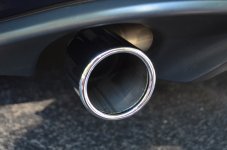
Exhaust tips:
Meguiar’s APC 4:1
Poorboy’s World Chrome Polish
Ultima Paint Sealant (lsp)
Trim:
Carpro Reload
Ammo Mud
Interior:
Vacuum
Einzett Cockpit Premium
Total time:
~11 hours
Thanks for looking & reading!


The car was in pretty good shape to begin with. No major swirling, a few random spots on the car is all. It was actually covered in rotary holograms more than anything. Wax too; there was wax in all the crevices and on most of the trim. Here is a video from my Instagram showing the holograms: https://www.instagram.com/p/BKou998Db7I/?taken-by=finnsfinedetails
Because it was mostly swirl free, I decided to use Essence to prep it for the coating.
There was plenty of paint on the GTI, it measured anywhere from 180 to 210 microns. Lowest point was the trunk. Essence hardly took anything off.
---
Products used:
Wheels , tires, wheel wells:
Carpro Reset
Nanolex Wheel Cleaner & Iron Remover
Optimum Ferrex
Meguiar’s D101 4:1
Various brushes
Gyeon Q2 Tire Gel
Carpro Hydro2 (lsp)
Carpro Reload (lsp)
Wash:
Carpro IX Snow Soap (presoak)
Carpro Reset
Decontamination:
Optimum Ferex
Wolfgang Uber Rinseless 1:16
Adam’s Visco Clay
Correction:
Rupes 21
Rupes Mini
Rupes Nano
Carpro Essence
Meguiar’s M205 (test spot)
Ultima Final Polish (test spot)
Rupes Yellow Pads
Meguiar’s Microfiber Cutting pads
3m automotive tape
LSP:
Mckees 37 Paint Coating
Glass:
Meguiar’s Glass Cleaner Concentrate
Nanoskin Rain (lsp)
Exhaust tips:
Meguiar’s APC 4:1
Poorboy’s World Chrome Polish
Ultima Paint Sealant (lsp)
Trim:
Carpro Reload
Ammo Mud
Interior:
Vacuum
Einzett Cockpit Premium
Total time:
~11 hours
Thanks for looking & reading!
Attachments
-
 resize1.jpg166.8 KB · Views: 123
 -
 resize2.jpg160.9 KB · Views: 122
 -
 resize3.jpg201.5 KB · Views: 125
 -
 resize4.jpg192.2 KB · Views: 123
 -
 resize5.jpg103.6 KB · Views: 121
 -
 resize6.jpg208.6 KB · Views: 122
 -
 resize7.jpg110.7 KB · Views: 121
 -
 resize9.jpg145.2 KB · Views: 123
 -
 resize8.jpg108.8 KB · Views: 121
 -
 resize10.jpg147.4 KB · Views: 122
")