Migue
New member
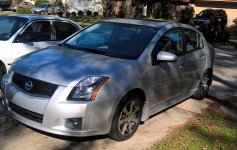
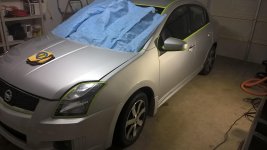
So the GF got herself a newer used car (only 30k miles) and of course, i had to get my hands on the new ride of the Household.
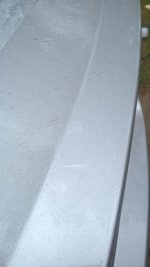
Paint was not in horrible shape, it is silver, so it hides defects very well. There was definitely some room for improvement in some neglected areas and the paint needed an overall polish to make it pop. This was done during New Years Eve weekend and got finished right before midnight.
Procducts used:
Mothers Mag & Aluminum Polish
3D Pink Soap
Megs APC
Sonax
3D Orange Degreaser
Ferrex
Red Nanoskin Sponge
Tarminator
HD Cut
HD Polish
FK1000P
Carpro Eraser
Carpro PERL
Black Magic(for dressing wells, nothing else i promise") )
)
HD Dress
Machine work done with Flex3401 & LC CCS/Flat Orange & White Pads , and PC with 4" LC CCS Yellow,Orange & White pads for small areas and spot scratch repair.
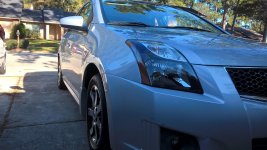
I did not compound the whole car, only certain areas where defects/swirls were pretty noticeable, the rest was just polished with HD Polish. It is a daily driver, and i want as much CC on the car as possible.Only the Roof,top of the trunk,top of 1/4 panels and scratches were compounded . I've decided, after inspecting the car further during the 1st post-paint polishing wash, that i will go ahead and compound the hood since polishing alone didn't do much for me.
-License plates removed
-Wheels sprayed with sonax, no heavy brake dust, so they were in pretty good condition already.
-Tires sprayed with Megs APC 4:1 and agitated with a brush, repeated this step about 3 times since Carmax Sprayed the crap out of the tires with their version of a tire dressing, even though i had told the guy to NOT wash the car. I guess i should have specified that it included not slamming the tires with gunk that drips all over the place.
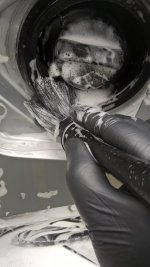
-Wells sprayed with 3D Orange Degreaser and agitated/scrubbed with wheel woolies.
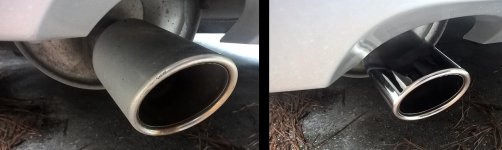
Exhaust was scrubbed with some fine steel wool first, then polished using a MF towel with some metal polish.

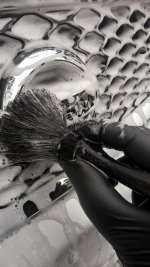
Car was rinsed off with pressure washer, then foamed using a mixture of the 3D Soap and a bit of Megs APC. While i let the foam dwell on the car i took my brush and agitated the grill,gas cap area and other areas needing some extra attention.


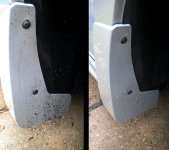
Car was then rinsed off and washed using 2B method and grit guards. Skirt areas behind each tire had road tar that did not come off during wash process, so i spent extra time on these and hit them with some Tarminator,bug sponge and plastic razor blade(using very gentle one-directional scraping motions to avoid scratching the paint). These were later compounded and polished to restore appearance from all the neglect.

Optimum Ferrex applied/sprayed on paint, not too many iron deposits, it was very minimal . After that, i decontaminated mechanically with Nanoskin's red sponge( i was going to polish anyways, so i went with the aggressive sponge grit).


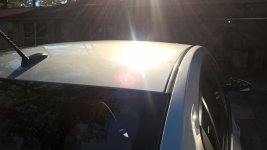
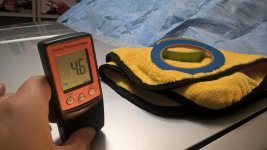
Car was dried with DP Turbo Dryer and waffle weave towels, then moved into the garage for the next stage.Trim was taped up using 3M Green Tape and TapeCase thin painters tape. Paint readings were taken throughout the entire car and readings were steadily between 4.1 to upper 4.00s which i was glad to see, because there was a nasty scratch that needed attention on the trunk area.


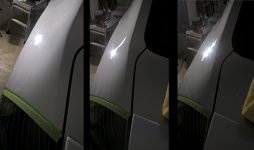
Upper Quarter Panel area compounded then polished. (Before-After from left to right)

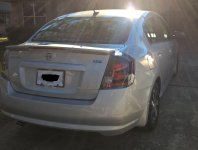
One of the tail lights had noticeable scratches on the top, so they were compounded and polished to remove them along with all the swirls.
Paint was not in horrible shape, it is silver, so it hides defects very well. There was definitely some room for improvement in some neglected areas and the paint needed an overall polish to make it pop. This was done during New Years Eve weekend and got finished right before midnight.
Procducts used:
Mothers Mag & Aluminum Polish
3D Pink Soap
Megs APC
Sonax
3D Orange Degreaser
Ferrex
Red Nanoskin Sponge
Tarminator
HD Cut
HD Polish
FK1000P
Carpro Eraser
Carpro PERL
Black Magic(for dressing wells, nothing else i promise
)HD Dress
Machine work done with Flex3401 & LC CCS/Flat Orange & White Pads , and PC with 4" LC CCS Yellow,Orange & White pads for small areas and spot scratch repair.
I did not compound the whole car, only certain areas where defects/swirls were pretty noticeable, the rest was just polished with HD Polish. It is a daily driver, and i want as much CC on the car as possible.Only the Roof,top of the trunk,top of 1/4 panels and scratches were compounded . I've decided, after inspecting the car further during the 1st post-paint polishing wash, that i will go ahead and compound the hood since polishing alone didn't do much for me.
-License plates removed
-Wheels sprayed with sonax, no heavy brake dust, so they were in pretty good condition already.
-Tires sprayed with Megs APC 4:1 and agitated with a brush, repeated this step about 3 times since Carmax Sprayed the crap out of the tires with their version of a tire dressing, even though i had told the guy to NOT wash the car. I guess i should have specified that it included not slamming the tires with gunk that drips all over the place.
-Wells sprayed with 3D Orange Degreaser and agitated/scrubbed with wheel woolies.
Exhaust was scrubbed with some fine steel wool first, then polished using a MF towel with some metal polish.
Car was rinsed off with pressure washer, then foamed using a mixture of the 3D Soap and a bit of Megs APC. While i let the foam dwell on the car i took my brush and agitated the grill,gas cap area and other areas needing some extra attention.
Car was then rinsed off and washed using 2B method and grit guards. Skirt areas behind each tire had road tar that did not come off during wash process, so i spent extra time on these and hit them with some Tarminator,bug sponge and plastic razor blade(using very gentle one-directional scraping motions to avoid scratching the paint). These were later compounded and polished to restore appearance from all the neglect.
Optimum Ferrex applied/sprayed on paint, not too many iron deposits, it was very minimal . After that, i decontaminated mechanically with Nanoskin's red sponge( i was going to polish anyways, so i went with the aggressive sponge grit).
Car was dried with DP Turbo Dryer and waffle weave towels, then moved into the garage for the next stage.Trim was taped up using 3M Green Tape and TapeCase thin painters tape. Paint readings were taken throughout the entire car and readings were steadily between 4.1 to upper 4.00s which i was glad to see, because there was a nasty scratch that needed attention on the trunk area.
Upper Quarter Panel area compounded then polished. (Before-After from left to right)
One of the tail lights had noticeable scratches on the top, so they were compounded and polished to remove them along with all the swirls.
Attachments
-
 Foam 2pic.jpg226.1 KB · Views: 92
 -
 Exhaust B4-After.jpg192.2 KB · Views: 92
 -
 Gas Cap.jpg178.3 KB · Views: 92
 -
 Grille.jpg215.6 KB · Views: 91
 -
 Front Skirt B4-After.jpg316.3 KB · Views: 91
 -
 Chem. Decon 1.jpg607.4 KB · Views: 91
 -
 Mech. Decon.jpg118.6 KB · Views: 91
 -
 In Garage 1.jpg423.5 KB · Views: 90
 -
 WP_20151231_09_55_20_Pro.jpg520.7 KB · Views: 91
 -
 LT Quarter B4-After.jpg278 KB · Views: 93