Just picked up a used '09 Z06 a few weeks ago. Started detailing it over the past few days, doing a little at a time. Will update this thread as I progress.
The car is clean for the mileage, but of course black shows everything. And it appears that some type of paint overspray (tiny specks) are visible on both sides of the car on the lower door area. Possibly from a road striping project. My main goal is to remove all the overspray and remove 90%-95% of the small scratches (marring) in the paint.
This was the last detail I did on my '07 that I had to sell: http://www.autopia.org/forum/click-brag/127748-black-2007-corvette-z06-detail-clay-polish-wax.html
Tools used on the '09:
Halogen lighting
Clay bar with ONR lube
PC 7424
PO85RD 3.02 (polish) [was having issues with the Meguiars M105 so I changed to Menzerna]
Menzerna 106FF (polish)
Lake country orange pad (stage 1 polish)
Meguiar's yellow pad (stage 2 polish)
Chemical Guys 50/50 (wax)
Poorboy's Black Hole (glaze)
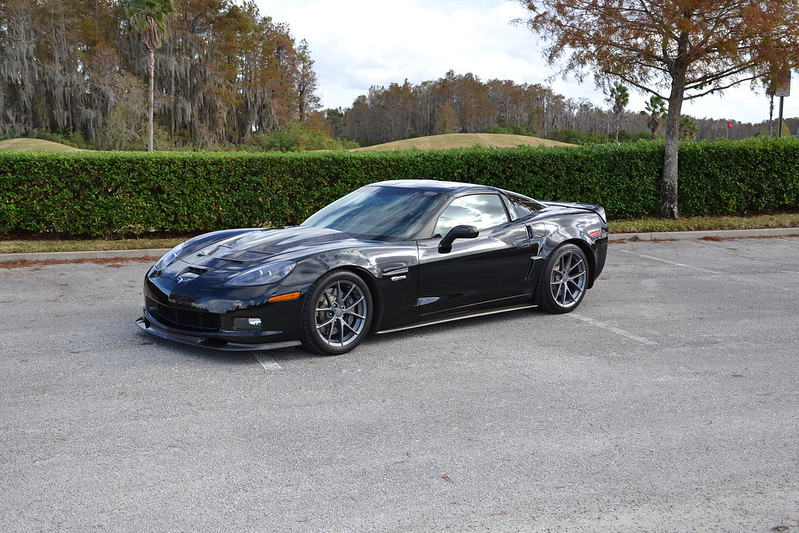
The car:

Some before pics (after the first wash)


Some small marring that I will be removing:

The overspray on passenger side door:


Clay bar removed all the paint dots. Applied masking tape and now ready for polishing:

Passenger door 50/50 shot after 1 pass of M105, and 1 pass of 106FF (polished on left side, right side untouched). Wow, dusting from the M105!! Switched to PO85RD 3.02 after these shots and it worked so much better for me. No dusting!!!!
Camera is picking up some lint from the microfiber in the following pics. Will be getting some new microfiber towels as the ones I am using are not doing the job.


Drivers and passenger fender, door, and quarter panel are done. I went with Menzerna PO85RD 3.02 (PO83, or SIP), followed by PO106. It was a lot easier to work with than the M105. There are still some small fine scratches, but the marring is removed and the hologens can't pick it up. I will have to take some pics in the sun to check the work, but it turned out great.
RF fender before:

RF fender after:

RF fender 50/50 (had to adjust camera settings to pick up the difference):

Waiting on the wax to do its thing. Time for a beverage:

Passenger side door. Some small scratches can be seen:


Finished product (lint from microfiber is visible):

Still need to polish the rear of the car, but the trim is getting on my nerves.
The front plastic mud flap pieces were looking pretty rough. Cleaned and then applied some 303 Aerospace Protectant, with no positive results. Scratches, overspray, and chips from rocks were keeping from a smooth feel. Least aggressive method first, so clay bar it is. Nothing. Maybe some paint spots were removed. Okay, heavy duty degreaser and brush it is. Ah yea, nothing. Goof-off? Yea, that didn't do too much, so time to whip out the sandpaper. Started with 1500 grit (wet-sanding), and it did not work out too well. Used 1000 grit (wet), and that worked a little better. Followed that with the 1500 grit (wet).
Pics under the halogens.
Before anything:
And yes, those are two large scratches in the plastic:

Closer (now you see what I am working with):

Wet-sanding rules! (1000 grit)

Now I can't feel my arm.... (1500 grit)

Okay, a little better at least?
RF after:

LF after the same procedure (sorry, no before shots, but it did look rough):

Looks a lot better, but the rear plastics are in worse shape. Need to get some after shots in the sunlight.....
More to come.......
The car is clean for the mileage, but of course black shows everything. And it appears that some type of paint overspray (tiny specks) are visible on both sides of the car on the lower door area. Possibly from a road striping project. My main goal is to remove all the overspray and remove 90%-95% of the small scratches (marring) in the paint.
This was the last detail I did on my '07 that I had to sell: http://www.autopia.org/forum/click-brag/127748-black-2007-corvette-z06-detail-clay-polish-wax.html
Tools used on the '09:
Halogen lighting
Clay bar with ONR lube
PC 7424
PO85RD 3.02 (polish) [was having issues with the Meguiars M105 so I changed to Menzerna]
Menzerna 106FF (polish)
Lake country orange pad (stage 1 polish)
Meguiar's yellow pad (stage 2 polish)
Chemical Guys 50/50 (wax)
Poorboy's Black Hole (glaze)
The car:
Some before pics (after the first wash)
Some small marring that I will be removing:
The overspray on passenger side door:
Clay bar removed all the paint dots. Applied masking tape and now ready for polishing:
Passenger door 50/50 shot after 1 pass of M105, and 1 pass of 106FF (polished on left side, right side untouched). Wow, dusting from the M105!! Switched to PO85RD 3.02 after these shots and it worked so much better for me. No dusting!!!!
Camera is picking up some lint from the microfiber in the following pics. Will be getting some new microfiber towels as the ones I am using are not doing the job.
Drivers and passenger fender, door, and quarter panel are done. I went with Menzerna PO85RD 3.02 (PO83, or SIP), followed by PO106. It was a lot easier to work with than the M105. There are still some small fine scratches, but the marring is removed and the hologens can't pick it up. I will have to take some pics in the sun to check the work, but it turned out great.
RF fender before:
RF fender after:
RF fender 50/50 (had to adjust camera settings to pick up the difference):
Waiting on the wax to do its thing. Time for a beverage:
Passenger side door. Some small scratches can be seen:
Finished product (lint from microfiber is visible):
Still need to polish the rear of the car, but the trim is getting on my nerves.
The front plastic mud flap pieces were looking pretty rough. Cleaned and then applied some 303 Aerospace Protectant, with no positive results. Scratches, overspray, and chips from rocks were keeping from a smooth feel. Least aggressive method first, so clay bar it is. Nothing. Maybe some paint spots were removed. Okay, heavy duty degreaser and brush it is. Ah yea, nothing. Goof-off? Yea, that didn't do too much, so time to whip out the sandpaper. Started with 1500 grit (wet-sanding), and it did not work out too well. Used 1000 grit (wet), and that worked a little better. Followed that with the 1500 grit (wet).
Pics under the halogens.
Before anything:
And yes, those are two large scratches in the plastic:
Closer (now you see what I am working with):
Wet-sanding rules! (1000 grit)
Now I can't feel my arm.... (1500 grit)
Okay, a little better at least?
RF after:
LF after the same procedure (sorry, no before shots, but it did look rough):
Looks a lot better, but the rear plastics are in worse shape. Need to get some after shots in the sunlight.....
More to come.......