RaydiantDetail
New member
Hey fellow Autopian`s
Had this 07 Saab 97x come in last week for a detail and correction. The owner just purchased the vehicle and contacted me based on a referral. The car was in pretty rough shape with 160K miles on her.
Heavy swirls, heavy water spot damage, heavy chips on the front bumper, side mirrors and hood. Beginning of clear coat failure on the hood (crows feet) and just a slew of other issues. With that we decided on a one step for most of the areas but I would do some further spot correction as needed. He will most likely have some areas painted he said in the coming year as he wants to keep the car as long as possible and got it for a good deal.
Luckily the paint was pretty soft, or unlucky as even using BOSS Perfecting Cream was causing marring in some areas on the black paint. Id come back after and use Essence with a CP gloss pad on the car to clean everything up so I was not too concerned.
Wash/ Prep
Foam bath using DP Foam Wash
2 BM using Chemical Guys Citrus Wash and Gloss
Decontamination with Iron X and Griots Garage Paint Cleaning Clay. It took two rounds of clay to remove the contaminants.
Wheels/ Tires
Tires cleaned with Tuff Shine, Megs Super Degreaser and Megs APC 4:1.
Tires dressed with CarPro PERL undiluted
Megs Wheel Brightener and Tarminator on the wheels.
Wheel wells were cleaned with APC, Tarminator, and Super Degreaser. Same goes - tons of tar and road grim
Paint Correction
G21, Rupes Mini, and Rupes iBrid Nano
Most of the car was corrected with Boss Perfecting Cream and Yellow pads
Some larger defects were corrected with Boss FCC or Perfecting Cream with the White and Orange pads.
LSP
CarPro Essence as a finishing polish to clear up any left over marring and leave a nice base layer of Sio2
CarPro Reload
Optimum Instant Detailer and Gloss Enhancer used prior to customer pick up.
Plastic Trim
All trim was restored with Solution Finish
BlackFire Trim Sealant for LSP
Interior
Light vacuum
Door jambs cleaned with Super Degreaser and steam and protected with Optimum Spray Wax
Center Console, Dash, Doors, were cleaned and protected with McKees QID.
Leather seats were lightly cleaned with McKees QID and protected with PERL 4:1.
Total time: Approx 30 hours
On to the pics...
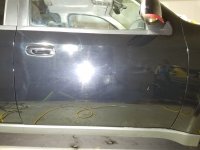
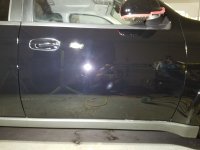
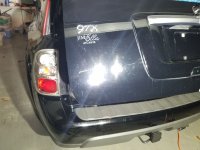
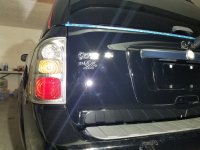
When she was first dropped off

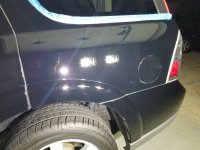
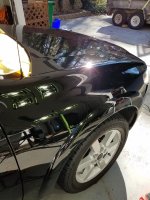
Paint rub off on the bumper. Rock chips. Bug splatter.

Wash and Decontamination

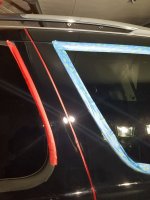
Clay Decontamination after first round of claying just from from the hood and front bumper. Entire car was clayed twice. First with traditional clay then I went back with the nano skin pad on the PC to speed up the process.

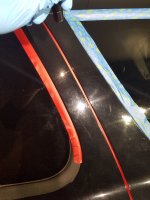
Test Spot completed with G21, Boss Yellow Pad and Perfecting Cream. This process was used around the car except some areas that had larger defects and deeper scratches where FCC and Correcting Cream were used.

Continued in next post due to photo limit...
Had this 07 Saab 97x come in last week for a detail and correction. The owner just purchased the vehicle and contacted me based on a referral. The car was in pretty rough shape with 160K miles on her.
Heavy swirls, heavy water spot damage, heavy chips on the front bumper, side mirrors and hood. Beginning of clear coat failure on the hood (crows feet) and just a slew of other issues. With that we decided on a one step for most of the areas but I would do some further spot correction as needed. He will most likely have some areas painted he said in the coming year as he wants to keep the car as long as possible and got it for a good deal.
Luckily the paint was pretty soft, or unlucky as even using BOSS Perfecting Cream was causing marring in some areas on the black paint. Id come back after and use Essence with a CP gloss pad on the car to clean everything up so I was not too concerned.
Wash/ Prep
Foam bath using DP Foam Wash
2 BM using Chemical Guys Citrus Wash and Gloss
Decontamination with Iron X and Griots Garage Paint Cleaning Clay. It took two rounds of clay to remove the contaminants.
Wheels/ Tires
Tires cleaned with Tuff Shine, Megs Super Degreaser and Megs APC 4:1.
Tires dressed with CarPro PERL undiluted
Megs Wheel Brightener and Tarminator on the wheels.
Wheel wells were cleaned with APC, Tarminator, and Super Degreaser. Same goes - tons of tar and road grim
Paint Correction
G21, Rupes Mini, and Rupes iBrid Nano
Most of the car was corrected with Boss Perfecting Cream and Yellow pads
Some larger defects were corrected with Boss FCC or Perfecting Cream with the White and Orange pads.
LSP
CarPro Essence as a finishing polish to clear up any left over marring and leave a nice base layer of Sio2
CarPro Reload
Optimum Instant Detailer and Gloss Enhancer used prior to customer pick up.
Plastic Trim
All trim was restored with Solution Finish
BlackFire Trim Sealant for LSP
Interior
Light vacuum
Door jambs cleaned with Super Degreaser and steam and protected with Optimum Spray Wax
Center Console, Dash, Doors, were cleaned and protected with McKees QID.
Leather seats were lightly cleaned with McKees QID and protected with PERL 4:1.
Total time: Approx 30 hours
On to the pics...
When she was first dropped off
Paint rub off on the bumper. Rock chips. Bug splatter.
Wash and Decontamination
Clay Decontamination after first round of claying just from from the hood and front bumper. Entire car was clayed twice. First with traditional clay then I went back with the nano skin pad on the PC to speed up the process.
Test Spot completed with G21, Boss Yellow Pad and Perfecting Cream. This process was used around the car except some areas that had larger defects and deeper scratches where FCC and Correcting Cream were used.
Continued in next post due to photo limit...


")