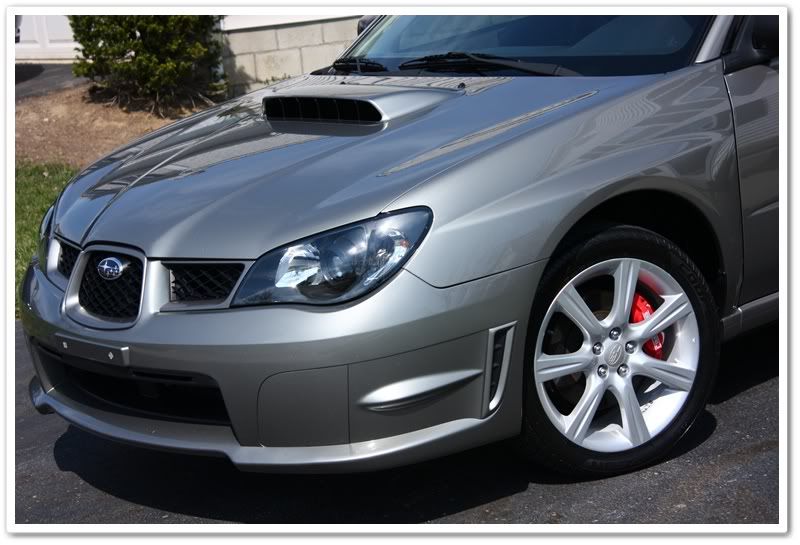
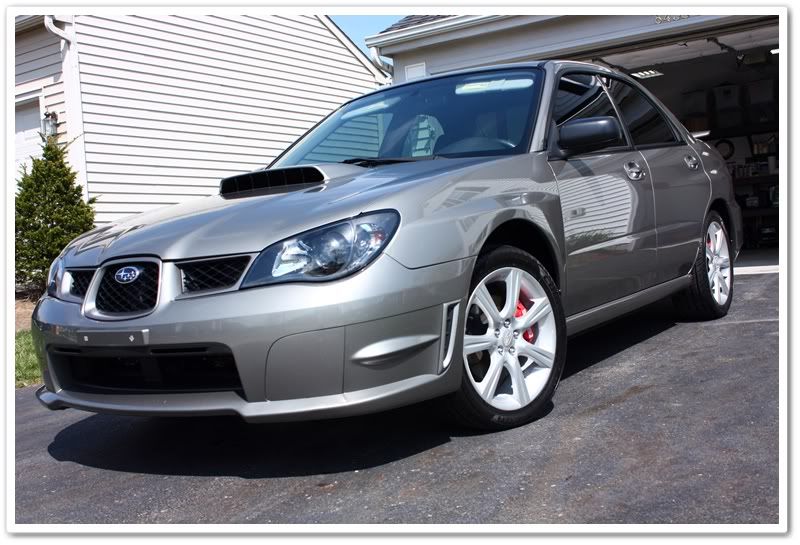
2006 Subaru WRX
This post ended up with a lot more reading, and less eye candy than what I normally do, but given the nature of the detail, I saw it as a good learning opportunity for those who are newer to detailing.
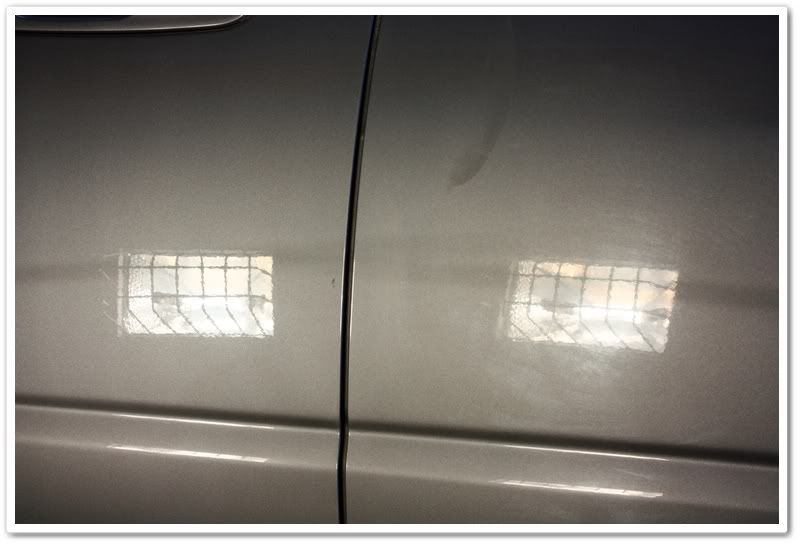
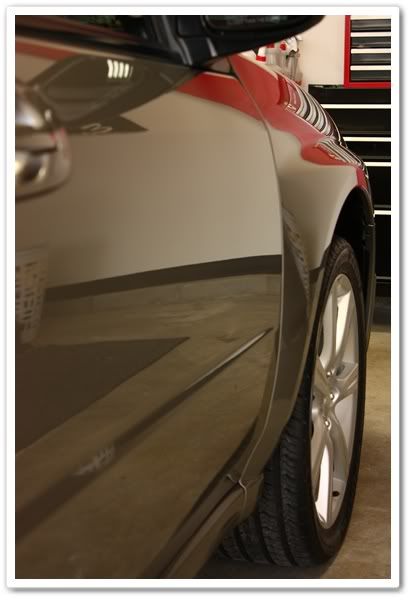
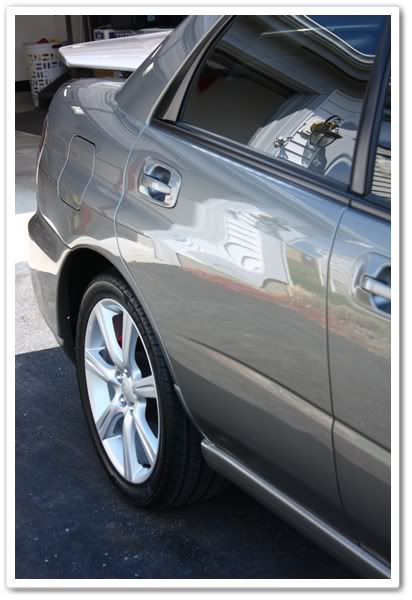
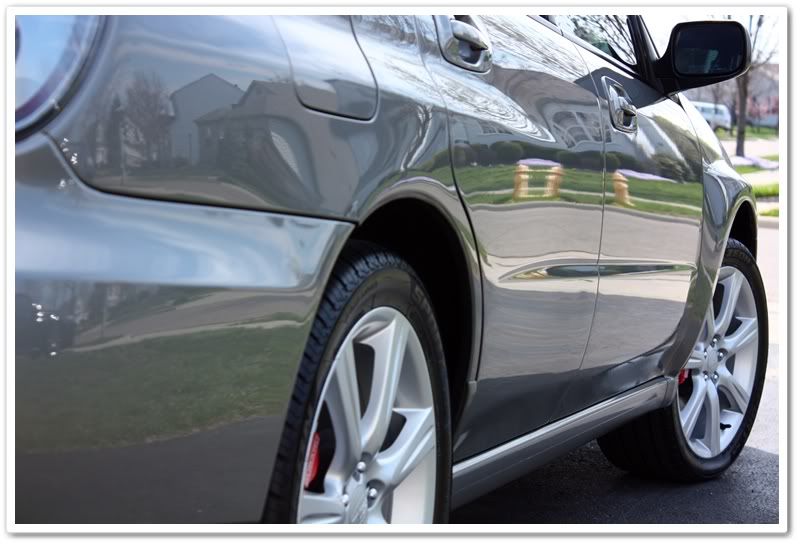
The owner recently purchased the car, and the exterior had been somewhat neglected. Silver typically does a great job of hiding swirls and defects, but not on this one! As you can see from the photos below, it was heavily swirled with plenty of holograms as well.
All of the horizontal surfaces were also covered in small dots, which looked to be paint overspray. I’ve experienced some that come off easily and others that will not, so I warned the owner accordingly and told him I’d touch base with him during the detail to see what we’re up against.
Silver is also challenging for photography and doesn’t provide the wow-factor during and after that darker colors do, so I held back on the detailed photos that I normally post.
Here’s what we were dealing with:
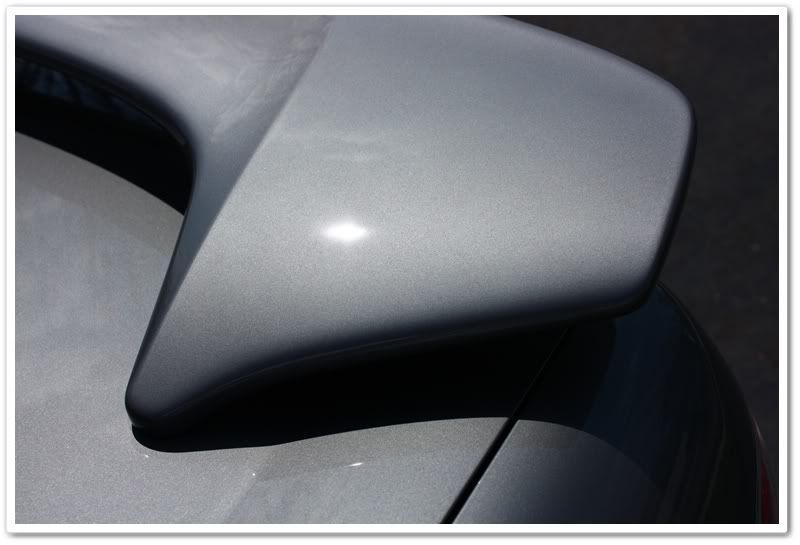
Got swirls?
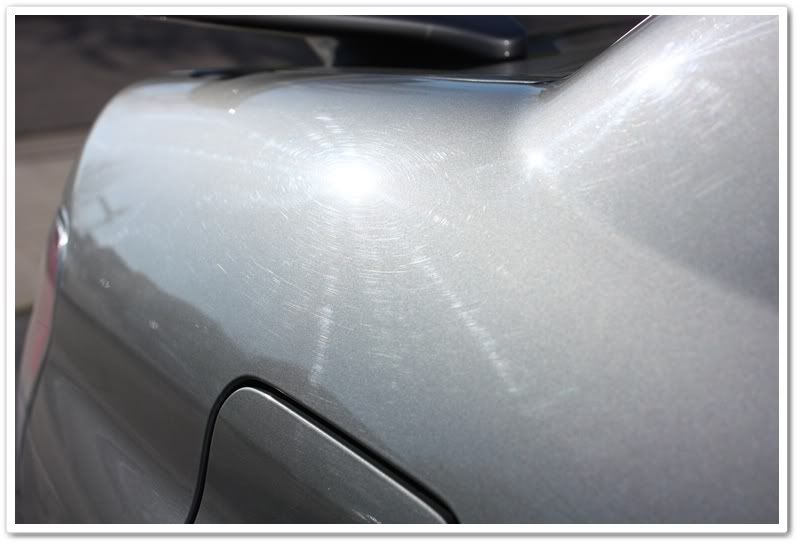
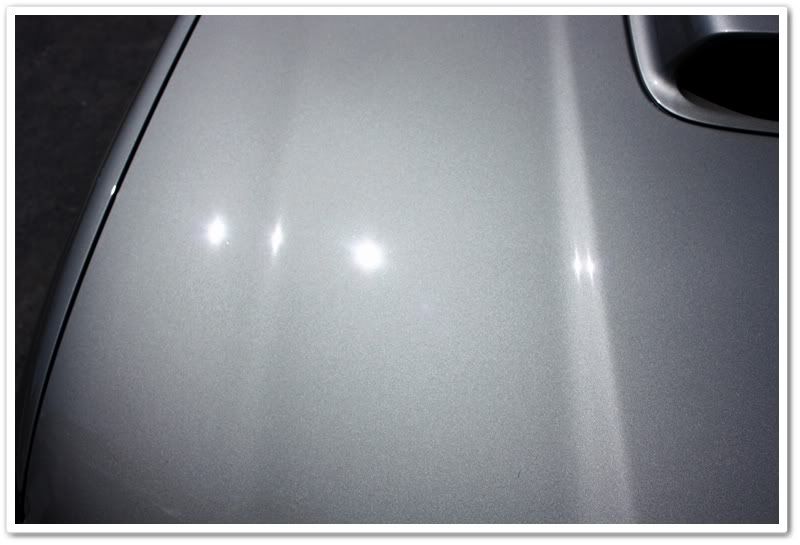
Here you can see hologram tracers indicating that somebody has made a poor attempt at rotary polishing sometime in the past.
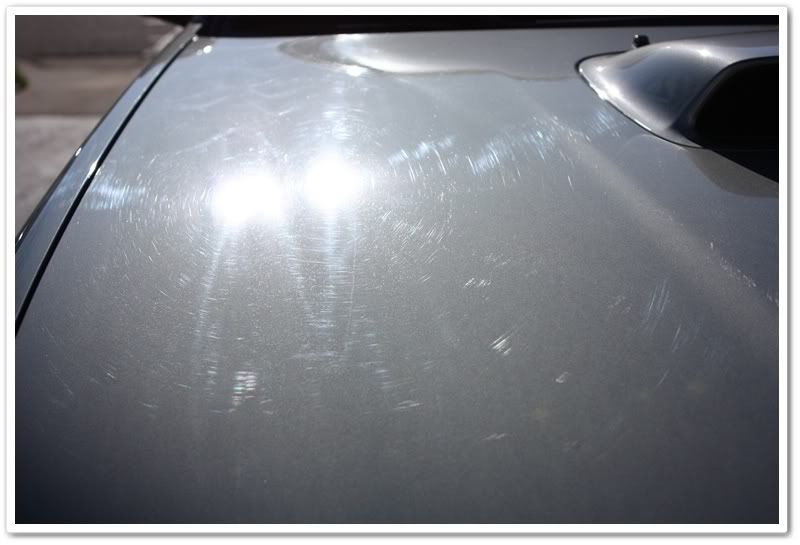
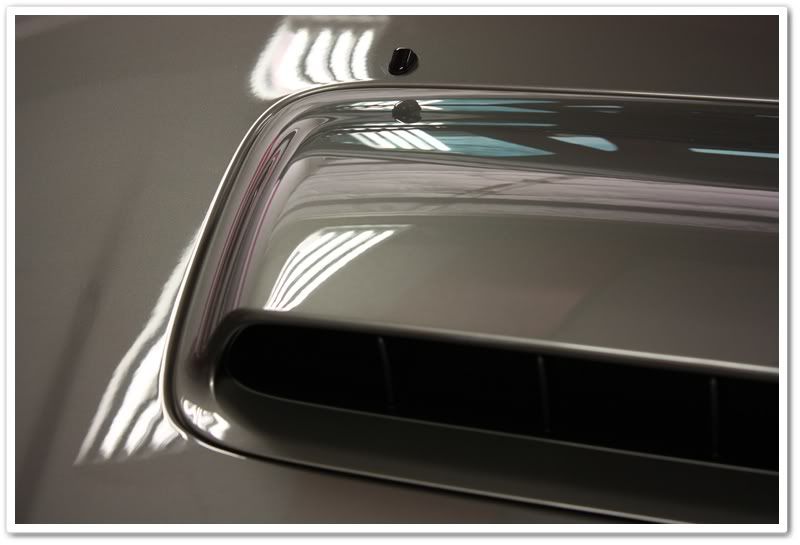
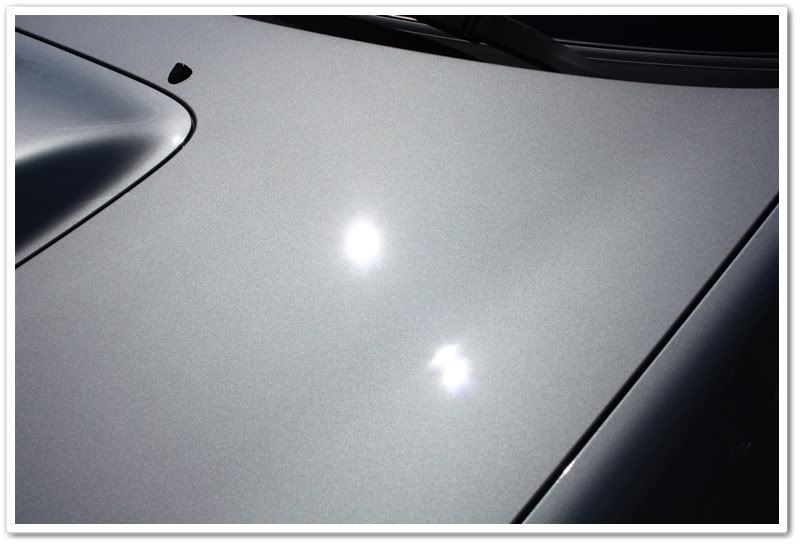
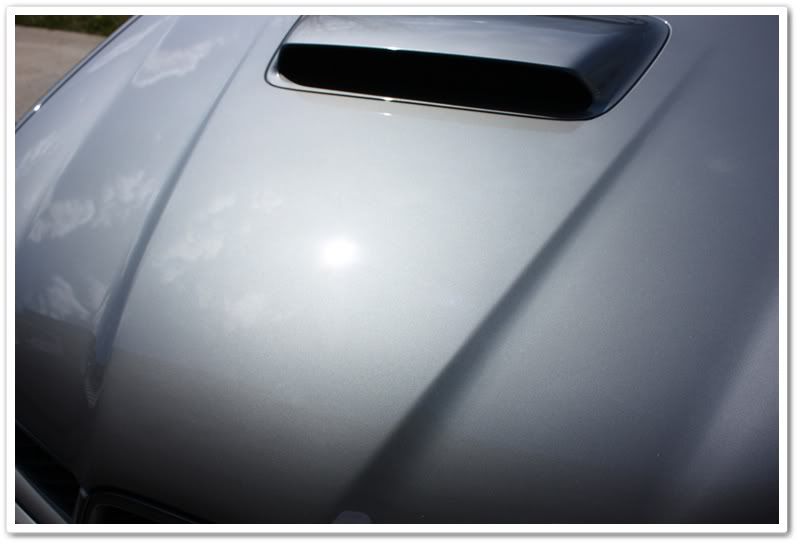
The hood looked especially bad. The camera couldn’t capture the true severity of the damage to the finish. If you look closely, you can actually see the small dots that I am referring to.
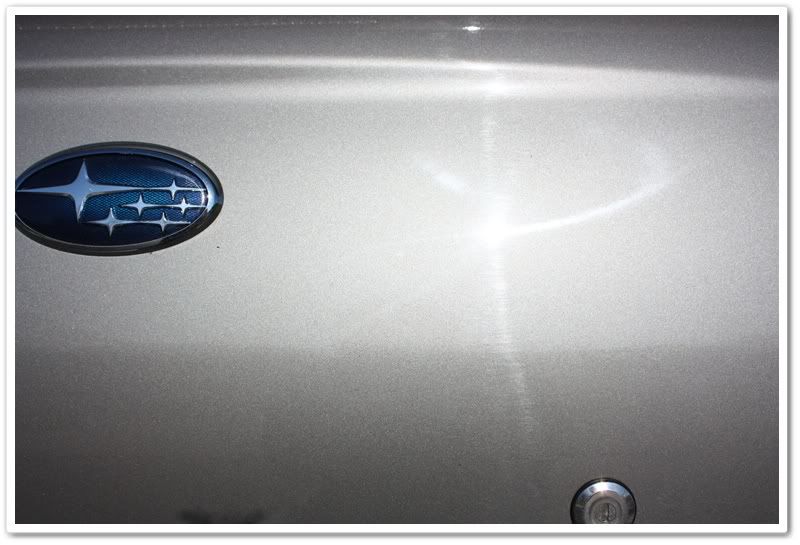
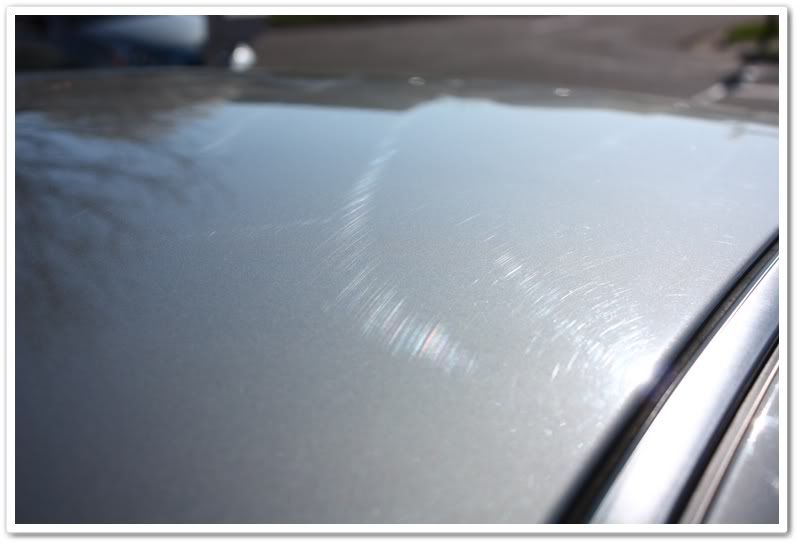
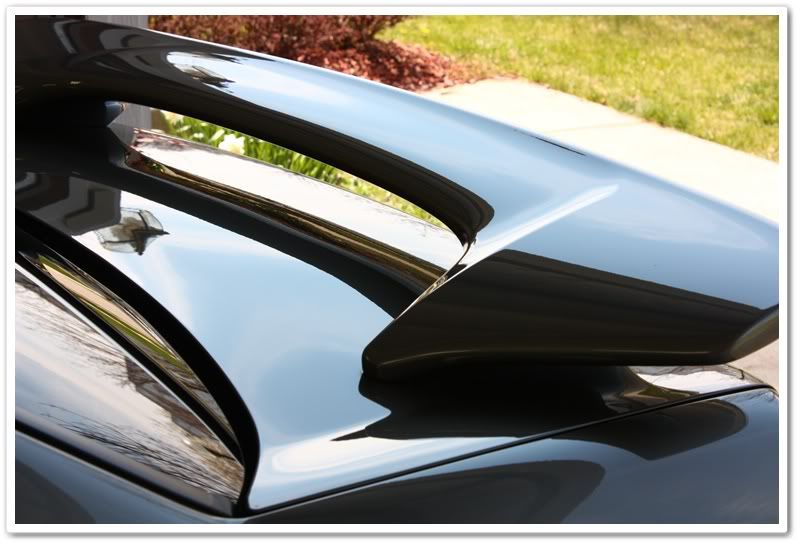
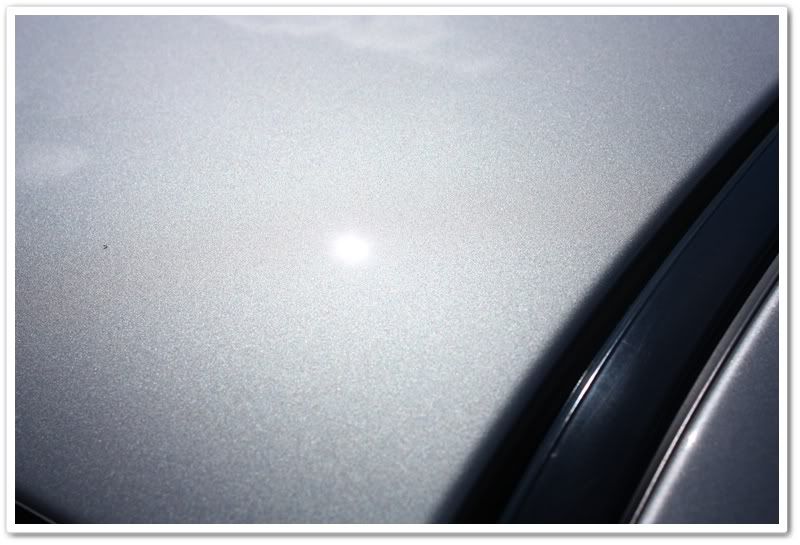
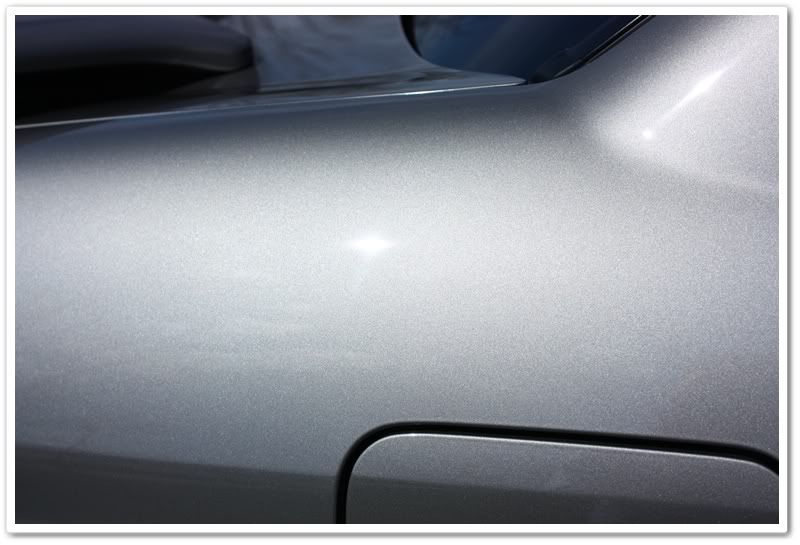
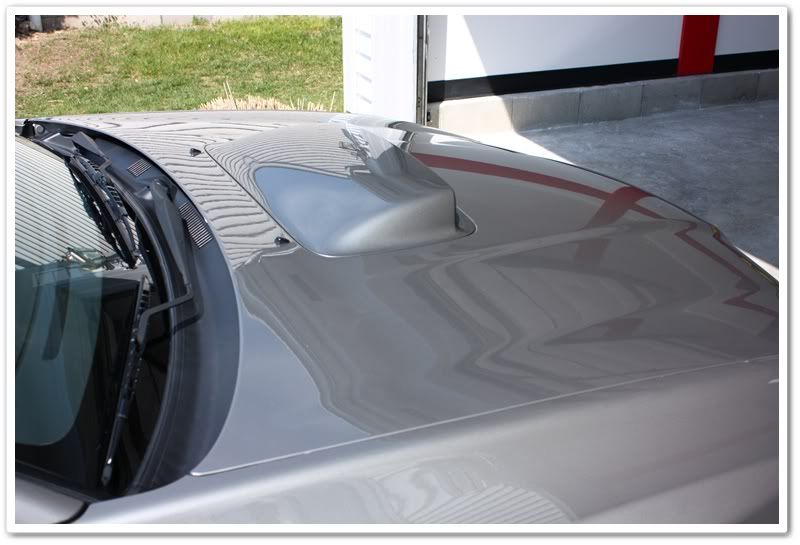
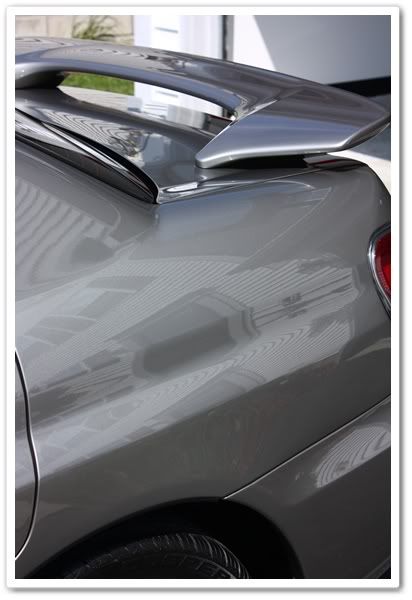
The roof…more swirls, scratches, water etching, and holograms.
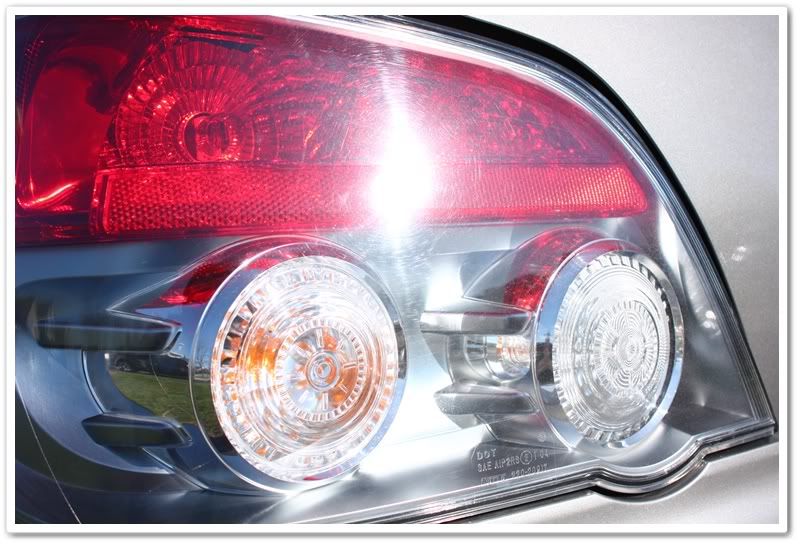
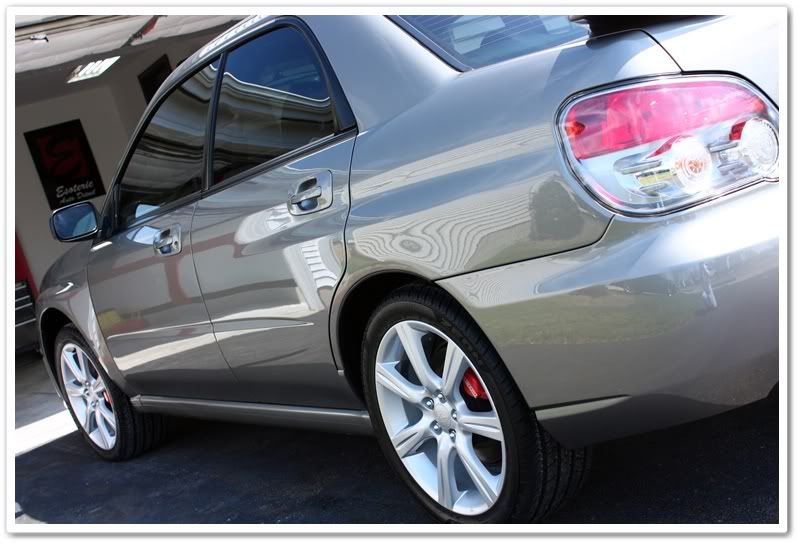
The tail lights were heavily swirled, and one of the headlights had some scrapes as well that required fixing (forgot to take photo of it).
To start the process, I washed the vehicle with Chemical Guys Wash & Clear at paint prep ratio to strip any possible wax or sealants that may still exist. The heavily soiled rims were treated with P21S Wheel Gel and allowed to dwell for a while to give it a chance to break down the baked on contaminants. While the P21S was working, I sprayed the tires and wheel wells with P21S Total Auto Wash. With a variety of brushes and about 40 minutes total time, I got the wheels cleaned up as best as they could without removing them (it had been a long time since these were cleaned!).
After washing, I started the claying process with Chemical Guys clay and used Optimum No Rinse as a lubricant. There was a lot of tar on the lower surfaces to remove, and I was also concentrating on the “dots� that covered the horizontal surfaces. I was able to make them better, and the way they were reacting to the clay I had a feeling that this was some sort of chemical and not paint overspray.
After claying I rinsed the car off again, and pulled it into the garage for drying and inspection under halogens and T-5 fluorescents (different lighting shows different kinds of defects). Upon further inspection I found the dots to be more severe than I could see outside. Since I thought it was chemical, I got out the Prep All solvent and treated all of the horizontal surfaces. Hmm, still not much better.
Curiosity was getting the better of me, as well as a touch of frustration so I decided to try some very fine wetsanding to see if it could be quickly remedied with Micro-Surface 8600 and 12000 pads. After a few passes it looked better, but after wiping it down with alcohol and re-inspecting, it hardly made a dent. After testing a small section with more abrasive MS pads, I determined that the only way to completely get rid of this would be with very aggressive wetsanding on all of the horizontal surfaces. I contacted the owner about it, and we agreed to just make it look as good as possible with regular polishing, and maybe we could go back at a later date for wetsanding since it would be such a sizable investment to do it properly.
I have a lot of people ask me how I know what the best combination of polishes/pads/techniques is for the job. Most of the time we can inspect a car, and have a good idea of what will be needed based on the type/color/condition of the paint, the experience we have with the manufacturer of the paint, as well as the experience with specific products. This car however proved that this is merely a guideline! First up was the Makita rotary with a Megs yellow 2.0 polishing pad and Menzerna PO203S polish (should be a great combination for soft Subaru paint). The paint was very “sticky�, which I suspected to be a result of the dots on the surface. The rotary had a mind of its own, was grabbing, jumping, and behaving badly! I switched it up and then tried a white pad with Menzerna Super Intensive Polish. It got even worse, the paint was quickly getting really hot, and the polish was clumping and spitting all over the place. I tried several other combinations, and it didn’t get any better. I decided to switch from the rotary to the Porter Cable D/A to see if that would help. I put on an orange 5.5� pad and used Megs 105 compound and proceeded to test a few different techniques. This seemed to do the trick. Since the paint was so finicky, it took a while to figure out an exact technique that would cut down all of the defects while finishing up nicely. I worked my way around the car, and had to adjust my techniques a bit as I went because the horizontal and vertical surfaces acted differently. Many times this can be caused by partial repaints, but I could not find evidence that this had been done.
Here are a few photos during the process:
The left side is after compounding with M105 (before final polish), and the right side has not been polished yet. Notice the difference in clarity already!
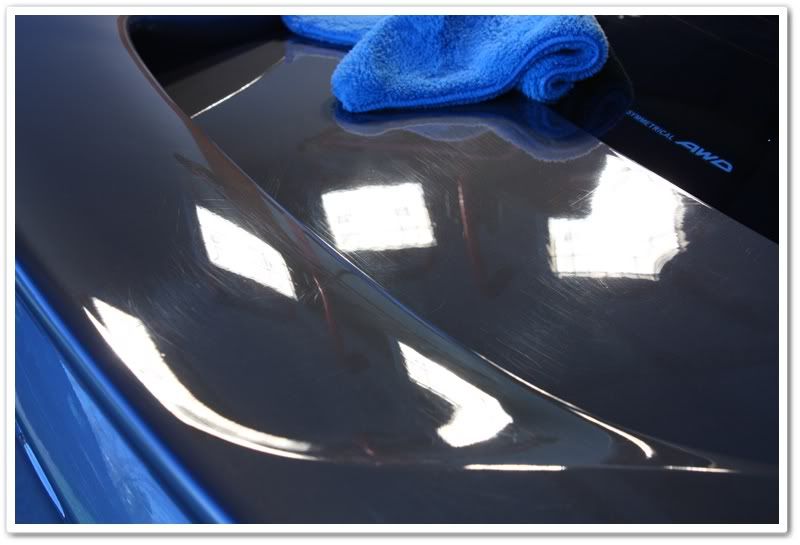
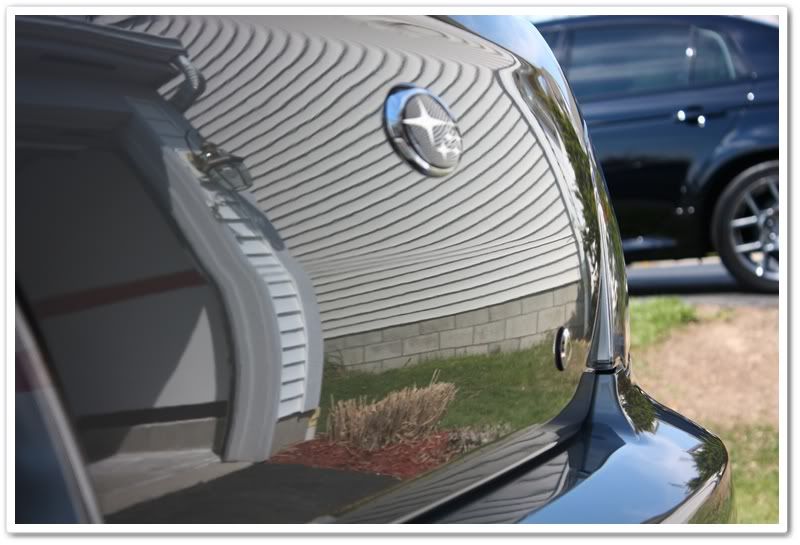
Same thing on the rear deck…before and after M105:
Before
After

This post ended up with a lot more reading, and less eye candy than what I normally do, but given the nature of the detail, I saw it as a good learning opportunity for those who are newer to detailing.
The owner recently purchased the car, and the exterior had been somewhat neglected. Silver typically does a great job of hiding swirls and defects, but not on this one! As you can see from the photos below, it was heavily swirled with plenty of holograms as well.
All of the horizontal surfaces were also covered in small dots, which looked to be paint overspray. I’ve experienced some that come off easily and others that will not, so I warned the owner accordingly and told him I’d touch base with him during the detail to see what we’re up against.
Silver is also challenging for photography and doesn’t provide the wow-factor during and after that darker colors do, so I held back on the detailed photos that I normally post.
Here’s what we were dealing with:
Got swirls?
Here you can see hologram tracers indicating that somebody has made a poor attempt at rotary polishing sometime in the past.
The hood looked especially bad. The camera couldn’t capture the true severity of the damage to the finish. If you look closely, you can actually see the small dots that I am referring to.
The roof…more swirls, scratches, water etching, and holograms.
The tail lights were heavily swirled, and one of the headlights had some scrapes as well that required fixing (forgot to take photo of it).
To start the process, I washed the vehicle with Chemical Guys Wash & Clear at paint prep ratio to strip any possible wax or sealants that may still exist. The heavily soiled rims were treated with P21S Wheel Gel and allowed to dwell for a while to give it a chance to break down the baked on contaminants. While the P21S was working, I sprayed the tires and wheel wells with P21S Total Auto Wash. With a variety of brushes and about 40 minutes total time, I got the wheels cleaned up as best as they could without removing them (it had been a long time since these were cleaned!).
After washing, I started the claying process with Chemical Guys clay and used Optimum No Rinse as a lubricant. There was a lot of tar on the lower surfaces to remove, and I was also concentrating on the “dots� that covered the horizontal surfaces. I was able to make them better, and the way they were reacting to the clay I had a feeling that this was some sort of chemical and not paint overspray.
After claying I rinsed the car off again, and pulled it into the garage for drying and inspection under halogens and T-5 fluorescents (different lighting shows different kinds of defects). Upon further inspection I found the dots to be more severe than I could see outside. Since I thought it was chemical, I got out the Prep All solvent and treated all of the horizontal surfaces. Hmm, still not much better.
Curiosity was getting the better of me, as well as a touch of frustration so I decided to try some very fine wetsanding to see if it could be quickly remedied with Micro-Surface 8600 and 12000 pads. After a few passes it looked better, but after wiping it down with alcohol and re-inspecting, it hardly made a dent. After testing a small section with more abrasive MS pads, I determined that the only way to completely get rid of this would be with very aggressive wetsanding on all of the horizontal surfaces. I contacted the owner about it, and we agreed to just make it look as good as possible with regular polishing, and maybe we could go back at a later date for wetsanding since it would be such a sizable investment to do it properly.
I have a lot of people ask me how I know what the best combination of polishes/pads/techniques is for the job. Most of the time we can inspect a car, and have a good idea of what will be needed based on the type/color/condition of the paint, the experience we have with the manufacturer of the paint, as well as the experience with specific products. This car however proved that this is merely a guideline! First up was the Makita rotary with a Megs yellow 2.0 polishing pad and Menzerna PO203S polish (should be a great combination for soft Subaru paint). The paint was very “sticky�, which I suspected to be a result of the dots on the surface. The rotary had a mind of its own, was grabbing, jumping, and behaving badly! I switched it up and then tried a white pad with Menzerna Super Intensive Polish. It got even worse, the paint was quickly getting really hot, and the polish was clumping and spitting all over the place. I tried several other combinations, and it didn’t get any better. I decided to switch from the rotary to the Porter Cable D/A to see if that would help. I put on an orange 5.5� pad and used Megs 105 compound and proceeded to test a few different techniques. This seemed to do the trick. Since the paint was so finicky, it took a while to figure out an exact technique that would cut down all of the defects while finishing up nicely. I worked my way around the car, and had to adjust my techniques a bit as I went because the horizontal and vertical surfaces acted differently. Many times this can be caused by partial repaints, but I could not find evidence that this had been done.
Here are a few photos during the process:
The left side is after compounding with M105 (before final polish), and the right side has not been polished yet. Notice the difference in clarity already!
Same thing on the rear deck…before and after M105:
Before
After


") , and then played one round on Sunday and drove straight home afterwards.
, and then played one round on Sunday and drove straight home afterwards.")