4u2nvinmtl
New member
Wheels off step by step (Iron-X, Tarminator, D101 APC, D108 Degreaser)
I decided to write this because I admire the work of professional detailers do a wheels off detail and felt an enthusiast guide could be helpful. The below is for the enthusiasts and newcomers looking for a step by step and the products I used.
Disclaimer (just in case): Please do not attempt to lift a car or remove the wheels if you’re not comfortable or familiar with how to change a tire. Above all exercise caution and common sense when lifting a vehicle and removing the wheels (read the owner’s manual for appropriate lift points, use an appropriate jack and jack stands as a failsafe).
This is the third time I do a “wheels off detail” on my 09 Jeep SRT8. This past winter the Jeep experienced more mileage and abuse than all the previous winters combined (lowered, parked outside, daily driven, snow raced, and subjected to my LSP winter test).
Tools and Products:
Tools products:
I decided to write this because I admire the work of professional detailers do a wheels off detail and felt an enthusiast guide could be helpful. The below is for the enthusiasts and newcomers looking for a step by step and the products I used.
Disclaimer (just in case): Please do not attempt to lift a car or remove the wheels if you’re not comfortable or familiar with how to change a tire. Above all exercise caution and common sense when lifting a vehicle and removing the wheels (read the owner’s manual for appropriate lift points, use an appropriate jack and jack stands as a failsafe).
This is the third time I do a “wheels off detail” on my 09 Jeep SRT8. This past winter the Jeep experienced more mileage and abuse than all the previous winters combined (lowered, parked outside, daily driven, snow raced, and subjected to my LSP winter test).
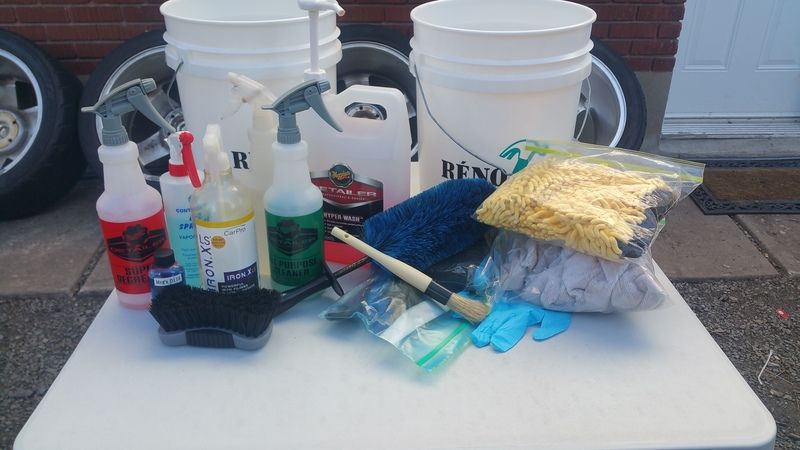
Tools and Products:
- 3 Ton quick lift jack
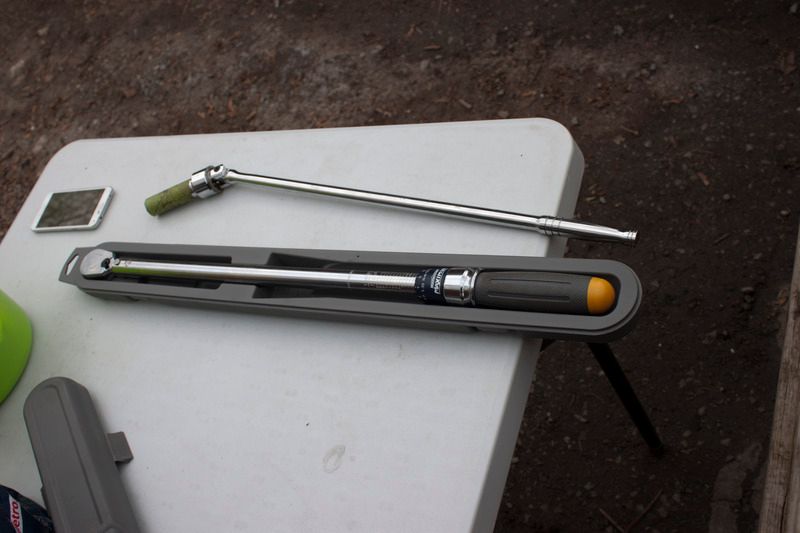
- 1/2inch drive breaker bar
- 1/2inch drive socket set
- 1/2inch drive Torque Wrench (20-150 ft-lbs.)
- Lock-lug-nut adaptor
- Detailing tape or painters tape
- Garden Gilmour sprayer
- Regular 100ft garden hose (connected to hot water tank, optional)
- 2x five-gallon buckets each with a grit guard
- EZ detail brush (blue fox tail)
- 1inch boar hair brush (optional)
- Stuff hand held tire scrub brush (generic)
- Rubber nitrile gloves (light blue, bring extra just in case)
- Tire dressing applicator
- Plastic razor blades
- Foam art brush to apply dressing in tight areas (optional)
- 8-12 borderless wheel duty towels (doesn’t have to be borderless)
- A sacrificial wheel duty wash mitt (mine was ruined by the end)
- Medium grade clay alternative wash mitt
- Meguiars D110 Hyper Wash (1.5 OZ in one bucket per wheel)
- Meguiars D114 Rinseless Wash (clay lube, drying aid)
- Meguiars D101 All Purpose Cleaner (10:1 ratio)
- Meguiars D107 Super Degreaser (4:1 ratio)
- CarPro Iron-X LS (Lemon Sent)
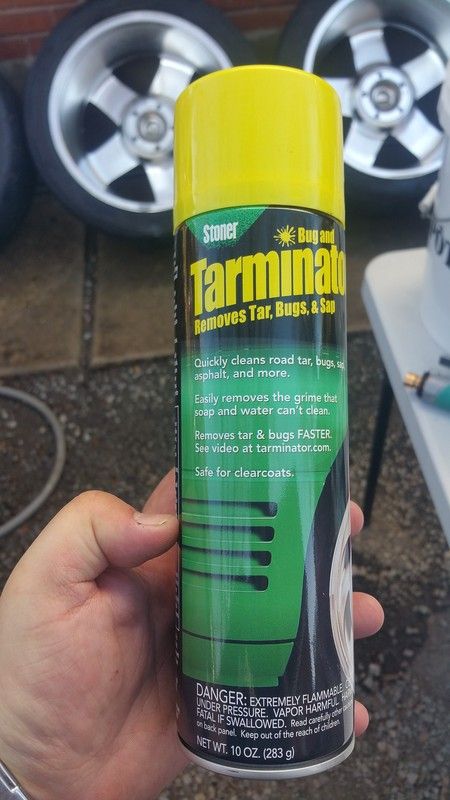
- Stoners Tarminator
- Collinite 476s
Tools products:


")